|
|

|
Porsche, and the Porsche crest are registered trademarks of Dr. Ing. h.c. F. Porsche AG.
This site is not affiliated with Porsche in any way. Its only purpose is to provide an online forum for car enthusiasts. All other trademarks are property of their respective owners. |
|
|
  |
| friethmiller |
 May 8 2023, 08:11 AM May 8 2023, 08:11 AM
Post
#1
|
|
Senior Member    Group: Members Posts: 846 Joined: 10-February 19 From: Austin, TX Member No.: 22,863 Region Association: Southwest Region 
|
After removing the engine mount from my passenger side (hell hole), I decided it might be fun, as a side project, to try and restore instead of replace this item. Not sure if anyone else has ever tried this (I'm sure they have) but I'm thinking... why not. Famous last words! So, here we go....
View of the engine mount pulled out of my very rusted out '74 LE. Note the rust (red arrow) on the back. 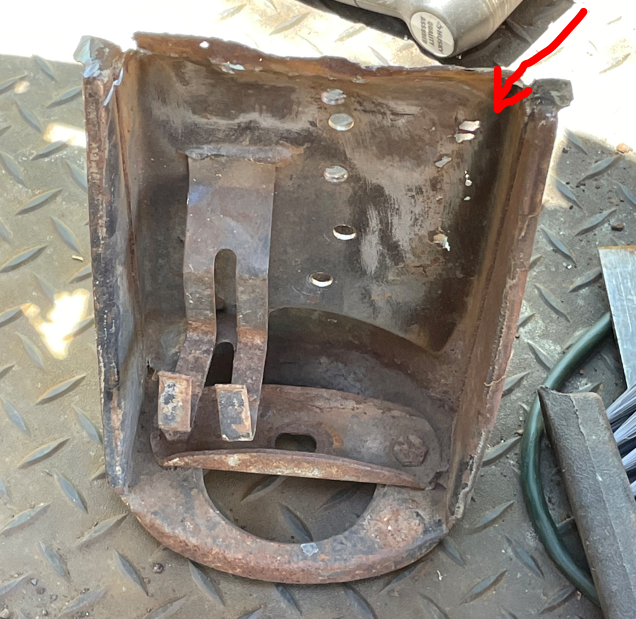 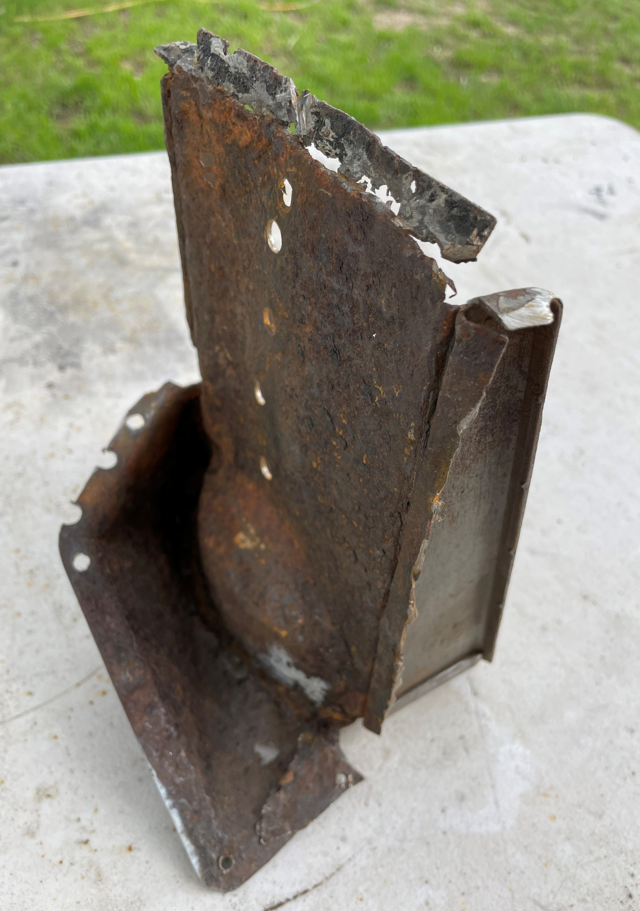 Beginning the process of drilling out the many spot welds around this two-piece, 14 gauge metal part. 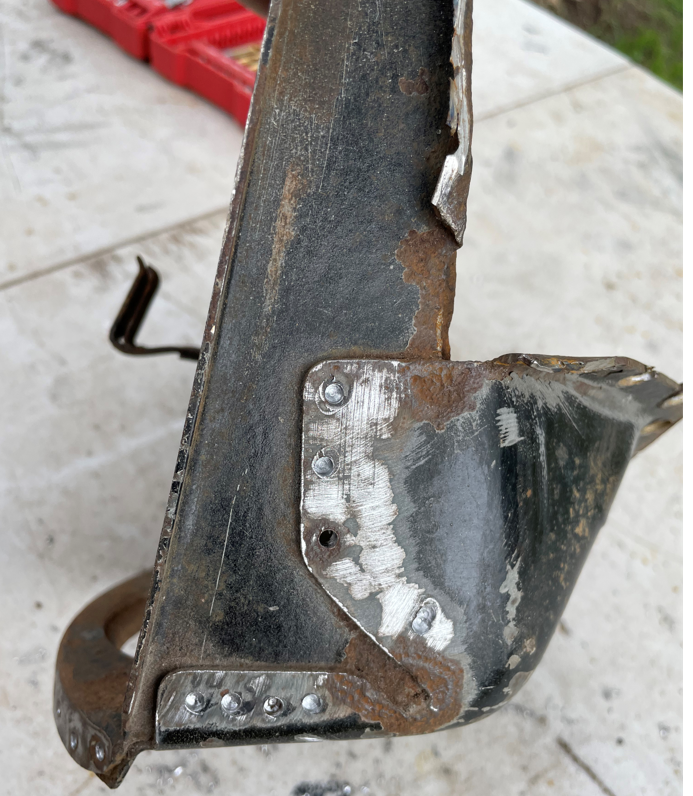 |
| friethmiller |
 May 8 2023, 08:15 AM May 8 2023, 08:15 AM
Post
#2
|
|
Senior Member    Group: Members Posts: 846 Joined: 10-February 19 From: Austin, TX Member No.: 22,863 Region Association: Southwest Region 
|
After a bit of drilling, I was finally able to remove the two pieces. These went into a rust removing bath before each piece was individual restored.
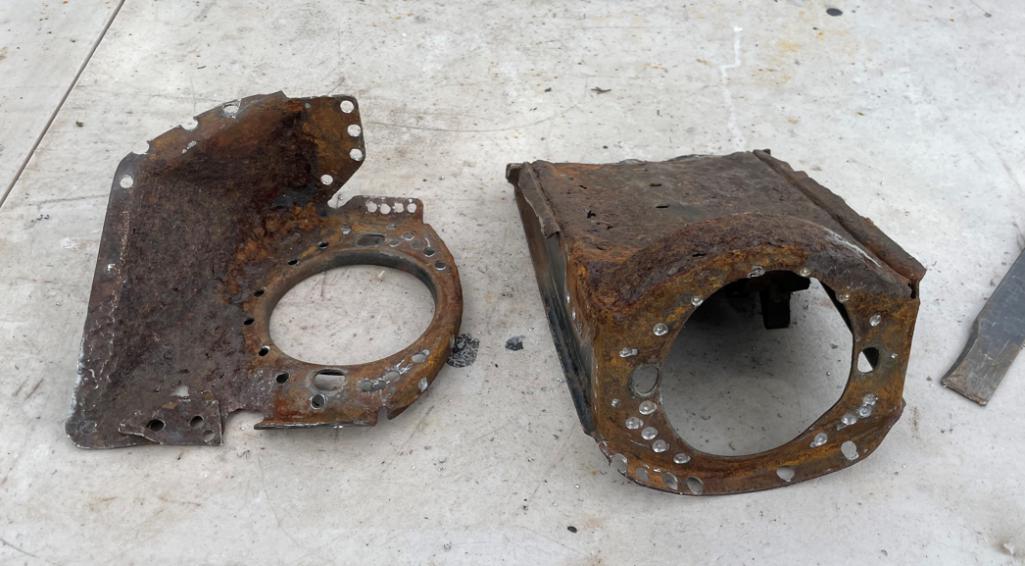 Here's the bottom piece with the three facets replaced. I actually used POR-15 in this area before the later reassembly. 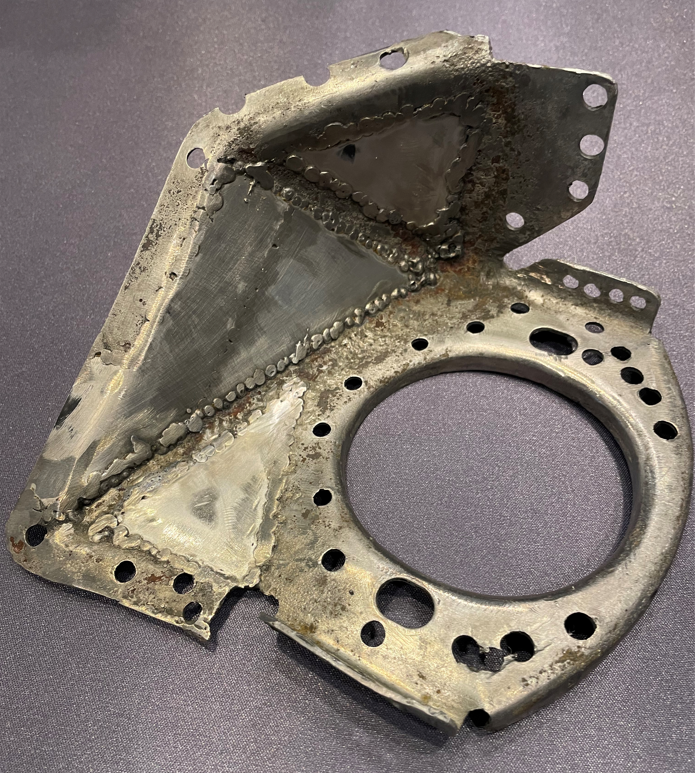 Removal of the rusted metal from the top part of the second piece. 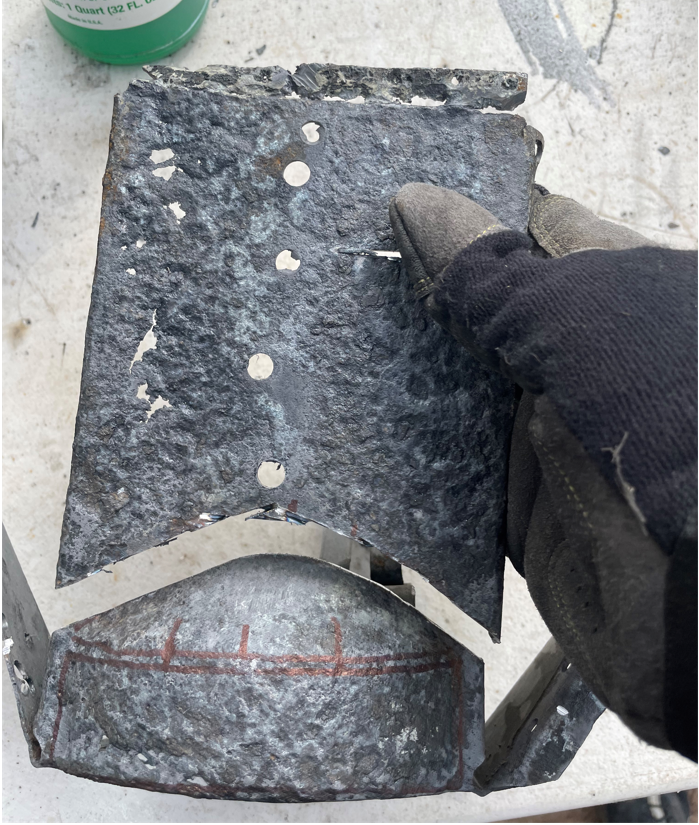 |
| friethmiller |
 May 8 2023, 08:18 AM May 8 2023, 08:18 AM
Post
#3
|
|
Senior Member    Group: Members Posts: 846 Joined: 10-February 19 From: Austin, TX Member No.: 22,863 Region Association: Southwest Region 
|
After cutting the new 14 gauge sheet metal, measurements where made and a metal brake was used to create the three simple 90 degree bends.
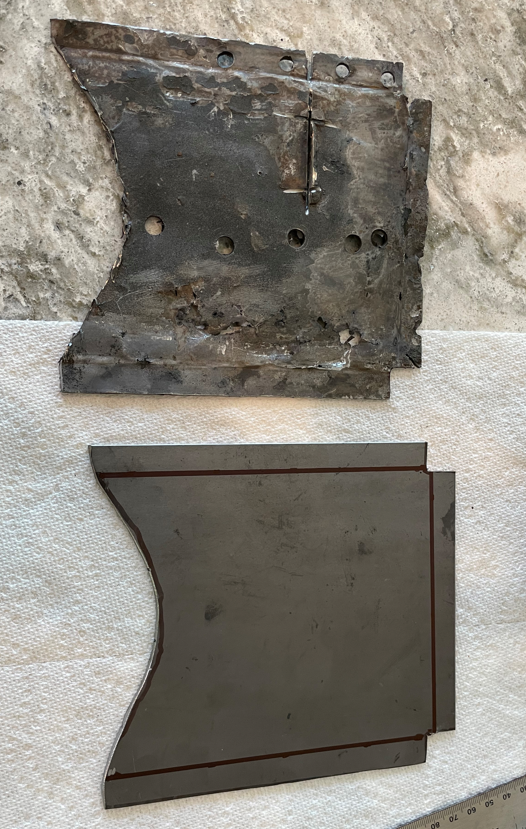 Here's the part welded on. Note the rust holes on the other section. 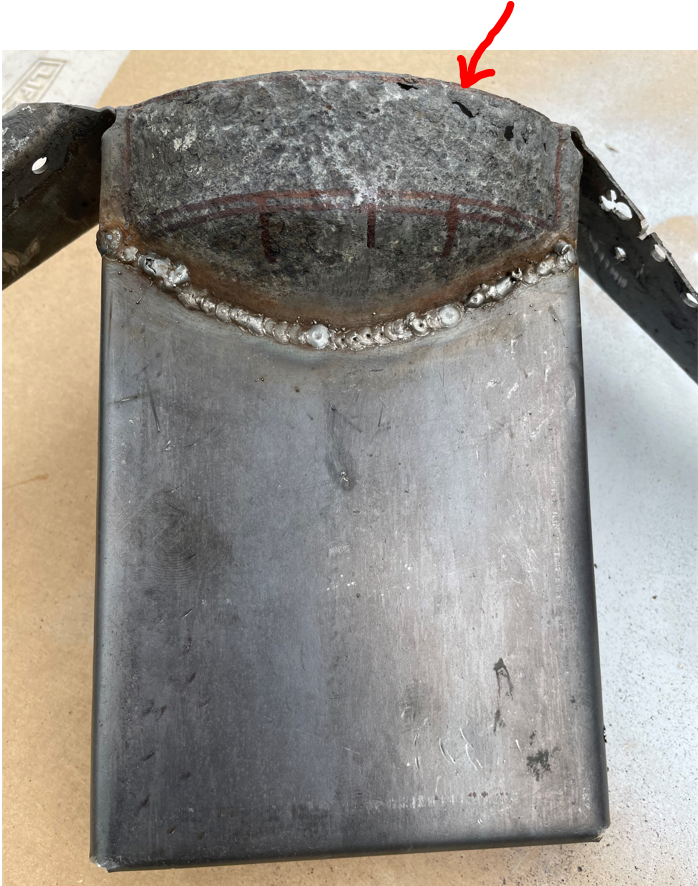 The bottom section with the metal replaced and welded in. 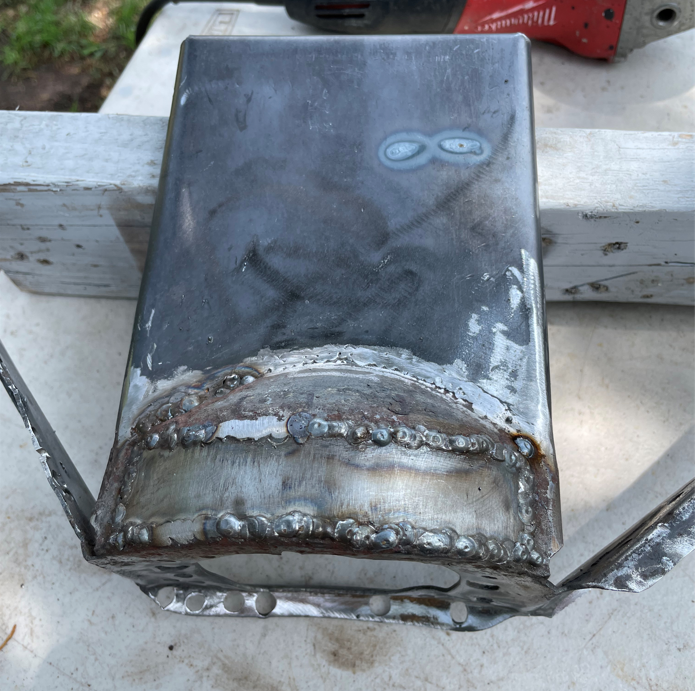 |
| friethmiller |
 May 8 2023, 08:21 AM May 8 2023, 08:21 AM
Post
#4
|
|
Senior Member    Group: Members Posts: 846 Joined: 10-February 19 From: Austin, TX Member No.: 22,863 Region Association: Southwest Region 
|
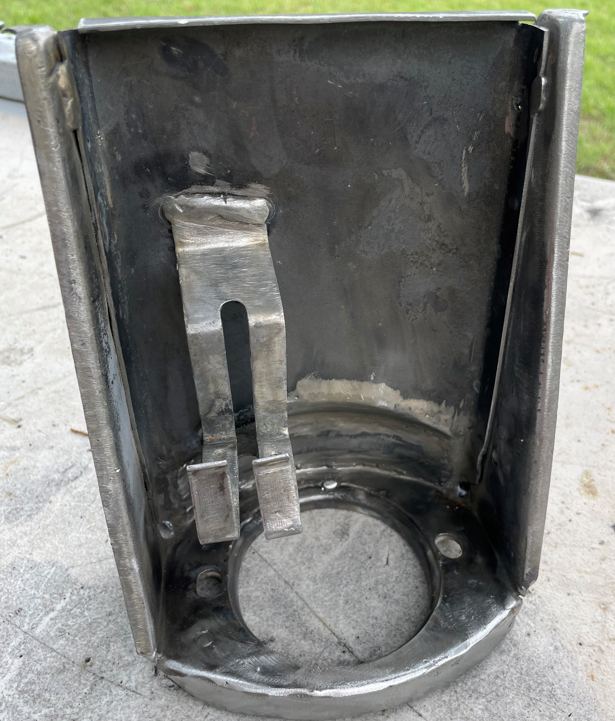
Final welds for the filter mount and clean up before final assembly.
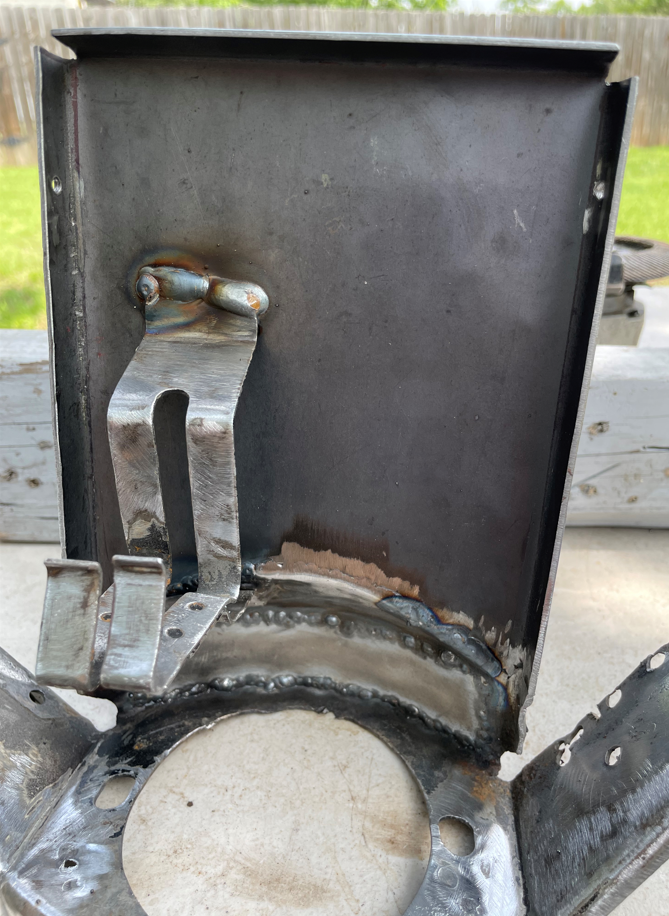 Joining the two pieces. This process was simple but took a lot of time. Had to keep the heat down, especially in the front section that you see here. 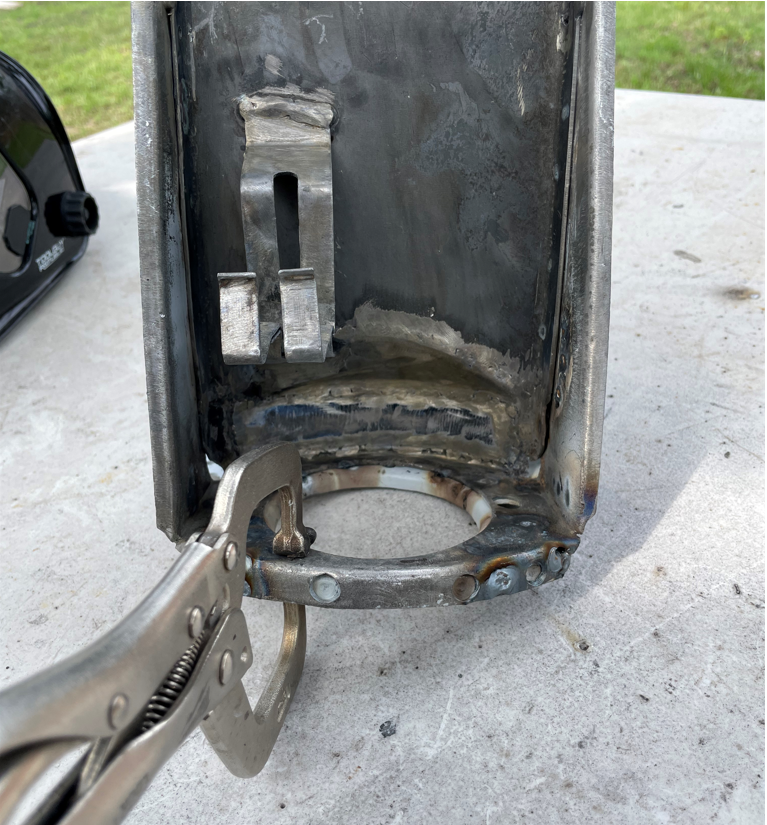 |
| friethmiller |
 May 8 2023, 08:23 AM May 8 2023, 08:23 AM
Post
#5
|
|
Senior Member    Group: Members Posts: 846 Joined: 10-February 19 From: Austin, TX Member No.: 22,863 Region Association: Southwest Region 
|
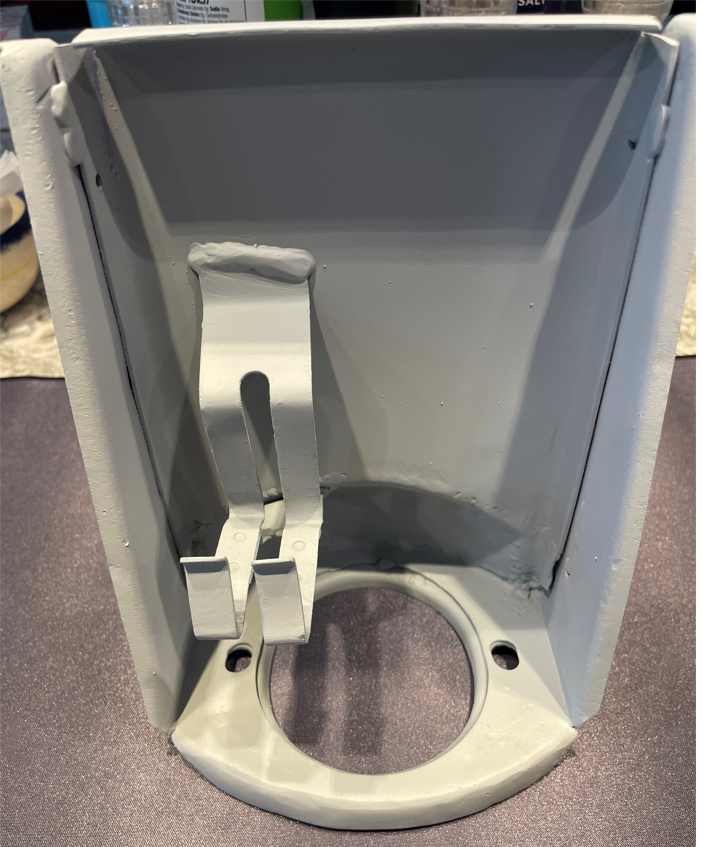
Final View with rust preventive paint and weld-thru primer. Not too bad for an amateur. This thing is now rock solid!!
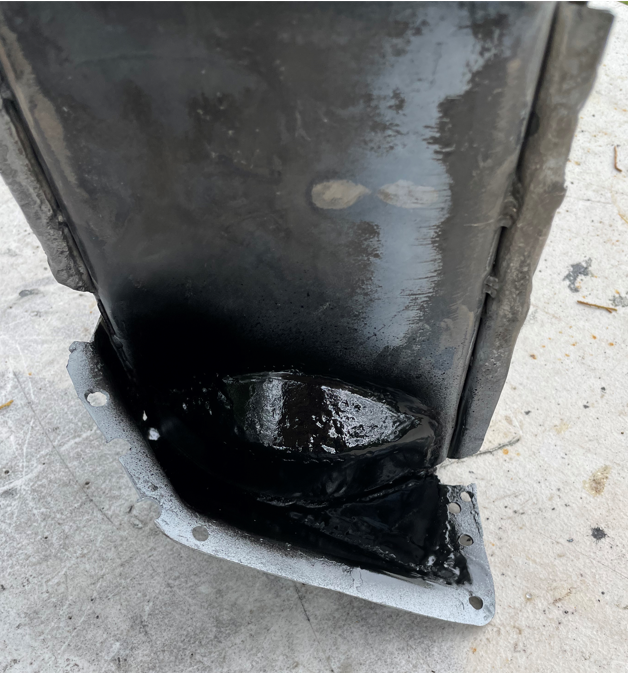   |
| Van B |
 May 8 2023, 12:40 PM May 8 2023, 12:40 PM
Post
#6
|
|
Senior Member    Group: Members Posts: 1,621 Joined: 20-October 21 From: WR, GA Member No.: 26,011 Region Association: None 
|
While I think you did a great job, you have also confirmed that I would choose replacement lol
|
| 930cabman |
 May 8 2023, 12:47 PM May 8 2023, 12:47 PM
Post
#7
|
|
Advanced Member     Group: Members Posts: 4,044 Joined: 12-November 20 From: Buffalo Member No.: 24,877 Region Association: North East States 
|
Looks great, want to do a couple for me?
Keep up the good work |
| Root_Werks |
 May 8 2023, 12:56 PM May 8 2023, 12:56 PM
Post
#8
|
|
Village Idiot      Group: Members Posts: 8,649 Joined: 25-May 04 From: About 5NM from Canada Member No.: 2,105 Region Association: Pacific Northwest 
|
Turned out nice! (IMG:style_emoticons/default/smash.gif)
|
| friethmiller |
 May 8 2023, 01:51 PM May 8 2023, 01:51 PM
Post
#9
|
|
Senior Member    Group: Members Posts: 846 Joined: 10-February 19 From: Austin, TX Member No.: 22,863 Region Association: Southwest Region 
|
While I think you did a great job, you have also confirmed that I would choose replacement lol Van, you made me laugh! (IMG:style_emoticons/default/lol-2.gif) Agree, I think "replacement" IS the better option here but I wanted to see how it would go. This was just a little distraction from my massive Hell Hole reconstruction project that is on-going. Plus, I found the absolute limit for my metal brake. With 14 gauge sheet metal, I felt like I was going to rip the brake out of the work bench it's mounted on. |
  |
1 User(s) are reading this topic (1 Guests and 0 Anonymous Users)
0 Members:

|
Lo-Fi Version | Time is now: 19th April 2025 - 11:49 PM |
Invision Power Board
v9.1.4 © 2025 IPS, Inc.


