|
|

|
Porsche, and the Porsche crest are registered trademarks of Dr. Ing. h.c. F. Porsche AG.
This site is not affiliated with Porsche in any way. Its only purpose is to provide an online forum for car enthusiasts. All other trademarks are property of their respective owners. |
|
|
  |
| stateofidleness |
 Sep 23 2007, 02:14 PM Sep 23 2007, 02:14 PM
Post
#1
|
|
Senior Member    Group: Members Posts: 810 Joined: 1-September 07 From: Canyon Lake, Texas! Member No.: 8,065 Region Association: None |
***EDITED TO BE MY BUILD THREAD*** I left in the important paragraph (IMG:style_emoticons/default/KMA.gif)
The journey begins! (IMG:style_emoticons/default/driving.gif) "im sorry it was without your consent, but you are ALL now my new mentors, educators, and general eFriends/maybe some day REAL friends. Look forward to that noob-to-educated resource transition! " here's kind of where i basically started: 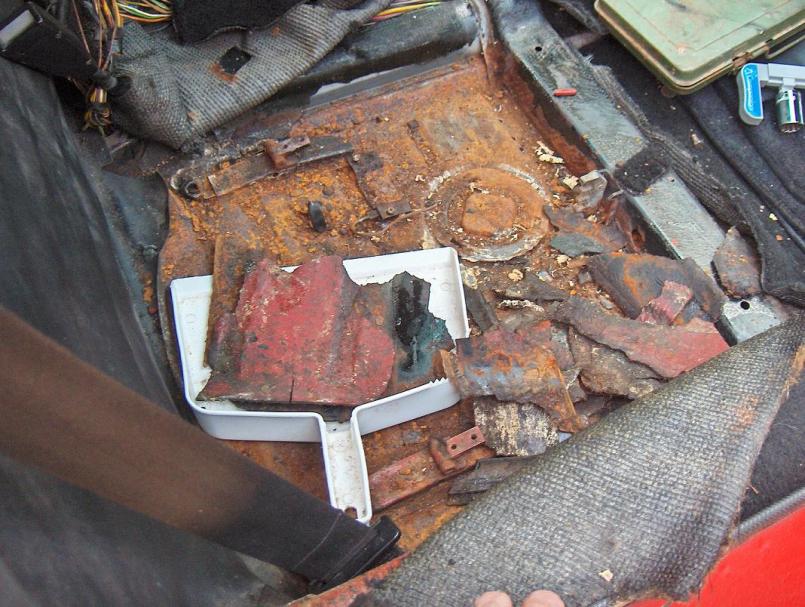 Thanks Everyone! |
| stateofidleness |
 Sep 23 2007, 02:15 PM Sep 23 2007, 02:15 PM
Post
#2
|
|
Senior Member    Group: Members Posts: 810 Joined: 1-September 07 From: Canyon Lake, Texas! Member No.: 8,065 Region Association: None |
|
| stateofidleness |
 Sep 23 2007, 02:18 PM Sep 23 2007, 02:18 PM
Post
#3
|
|
Senior Member    Group: Members Posts: 810 Joined: 1-September 07 From: Canyon Lake, Texas! Member No.: 8,065 Region Association: None |
Pictures I found when scouring the Classics:
Is mine comparable to this? or was his surface rust? 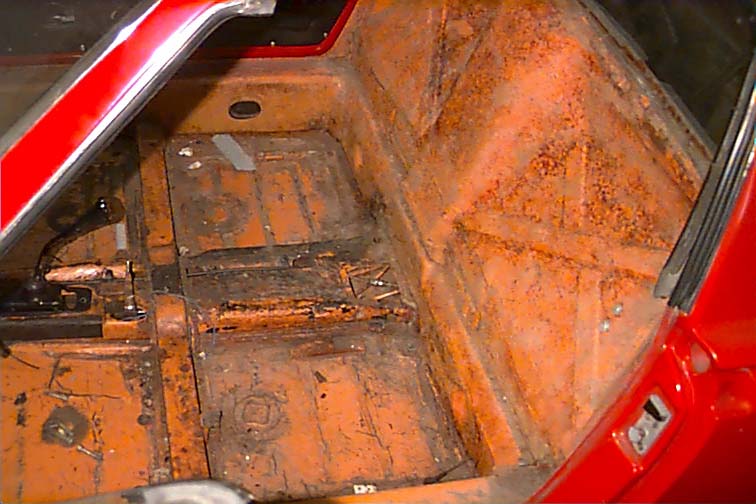 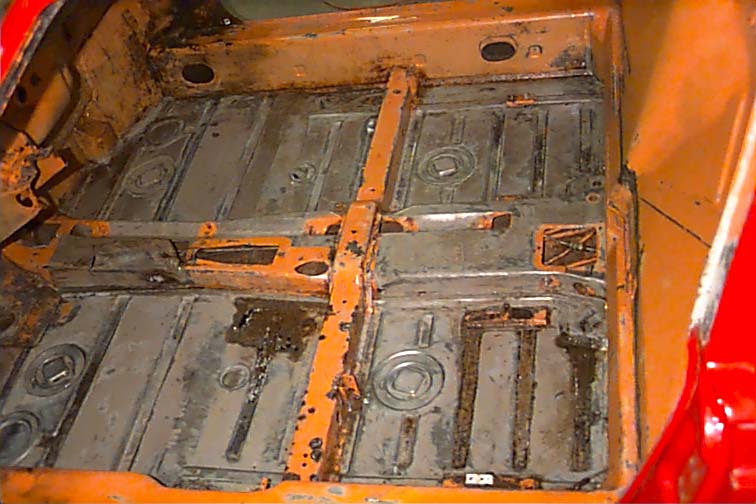 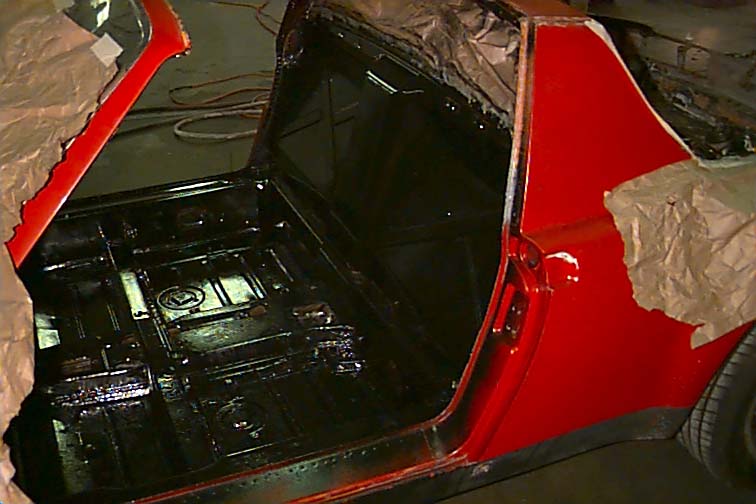 |
| type47 |
 Sep 23 2007, 02:18 PM Sep 23 2007, 02:18 PM
Post
#4
|
|
Viermeister     Group: Members Posts: 4,254 Joined: 7-August 03 From: Vienna, VA Member No.: 994 Region Association: MidAtlantic Region |
is it rusted through, that is, do you see the road thru any holes? if not, why not wire brush the rust away and POR 15? if so, you can drill the welds and weld in new floor pieces. restoration-design, among others, sells floors.
|
| stateofidleness |
 Sep 23 2007, 02:21 PM Sep 23 2007, 02:21 PM
Post
#5
|
|
Senior Member    Group: Members Posts: 810 Joined: 1-September 07 From: Canyon Lake, Texas! Member No.: 8,065 Region Association: None |
Now I've pretty much read EVERY thread in the classics forum about floorpans. Depending on ya'lls recommendations, im leaning towards
Restoration Desigins floorpans, or if i can find the Left and Right combination id prefer that Let me know where i stand on this project. And just to nip it in the bud, please don't say this is a "parts" car.. because the only thing it's a part of is ME. (corny i know, but the parts car comments get to me..) thanks for your help! |
| stateofidleness |
 Sep 23 2007, 02:25 PM Sep 23 2007, 02:25 PM
Post
#6
|
|
Senior Member    Group: Members Posts: 810 Joined: 1-September 07 From: Canyon Lake, Texas! Member No.: 8,065 Region Association: None |
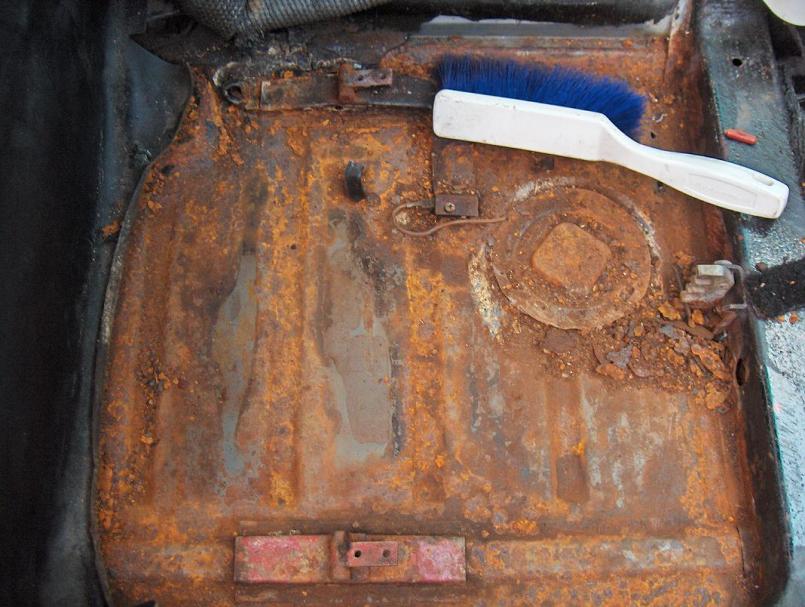
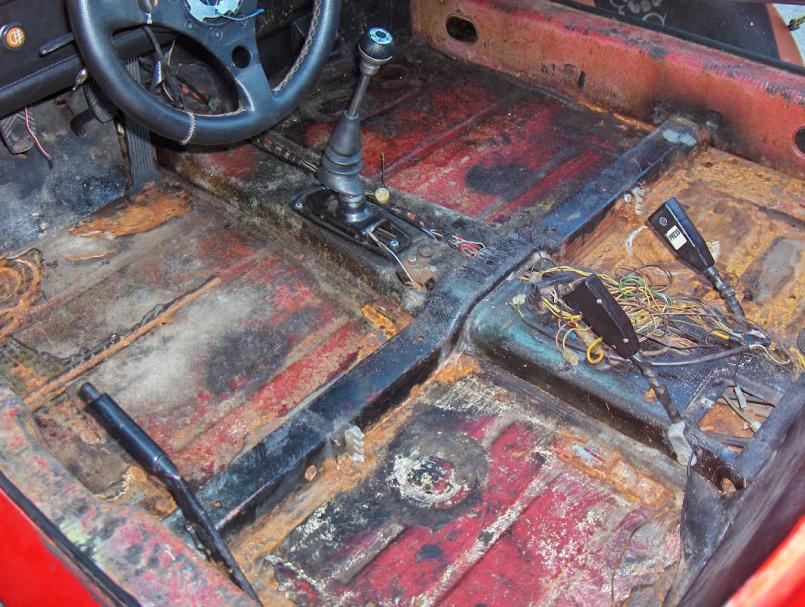
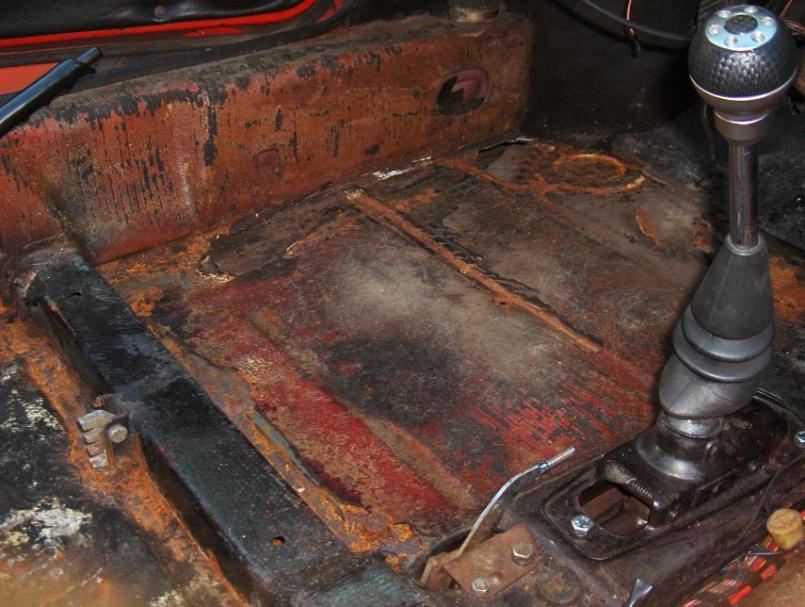
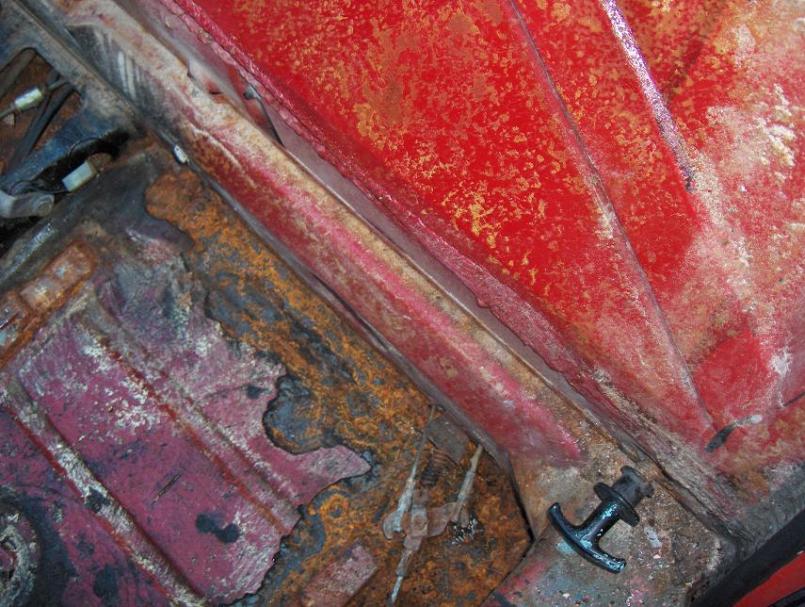
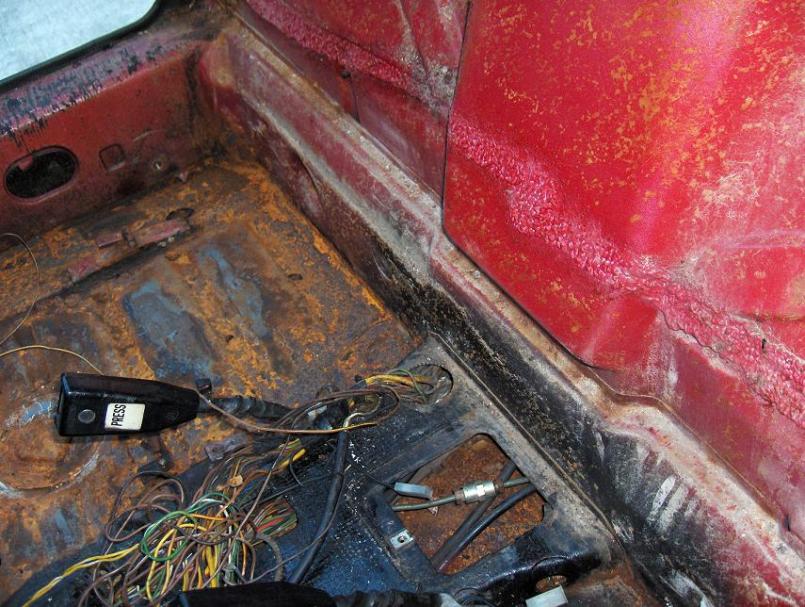
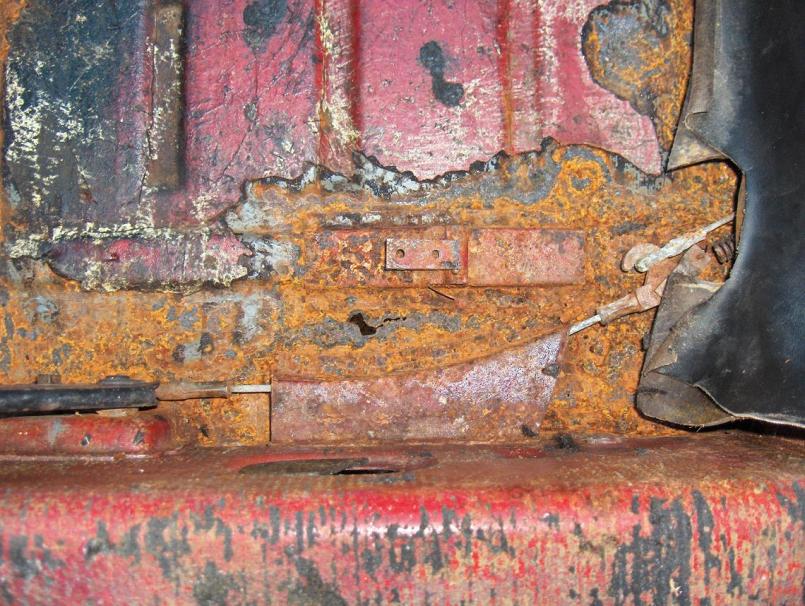
Type, it is rusted through in SOME spots but not all over. Mainly in the corners.
Id like to do this the right way the first time so im leaning towards getting new pans. Would it be safe to go ahead and order them? where can i get the left side/ride side combo as opposed to back and front pans? or what is recommended or easier to replace? ive tried wiring brushing it and it looks fine but since theres random holes and a big one by the pedal assembly corner, i figured i might as well just replace the pan with a new one and start from scratch.. that way i know what im sitting on. also i could then add the stiffening kit |
| PeeGreen 914 |
 Sep 23 2007, 02:57 PM Sep 23 2007, 02:57 PM
Post
#7
|
|
Just when you think you're done...wait, there is more..lol           Group: Members Posts: 10,219 Joined: 21-September 06 From: Seattle, WA... actually Everett Member No.: 6,884 Region Association: Pacific Northwest 
|
I have a new rear pan with the stiffeners that I thought I was going to have to use. Turns out I don't need it, and I will sell it to you for what I paid if you would like. I paid 150+ shipping for the rear pan and the stiffeners , which you have to buy seperately. It is one of restoration designs. I would also use Engmans inner kit if you are going to do all this repair. Keep up the good work, and be thorough with everything. Do it right and your car will turn out very nice.
|
| Bartlett 914 |
 Sep 23 2007, 03:02 PM Sep 23 2007, 03:02 PM
Post
#8
|
|
Advanced Member     Group: Members Posts: 2,218 Joined: 30-August 05 From: South Elgin IL Member No.: 4,707 Region Association: Upper MidWest |
That all looks repairable. I would look over the longs and the jack posts. Look at the Hell Hole under the battery. Replacing the pans is a good idea but it is a lot of work. This is harder because you will be working upside down. Patching is maybe a good option. Only you can tell for sure. The small photos are not the best at this point to tell you to patch or replace. I suspect patching and POR 15 may be enough. Speaking of POR 15, there are lots of other products that folks use. Some claim they are better than POR 15.
|
| Chuck |
 Sep 23 2007, 03:39 PM Sep 23 2007, 03:39 PM
Post
#9
|
|
What it eventually will look like . . . .   Group: Members Posts: 355 Joined: 29-March 07 From: Maple Grove, MN Member No.: 7,632 Region Association: Northstar Region |
Don't worry. You can do this. At least your seat mounts are still attached to the floor; mine weren't. If you find yourself feeling overwhelmed just step back and focus on one easy part of the process. If you get upset while working on it, move to something else or leave it alone for a bit. That is what I do. This is my first restoration project as well. I just remind myself that it is supposed to be fun and that the only deadline on being done is the one that I set.
|
| my928s4 |
 Sep 23 2007, 06:05 PM Sep 23 2007, 06:05 PM
Post
#10
|
|
Member   Group: Members Posts: 349 Joined: 18-August 07 From: Spokane, WA Member No.: 8,018 Region Association: Pacific Northwest |
Don't worry. You can do this. At least your seat mounts are still attached to the floor; mine weren't. If you find yourself feeling overwhelmed just step back and focus on one easy part of the process. If you get upset while working on it, move to something else or leave it alone for a bit. That is what I do. This is my first restoration project as well. I just remind myself that it is supposed to be fun and that the only deadline on being done is the one that I set. I agree with Chuck, I did it on my last car project, before you cry or get out the bigger hammer take a break and work on something you can complete however trivial. |
| stateofidleness |
 Sep 23 2007, 07:15 PM Sep 23 2007, 07:15 PM
Post
#11
|
|
Senior Member    Group: Members Posts: 810 Joined: 1-September 07 From: Canyon Lake, Texas! Member No.: 8,065 Region Association: None |
|
| swl |
 Sep 23 2007, 07:23 PM Sep 23 2007, 07:23 PM
Post
#12
|
|
Senior Member    Group: Members Posts: 1,409 Joined: 7-August 05 From: Kingston,On,Canada Member No.: 4,550 Region Association: Canada |
You'll have to change your handle if your are going to keep working.
914 and stateofidleness are mutually exclusive! (IMG:style_emoticons/default/biggrin.gif) As mentioned above you need to have a really good look around at the longs as long as they are ok then you are good to go. Do you weld? I know what your saying about a 22 year old with a porsche that he can't drive. Not much different at 55 (IMG:style_emoticons/default/smile.gif) Just don't put yourself under time pressures. Choose your battles. Make the car safe first then start on the rustoration and beautification. |
| swl |
 Sep 23 2007, 07:26 PM Sep 23 2007, 07:26 PM
Post
#13
|
|
Senior Member    Group: Members Posts: 1,409 Joined: 7-August 05 From: Kingston,On,Canada Member No.: 4,550 Region Association: Canada |
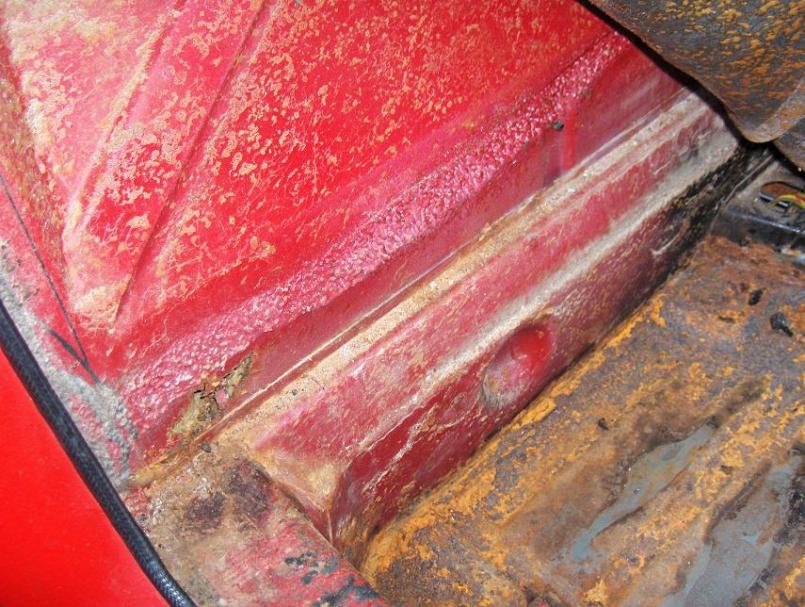
heck - that ain't rust! You're good to go!
how about shots of the two rear corners of the floor and the rust through |
| stateofidleness |
 Sep 23 2007, 07:27 PM Sep 23 2007, 07:27 PM
Post
#14
|
|
Senior Member    Group: Members Posts: 810 Joined: 1-September 07 From: Canyon Lake, Texas! Member No.: 8,065 Region Association: None |
under the seats? or near the pedals?
|
| stateofidleness |
 Sep 23 2007, 07:34 PM Sep 23 2007, 07:34 PM
Post
#15
|
|
Senior Member    Group: Members Posts: 810 Joined: 1-September 07 From: Canyon Lake, Texas! Member No.: 8,065 Region Association: None |
|
| stateofidleness |
 Sep 23 2007, 07:35 PM Sep 23 2007, 07:35 PM
Post
#16
|
|
Senior Member    Group: Members Posts: 810 Joined: 1-September 07 From: Canyon Lake, Texas! Member No.: 8,065 Region Association: None |
|
| stateofidleness |
 Sep 23 2007, 07:37 PM Sep 23 2007, 07:37 PM
Post
#17
|
|
Senior Member    Group: Members Posts: 810 Joined: 1-September 07 From: Canyon Lake, Texas! Member No.: 8,065 Region Association: None |
|
| Brett W |
 Sep 23 2007, 07:38 PM Sep 23 2007, 07:38 PM
Post
#18
|
|
Advanced Member     Group: Members Posts: 2,858 Joined: 17-September 03 From: huntsville, al Member No.: 1,169 Region Association: None 
|
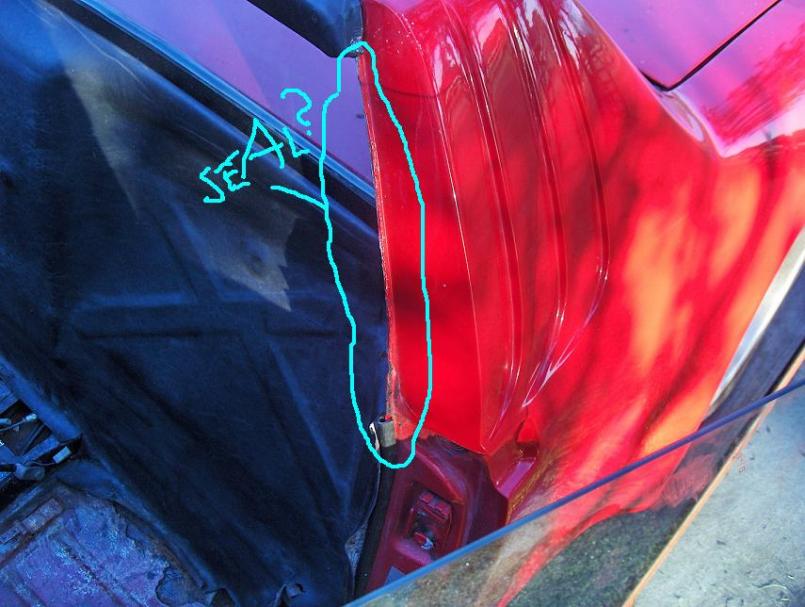
Peel up all of the tar crap in the floor boards and then look at the whole picture. Take a four in grinder and put a knotted wire wheel on there and go to town. It will take most of the rust off. Then Por-15 or Marhyde One Step the whole thing. Take the sound pad off the firewall and look for rust there and at the base of the fire wall. I am betting the rear window is leaking and needs to be resealed. Also look at the point where the firewall connects to the floor pans. Those are good places for the water to hang out and start rusting.
|
| stateofidleness |
 Sep 23 2007, 07:38 PM Sep 23 2007, 07:38 PM
Post
#19
|
|
Senior Member    Group: Members Posts: 810 Joined: 1-September 07 From: Canyon Lake, Texas! Member No.: 8,065 Region Association: None |
|
| stateofidleness |
 Sep 23 2007, 07:40 PM Sep 23 2007, 07:40 PM
Post
#20
|
|
Senior Member    Group: Members Posts: 810 Joined: 1-September 07 From: Canyon Lake, Texas! Member No.: 8,065 Region Association: None |
how is that back pad affixed to at the top? i dont want to damage the rear window or its "seal" thing... it looks like double sided tape or something.. is it seated in tabs or something or should i just be able to yank it off without hurting the window?
|
  |
5 User(s) are reading this topic (5 Guests and 0 Anonymous Users)
0 Members:

|
Lo-Fi Version | Time is now: 27th December 2024 - 12:36 AM |
Invision Power Board
v9.1.4 © 2024 IPS, Inc.


