|
|

|
Porsche, and the Porsche crest are registered trademarks of Dr. Ing. h.c. F. Porsche AG.
This site is not affiliated with Porsche in any way. Its only purpose is to provide an online forum for car enthusiasts. All other trademarks are property of their respective owners. |
|
|
| cary |
 Mar 12 2013, 01:34 PM Mar 12 2013, 01:34 PM
Post
#1
|
|
Advanced Member     Group: Members Posts: 3,900 Joined: 26-January 04 From: Sherwood Oregon Member No.: 1,608 Region Association: Pacific Northwest 
|
We're getting ready to move the project off the rotissere to the lift.
We'd rehung the doors . Pretty scary hanging there on the rotissere. How many 100's should we allow for shrinkage when we reinstall the long? |
  |
Replies(1 - 19)
| rick 918-S |
 Mar 12 2013, 04:32 PM Mar 12 2013, 04:32 PM
Post
#2
|
|
Hey nice rack! -Celette                Group: Members Posts: 20,826 Joined: 30-December 02 From: Now in Superior WI Member No.: 43 Region Association: Northstar Region 

|
Shrinkage is not required or desired. (IMG:style_emoticons/default/thisthreadisworthlesswithoutpics.gif)
|
| cary |
 Mar 12 2013, 05:28 PM Mar 12 2013, 05:28 PM
Post
#3
|
|
Advanced Member     Group: Members Posts: 3,900 Joined: 26-January 04 From: Sherwood Oregon Member No.: 1,608 Region Association: Pacific Northwest 
|
Took lots of pictures on my camera that l'll post when I get back from the shop.
So if we have it held solidly in place we shouldn't except some shrinkage when the welds cool? It's almost scary how much you can move everything. Should have taken a video it would scare the sxxx out of most of us. Door gap looks like I'm seeing .19 to .22. |
| scotty b |
 Mar 12 2013, 08:20 PM Mar 12 2013, 08:20 PM
Post
#4
|
|
rust free you say ?                Group: Members Posts: 16,375 Joined: 7-January 05 From: richmond, Va. Member No.: 3,419 Region Association: None |
Weld slowly, mocve around, not in one direction, allow time for the weld to cool, keep a blow chuck handy and blow it cool before going to the next one. No need for shrinkage. As Todd said in the sandbox...perfection costs, ( whether it be time or money ) and so do f-ups from rushing
|
| cary |
 Mar 12 2013, 09:02 PM Mar 12 2013, 09:02 PM
Post
#5
|
|
Advanced Member     Group: Members Posts: 3,900 Joined: 26-January 04 From: Sherwood Oregon Member No.: 1,608 Region Association: Pacific Northwest 
|
Here's the pictures I promised.
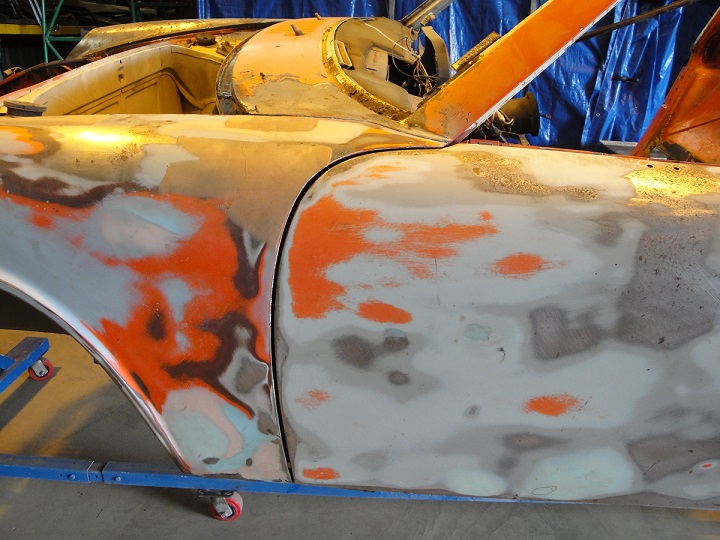 Put the doors back on to make sure everything is perfect. 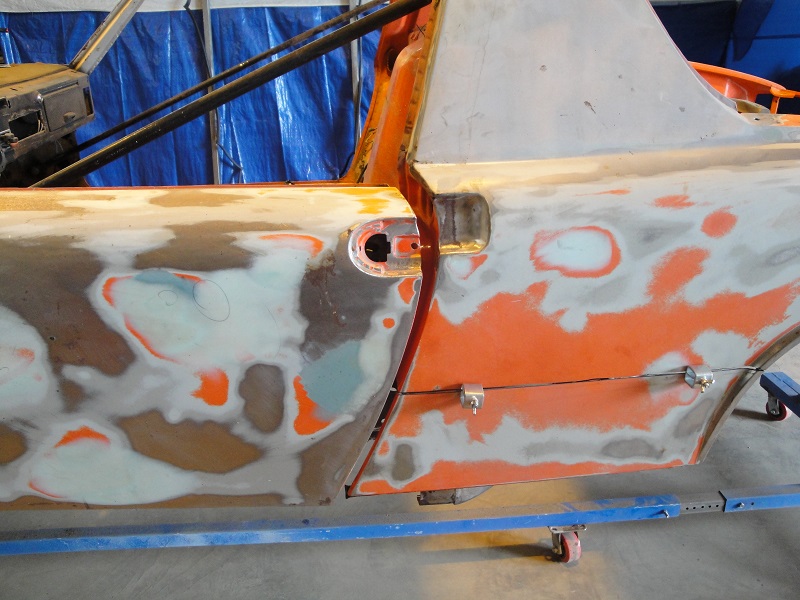 Might need some adjustment. This is where I ended up even with the door brace installed in the beginning. But this is with the drivers long removed. 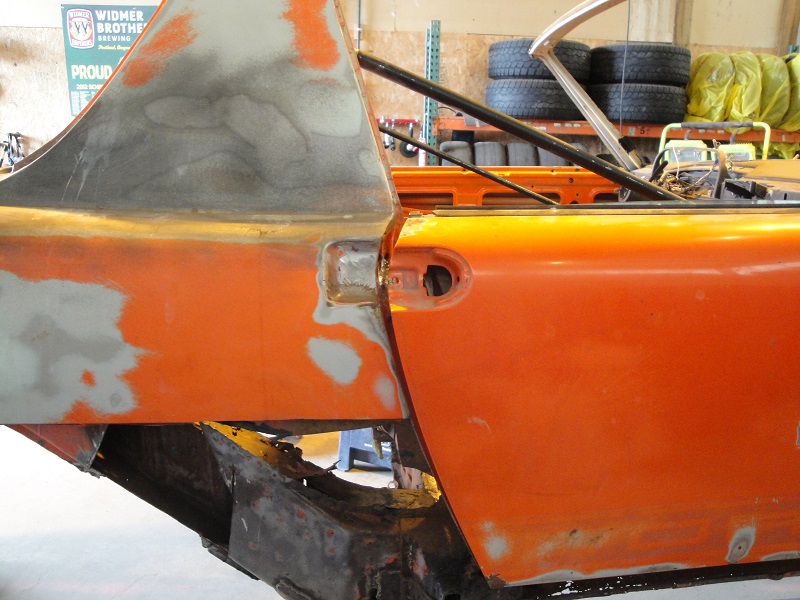 Passenger side. |
| SirAndy |
 Mar 12 2013, 09:06 PM Mar 12 2013, 09:06 PM
Post
#6
|
|
Resident German                          Group: Admin Posts: 41,945 Joined: 21-January 03 From: Oakland, Kalifornia Member No.: 179 Region Association: Northern California |
This is where I ended up even with the door brace installed in the beginning. But this is with the drivers long removed. Passenger side. Not even close. It looks like you could use some shrinkage! (IMG:style_emoticons/default/biggrin.gif) I think you need adjustable braces that allow you to pull or push the car until everything lines up. (IMG:style_emoticons/default/idea.gif) http://www.914world.com/specs/bodydims.php http://www.914world.com/specs/underdims.php |
| cary |
 Mar 12 2013, 09:09 PM Mar 12 2013, 09:09 PM
Post
#7
|
|
Advanced Member     Group: Members Posts: 3,900 Joined: 26-January 04 From: Sherwood Oregon Member No.: 1,608 Region Association: Pacific Northwest 
|
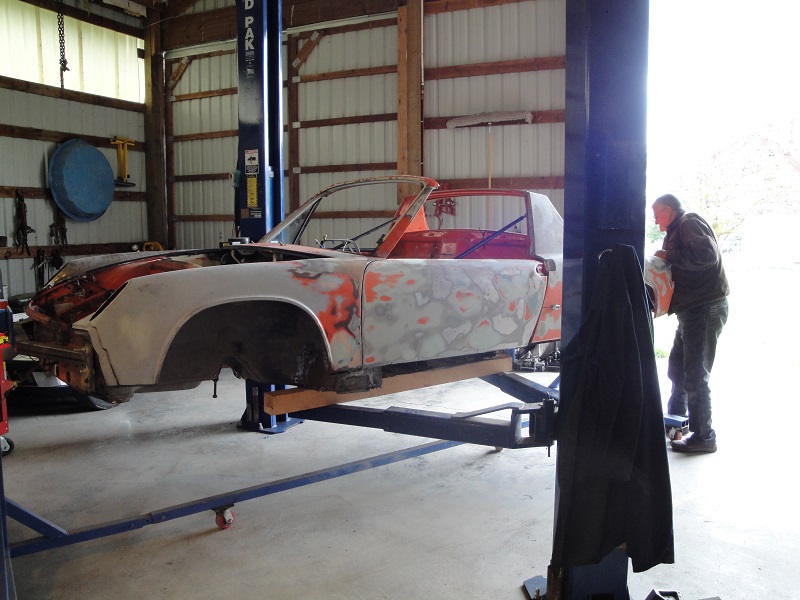 Moving from the rostissere to the lift. 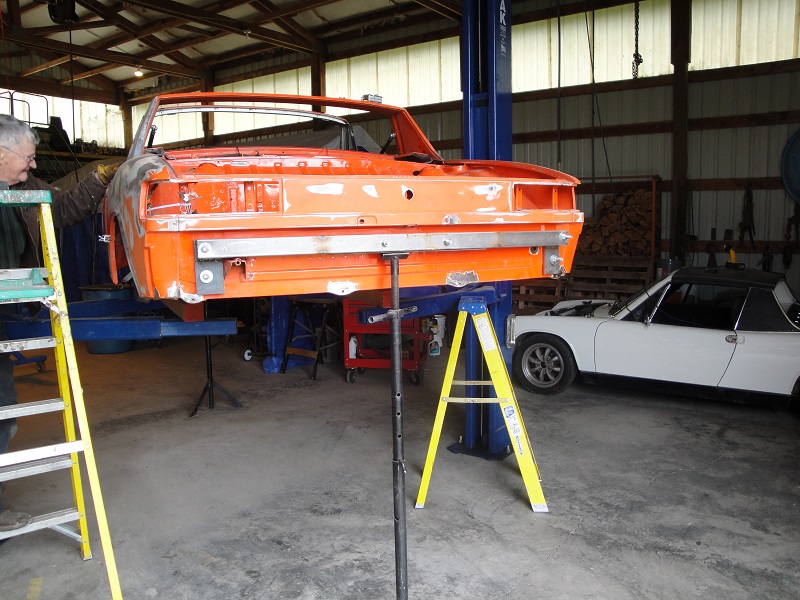 The tall jack stands allow you to twist the body into position. Without the long, its kind of like a noodle. I wish I'd done a movie to show you how flexible the body is without the long attached. 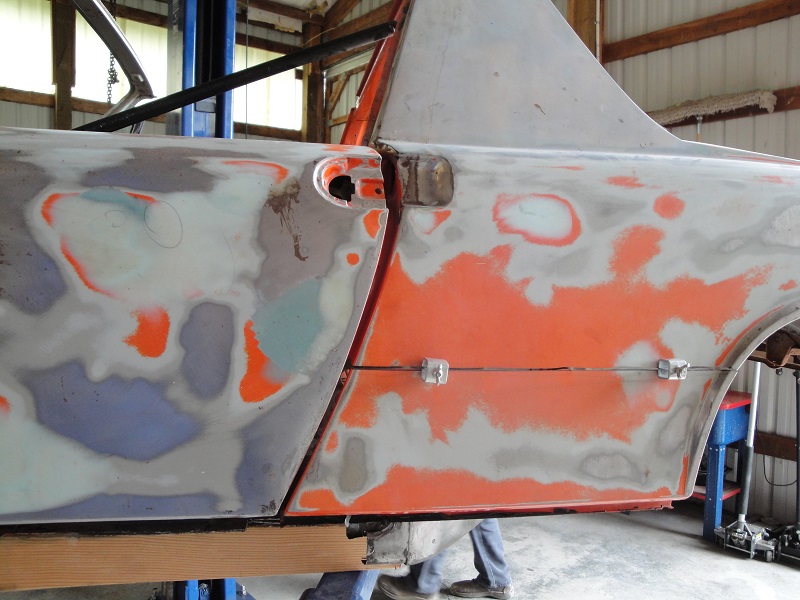 After a couple hours of tweaking. Getting closer. |
| cary |
 Mar 12 2013, 09:16 PM Mar 12 2013, 09:16 PM
Post
#8
|
|
Advanced Member     Group: Members Posts: 3,900 Joined: 26-January 04 From: Sherwood Oregon Member No.: 1,608 Region Association: Pacific Northwest 
|
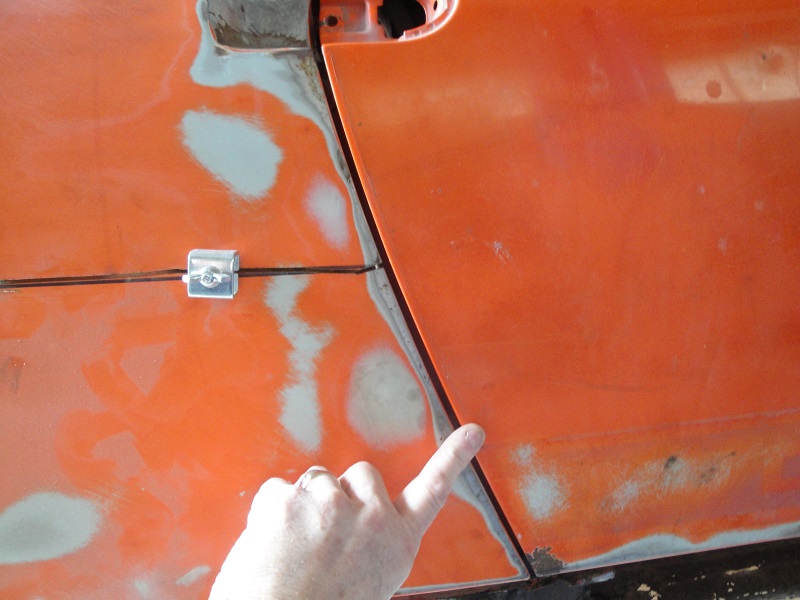 Almost getting there on the passenger side. But I'm working on the drivers side first. 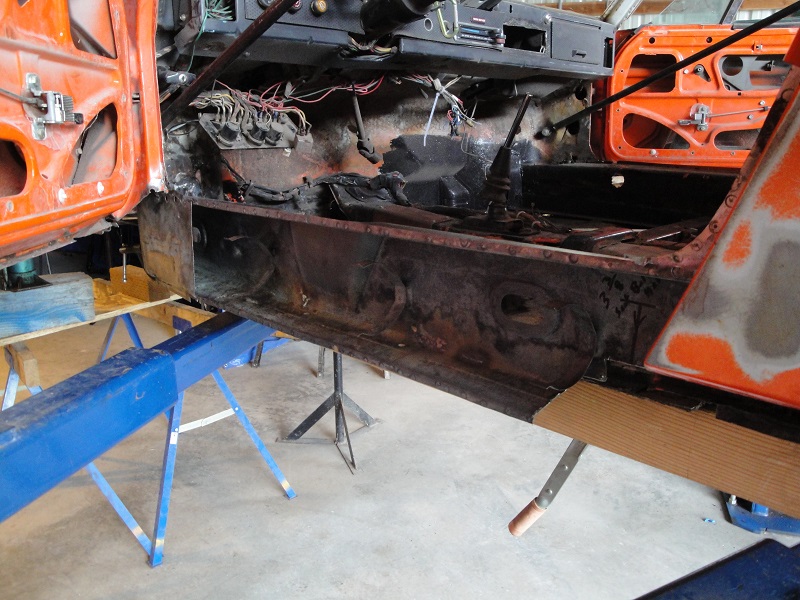 Test fitting the drivers long. Even with this being an Arizona car. I'm putting in a patch under the jack point. |
| cary |
 Mar 12 2013, 09:18 PM Mar 12 2013, 09:18 PM
Post
#9
|
|
Advanced Member     Group: Members Posts: 3,900 Joined: 26-January 04 From: Sherwood Oregon Member No.: 1,608 Region Association: Pacific Northwest 
|
Here's the drivers side.
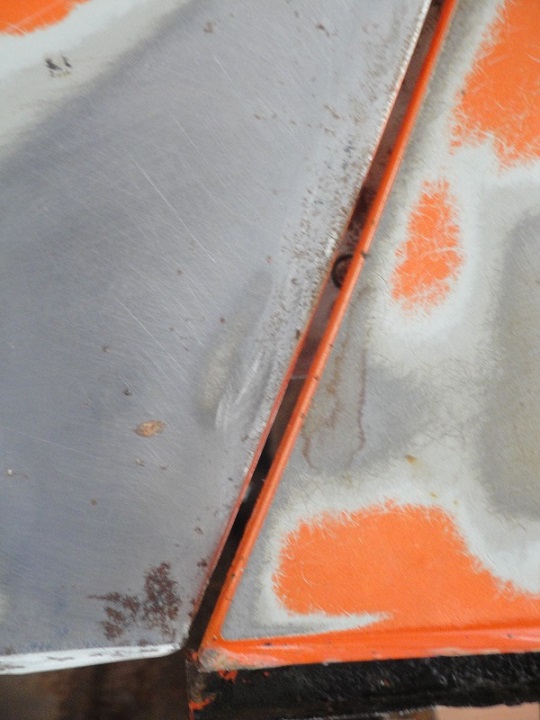 |
| cary |
 Mar 12 2013, 10:18 PM Mar 12 2013, 10:18 PM
Post
#10
|
|
Advanced Member     Group: Members Posts: 3,900 Joined: 26-January 04 From: Sherwood Oregon Member No.: 1,608 Region Association: Pacific Northwest 
|
I do have adjustable door braces. I can move the door gap all over the place.
Without a long installed you can't believe how much you can move things around. Just trying to get the top and the bottom of the door to match. Looking for a gap of .19 to .21. I assume that's the correct measurement. Being that's what the front gap is. |
| cary |
 Mar 13 2013, 07:28 AM Mar 13 2013, 07:28 AM
Post
#11
|
|
Advanced Member     Group: Members Posts: 3,900 Joined: 26-January 04 From: Sherwood Oregon Member No.: 1,608 Region Association: Pacific Northwest 
|
Got up early to finish reading this post.
http://www.914world.com/bbs2/index.php?sho...03941&st=50 I need to add some additional information. This car was a poor at best, front clip repair back in the day. So the poor workmanship and the fact these cars were hand built might be adding to my issues. LOL. I'm just seeking perfection on a tub that most folks would have crushed. I don't think I want to tweak the doors the old fashioned way being that the front door gaps are good. I'm only looking for an additional .02 to .03 on the bottom of the drivers door. I'll probably have to lower the car closer to the ground to get more pressure points to tweak with. Looks like coffee and tape measure work this am while Super In Law is doing some work on the new inner long. I do have confidence we'll get it. Super In Law got it road worthy 12 years ago. He over did it welding wise, but it was perfectly square when it went on the alignment rack. And the doors closed. I wish I'd taken pictures of the door gaps 4 years ago when I took it apart. Sorry to say I do have two Porta Powers that could be used. But there's something about Porta Powers and an 18 gauge car that don't feel quite right. |
| SirAndy |
 Mar 13 2013, 11:25 AM Mar 13 2013, 11:25 AM
Post
#12
|
|
Resident German                          Group: Admin Posts: 41,945 Joined: 21-January 03 From: Oakland, Kalifornia Member No.: 179 Region Association: Northern California |
I'm just seeking perfection on a tub that most folks would have crushed. While the door gaps are important and visually annoying if off, i would rather concentrate on the suspension points. With a car that far gone, you really want to put it on a Celette bench while you are welding the pieces back in. That way you *know* all your suspension points are dead on. You can always tweak the doors later, especially the height (sagging) of the doors is easily adjusted on a complete car. I would not use the doors as a guide to building the frame ... (IMG:style_emoticons/default/shades.gif) |
| ThePaintedMan |
 Mar 13 2013, 11:42 AM Mar 13 2013, 11:42 AM
Post
#13
|
|
Advanced Member     Group: Members Posts: 3,886 Joined: 6-September 11 From: St. Petersburg, FL Member No.: 13,527 Region Association: South East States 
|
While the door gaps are important and visually annoying if off, i would rather concentrate on the suspension points. With a car that far gone, you really want to put it on a Celette bench while you are welding the pieces back in. That way you *know* all your suspension points are dead on. You can always tweak the doors later, especially the height (sagging) of the doors is easily adjusted on a complete car. I would not use the doors as a guide to building the frame ... (IMG:style_emoticons/default/shades.gif) (IMG:style_emoticons/default/agree.gif) That car is a little far gone to be seeking that kind of perfection off the bat with the doors. Suspension points are far less "adjustable" when the car is back together. Looks like a ton of work, and hats off to you for going for it! |
| sixnotfour |
 Mar 13 2013, 12:11 PM Mar 13 2013, 12:11 PM
Post
#14
|
|
914 Wizard           Group: Members Posts: 10,681 Joined: 12-September 04 From: Life Elevated..planet UT. Member No.: 2,744 Region Association: Rocky Mountains 

|
Better measure the windshield to targa bar also, Top needs to fit.
looks like your front half is tipped back. |
| cary |
 Mar 13 2013, 02:42 PM Mar 13 2013, 02:42 PM
Post
#15
|
|
Advanced Member     Group: Members Posts: 3,900 Joined: 26-January 04 From: Sherwood Oregon Member No.: 1,608 Region Association: Pacific Northwest 
|
Time for lunch.
Feel much better now. Both doors are at 25 1/8" at the targa bar to windshield measurement. And 139mm at the latch plate measurement. Put the latch back in the drivers door. Closes perfect without a bind. Can't really measure the suspension pick up points. Both mounts are removed from the passenger side. I have a 4 corner jig that was on the car before I tore into the longs. |
| cary |
 Mar 13 2013, 10:07 PM Mar 13 2013, 10:07 PM
Post
#16
|
|
Advanced Member     Group: Members Posts: 3,900 Joined: 26-January 04 From: Sherwood Oregon Member No.: 1,608 Region Association: Pacific Northwest 
|
Here's the pictures from today.
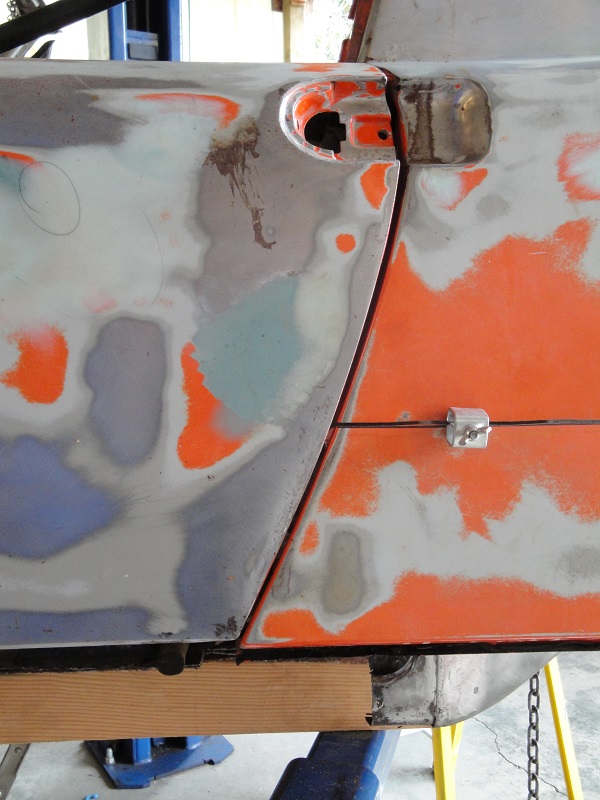 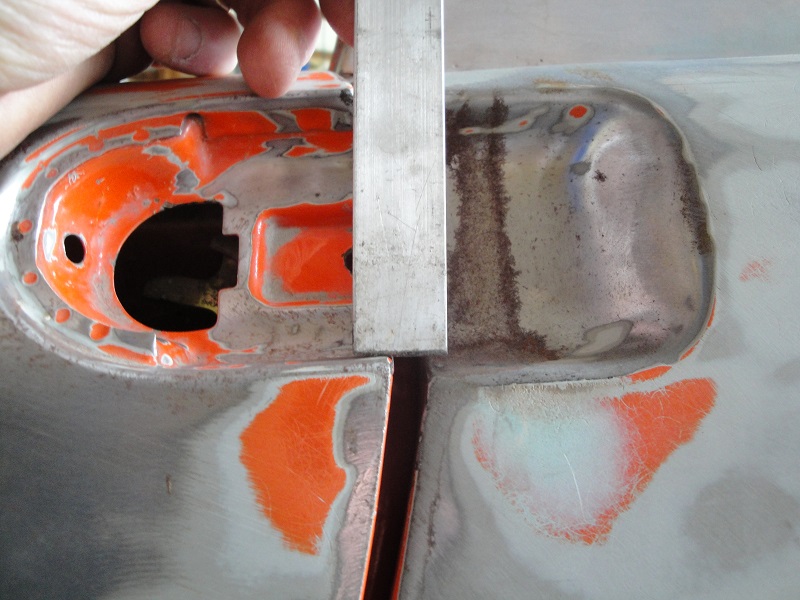 Drivers side.. The nut plate on the door jam latch is a bit frozen. So its soaking with PB Blaster. Pulls the door up just a smidgen. I'll tidy that up tomorrow. I didn't want to catch the paint on fire with the torch. 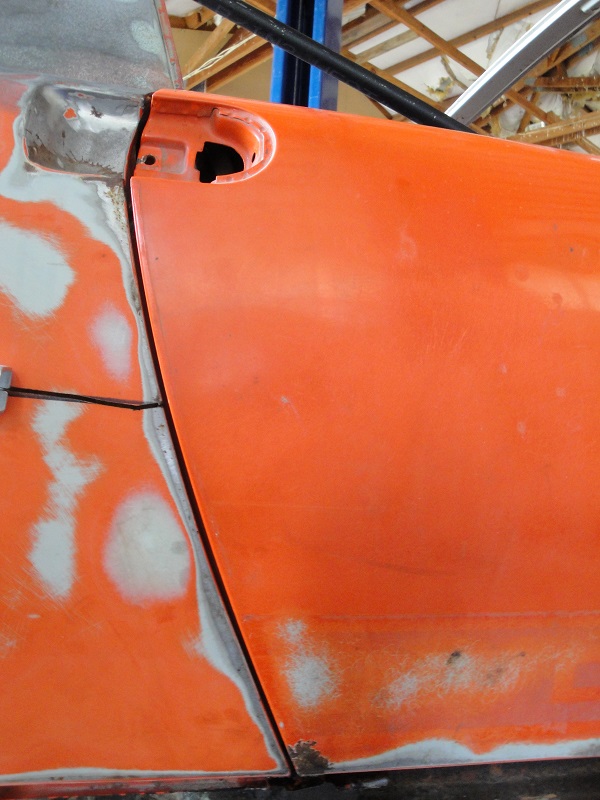 Here's the passenger side. Real happy with the progress today. My fabricator (Super In Law) mis-measured the patch on the drivers long. (IMG:style_emoticons/default/mad.gif) Missed that it gets about .20 wider as is goes under the firewall. So we didn't leave the shop till after 6:30. |
| cary |
 Mar 13 2013, 10:12 PM Mar 13 2013, 10:12 PM
Post
#17
|
|
Advanced Member     Group: Members Posts: 3,900 Joined: 26-January 04 From: Sherwood Oregon Member No.: 1,608 Region Association: Pacific Northwest 
|
Here's the suspension point jig we built.
Bolts to all four suspension points plus the front motor mounts. 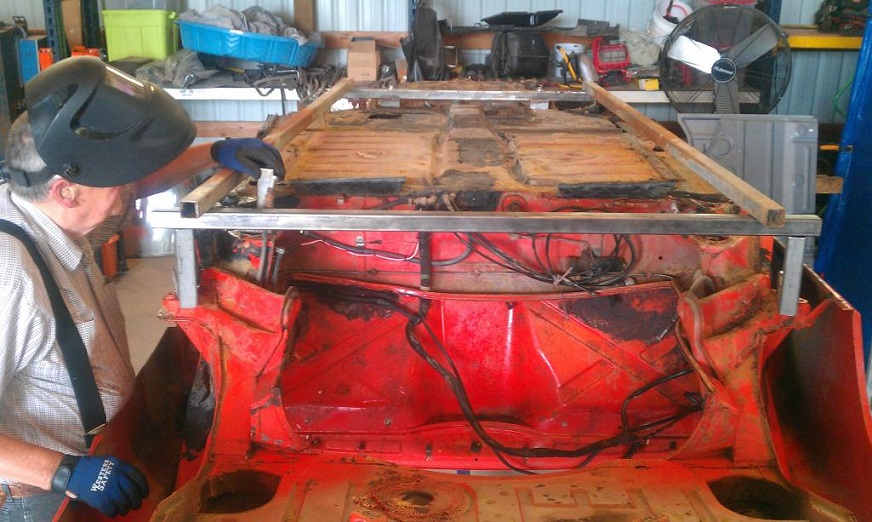 |
| cary |
 Mar 13 2013, 10:25 PM Mar 13 2013, 10:25 PM
Post
#18
|
|
Advanced Member     Group: Members Posts: 3,900 Joined: 26-January 04 From: Sherwood Oregon Member No.: 1,608 Region Association: Pacific Northwest 
|
Tomorrow we'll install the drivers long after a bit more trimming.
I'll follow my instructions. Go slow. Don't weld too long in one spot. Cool the welds with the air hose. |
| rick 918-S |
 Mar 13 2013, 11:37 PM Mar 13 2013, 11:37 PM
Post
#19
|
|
Hey nice rack! -Celette                Group: Members Posts: 20,826 Joined: 30-December 02 From: Now in Superior WI Member No.: 43 Region Association: Northstar Region 

|
get the drivers door gap
closed up around 5mm max. That gap is looks wide but I have been drinking so.... (IMG:style_emoticons/default/wacko.gif) (IMG:style_emoticons/default/icon8.gif) |
| Jeff Hail |
 Mar 14 2013, 01:33 AM Mar 14 2013, 01:33 AM
Post
#20
|
|
Senior Member    Group: Members Posts: 1,141 Joined: 3-May 07 From: LA/ CA Member No.: 7,712 |
There is a lot of good feedback and direction here on this thread. As I have read everyone’s replies the seasoned guys here have wisdom to share. That wisdom is learned through experience of trial and error.
Andy is correct "I would not use the doors as a guide to building the frame" ...what you can use them for as an indicator of what is shrinking and shifting as you repair, replace and weld. The main control points are the most critical parts. Suspension mounting and load bearing areas are primary. Remember when the car is assembled and all four tires sitting on the ground the center section of the tub is not bearing the entire weight of the car, its loaded from the suspension mounting points and then spread to the center section. The center section is critical to being square an level but the entire chassis is a concerted system as a whole. If you are repairing a tub and only the center section is supported both front and rear overhangs are sagging. If you support the car from the ends such as a rotisserie the center section sags. 8 points are recommended at a minimum (center section 4 points and 2 points on each end of the tub). With a Celette you can add as many fixtures available that are made for the chassis which will provide for consistent support across the datum line through both ends of the tub, torque box’s and center section. Many cars have up to 20+ control points that can be supported. 4 point pinch weld clamps at the rockers is insufficient for major structural repairs on a 914. Think of a Celette as a surface plate with predetermined stand offs. Many cannot afford or do not have access to a dedicated bench. What do you do? Take your time! Watch panel gaps to see what’s happening during welding, use them as a visual aid. Improvised support jigs, brackets, braces can be made and are effective. Some kind of improvised support like an H beam frame, box tubing, truss under the chassis to keep things flat and level are a start. The datum line under the car will give you a level line to reference. If your support is uniform on both sides of the tub it can indicate twist in the chassis also and height differences. Tape measures are indispensible and so are plumb lines. All of these are old school and can be done on the cheap with minimal fabrication. Might take a little longer than a bench system but if done properly will result in a straight project. X, Y and Z axis did not originate on CNC machines! Door bars are great for roofless cars. If you use door bars I advise bracing at the windshield frame to targa bar also as door bars alone can actually spread the door openings unevenly when the pressure is cranked up. Cross bracing across the center section long to long is also recommended. It’s a lot harder for the chassis to move around when something is helping it resist or oppose forces. When you introduce heat you will have shrinkage of some kind in the area its applied. It’s one of those laws of the galaxy called thermodynamics so get used to it. Heat goes to cold with metal. Just visualize your testicles when it’s really cold out!!! The cold sucks the body heat away resulting in turtle syndrome! Same principal applies to metal, how its controlled is key. Do not spray water or use cold wet rags on structural areas –just don’t! I have stuck and air hose with a slow blead nozzle inside of longs to “move air” and it seems to work for minimizing shrinkage. I have also learned that human nature says add more heat when things start sputtering and popping –stop now, go back and clean your metal better at the weld site and slow down. Speed welding always causes more work in the end. Another thing- if your panel’s gaps are perfect before you start welding they are not going to be perfect when you finish. Sometimes you need to fit and spread a gap (say door opening) wider and account for shrinkage where the end result will be where you want it. Learn to control it. One thing about metal that’s a fact; material can be added or subtracted. Spot welds can be drilled out a second time if need be. Metal is forgiving, stretchable, shrinkable and submissive. If you learn to read it you can make it do whatever you want. What’s the worst that can happen a do over? |
  |
3 User(s) are reading this topic (3 Guests and 0 Anonymous Users)
0 Members:

|
Lo-Fi Version | Time is now: 27th December 2024 - 06:00 AM |
Invision Power Board
v9.1.4 © 2024 IPS, Inc.


