|
|

|
Porsche, and the Porsche crest are registered trademarks of Dr. Ing. h.c. F. Porsche AG.
This site is not affiliated with Porsche in any way. Its only purpose is to provide an online forum for car enthusiasts. All other trademarks are property of their respective owners. |
|
|
| type4org |
 Jul 27 2006, 07:55 AM Jul 27 2006, 07:55 AM
Post
#1
|
|
You need PLAID!   Group: Members Posts: 231 Joined: 13-June 06 From: Oldenburg (Oldb), Germany Member No.: 6,212 |
I'm currently in the process of replacing all the vacuum hoses on my '76, but all the vacuum diagrams I can find are at least slightly off or miss stuff. Mine is a CA model with all the goodies (EGR, air pump, catalytic converter). Does anyone have a suitable vacuum diagram?
One thing I noticed is that the EGR valve is not connected to anything and I cannot find an open nipple for its vacuum line, which is still connected to the EGR valve, on the throttle body. However, the distributor advance is connected to a nipple in the correct vicinity, which, according to one diagram I have, is simply not connected on many 74+ cars. My symptoms right now are that the car wants to die badly when started and hesitates/bucks when I'm not careful during warmup. Any help greatly appreciated (IMG:style_emoticons/default/smile.gif) |
  |
Replies(1 - 19)
| Bleyseng |
 Jul 27 2006, 08:05 AM Jul 27 2006, 08:05 AM
Post
#2
|
|
Aircooled Baby!           Group: Members Posts: 13,036 Joined: 27-December 02 From: Seattle, Washington (for now) Member No.: 24 Region Association: Pacific Northwest |
take some pics of the engine and smog stuff. I have never seen in person a complete setup as its usually been hacked or removed.
The vacuum advance should be going to no where. The vac retard is what should be hooked up. This is the lower slightly larger hose on the vac can. |
| type4org |
 Jul 27 2006, 08:10 AM Jul 27 2006, 08:10 AM
Post
#3
|
|
You need PLAID!   Group: Members Posts: 231 Joined: 13-June 06 From: Oldenburg (Oldb), Germany Member No.: 6,212 |
take some pics of the engine and smog stuff. I have never seen in person a complete setup as its usually been hacked or removed. The vacuum advance should be going to no where. The vac retard is what should be hooked up. This is the lower slightly larger hose on the vac can. I'll try to take some pictures tonight if I don't forget it. The setup is indeed complete (I bought the car less than a month ago and it had 24,500 miles then), but might have been in the hands of less-than-competent mechanics. The vacuum retard is hooked up, that one winds around to the opposite side of the throttle body. |
| Dave_Darling |
 Jul 27 2006, 10:04 AM Jul 27 2006, 10:04 AM
Post
#4
|
|
914 Idiot                Group: Members Posts: 15,067 Joined: 9-January 03 From: Silicon Valley / Kailua-Kona Member No.: 121 Region Association: Northern California 
|
I think the ported vacuum fitting (advance fitting) on the throttle body runs the EGR. In at least some cases the line has a T that also goes to the distributor.
Check the 75 1.8 diagram on Pelican's site for some of the details of how smog equipment gets hooked up... --DD |
| AZ914 |
 Jul 27 2006, 10:30 AM Jul 27 2006, 10:30 AM
Post
#5
|
|
914 Dumbass    Group: Members Posts: 1,461 Joined: 6-January 03 From: Sunny Tucson Member No.: 98 Region Association: Southwest Region |
I have a 75 2.0 with all the smog crap still hooked up. I will do my best to remember to snap some pictures of that spagetti tonight.
|
| type4org |
 Jul 29 2006, 02:15 PM Jul 29 2006, 02:15 PM
Post
#6
|
|
You need PLAID!   Group: Members Posts: 231 Joined: 13-June 06 From: Oldenburg (Oldb), Germany Member No.: 6,212 |
Today I went and replaced all the vacuum lines that I could, going off a kit purchased from an unnamed but well-known vendor (No worries, Dave, not Pelican!).
The good: - The hoses that did fit were all cut with a couple inches to spare, no problem with the lengths. The bad: - The kit was advertised as fitting '75 and '76 cars, but did not contain any hose for the connections to and from the charcoal canister. Looking at what's left over (a bunch of 14mm ID hoses) they seemed to assume that 14 mm ID is correct, while in reality it is 12. I could have made it work with hose clamps, but the kit did not contain any. The ugly: - The kit was advertised as coming with a diagram to help with installation. It does come with a diagram and a spreadsheet listing the IDs and lengths for the hose in the kit. However, the color is not listed, but I was able to guess which is which. But the diagram is the worst. It is a hand-drawn diagram that does not contain any information about the air pump and EGR systems. It also does not tell you which diameter hose to use where or which color - it's all uniformly black and white. I serious thumbs-down for this diagram. However, a good one that includes colors and diameters does not seem to be available at all. I was left guessing most of the time. Below there are some pictures of the engine compartment from three sides with the air cleaner removed. It shows some of the interesting emissions componentry on the 1976 2.0, like the air pump (the thing sitting on top of the fan housing) and the EGR valve and air filter inlet connection (to the right of the air filter). I saved all the hoses and plan on creating my own diagram, complete with diameters and colors and lengths. View from drivers side: (IMG:http://www.type4.org/midlifecrisis/FI/driversside.jpg) View from passenger side: (IMG:http://www.type4.org/midlifecrisis/FI/passengerside.jpg) View from rear: (IMG:http://www.type4.org/midlifecrisis/FI/rear.jpg) Hope this helps someone. |
| tod914 |
 Jul 29 2006, 02:20 PM Jul 29 2006, 02:20 PM
Post
#7
|
|
Advanced Member     Group: Members Posts: 3,755 Joined: 19-January 03 From: Lincoln Park, NJ Member No.: 170 |
Let them know your missing lines and they should send them to you. Happened to a friend was easily resolved.
|
| Dave_Darling |
 Jul 29 2006, 04:44 PM Jul 29 2006, 04:44 PM
Post
#8
|
|
914 Idiot                Group: Members Posts: 15,067 Joined: 9-January 03 From: Silicon Valley / Kailua-Kona Member No.: 121 Region Association: Northern California 
|
I saved all the hoses and plan on creating my own diagram, complete with diameters and colors and lengths. I am quite sure Pelican would be very very happy indeed to host this once it's done!! (IMG:style_emoticons/default/biggrin.gif) --DD |
| RustyWa |
 Jul 30 2006, 10:51 AM Jul 30 2006, 10:51 AM
Post
#9
|
|
Working Member    Group: Members Posts: 610 Joined: 2-January 03 From: Kent, WA Member No.: 72 |
My symptoms right now are that the car wants to die badly when started and hesitates/bucks when I'm not careful during warmup. Looks like the hose from your AAR valve is kinked. This could cause some warm-up issues if the engine doesn't get the extra air it needs. |
| RustyWa |
 Jul 30 2006, 10:53 AM Jul 30 2006, 10:53 AM
Post
#10
|
|
Working Member    Group: Members Posts: 610 Joined: 2-January 03 From: Kent, WA Member No.: 72 |
Just looked again..the picture from the drivers side doesn't look that bad.
|
| type4org |
 Jul 30 2006, 11:01 AM Jul 30 2006, 11:01 AM
Post
#11
|
|
You need PLAID!   Group: Members Posts: 231 Joined: 13-June 06 From: Oldenburg (Oldb), Germany Member No.: 6,212 |
Looks like the hose from your AAR valve is kinked. This could cause some warm-up issues if the engine doesn't get the extra air it needs. That's not it - the hose looked fine and I replaced it along with almost all vac hoses yesterday. Issue still there. Just now I removed the AAR and will do some simple testing. It does let air through at ambient temp (high 80s now), but will be warming carefully in the oven to make sure opening/closing works correctly. |
| Bleyseng |
 Jul 30 2006, 12:20 PM Jul 30 2006, 12:20 PM
Post
#12
|
|
Aircooled Baby!           Group: Members Posts: 13,036 Joined: 27-December 02 From: Seattle, Washington (for now) Member No.: 24 Region Association: Pacific Northwest |
Just plug it in to a 12v source off the car (battery) and see if in 5 minutes its nearly closed. Probably not so squirt some PB Blaster into it and leave it over nite as that will free up the rotary valve inside.
It also should free warm to the touch as there is a heater in the bottom. |
| type4org |
 Jul 30 2006, 12:27 PM Jul 30 2006, 12:27 PM
Post
#13
|
|
You need PLAID!   Group: Members Posts: 231 Joined: 13-June 06 From: Oldenburg (Oldb), Germany Member No.: 6,212 |
Just plug it in to a 12v source off the car (battery) and see if in 5 minutes its nearly closed. Probably not so squirt some PB Blaster into it and leave it over nite as that will free up the rotary valve inside. It also should free warm to the touch as there is a heater in the bottom. I have tested it cold (short time in the freezer), at ambient temperature and heated up (short time in the oven), and it seems to work fine. It did start closing in the oven. Internal resistance is 13.5 Ohms, that seems fine as well. The last test I want to do is heat the engine up and then try to blow air into the air filter-to-AAR hose to see how much gets through. At any rate, I doubt the AAR is causing the problems when cold. Another cold running symptom is that it wants to stall whenever I push on the gas pedal. I have to push down more to get over the "hump". Either there is not enough enrichment at that moment, or too much. This symptom is much less pronounced when warm. |
| Bleyseng |
 Jul 30 2006, 05:10 PM Jul 30 2006, 05:10 PM
Post
#14
|
|
Aircooled Baby!           Group: Members Posts: 13,036 Joined: 27-December 02 From: Seattle, Washington (for now) Member No.: 24 Region Association: Pacific Northwest |
1.check for a vacuum leaks using propane, starting fluid etc
2. Check your timing as it sounds like that too as the "hole" might be that |
| type4org |
 Jul 30 2006, 05:20 PM Jul 30 2006, 05:20 PM
Post
#15
|
|
You need PLAID!   Group: Members Posts: 231 Joined: 13-June 06 From: Oldenburg (Oldb), Germany Member No.: 6,212 |
1.check for a vacuum leaks using propane, starting fluid etc 2. Check your timing as it sounds like that too as the "hole" might be that The car is going into the shop on Tuesday and will get the mechanical/igition side checked out and adjusted. I'm also having all the fuel lines replaced and will ask them to check the fuel pressure at that time as well. The seller had to replace the fuel pump, maybe the pressure is incorrect. With the exception of the lines from/to the charcoal canister all vacuum lines on the engine have been replaced. Major drag at 95 degrees temperature! (IMG:style_emoticons/default/wink.gif) Unless there are other spots that could leak vacuum I'd consider that part taken care of. |
| Hoss |
 Jul 31 2006, 11:48 PM Jul 31 2006, 11:48 PM
Post
#16
|
|
Member   Group: Members Posts: 113 Joined: 24-January 06 From: Del Mar, CA Member No.: 5,465 |
Jens,
Here are some other pics I took of my '76 with smog equipment as requested by Geoff Bleyseng in another thread. I thought I would post it here in case you decided to do a full write up with the correct routing for the Bird Board to host. I can take additional photos if there are specific requests. Note that I do not have a hose on the part just under the smaller air filter. I checked your photos and could not see a similar angle for comparison. Attached thumbnail(s) 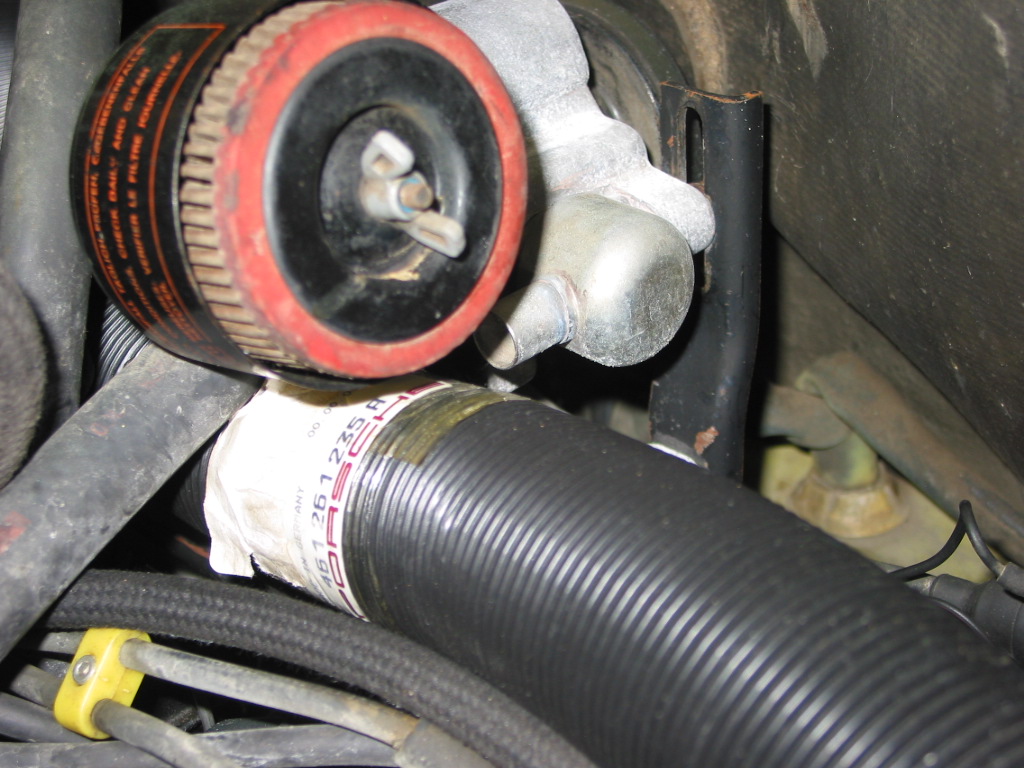
|
| Hoss |
 Jul 31 2006, 11:50 PM Jul 31 2006, 11:50 PM
Post
#17
|
|
Member   Group: Members Posts: 113 Joined: 24-January 06 From: Del Mar, CA Member No.: 5,465 |
Next shot
Attached thumbnail(s) 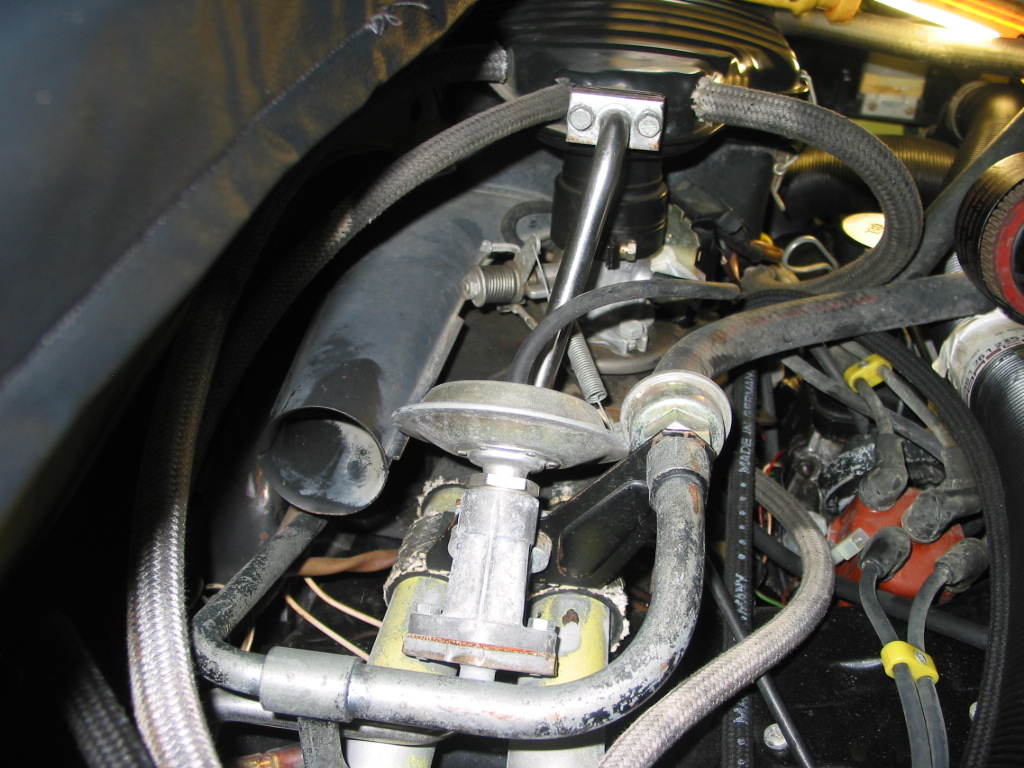
|
| Hoss |
 Jul 31 2006, 11:51 PM Jul 31 2006, 11:51 PM
Post
#18
|
|
Member   Group: Members Posts: 113 Joined: 24-January 06 From: Del Mar, CA Member No.: 5,465 |
Another one.
Attached thumbnail(s) 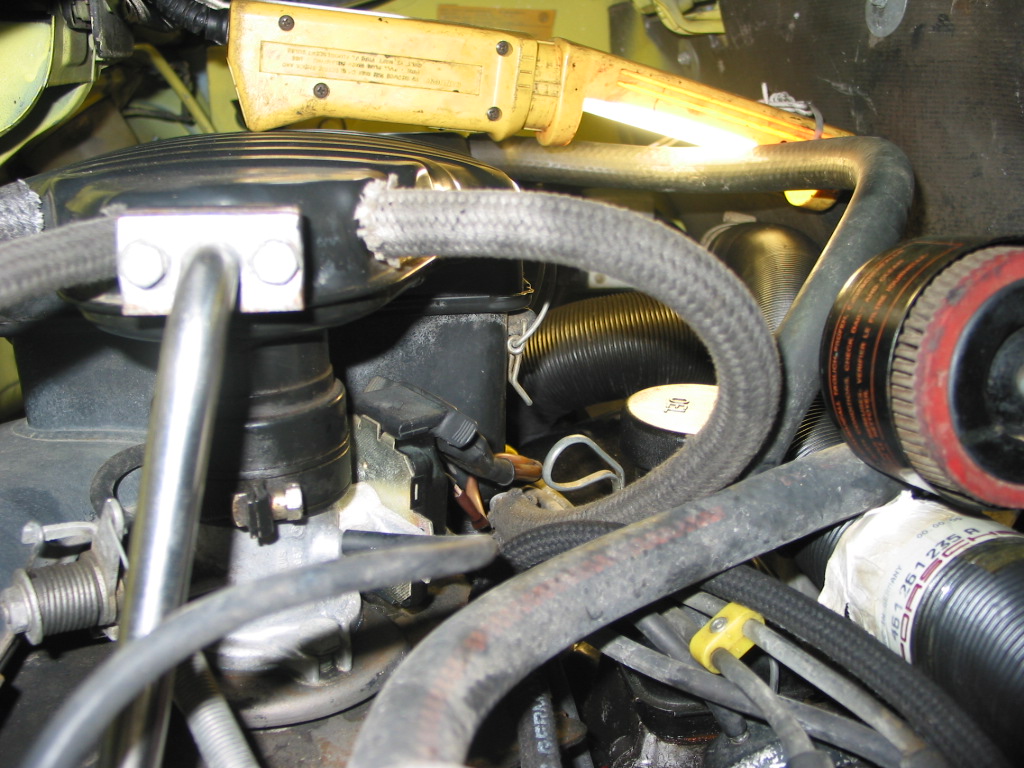
|
| Hoss |
 Jul 31 2006, 11:53 PM Jul 31 2006, 11:53 PM
Post
#19
|
|
Member   Group: Members Posts: 113 Joined: 24-January 06 From: Del Mar, CA Member No.: 5,465 |
Another one.
Attached thumbnail(s) 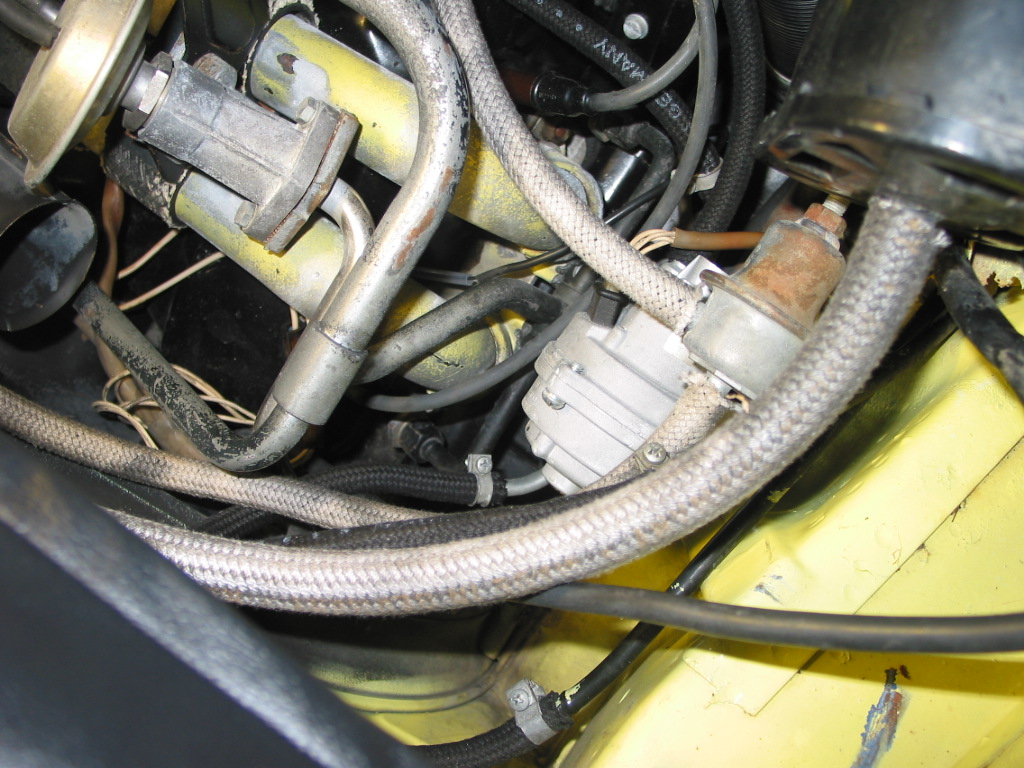
|
| Hoss |
 Jul 31 2006, 11:55 PM Jul 31 2006, 11:55 PM
Post
#20
|
|
Member   Group: Members Posts: 113 Joined: 24-January 06 From: Del Mar, CA Member No.: 5,465 |
Yet again.
Attached thumbnail(s) 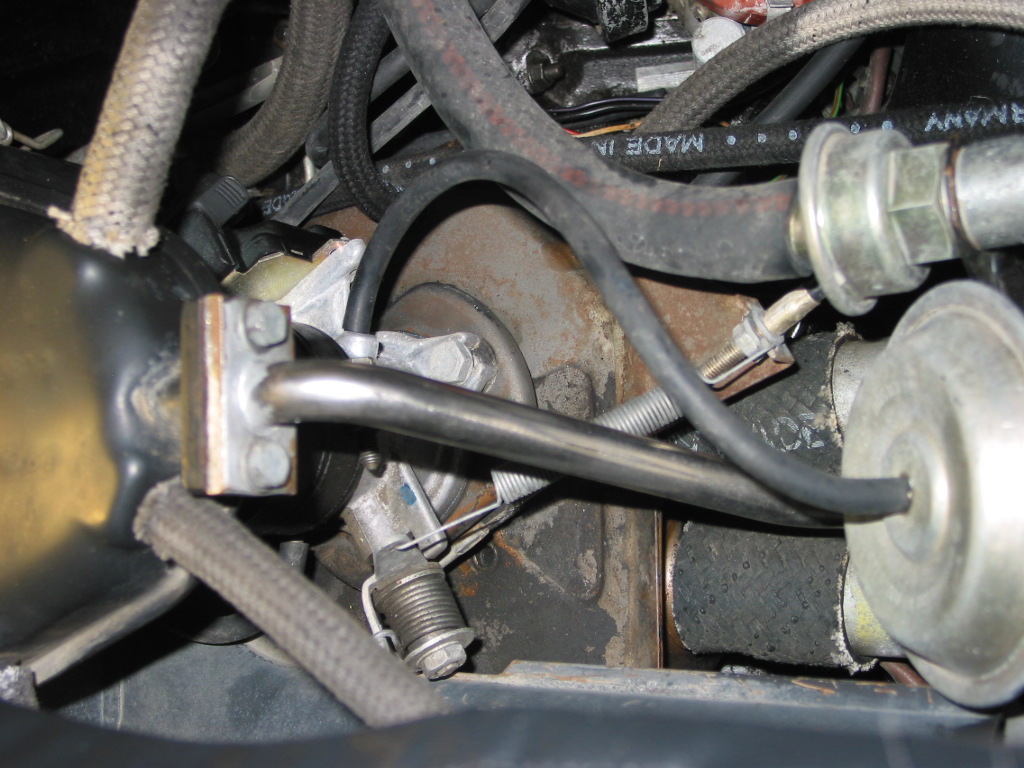
|
  |
2 User(s) are reading this topic (2 Guests and 0 Anonymous Users)
0 Members:

|
Lo-Fi Version | Time is now: 3rd January 2025 - 09:29 PM |
Invision Power Board
v9.1.4 © 2025 IPS, Inc.


