|
|

|
Porsche, and the Porsche crest are registered trademarks of Dr. Ing. h.c. F. Porsche AG.
This site is not affiliated with Porsche in any way. Its only purpose is to provide an online forum for car enthusiasts. All other trademarks are property of their respective owners. |
|
|
| wayne1234 |
 May 5 2009, 08:32 PM May 5 2009, 08:32 PM
Post
#1
|
|
Member   Group: Members Posts: 260 Joined: 6-April 09 From: indianapolis in Member No.: 10,238 Region Association: None |
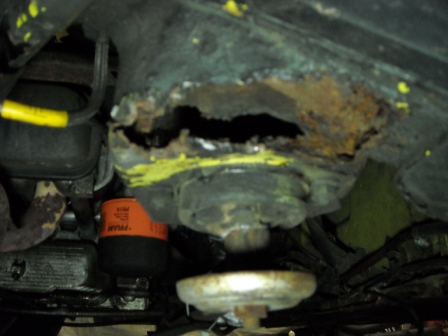 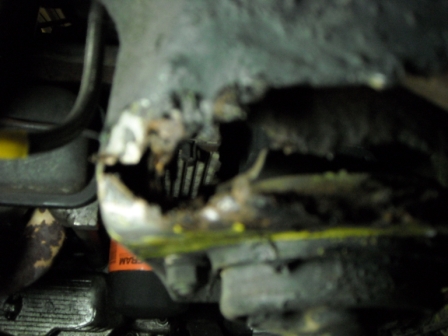 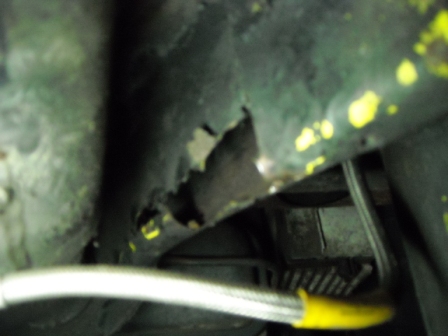 Well, I decided to look into the new car more that I got from a member on here. there was a trunk floor repair that left a little to be desired. I tried using flux cored mig welding and didnt have much luck, so yesterday I got a tank and some gas @ $200 (ouch) and I was doing some survey work on the front trunk. Let me say I was way too excited to get my car and I looked underneath and saw a couple of rust throughts on the passenger side near the rear but the "longs" where I spent most of my 5 minutes looking was solid. and I though no big deal just a couple of pan spots. and under the new battery tray looked solid from the engine compartment. well under the battery tray "hell hole" was described as" not perfect". there is a piece of metal screwed over the bad stuff. making it appear solid. Then the big suprise, there has been por15 used on the motor mount I thought it looked real rough and when i pushed on it with my finger oops a hole. some poking with a screw driver resulted in the hole you see. the I looked further back at the arm that goes to the rear suspension and it is also por15 with a odd look . more poking and you guessed it a hole. I guess some one thinks por15 is structural. NOT,,, Well I dont mind documenting this because I will fix it right. but hopefully my eagerness to finally get my 914 will make someone else take a second look at the car they are looking at. Mine look great in photo's and even pretty good in person. but it had a dark secret. Now the Real question on the motor mount and (trailing arm mount?) guess that's what its called. what should I paint the back of the metal with and what gauge should I use, should I make drain holes so It wont hold water in the future? Im gonna try to do all this welding with the motor in the car. I fear I will never get the car back together if I take out the motor. Thanks for all your input. Wayne |
  |
Replies
| wayne1234 |
 Dec 12 2009, 02:25 AM Dec 12 2009, 02:25 AM
Post
#2
|
|
Member   Group: Members Posts: 260 Joined: 6-April 09 From: indianapolis in Member No.: 10,238 Region Association: None |
Wow we have been putting in the hours on the 914. Well I got the passanger fender hammered into shape using my templates from earlier and it came out awesome just a light skim coat to even out the tiny hammer dimples and it will be good.. (IMG:style_emoticons/default/smilie_pokal.gif) Shaping that metal takes forever, especially since I'm fairly new at it, but I'm so pleased with how it came out, (I'm pleased at how both of them came out I just had to start from scratch on this side so it was more involved)... I threw in a picture of when I was grinding out some of the old bondo to show how thick the PO had it in spots... (IMG:style_emoticons/default/screwy.gif) then we started to tackle what is hopefully the last of the rust (IMG:style_emoticons/default/lol-2.gif) I hope... I had noticed a while ago there was some expanding foam under the sill extension metal on the drivers side up real high the other night, which I thought was odd, so I started scrapping it away and guess what, it was there to hold in the bondo under the sill plate (IMG:style_emoticons/default/WTF.gif) there were rust holes where the outer screws hold on the threshold plate. and a larger hole in the front from who knows what.. I had looked at the longs before and knew they were solid but I hadnt laid down with the car high enough on stands to see this... Not a huge deal as the sill plate covers everything so it doesnt have to look pretty just need to be structural. (And there was zero rust on the actual long)... What I dont understand why would you go the the trouble and time of putting filler in this rust holes and not fixing it right, when its going to under the sill plate (IMG:style_emoticons/default/screwy.gif) it probably only took 2 hours to cut out the bad make up some metal weld it in and grind it down. I know it took longer than that to put in filler sand it down and make it paint worthy, because again the bondo looked decent, Who knows. I just think its funny.. So now thats done the screws will have something to thread into now, imagine that. also my buddy drew the short end of the stick since my ankle was killing me and he wire wheeled every inner fender getting all the grime and grease, and non sticking paint behind there removed, so now the inner fenders and under fenders are getting pretty close to being paint worthy (IMG:style_emoticons/default/aktion035.gif) . well here are some pics .. keep the comments coming they keep me motivated.
Before 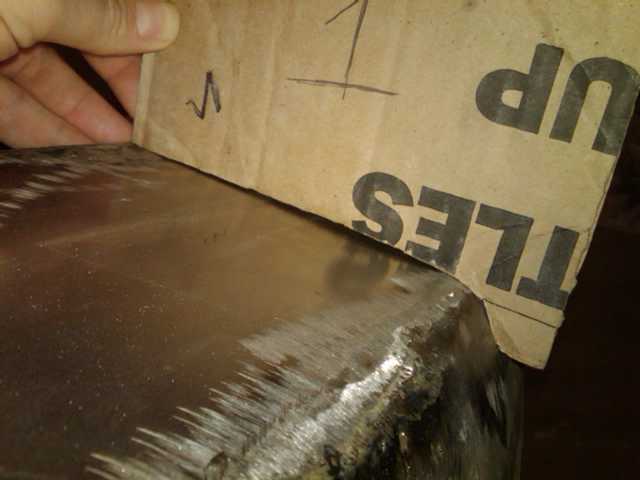 After (IMG:style_emoticons/default/smash.gif) 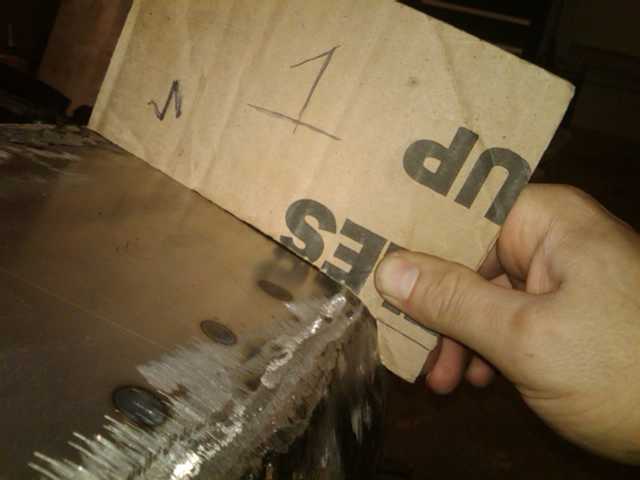 |
Posts in this topic
 wayne1234 WOW, my "solid" car aint so solid, but now it is solid! May 5 2009, 08:32 PM
 wayne1234 here some more pics... And check out the "All... May 5 2009, 08:38 PM
 wayne1234 here is more :headbang:
May 5 2009, 08:41 PM
 SirAndy What year is your car?
The color should have been... May 5 2009, 08:41 PM
 wayne1234 Its a 74 one year older than me. yep :confused: l... May 5 2009, 08:47 PM

 SirAndy
Its a 74 one year older than me. yep :confused: ... May 5 2009, 10:00 PM
 wayne1234 My fear is I wont ever get her back together if I ... May 5 2009, 08:51 PM
 wayne1234 how can I tell what trans I have May 5 2009, 10:28 PM

 Dave_Darling
how can I tell what trans I have
Where does the... May 5 2009, 11:13 PM
 charliew You need to move back and manualy focus your camer... May 5 2009, 11:03 PM
 wayne1234 Thanks for the input, tools are not the problem. I... May 5 2009, 11:28 PM
 wayne1234 Well I have been busy here is the good and the bad... May 5 2009, 11:57 PM
 wayne1234 by the way looks like side shift linkage on driver... May 6 2009, 12:15 AM
 wayne1234 couple of better pics
May 6 2009, 12:19 AM
 veltror Mine was yellow,...........once May 6 2009, 03:53 AM
 Dave_Darling For a side-shift car, your motor mount bar should ... May 6 2009, 08:45 AM
 mudfoot76 :wttc:
If you haven't dropped engine yet and... May 6 2009, 08:46 AM
 Vacca Rabite If your engine mount is rusted out, you are going ... May 6 2009, 09:03 AM
 wayne1234 Thanks for the offer mudfoot. i looked at your sig... May 7 2009, 05:17 PM
 Larouex That's a heartbreak and a totally misrepresent... May 7 2009, 11:38 PM
 wayne1234 I'm gonna save her, i got all the bad out on t... May 8 2009, 05:32 PM
 highways It's good you're motivated to save her. Th... May 9 2009, 03:32 PM
 veltror Soda blast it rather then walnut shells, much les... May 10 2009, 11:03 AM
 charliew When a unibody car has a lot of rust that is obvio... May 10 2009, 01:07 PM
 wayne1234 Well I have decided to go the easier route and dro... May 11 2009, 08:41 PM
 wayne1234 here is the mini sand blaster and my bike May 11 2009, 08:44 PM
 wayne1234 Progress :bump: .. Well after the girlfriend got h... Oct 9 2009, 11:29 PM
 wayne1234 what was left of the motor mount pics
Oct 9 2009, 11:49 PM
 wayne1234 oops a little big lets try this
Oct 10 2009, 12:21 AM
 wayne1234 RE: WOW, my "solid" car aint so solid, but now it is solid! Oct 10 2009, 12:33 AM
 wayne1234 with the inner fender well in :headbanger:
remin... Oct 10 2009, 12:38 AM
 wayne1234 The girlfriends car that kicked the Porsche out of... Oct 10 2009, 12:50 AM
 wayne1234 Feels like I'm making some real progress. Wha... Oct 10 2009, 11:19 AM

 SirAndy
Feels like I'm making some real progress. Wh... Oct 10 2009, 12:42 PM
 Dave_Darling In my experience, lighter colors show the dirt a l... Oct 10 2009, 01:30 PM
 faux916 Wayne, is that the car that was in the classifieds... Oct 10 2009, 02:42 PM

 rick 918-S
Wayne, is that the car that was in the classified... Oct 10 2009, 02:52 PM
 wayne1234 WTF indeed,,,, Yep I bought it off a member on her... Oct 11 2009, 02:15 AM
 veltror Keep going, mine is/was bad and I am still with it... Oct 11 2009, 06:07 AM
 wayne1234 RE: WOW, my "solid" car aint so solid, but now it is solid! Oct 31 2009, 08:19 PM
 wayne1234 RE: WOW, my "solid" car aint so solid, but now it is solid! Oct 31 2009, 08:27 PM
 wayne1234 RE: WOW, my "solid" car aint so solid, but now it is solid! Oct 31 2009, 08:31 PM
 FourBlades Your car is looking great, man. :trophy:
You w... Oct 31 2009, 08:35 PM
 wayne1234 Finally got some more work done with a buddy helpi... Oct 31 2009, 08:38 PM
 914_teener You are a true Hoosier... my Mom is from Indy....k... Oct 31 2009, 08:44 PM
 wayne1234 RE: WOW, my "solid" car aint so solid, but now it is solid! Oct 31 2009, 08:52 PM
 wayne1234 Well I'm waiting on engine parts :bullshit: ... Nov 18 2009, 10:23 PM
 rick 918-S I ran a metal fuel line through the tunnel but I e... Nov 18 2009, 11:54 PM
 wayne1234 OH NO,,, There is more welding in my future... Wel... Nov 19 2009, 10:39 PM
 wayne1234 RE: WOW, my "solid" car aint so solid, but now it is solid! Nov 19 2009, 10:42 PM
 Ferg :blink: were those lower gaps/holes covered with... Nov 20 2009, 02:08 PM
 wayne1234 No they were covered by that light blue metal piec... Nov 20 2009, 04:49 PM
 wayne1234 Getting it sorted out
Nov 25 2009, 05:51 PM
 wayne1234 Keep the comments coming
Nov 25 2009, 05:53 PM
 wayne1234 Welded up a couple of bondo spots that had nothing... Dec 4 2009, 02:56 PM
 SirAndy Oh man, every time you post another picture, it ju... Dec 4 2009, 03:01 PM

 oz371
Oh man, every time you post another picture, it j... Feb 12 2010, 01:51 PM
 wayne1234 Also major progress.. We got the passenger inner f... Dec 4 2009, 03:07 PM

 wallys914
Also major progress.. We got the passenger inner ... Dec 5 2009, 03:03 AM
 wayne1234 Well we got the front slope nose back into shape t... Dec 5 2009, 12:07 AM
 wayne1234 RE: WOW, my "solid" car aint so solid, but now it is solid! Dec 5 2009, 12:09 AM
 charliew The guy that sold you that car should have his nam... Dec 5 2009, 11:57 AM
 wayne1234 Lots of progress :D ... Well I tore into the passe... Dec 10 2009, 12:45 PM

 SirAndy
It Was purchased off a member on here "1bad9... Dec 10 2009, 01:03 PM
 wayne1234 RE: WOW, my "solid" car aint so solid, but now it is solid! Dec 10 2009, 12:47 PM
 wayne1234 RE: WOW, my "solid" car aint so solid, but now it is solid! Dec 10 2009, 12:50 PM
 Rand Kudos to you Wayne for showing such a good attitud... Dec 10 2009, 01:02 PM
 wayne1234 Yeah he said it was welded but.... He must have me... Dec 10 2009, 01:14 PM
 6freak I feel for ya man.your a better man then me cause ... Dec 10 2009, 03:22 PM
 wayne1234 Before
After :smash:
Some of the PO handy work... Dec 12 2009, 02:35 AM
 wayne1234 Success :trophy:
The start of the sill plate mes... Dec 12 2009, 02:41 AM
 wayne1234
This is grafic :evilgrin: He though to hims... Dec 12 2009, 02:50 AM
 wayne1234 New metal :cheer:
Dec 12 2009, 02:53 AM
 jd74914 Its looking great Wayne! The slope nose is rea... Dec 12 2009, 08:23 AM
 Gint Sheeesh.... What a mess. :agree: Great work c... Dec 12 2009, 08:53 AM
 wayne1234 Got the drivers side all blocked out!
Here i... Dec 13 2009, 06:09 PM
 wayne1234 Well me and my buddy have still been putting int t... Dec 23 2009, 12:56 AM
 Spoke Good job. I'm going through some rustoration m... Dec 23 2009, 10:54 AM
 wayne1234 Alot more progress, I finally finished the paint, ... Jan 2 2010, 12:10 AM
 wayne1234 RE: WOW, my "solid" car aint so solid, but now it is solid! Jan 2 2010, 12:13 AM
 sendjonathanmail Try 914ap.com for your carpet and interior needs. ... Jan 2 2010, 08:20 AM
 wayne1234 I'm really happy with how the paint is coming ... Jan 3 2010, 03:08 PM
 Ferg Wow, you've been busy, great work! If I w... Jan 3 2010, 04:12 PM
 rick 918-S Looks like your on top of it now! :clap: Jan 3 2010, 08:16 PM
 Sleepin Looking good! I wish I could do paint and body... Jan 3 2010, 09:30 PM
 plymouth37 Paint looks great! keep up the good work! Jan 3 2010, 10:25 PM
 wayne1234 Engine is almost totally together :cheer: couple ... Jan 6 2010, 02:12 AM
 wayne1234 Progress has been SLOW.... the engine is in :D I m... Feb 12 2010, 12:28 PM
 wayne1234 RE: WOW, my "solid" car aint so solid, but now it is solid! Feb 12 2010, 12:40 PM
 wayne1234 Almost forgot I got the bumpers on!! here... Feb 12 2010, 12:45 PM
 wayne1234 Also I got the parking brake installed and working... Feb 12 2010, 12:56 PM

 SirAndy
I know its a small piece , but it was curve and w... Feb 12 2010, 02:15 PM
 6freak ton of work ...nice job .....rubber buggy bumpers ... Feb 12 2010, 01:44 PM
 wayne1234 There is always that :D I thought about it after... Feb 12 2010, 02:26 PM
 PanelBilly Did I understand you correctly? You sanded and the... Feb 12 2010, 02:40 PM
 wayne1234 Yeah there was a crack in mine So I used the hobby... Feb 12 2010, 03:09 PM
 wayne1234 Still making small progress, I got almost all the ... Mar 6 2010, 12:01 AM
 wayne1234 Then the new mod... I realised I have no front pa... Mar 6 2010, 12:08 AM
 FourBlades Your car is looking good man.
I like your turn si... Mar 6 2010, 06:53 AM
  |
17 User(s) are reading this topic (17 Guests and 0 Anonymous Users)
0 Members:

|
Lo-Fi Version | Time is now: 20th April 2025 - 09:19 AM |
Invision Power Board
v9.1.4 © 2025 IPS, Inc.


