|
|
|
Porsche, and the Porsche crest are registered trademarks of Dr. Ing. h.c. F. Porsche AG.
This site is not affiliated with Porsche in any way. Its only purpose is to provide an online forum for car enthusiasts. All other trademarks are property of their respective owners. |
|
|


| EdArango |
 Oct 31 2011, 01:29 PM Oct 31 2011, 01:29 PM
Post
#1
|
|
914 Enthusiast  Group: Members Posts: 267 Joined: 30-January 10 From: Huntington Beach, CA Member No.: 11,309 Region Association: Southern California |
Hi All,
Well, I've got a 1986 911sc front suspension that I want to bolt onto my 914 but wa would like to replace the rotors. I can't even get pass the center cap !!! Does anyone have any suggestion on removing this cap?? Thanks ED  |
   |

 
|
  |
Replies
| type47 |
Nov 1 2011, 12:33 PM
Post
#2
|
|
Viermeister Group: Members Posts: 4,254 Joined: 7-August 03 From: Vienna, VA Member No.: 994 Region Association: MidAtlantic Region |
I copy alot of stuff from here to dorkiphus, now here's one from dorkiphus to here
Here's a quick and dirty how-to for building a replica of the Porsche factory tool for removing the bearing dust caps on the front of a 911. The inspiration for this came from helping Matt DeMaria of Stuttgart Performance Engineering tech my car for a DE one weekend. Matt said my front bearings were loose, and told me to remove the dust cover and tighten them up. So I asked him "You got a big ol' chisel I can use ta take the dust cap off?". Matt looked at me like I was insane, and then proceeded to explain to me that pounding the dust cap off with a chisel like a ham fisted gorilla eggs out the hub, which is made of aluminum. Do it too much, the dust cap won't seat anymore and you have to buy new hubs. "Fair enough. So how do you remove them?" I asked. "With this - the factory tool made specifically for this job" he said. (BTW, this is how Matt does everything - the right way, with the right tool. Its pretty impressive to watch him work on stuff, IMO). Turns out, the the factory tool is a pretty simple contraption - a metal cap with 3 set screws attached to a slide hammer. The cap goes over the dust cap, and the set screws are tighened into the groove around the cap. One good whack with the hammer and you're done - cap off with no side load to egg out the hub. Here's a picture: 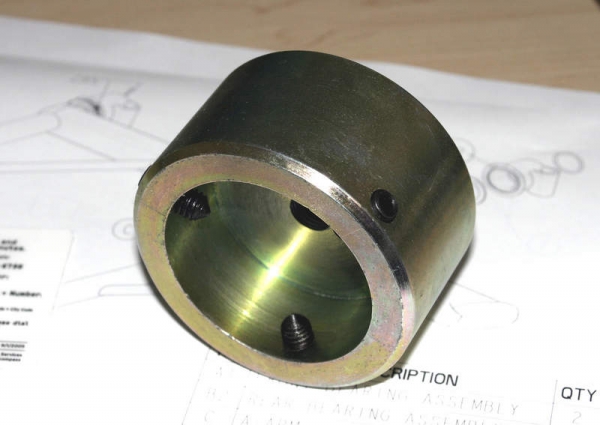 Anyone who knows me knows I'm a tool junkie, so I wanted one of these (since I do a lot of bearing adjusting). Matt told me that he remembers the puller running about $100 20 years ago . Looking at it, I figured I could build a replica for less. One trip to Home Depot later, I had about $5 worth of parts and was ready to go. Step 1. Get your materials. Here's what you need: (1) 2" cast iron pipe cap. (3) #10-24 x 1" Thumbscrews (1) #10-24 tap and drill bit set (1) Bolt (M6 x 25mm in my case) to attach the tool to your slide hammer (1) Slide hammer. Mine is a $10, 10lb POS from Harbor Freight. One of the best $10 I've ever spent on a tool. 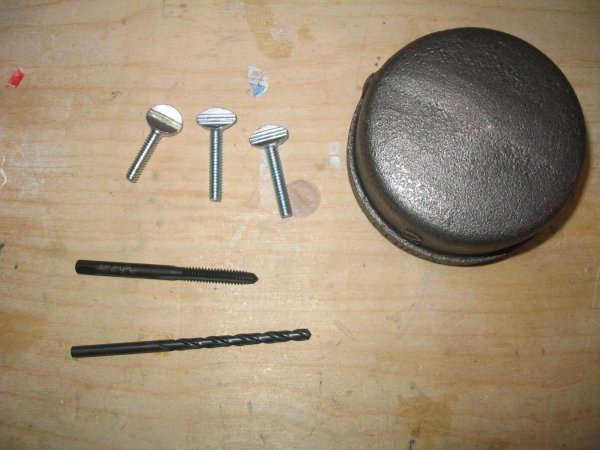 This is the key to the whole tool - the 2" cast iron pipe cap. $3 at Home Depot, IIRC. 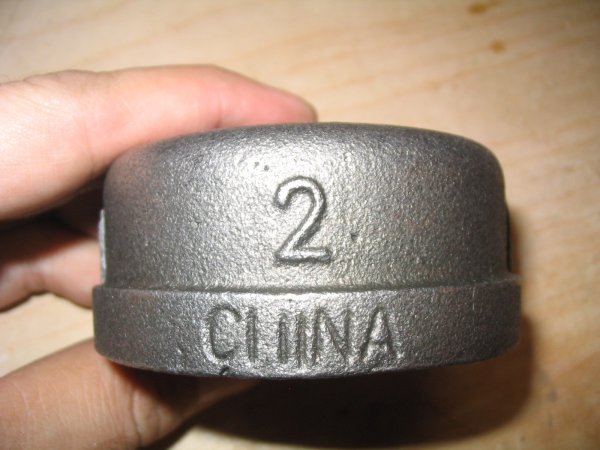 Step 2. Drill a hole in the center of the top of the pipe cap for the slide hammer mounting bolt. 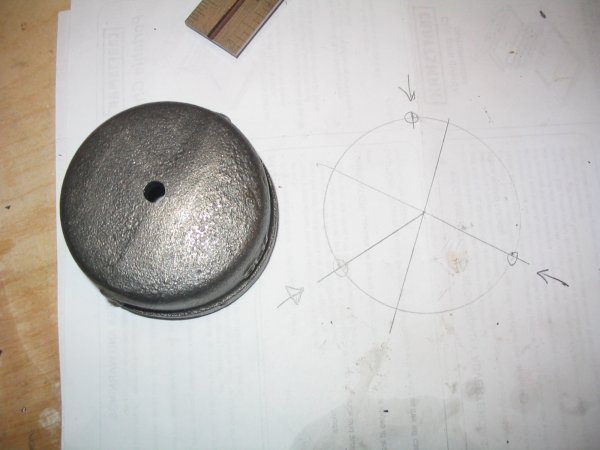 Step 3. Mark around the edges of the cap at 120 degree angles. You can see the template I used in the picture above. This doesn't need to be super precise, obviously. Step 4. Center punch at the 120 degree marks 8.5mm (0.330") from the edge of the cap. Drill with a #25 drill bit. 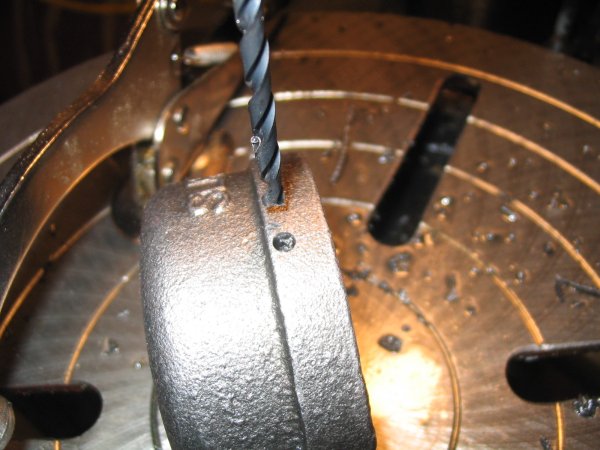 Step 5. Tap the holes with the #10-24 tap. I bought a cheap drill and tap set from Home Depot for #10-24, came with the right drill bit for the tap. Remember to use a lubricant when tapping the hole (always a good idea ). This cap is cast iron, which is soft and taps very easily. 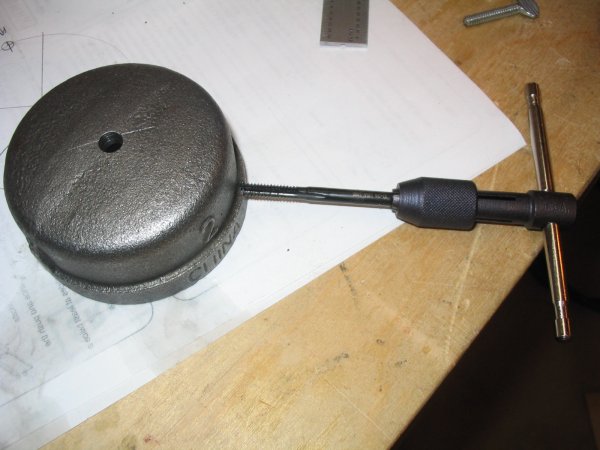 Mmmm... threads... 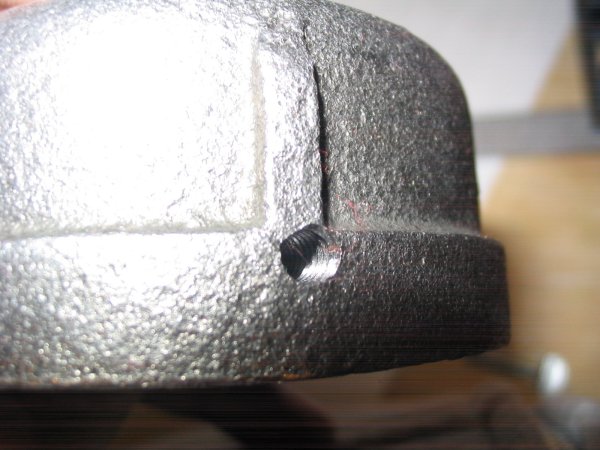 Step 6. With all three holes along the edge drilled and tapped, install the thumbscrews and the slide hammer attachment screw. 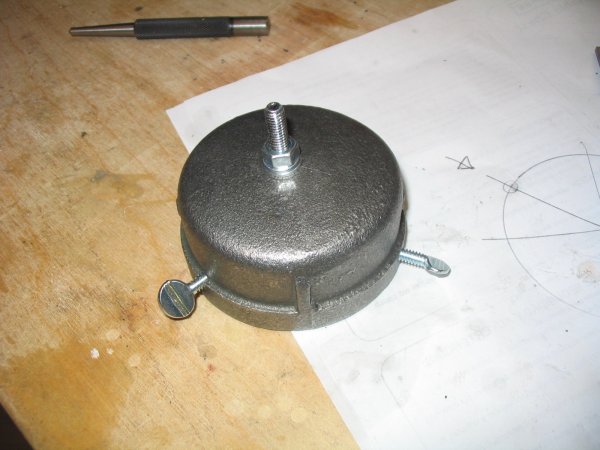 Here's a shot from the bottom, showing how the thumbscrews will grab into the dust cap groove: 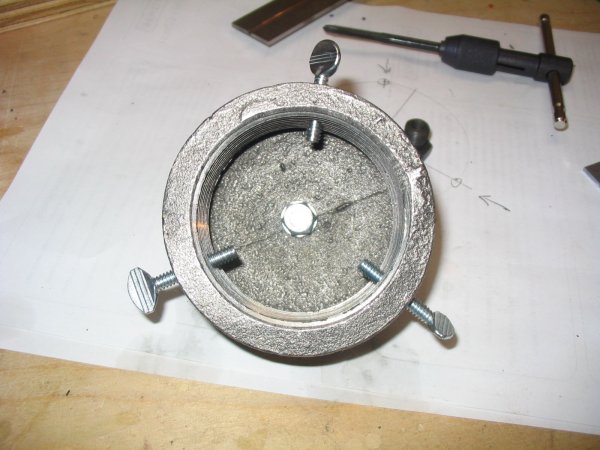 Step 7. Attach to the slide hammer... 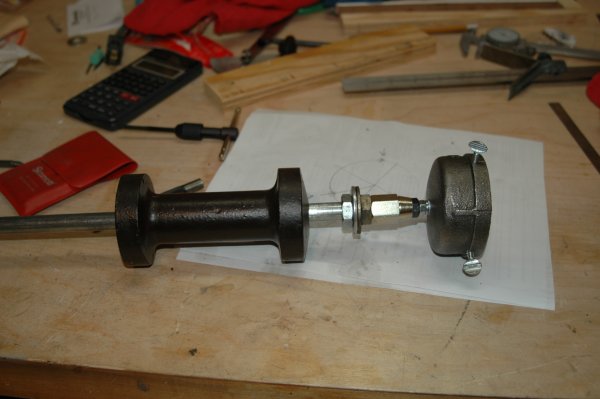 And you're done! Total time to build, about 30mins. Now to use, put the tool over the dust cap and tighten the thumbscrews into the groove: One good whack and presto: |
|
|
|
Posts in this topic
 EdArango Removing Center Cap on the Hub of a 911 Front-end? Oct 31 2011, 01:29 PM
 Spoke I'm doing the same thing. I just popped both c... Oct 31 2011, 01:32 PM
 mikea100 +1 on little prybar & tap-tap. Sometimes I use... Oct 31 2011, 01:38 PM iamchappy Some people use a hose clamp and pry it against th... Oct 31 2011, 01:33 PM SLITS Big ass pair of channel locks .... Oct 31 2011, 01:57 PM SirAndy Does anyone have any suggestion on removing this c... Oct 31 2011, 03:03 PM vsg914
Does anyone have any suggestion on removing this ... Oct 31 2011, 03:07 PM porsche913b_sp Buy this clamp from local auto parts store, should... Oct 31 2011, 06:35 PM jaxdream
I copy alot of stuff from here to dorkiphus, now ... Nov 1 2011, 01:57 PM Cap'n Krusty Most of you seem to be missing the fact that 911 d... Nov 1 2011, 02:20 PM SirAndy Most of you seem to be missing the fact that 911 d... Nov 1 2011, 04:29 PM bcheney I have used "PB Blaster" penetrant in th... Nov 1 2011, 05:29 PM EdArango These are all great replies! Thanks everyone.... Nov 1 2011, 04:25 PM
mikea100 +1 on little prybar & tap-tap. Sometimes I use... Oct 31 2011, 01:38 PM iamchappy Some people use a hose clamp and pry it against th... Oct 31 2011, 01:33 PM SLITS Big ass pair of channel locks .... Oct 31 2011, 01:57 PM SirAndy Does anyone have any suggestion on removing this c... Oct 31 2011, 03:03 PM vsg914
Does anyone have any suggestion on removing this ... Oct 31 2011, 03:07 PM porsche913b_sp Buy this clamp from local auto parts store, should... Oct 31 2011, 06:35 PM jaxdream
I copy alot of stuff from here to dorkiphus, now ... Nov 1 2011, 01:57 PM Cap'n Krusty Most of you seem to be missing the fact that 911 d... Nov 1 2011, 02:20 PM SirAndy Most of you seem to be missing the fact that 911 d... Nov 1 2011, 04:29 PM bcheney I have used "PB Blaster" penetrant in th... Nov 1 2011, 05:29 PM EdArango These are all great replies! Thanks everyone.... Nov 1 2011, 04:25 PM |
2 User(s) are reading this topic (2 Guests and 0 Anonymous Users)
0 Members:

|
Lo-Fi Version | Time is now: 28th June 2024 - 09:34 AM |
Invision Power Board
v9.1.4 © 2024 IPS, Inc.