|
|

|
Porsche, and the Porsche crest are registered trademarks of Dr. Ing. h.c. F. Porsche AG.
This site is not affiliated with Porsche in any way. Its only purpose is to provide an online forum for car enthusiasts. All other trademarks are property of their respective owners. |
|
|
| McMark |
 Jun 13 2012, 10:44 AM Jun 13 2012, 10:44 AM
Post
#1
|
|
914 Freak!                Group: Retired Admin Posts: 20,179 Joined: 13-March 03 From: Grand Rapids, MI Member No.: 419 Region Association: None |
I was asked about which CHT gauge to get and thought that I had posted this info about the Micro1000 over here some time ago. Apparently not. (IMG:style_emoticons/default/rolleyes.gif) So here's my preferred CHT setup because it has an original looking appearance, it's temperature compenstated, and the sensor and wiring is QUALITY stuff. The temperature compensation is important because the crappy VDO setup (and other cheapies) will read 1° off for every 1° above or below 70° inside your car. The VDO wiring can also lead to erroneous readings due to how the thermocouple works and what are called 'cold-junctions'.
CHT Gauge This is the Micro 1000 gauge as mentioned. It ranges from 0-600 degree F or 0-300 degrees C. The top row of numbers is F, the bottom row is C. It's got two thumbscrews on the back for the collar that will hold the gauge in the dash (or wherever). It comes with a bulb assembly included for night visibility (I forgot to take a picture of that). The back has a + and a - connection for the wire extension. You want the 2" version. (IMG:http://www.914world.com/bbs2/uploads_offsite/www.paintandmetal.com-419-1339605841.1.jpg) (IMG:http://www.914world.com/bbs2/uploads_offsite/www.paintandmetal.com-419-1339605842.2.jpg) Sender You will need to buy the appropriate probe/sender for your application. A standard Type IV spark plug is 14 mm. The smaller plugs that Len is using is a 12 mm motorcycle spark plug. I can't vouch for which sender should be used for this application. The sender only comes with about 12" of wire. You will need to purchase an extension lead (see below). The sender comes with a section of heat shrink tubing to protect the screw connections between the sender and the extension leads. The section of wire close to the heat source is protected by a braided wire exterior. This is a very nice feature. (IMG:style_emoticons/default/biggrin.gif) (IMG:http://www.914world.com/bbs2/uploads_offsite/www.paintandmetal.com-419-1339605843.3.jpg) (IMG:http://www.914world.com/bbs2/uploads_offsite/www.paintandmetal.com-419-1339605843.4.jpg) (IMG:http://www.914world.com/bbs2/uploads_offsite/www.paintandmetal.com-419-1339605844.5.jpg) Extension Leads You will need to purchase either the 7' or the 15' CHT extension lead (make sure you don't accidentally get the EGT leads). These are special wires. You can not use normal copper wire to extend the wires. The wires come pre-crimped with the appropriate connections. So it's a simple plug in installation. I purchased the 15' kit for my 914 as I suspect the 7' is too short, unless you're doing something unique. (IMG:http://www.914world.com/bbs2/uploads_offsite/www.paintandmetal.com-419-1339605844.6.jpg) This is the link to buy the whole setup. And part numbers: Guage: 10-01425 Sender: 10-00823 Extension: 10-01443 |
  |
Replies
| michael7810 |
 Jan 5 2015, 09:10 PM Jan 5 2015, 09:10 PM
Post
#2
|
|
Senior Member    Group: Members Posts: 1,082 Joined: 6-June 11 From: Scottsdale, AZ Member No.: 13,164 Region Association: Southwest Region 
|
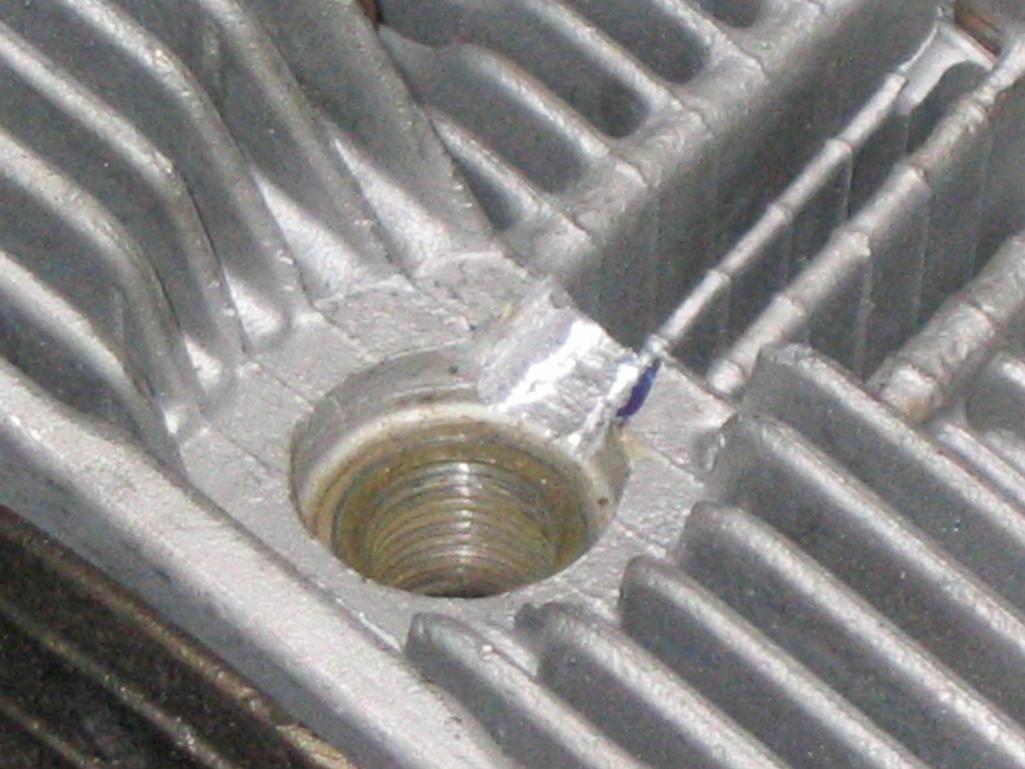
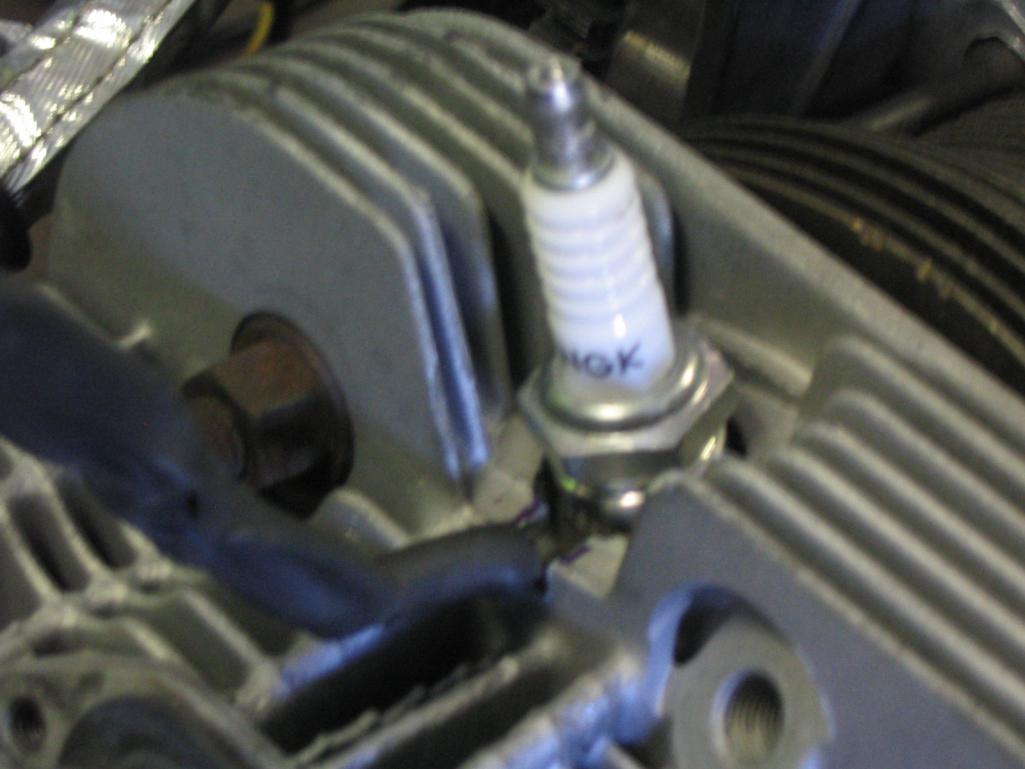
A year later and I just got around to notching the heads to allow the CHT sensor to sit flat. It is possible to install the sensor without the notch but it is a bitch to get the plugs in and out and it tears up the sensors. I'm using the Micro 1000 dual CHT gauge from Aircraft Spruce.
So now my engine is out and tranny on the way to Dr Evil for overhaul I decided to fix a few things. To cover the plug hole, I found a plastic plug in my junk box that fits perfectly in the spark plug hole. I used the sensor to mark the head with a sharpie. Using a Dremel, I started by cutting as much as possible with a round cutoff wheel and finished with a spherical burr cutter about 1/8" diameter. I stopped every minute or so and vacuumed up the chips to keep it as clean as possible. Below are pics of the finished notch and with the plug installed. The entire job took about 1/2 hour to notch #1, 3, & 4 plug areas (had a senior moment and did 4 thinking it was 3).   |
Posts in this topic
 McMark Micro1000 CHT Gauge Jun 13 2012, 10:44 AM
 biosurfer1 despite being sick, you are not crazy :D ...you di... Jun 13 2012, 11:11 AM
 Mark Henry Cool...er... hot :D
I don't see the sender f... Jun 13 2012, 11:30 AM
 ConeDodger This is the one you used on my car... Jun 13 2012, 11:35 AM

 Steve Pratel
This is the one you used on my car...
How do y... Jan 6 2015, 07:11 AM
 Elliot Cannon My biggest problem with the VDO is the lousy conne... Jun 13 2012, 11:50 AM
 McMark
No, there is no 12mm sender. But you can use the... Jun 13 2012, 12:03 PM

 Mark Henry
No, there is no 12mm sender. But you can use th... Jun 13 2012, 12:48 PM

 Steve Pratel
No, there is no 12mm sender. But you can use th... Jan 6 2015, 07:09 AM
 yeahmag I have used the same one for years now and love it... Jun 13 2012, 12:11 PM
 Jeffs9146 Here you go! Jun 13 2012, 12:54 PM

 rwilner Here's mine (pardon the crappy iphone pic).
T... Jun 13 2012, 01:25 PM

 gothspeed
Here's mine (pardon the crappy iphone pic).
... Sep 14 2012, 02:33 PM
 Valy So is the gauge smaller than other 52mnemonic gaug... Jun 13 2012, 01:39 PM

 rwilner
So is the gauge smaller than other 52mnemonic gau... Jun 13 2012, 01:56 PM
 McMark
This totally jogged my memory. Westach is about ... Jun 13 2012, 01:54 PM
 McMark Yup, you can get black PVC and make an adapter tha... Jun 13 2012, 02:17 PM
 jim_hoyland Just installed a Micro 1000 CHT. Works fine but ca... Sep 13 2012, 04:33 PM

 76-914
Just installed a Micro 1000 CHT. Works fine but c... Sep 13 2012, 05:58 PM

 jim_hoyland
Just installed a Micro 1000 CHT. Works fine but ... Sep 13 2012, 08:39 PM

 McMark
[quote name='76-914' post='1738805' date='Se... Sep 16 2012, 11:44 AM

 jim_hoyland
There's a plastic diffuser in front of the b... Sep 16 2012, 04:19 PM
 worn
I was asked about which CHT gauge to get and thou... Sep 14 2012, 01:38 PM

 ConeDodger
I was asked about which CHT gauge to get and tho... Sep 14 2012, 02:27 PM
 FourBlades Just to add a little update.
I ordered one of the... Mar 1 2013, 10:04 AM
 michael7810 I'm very happy with the Micro 1000 dual needle... Mar 1 2013, 05:11 PM
 FourBlades I thought about getting that one.
I think there i... Mar 3 2013, 06:31 PM
 Mueller Being out of the air-cooled world for so long, at ... Jan 6 2015, 10:26 AM
 era vulgaris
Being out of the air-cooled world for so long, at... Jan 6 2015, 10:54 AM
 Mueller
Being out of the air-cooled world for so long, a... Jan 6 2015, 10:59 AM
  |
22 User(s) are reading this topic (22 Guests and 0 Anonymous Users)
0 Members:

|
Lo-Fi Version | Time is now: 27th November 2024 - 05:53 AM |
Invision Power Board
v9.1.4 © 2024 IPS, Inc.


