|
|

|
Porsche, and the Porsche crest are registered trademarks of Dr. Ing. h.c. F. Porsche AG.
This site is not affiliated with Porsche in any way. Its only purpose is to provide an online forum for car enthusiasts. All other trademarks are property of their respective owners. |
|
|
| NS914 |
 Oct 2 2016, 12:43 PM Oct 2 2016, 12:43 PM
Post
#1
|
|
Member   Group: Members Posts: 198 Joined: 9-June 09 From: Dartmouth, Nova Scotia Member No.: 10,455 Region Association: Canada 
|
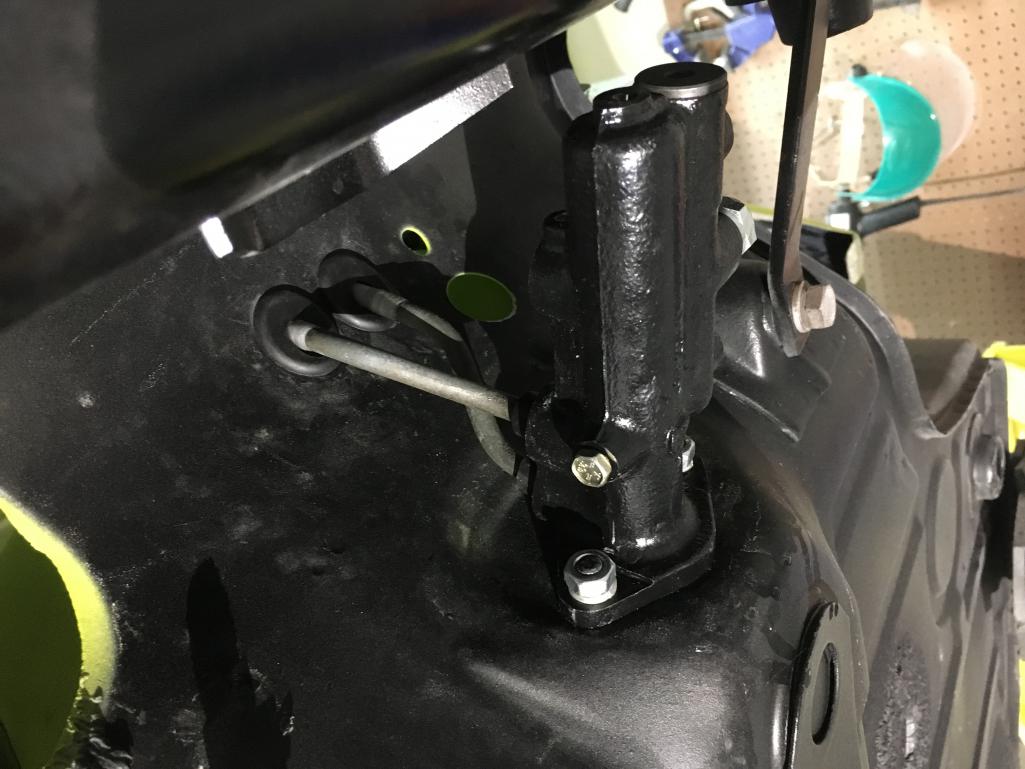
I expect the more experienced among you will know this but, I literally just put mine together yesterday. Much easier than I thought.
I had heard that you need to drop the Master Cylinder in order to press the lines in place and in fact tried that out....as it turned out the most effective aspect of this exercise was to swab a little brake fluid seals...the feed lines dropped in place with no fuss at all. I hope this helps someone or at the very least makes you aware its not that big a deal at all. Grant |
  |
Replies
| jmitro |
 Oct 4 2017, 05:49 PM Oct 4 2017, 05:49 PM
Post
#2
|
|
Senior Member    Group: Members Posts: 713 Joined: 23-July 15 From: Oklahoma Member No.: 18,986 Region Association: None 
|
I bought the new plastic reservoir feed lines from PMB; trying to insert the steel barbed fittings into the plastic is proving to be difficult. Any suggestions?
by the way...don't heat the plastic lines; they just melt and distort. (IMG:style_emoticons/default/blink.gif) EDIT.....I finally got the plastic lines over the barbed fittings. Just requires brute force. Sequence (master cylinder and reservoir both removed from car): 1. After removing the barbed fittings from the MC, I slid the rubber floorboard grommets over the plastic lines 2. put the plastic lines on a workbench and used some vice grips on the metal fittings (avoiding the barbs) and "screwed" the barbs into the plastic lines until they were fully seated 3. plastic lines and barbed fittings were then fed through the frunk floor from above, metal fttings then fully seated into the MC. 4. MC bolted in place, rubber grommets seated into the frunk floor Hope this helps someone (IMG:style_emoticons/default/smile.gif) Attached thumbnail(s) 
|
Posts in this topic
 NS914 Brake Resourvoir Feed Lines Oct 2 2016, 12:43 PM
 NS914 [quote name='NS914' date='Oct 2 2016, ... Oct 2 2016, 12:45 PM
 Eric_Shea It's a "huge" deal and I've done... Oct 2 2016, 12:58 PM

 87m491 Not an option for all, but as my fuel tank was out... Oct 2 2016, 04:47 PM

 914bub
It's a "huge" deal and Also, everyo... Oct 2 2016, 11:47 PM
 euro911 :agree: I took Eric's advice and I pull the fa... Oct 2 2016, 05:06 PM

 87m491 I wonder if it was the "dousing" of brak... Oct 2 2016, 05:40 PM
 mepstein It's also easy if you leave out the metal wash... Oct 2 2016, 06:13 PM
 SKL1 That is one of the biggest PITA jobs in the world... Oct 2 2016, 08:37 PM

 euro911 That is one of the biggest PITA jobs in the world... Oct 2 2016, 08:59 PM
 Perry Kiehl I too suspect the washers are in the box, and not ... Oct 4 2017, 07:57 PM
 second wind
I too suspect the washers are in the box, and not... Oct 4 2017, 08:08 PM
  |
1 User(s) are reading this topic (1 Guests and 0 Anonymous Users)
0 Members:

|
Lo-Fi Version | Time is now: 27th December 2024 - 10:24 PM |
Invision Power Board
v9.1.4 © 2024 IPS, Inc.


