|
|
|
Porsche, and the Porsche crest are registered trademarks of Dr. Ing. h.c. F. Porsche AG.
This site is not affiliated with Porsche in any way. Its only purpose is to provide an online forum for car enthusiasts. All other trademarks are property of their respective owners. |
|
|


| 76-914 |
 Aug 21 2011, 10:46 PM Aug 21 2011, 10:46 PM
Post
#1
|
|
Repeat Offender & Resident Subaru Antagonist  Group: Members Posts: 13,613 Joined: 23-January 09 From: Temecula, CA Member No.: 9,964 Region Association: Southern California |
I think my back pad is like most. Looks good from a distance......
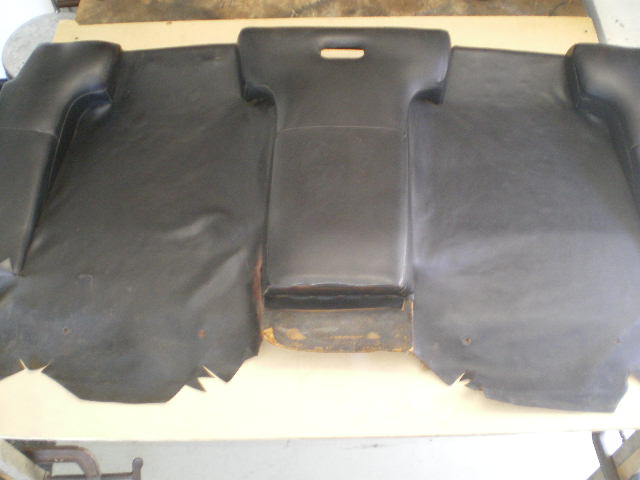 but a wreck upon closer examination. Like the bottoms which have wicked up water and warped like this center piece....... 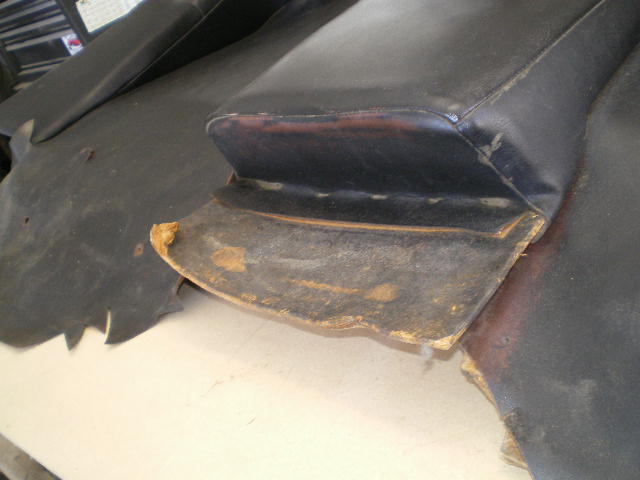 Or worse; like breaking off like this drivers side as viewed from the rear....... 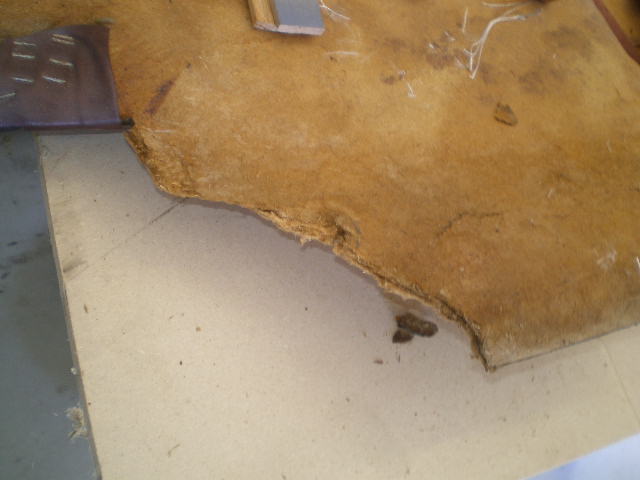 or this passanger side which is missing the bottom 6" all the way across 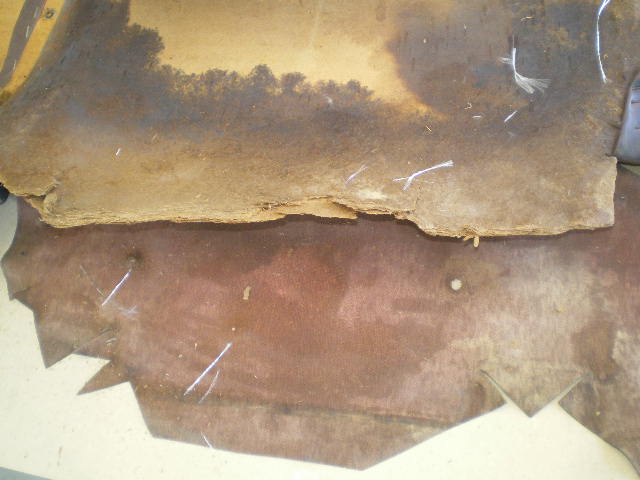 and several edges like this one that have become delaminated. 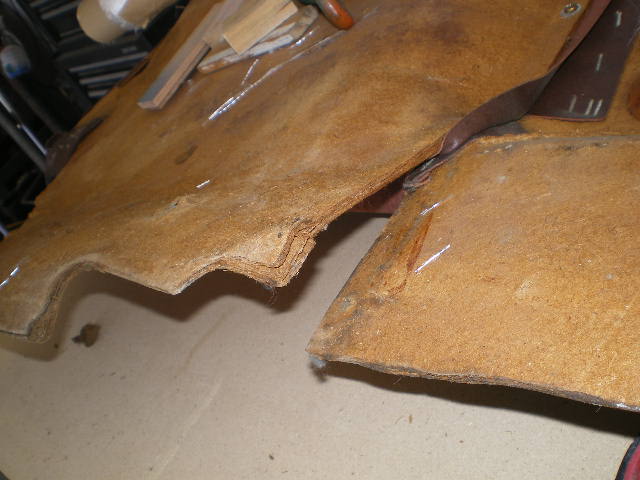 These spots and the warped pieces are easiest to repair so I'll start there. This is a shot of a warped bottom on the center piece. This one was removed for another repair but as you will see in other pic's I did not separate the pieces or removed the vinyl to make repairs. 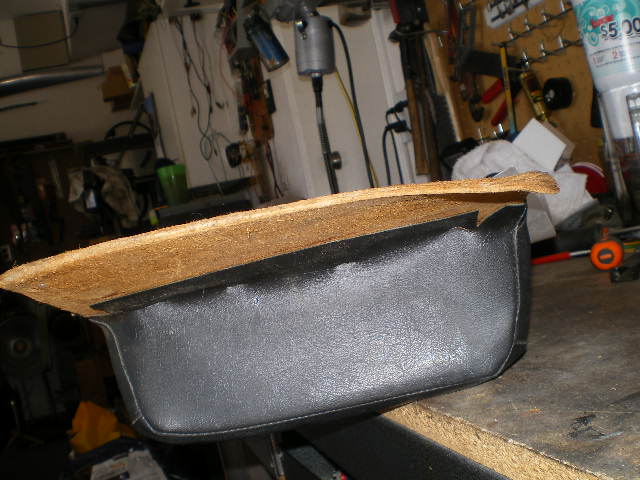 First you will need to wet the piece, both sides................. 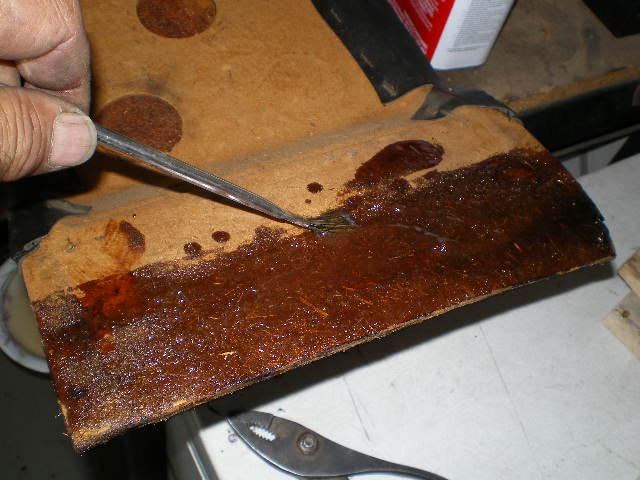 Then place wax paper on the wetted sides............ 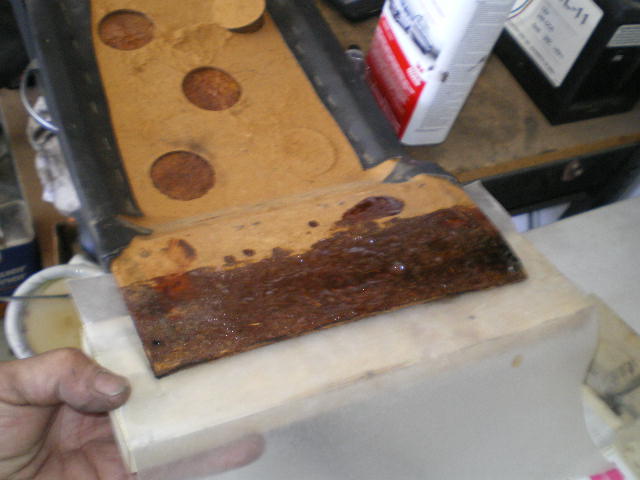 Then place a "flat" piece of wood on both sides and clamp in place........ 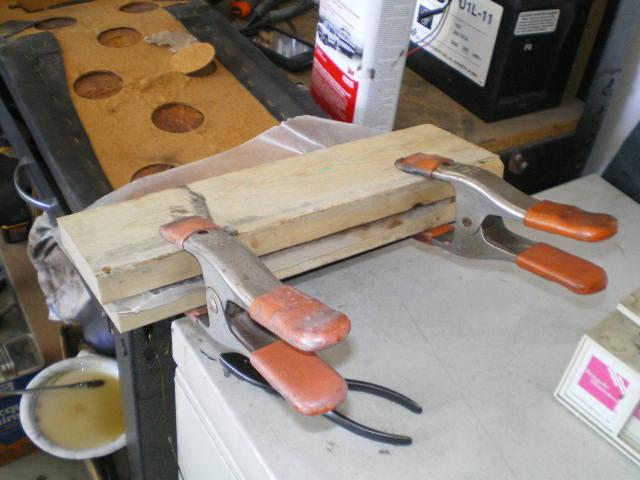 2 hr's later................... 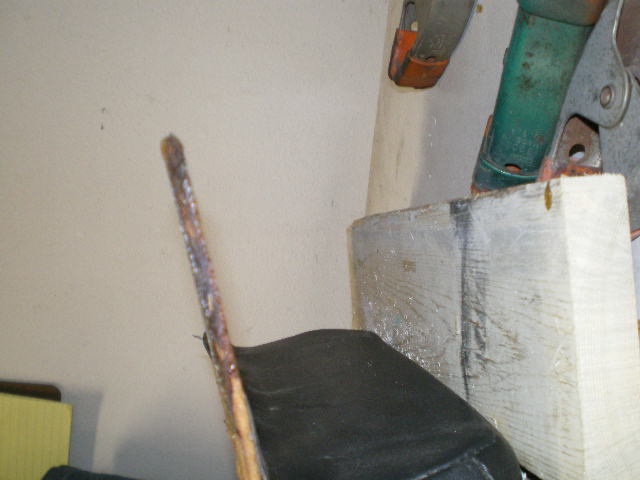 This pic shows the actual center piece in clamps as shown in an earlier shot but I wanted to show that frayed edge in the single clamp above and to the left of the board. The same is done to the frayed areas as the warped areas. After drying they will be flat as a pancake and water resistant. 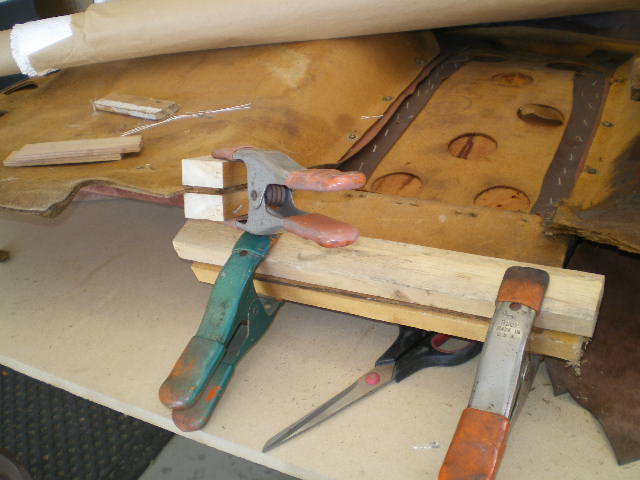 The most common complaint is that one or more of the upper clips has broken off. This is a very simple repair. Simply wet any remaining board on the clip and back pad, then I laid 2 pieces of 2" fiberglass across the clips, wetted them and placed a piece of Armaflex foam which was covered in wax paper and compressed with a board and clamp. This helps when dealing with uneven surfaces if you can't vacuum bag it. 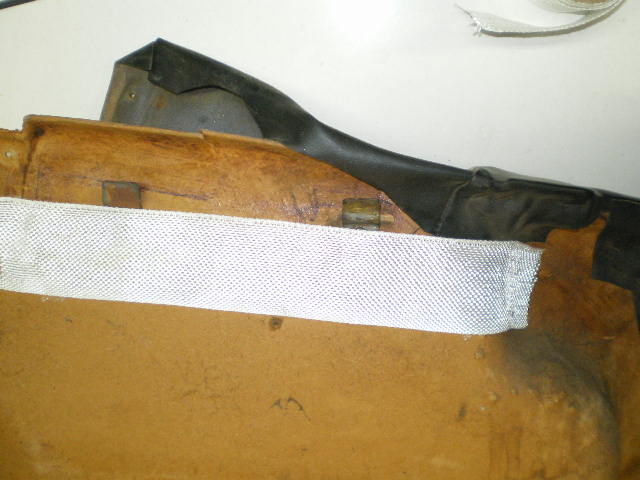 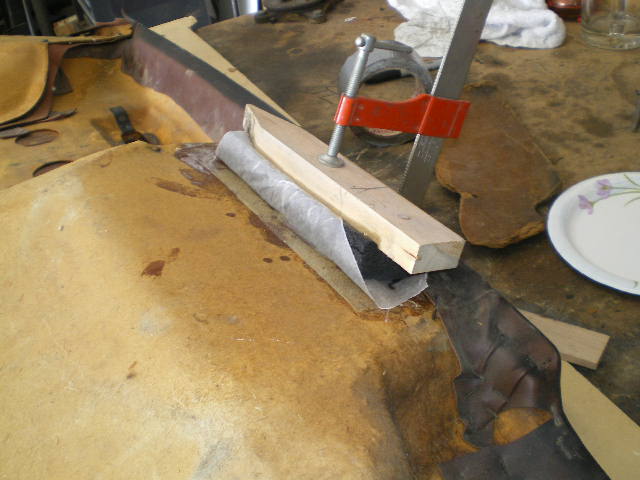  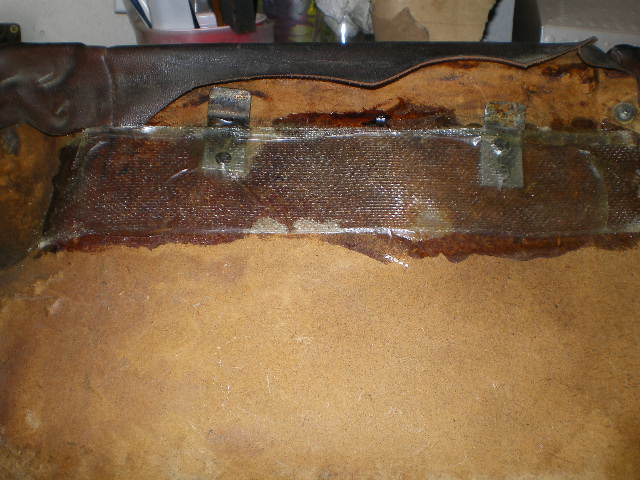 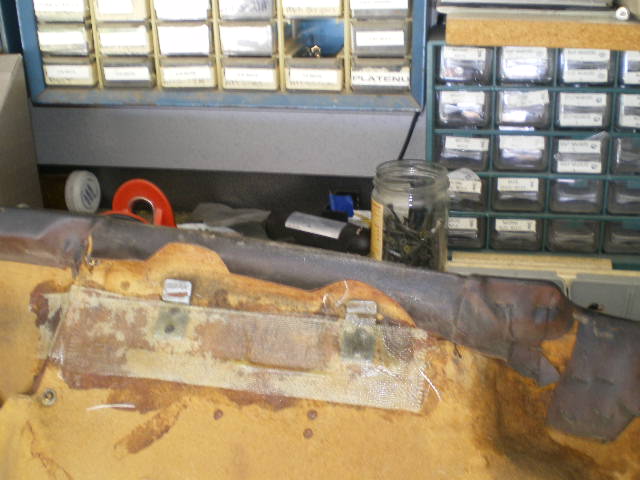 Speaking of that rubber; my shop stool had lived thru 1 puppy then another. Between the two there wasn't much left of the padding or covering. So I cut a piece out for my stool while I was at it and recovered my stool seat with a scrap piece from a seat back so n ow it is a Porsche Seat. LOL 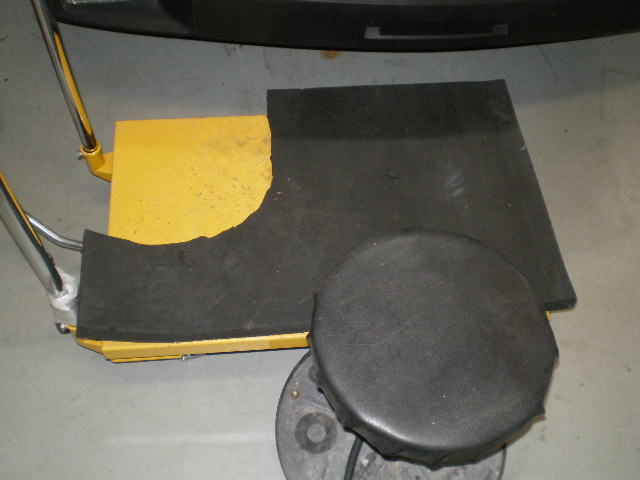 The drivers side will take a little more work but still easy to do. We'll need some underlayment for support so I used a thin piece of cardboard similar to a phone book cover. By massaging the piece and placeing the various clamps in different positions the cardboard assumes the contour of the back pad, as seen in the 2nd pic....... 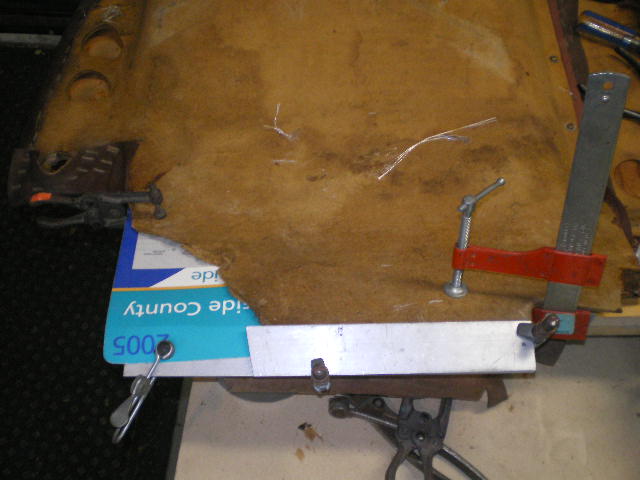 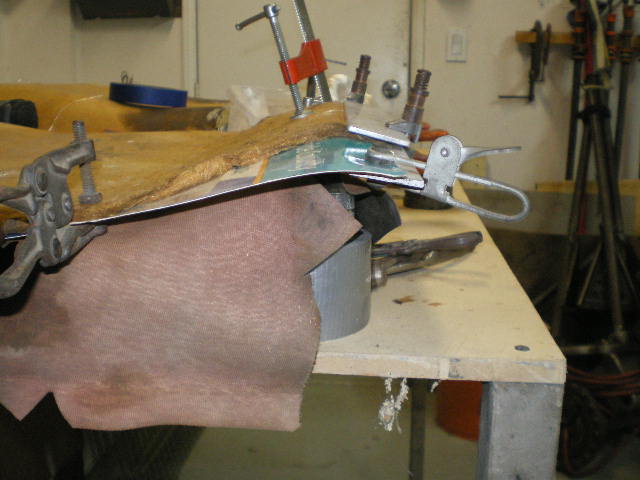 Now a piece of regular cardboard is traced out to fill the void.............. 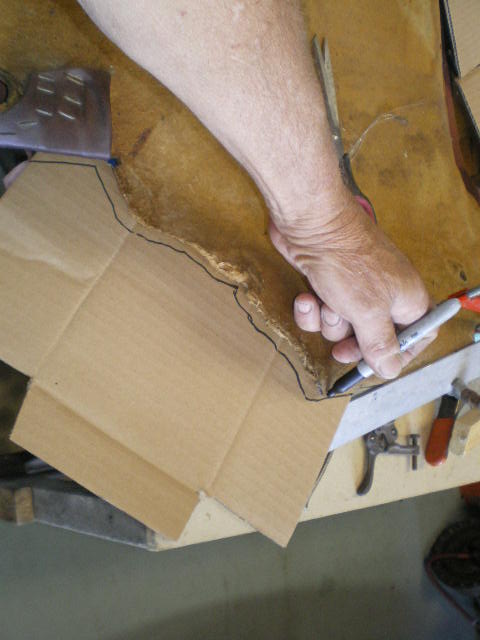 Filler piece of cardboard in place.......... 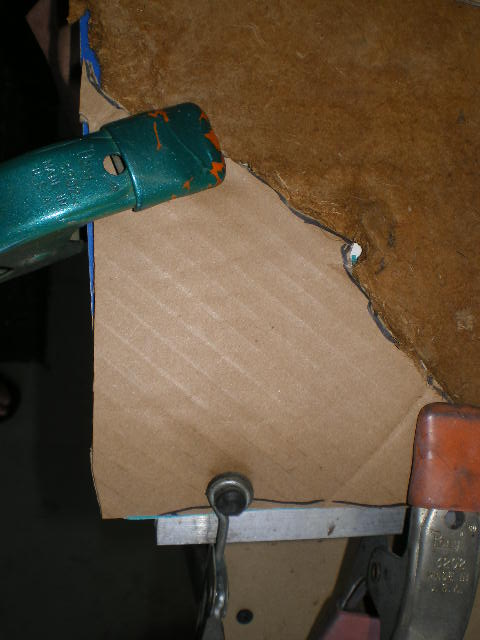 And the same area with a small fiberglass patch in place and dried. This area will get a few more layers of glass later. 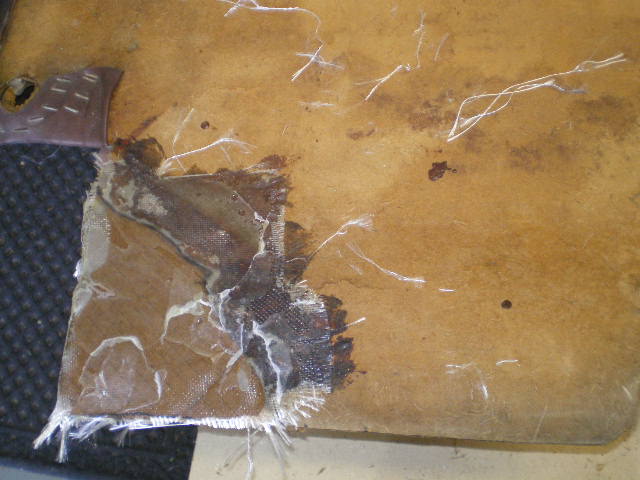 The same area but viewed from the front....... 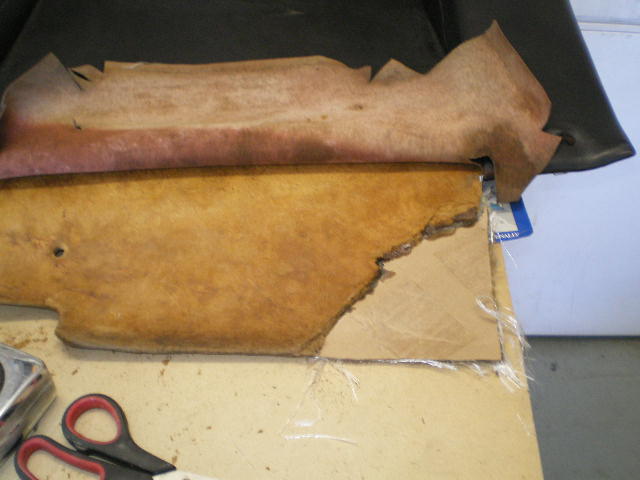 Now for the passenger side. I didn't have an existing piece to graft onto like the drivers side and I was missing the bottom 6" all the way across. But I did have a donor to use as a model.............. 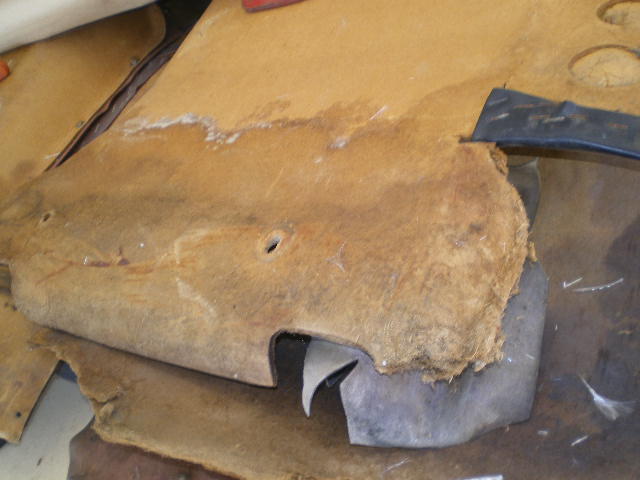 So I taped some wax paper on the area first.............. 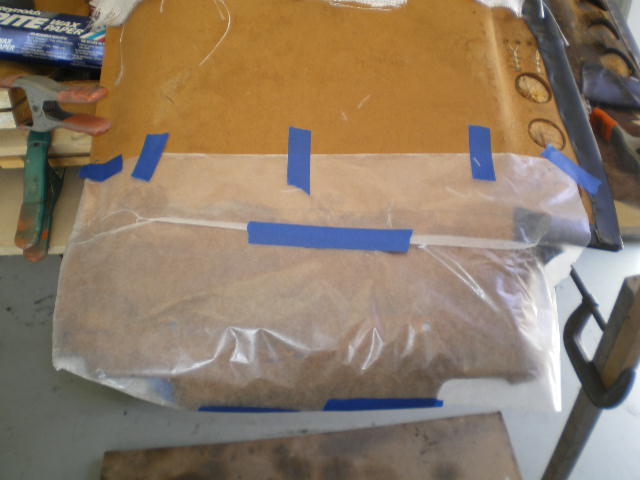 Then a couple pieces of glass........... 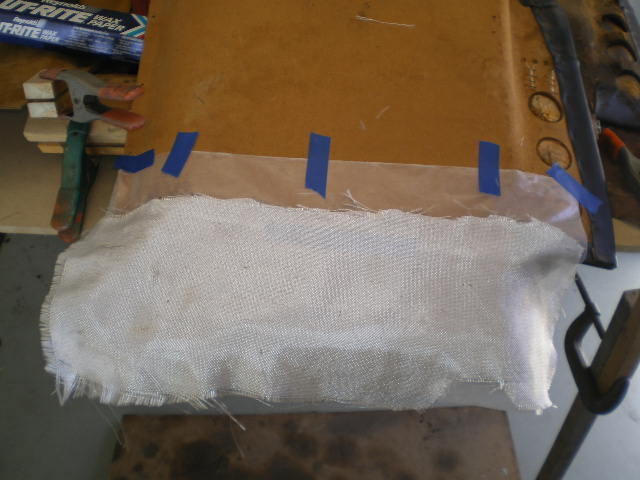 Here is another pic of the rubber used to conform to the rolled edge............ 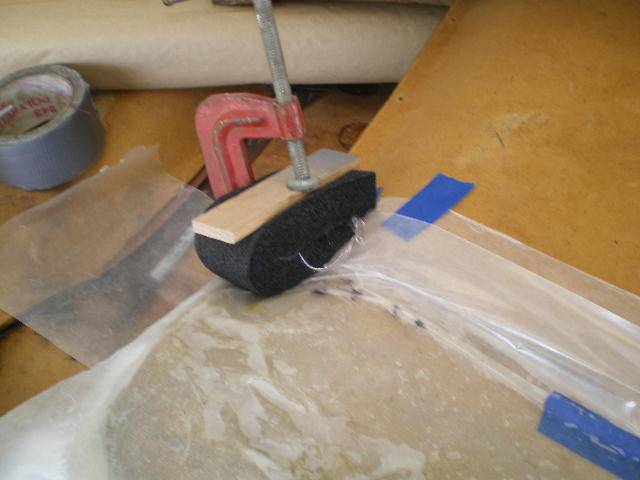 When the piece dried it was removed from the donor piece that was used as a mold and stapled to the passenger back pad as viewed now from the front..... it has a few more layers added later. 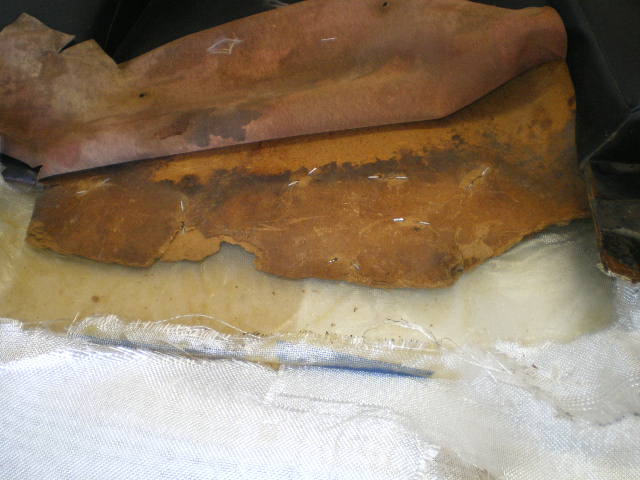 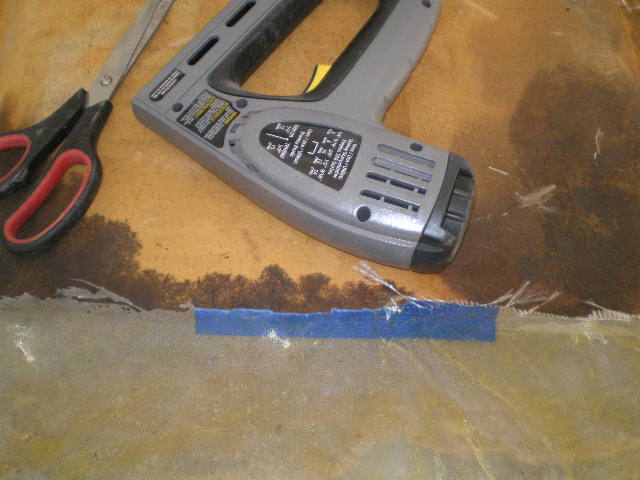 Here is the psgr back side with a more glass ans untrimmed.............. 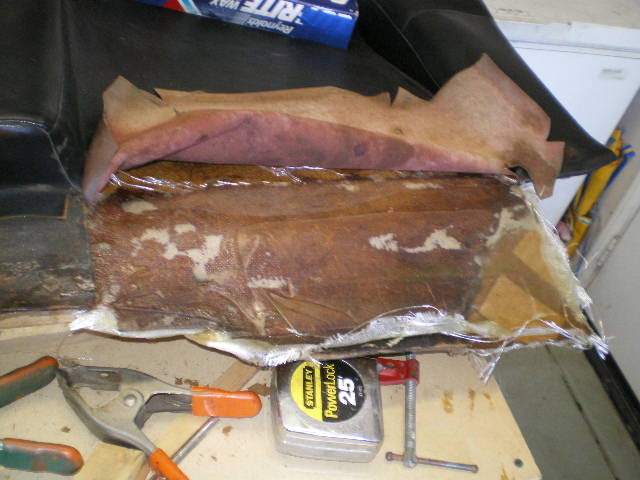 Now the back side pieces get a few layers of glass 7" x 16" wetted, wax paper and longer wood pieces clamped and glassed to keep her straight and tie it all together. 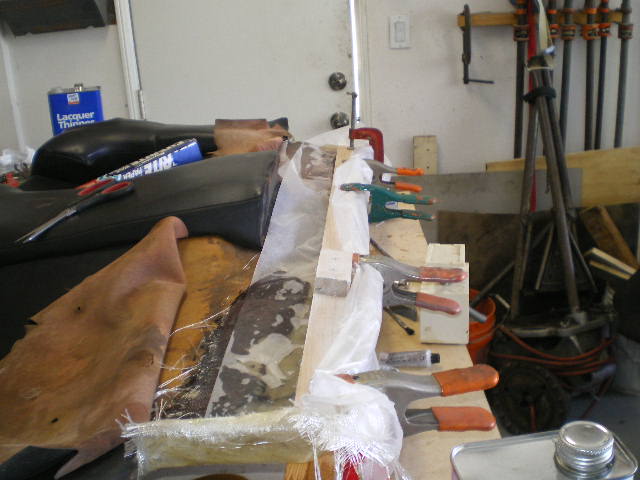 An untrimmed shot............... 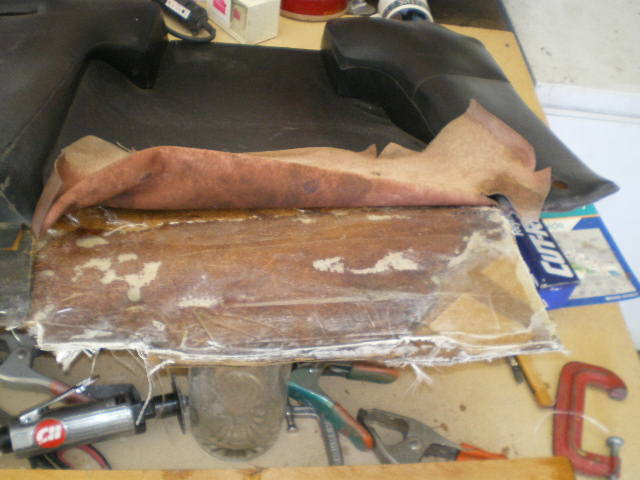 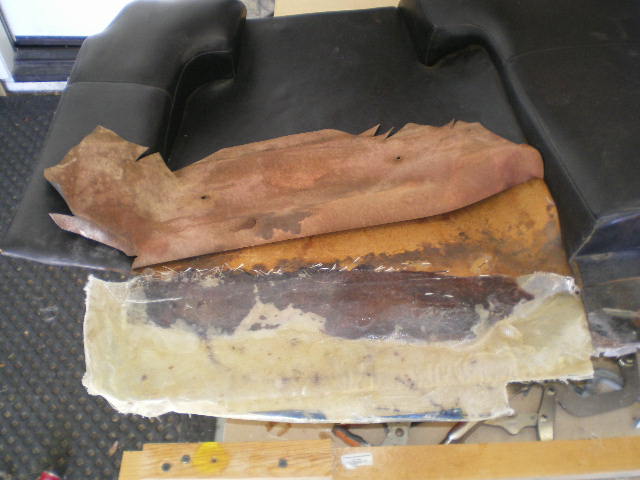 Standing on it's own now waiting on a small bit of trimming for final fit........ 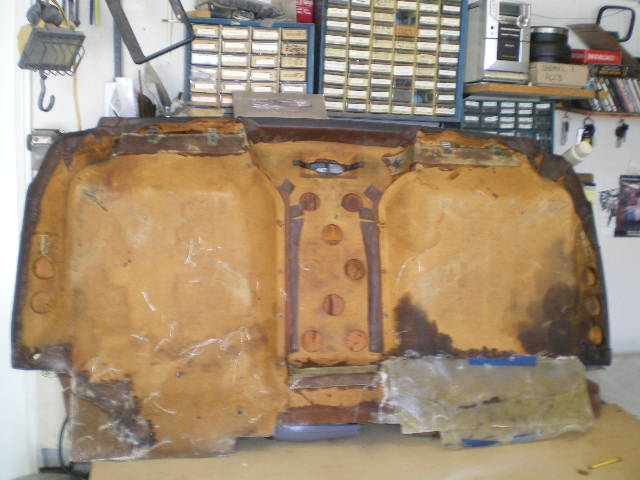 And now installed. Those screw thimbles fit quite solidly in the fiberglass so mark your 4 bottom holes carefully, pilot drill with a small bit and adjust hole as necessary. Now I don't have to keep the seat all the way back to keep the pad up. (IMG:style_emoticons/default/laugh.gif)  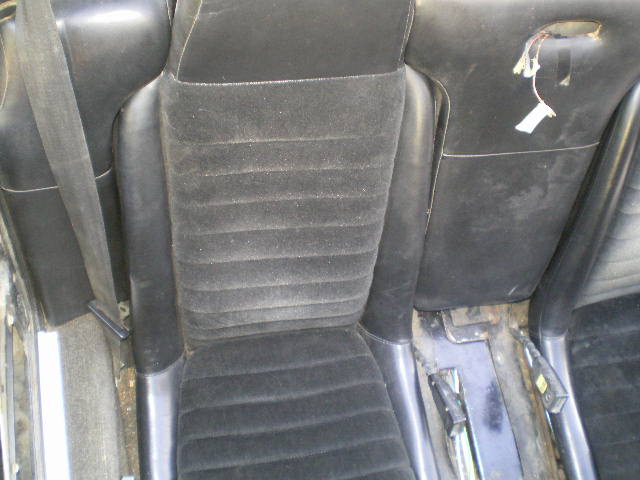 Attached image(s)  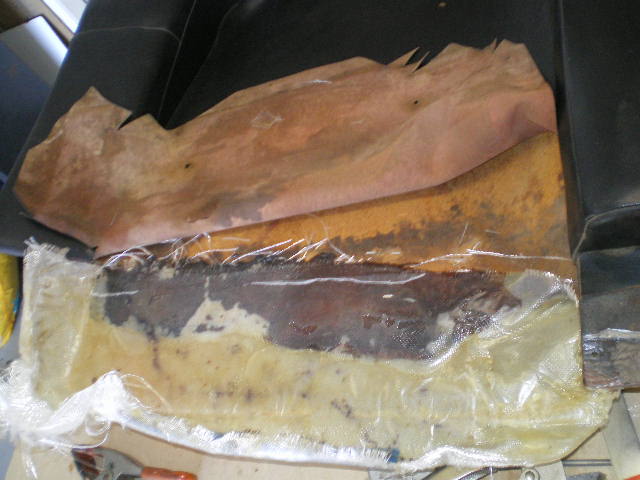 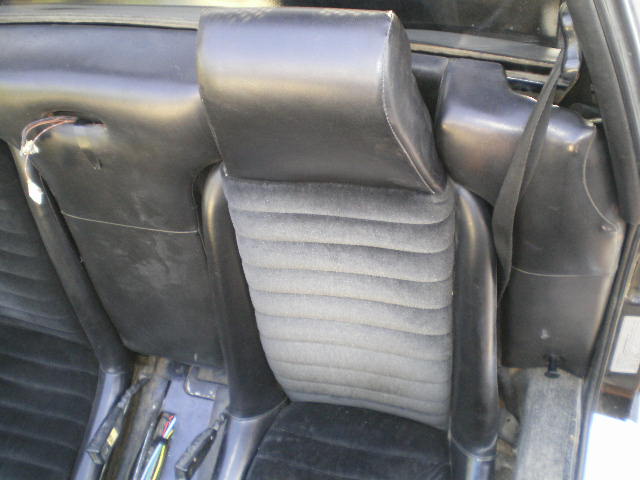
|
   |

 
|
  |
Replies
| windforfun |
Nov 5 2022, 03:36 PM
Post
#2
|
|
Senior Member Group: Members Posts: 1,956 Joined: 17-December 07 From: Blackhawk, CA Member No.: 8,476 Region Association: None |
You can still buy brand new ones from Porsche. At least they were available a few years ago.
|
|
|
|
Posts in this topic
 76-914 How to repair a Back Pad Aug 21 2011, 10:46 PM
 markb Nice job! I've never worked with fiberglas... Aug 21 2011, 11:16 PM
 poorsche914 Very timely as I will be refurbing my backpad soon... Aug 21 2011, 11:39 PM
 76-914
Nice job! I've never worked with fibergla... Aug 22 2011, 09:19 AM windforfun If anybody needs some panels or a center pad, let ... Aug 22 2011, 10:15 AM fteixeira
If anybody needs some panels or a center pad, let... Aug 23 2011, 02:43 PM windforfun
If anybody needs some panels or a center pad, le... Aug 23 2011, 03:04 PM saigon71 :beer2: Great work! Aug 22 2011, 06:03 AM nsr-jamie Excellent !! Perfect thread with easy to u... Aug 22 2011, 09:15 AM Philip W. Pretty cool, - i was lazy and ordered replacement ... Aug 23 2011, 12:00 PM Dutchy914 I have same issue,
thanks for your post, nice work... Feb 5 2022, 05:01 PM windforfun I have extra backpad panels for sale for cheap. Y... Feb 5 2022, 08:32 PM pfreiburger Thanks much, very good info and your repair was ni... Feb 6 2022, 06:24 AM Superhawk996 Based on CSOB title I expected Duct Tape.
Nice j... Feb 6 2022, 10:55 AM rhodyguy The 3 piece design ships pretty cheaply if you bre... Feb 6 2022, 11:04 AM tygaboy Kent isn't SuperMan. SuperMan is only "Th... Feb 7 2022, 09:57 AM 76-914 Hah. Thx Chris. I'd forgotten about this threa... Feb 8 2022, 12:16 AM partwerks Mine wasn't near that bad, but made one good o... Nov 3 2022, 06:48 PM worn
You can still buy brand new ones from Porsche. A... Nov 5 2022, 05:02 PM 930cabman Great information, thank you for sharing. Not much... Nov 6 2022, 06:06 AM
76-914
Nice job! I've never worked with fibergla... Aug 22 2011, 09:19 AM windforfun If anybody needs some panels or a center pad, let ... Aug 22 2011, 10:15 AM fteixeira
If anybody needs some panels or a center pad, let... Aug 23 2011, 02:43 PM windforfun
If anybody needs some panels or a center pad, le... Aug 23 2011, 03:04 PM saigon71 :beer2: Great work! Aug 22 2011, 06:03 AM nsr-jamie Excellent !! Perfect thread with easy to u... Aug 22 2011, 09:15 AM Philip W. Pretty cool, - i was lazy and ordered replacement ... Aug 23 2011, 12:00 PM Dutchy914 I have same issue,
thanks for your post, nice work... Feb 5 2022, 05:01 PM windforfun I have extra backpad panels for sale for cheap. Y... Feb 5 2022, 08:32 PM pfreiburger Thanks much, very good info and your repair was ni... Feb 6 2022, 06:24 AM Superhawk996 Based on CSOB title I expected Duct Tape.
Nice j... Feb 6 2022, 10:55 AM rhodyguy The 3 piece design ships pretty cheaply if you bre... Feb 6 2022, 11:04 AM tygaboy Kent isn't SuperMan. SuperMan is only "Th... Feb 7 2022, 09:57 AM 76-914 Hah. Thx Chris. I'd forgotten about this threa... Feb 8 2022, 12:16 AM partwerks Mine wasn't near that bad, but made one good o... Nov 3 2022, 06:48 PM worn
You can still buy brand new ones from Porsche. A... Nov 5 2022, 05:02 PM 930cabman Great information, thank you for sharing. Not much... Nov 6 2022, 06:06 AM |
2 User(s) are reading this topic (2 Guests and 0 Anonymous Users)
0 Members:

|
Lo-Fi Version | Time is now: 28th September 2024 - 02:43 PM |
Invision Power Board
v9.1.4 © 2024 IPS, Inc.