|
|

|
Porsche, and the Porsche crest are registered trademarks of Dr. Ing. h.c. F. Porsche AG.
This site is not affiliated with Porsche in any way. Its only purpose is to provide an online forum for car enthusiasts. All other trademarks are property of their respective owners. |
|
|
  |
| rick 918-S |
 Apr 27 2013, 11:58 PM Apr 27 2013, 11:58 PM
Post
#41
|
|
Hey nice rack! -Celette                Group: Members Posts: 20,837 Joined: 30-December 02 From: Now in Superior WI Member No.: 43 Region Association: Northstar Region 

|
I purchased a set of manifolds for an ITB project. One of the ears was broken off. I spent a few minutes and made a repair. Fun with tig welding.
Attached image(s) 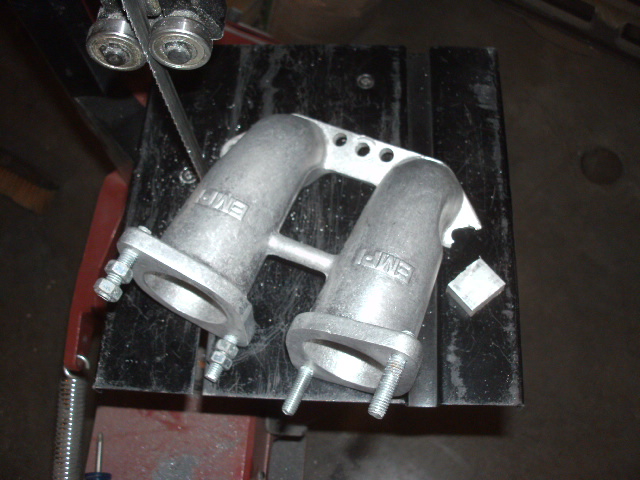 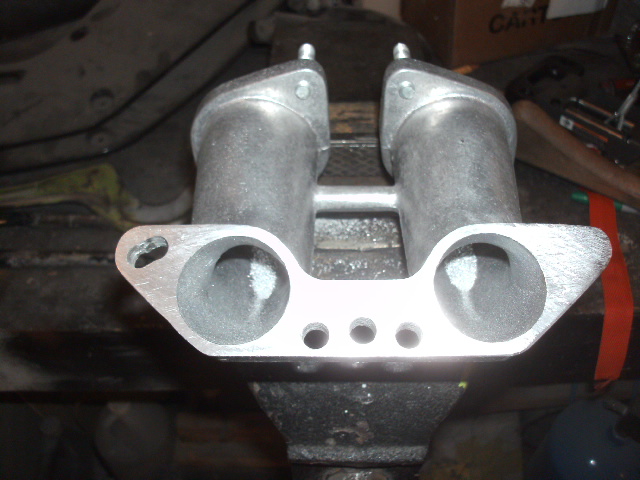 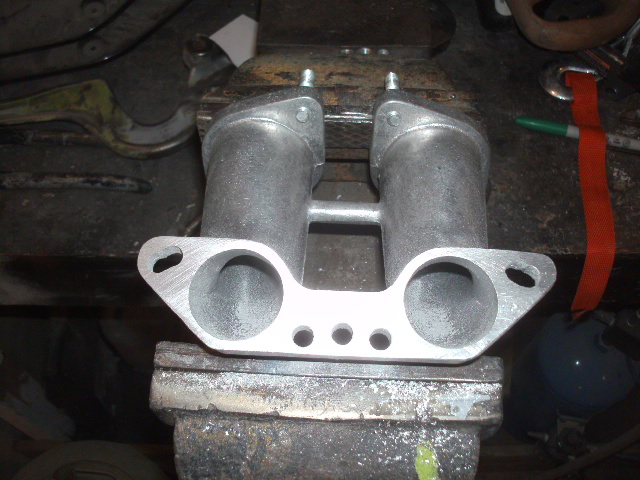
|
| Rleog |
 Apr 28 2013, 05:09 AM Apr 28 2013, 05:09 AM
Post
#42
|
|
Senior Member    Group: Members Posts: 609 Joined: 12-October 03 From: Middleton, MA Member No.: 1,239 Region Association: North East States 
|
True craftsmanship.
|
| ottox914 |
 May 1 2013, 08:42 PM May 1 2013, 08:42 PM
Post
#43
|
|
The glory that once was.    Group: Members Posts: 1,302 Joined: 15-December 03 From: Mahtomedi, MN Member No.: 1,438 Region Association: Upper MidWest  |
Crazy mad man skillz. I need to convince you to work on my 914. Its value would go up just by the masters touch.
|
| rick 918-S |
 Jul 15 2013, 09:26 PM Jul 15 2013, 09:26 PM
Post
#44
|
|
Hey nice rack! -Celette                Group: Members Posts: 20,837 Joined: 30-December 02 From: Now in Superior WI Member No.: 43 Region Association: Northstar Region 

|
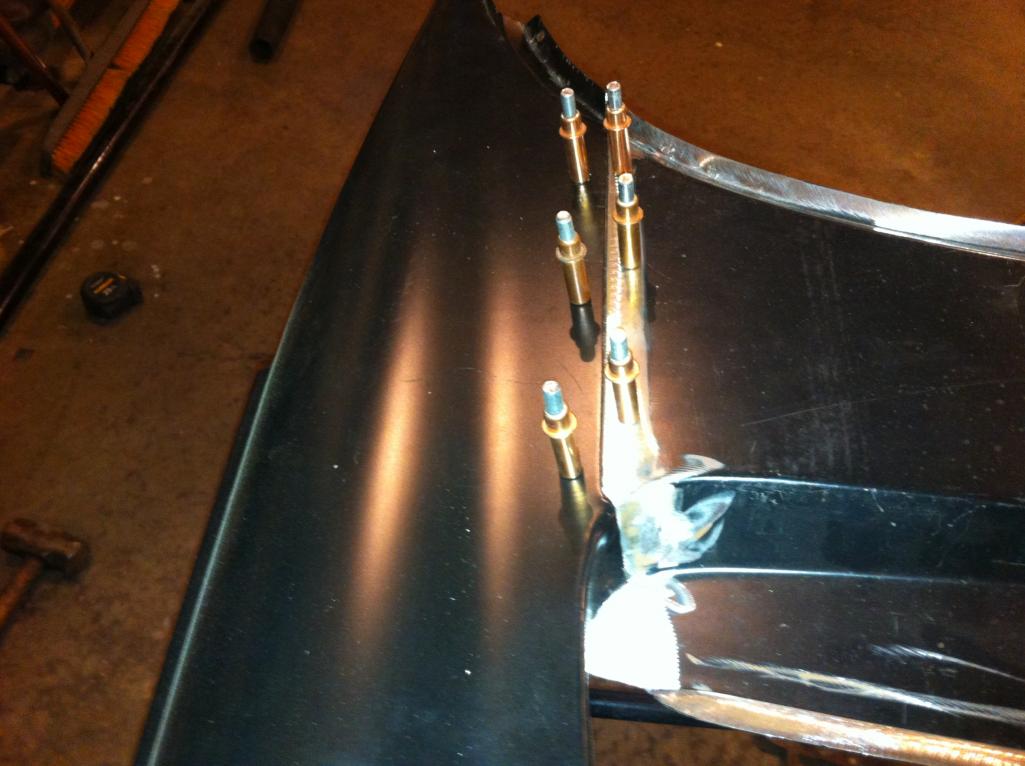
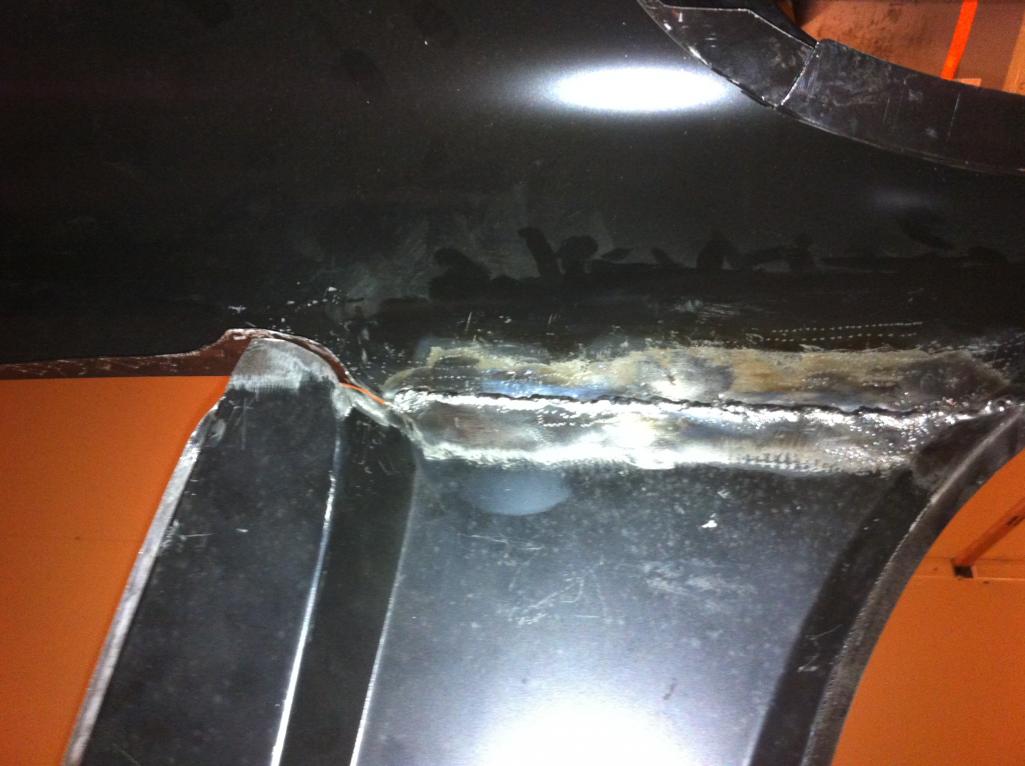
This Mercedes is even challenging my skill set. The factory used to sell the front shroud as a complete unit. It is not available that way anymore so I need to assemble all the pieces and metal finish all the seams before sliding the shroud over the inner structure.
Now in case you don't know the lids and doors are aluminum. The sheet metal is assembled, then the doors and lids are filed to fit the openings. The gaps are perfect and set to 5mm from what I'm told. So as I assemble the car I have to fit sheet metal parts that is normally welded "close" and fit by hand to the doors and lids that are filed to fit the sheet metal. (IMG:style_emoticons/default/screwy.gif) Not easy. Here's the shroud As I build it. I hope it fits.... (IMG:style_emoticons/default/unsure.gif) 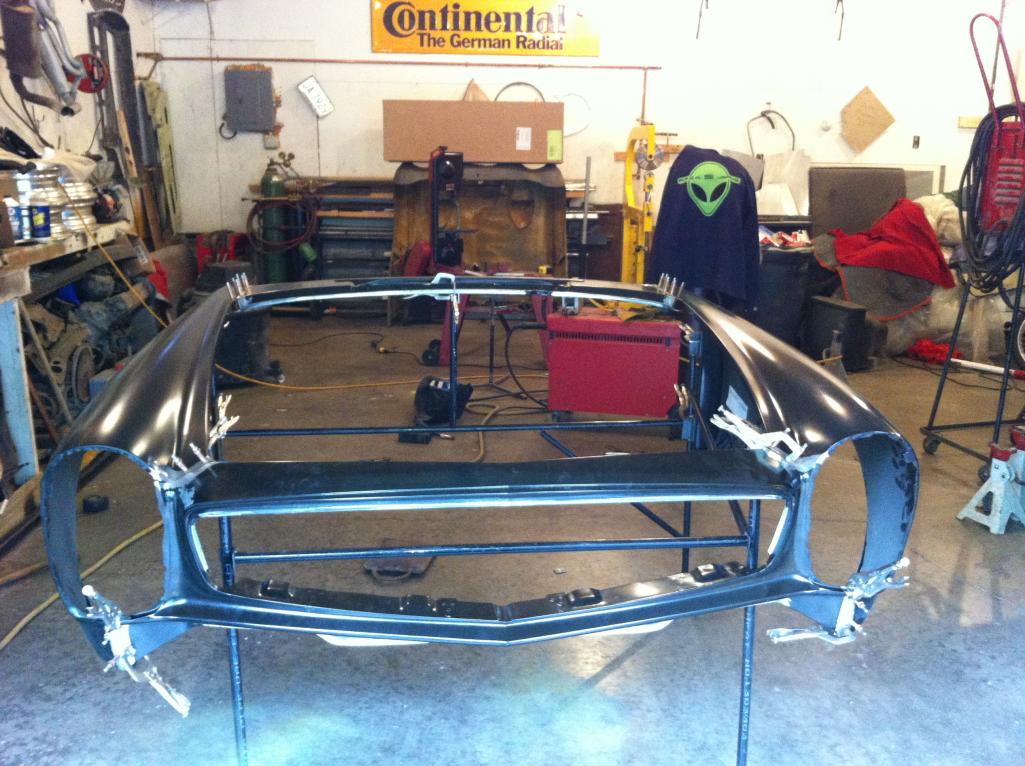 Here's the first metal finished seam from the cowl to the fender. Attached thumbnail(s) 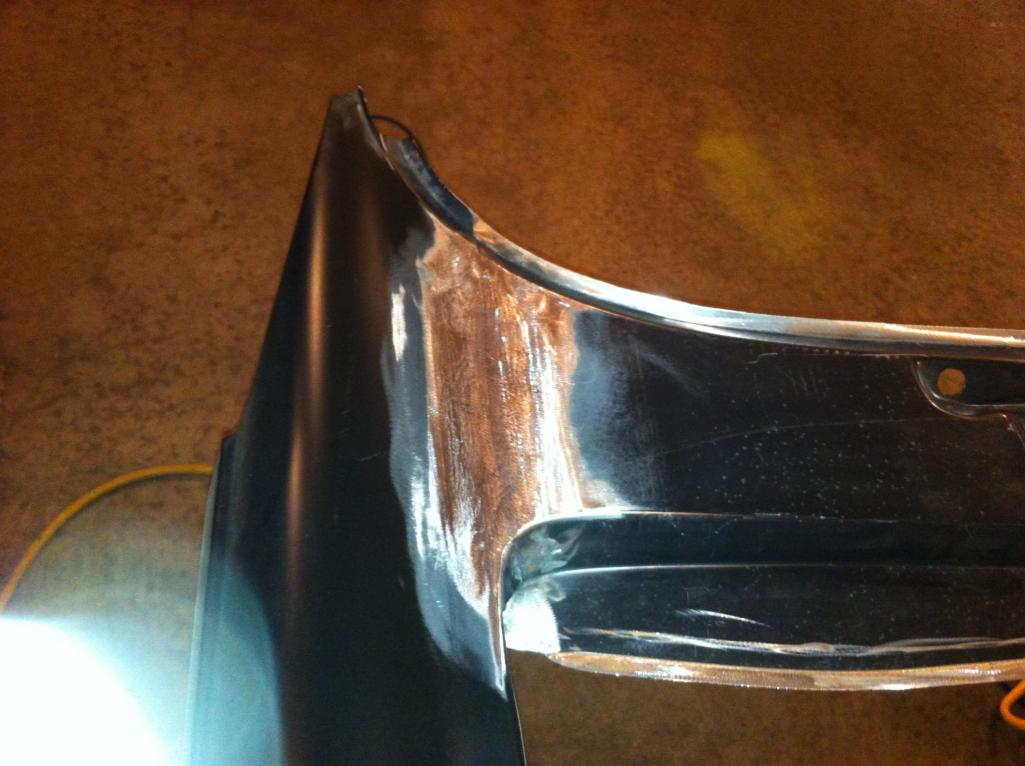
|
| rick 918-S |
 Jul 17 2013, 09:43 PM Jul 17 2013, 09:43 PM
Post
#45
|
|
Hey nice rack! -Celette                Group: Members Posts: 20,837 Joined: 30-December 02 From: Now in Superior WI Member No.: 43 Region Association: Northstar Region 

|
Part of the process when metal finishing is to Anneal the area you want to work. Here is a photo of the process. First you blow acetylene soot on the area you want to anneal. Then using a torch you work the area burning off the soot. Just enough to dissolve the soot and not over heat the metal. You want to relax the molecules not distort the panel.
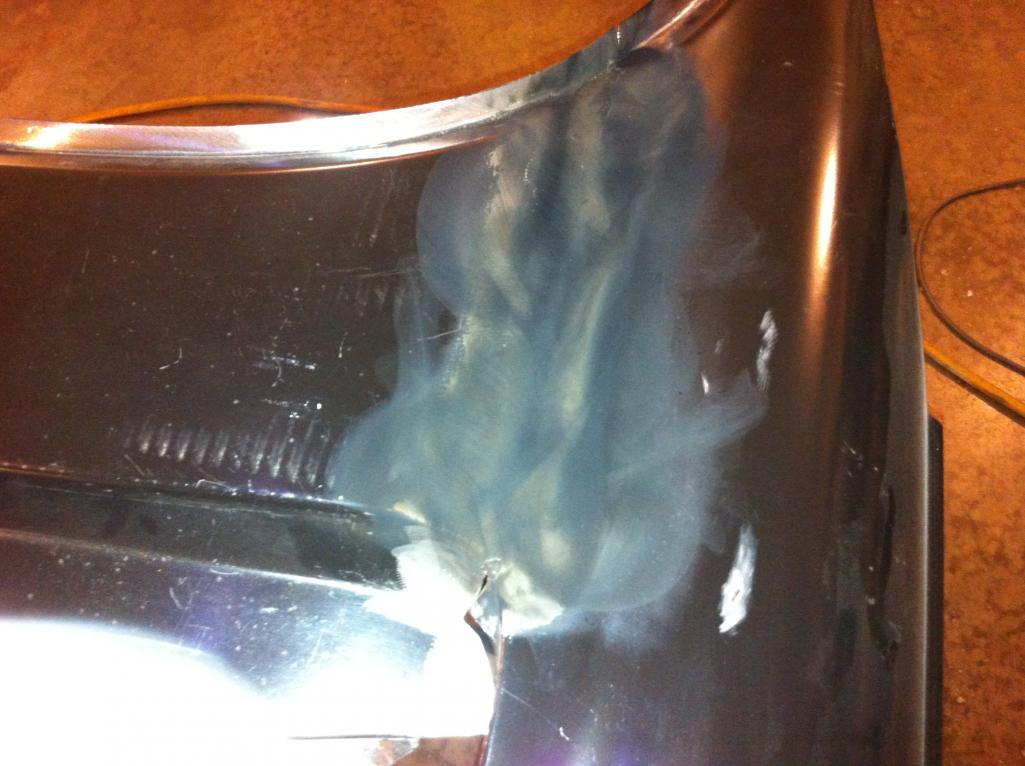 Here is the second seam after metal finishing. 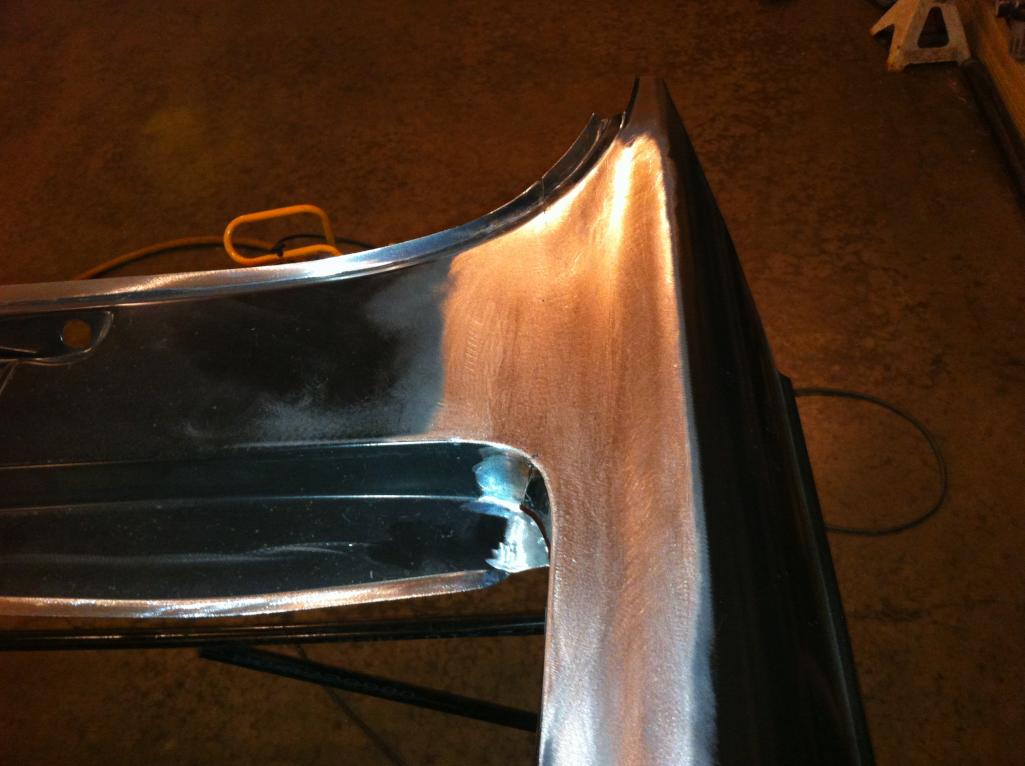 |
| rick 918-S |
 Jul 17 2013, 10:32 PM Jul 17 2013, 10:32 PM
Post
#46
|
|
Hey nice rack! -Celette                Group: Members Posts: 20,837 Joined: 30-December 02 From: Now in Superior WI Member No.: 43 Region Association: Northstar Region 

|
A couple more things you may find interesting. I used a copper strip as a back up. Notice I used my bead roller and rolled a bead groove down the middle. This allows the weld metal to protrude giving a good strong weld.
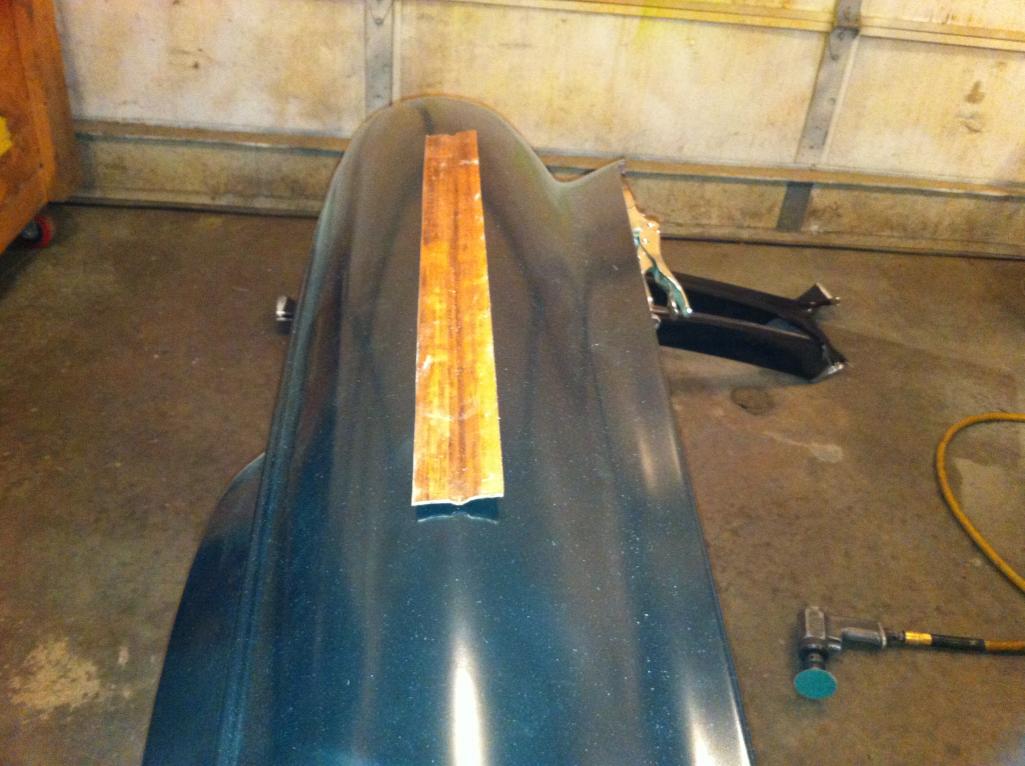 This is the under side of the fender to cowl seam with the back up strip in place. 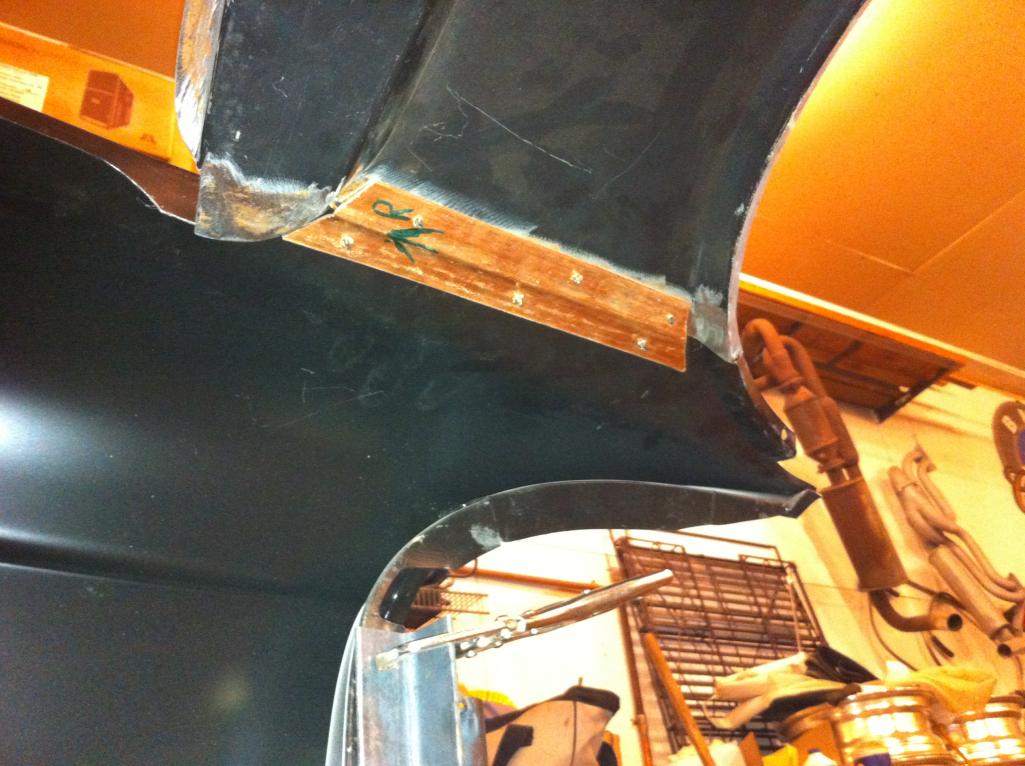 |
| rick 918-S |
 Jul 17 2013, 10:33 PM Jul 17 2013, 10:33 PM
Post
#47
|
|
Hey nice rack! -Celette                Group: Members Posts: 20,837 Joined: 30-December 02 From: Now in Superior WI Member No.: 43 Region Association: Northstar Region 

|
|
| 76-914 |
 Jul 18 2013, 07:51 AM Jul 18 2013, 07:51 AM
Post
#48
|
|
Repeat Offender & Resident Subaru Antagonist           Group: Members Posts: 13,650 Joined: 23-January 09 From: Temecula, CA Member No.: 9,964 Region Association: Southern California 
|
|
| tdgray |
 Jul 18 2013, 11:02 AM Jul 18 2013, 11:02 AM
Post
#49
|
|
Thank God Nemo is not here to see this      Group: Members Posts: 9,705 Joined: 5-August 03 From: Akron, OH Member No.: 984 Region Association: None |
That is crazy mad skillz as usual Rick... I have got to learn me to tig weld (IMG:style_emoticons/default/aktion035.gif)
|
| rick 918-S |
 Aug 3 2013, 06:56 AM Aug 3 2013, 06:56 AM
Post
#50
|
|
Hey nice rack! -Celette                Group: Members Posts: 20,837 Joined: 30-December 02 From: Now in Superior WI Member No.: 43 Region Association: Northstar Region 

|
Spot welding and more spot welding. After several fittings I'm welding the front shroud to the inner panels on this 280 SL. Great hobby.
Drug out all the welders for this one. 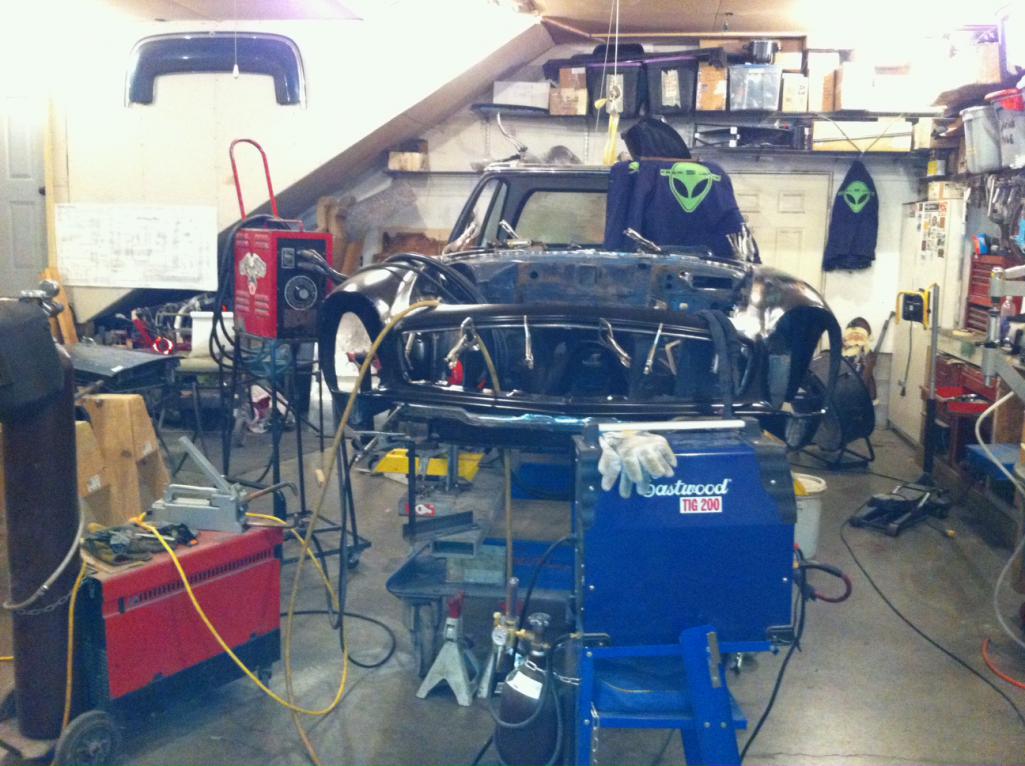 The cowl top panel has a flange that is hammered over like a door skin then spot welded. 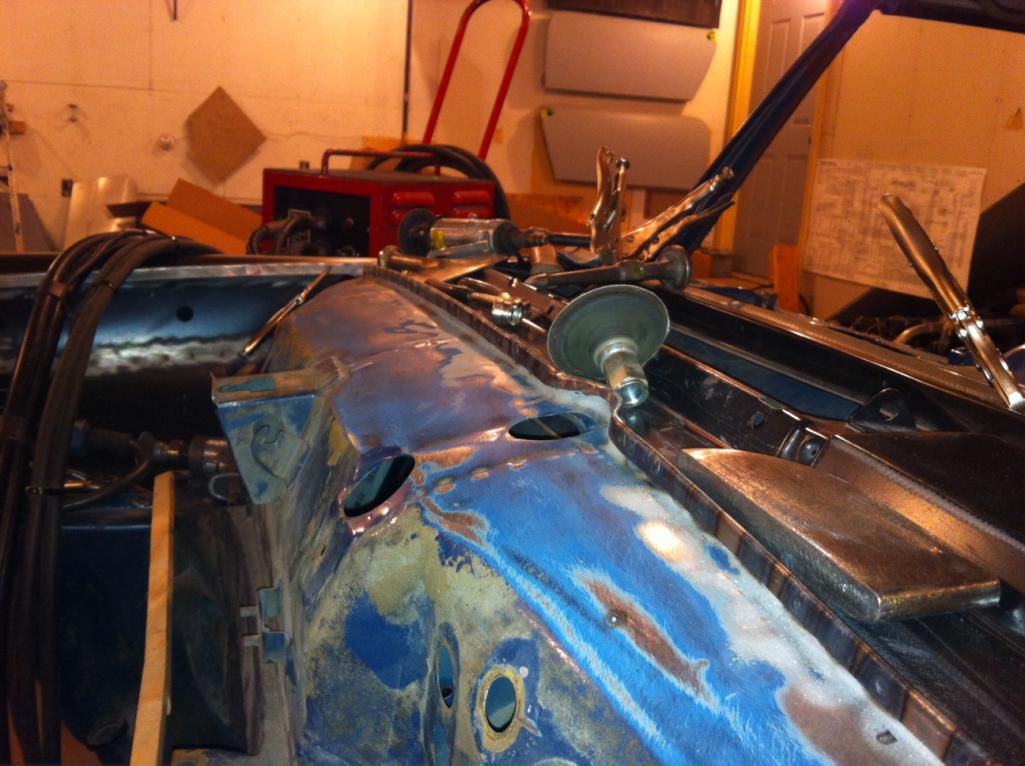 Then lots of spot welds all around the shroud. (IMG:style_emoticons/default/welder.gif) 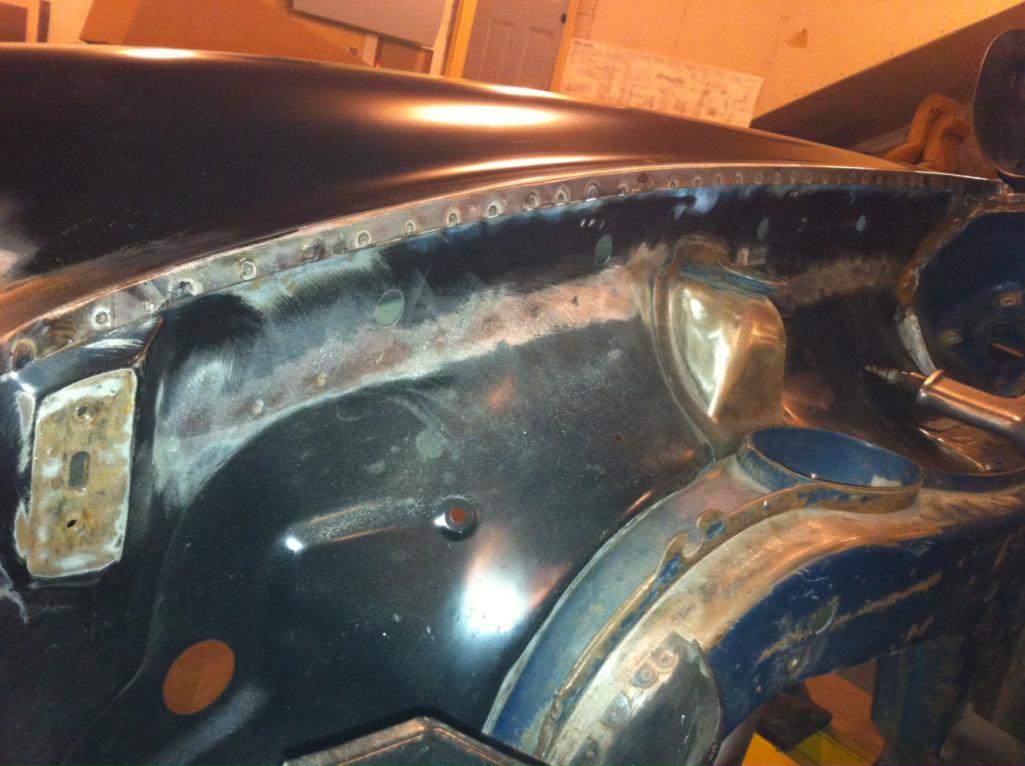 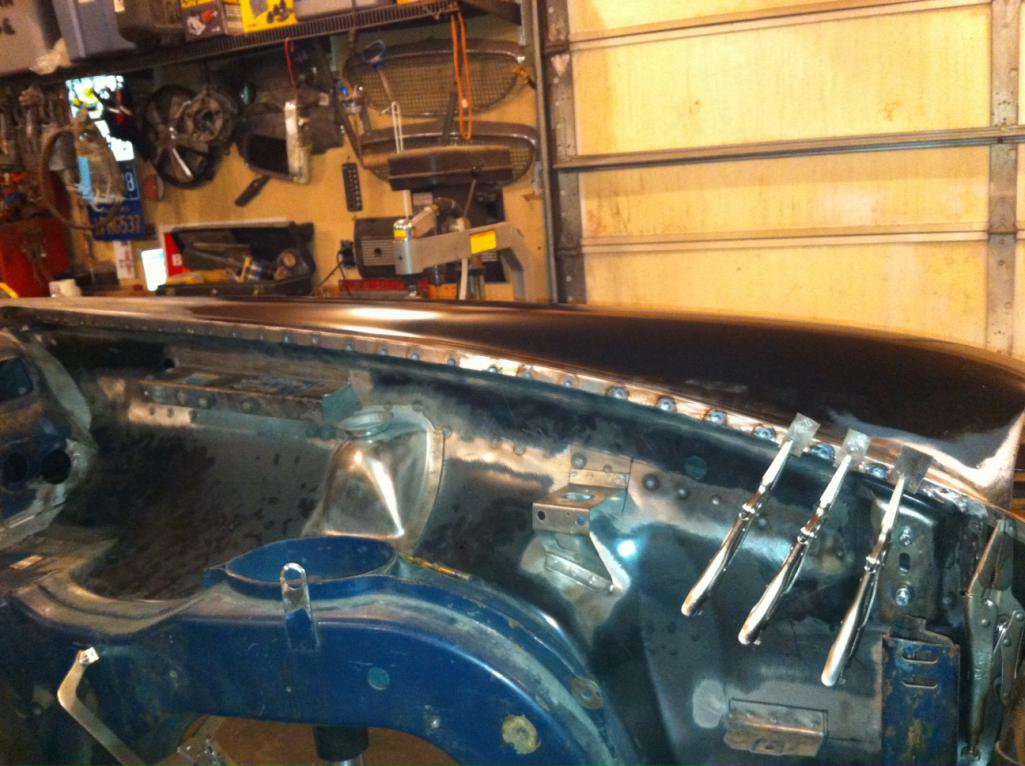 |
| Cairo94507 |
 Aug 3 2013, 07:30 AM Aug 3 2013, 07:30 AM
Post
#51
|
|
Michael           Group: Members Posts: 10,144 Joined: 1-November 08 From: Auburn, CA Member No.: 9,712 Region Association: Northern California 
|
Oh my! You have out of this world skills! (IMG:style_emoticons/default/w00t.gif)
|
| jd74914 |
 Aug 3 2013, 09:05 AM Aug 3 2013, 09:05 AM
Post
#52
|
|
Its alive     Group: Members Posts: 4,819 Joined: 16-February 04 From: CT Member No.: 1,659 Region Association: North East States |
That looks awesome Rick!
OT, but how do you like that Eastwood TIG? |
| Elliot Cannon |
 Aug 3 2013, 12:13 PM Aug 3 2013, 12:13 PM
Post
#53
|
|
914 Guru      Group: Retired Members Posts: 8,487 Joined: 29-December 06 From: Paso Robles Ca. (Central coast) Member No.: 7,407 Region Association: None 

|
It looks like the copper strip is held on with clecos. Do you just weld the cleco holes to fill them when you're done? I should do more with my TIG but the MIG is just so EASY to use. (IMG:style_emoticons/default/biggrin.gif) (IMG:style_emoticons/default/welder.gif)
|
| rick 918-S |
 Aug 3 2013, 12:24 PM Aug 3 2013, 12:24 PM
Post
#54
|
|
Hey nice rack! -Celette                Group: Members Posts: 20,837 Joined: 30-December 02 From: Now in Superior WI Member No.: 43 Region Association: Northstar Region 

|
|
| rick 918-S |
 Aug 3 2013, 12:26 PM Aug 3 2013, 12:26 PM
Post
#55
|
|
Hey nice rack! -Celette                Group: Members Posts: 20,837 Joined: 30-December 02 From: Now in Superior WI Member No.: 43 Region Association: Northstar Region 

|
It looks like the copper strip is held on with clecos. Do you just weld the cleco holes to fill them when you're done? I should do more with my TIG but the MIG is just so EASY to use. (IMG:style_emoticons/default/biggrin.gif) (IMG:style_emoticons/default/welder.gif) Yep. Easy to tig the 1/8" holes when your done. I switch from my mig to tig depending on what I'm doing. |
| r_towle |
 Aug 3 2013, 10:04 PM Aug 3 2013, 10:04 PM
Post
#56
|
|
Custom Member                Group: Members Posts: 24,680 Joined: 9-January 03 From: Taxachusetts Member No.: 124 Region Association: North East States 
|
Dude,
Can you show the shield you are using with the speed blaster? Rich |
| rick 918-S |
 Aug 4 2013, 08:39 AM Aug 4 2013, 08:39 AM
Post
#57
|
|
Hey nice rack! -Celette                Group: Members Posts: 20,837 Joined: 30-December 02 From: Now in Superior WI Member No.: 43 Region Association: Northstar Region 

|
Dude, Can you show the shield you are using with the speed blaster? Rich Are you talking about a spot blaster (sand blaster)? I use gorilla duct tape and heavy plastic and tape off the area I want to spot blast. Then I either stick the nozzle through the plastic or insert the whole gun through. when your done there is less clean up. Not sure if this is what your asking. |
| rick 918-S |
 Dec 13 2013, 11:40 PM Dec 13 2013, 11:40 PM
Post
#58
|
|
Hey nice rack! -Celette                Group: Members Posts: 20,837 Joined: 30-December 02 From: Now in Superior WI Member No.: 43 Region Association: Northstar Region 

|
I'm wrapping up the Mercedes shell. My friend wants me to transport it to Romulus Michigan to get it e-coated. http://www.redi-coat.com/photos.html
He asked me to build a trailer that mounts the car by the jack points and has a single torsion axle that can be removed. So I'm building the frame on top of my Celette. The pins that lock the trailer frame to the car slide out and are locked with a grade 8 bolt. I drug out the old buzz box today to burn in the first pass on this 1/4 wall 2"X3" tubing. Then I multi pass over with the wire feed. With the heat the arc welder develops I don't have to pre-heat the 1/4 wall before running the mig welder. 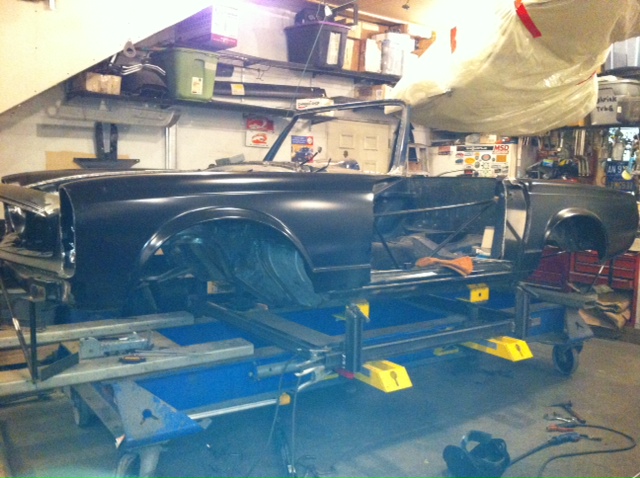 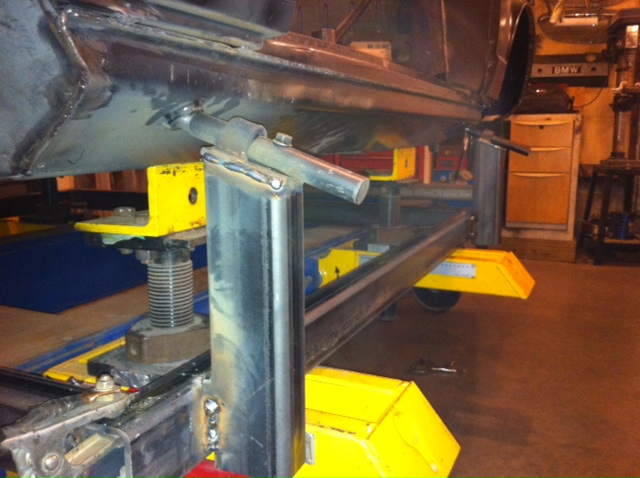 |
| r_towle |
 Dec 13 2013, 11:43 PM Dec 13 2013, 11:43 PM
Post
#59
|
|
Custom Member                Group: Members Posts: 24,680 Joined: 9-January 03 From: Taxachusetts Member No.: 124 Region Association: North East States 
|
You must have smoked something when you were younger....
Wild stuff man....nice job |
| JeffBowlsby |
 Dec 14 2013, 12:11 AM Dec 14 2013, 12:11 AM
Post
#60
|
|
914 Wiring Harnesses      Group: Members Posts: 8,786 Joined: 7-January 03 From: San Ramon CA Member No.: 104 Region Association: None 
|
Art surpasses the sum of its parts. Talent is innate and cannot be learned as skills with experience can be.
Ricks unbeleivable talents + (time x money) = Art What a privilege it is that you share your work with us Rick. |
  |
1 User(s) are reading this topic (1 Guests and 0 Anonymous Users)
0 Members:

|
Lo-Fi Version | Time is now: 5th January 2025 - 01:23 AM |
Invision Power Board
v9.1.4 © 2025 IPS, Inc.


