|
|

|
Porsche, and the Porsche crest are registered trademarks of Dr. Ing. h.c. F. Porsche AG.
This site is not affiliated with Porsche in any way. Its only purpose is to provide an online forum for car enthusiasts. All other trademarks are property of their respective owners. |
|
|
  |
| Mike Bellis |
 Apr 23 2011, 02:43 PM Apr 23 2011, 02:43 PM
Post
#161
|
|
Resident Electrician      Group: Members Posts: 8,346 Joined: 22-June 09 From: Midlothian TX Member No.: 10,496 Region Association: None 

|
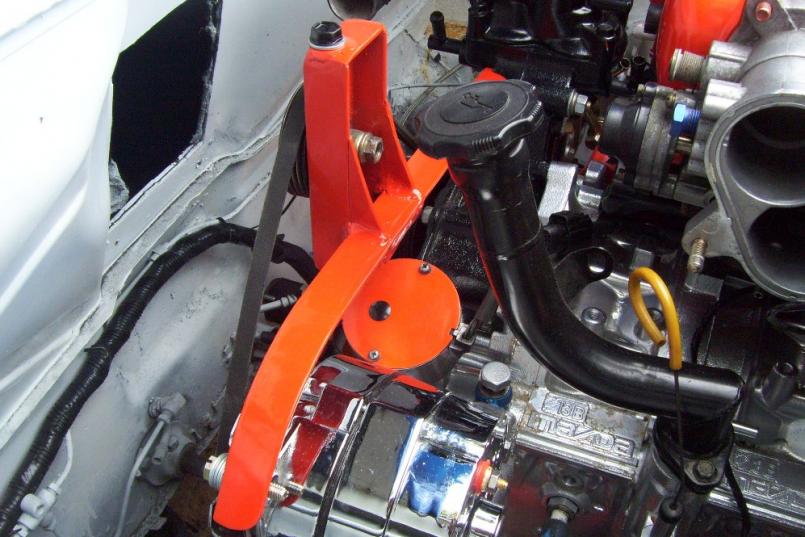
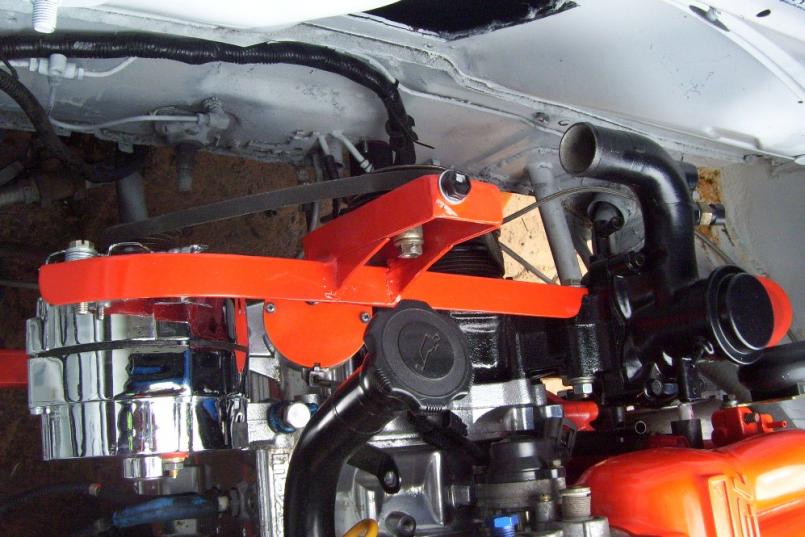
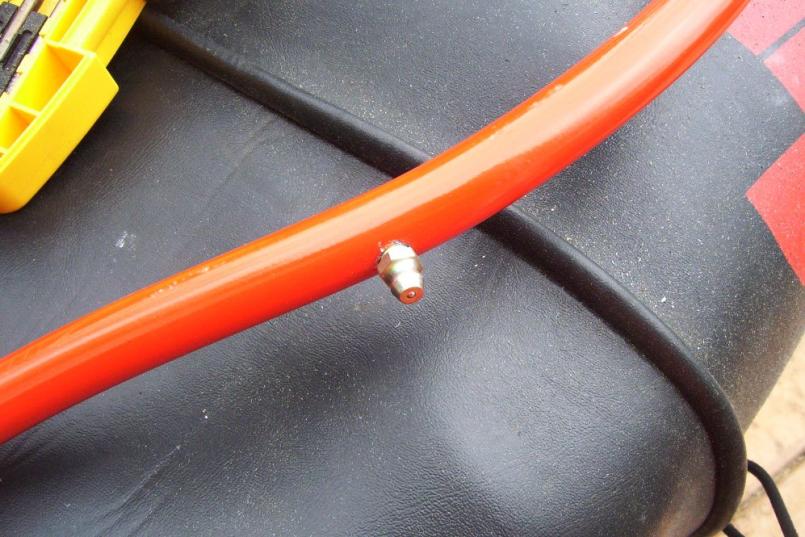
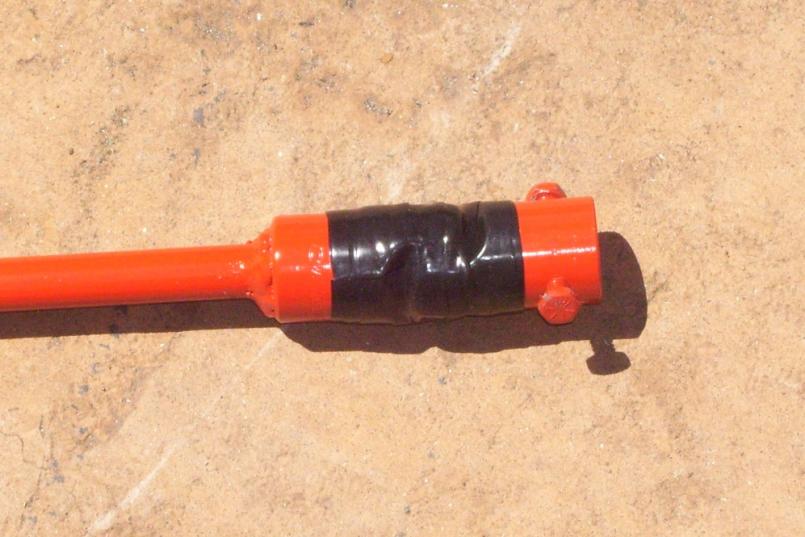
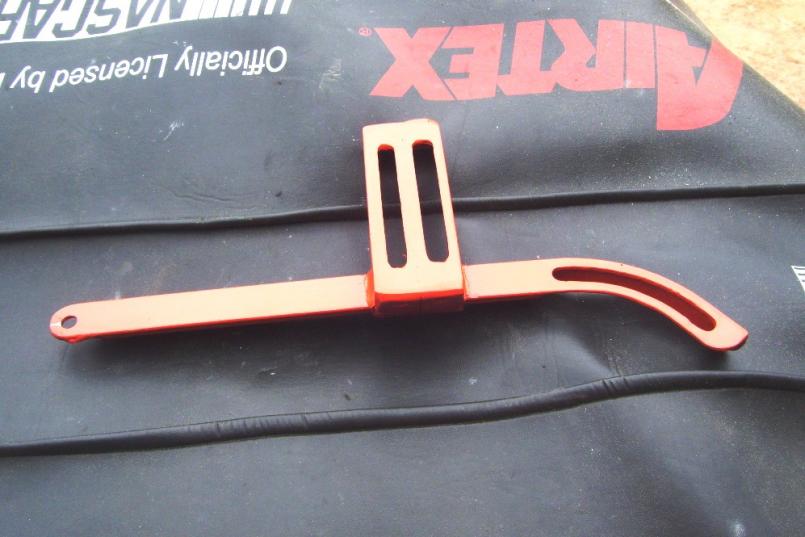
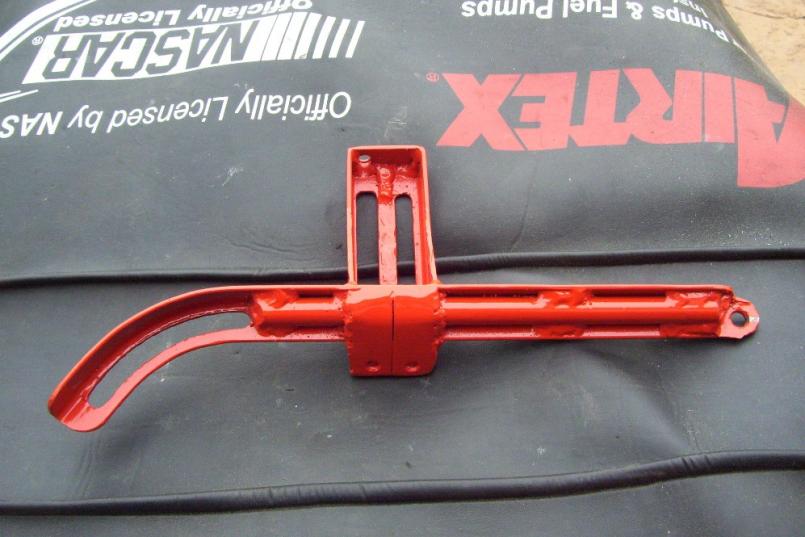
I spent about 8 hours making this bracket out of a single piece of L channel and some 5/8 DOM. I wanted to use the serpentine belt tensioner. Seems to work good. It was a pain to get the alignment... The curve was easy. I cut the slot first. Then I cut off the inside piece. made some releif cuts in the main section and bent the channel. I welded it back up. Bent the inside curve piece and welded it on. smoothed it all out with a grinder.
  |
| Mike Bellis |
 Apr 23 2011, 02:45 PM Apr 23 2011, 02:45 PM
Post
#162
|
|
Resident Electrician      Group: Members Posts: 8,346 Joined: 22-June 09 From: Midlothian TX Member No.: 10,496 Region Association: None 

|
|
| Mike Bellis |
 Apr 23 2011, 02:51 PM Apr 23 2011, 02:51 PM
Post
#163
|
|
Resident Electrician      Group: Members Posts: 8,346 Joined: 22-June 09 From: Midlothian TX Member No.: 10,496 Region Association: None 

|
|
| Andyrew |
 Apr 24 2011, 04:11 AM Apr 24 2011, 04:11 AM
Post
#164
|
|
Spooling.... Please wait           Group: Members Posts: 13,377 Joined: 20-January 03 From: Riverbank, Ca Member No.: 172 Region Association: Northern California 
|
Looks fantastic!!!
|
| Mike Bellis |
 Apr 30 2011, 07:02 PM Apr 30 2011, 07:02 PM
Post
#165
|
|
Resident Electrician      Group: Members Posts: 8,346 Joined: 22-June 09 From: Midlothian TX Member No.: 10,496 Region Association: None 

|
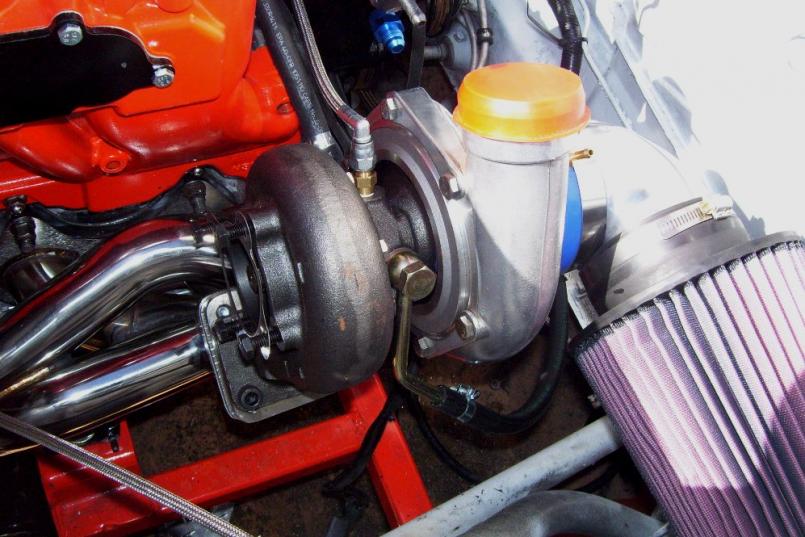
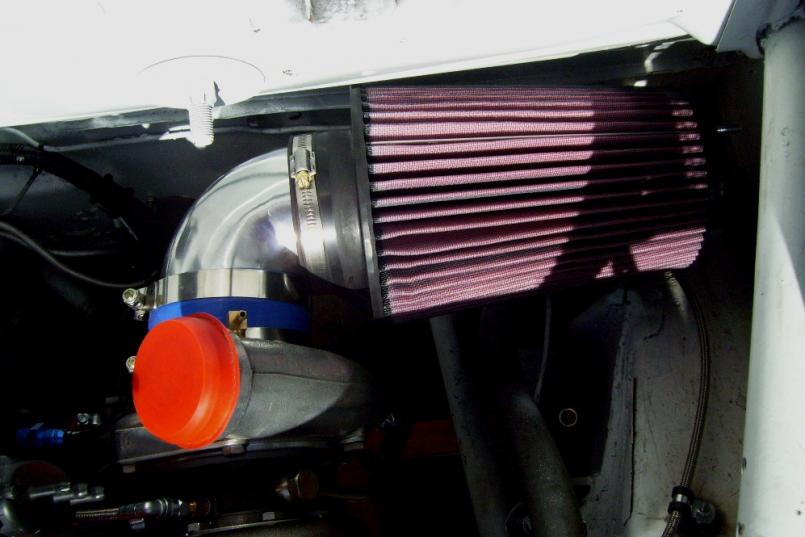
Well I'm mostly down to booring stuff and puch list items. The major stuff I still need are a clutch, air/water intercooler, Oil Cooler and lines. Time to save some money from my new job. My new Air Filter came in. Krusty won't like it because it's a K&N. 4 inch ID by 10 inches long. I have to get a 90 degree fitting to turn the filter in front of the turbo. Otherwize the filter will be half inside the cabin. I needed high flow for the inlet, that's why it's so massive.
Here is a pic of it stuck on the front of the turbo... 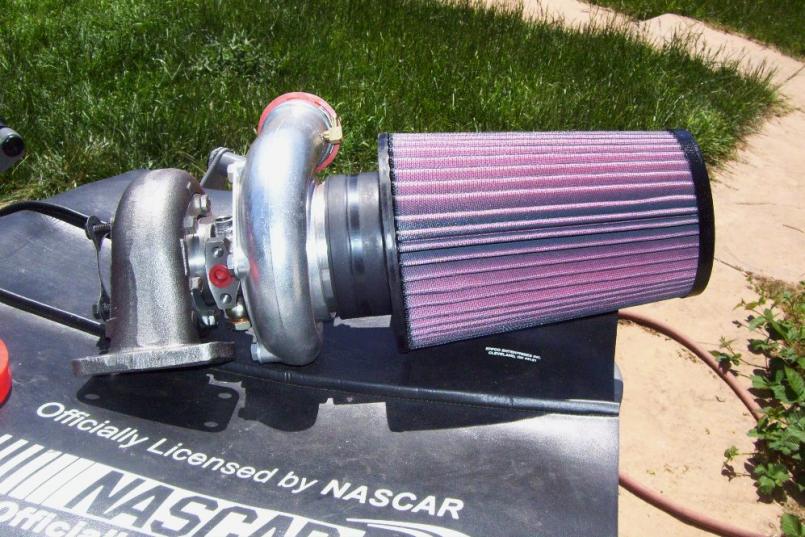 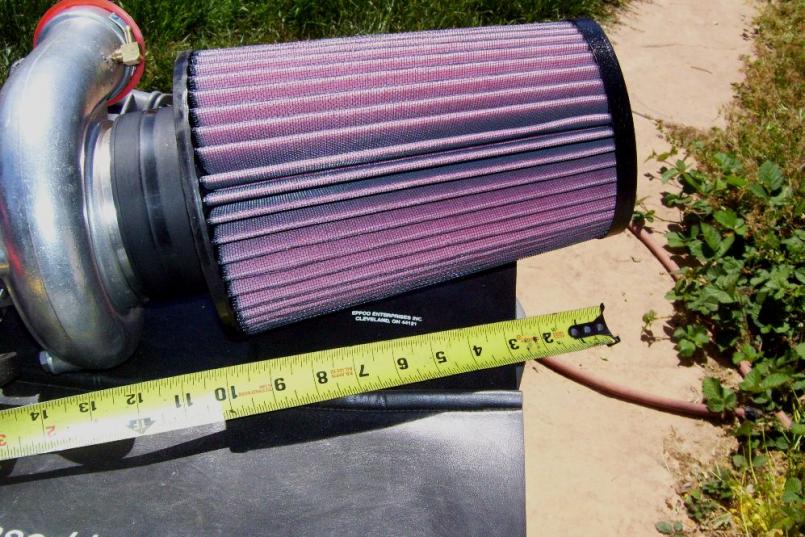 |
| Mike Bellis |
 Apr 30 2011, 07:10 PM Apr 30 2011, 07:10 PM
Post
#166
|
|
Resident Electrician      Group: Members Posts: 8,346 Joined: 22-June 09 From: Midlothian TX Member No.: 10,496 Region Association: None 

|
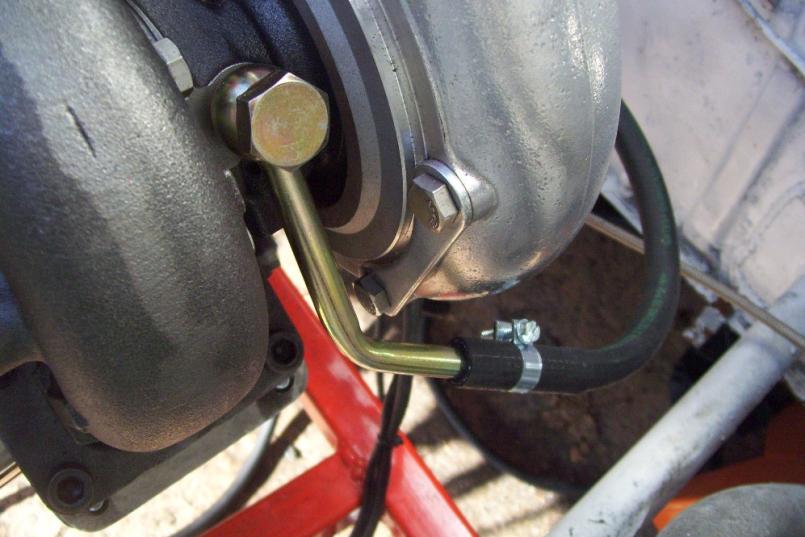
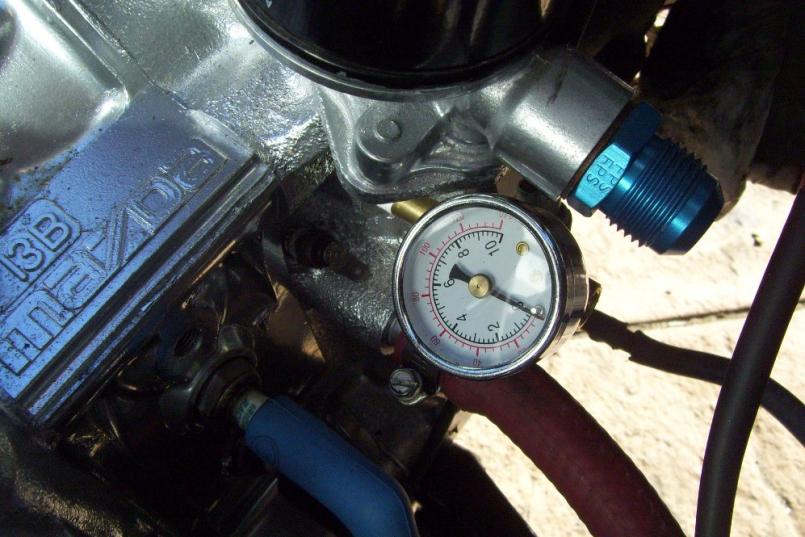
Some of the little stuff... Turbo coolant lines. I need to fab a -4AN for the Oil supply and a -10AN for the drain. I worked on the fuel lines a little. Got the hard lines routed to the drivers side. Still need the final connection to the rail... I added a 150psi guage to my oil sender bung. These little engines run 85-120psi on the oil...
  |
| Mike Bellis |
 May 1 2011, 07:49 PM May 1 2011, 07:49 PM
Post
#167
|
|
Resident Electrician      Group: Members Posts: 8,346 Joined: 22-June 09 From: Midlothian TX Member No.: 10,496 Region Association: None 

|
I had to move my battery cut off switch to make room for my oil cooler. It was on the front bumper. Now it is on the cowl in front of the windshield. I ran a new main battery cable too. a 1/0 welding cable is pulled through my heater tube. Along with my #2 ground and my heater hoses. (see one of my old threads for info on my fresh air heater box). The cooler I'm running is a Setrab 25"x17" and will lay down right on the radiator with rubber spacers. It requires -12AN connections. More on the cooler when I get it mounted. I haven't decided the type or routing of the oil lines. I guess my choices are: SS Braided hose, Copper or Aluminum hard tube.
Anybody have an opinion on cooling lines? Here's some pics... 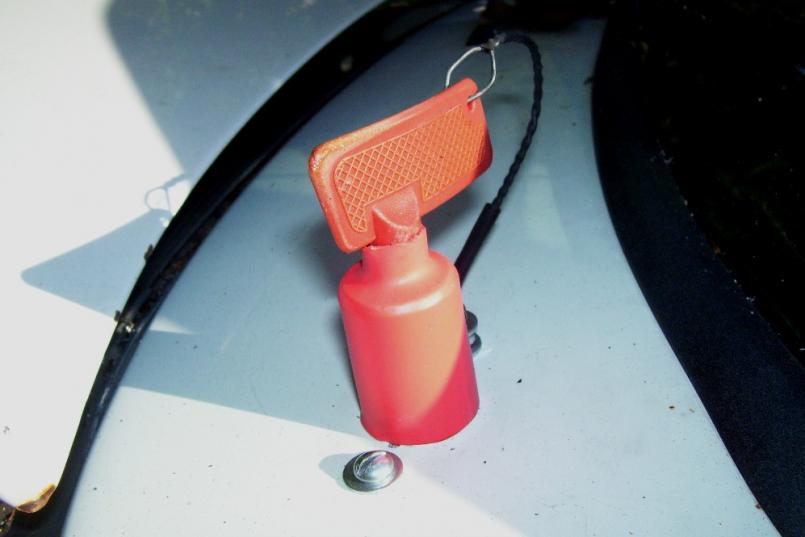 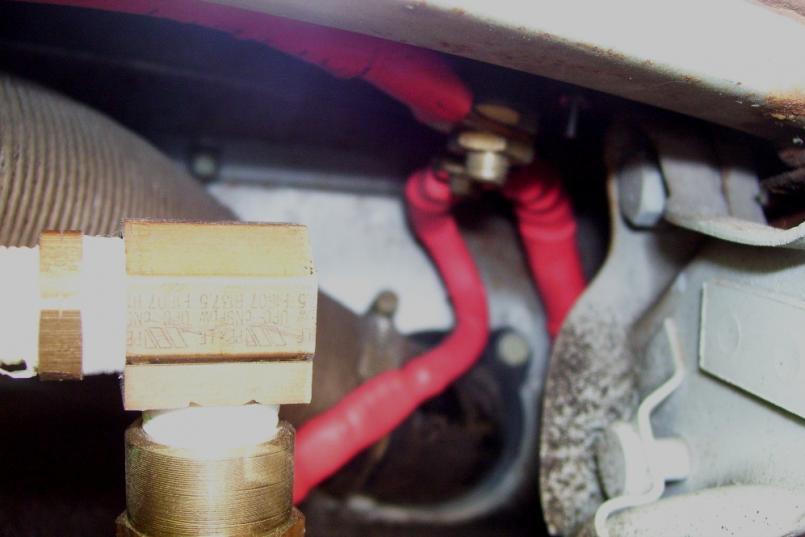 |
| Mike Bellis |
 May 1 2011, 07:57 PM May 1 2011, 07:57 PM
Post
#168
|
|
Resident Electrician      Group: Members Posts: 8,346 Joined: 22-June 09 From: Midlothian TX Member No.: 10,496 Region Association: None 

|
Here is a pick of my VW Jetta water valve. It is connected to the factory temp control slider...
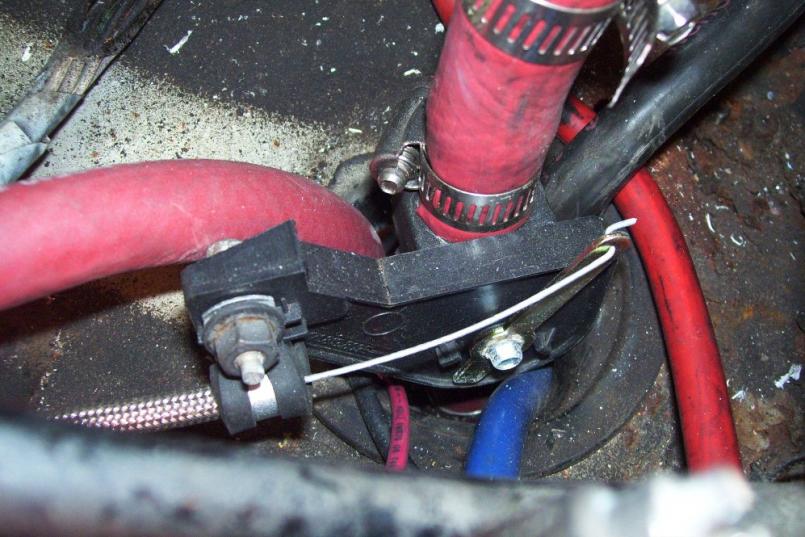 My starter cable routes from the cut off then to the battery. All other power is routed from the cut off to this 250 Amp fuse. This will give the system some protection from dead shorts. The circuit path is: Battery, to Cut Off Switch, then 1/0 to starter. Battery, to Cut Off Switch, then #2 to the 250 Amp fuse. This set up does not kill the alternator but will isolate it from the battery and other electronics. 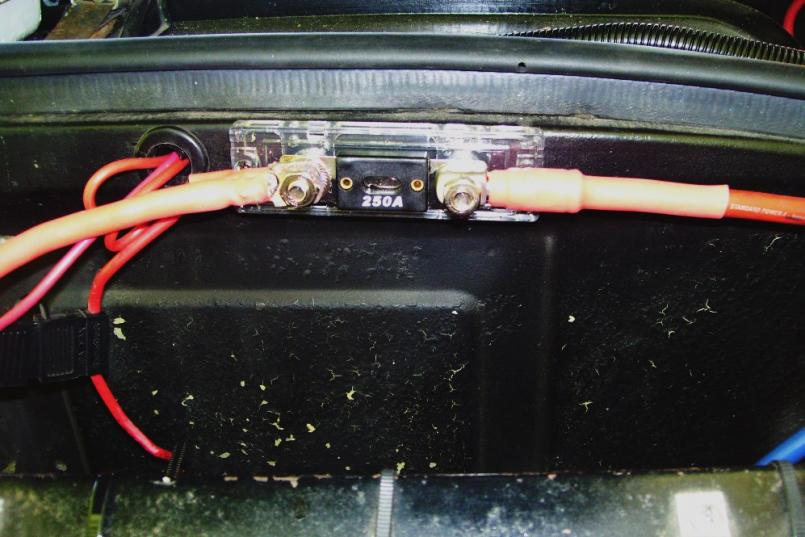 |
| enderw88 |
 May 1 2011, 08:05 PM May 1 2011, 08:05 PM
Post
#169
|
|
Newbie  Group: Members Posts: 35 Joined: 20-April 11 From: Tucson, AZ Member No.: 12,960 Region Association: Southwest Region |
Out of curiosity, shouldn't this be a "Yeti" build since it is white?
(IMG:http://www.914world.com/bbs2/uploads_offsite/www.scaryforkids.com-12960-1304301940.1.jpg) |
| Mike Bellis |
 May 1 2011, 08:12 PM May 1 2011, 08:12 PM
Post
#170
|
|
Resident Electrician      Group: Members Posts: 8,346 Joined: 22-June 09 From: Midlothian TX Member No.: 10,496 Region Association: None 

|
Out of curiosity, shouldn't this be a "Yeti" build since it is white? (IMG:http://www.914world.com/bbs2/uploads_offsite/www.scaryforkids.com-12960-1304301940.1.jpg) Maybe? (IMG:style_emoticons/default/idea.gif) But The car was named some 3 owners ago. Steve Malmz rescued it from a yard and some how it was nicknamed Sasquach. I went through all his old posts on this and the club site. The car was referred to as Sasquach and 914 Wide Body. |
| Mike Bellis |
 May 6 2011, 06:27 PM May 6 2011, 06:27 PM
Post
#171
|
|
Resident Electrician      Group: Members Posts: 8,346 Joined: 22-June 09 From: Midlothian TX Member No.: 10,496 Region Association: None 

|
Got some more parts in today. My Setrab Cooler showed up. It's a littly dirty but it don't leak and it will clean up. I also got a great deal on an NOS Mocal thermostat. All these are -12 AN. I guess I willl go with SS Braided lines. This Setrab is huge! 25"x18". almost as big as my radiator 31"x19". I was goint to go smaller but my V8 with this radiator was steady around 165 degrees. This Rotary runs hotter than a V8 so the big rad and cooler should help to keep temps well within normal ranges...
Radiator... 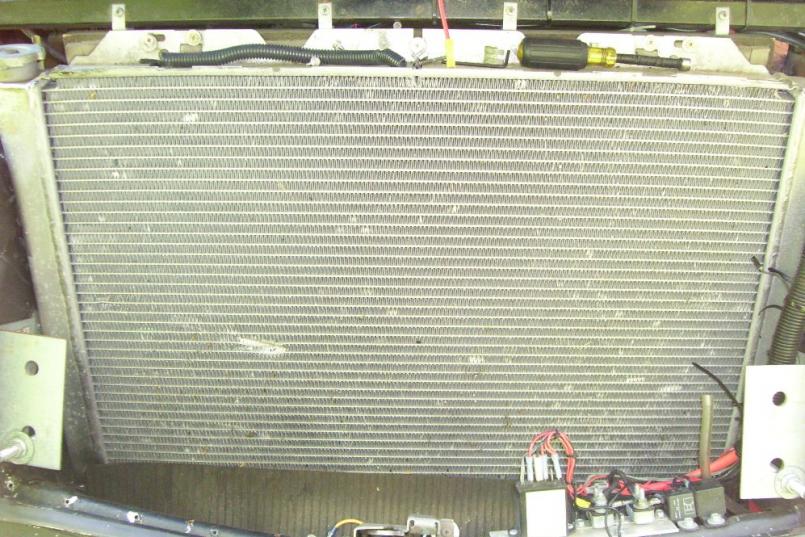 Oil Cooler... 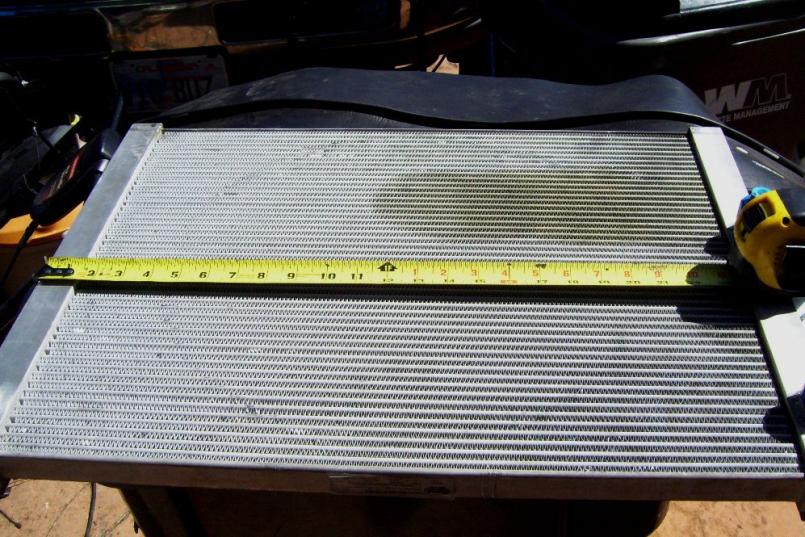 |
| Mike Bellis |
 May 6 2011, 06:32 PM May 6 2011, 06:32 PM
Post
#172
|
|
Resident Electrician      Group: Members Posts: 8,346 Joined: 22-June 09 From: Midlothian TX Member No.: 10,496 Region Association: None 

|
Here's what they looke like stacked. I need to rework the shrouding. The Cooler has a 3/8 rubber insulator between the Rad...
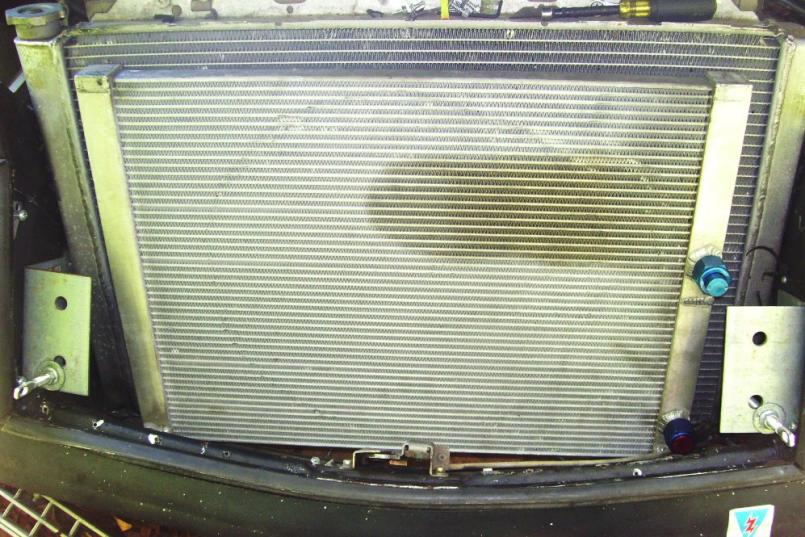 Mocal Theromstat. Has a bypass until it reaches 180 then the bypass is fully closed. It does not cut off the Cooler, only give a shorter path back to the engine until full temp is reached. As is warms up, it slowly closes off the baypass... 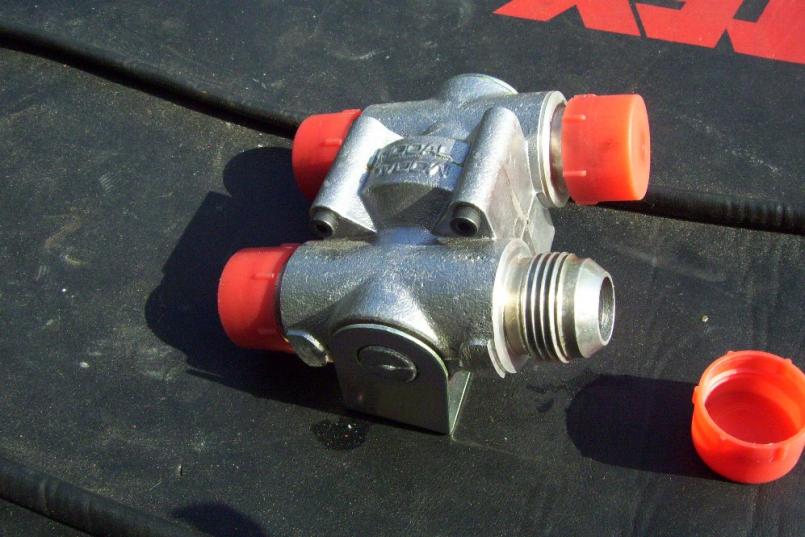 |
| Mike Bellis |
 May 6 2011, 06:40 PM May 6 2011, 06:40 PM
Post
#173
|
|
Resident Electrician      Group: Members Posts: 8,346 Joined: 22-June 09 From: Midlothian TX Member No.: 10,496 Region Association: None 

|
Now here's the F-ed up part. When I last dorve the car there was a bad rattle/bang in the front end. I jacked it up to check the ball joints but they were good. I figured I'd get back to it.
I found the source... The PPPPO used to race this car inan SCCA class. The fron end comes from a 930 Turbo. He used the 930 anti sway bar under the tank and "rigged" the mounting pivot. The rattle was the pivot ripping out of the inner fender and bouncing around. I have seen a reenforcement plate from a vendor around here. I need to track the piece down and weld it back into place. Not a difficult fix but it is a pain in the ass... 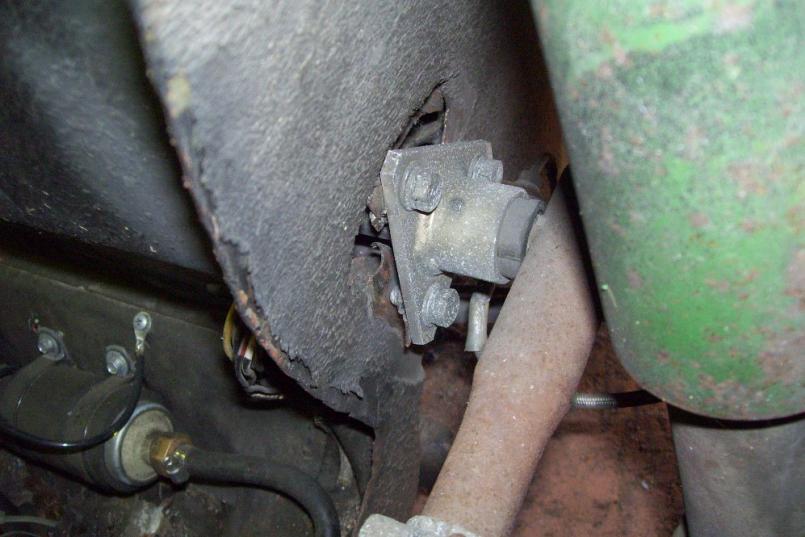 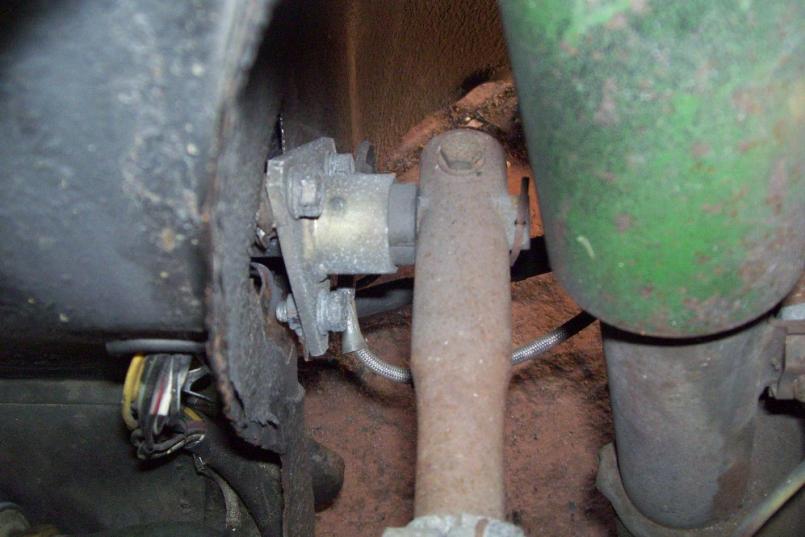 |
| Mike Bellis |
 May 6 2011, 08:14 PM May 6 2011, 08:14 PM
Post
#174
|
|
Resident Electrician      Group: Members Posts: 8,346 Joined: 22-June 09 From: Midlothian TX Member No.: 10,496 Region Association: None 

|
|
| JRust |
 May 6 2011, 09:39 PM May 6 2011, 09:39 PM
Post
#175
|
|
914 Guru      Group: Members Posts: 6,310 Joined: 10-January 03 From: Corvallis Oregon Member No.: 129 Region Association: Pacific Northwest 
|
Looking great Mike. I can't wait to go for a ride in that sucker (IMG:style_emoticons/default/biggrin.gif)
|
| Eric_Shea |
 May 7 2011, 06:50 AM May 7 2011, 06:50 AM
Post
#176
|
|
PMB Performance                Group: Admin Posts: 19,289 Joined: 3-September 03 From: Salt Lake City, UT Member No.: 1,110 Region Association: Rocky Mountains  |
Not a 930 bar...
Look for the mounting plates from Engman Parts. (IMG:style_emoticons/default/sad.gif) |
| Mike Bellis |
 May 7 2011, 08:51 PM May 7 2011, 08:51 PM
Post
#177
|
|
Resident Electrician      Group: Members Posts: 8,346 Joined: 22-June 09 From: Midlothian TX Member No.: 10,496 Region Association: None 

|
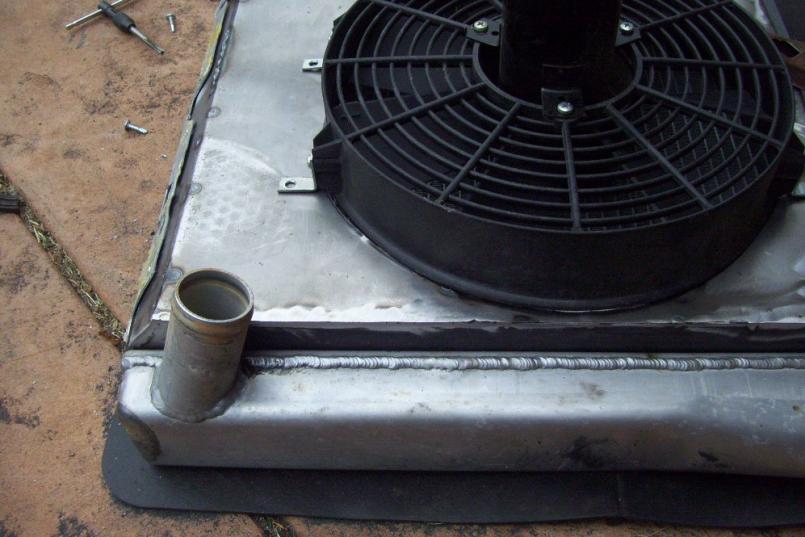
If anyone has looked at my radiator you would have noticed the PO made a wooden shroud for the dual fans. It was time to tackle this project. In order to fit my large oil cooler and close the hood, I needed to lower and lay the Rad back a little. the wooden shroud was elevating the Rad a little. Additionally the PO used spray foam to seal the bottom of the Radiator to the trunk. I started with some metal work in the trunk. The front area was hammered flat. The PO curled it up and filled the gap with foam. That lowered the system a little but the shroud was hanging it up still. I welded up a 1/8" steel frame and clad it with 20ga sheet. The bottom was set up with a 45 angle. This will be flat on the trunk bottom when installed. It should put the Radiator right where I need it. I was almost finished when my welder gun broke. The switch in the handle wont work. Now I need to find a new one since it does not look rebuildable.
Here is the cool wooden shroud... (IMG:style_emoticons/default/barf.gif) 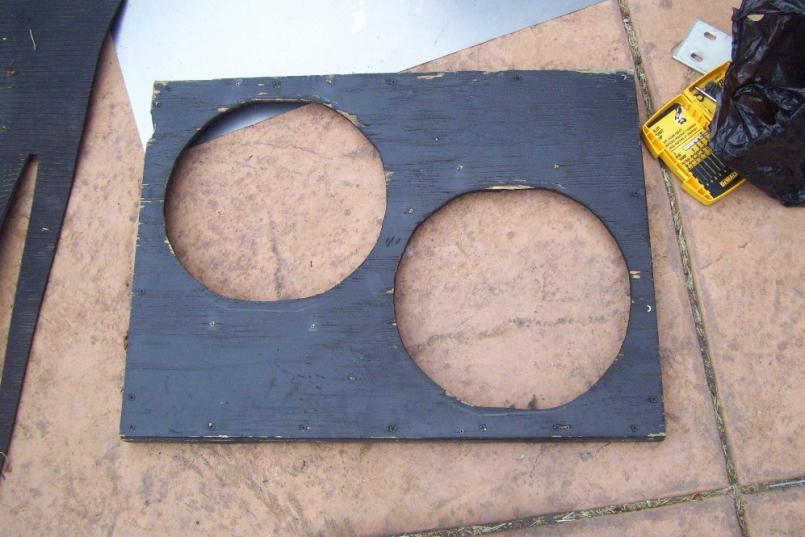 Here is my new steel shroud... (IMG:style_emoticons/default/smash.gif) (IMG:style_emoticons/default/aktion035.gif) 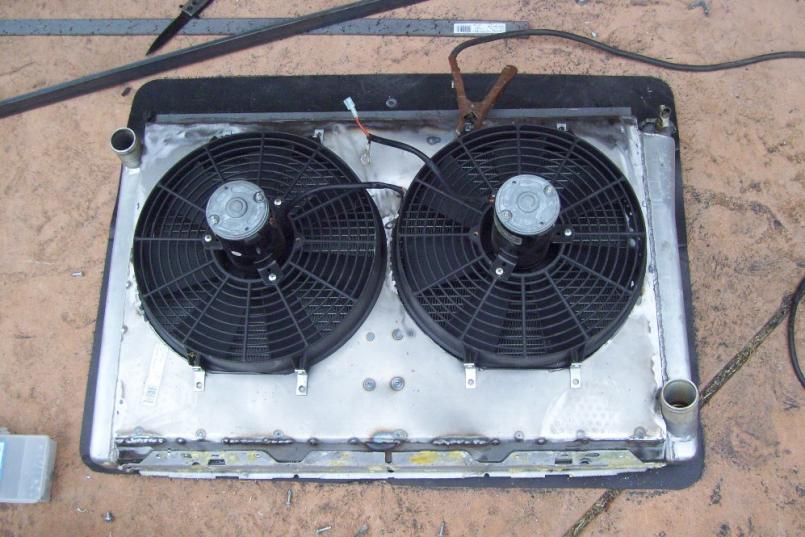 |
| Mike Bellis |
 May 7 2011, 08:53 PM May 7 2011, 08:53 PM
Post
#178
|
|
Resident Electrician      Group: Members Posts: 8,346 Joined: 22-June 09 From: Midlothian TX Member No.: 10,496 Region Association: None 

|
|
| Andyrew |
 May 8 2011, 08:12 AM May 8 2011, 08:12 AM
Post
#179
|
|
Spooling.... Please wait           Group: Members Posts: 13,377 Joined: 20-January 03 From: Riverbank, Ca Member No.: 172 Region Association: Northern California 
|
Great stuff! Sucks about the sway bar... Should be a relatively easy fix, just time consuming...
|
| Krank |
 May 12 2011, 10:43 PM May 12 2011, 10:43 PM
Post
#180
|
|
Member   Group: Members Posts: 140 Joined: 11-October 09 From: Winnipeg, MB Member No.: 10,922 Region Association: Canada |
Although the 4" exhaust looks kewl and will sound deep, you may run into an issue with engine temp unless the turbo you are using provides lots of back pressure. This is a problem with the newer diesel pick up guys, they go to 5" on their daily drivers and find that the engine actually runs on the cold side unless they are constantly draggin' around a 13,000 lb trailer. I'm not sure about the effect on this gas engine but a simple restrictor inside the pipe should fix any issues if it is a problem. Does anyone have any cfm numbers on this engine? |
  |
20 User(s) are reading this topic (20 Guests and 0 Anonymous Users)
0 Members:

|
Lo-Fi Version | Time is now: 25th November 2024 - 11:32 PM |
Invision Power Board
v9.1.4 © 2024 IPS, Inc.


