|
|

|
Porsche, and the Porsche crest are registered trademarks of Dr. Ing. h.c. F. Porsche AG.
This site is not affiliated with Porsche in any way. Its only purpose is to provide an online forum for car enthusiasts. All other trademarks are property of their respective owners. |
|
|
  |
| Mike Bellis |
 Jun 26 2011, 06:49 PM Jun 26 2011, 06:49 PM
Post
#221
|
|
Resident Electrician      Group: Members Posts: 8,346 Joined: 22-June 09 From: Midlothian TX Member No.: 10,496 Region Association: None 

|
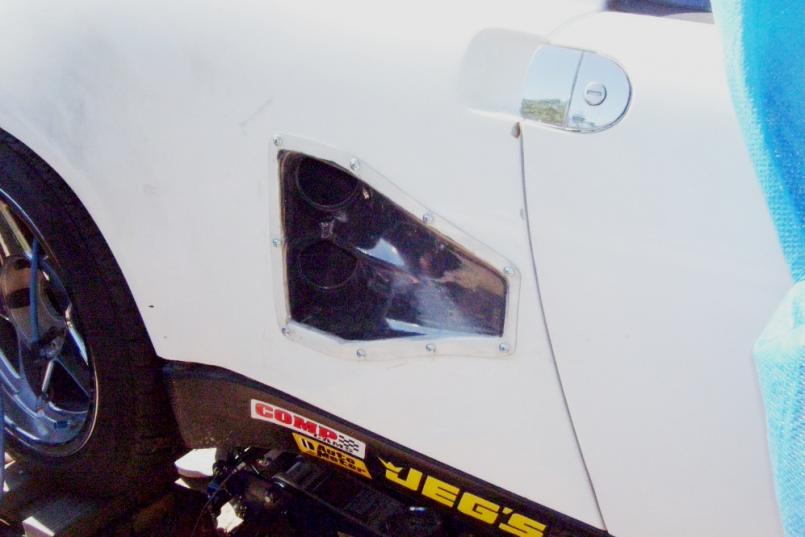
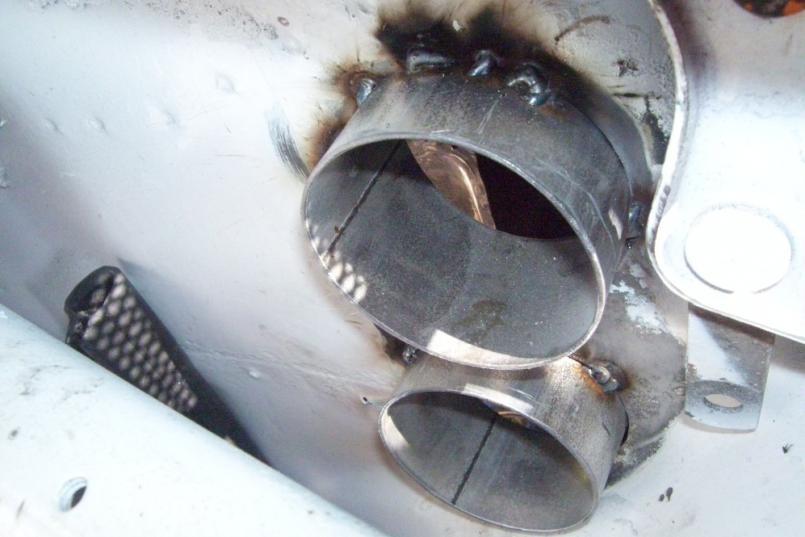
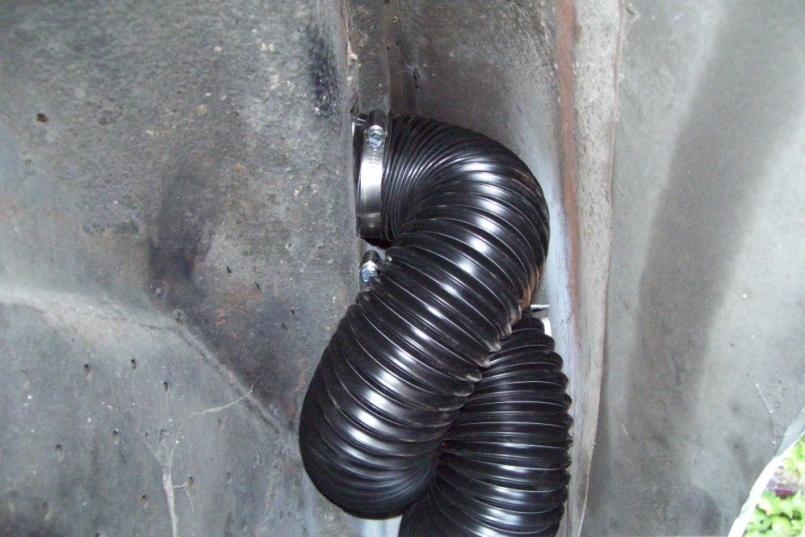
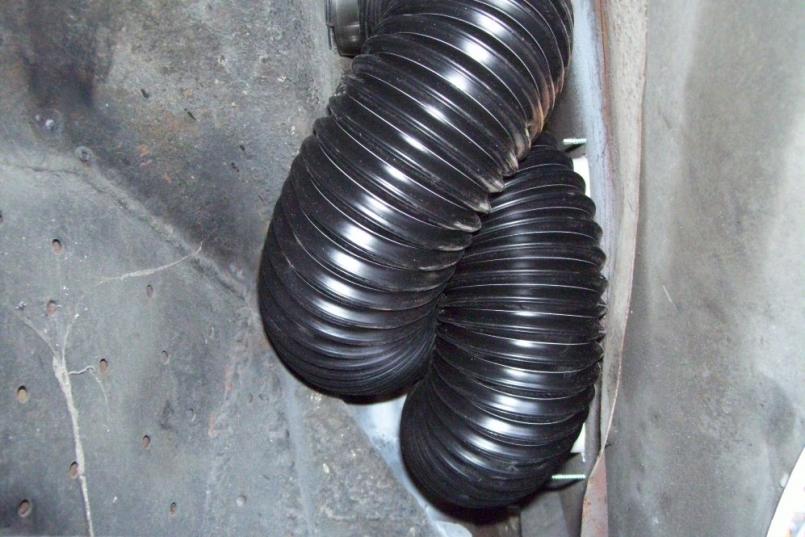
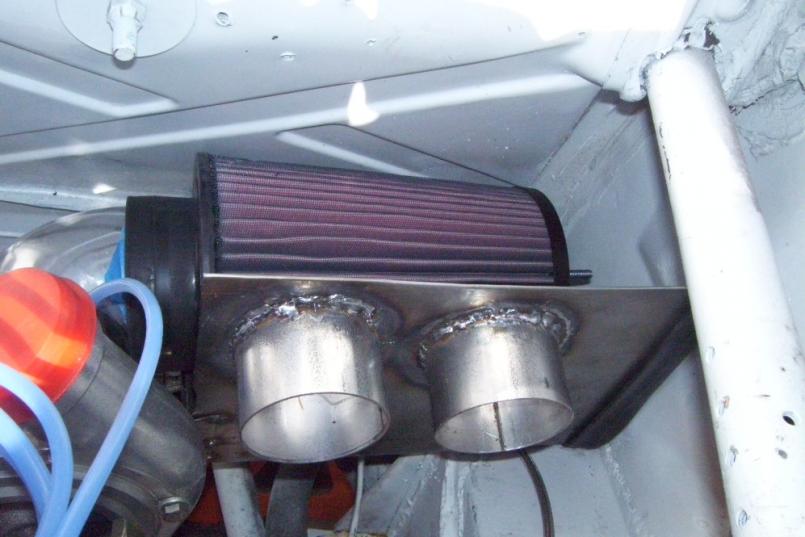
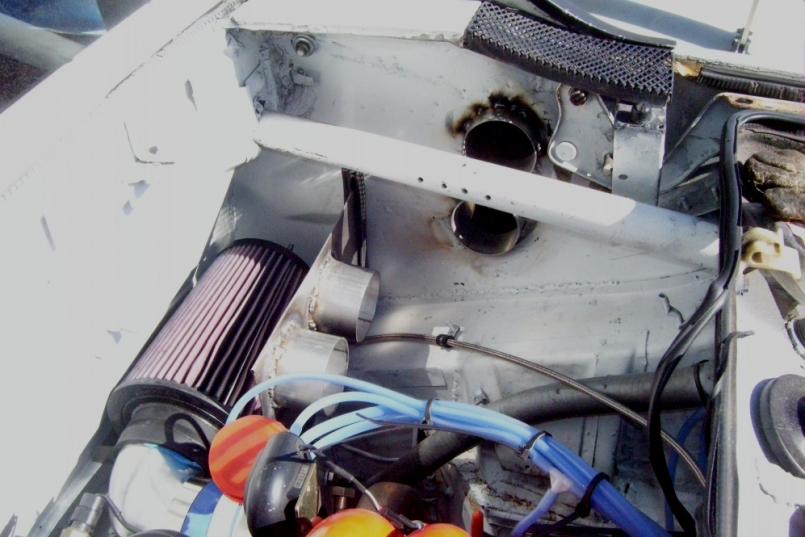
Today I worked on the cold air intake. I used another NACA duct (can't have just one). I built a steel box, hemmed the edges and fitted a gasket where it touches the body. I need to fab the top still to enclose the air filter. I used 3" tubing welded to both the box and the side firewall. I will connect the tubes to the NACA duct with brake cooling hose. I built this old school since I don't have a metal brake. Blood sweat and tears... And a BFH! Hand hammered all of it and used some 1x4's and clamps to make a getto brake.
  |
| Mike Bellis |
 Jun 26 2011, 06:51 PM Jun 26 2011, 06:51 PM
Post
#222
|
|
Resident Electrician      Group: Members Posts: 8,346 Joined: 22-June 09 From: Midlothian TX Member No.: 10,496 Region Association: None 

|
|
| Mike Bellis |
 Jun 28 2011, 07:38 PM Jun 28 2011, 07:38 PM
Post
#223
|
|
Resident Electrician      Group: Members Posts: 8,346 Joined: 22-June 09 From: Midlothian TX Member No.: 10,496 Region Association: None 

|
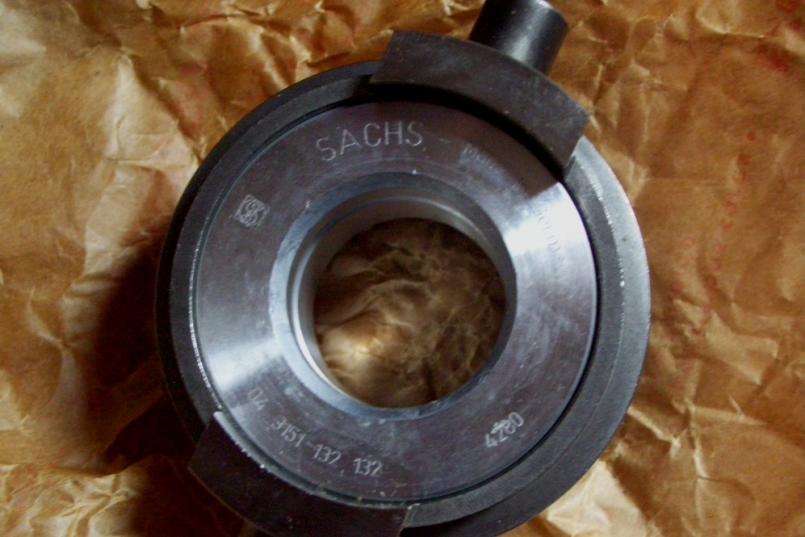
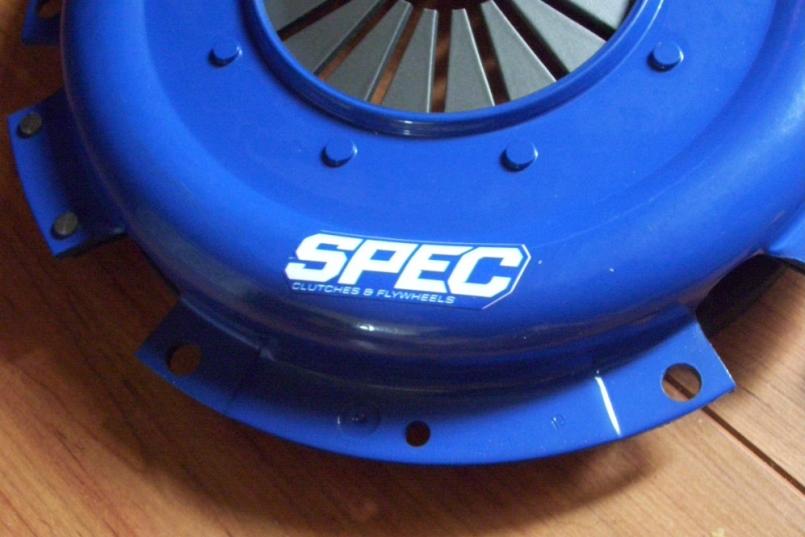
My clutch showed up today. Too bad it's raining in California toaday. It's a SPEC Stage III+ unit. Came with new Sachs TOB and tool. The disc looks like a copper composit. It even came with stickers to make my car faster! The instruction say I have to drive for 500 miles in stop an go traffic to break in the clutch. I'm worried I won't be able to find any traffic in California (IMG:style_emoticons/default/biggrin.gif)
Looks like great quality stuff. I can almost make my car go (IMG:style_emoticons/default/piratenanner.gif) 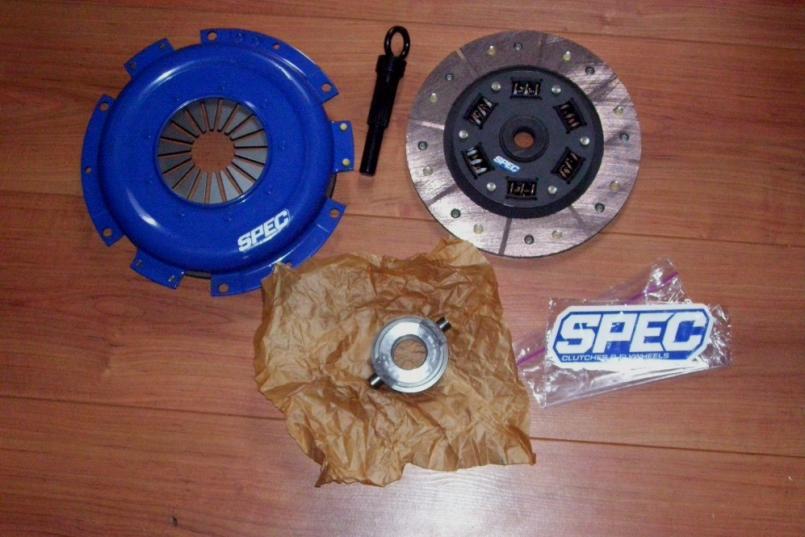 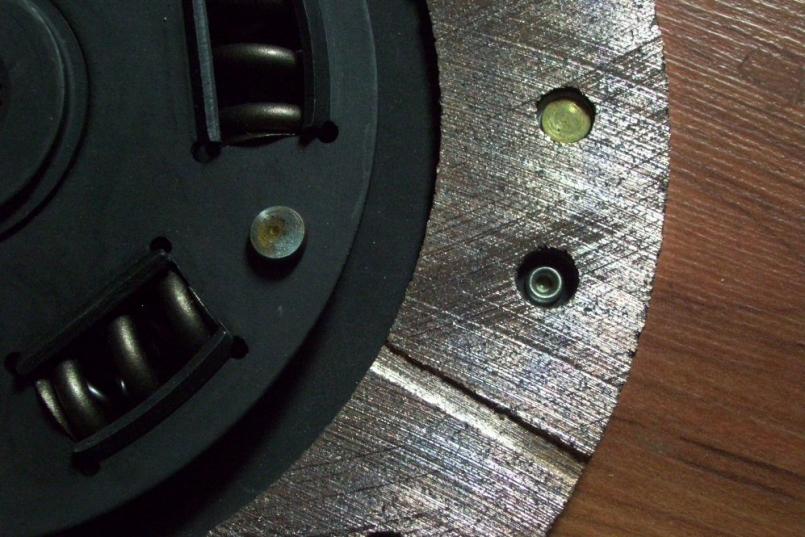 |
| Mike Bellis |
 Jun 28 2011, 07:39 PM Jun 28 2011, 07:39 PM
Post
#224
|
|
Resident Electrician      Group: Members Posts: 8,346 Joined: 22-June 09 From: Midlothian TX Member No.: 10,496 Region Association: None 

|
|
| Mike Bellis |
 Jul 2 2011, 10:16 PM Jul 2 2011, 10:16 PM
Post
#225
|
|
Resident Electrician      Group: Members Posts: 8,346 Joined: 22-June 09 From: Midlothian TX Member No.: 10,496 Region Association: None 

|
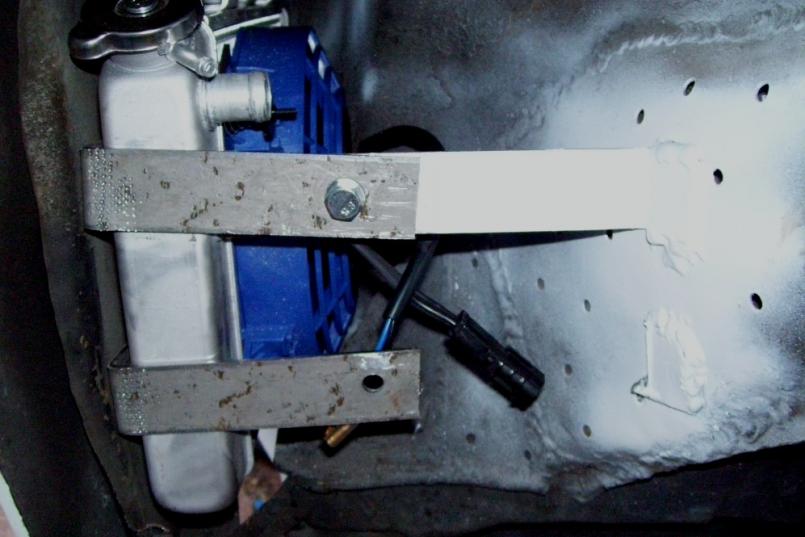
Big push on the car this weekend. About 11 hours today. I had to go backwards a little. I realized my turbo flange gasket was missing. I had to unbolt a ton of stuff to get the turbo off. Then I realized the mounting bolts were to short. Along with everything else I was doing I made 3 trips to the auto parts store, 2 trips to orchard supply hardware and 2 trips to the HD. I lost my clutch mounting bolts. They are new and in a bag in a safe place somewhere in the garage. Nobody had hardened metric bolts. I had to old school it by hardening the bolts myself. Heated them until red hot and dunk in a can of old oil; repeat several times. Not sure the actual hardness but they will work for now. Clutch is in, new bushing on the fork. I finished the top to my fresh air box and got it plumbed to the outside. My radiator overflow tank is mounted. Most of the misc loose bolts are now tight. I mounted the heat exchanger fan in the rear quarter. Need to find a pump and plumb it. Tomorrow I will try to finish the cooling system by replacing the under body hoses and finish my shroud modifications. I think I can have this running by August. I pulled the motor in November. This has raken way more time and money than I originally thought.
Here's some pics... 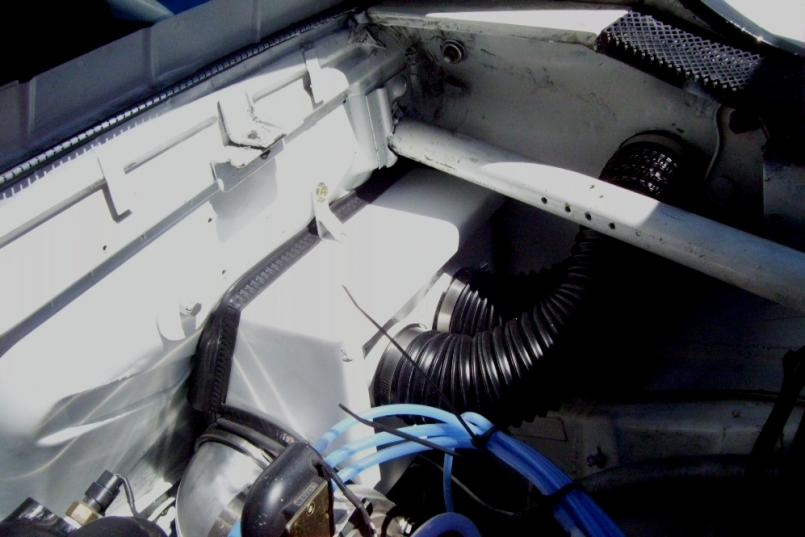 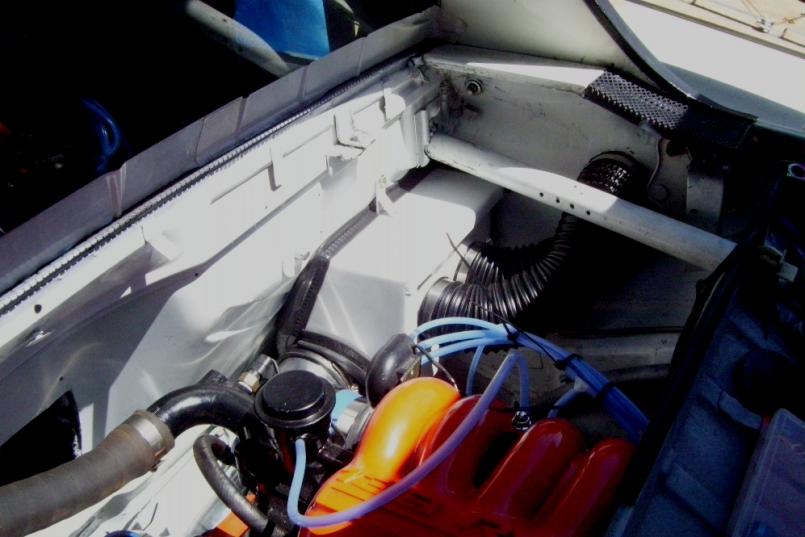 |
| Mike Bellis |
 Jul 2 2011, 10:19 PM Jul 2 2011, 10:19 PM
Post
#226
|
|
Resident Electrician      Group: Members Posts: 8,346 Joined: 22-June 09 From: Midlothian TX Member No.: 10,496 Region Association: None 

|
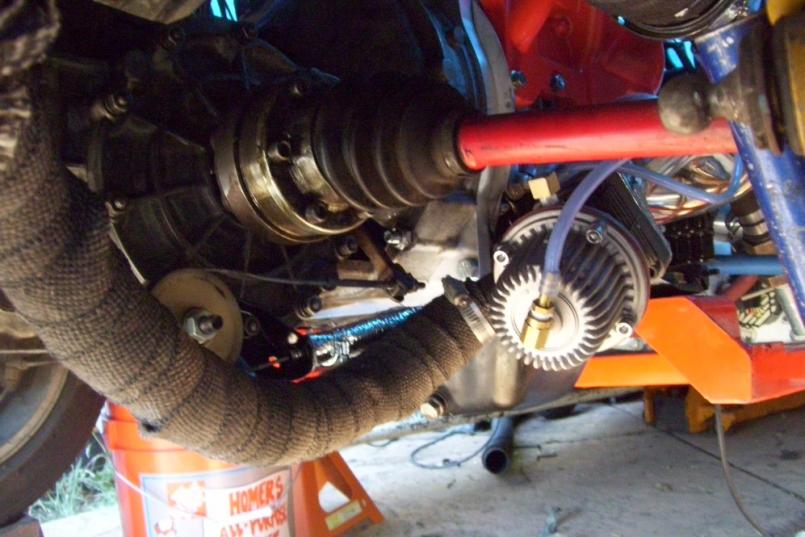
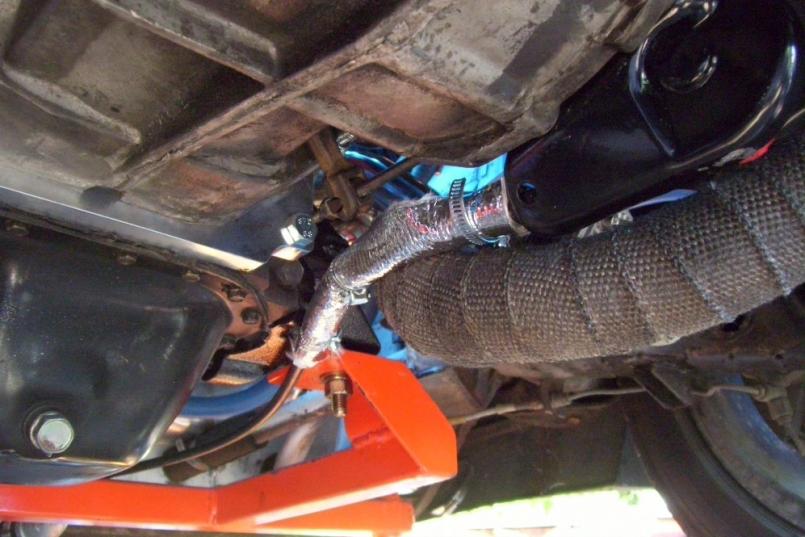
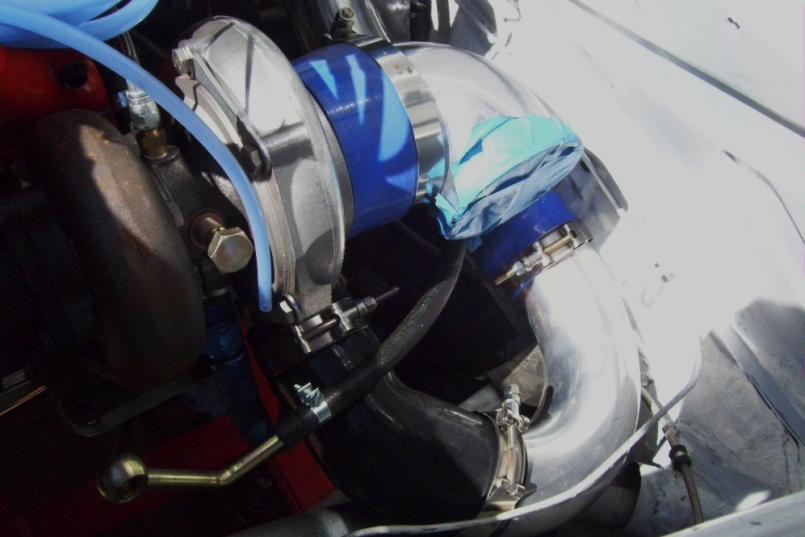
I had to clock the turbo outlet to the passenger side and use a U bend to get it in front of the motor. Two 45's later and its into the intercooler. Just need some more couplings to show up and it's done...
 Did the tranny removal the old fashion way. On my back and lifting it in/out. It was actually easier than the floor jack... 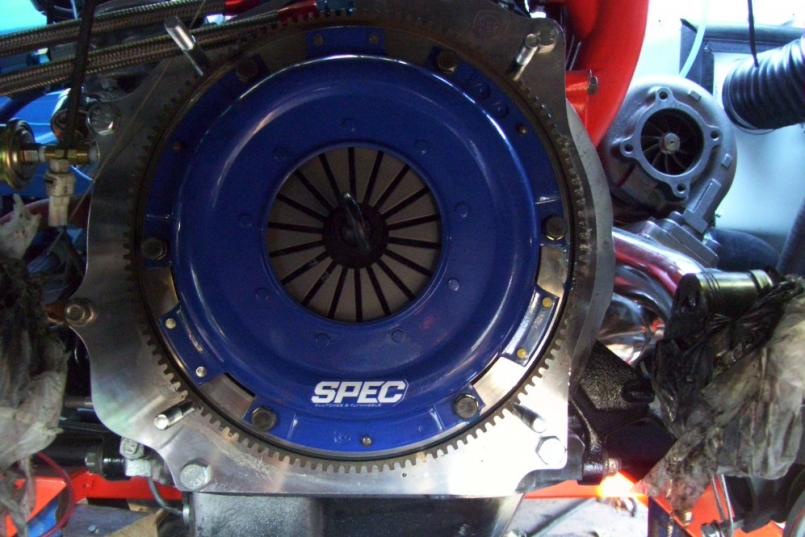 |
| Mike Bellis |
 Jul 2 2011, 10:23 PM Jul 2 2011, 10:23 PM
Post
#227
|
|
Resident Electrician      Group: Members Posts: 8,346 Joined: 22-June 09 From: Midlothian TX Member No.: 10,496 Region Association: None 

|
|
| Andyrew |
 Jul 2 2011, 10:39 PM Jul 2 2011, 10:39 PM
Post
#228
|
|
Spooling.... Please wait           Group: Members Posts: 13,377 Joined: 20-January 03 From: Riverbank, Ca Member No.: 172 Region Association: Northern California 
|
Spec makes good stuff. I have a Spec flywheel in my Audi, one of my favorite purchases.
I hate those days where everything goes wrong... Good lookin progress none the less! |
| Rand |
 Jul 2 2011, 10:52 PM Jul 2 2011, 10:52 PM
Post
#229
|
|
Cross Member      Group: Members Posts: 7,409 Joined: 8-February 05 From: OR Member No.: 3,573 Region Association: None |
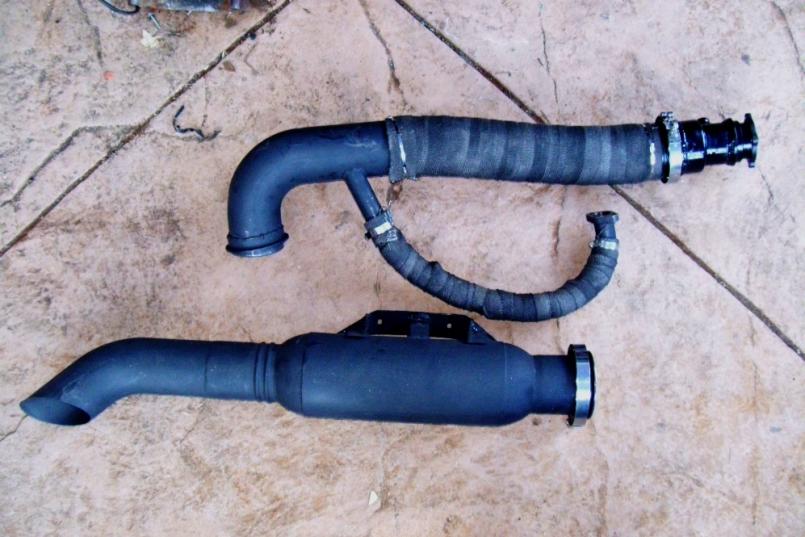
....That thing is going to sound ??? I have no idea actualy but I bet it will be impressive.... Like an alien movie soundtrack. In high def, THX and all the other acronyms. Mad frickin 10' hornets swarming. Can't wait Mike. Is it going to hunt like a banshee, or idle smooth? |
| Mike Bellis |
 Jul 2 2011, 11:05 PM Jul 2 2011, 11:05 PM
Post
#230
|
|
Resident Electrician      Group: Members Posts: 8,346 Joined: 22-June 09 From: Midlothian TX Member No.: 10,496 Region Association: None 

|
Can't wait Mike. Is it going to hunt like a banshee, or idle smooth? It's a JDM motor. I did no porting to it so it should have a good idle. When I rebuild it (enevitable) I will do a pretty serious "street port" and it will have a lopey idle. At that point I can push the boost and get around 500hp and stay reliable. I'm not sure I need more HP. FYI for those that want to know. A master rebuild gasket kit is $1300 no bearings included. they're actually fairly easy to rebuild if all the rotors and housings are good. Lucky for me, Atkins Rotary in Oregon has the gaskets I needed for the intake. Most FLAPS do not cary ANY Rotary gaskets. Not even a water pump gasket. |
| Mike Bellis |
 Jul 3 2011, 11:00 PM Jul 3 2011, 11:00 PM
Post
#231
|
|
Resident Electrician      Group: Members Posts: 8,346 Joined: 22-June 09 From: Midlothian TX Member No.: 10,496 Region Association: None 

|
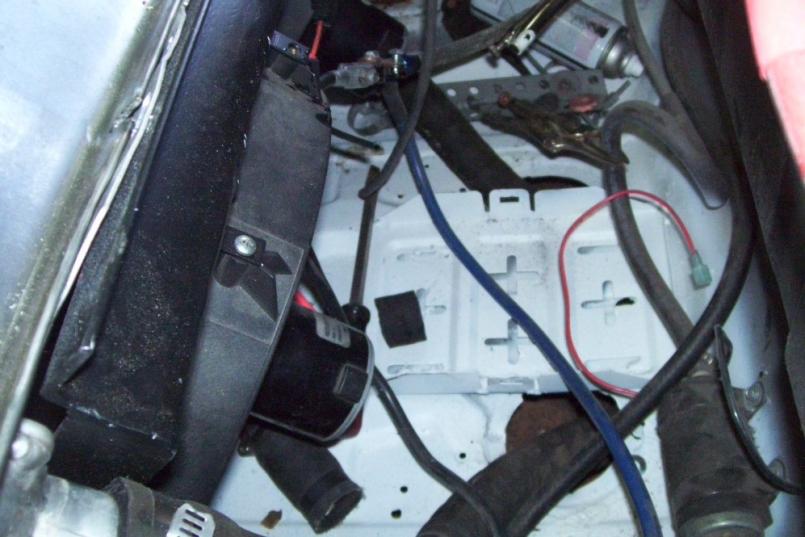
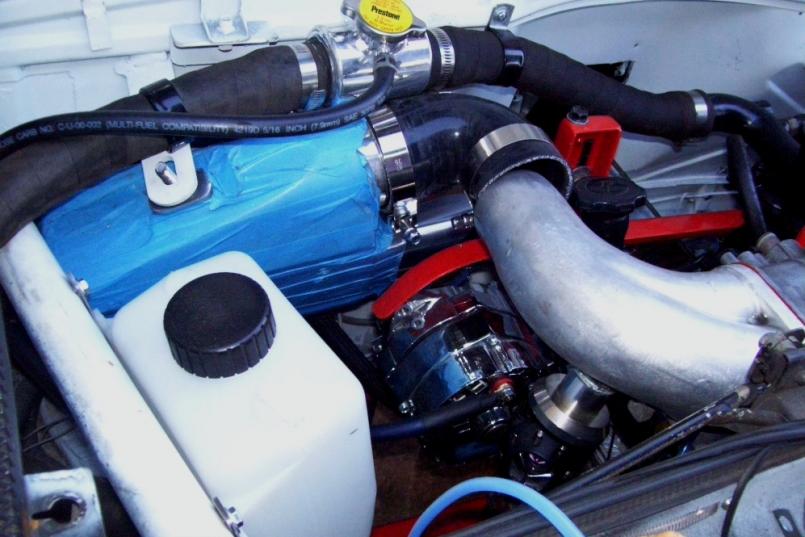
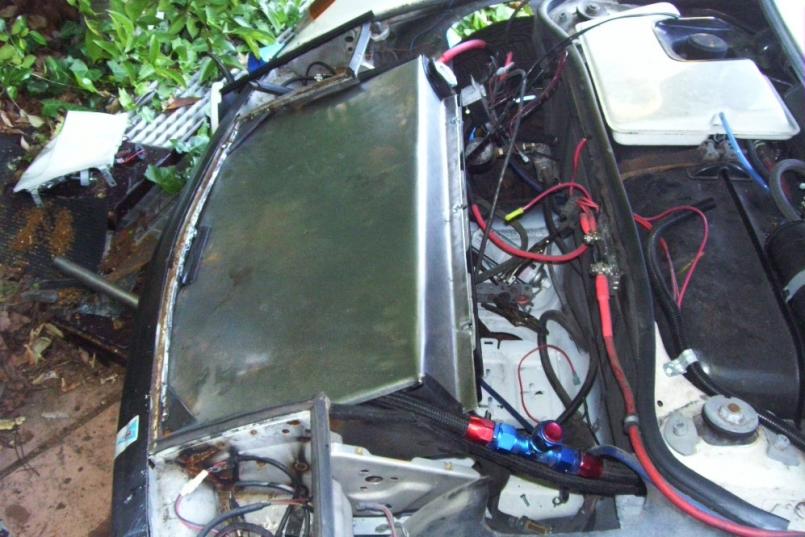
Today I tackeld the cooling system. I used some 1-1/8 ID high temp hose. I was running 1" green stripe hose. The added diameter should make a huge difference in flow even though the increase is small. when routing my hoses, I found the front trunk pan was cracked in 5 or 6 places. It was from the battery tray being bolted by the PO and then racing with it. Shitty setup. So I had to repair the pan before I could continue. I then welded the battery tray to the floor in 8 places. The floor pan has no flex anymore (IMG:style_emoticons/default/piratenanner.gif) I fabed up a new shroud to cover the added oil cooler and radiator. I'm actually getting good at bending sheet metal getto style. I need to buy a brake! HF having any sales? The radiator floats on rubber isolators. No bolts to the car. I had to make a few more trips to HD and the hardware store. I made a copper reducer from 1-1/2 to 1-1/4(they didn't have one I could buy). None of my Renegade hose adapters would work on the lower rad outlet. I also ditched the Renegade water filler tank for an inline 1-1/4 unit. The rotary engine needs 13psi caps so I got 2 new ones. The one on the radiator is a Mr. Gasket unit with built in thermometer. I removed the clamps on the fuel lines only to discover I left a fuel line loose under the intake manifold. I think I have to pull it off to get to it. Once that is done I will check all the oil lines and coolant lines. I think I can fill 'er up with liquid. This is the start of my 9th month of this engine conversion. I'm ready to enjoy driving it for a while...
  |
| Mike Bellis |
 Jul 3 2011, 11:03 PM Jul 3 2011, 11:03 PM
Post
#232
|
|
Resident Electrician      Group: Members Posts: 8,346 Joined: 22-June 09 From: Midlothian TX Member No.: 10,496 Region Association: None 

|
|
| Mike Bellis |
 Jul 4 2011, 02:56 PM Jul 4 2011, 02:56 PM
Post
#233
|
|
Resident Electrician      Group: Members Posts: 8,346 Joined: 22-June 09 From: Midlothian TX Member No.: 10,496 Region Association: None 

|
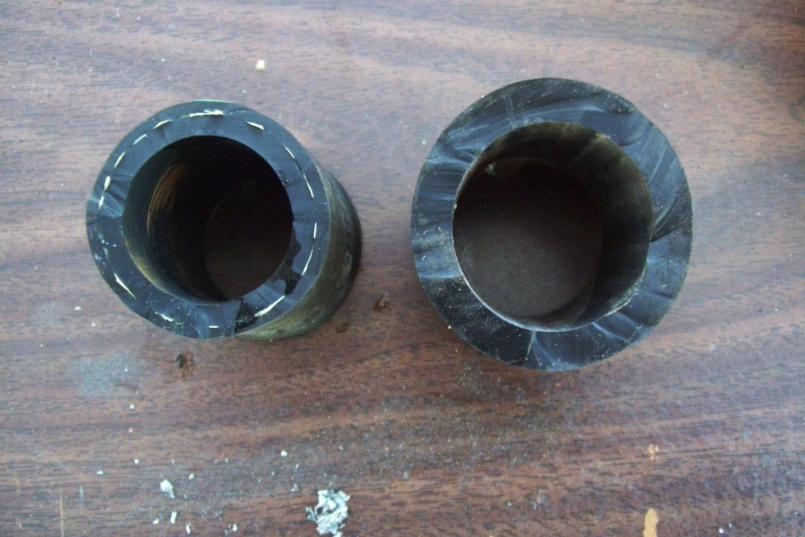
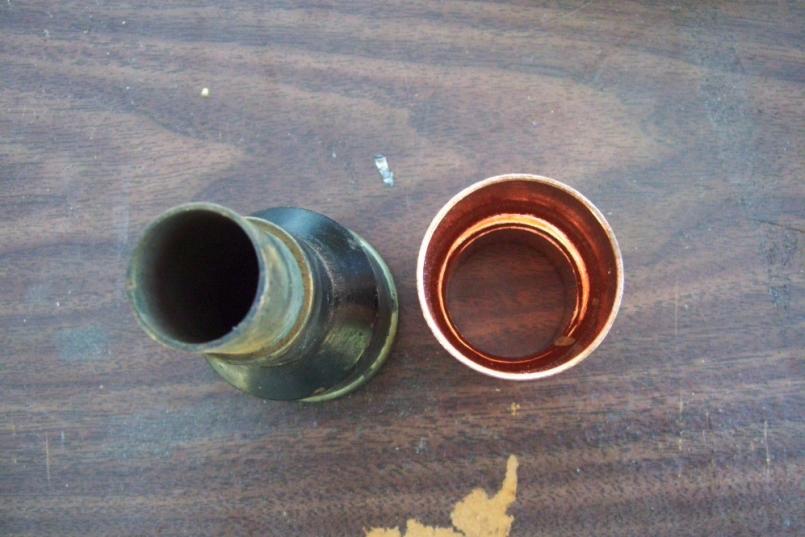
Here's a comparison of the Gates green stripe hose (Left) to the new 1-1/8" hose I'm running (right). Also pictured are the Renegade reducer fitting(left). Notice the reducer is 1-1/4" to 7/8"-3/4". The fitting on the right shows the smallest size I'm using 1-1/4" but I'm stepping up to 1-1/4" entering all devices. The 1-1/8" hose can strech over the 1-1/4" fitting. Clearly the Renegade reducer flows less than my new system. I had atleast 3 of these reducers on my V8 system. These larger reducers should help the stock RX7 water pump move liquid.
  |
| Mike Bellis |
 Jul 4 2011, 08:19 PM Jul 4 2011, 08:19 PM
Post
#234
|
|
Resident Electrician      Group: Members Posts: 8,346 Joined: 22-June 09 From: Midlothian TX Member No.: 10,496 Region Association: None 

|
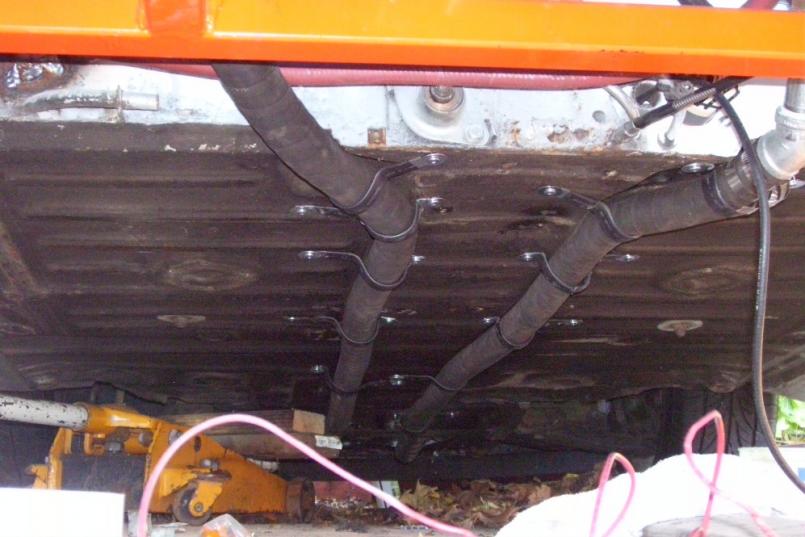
Here's a shot of the under car water lines. They run in the factory indentations and hang down about 1.5" below the car. I have hit speed bumps with my old lines with no adverse effects. There was no damage to the old lines. I just wanted to install new larger lines. Some people like copper but I would have ripped the copper apart many times over. I used insulated Adel clamps with an added layer of shrink tubing.
 |
| Mike Bellis |
 Jul 4 2011, 08:23 PM Jul 4 2011, 08:23 PM
Post
#235
|
|
Resident Electrician      Group: Members Posts: 8,346 Joined: 22-June 09 From: Midlothian TX Member No.: 10,496 Region Association: None 

|
|
| Cairo94507 |
 Jul 5 2011, 07:06 AM Jul 5 2011, 07:06 AM
Post
#236
|
|
Michael           Group: Members Posts: 10,095 Joined: 1-November 08 From: Auburn, CA Member No.: 9,712 Region Association: Northern California 
|
Wow. You have done some serious work. I look forward to seeing that car running around town and hearing it.
|
| Mike Bellis |
 Jul 5 2011, 09:02 PM Jul 5 2011, 09:02 PM
Post
#237
|
|
Resident Electrician      Group: Members Posts: 8,346 Joined: 22-June 09 From: Midlothian TX Member No.: 10,496 Region Association: None 

|
|
| Mike Bellis |
 Jul 5 2011, 09:05 PM Jul 5 2011, 09:05 PM
Post
#238
|
|
Resident Electrician      Group: Members Posts: 8,346 Joined: 22-June 09 From: Midlothian TX Member No.: 10,496 Region Association: None 

|
I realize I need practice welding upsidedown... I welded up this exhaust hanger to help support the front half of the exhaust.
Goober welds! (IMG:style_emoticons/default/piratenanner.gif) 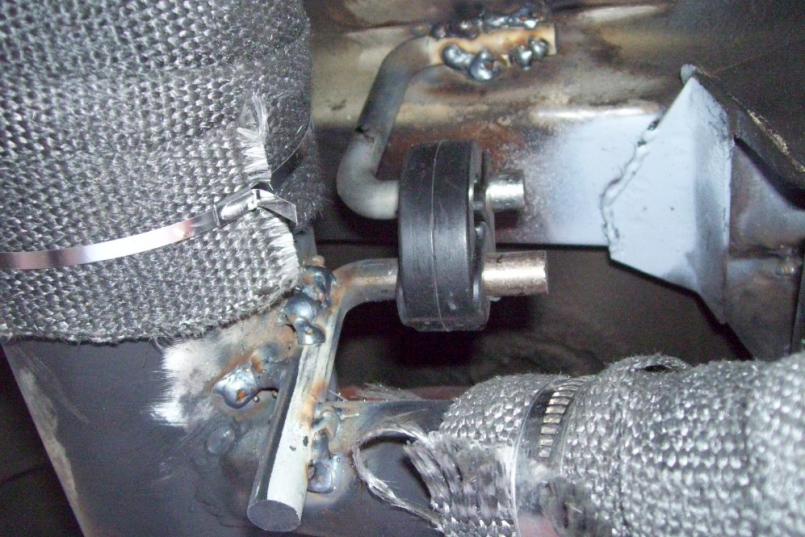 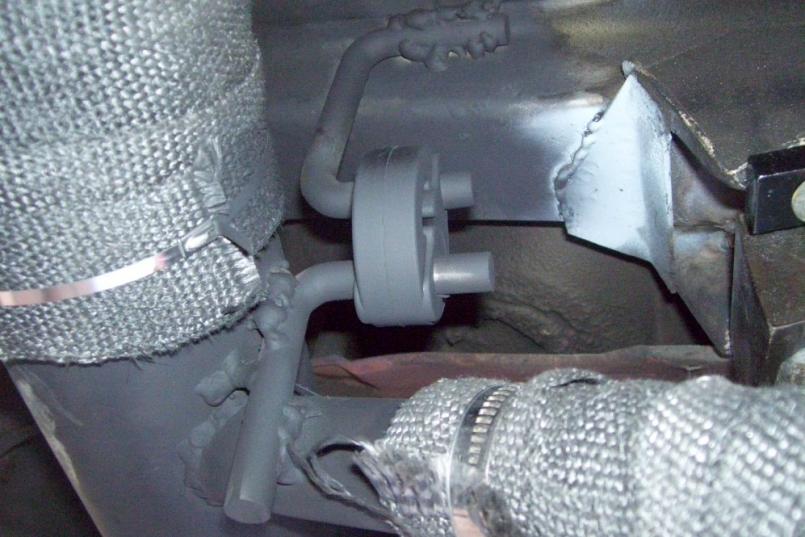 |
| Andyrew |
 Jul 5 2011, 09:29 PM Jul 5 2011, 09:29 PM
Post
#239
|
|
Spooling.... Please wait           Group: Members Posts: 13,377 Joined: 20-January 03 From: Riverbank, Ca Member No.: 172 Region Association: Northern California 
|
I always turn up my heat setting or turn down my welding speed when welding upside down. However it looks like itll hold!
|
| diabolical1 |
 Jul 8 2011, 06:59 PM Jul 8 2011, 06:59 PM
Post
#240
|
|
Newbie  Group: Members Posts: 1 Joined: 15-June 11 From: Florida Member No.: 13,196 Region Association: South East States |
very impressive work thus far. i'm curious to hear how it sounds when you get to fire it up.
|
  |
4 User(s) are reading this topic (4 Guests and 0 Anonymous Users)
0 Members:

|
Lo-Fi Version | Time is now: 26th November 2024 - 02:26 AM |
Invision Power Board
v9.1.4 © 2024 IPS, Inc.


