|
|

|
Porsche, and the Porsche crest are registered trademarks of Dr. Ing. h.c. F. Porsche AG.
This site is not affiliated with Porsche in any way. Its only purpose is to provide an online forum for car enthusiasts. All other trademarks are property of their respective owners. |
|
|
  |
| sean_v8_914 |
 Jan 26 2011, 01:35 AM Jan 26 2011, 01:35 AM
Post
#41
|
|
Chingon 601     Group: Members Posts: 4,011 Joined: 1-February 05 From: San Diego Member No.: 3,541 |
no, actually I was a nurse in the coast guard
|
| sean_v8_914 |
 Jan 26 2011, 01:51 AM Jan 26 2011, 01:51 AM
Post
#42
|
|
Chingon 601     Group: Members Posts: 4,011 Joined: 1-February 05 From: San Diego Member No.: 3,541 |
for some odd reason the chassis rail from teh rt shock tower to the trans mound was hammered inward hard. it was flattened out very deep. WTF? tire clearance? ...but only on one side and it looks like it was hammered in
Attached thumbnail(s) 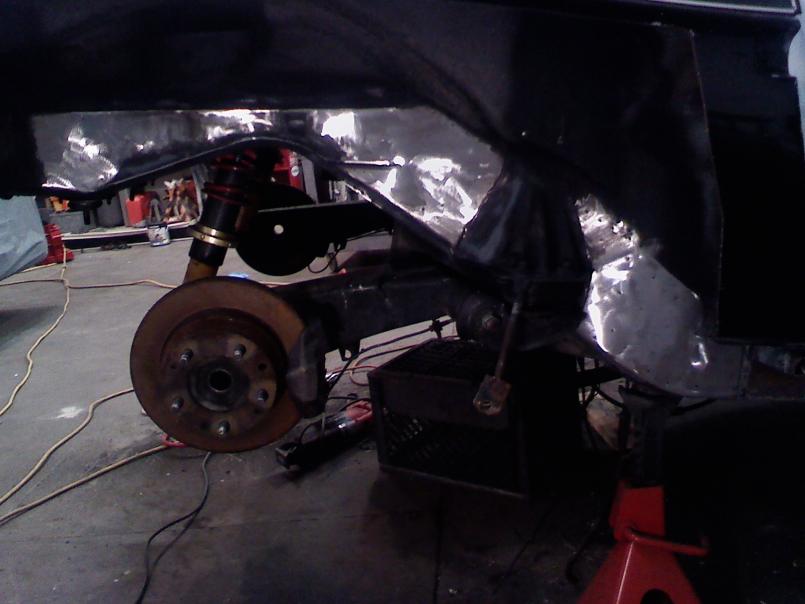
|
| sean_v8_914 |
 Jan 26 2011, 01:54 AM Jan 26 2011, 01:54 AM
Post
#43
|
|
Chingon 601     Group: Members Posts: 4,011 Joined: 1-February 05 From: San Diego Member No.: 3,541 |
my harbour freight stud welder died so I welded on some franken-bolts to pull it out prior to adding th GT stiffeners. this is after seam welding. I better re-measure this after all the beating, pulling and welding
Attached thumbnail(s) 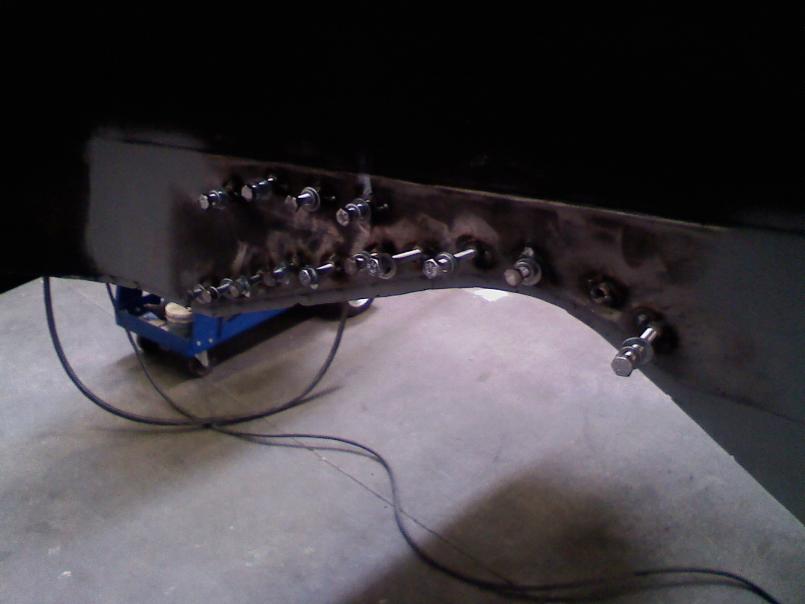
|
| 76-914 |
 Jan 26 2011, 09:03 AM Jan 26 2011, 09:03 AM
Post
#44
|
|
Repeat Offender & Resident Subaru Antagonist           Group: Members Posts: 13,647 Joined: 23-January 09 From: Temecula, CA Member No.: 9,964 Region Association: Southern California 
|
The Navy was created so Marines would have someone to dance with. (IMG:style_emoticons/default/lol-2.gif) (IMG:style_emoticons/default/av-943.gif)
|
| sean_v8_914 |
 Jan 26 2011, 11:25 AM Jan 26 2011, 11:25 AM
Post
#45
|
|
Chingon 601     Group: Members Posts: 4,011 Joined: 1-February 05 From: San Diego Member No.: 3,541 |
Marines were the onboard security force of the Navy. They were the guys swingin over teh gunnals onto the enemy ships thru cannon foddar
|
| 914.SBC |
 Jan 26 2011, 03:34 PM Jan 26 2011, 03:34 PM
Post
#46
|
|
Member   Group: Members Posts: 248 Joined: 12-December 10 From: CORONA, CA Member No.: 12,479 Region Association: None |
Marines were the onboard security force of the Navy. They were the guys swingin over teh gunnals onto the enemy ships thru cannon foddar Hey Sean, Looks like you are getting there. The two things I hate most...rust and tranny problems. Hey I would love to see pics of engine and cooling system set up. |
| sean_v8_914 |
 Jan 26 2011, 05:13 PM Jan 26 2011, 05:13 PM
Post
#47
|
|
Chingon 601     Group: Members Posts: 4,011 Joined: 1-February 05 From: San Diego Member No.: 3,541 |
the coolign system is early Renegade fro when they were in Redlands. Ill snap some photos in a day or two. engien is ZZ3 factory AL heads but someone put a carb on it, yuck. stock it was 348hp I think. Karlo will chime in if Im wrong.
|
| karlo |
 Jan 26 2011, 11:08 PM Jan 26 2011, 11:08 PM
Post
#48
|
|
Karl Anders Øygard   Group: Members Posts: 56 Joined: 2-November 09 From: San Diego, CA Member No.: 10,999 Region Association: Southern California |
345 hp @ 5200, 387 lb-ft @ 3250. The carb setup really is a POS. I want to go to an LS engine (for the lower weight) some time in the future, so I'm not sure if it's worth spending much time optimising the existing engine setup.
|
| sean_v8_914 |
 Jan 26 2011, 11:24 PM Jan 26 2011, 11:24 PM
Post
#49
|
|
Chingon 601     Group: Members Posts: 4,011 Joined: 1-February 05 From: San Diego Member No.: 3,541 |
those Edlebrock carbs are about $250 new and work well staight out of the box
|
| karlo |
 Jan 27 2011, 02:39 AM Jan 27 2011, 02:39 AM
Post
#50
|
|
Karl Anders Øygard   Group: Members Posts: 56 Joined: 2-November 09 From: San Diego, CA Member No.: 10,999 Region Association: Southern California |
Good tip. I'd have to learn something about carbs, though, something I have been pretty determined never to do. (IMG:style_emoticons/default/smile.gif)
Gear stack going back in the transmission: 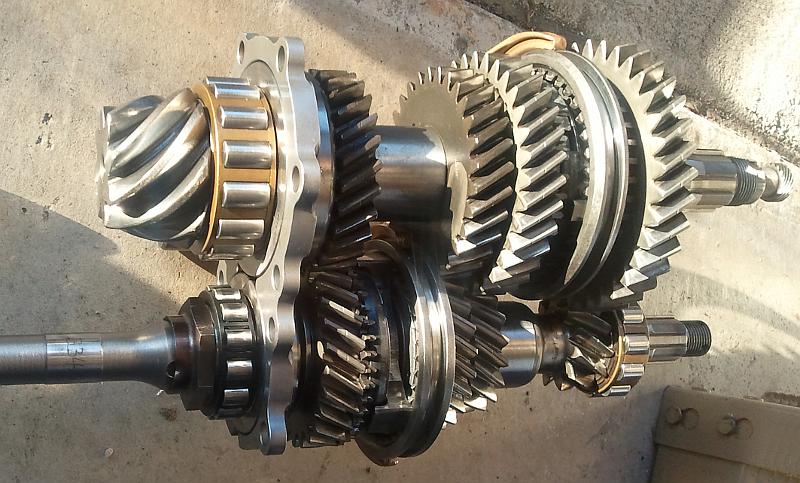 I opted to ditch the main shaft/1st gear I had and get a newer one which wasn't worn. As a bonus, it's the later stronger shaft (old was weaker revision 1), like brilliantrot pointed out earlier. Replaced the fourth gear as well, since the one I had was worn through the hardening. New thrust bearings, etc., and got the CMS one piece bearing retainer. Not many original parts left in the trans now. It should all make it better and stronger, though. |
| karlo |
 Feb 5 2011, 09:59 PM Feb 5 2011, 09:59 PM
Post
#51
|
|
Karl Anders Øygard   Group: Members Posts: 56 Joined: 2-November 09 From: San Diego, CA Member No.: 10,999 Region Association: Southern California |
Some updates I got from Sean:
The usual crack in the long, crack travels 4-5 inches further underneath. 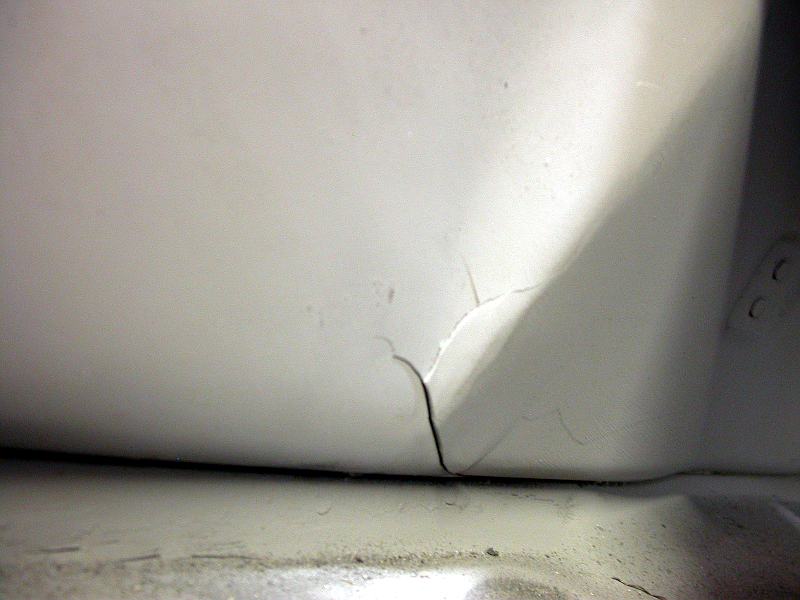 All welded up, engman kit installed. 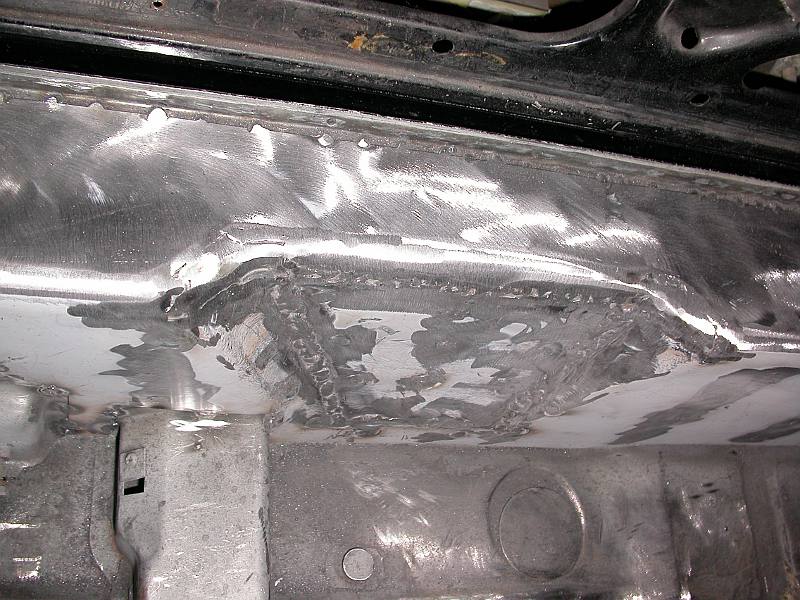 Substantially reinforced RHS suspension ears. 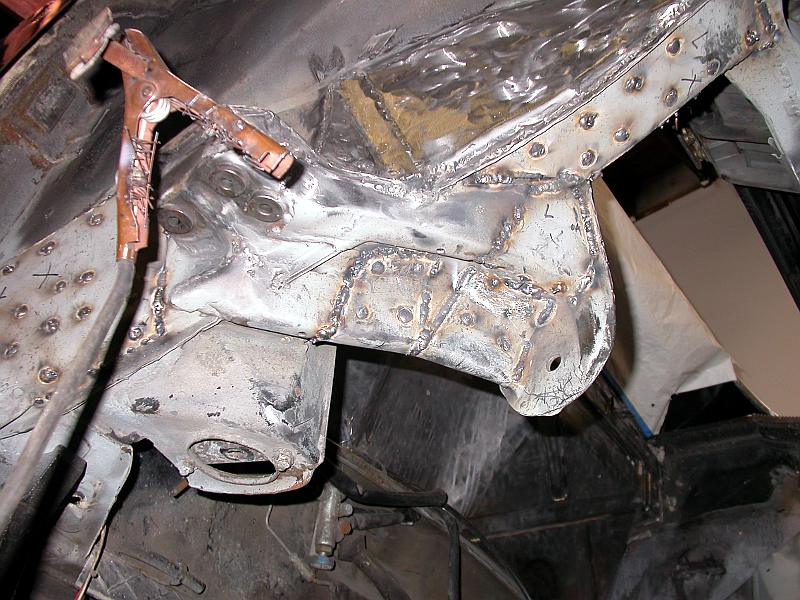 Likewise for the LHS. 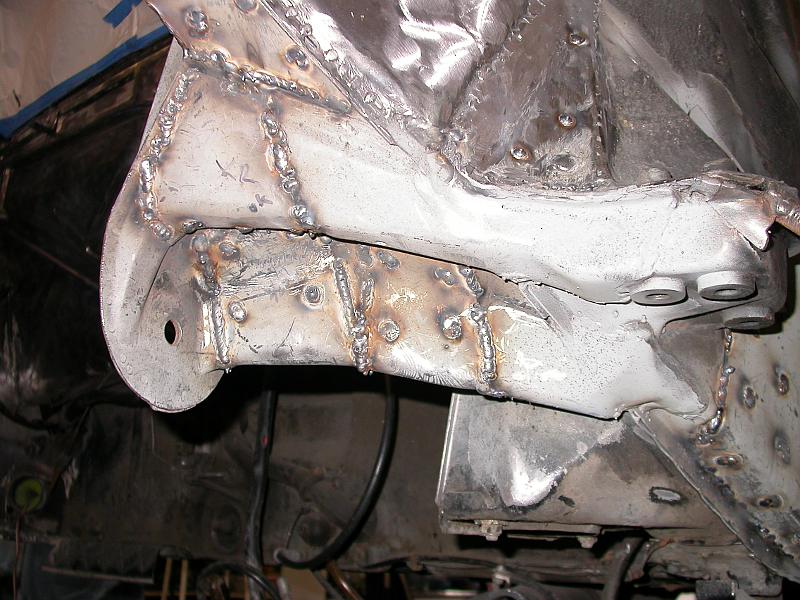 |
| sean_v8_914 |
 Feb 6 2011, 12:07 PM Feb 6 2011, 12:07 PM
Post
#52
|
|
Chingon 601     Group: Members Posts: 4,011 Joined: 1-February 05 From: San Diego Member No.: 3,541 |
here's an ugly one. I cant find the pic from under teh floor. maybe on my cell phone...?
Attached image(s) 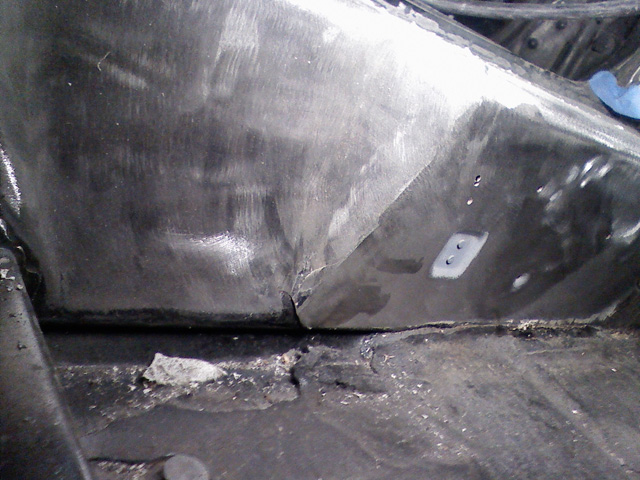
|
| karlo |
 Feb 12 2011, 02:56 AM Feb 12 2011, 02:56 AM
Post
#53
|
|
Karl Anders Øygard   Group: Members Posts: 56 Joined: 2-November 09 From: San Diego, CA Member No.: 10,999 Region Association: Southern California |
More pictures from Sean:
Acid etched, rust passivated, cold galvanized inside-out. 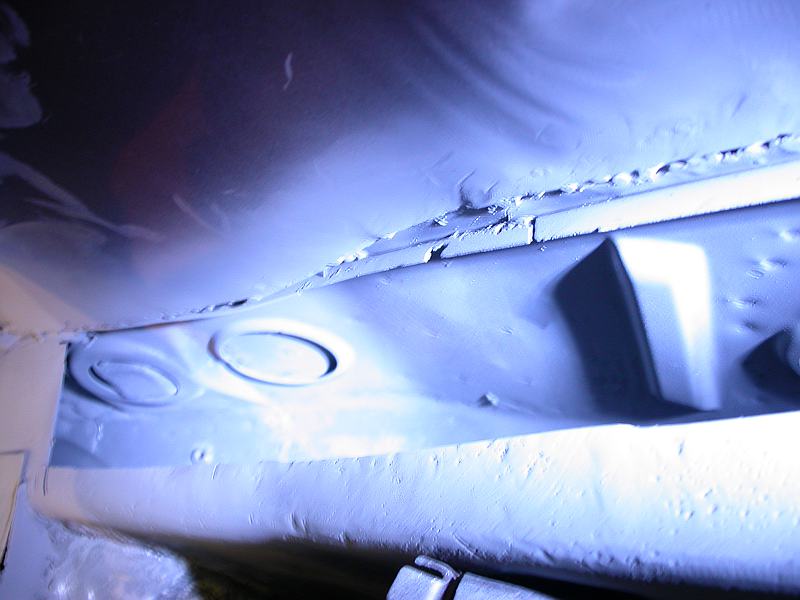 Treated all the way up using long wand adapter. 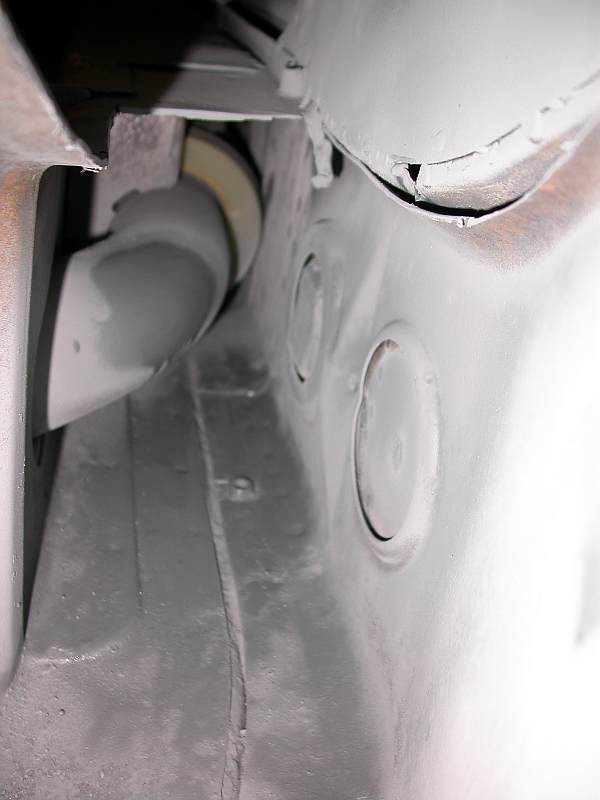 Etching primer, seam sealer, fresh metal. 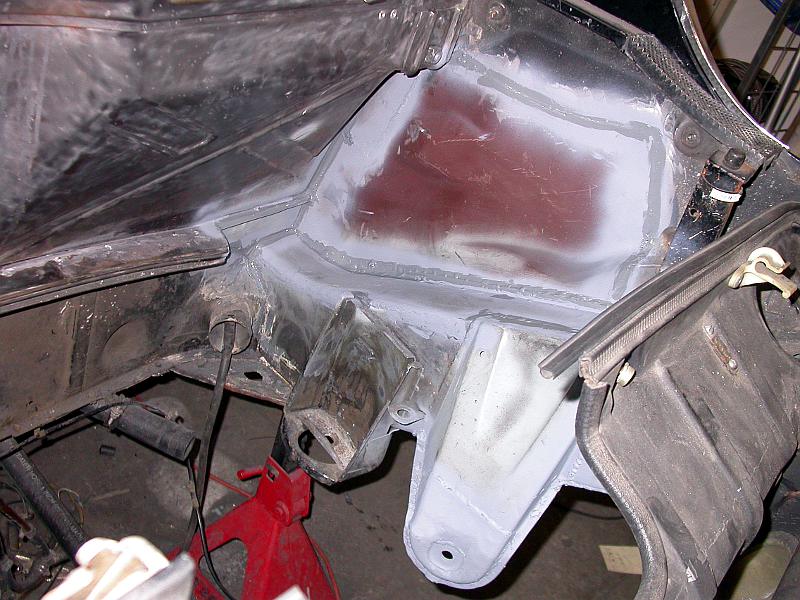 New inner wheel house. Metal replaced all the way up to the roll bar. 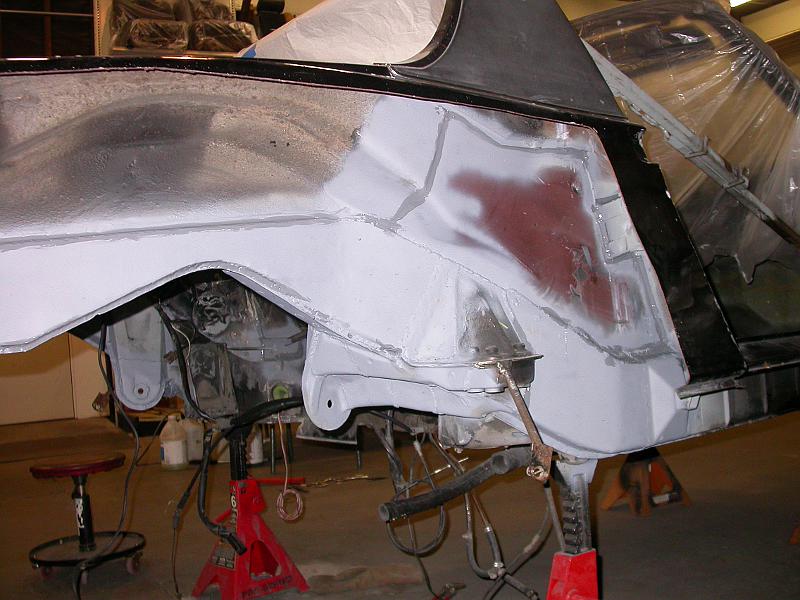 New cable pull. 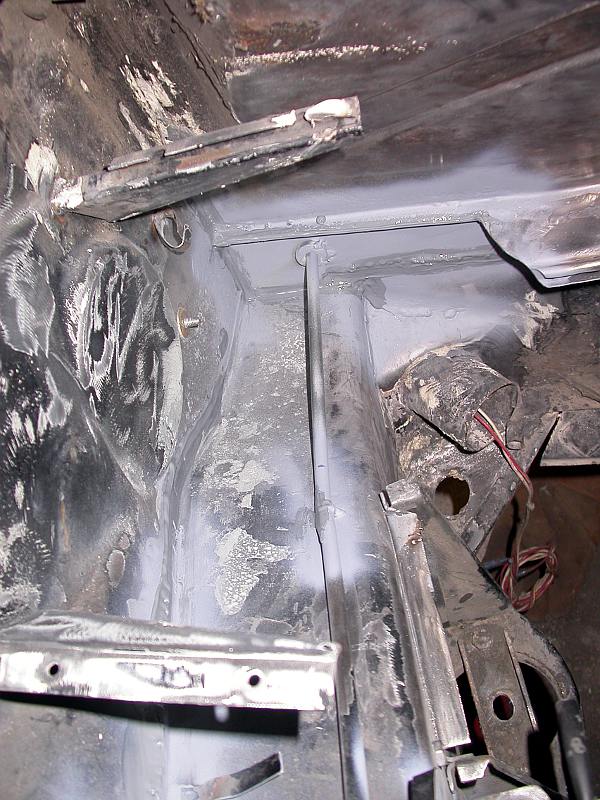 Engman kit fitted and hole plugged. 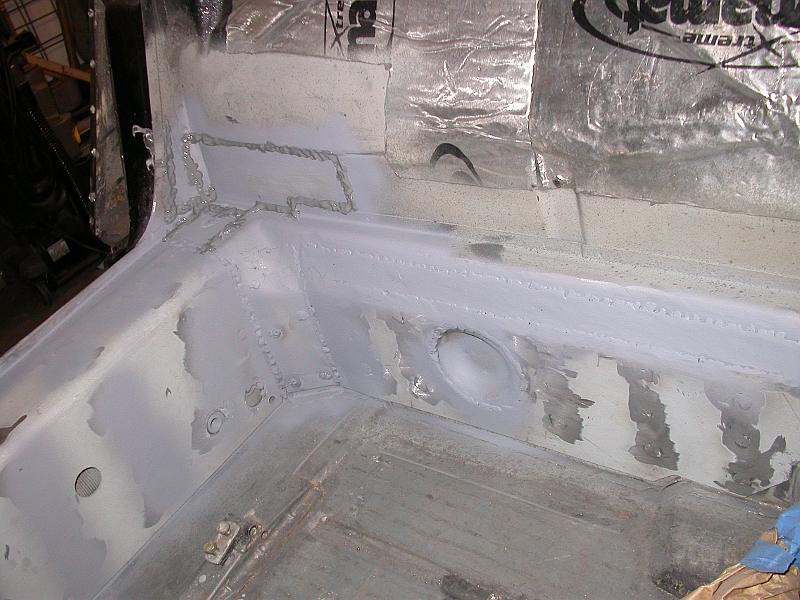 |
| karlo |
 Feb 12 2011, 03:25 AM Feb 12 2011, 03:25 AM
Post
#54
|
|
Karl Anders Øygard   Group: Members Posts: 56 Joined: 2-November 09 From: San Diego, CA Member No.: 10,999 Region Association: Southern California |
Next in line is welding in steel flares, full repaint, big brakes, etc., but that will have to wait until next time I visit San Diego...
|
| karlo |
 Feb 18 2011, 11:45 PM Feb 18 2011, 11:45 PM
Post
#55
|
|
Karl Anders Øygard   Group: Members Posts: 56 Joined: 2-November 09 From: San Diego, CA Member No.: 10,999 Region Association: Southern California |
More updates from Sean:
Stealth GT. 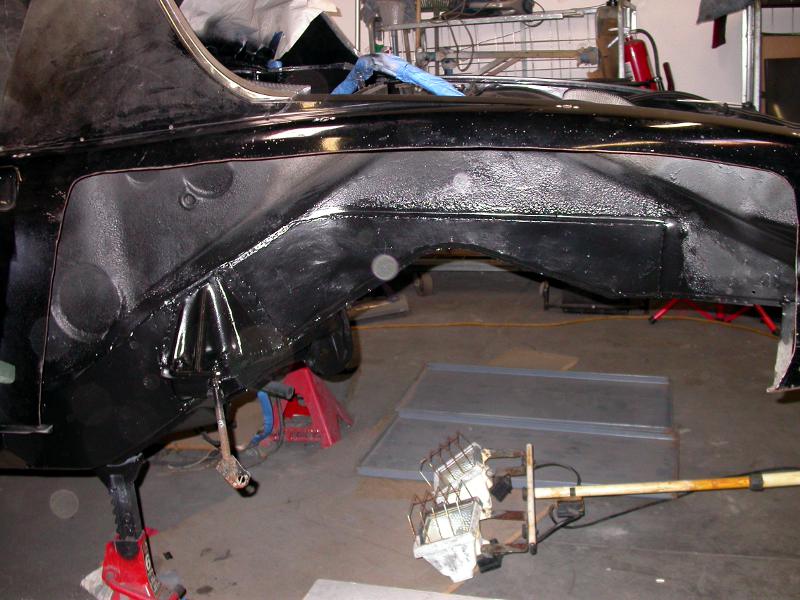 Too dark to get good pics. 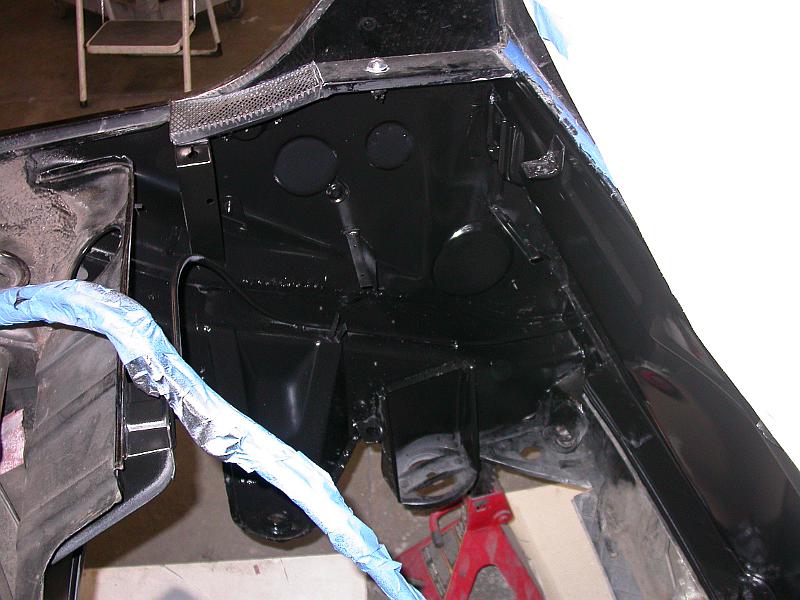 GT wraps around the long, not just a scab plate. 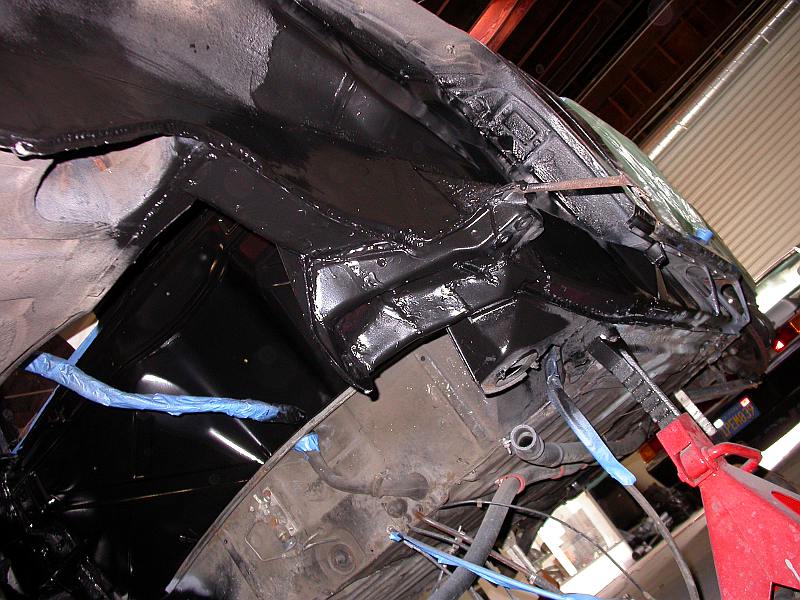 Left hell hole nice and cleaned up. 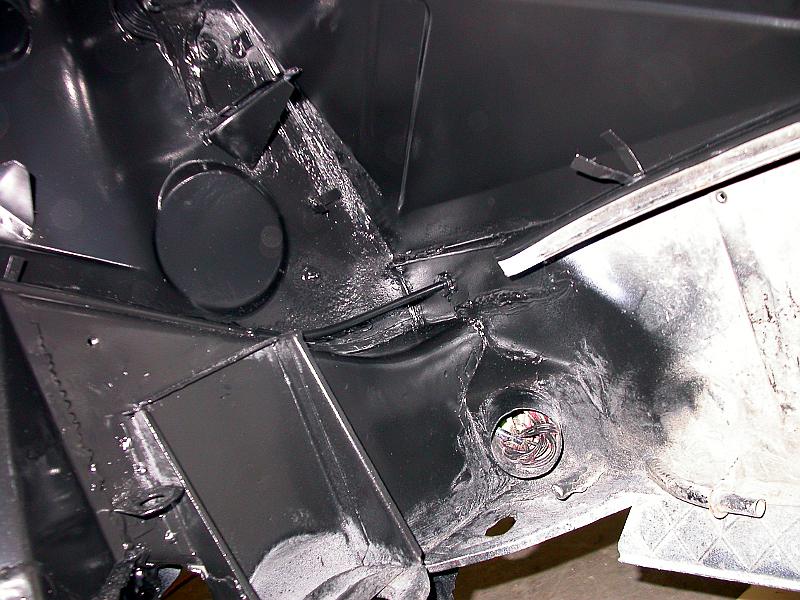 Image shows seam of inner wheel house. New inner wheel house panel runs from bottom of sail panel/roll bar doubler to the top of the longitudinal inner doubler. It is welded to the inside longitudinal stiffener. Then top longitudinal inner doubler welded to it, then top longitudinal cover welded over that and joined to the inner wheel house vertical wall. Yeah, it’s a little over-kill perhaps. All seams are sealed and prior to welding all joints treated with zinc weld thru. 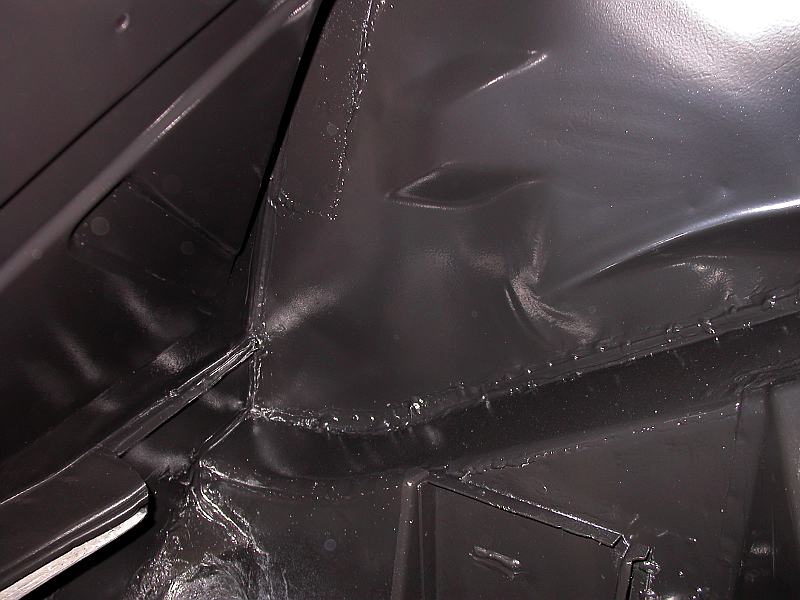 |
| karlo |
 Feb 19 2011, 12:13 AM Feb 19 2011, 12:13 AM
Post
#56
|
|
Karl Anders Øygard   Group: Members Posts: 56 Joined: 2-November 09 From: San Diego, CA Member No.: 10,999 Region Association: Southern California |
SEM epoxy seam sealed, wurth etching primer, wurth weld thru cold galvanived primer between laminate sheets of steel. There is no bare metal. Even inside reconstructed areas has no bare metal. Welded joints are treated with zinc that melts into the weld area.
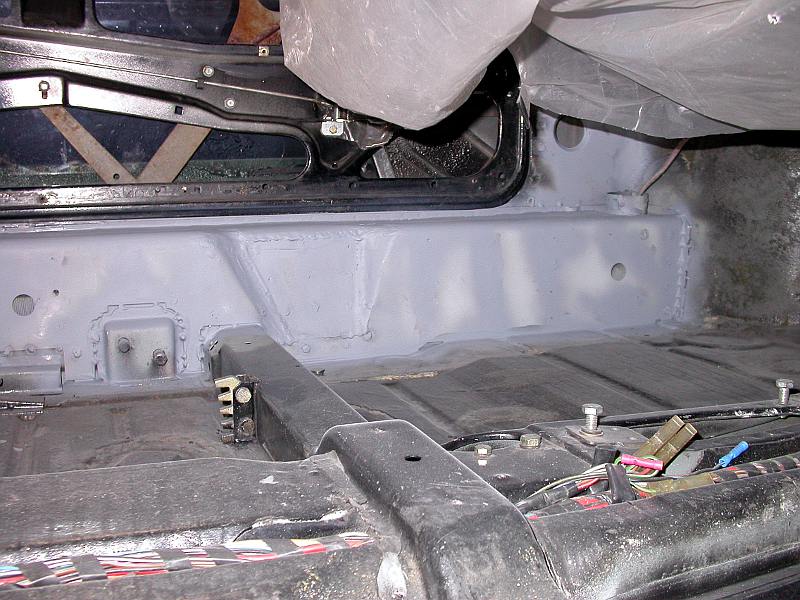 We fitted 911 e-brakes as well. However, the bearing cover is from a 1968 911, and does requires some massaging to fit. The bolt holes had to be filed about 1mm to line up with the trailing arm, and the cover interferes with the hub as it gets pressed into the bearing. The hub is in bind and will not rotate. 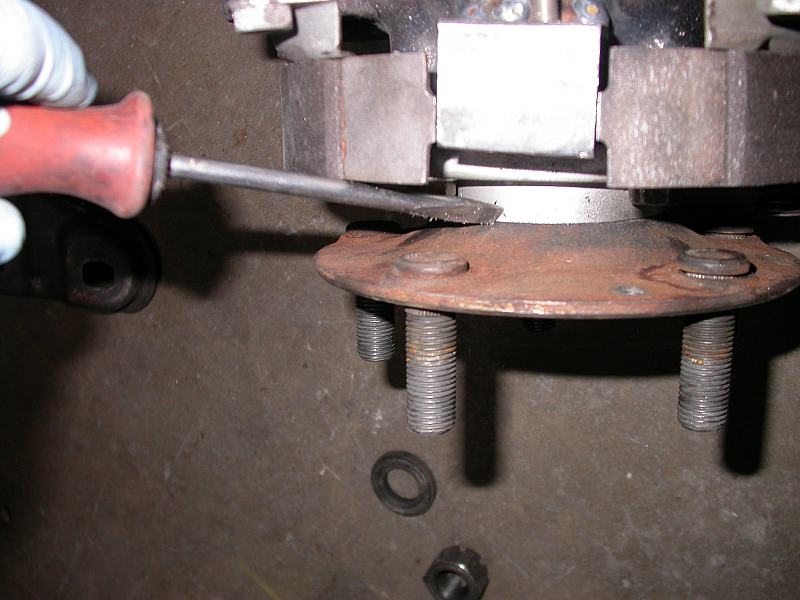 Sean was able to trim the cover down in situ. 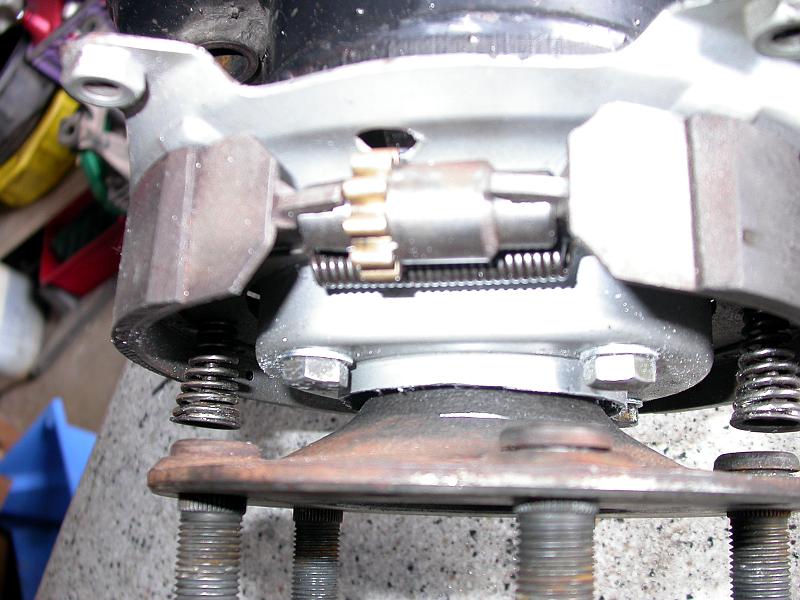 Engine back in car, almost all done. 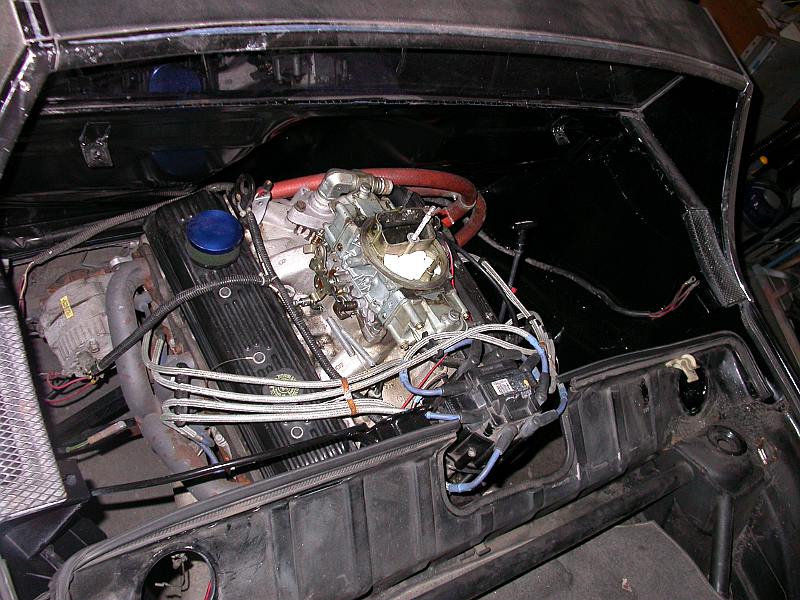 |
| karlo |
 Feb 20 2011, 11:34 AM Feb 20 2011, 11:34 AM
Post
#57
|
|
Karl Anders Øygard   Group: Members Posts: 56 Joined: 2-November 09 From: San Diego, CA Member No.: 10,999 Region Association: Southern California |
Further issues with the 911 ebrake setup. The ebrake that I bought came from a '68 911, which is the wrong year. The brake shoes are about 7mm too tall, causing them to bottom out on the brake rotor. If someone else wants to do this, make sure you get '69 or later.
For documentational purposes, I'll include a few pictures from my transaxle overhaul. New main shaft/1st gear (the strongest type). 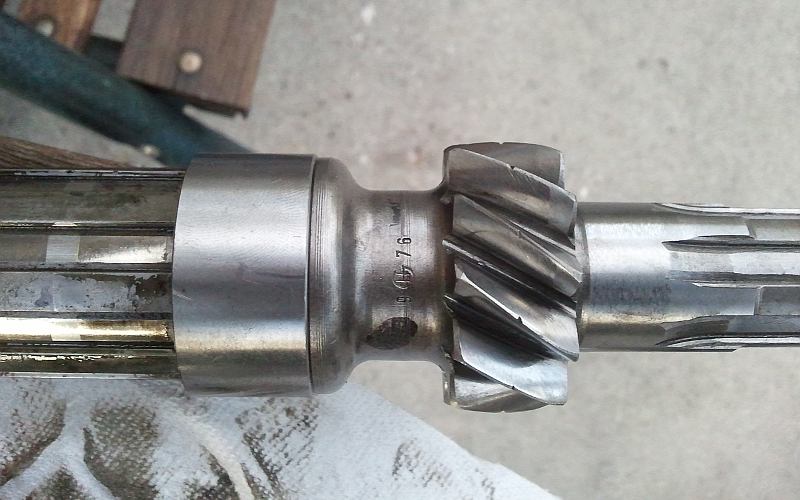 Excellent new 2nd gear. 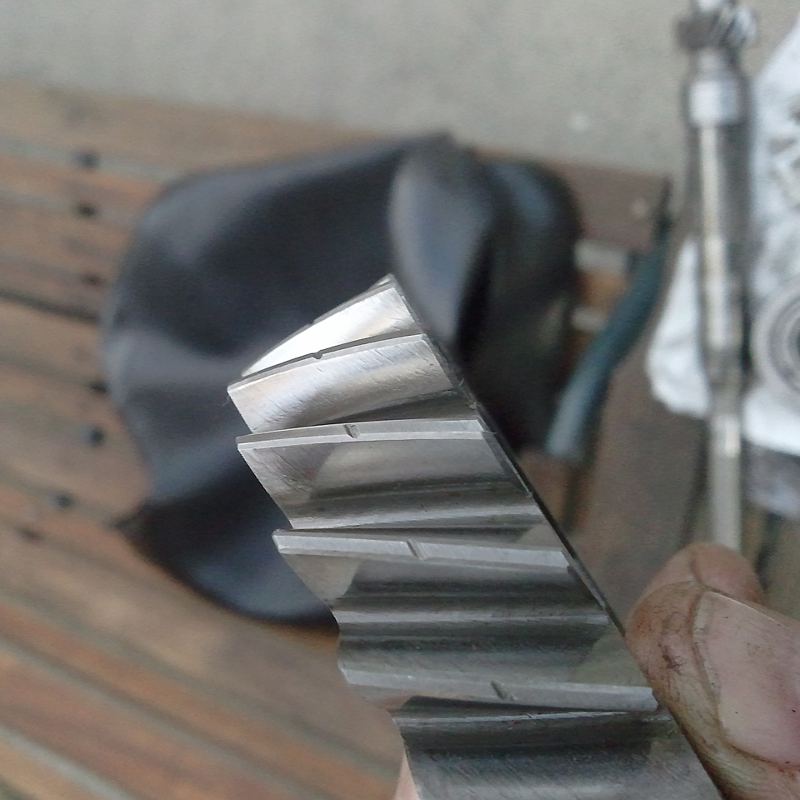 New 3rd gear, dog teeth and synchro. 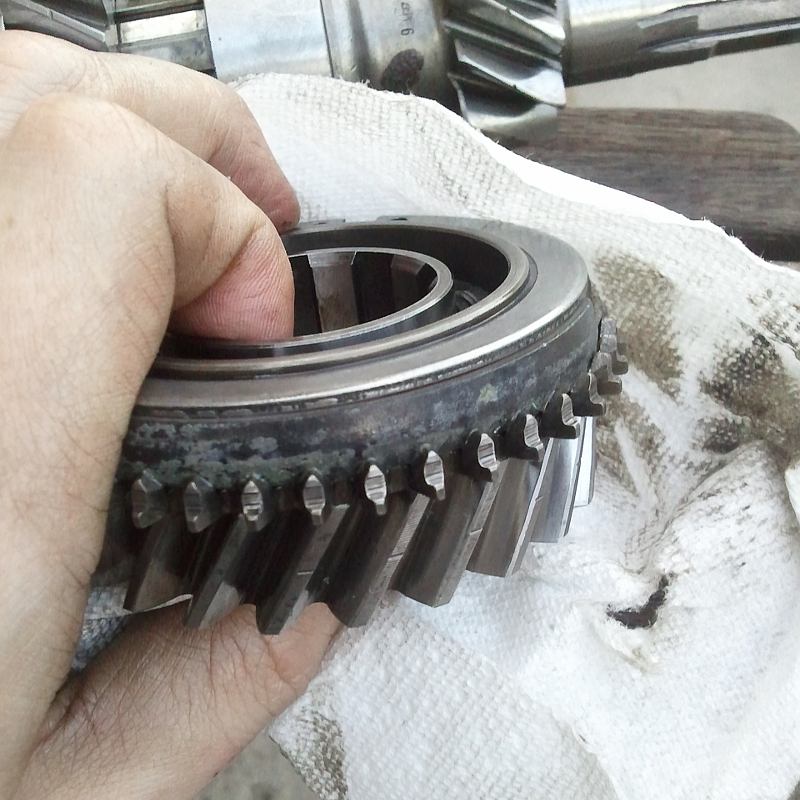 Late fat synchro hub (previous was skinny, NLA). 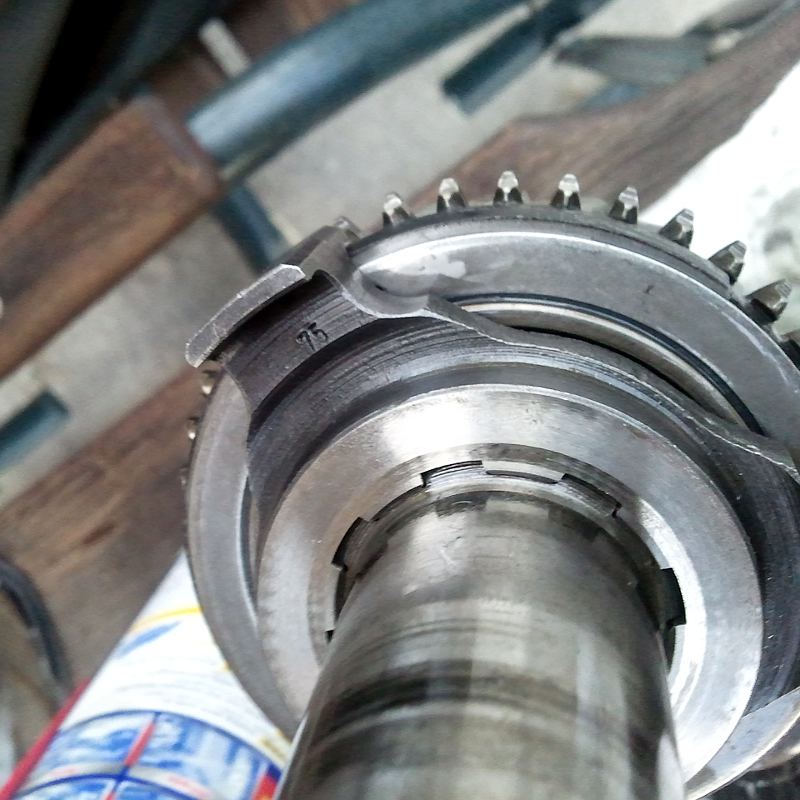 QQ 4th gear. 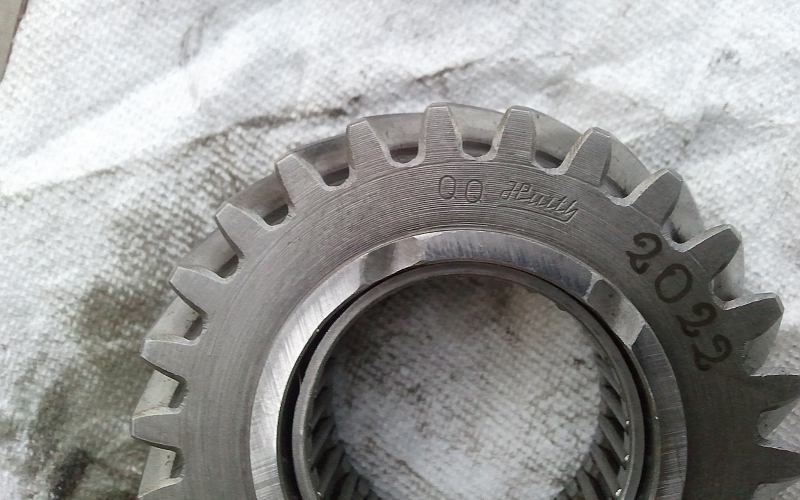 And again, new dog teeth and synchro on 4th. 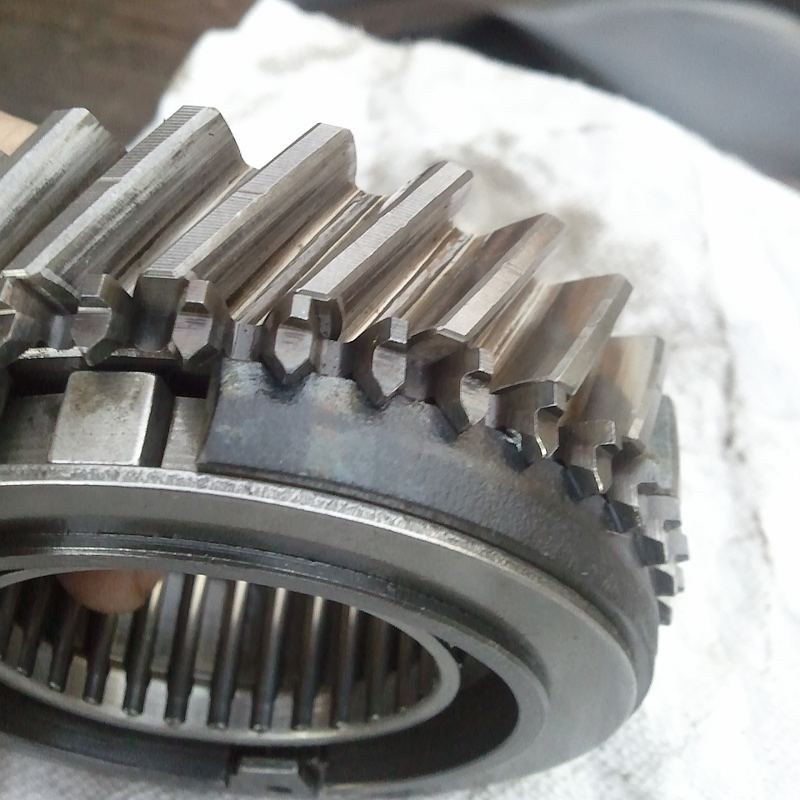 |
| karlo |
 Feb 20 2011, 12:26 PM Feb 20 2011, 12:26 PM
Post
#58
|
|
Karl Anders Øygard   Group: Members Posts: 56 Joined: 2-November 09 From: San Diego, CA Member No.: 10,999 Region Association: Southern California |
The ring and pinion was in excellent shape, so was reused.
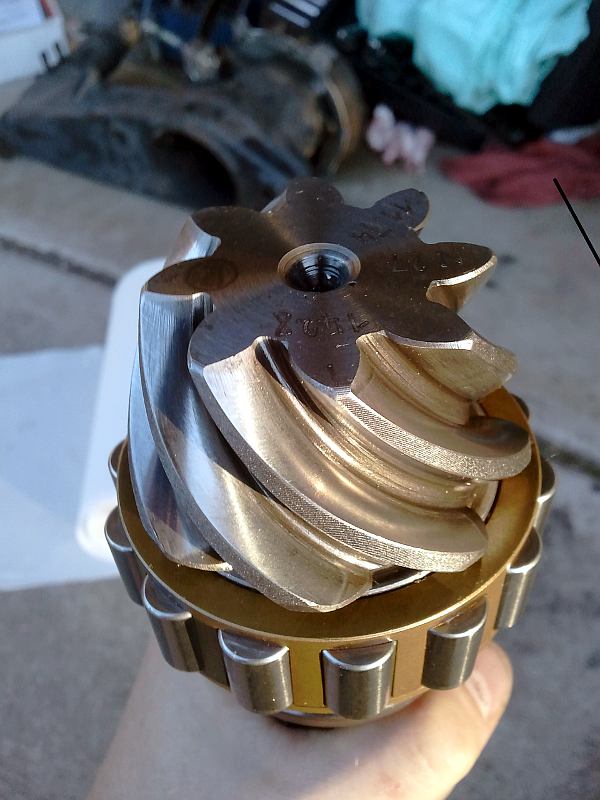 Quaife differential. 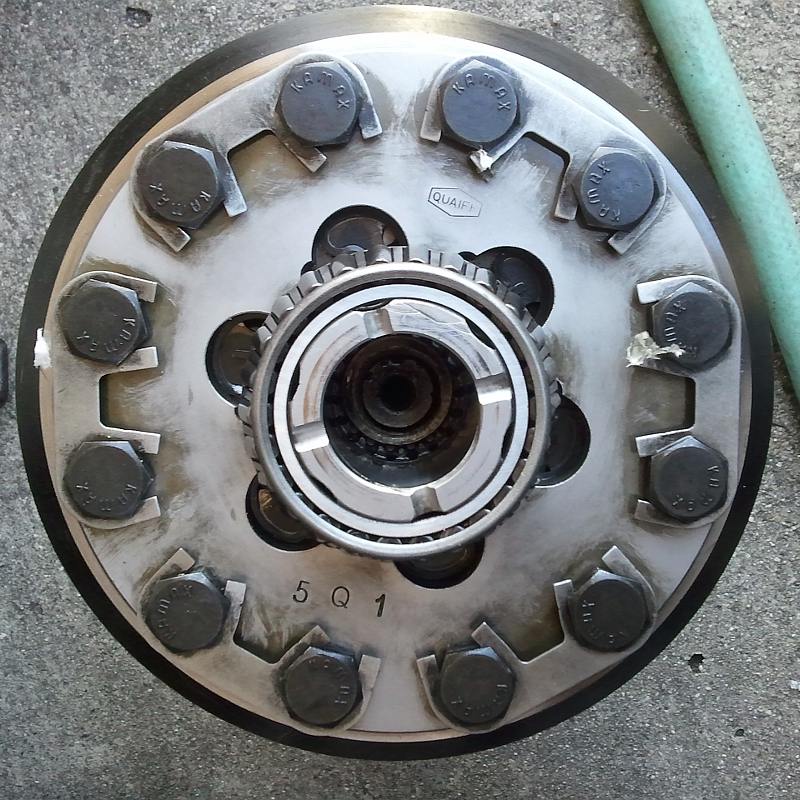 Finally, all the parts that got replaced... Lotsa dollars went into this. 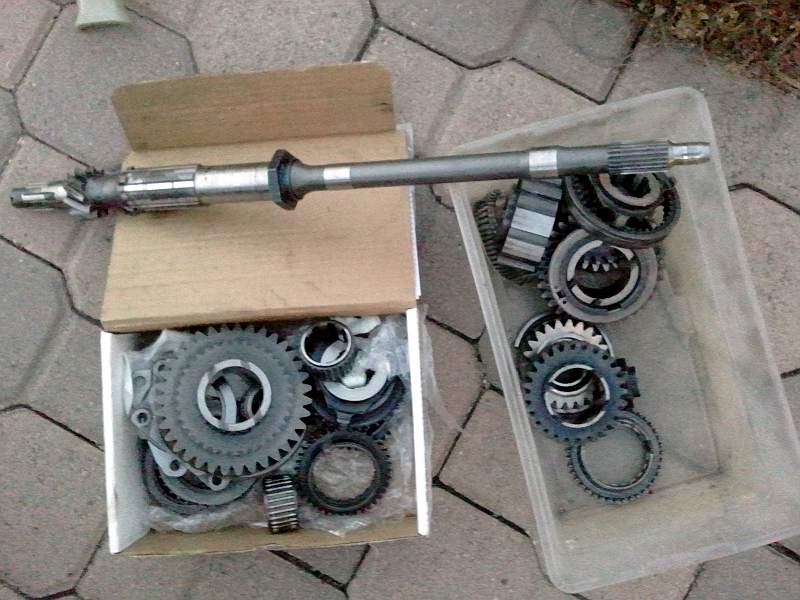 |
| sean_v8_914 |
 Feb 21 2011, 10:55 AM Feb 21 2011, 10:55 AM
Post
#59
|
|
Chingon 601     Group: Members Posts: 4,011 Joined: 1-February 05 From: San Diego Member No.: 3,541 |
more quaiffe photos please so we can all drool and dream
|
| abnrdo |
 Feb 21 2011, 11:36 AM Feb 21 2011, 11:36 AM
Post
#60
|
|
Member   Group: Members Posts: 399 Joined: 24-September 04 From: Panama City, FL Member No.: 2,820 Region Association: South East States |
Very nice! I am interested in how your body shop treated the internals of the frame. Do you know what brand they used? POR?
Thanks, Jim I am looking at a Renegade system. I like the LS1/LS2 conversion!! (IMG:style_emoticons/default/popcorn[1].gif) |
  |
2 User(s) are reading this topic (2 Guests and 0 Anonymous Users)
0 Members:

|
Lo-Fi Version | Time is now: 27th December 2024 - 07:54 AM |
Invision Power Board
v9.1.4 © 2024 IPS, Inc.


