|
|
|
Porsche, and the Porsche crest are registered trademarks of Dr. Ing. h.c. F. Porsche AG.
This site is not affiliated with Porsche in any way. Its only purpose is to provide an online forum for car enthusiasts. All other trademarks are property of their respective owners. |
|
|

  |

| dheming |
 Jun 13 2011, 03:55 PM Jun 13 2011, 03:55 PM
Post
#69
|
|
Newbie  Group: Members Posts: 8 Joined: 9-January 11 From: Bay Area, CA Member No.: 12,574 Region Association: None |
Nice score on the parts car. BTW, something like this is what I was talking about for a simple engine run stand: http://lainefamily.com/EngineStandProject.htm
|
   |

 
|
| nathansnathan |
Jun 13 2011, 04:51 PM
Post
#70
|
|
Senior Member Group: Members Posts: 1,052 Joined: 31-May 10 From: Laguna Beach, CA Member No.: 11,782 Region Association: None |
QUOTE(dheming @ Jun 13 2011, 02:55 PM)  Nice score on the parts car. BTW, something like this is what I was talking about for a simple engine run stand: http://lainefamily.com/EngineStandProject.htm You call that simple? (IMG:style_emoticons/default/biggrin.gif) Here's a pic I had saved, he's got the fuel injection partially attached to it, too, 914 stuff there. (IMG:http://www.914world.com/bbs2/uploads_offsite/www.eggscollective.org-11782-1308005510.1.jpg) |
|
|
|
| nathansnathan |
Jul 19 2011, 07:03 PM
Post
#71
|
|
Senior Member Group: Members Posts: 1,052 Joined: 31-May 10 From: Laguna Beach, CA Member No.: 11,782 Region Association: None |
This seems like a good place to talk about how I've got to get rid of the parts car as I'm still taking things off it, and it's not ready for the classifieds section yet.
I agreed with my land lord when I got permission to get it that I could only keep it for 3 months. So 1 month to go, I've got until September 1st. Likely the shell will be mostly useless if it comes to calling the junkyard, as I would cut off what's good of the body just because it's good. A lot of it isn't. The thing is I have to keep it rolling I'm thinking in order to get it towed or even trailered to a ..junkyard ... I'm a little nervous actually about it, whether I can just call someone to take away my cutup shell. Plus I would hate to think of the suspension and steering stuff getting crushed. Maybe someone local has a yard or something. I'd sell it for less than most want for just the rack & pinion. We'll see how it goes. I'm just putting it out there. |
|
|
|
| Mike Bellis |
Jul 19 2011, 07:13 PM
Post
#72
|
|
Resident Electrician Group: Members Posts: 8,346 Joined: 22-June 09 From: Midlothian TX Member No.: 10,496 Region Association: None |
If you have the title you can junk it. They can bring a flatbed and drag it. Take the suspension off. You could make a simple wood dolly on casters to move it around.
|
|
|
|
| nathansnathan |
Aug 26 2011, 10:55 PM
Post
#73
|
|
Senior Member Group: Members Posts: 1,052 Joined: 31-May 10 From: Laguna Beach, CA Member No.: 11,782 Region Association: None |
About a week to go here and I think my landlord will be ok if I go long. Unfortunately I don't have the title. I've got 2 bills of sale from the past owners, so I'm going to cut up.
I've been busy preparing. I've got a reciprocating saw ready (IMG:style_emoticons/default/ar15.gif) and i've built a dolly. Once the donor is in pieces and the 420 car is more stable, I will put it on there as I need to be able to move it around to go forward. Here are some pics of the dolly construction. (IMG:http://www.914world.com/bbs2/uploads_offsite/www.914club.com-11782-1314420902.1.jpg) (IMG:http://www.914world.com/bbs2/uploads_offsite/www.914club.com-11782-1314420902.2.jpg) (IMG:http://www.914world.com/bbs2/uploads_offsite/www.914club.com-11782-1314420902.3.jpg) (IMG:http://www.914world.com/bbs2/uploads_offsite/www.914club.com-11782-1314420902.4.jpg) (IMG:http://www.914world.com/bbs2/uploads_offsite/www.914club.com-11782-1314420903.5.jpg) |
|
|
|
| nathansnathan |
Aug 26 2011, 11:13 PM
Post
#74
|
|
Senior Member Group: Members Posts: 1,052 Joined: 31-May 10 From: Laguna Beach, CA Member No.: 11,782 Region Association: None |
Other progress, I upgraded my air compressor. I'd got this old old Westinghose/ homemade jobber from some guy off craigslist a few years ago and I'd been working it to death with the blast cabinet. It is I think a 35 gallon. I'd been thinking about getting something better.
(IMG:http://www.914world.com/bbs2/uploads_offsite/www.914club.com-11782-1314422026.1.jpg) ...so I found this on craigslist, got it from a tire shop in huntington Beach. (IMG:http://www.914world.com/bbs2/uploads_offsite/www.914club.com-11782-1314422026.2.jpg) 80 gallons, dual stage goes up to 175psi. It is actually made by the same company as the old one, as Westinghouse was bought by LeRoi, which actually makes this for Wayne. It is the real deal. The sort of overkill that I'd been looking for seems to come only in 3 phase, and so it was quite challenging to get it hooked up to work with single phase 220 power. I found a 5hp Baldor 220 single phase motor on eBay. It was not cheap, though I guess it could have cost a lot more for a new baldor motor of that size. Anyway, this new compressor is a beast. I regulate it down to 90psi for the sandblast cabinet, and I can say that it does not EVER get below that. I can blast continuously and it will meet the demand. If I give it half a chance it will actually catch up and turn off. I'd thought that the shortcomings of my cabinet were a lot due to it being not the recirculating type, but it is working a lot better with this bad boy, like it puts out a stronger 90psi than the other though I'm using the same gauge!. (IMG:style_emoticons/default/biggrin.gif) (IMG:http://www.914club.com/bbs2/uploads/1313252010/gallery_21132_255_23387.jpg) |
|
|
|
| Mike Bellis |
Aug 26 2011, 11:38 PM
Post
#75
|
|
Resident Electrician Group: Members Posts: 8,346 Joined: 22-June 09 From: Midlothian TX Member No.: 10,496 Region Association: None |
For future reference... There is a device called "Add A Phase". Available at most any electrical wholesale house. It uses an LC network to phase shift your house 220V into 3 pahse power. Small box, mounts on the wall close to your equipment. I've installed many in home garages needing 3 phase machines to function. Cost a couple hundred bucks... Easy install... 2 wires in, 3 wires out...
|
|
|
|
| nathansnathan |
Aug 27 2011, 10:56 AM
Post
#76
|
|
Senior Member Group: Members Posts: 1,052 Joined: 31-May 10 From: Laguna Beach, CA Member No.: 11,782 Region Association: None |
QUOTE(kg6dxn @ Aug 26 2011, 10:38 PM) For future reference... There is a device called "Add A Phase". Available at most any electrical wholesale house. It uses an LC network to phase shift your house 220V into 3 pahse power. Small box, mounts on the wall close to your equipment. I've installed many in home garages needing 3 phase machines to function. Cost a couple hundred bucks... Easy install... 2 wires in, 3 wires out... I researched variable frequency drives, rotary and static phase converters, and I found that the rotary converter was the only acceptable way to do it. Upwards of 3hp it gets very expensive to do it right... though it may have been about the same. (IMG:style_emoticons/default/blink.gif) This is a true 5hp motor (IMG:style_emoticons/default/aktion035.gif) |
|
|
|
| nathansnathan |
Aug 27 2011, 10:57 AM
Post
#77
|
|
Senior Member Group: Members Posts: 1,052 Joined: 31-May 10 From: Laguna Beach, CA Member No.: 11,782 Region Association: None |
I've got some other 3 phase/ single phase stuff to figure out. It's a little easier than the motor as a heater can be wired in different ways. This crazy thing was actually out of a Chrysler plant. Running it single phase 220 will make it less effective than the 480 3 phase but it should still be quite effective. I've read that getting the paint to off gas is the secret to a professional quality paint job, either by waiting between coats or by baking. I've read that they go up to 400 something degrees at the factory, where paint shops will heat panels up to 150 or so.
(IMG:http://www.914world.com/bbs2/uploads_offsite/www.914club.com-11782-1314464255.1.jpg) (IMG:http://www.914world.com/bbs2/uploads_offsite/www.914club.com-11782-1314464255.2.jpg) Wiring costs get pretty up there with this high amperage stuff. I needed to move my welder across the room. I ended up making my own 50 amp 20 ft extension chord and it cost me $250. I broke down and got the runner kit for it which is ridiculous in its construction. The welder weighs 300 lbs and it's held to the rear wheel assembly only by 4 1/4-20 bolts into the sheet metal. The rear wheels look like 5 lug Fuchs though so it's worth it. (IMG:http://www.914world.com/bbs2/uploads_offsite/www.914club.com-11782-1314464255.3.jpg) |
|
|
|
| nathansnathan |
Sep 3 2011, 08:21 PM
Post
#78
|
|
Senior Member Group: Members Posts: 1,052 Joined: 31-May 10 From: Laguna Beach, CA Member No.: 11,782 Region Association: None |
The big bolts at the rear are a bear. Oh, 3/4" Bonney! (IMG:style_emoticons/default/bootyshake.gif)
(IMG:http://www.914world.com/bbs2/uploads_offsite/www.914club.com-11782-1315102885.1.jpg) After much liquid wrench. (IMG:http://www.914world.com/bbs2/uploads_offsite/www.914club.com-11782-1315102885.2.jpg) A giant release, a big pop and off she came. (IMG:style_emoticons/default/beer.gif) |
|
|
|
| nathansnathan |
Sep 3 2011, 09:16 PM
Post
#79
|
|
Senior Member Group: Members Posts: 1,052 Joined: 31-May 10 From: Laguna Beach, CA Member No.: 11,782 Region Association: None |
Some progress on the parts car. September 1st was the day I agreed to have it out of here. ... landlords and non-operational vehicles (IMG:style_emoticons/default/dry.gif)
Some guy talked my ear off All Day Long on Thursday, same guy that scavenged just the head off the old compressor that I put out with a free sign leaving me to deal with the rest. (IMG:style_emoticons/default/evilgrin.gif) I guess I was just nervous about how to proceed that I wasn't like, "I need to get to this, mister" and be on with it. I'd got out my new sawzall. (IMG:http://www.914world.com/bbs2/uploads_offsite/www.914club.com-11782-1315106182.1.jpg) I suppose I didn't really want to cut it up. I still wonder if I should have made a jig to store it vertically. (IMG:style_emoticons/default/screwy.gif) With all these parts, bring it back... (IMG:style_emoticons/default/chair.gif) Pretty rusty in places. (IMG:http://www.914world.com/bbs2/uploads_offsite/www.914club.com-11782-1315106182.2.jpg) (IMG:http://www.914world.com/bbs2/uploads_offsite/www.914club.com-11782-1315106183.3.jpg) And with the deadline, on went the plan to cut it up. Someone might need the metal; I'll keep it around, will need some myself: the cowl piece may be better than mine. Thinking about modifying the driver side engine mount back to be a passenger side? Made a rack to make some room for the chopped up car. (IMG:http://www.914world.com/bbs2/uploads_offsite/www.914club.com-11782-1315106183.4.jpg) Things went better on Friday without Mr. Diarrhea mouth, got a fender off after work. (IMG:http://www.914world.com/bbs2/uploads_offsite/www.914club.com-11782-1315106183.5.jpg) (IMG:http://www.914world.com/bbs2/uploads_offsite/www.914club.com-11782-1315106183.6.jpg) (IMG:http://www.914world.com/bbs2/uploads_offsite/www.914club.com-11782-1315106184.7.jpg) Today, I got off the other front and the driver rear, will do the passenger rear tomorrow. (IMG:http://www.914world.com/bbs2/uploads_offsite/www.914club.com-11782-1315106184.8.jpg) (IMG:http://www.914world.com/bbs2/uploads_offsite/www.914club.com-11782-1315106184.9.jpg) Came a long way in a week with it. (IMG:http://www.914world.com/bbs2/uploads_offsite/www.914club.com-11782-1315106184.10.jpg) Looks like there was a fire under the dash at some point. Sure is crusty. (IMG:http://www.914world.com/bbs2/uploads_offsite/www.914club.com-11782-1315106185.11.jpg) That's all for now. I'll finally be able to work on the blue car soon with this out of the way. It's actually almost not-blue as I've been taking off the paint, will show some of that later. Next step is ro get the blue car ready to transfer to the dolly, well after I get the rest of the donor cut and have made some room... (IMG:style_emoticons/default/smash.gif) |
|
|
|
| nathansnathan |
Oct 1 2011, 10:48 PM
Post
#80
|
|
Senior Member Group: Members Posts: 1,052 Joined: 31-May 10 From: Laguna Beach, CA Member No.: 11,782 Region Association: None |
Back a step to show there has actually been progress.
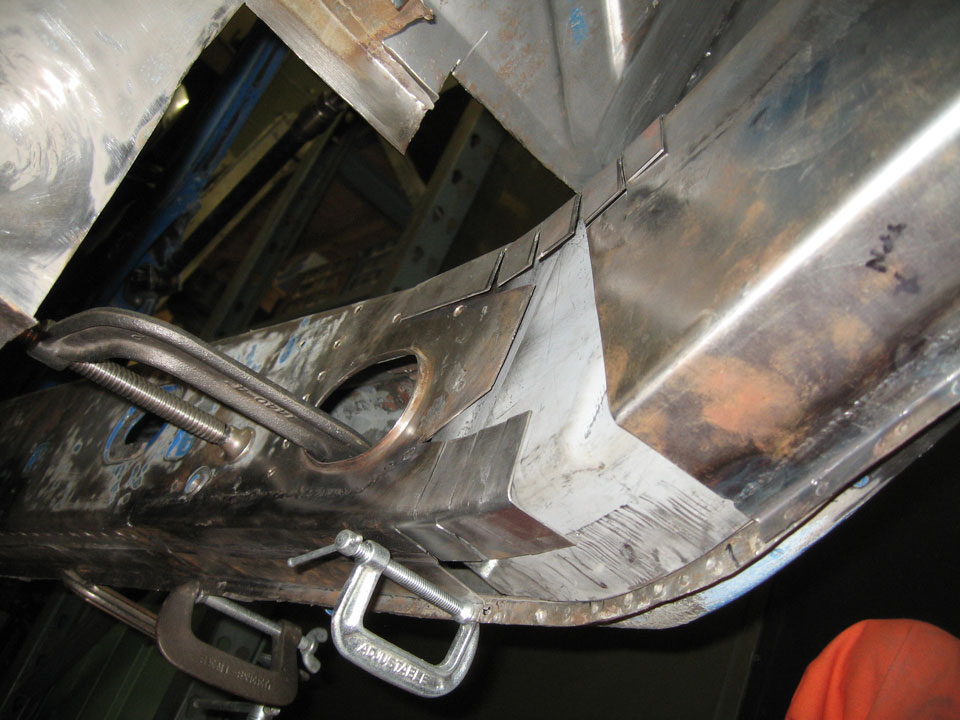
(IMG:http://www.914world.com/bbs2/uploads_offsite/www.smileyvault.com-11782-1317530913.1.gif) 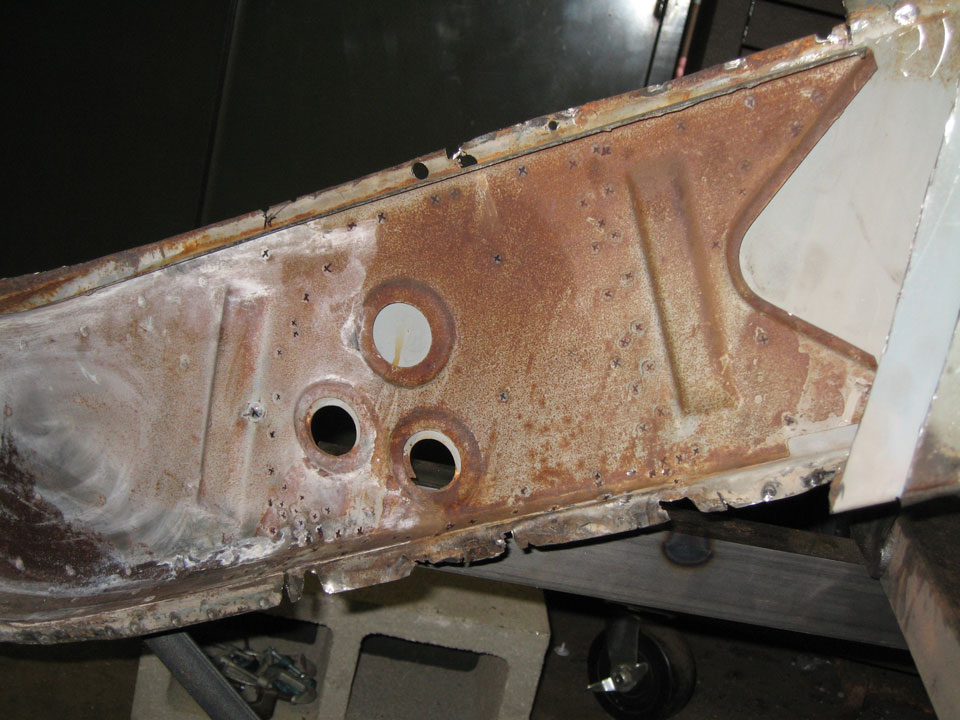 It did get brutal when I removed the old suspension console, was more than a year ago. 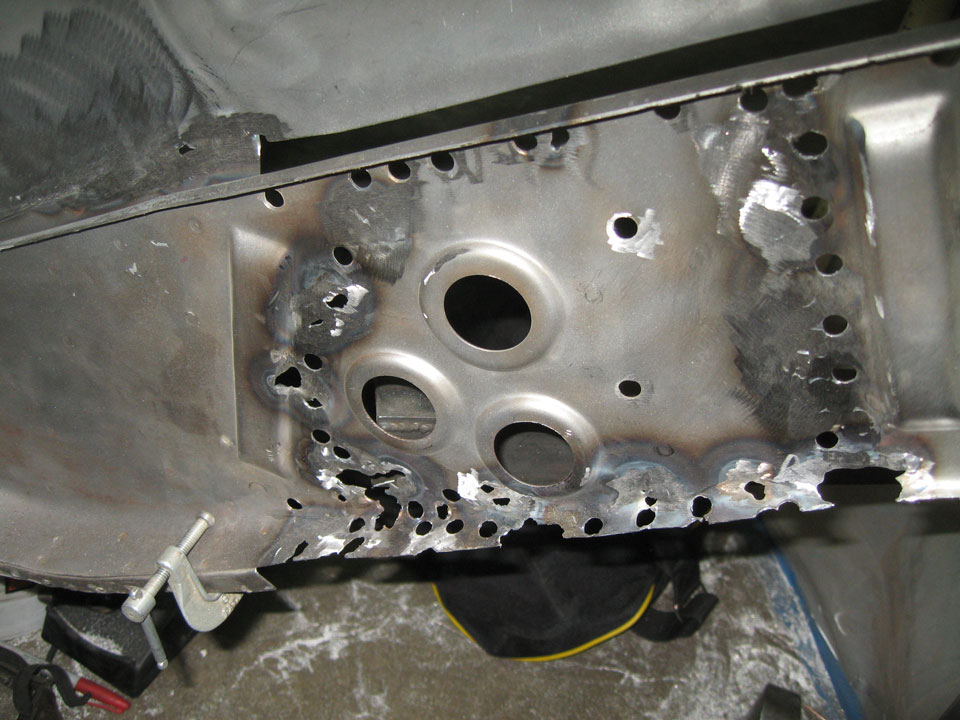 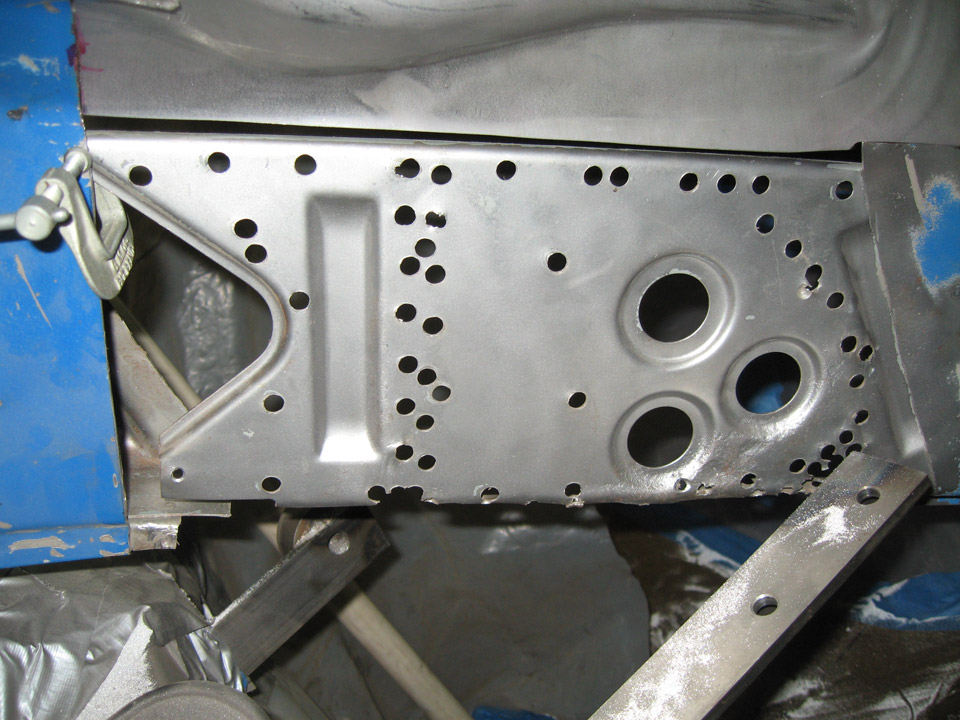 (IMG:style_emoticons/default/welder.gif) 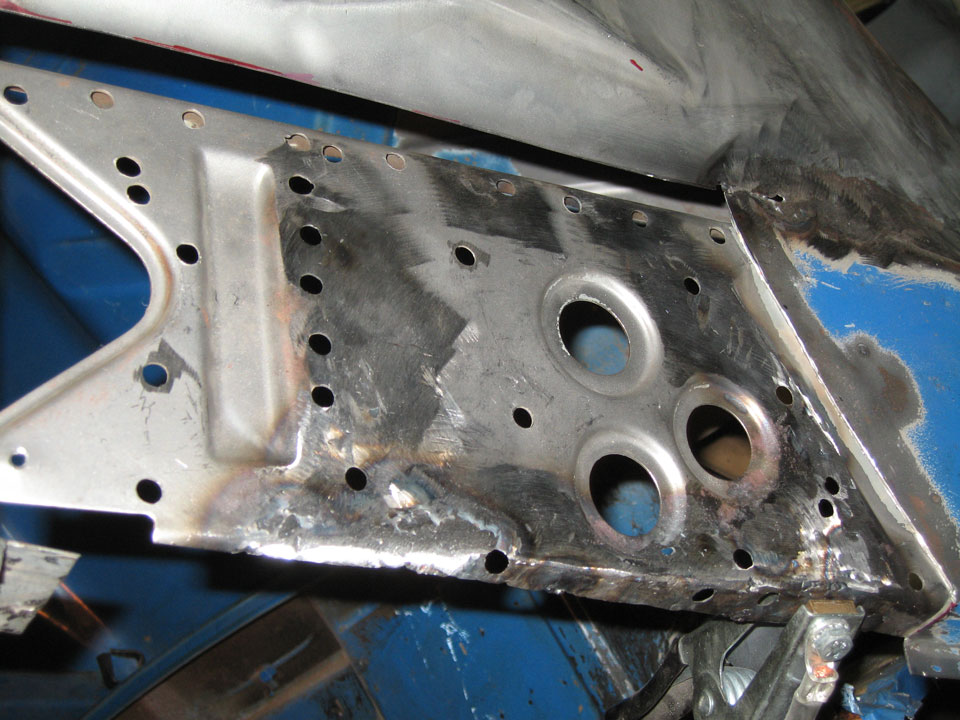 (IMG:style_emoticons/default/welder.gif) Bit of work to get both sides looking solid 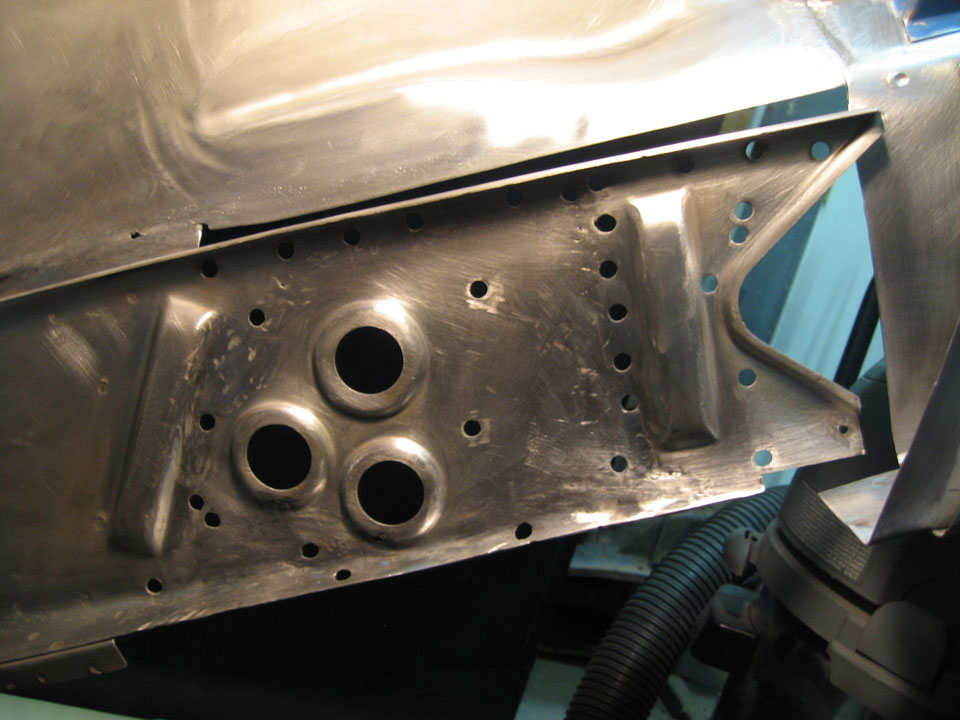 bit lumpy, but passable. They don't sell this as a replacement piece afaik. 3M weld thru primer. 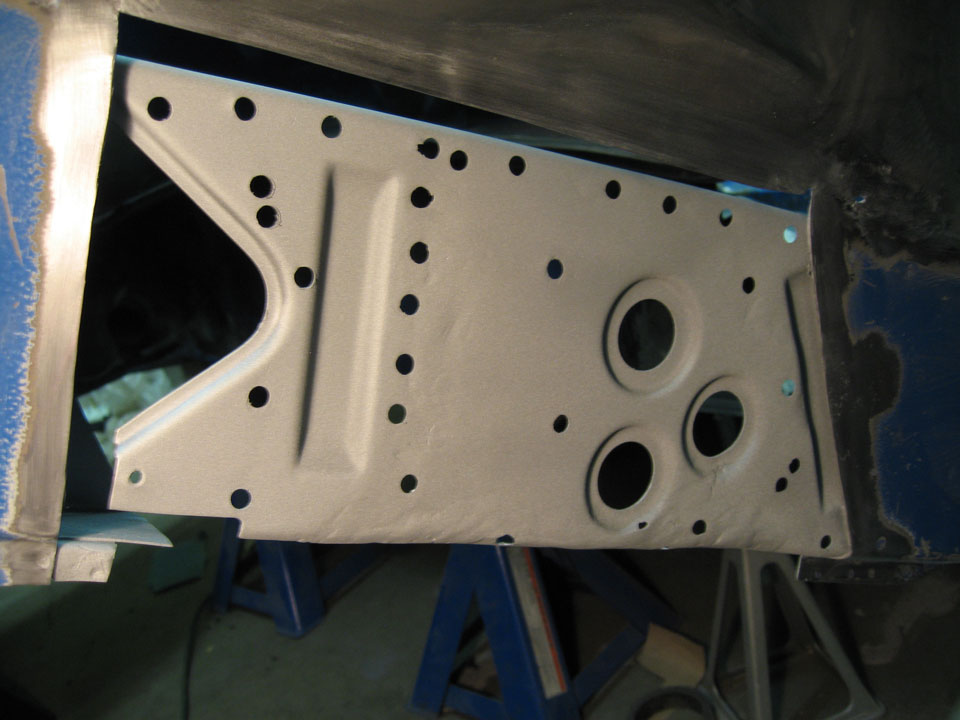 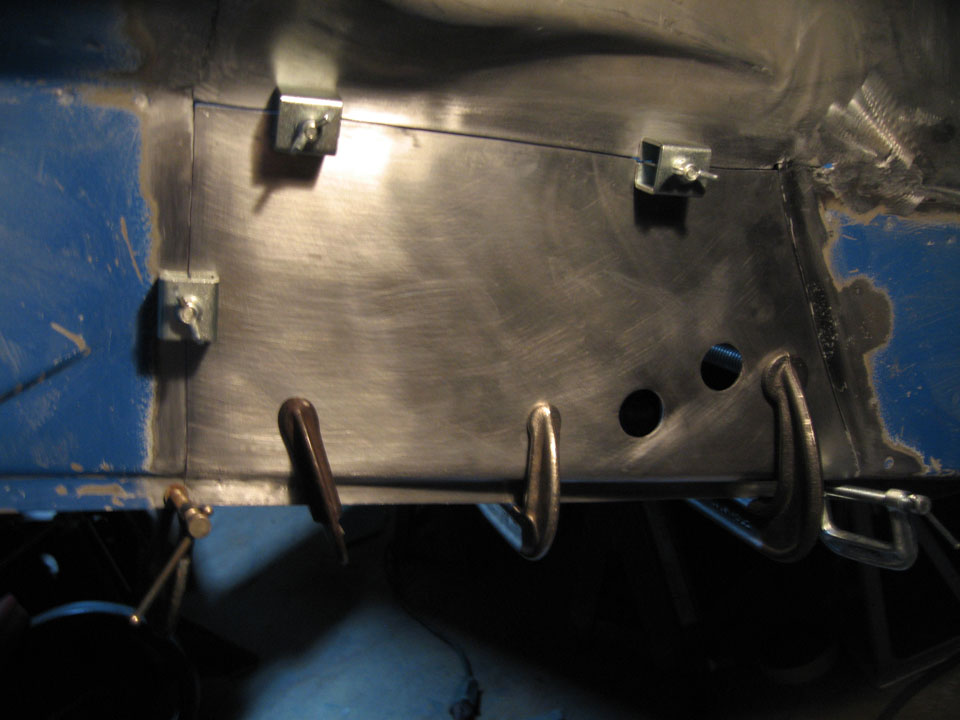 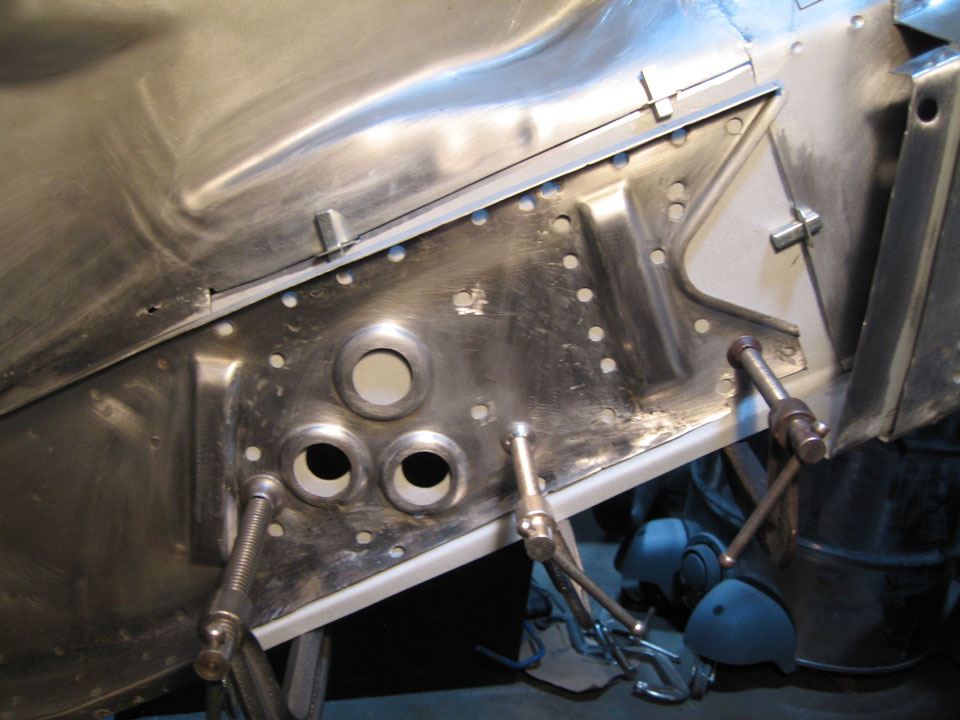 I've got some more plug welding to do; waiting on a big ass c-clamp to hold it together way in. A bit of a fit up of the outer suspension console. 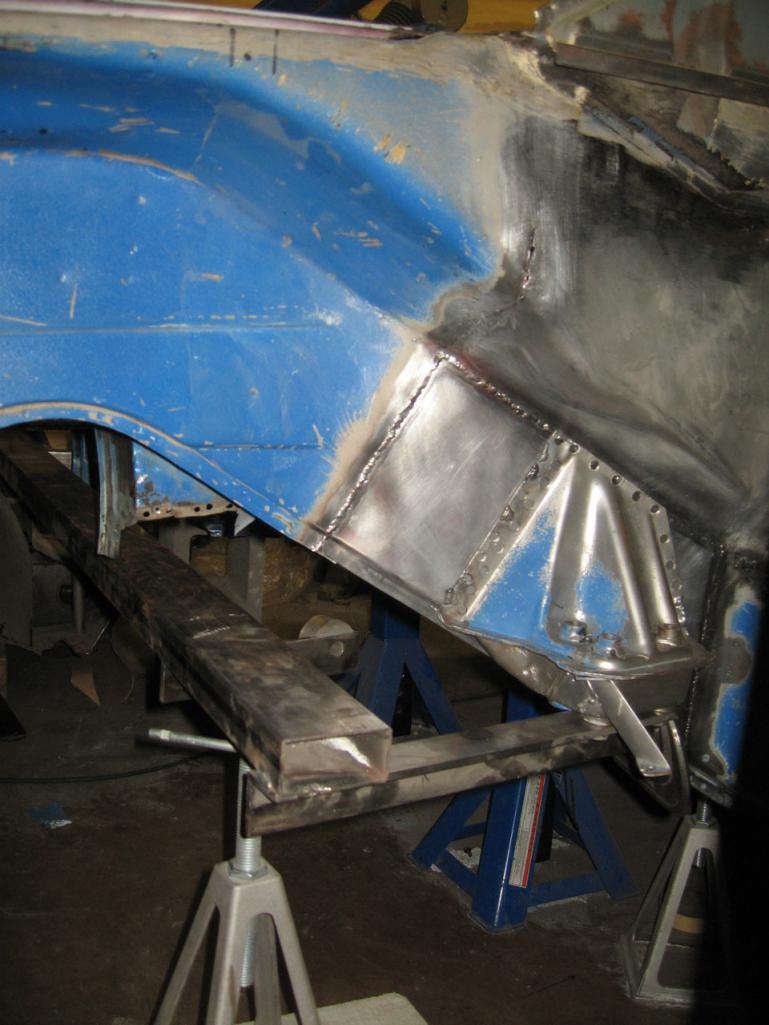 The inside, fitting 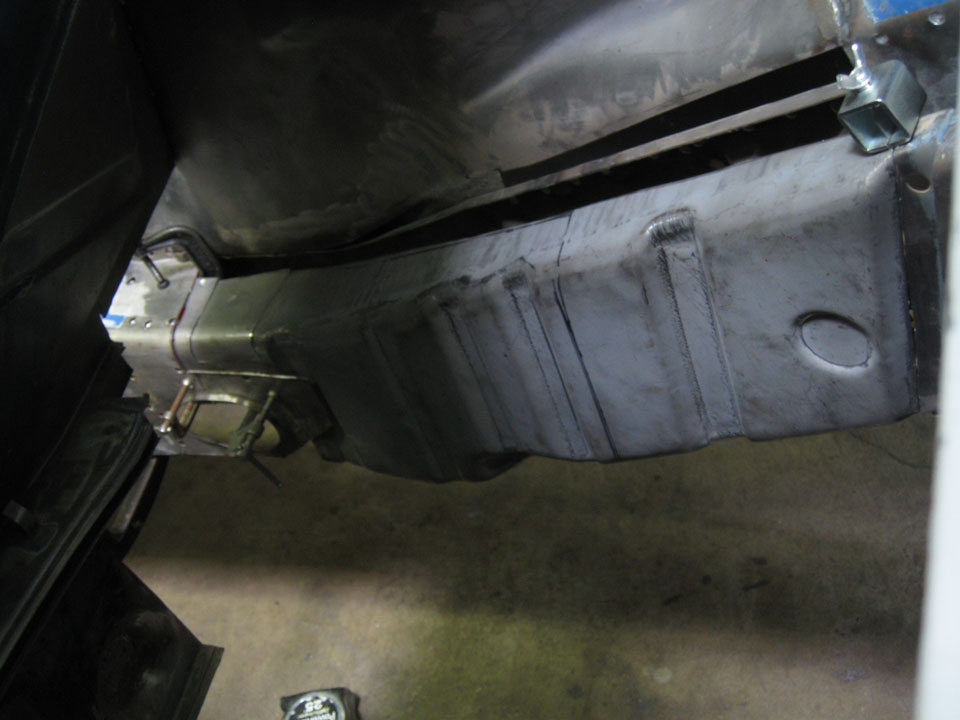 I've cut out pieces of the long from the donor car to get the curvature without having to make tooling for the bender. 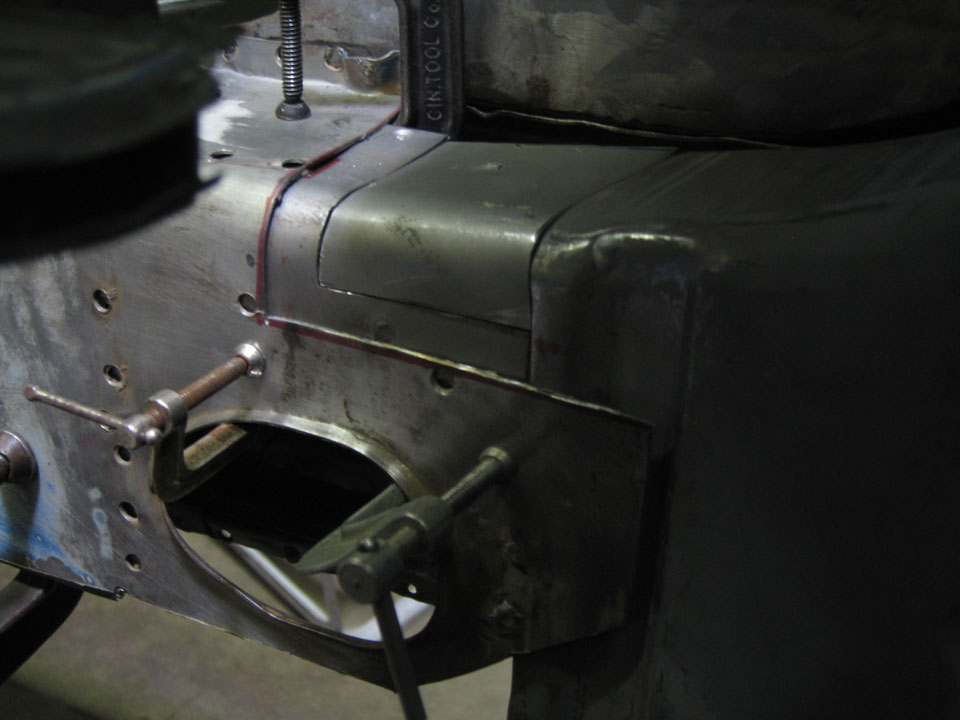 (IMG:style_emoticons/default/happy11.gif) 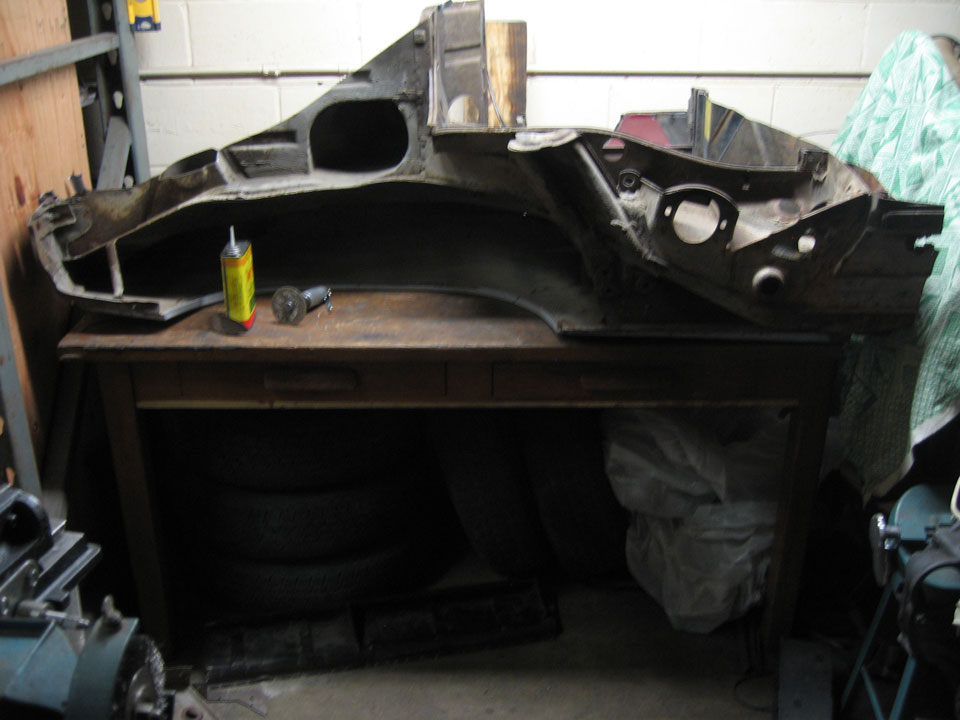 Got the driver engine mount off and seperated. This cleaned up nice (this is before (IMG:style_emoticons/default/smile.gif) ). I've got a paper template only, for the bottom part, the passenger-side version. 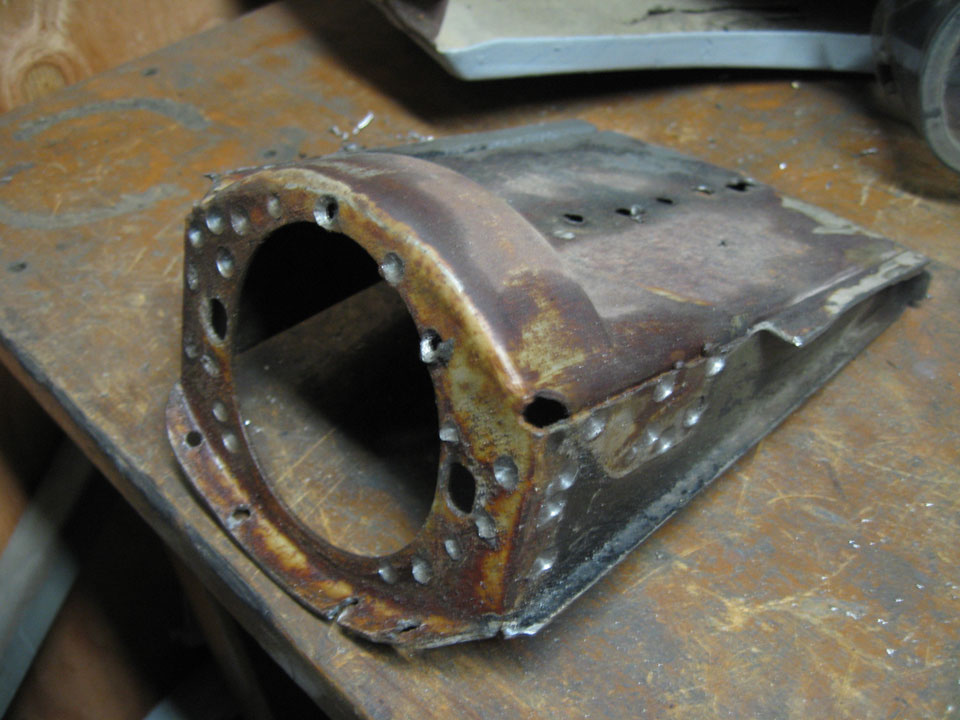 Working toward completing the inner long, those corrugations at the bottom, I can use parts of the driver-side long of the donor for the outer layer, I've got to make the inner, Richard Castro-style, as his thread is the only one I've seen really address the intricacies of the lower long. Looked through like 3 times this many swatches. My neighbor down the way is an upholsterer and is going to help me get the interior in shape... once I get it painted. 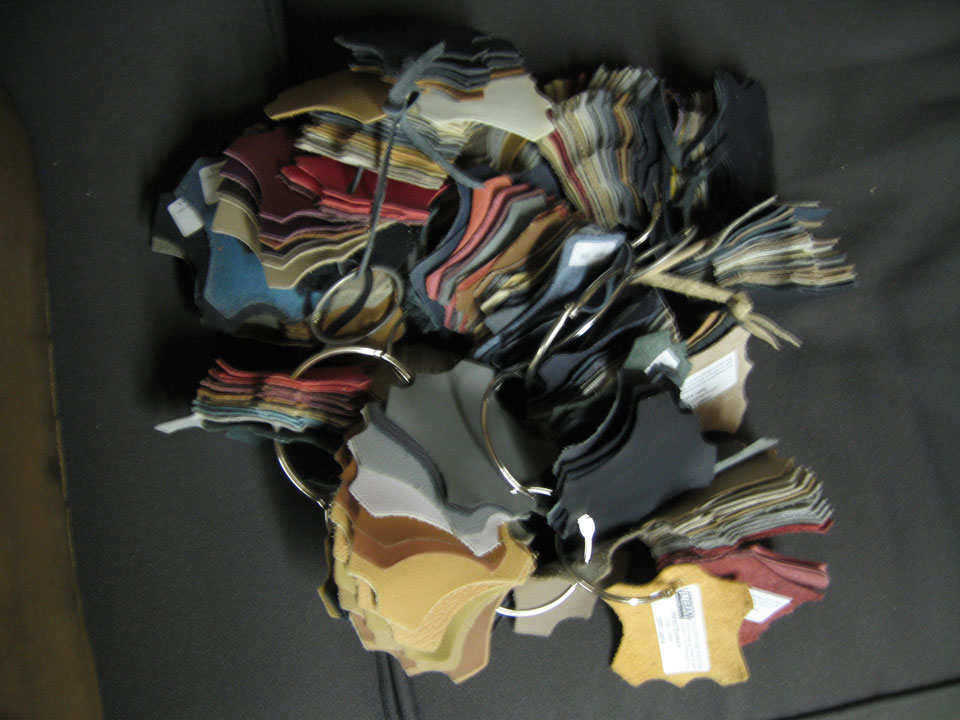 I'm not sure if it's what I will go with as I'd like it to be more 70's 'camel', but out of all the ones he had this was the closest, it's sahara beige, a 996-7 color. This is leather, not leatherette which I think I might prefer, as he says that it will be mostly labor the cost. He's going to get me some more swatches, we'll see. I'm more concerned about camel-ish square-weave carpet. 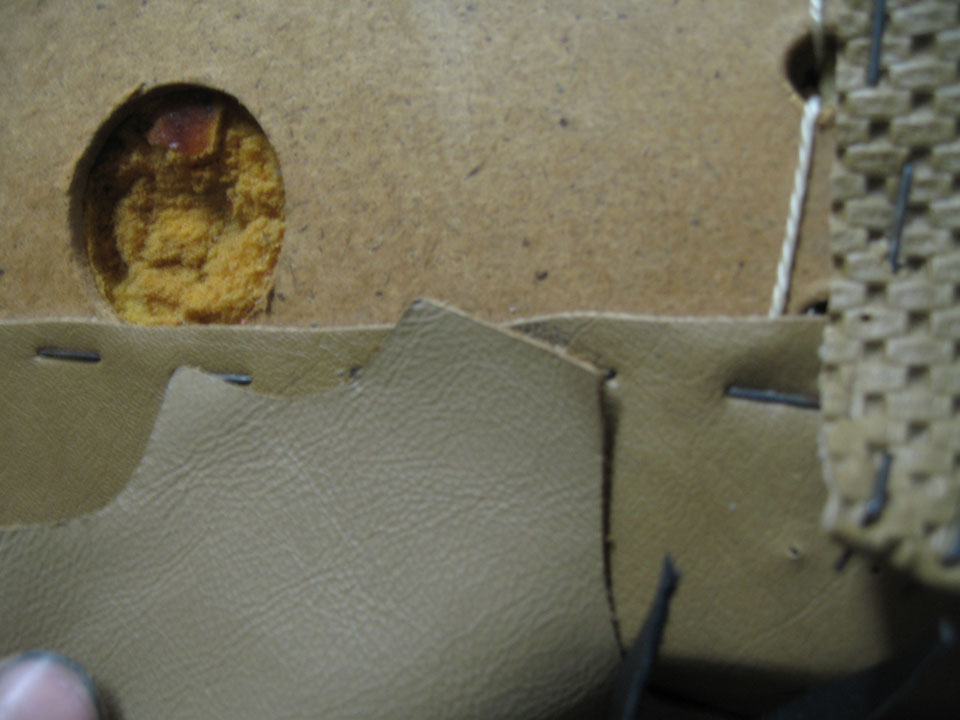 I've sanded it a bit more, got the cowl and working on the gas tank compartment now. I ordered metal prep and primer, ppg, from the paint store. I'll need to get the long together before I can move the car onto the dolly in order to set up the ladder to move the lights and hang the divider. I can't wait to cover this metal up. I don't know how the anklebiter sits around like that. (IMG:style_emoticons/default/biggrin.gif) (IMG:style_emoticons/default/poke.gif) That's the entirety of the donor car there in the corner. Attached thumbnail(s)   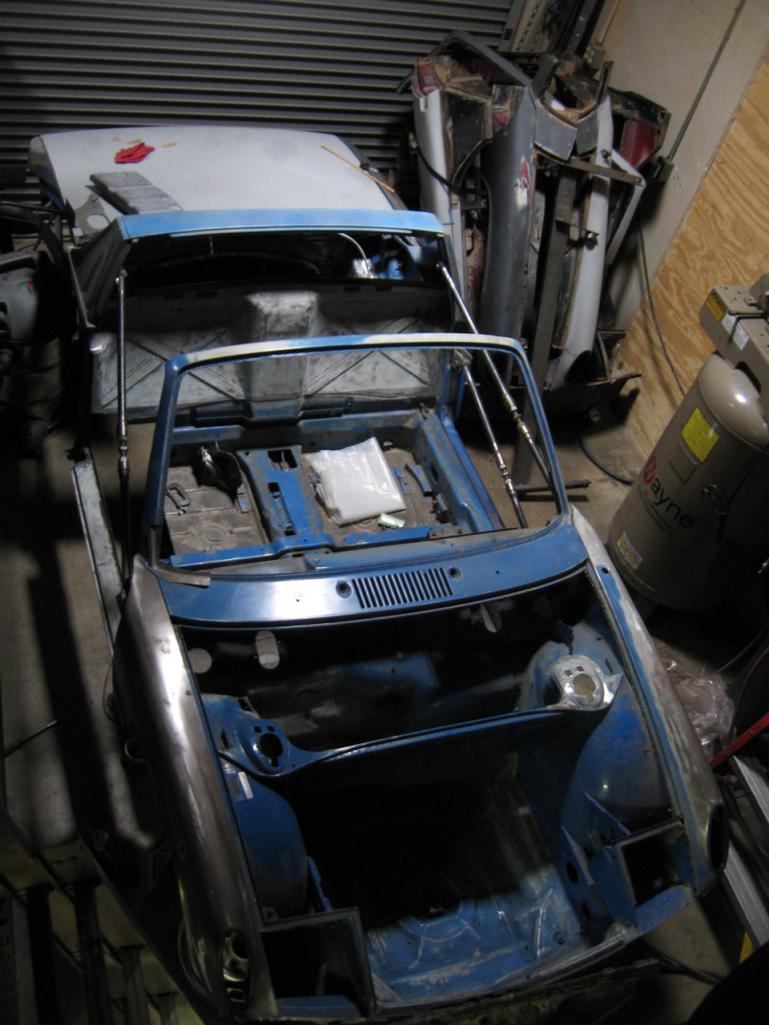
|
|
|
|
| nathansnathan |
Oct 19 2011, 10:59 PM
Post
#81
|
|
Senior Member Group: Members Posts: 1,052 Joined: 31-May 10 From: Laguna Beach, CA Member No.: 11,782 Region Association: None |
I'm pretty excited about the G&R swapmeet. Coming along slowly but surly. A few recap pics.
 |
|
|
|
| nathansnathan |
Oct 19 2011, 11:04 PM
Post
#82
|
|
Senior Member Group: Members Posts: 1,052 Joined: 31-May 10 From: Laguna Beach, CA Member No.: 11,782 Region Association: None |
I finally made the 5th page.
The pics are a little large maybe? I've wondered if it is too much. I think I put too many in a post throughout. I envisioned the thread as an immersive pictorial essay of 914 restoration. The load time, though, may be too much? 800x600 seems ideal. (IMG:style_emoticons/default/biggrin.gif) 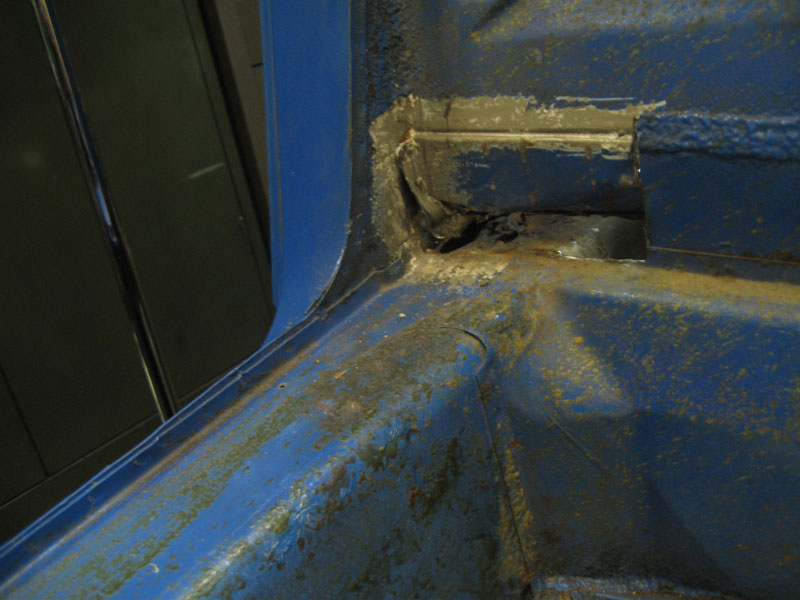 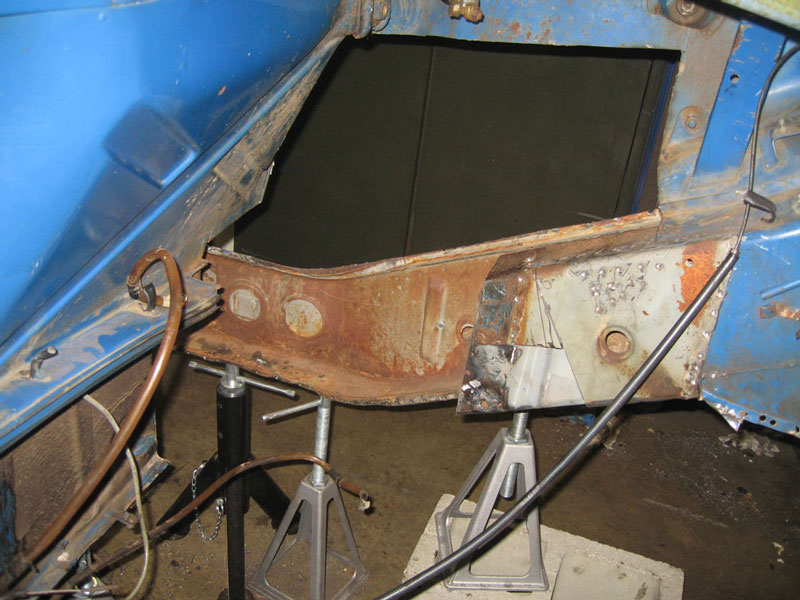 |
|
|
|
| nathansnathan |
Oct 19 2011, 11:18 PM
Post
#83
|
|
Senior Member Group: Members Posts: 1,052 Joined: 31-May 10 From: Laguna Beach, CA Member No.: 11,782 Region Association: None |
To show it before and during adds drama and makes it look like I am progressing faster. (IMG:style_emoticons/default/piratenanner.gif)
 A bit of fitting up, a few pieces put together, some tricky bit to do at the bottom. 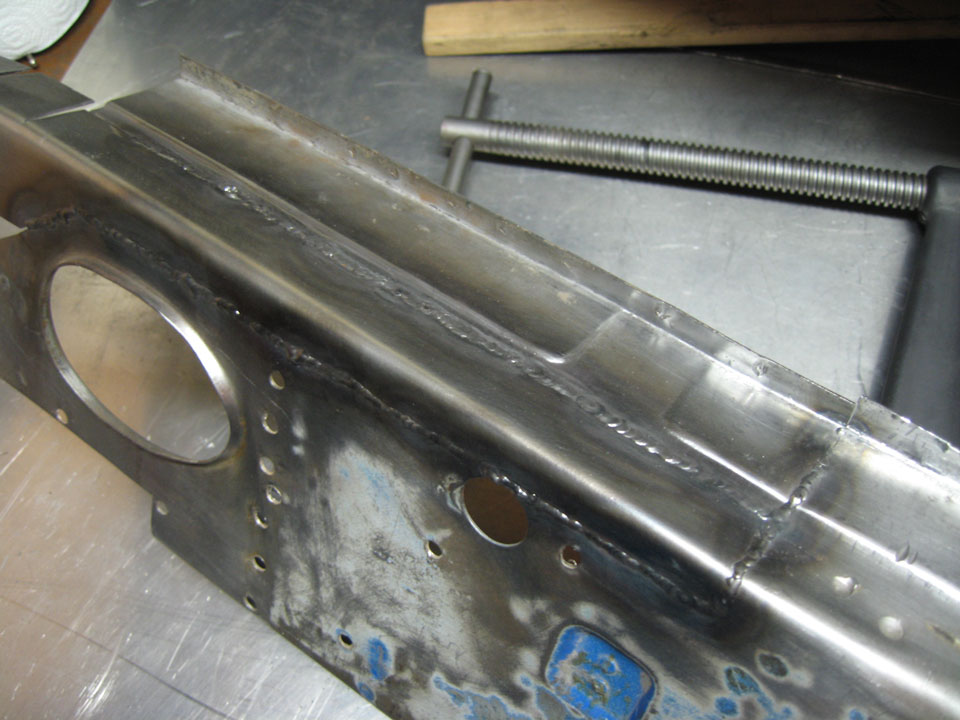 Welding is coming along, could be prettier. I will grind the butt welds though. 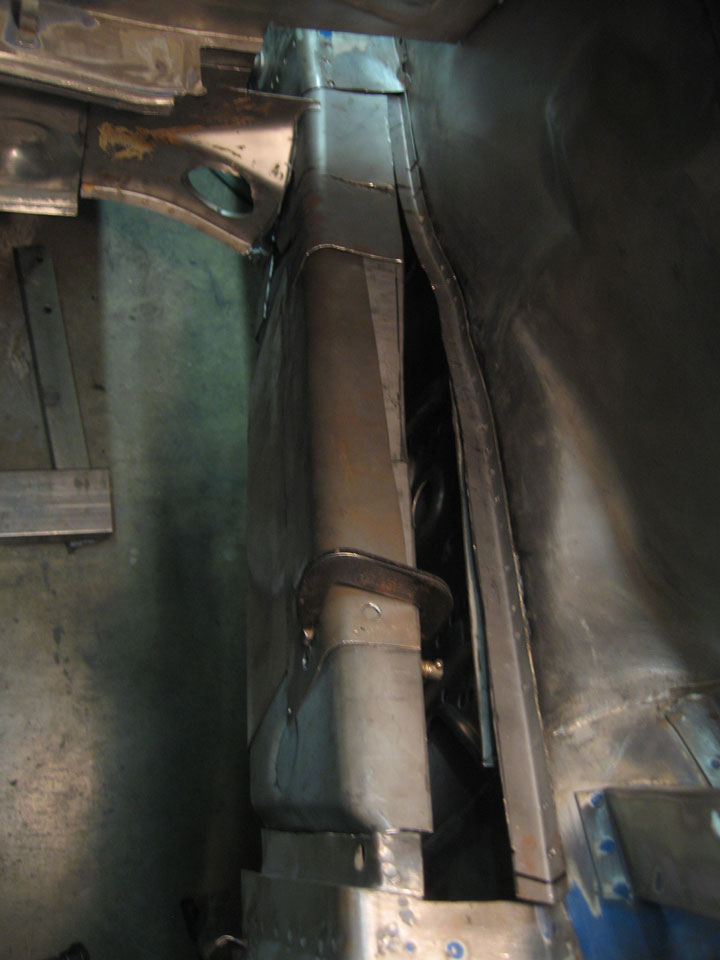 Almost have all the pieces.. I do have that back bit with the recessed hole for behind the inner console. 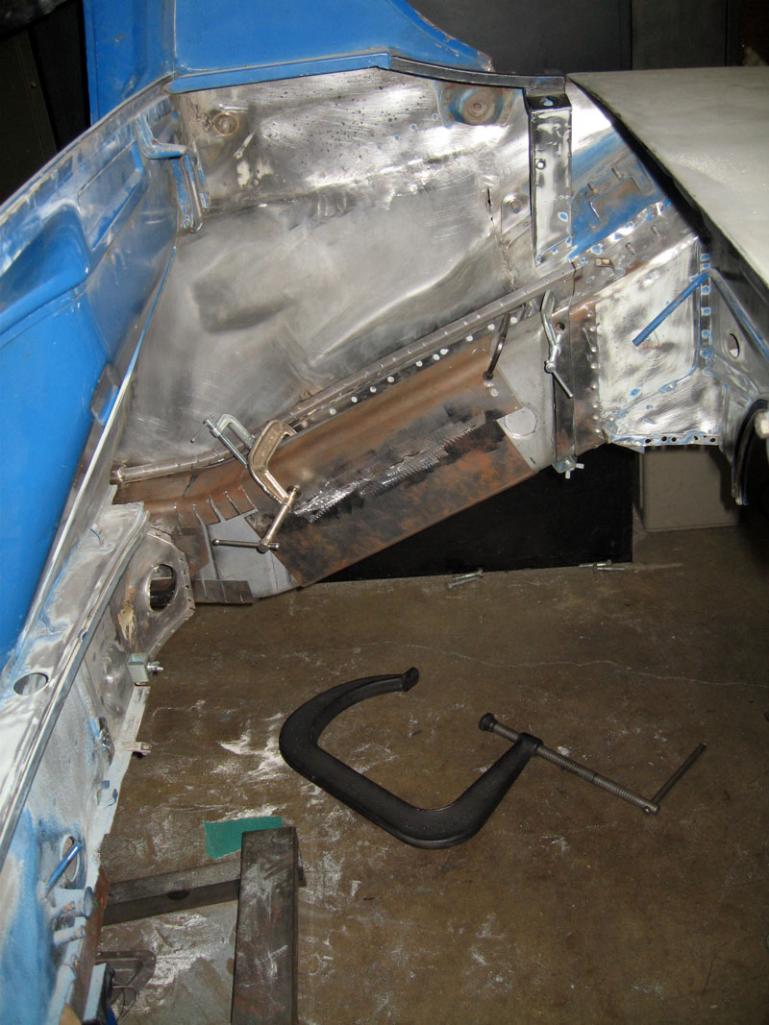 A bit of rust color there, a lot of handling going on, but well get it clean before it goes back together. I got my big-ass clamp. Who knew 8 inches could be so big. I blasted, sanded and painted it with high temp paint. 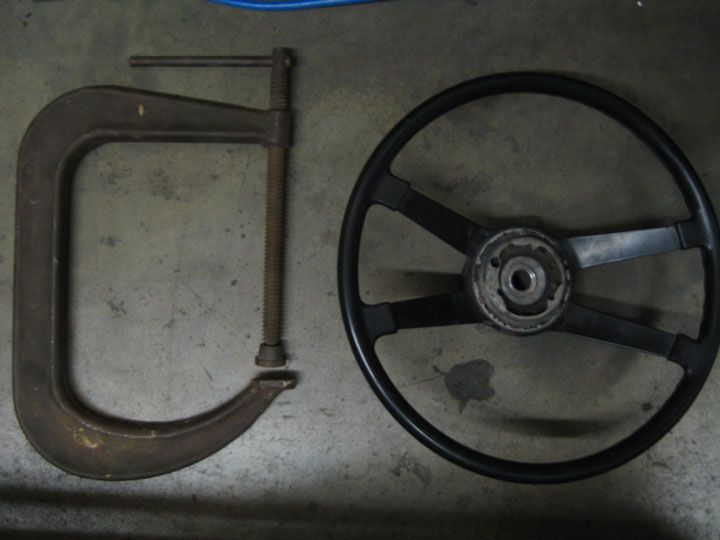 I've got the stuff to put down epoxy primer though. A few things to do before I can spray any. (IMG:style_emoticons/default/bye1.gif) 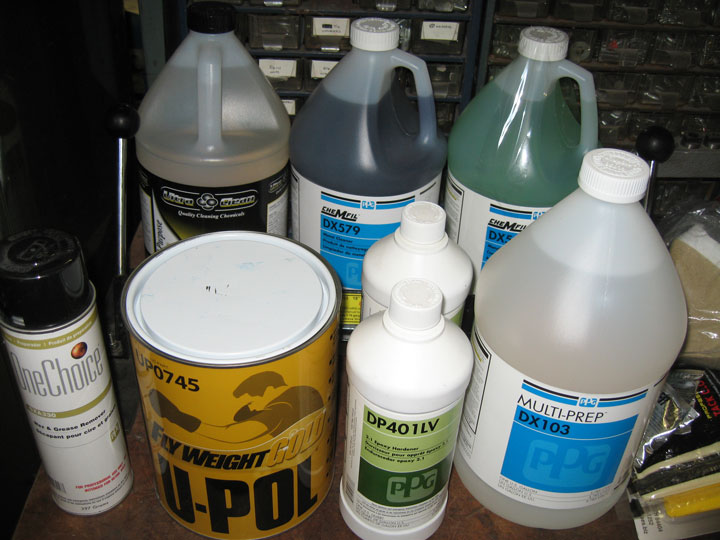 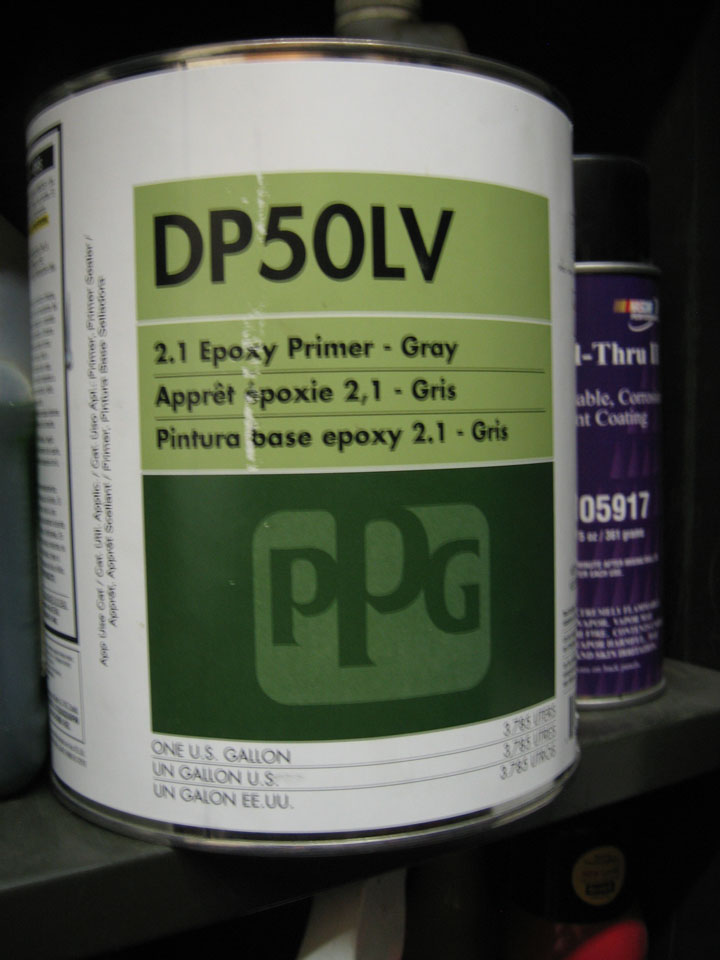 |
|
|
|
| SirAndy |
Oct 20 2011, 12:41 AM
Post
#84
|
|
Resident German Group: Admin Posts: 41,828 Joined: 21-January 03 From: Oakland, Kalifornia Member No.: 179 Region Association: Northern California |
|
 |
|
| Rex-n-effect |
Oct 20 2011, 09:53 AM
Post
#85
|
|
Newbie Group: Members Posts: 44 Joined: 4-February 11 From: Missoula, MT Member No.: 12,659 Region Association: None |
Your work is looking really good! Have you done anymore to your B pillar air vent areas yet? That is next up on mine and some photos of your work there would really help me???
Rex |
|
|
|
| nathansnathan |
Oct 20 2011, 12:00 PM
Post
#86
|
|
Senior Member Group: Members Posts: 1,052 Joined: 31-May 10 From: Laguna Beach, CA Member No.: 11,782 Region Association: None |
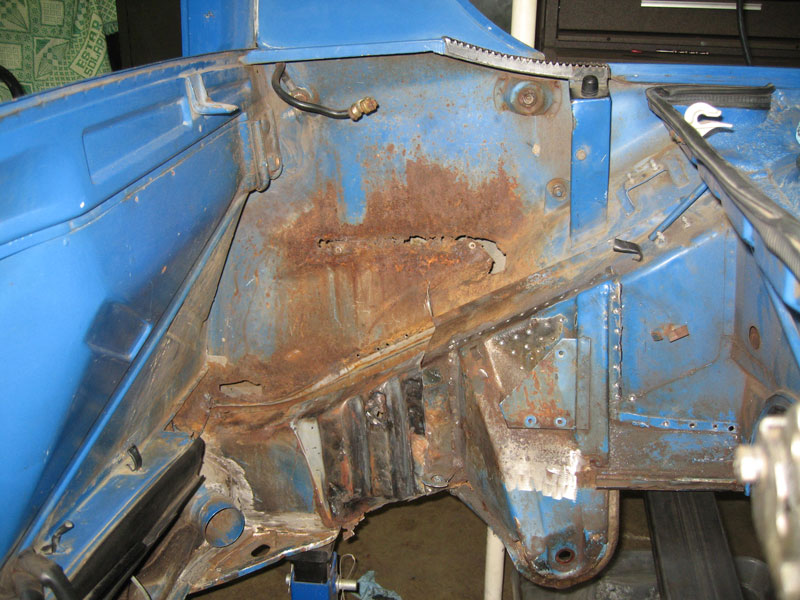
QUOTE(Rex-n-effect @ Oct 20 2011, 08:53 AM) Your work is looking really good! Have you done anymore to your B pillar air vent areas yet? That is next up on mine and some photos of your work there would really help me??? Rex Thanks man. I really appreciate the encouragement, guys. The plan for the air vent is to cut the old one out entirely, just behind the tube where it becomes double-layered. The new piece will have part of the door jam where it comes through and include the recess just behind the door pull, so that whole "corner". First the long, then the engine mount, the firewall, the outer suspension console, then the inner console, the inter-ties, maybe the engine shelf, and then the fresh air duct. (IMG:style_emoticons/default/biggrin.gif) The rear fender I'll be fitting at the same time. |
|
|
|
| veltror |
Oct 20 2011, 01:30 PM
Post
#87
|
|
Senior Member Group: Members Posts: 928 Joined: 27-April 08 From: Potters Bar Herts UK Member No.: 8,978 Region Association: None |
it's as if I was doing my car again..
|
|
|
|
| nathansnathan |
Dec 10 2011, 11:54 PM
Post
#88
|
|
Senior Member Group: Members Posts: 1,052 Joined: 31-May 10 From: Laguna Beach, CA Member No.: 11,782 Region Association: None |
(IMG:http://www.914world.com/bbs2/uploads_offsite/www.914club.com-11782-1296535789.11.jpg)
QUOTE(ripper911 @ Apr 5 2011, 09:52 PM) Also, I don't think that is a black widow. But, maybe thats a california black widow. I think it's bit me, a brown widow, though. Their venom is twice as toxic as a black widow's but they inject less and it stays more localized instead of going to the whole body. (IMG:http://www.914world.com/bbs2/uploads_offsite/cisr.ucr.edu-11782-1323582892.1.jpg) That's me in the middle of that large red area. I felt the bump on Monday last week. I think it was in my overalls. I thought it might go away, the bump, but it spread, swelled up. I ended up at the hospital on friday, and again today for intravenous antibiotic injections, and will be back there again tomorrow. Unbelievable the amount of nasty ichor, pus? that I have witnessed spout from my arm. (IMG:style_emoticons/default/WTF.gif) (IMG:style_emoticons/default/head_hurts_kr.gif) (IMG:style_emoticons/default/wacko.gif) (IMG:style_emoticons/default/icon8.gif) (IMG:style_emoticons/default/sad.gif) (IMG:style_emoticons/default/ohmy.gif) (IMG:style_emoticons/default/smoke.gif) (IMG:style_emoticons/default/mellow.gif) (IMG:style_emoticons/default/cool_shades.gif) I'd hoped to be putting in the long on my next post here but I have been unable to work with it going on. It is a bacterial infection, fever, shaking, headache, etc. I've got some shots of where it sits, fairly impressive with almost all of the inner long welded and the firewall and floor fitted up. I will post pics soon (of the car, not the wound (IMG:style_emoticons/default/biggrin.gif) ) |
|
|
|
|
1 User(s) are reading this topic (1 Guests and 0 Anonymous Users)
0 Members:

|
Lo-Fi Version | Time is now: 5th October 2024 - 11:18 PM |
Invision Power Board
v9.1.4 © 2024 IPS, Inc.