|
|

|
Porsche, and the Porsche crest are registered trademarks of Dr. Ing. h.c. F. Porsche AG.
This site is not affiliated with Porsche in any way. Its only purpose is to provide an online forum for car enthusiasts. All other trademarks are property of their respective owners. |
|
|
  |
| 3d914 |
 Sep 6 2012, 09:19 PM Sep 6 2012, 09:19 PM
Post
#81
|
|
Senior Member    Group: Members Posts: 1,275 Joined: 24-September 03 From: Benson, AZ Member No.: 1,191 Region Association: Southwest Region |
Forgot to take pictures of the patches and fixes in the back firewall but I got the rest of the grinding and cleanup done and shot some primer. (IMG:http://www.914world.com/bbs2/uploads/post-12268-1329020090_thumb.jpg) Mike, looking good. What gun & primer are you using? Is final paint single stage? Gettin close to the same stage on mine - love the details! Keep it up. |
| balljoint |
 Sep 6 2012, 09:46 PM Sep 6 2012, 09:46 PM
Post
#82
|
|
914 Wizard           Group: Members Posts: 10,000 Joined: 6-April 04 Member No.: 1,897 Region Association: None |
The last cruise night in Milton was last Sunday. You have 8 months to get that puppy back together for the first one next Spring. (IMG:style_emoticons/default/blink.gif) Good luck.
Worst comes to worst just get a flat tow bracket for it and you can sit in the drivers seat and I will pull you up and down Main St. a couple of times. (IMG:style_emoticons/default/smile.gif) Looking good. |
| MrHyde |
 Sep 9 2012, 04:42 PM Sep 9 2012, 04:42 PM
Post
#83
|
|
Senior Member    Group: Members Posts: 525 Joined: 13-October 10 From: Ontario, Canada Member No.: 12,268 Region Association: None |
Forgot to take pictures of the patches and fixes in the back firewall but I got the rest of the grinding and cleanup done and shot some primer. (IMG:http://www.914world.com/bbs2/uploads/post-12268-1329020090_thumb.jpg) Mike, looking good. What gun & primer are you using? Is final paint single stage? Gettin close to the same stage on mine - love the details! Keep it up. Primer and single stage paint are both PPG... primer gun is a $24 princess auto special (or Harbour Frieght for the Americans ) and top coat gun is a devilbiss ( cant remember the model but its anodized blue) |
| MrHyde |
 Sep 11 2012, 09:02 PM Sep 11 2012, 09:02 PM
Post
#84
|
|
Senior Member    Group: Members Posts: 525 Joined: 13-October 10 From: Ontario, Canada Member No.: 12,268 Region Association: None |
Primed today, also did some filler and sanding.. Tomorrow, more sanding and maybe painting some colour.. (IMG:style_emoticons/default/smile.gif)
Attached thumbnail(s) 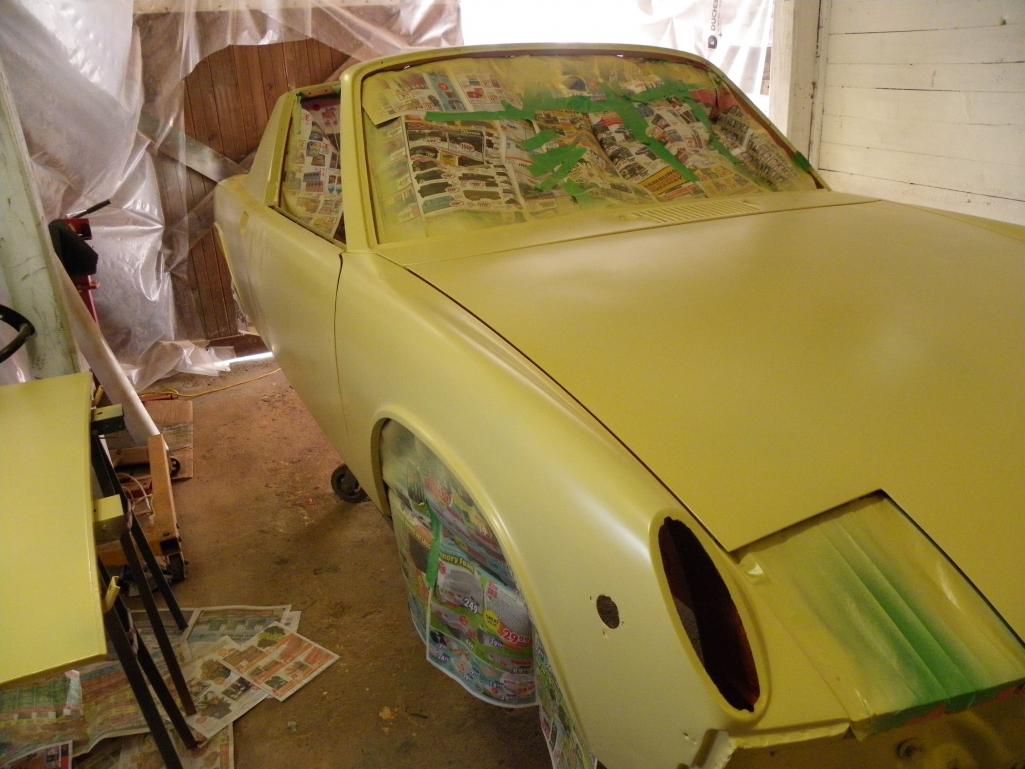
|
| MrHyde |
 Sep 13 2012, 11:47 AM Sep 13 2012, 11:47 AM
Post
#85
|
|
Senior Member    Group: Members Posts: 525 Joined: 13-October 10 From: Ontario, Canada Member No.: 12,268 Region Association: None |
Well... The car is now Tangerine orange (IMG:style_emoticons/default/smile.gif)
The filler I had to put on the door and a couple small spots didn't turn out as good as I'd hoped.. I've heard someone say " its just like mudding drywall " and well I hate doing that and I suck at it too... So I'm a bit disapointed in how the filler turned out.. BUT I'm not looking for a perfect concours car and I knew already that I'd be getting another ( professional this time ) paint job done in a couple years.. I just need the car back to one colour and welded up so I can assemble it... The paint on the other hand turned out pretty good for a first timer with no training to speak of... I have a couple runs to sand/buff out once my dry time is up. Considering I painted in my garage, with vapour barrier walls and ceiling and a big fan to create negative pressure and poor lighting, I think it turned out decent.. True test will be tomorrow when I pull it out of the garage into the sunlight... Attached thumbnail(s) 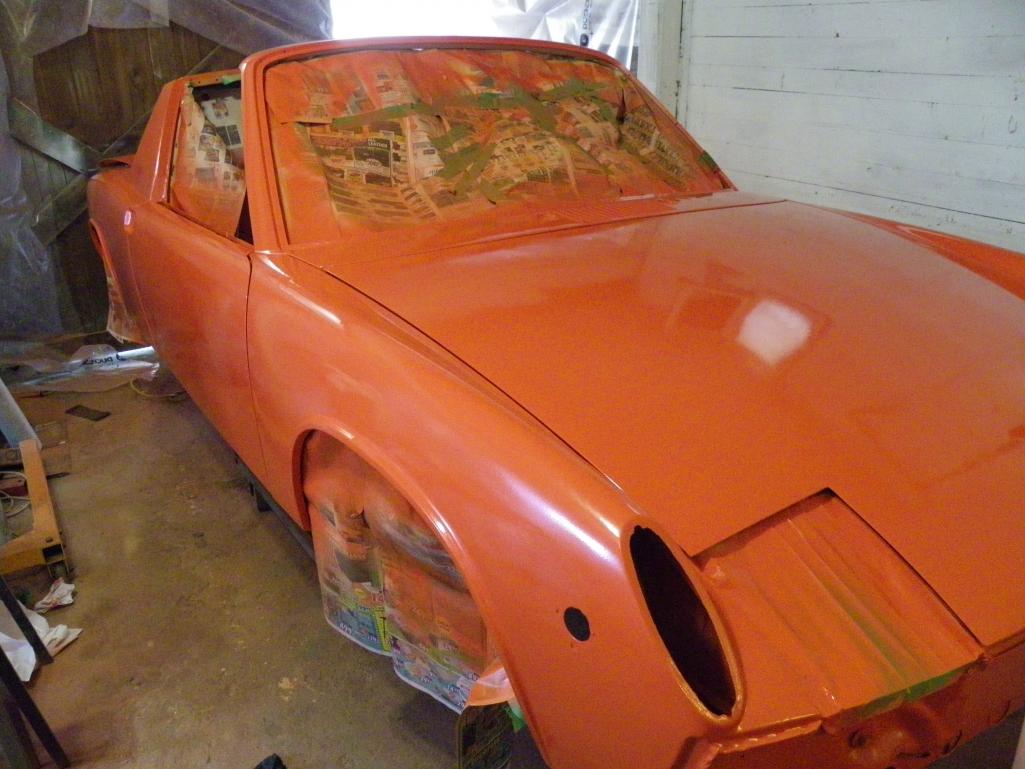
|
| MrHyde |
 Oct 4 2012, 12:40 PM Oct 4 2012, 12:40 PM
Post
#86
|
|
Senior Member    Group: Members Posts: 525 Joined: 13-October 10 From: Ontario, Canada Member No.: 12,268 Region Association: None |
draged it outside and pulled off the masking, etc.. Well I wanted a 10 ft paint job and I'd say thats what i got.. I still want to repaint the left rear quarter, but I think we've run out of warm days for the year and its getting cold at night, so it will have to wait untill next spring.. I'm starting to now order parts for the suspension to get that all hung... More to come in a week or two. (IMG:style_emoticons/default/beerchug.gif)
Attached thumbnail(s) 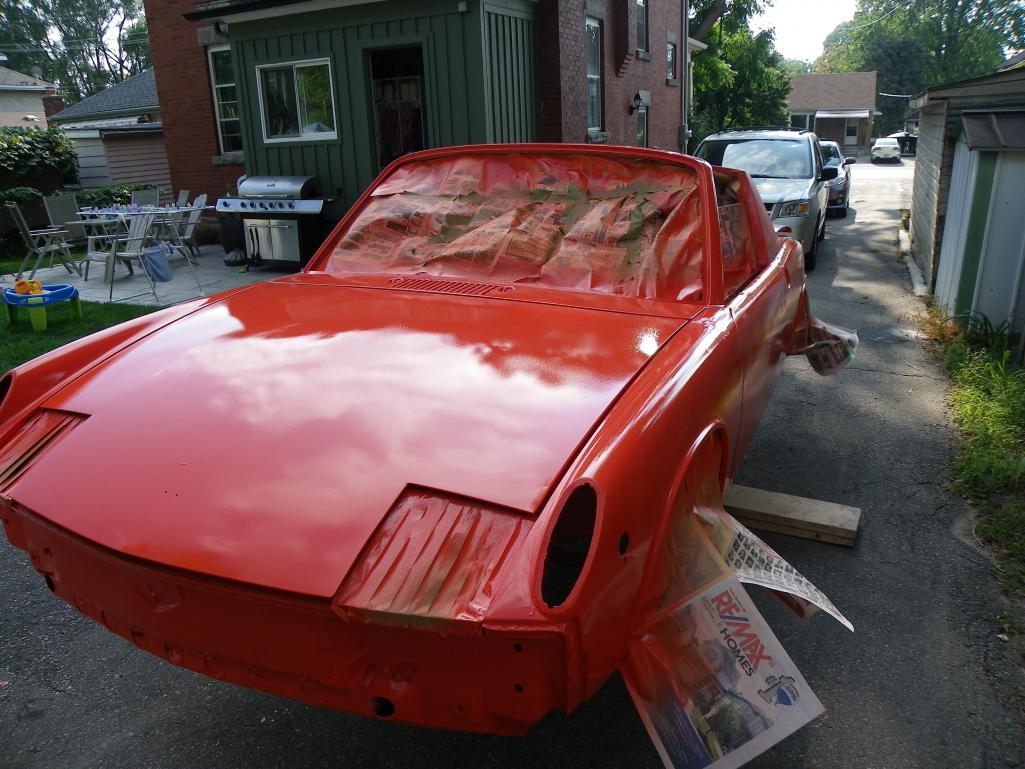
|
| MrHyde |
 Oct 4 2012, 12:47 PM Oct 4 2012, 12:47 PM
Post
#87
|
|
Senior Member    Group: Members Posts: 525 Joined: 13-October 10 From: Ontario, Canada Member No.: 12,268 Region Association: None |
Oh ya.. you may notice the hole where the jack post would be.. I've decided to not run with the jack post as they just rust out anyways... I took off the remains of the post earlier and welded up the longitudinal in that area. When I welded in the rear chassis stiffner kit I fab'd up a piece to tie into the front most piece of the stiffeners and covered over where the jack post area was ( after repairing the original long of course). After it was all covered and welded, I made a hole in the area where the jack post was so that I would have access to spray some eastwood frame coating stuff down the longs. I've coverd that hole with a grommet to seal out water and allow acceccability to inspect later. This shouldn't affect the structural of the car as the piece I welded in over the long welds around the top and bottom of the long as well just as the jack post cover did, as well as being welded to the long and tied into the chassis stiffner.
Attached thumbnail(s) 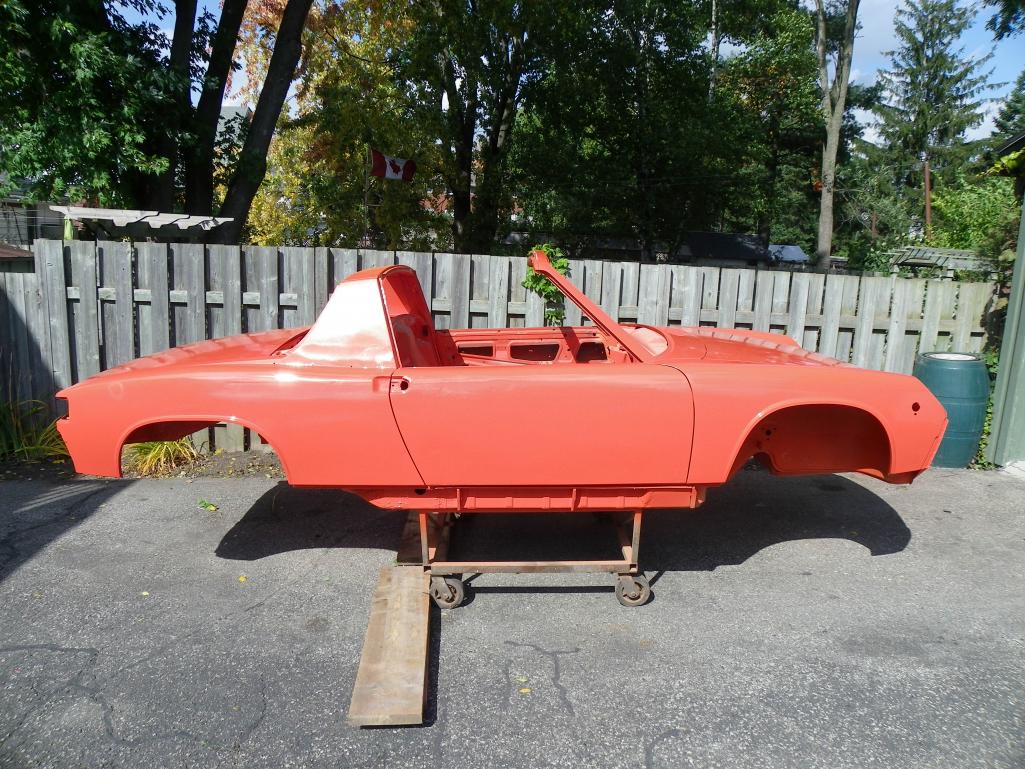
|
| MrHyde |
 Oct 21 2012, 04:41 PM Oct 21 2012, 04:41 PM
Post
#88
|
|
Senior Member    Group: Members Posts: 525 Joined: 13-October 10 From: Ontario, Canada Member No.: 12,268 Region Association: None |
I got the engine grill back together and the broken letters replaced and put it back on the car temporarily. I'll have to take it off when its time to put the engine in ofcourse. Put the front hood springs back on and both trunk lids.
Also pulled down my suspension parts from the barn and got in new bushings from Eric. Big thing was that the car is back off the dolly for good now. Back sitting on jack stands so that I can start assembly. Attached thumbnail(s) 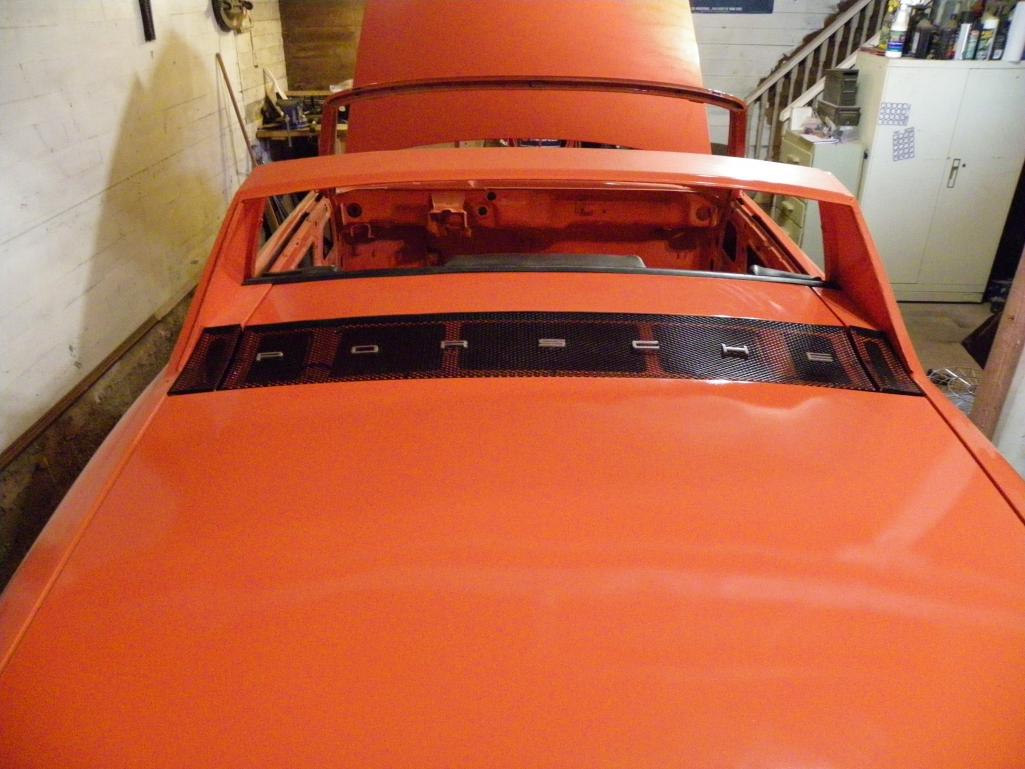
|
| MrHyde |
 Oct 21 2012, 04:43 PM Oct 21 2012, 04:43 PM
Post
#89
|
|
Senior Member    Group: Members Posts: 525 Joined: 13-October 10 From: Ontario, Canada Member No.: 12,268 Region Association: None |
asdf
Attached thumbnail(s) 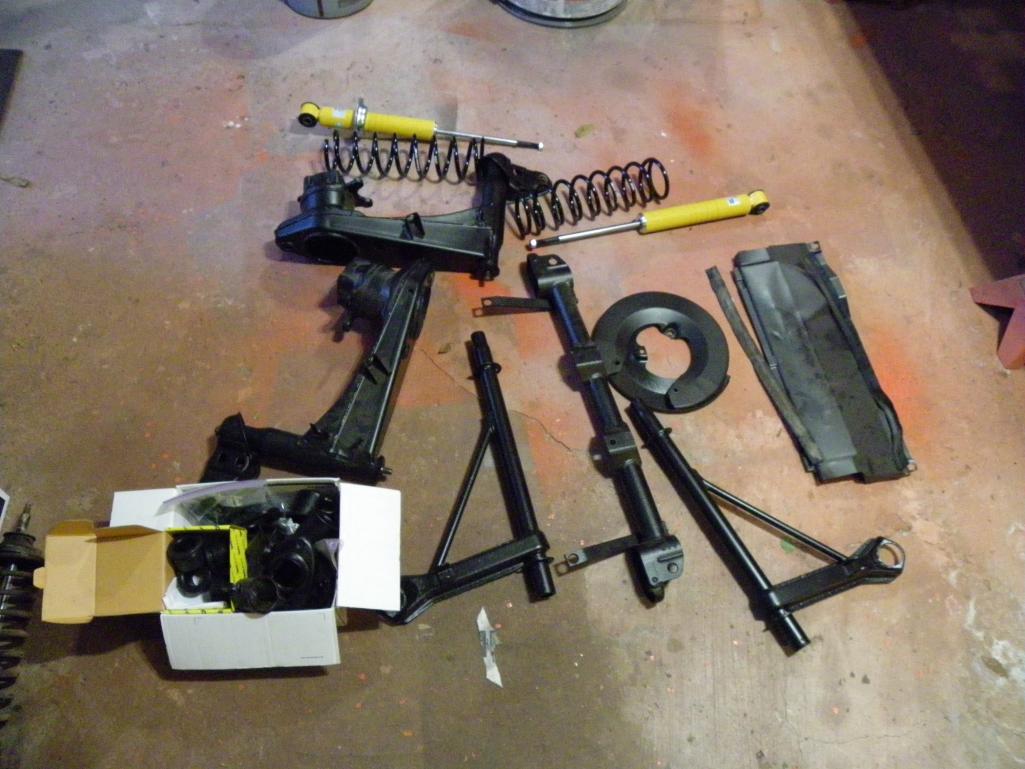
|
| balljoint |
 Oct 21 2012, 04:49 PM Oct 21 2012, 04:49 PM
Post
#90
|
|
914 Wizard           Group: Members Posts: 10,000 Joined: 6-April 04 Member No.: 1,897 Region Association: None |
Let me know if you need a spring compressor.
|
| MrHyde |
 Oct 21 2012, 05:04 PM Oct 21 2012, 05:04 PM
Post
#91
|
|
Senior Member    Group: Members Posts: 525 Joined: 13-October 10 From: Ontario, Canada Member No.: 12,268 Region Association: None |
hmm I read somewhere on here that you dont need a spring compressor to take the springs off/on the shocks ?? (IMG:style_emoticons/default/confused24.gif)
Minor issue with the bushings I got from Eric... the bushing OD is too small for my trailing arms.. the bushings spin in the arm... I gotta figure out where I can get some shim nearby |
| balljoint |
 Oct 21 2012, 05:15 PM Oct 21 2012, 05:15 PM
Post
#92
|
|
914 Wizard           Group: Members Posts: 10,000 Joined: 6-April 04 Member No.: 1,897 Region Association: None |
If you have stock springs then the compressor is needed. The heavier aftermarket springs tend to have the opposite problem of not engaging the perch as they are too short at the full jackstand induced droop.
|
| MrHyde |
 Oct 21 2012, 05:26 PM Oct 21 2012, 05:26 PM
Post
#93
|
|
Senior Member    Group: Members Posts: 525 Joined: 13-October 10 From: Ontario, Canada Member No.: 12,268 Region Association: None |
well I need the top perch and hardware off the old shock soooo Sure, I'll take you up on the offer.. will PM you..
|
| jersey914 |
 Oct 21 2012, 06:09 PM Oct 21 2012, 06:09 PM
Post
#94
|
|
Member   Group: Members Posts: 161 Joined: 6-September 12 From: Marlton, NJ Member No.: 14,895 Region Association: North East States |
(IMG:style_emoticons/default/popcorn[1].gif)
This car looks great! Congrats on the progress! Hope to see it done soon! Rob |
| MrHyde |
 Oct 28 2012, 05:13 PM Oct 28 2012, 05:13 PM
Post
#95
|
|
Senior Member    Group: Members Posts: 525 Joined: 13-October 10 From: Ontario, Canada Member No.: 12,268 Region Association: None |
Went down to Balljoint's place today and picked up the spring compressor and shoot the sh**.. Thanks for the 914 ride too (IMG:style_emoticons/default/smile.gif) Just what i needed. Some more motivation. (IMG:style_emoticons/default/smile.gif)
Got my old shock/spring taken apart and got the hardware off and setup the new shock/spring.. fixed my trailing arm bushing issue by using some super duper glue and now they're good and locked in the trailing arms. Re-honed the ID of the bushings and put the pivot shafts in. I was going to use some shim between the bushing OD and the trailing arm as I've read elsewhere on here, however the bushing were just barely a slip fit and i dont think there was even .002" room to play with, so the super glue will hold it still while the pivot shaft spins freely. Thanks again Balljoint.. I'll sort out when I can bring your spring compressor back. Attached thumbnail(s) 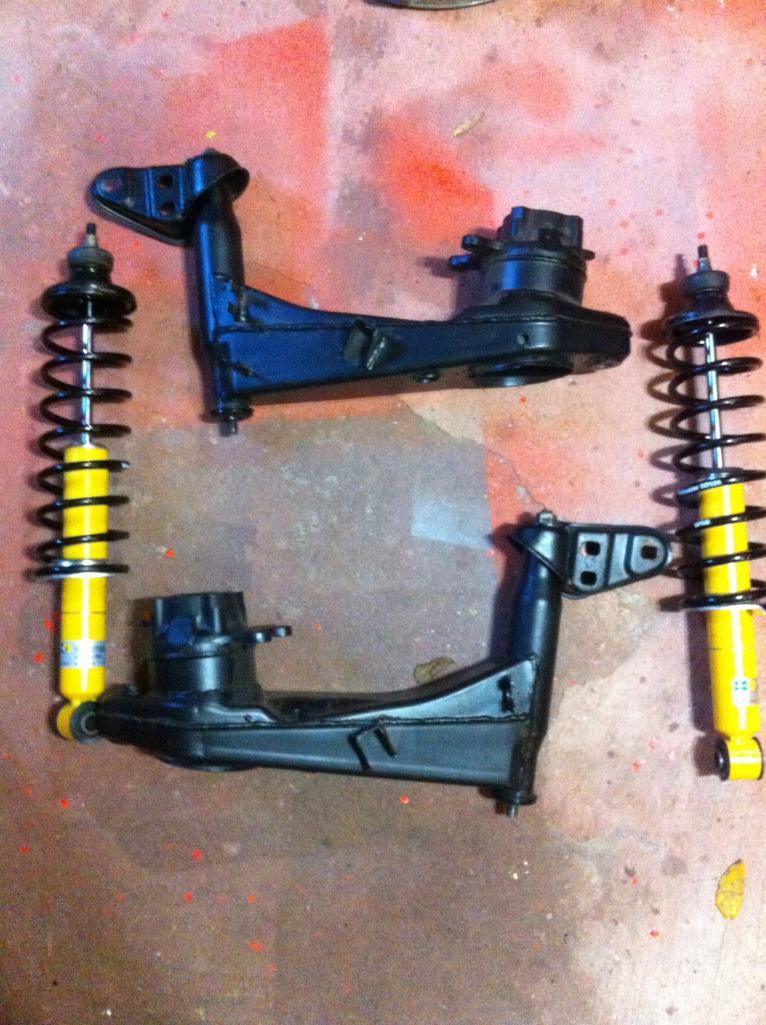
|
| FourBlades |
 Oct 28 2012, 05:22 PM Oct 28 2012, 05:22 PM
Post
#96
|
|
From Wreck to Rockin     Group: Members Posts: 2,056 Joined: 3-December 07 From: Brevard, FL Member No.: 8,414 Region Association: South East States 
|
Looking good man! (IMG:style_emoticons/default/piratenanner.gif) You will be so stoked when you take that first drive. (IMG:style_emoticons/default/driving.gif) It will all be worth it. (IMG:style_emoticons/default/smilie_pokal.gif) John |
| pete-stevers |
 Oct 28 2012, 06:10 PM Oct 28 2012, 06:10 PM
Post
#97
|
|
saved from fire!     Group: Members Posts: 2,645 Joined: 10-October 04 From: Abbotsford,BC, Canada Member No.: 2,914 Region Association: Pacific Northwest 
|
looks Great!!! (IMG:style_emoticons/default/biggrin.gif)
|
| MrHyde |
 Nov 2 2012, 11:58 AM Nov 2 2012, 11:58 AM
Post
#98
|
|
Senior Member    Group: Members Posts: 525 Joined: 13-October 10 From: Ontario, Canada Member No.: 12,268 Region Association: None |
Its Friday.. Time for some Engine porn... just picked this up from the machine shop. I didnt get it cleaned when I got the machine work done previously.
Attached thumbnail(s) 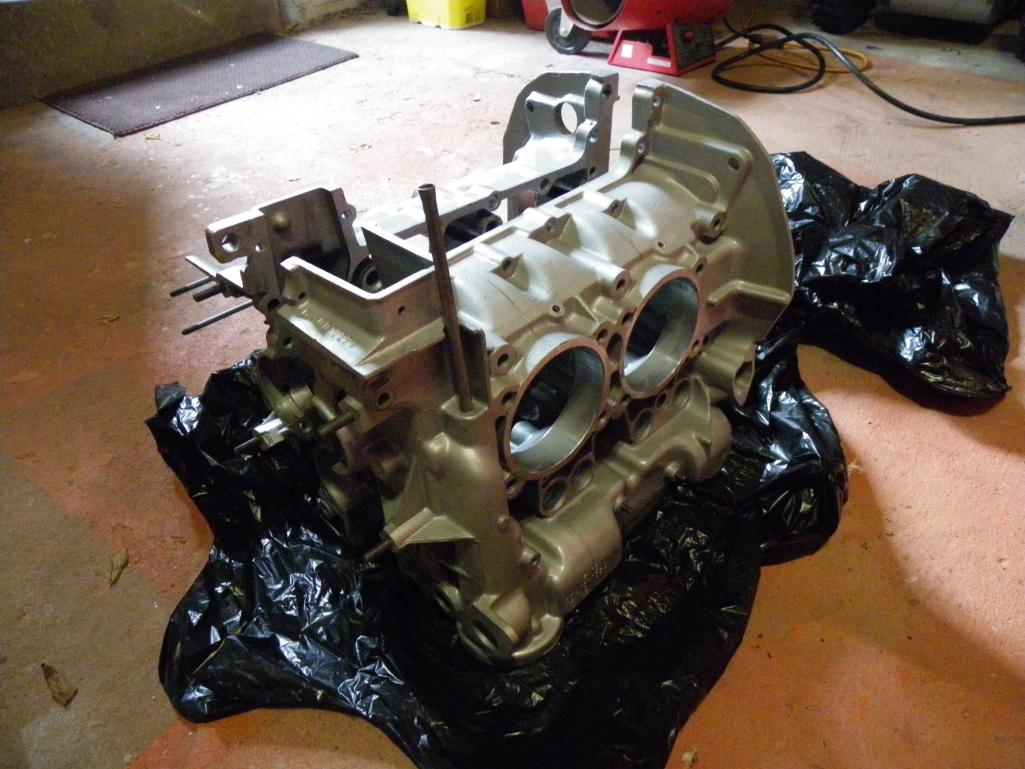
|
| balljoint |
 Nov 2 2012, 12:09 PM Nov 2 2012, 12:09 PM
Post
#99
|
|
914 Wizard           Group: Members Posts: 10,000 Joined: 6-April 04 Member No.: 1,897 Region Association: None |
Oh, uh oh. It's never going to run like that. (IMG:style_emoticons/default/unsure.gif) You're going to need a gallon of RTV.
|
| MrHyde |
 Nov 18 2012, 06:19 PM Nov 18 2012, 06:19 PM
Post
#100
|
|
Senior Member    Group: Members Posts: 525 Joined: 13-October 10 From: Ontario, Canada Member No.: 12,268 Region Association: None |
Got the front truck cable and latch installed, and the engine lid cable and latch. Also got the shock/springs bolted to the swing arms. Starting to look a bit better now (IMG:style_emoticons/default/smile.gif)
Oh.. the old caliper is there just so I can see what it'd look like.. I'll be getting some shiny restored calipers from PMB soon ( hopefully right after christmas ) Attached thumbnail(s) 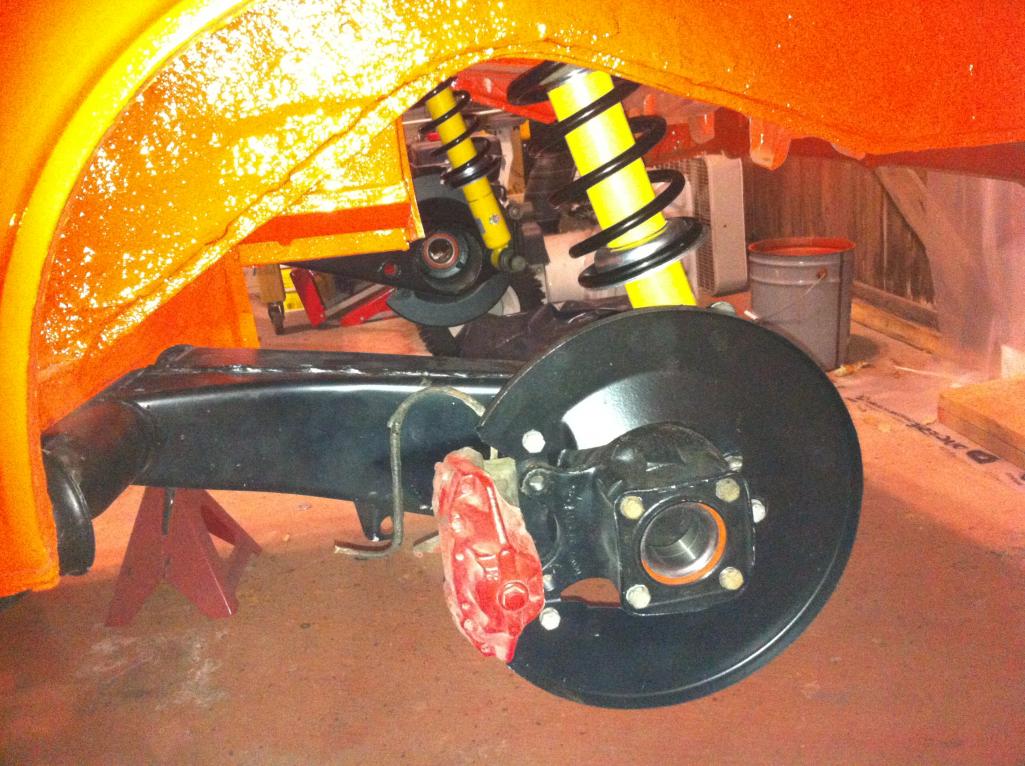
|
  |
1 User(s) are reading this topic (1 Guests and 0 Anonymous Users)
0 Members:

|
Lo-Fi Version | Time is now: 15th January 2025 - 01:55 AM |
Invision Power Board
v9.1.4 © 2025 IPS, Inc.


