|
|

|
Porsche, and the Porsche crest are registered trademarks of Dr. Ing. h.c. F. Porsche AG.
This site is not affiliated with Porsche in any way. Its only purpose is to provide an online forum for car enthusiasts. All other trademarks are property of their respective owners. |
|
|
  |
| Andyrew |
 Sep 7 2015, 02:44 AM Sep 7 2015, 02:44 AM
Post
#407
|
|
Spooling.... Please wait           Group: Members Posts: 13,377 Joined: 20-January 03 From: Riverbank, Ca Member No.: 172 Region Association: Northern California 
|
Dash wiring harness (There are 2 dash wiring harnesses in the picture)
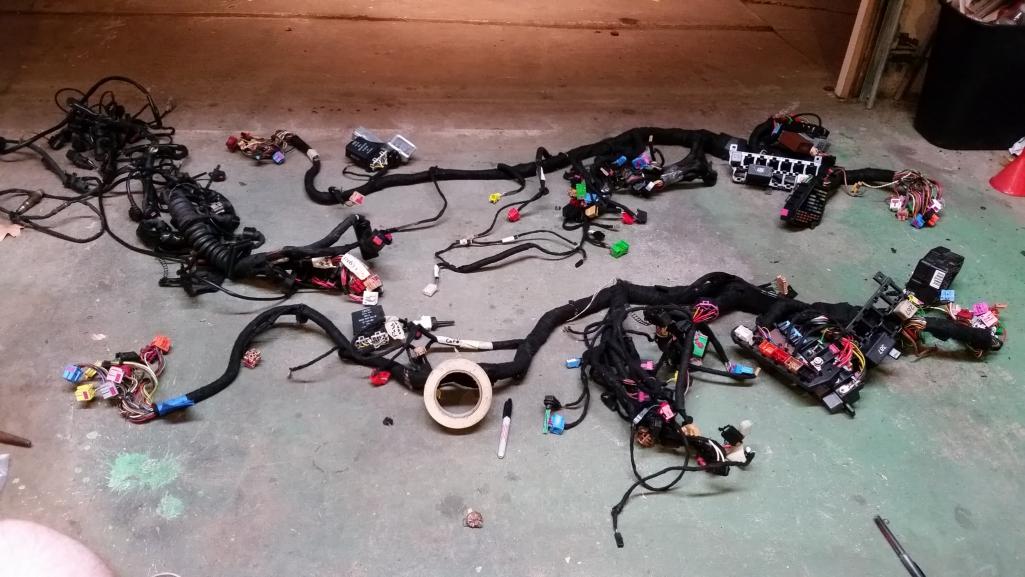 Engine harness (Bought it a while ago, but here it is laid out on plywood for storage and sorting) 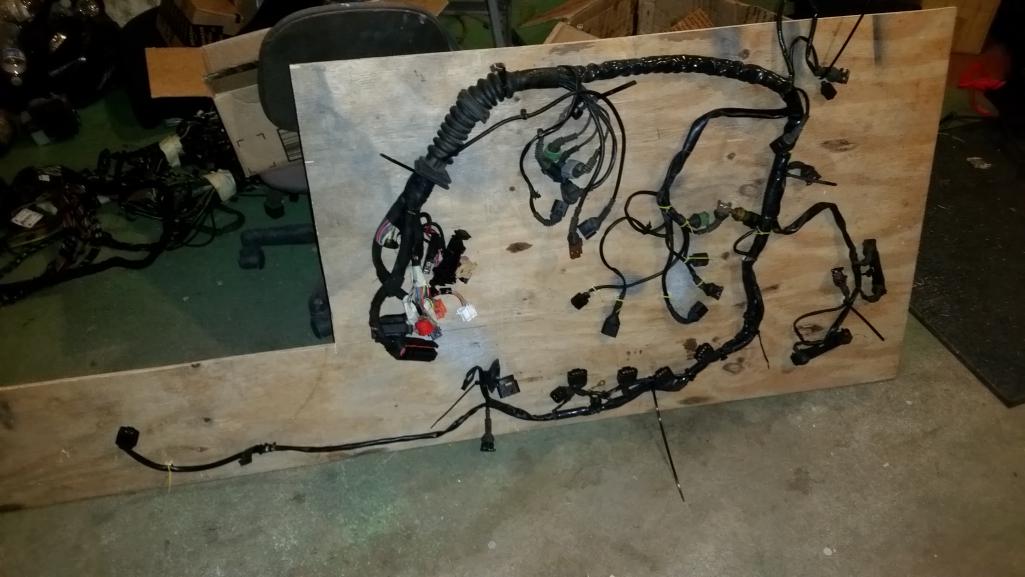 ABS module/block/sensors and pump for stability control (brake assisted) 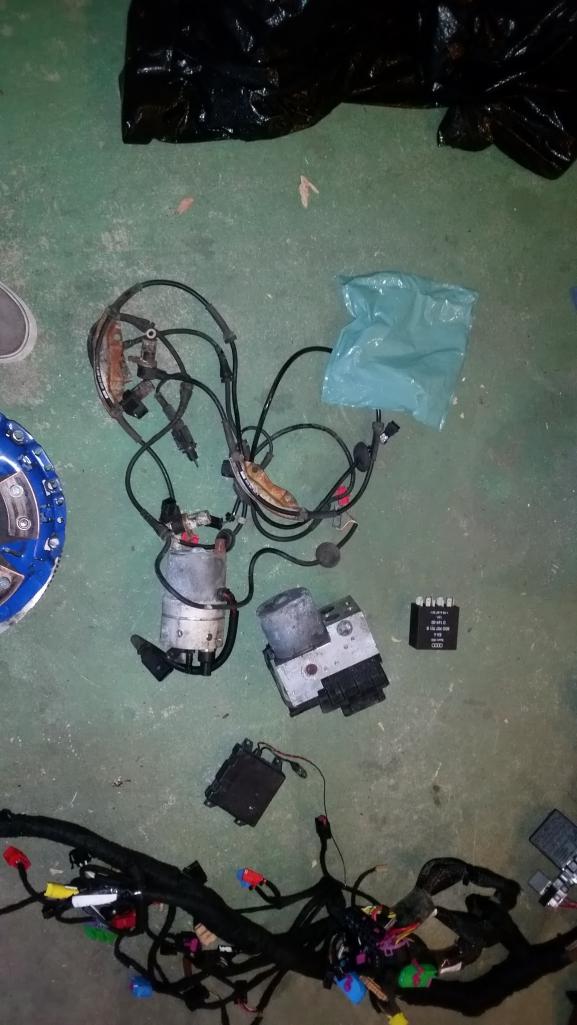 240MM 12lb flywheel for the 1.8T engine, 6 puck disk and standard pressure plate. 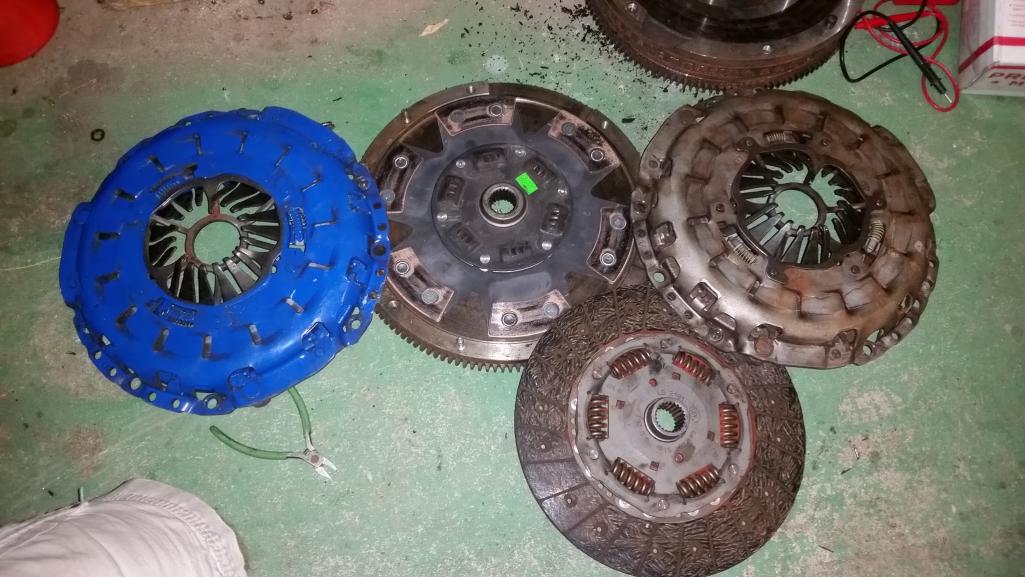 |
| Andyrew |
 Sep 7 2015, 03:05 AM Sep 7 2015, 03:05 AM
Post
#408
|
|
Spooling.... Please wait           Group: Members Posts: 13,377 Joined: 20-January 03 From: Riverbank, Ca Member No.: 172 Region Association: Northern California 
|
Ac/Heater box complete
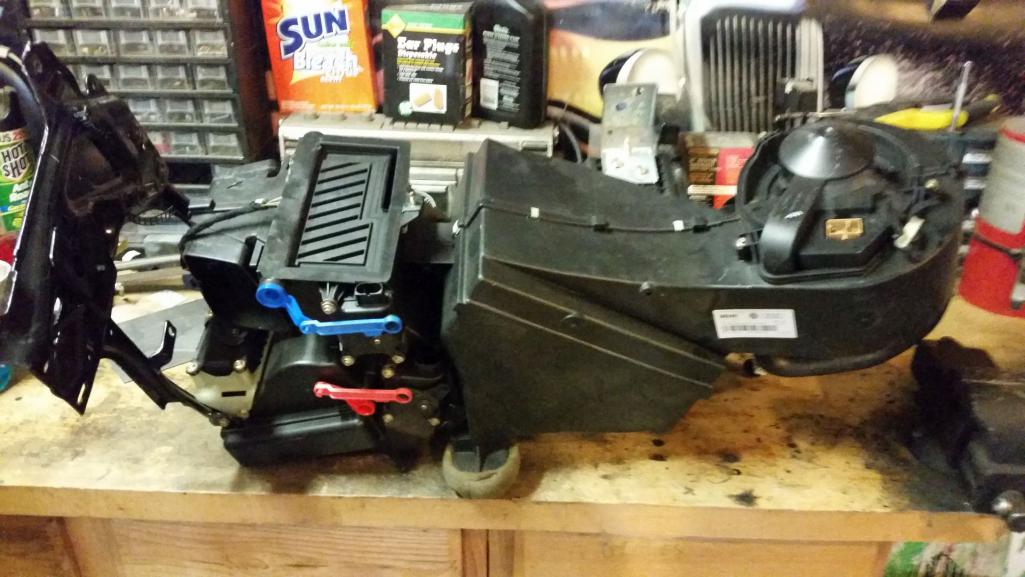 AC Heater box cut in half (removed fan) and opened up. 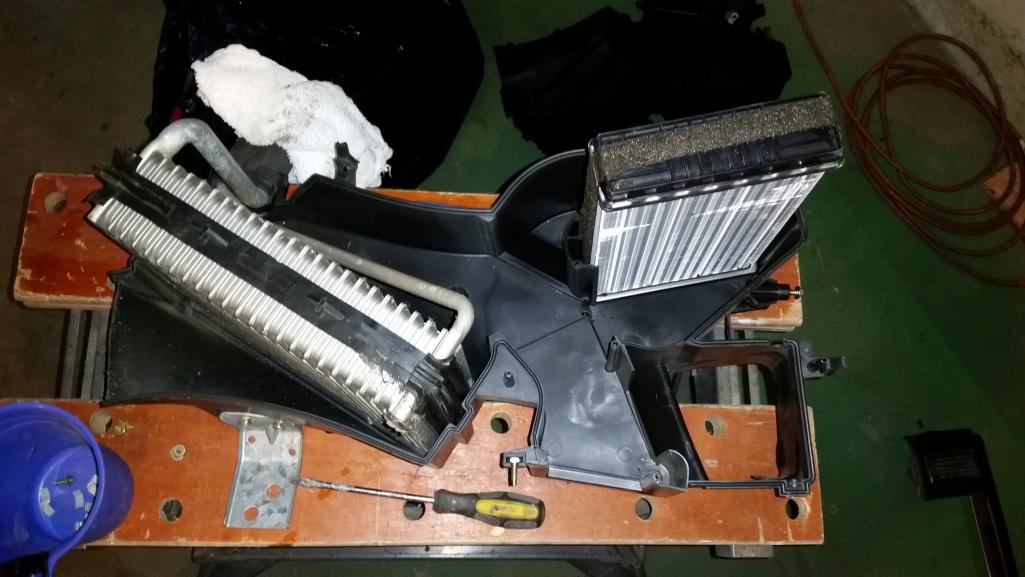 Fan in mock up position 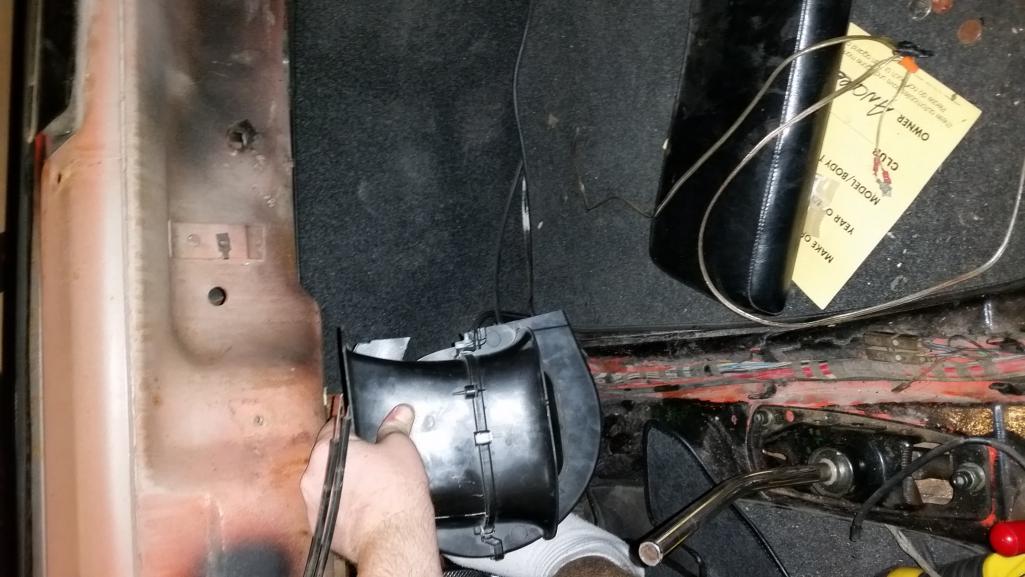 Ac/Heater box in mock up position. Yes this will kill half the front trunk but I still have plenty of space for a medium sized suitcase up front and this gives me much more legroom in the cabin. This position was suggested by my Jerika (my wife) and after looking at it, it make a lot of sense! And yes it is upside down, I dont have a good photo of the mock up position. The heater core connection lines will be cut short and the AC lines might get bent just to get a bit more room. And yes I will cut some holes to run the ducting to the cabin. 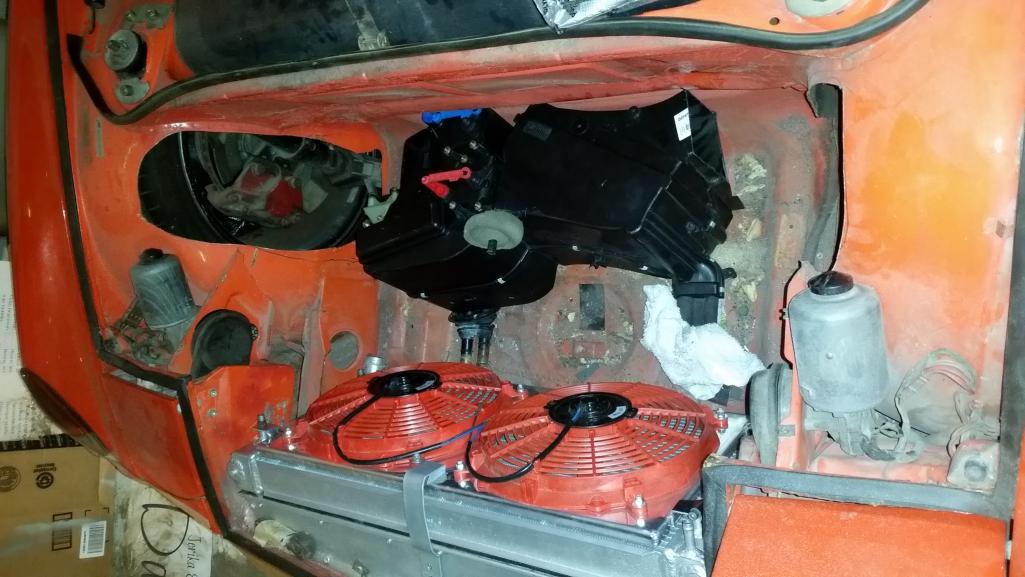 |
| Andyrew |
 Sep 13 2015, 10:56 PM Sep 13 2015, 10:56 PM
Post
#409
|
|
Spooling.... Please wait           Group: Members Posts: 13,377 Joined: 20-January 03 From: Riverbank, Ca Member No.: 172 Region Association: Northern California 
|
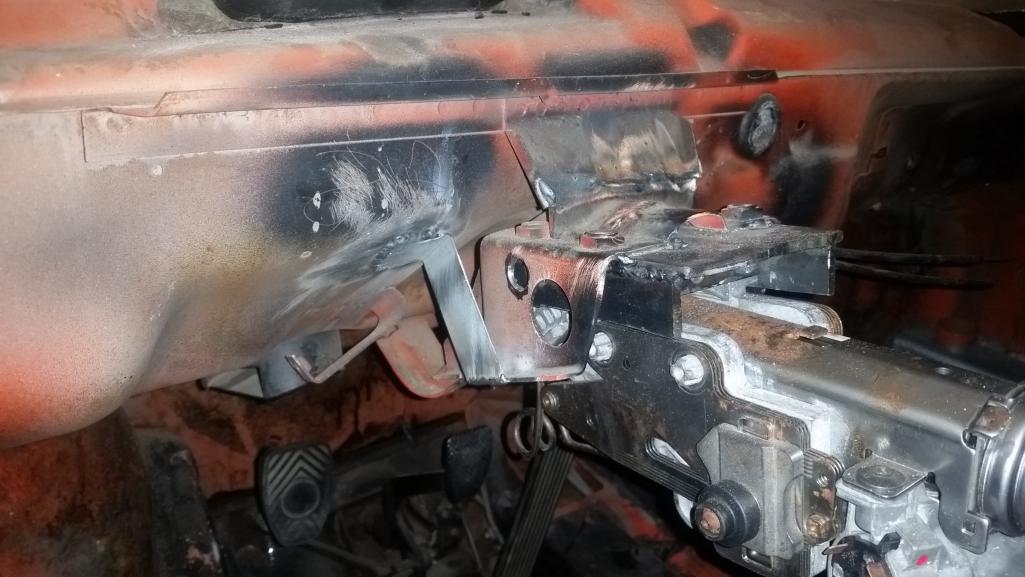
Steering column is mounted and moved back.
Unlike Mike my steering column was not surrounded with steel it was surrounded with aluminum (IMG:style_emoticons/default/dry.gif). So I first had to build a steel enclosure for that and then mount that to the 914 body. I decided to weld it and bolt the Audi column to it. (Secured with 8 1/4x20 bolts and an extremely tight fitting enclosure, Hammer required) 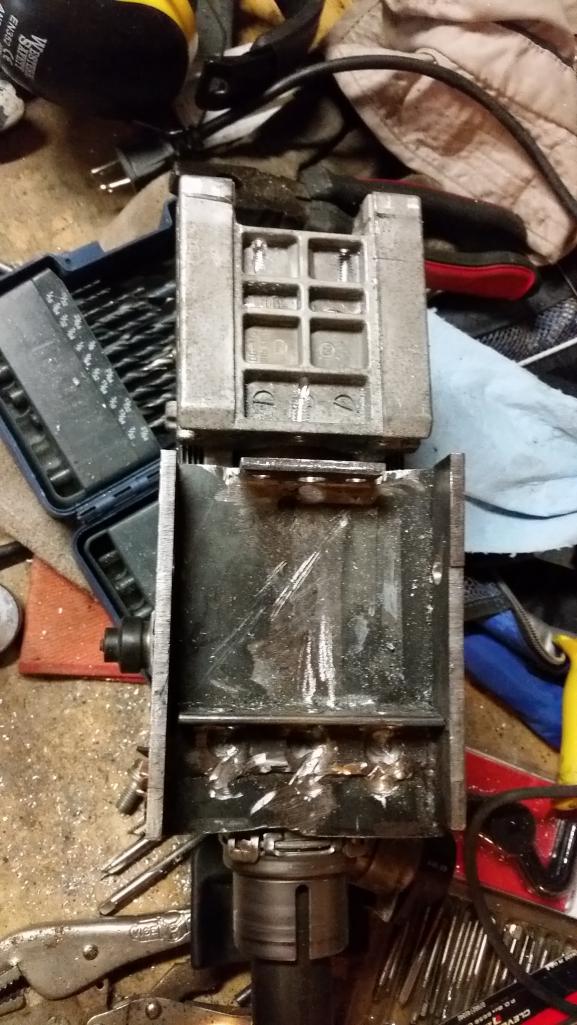 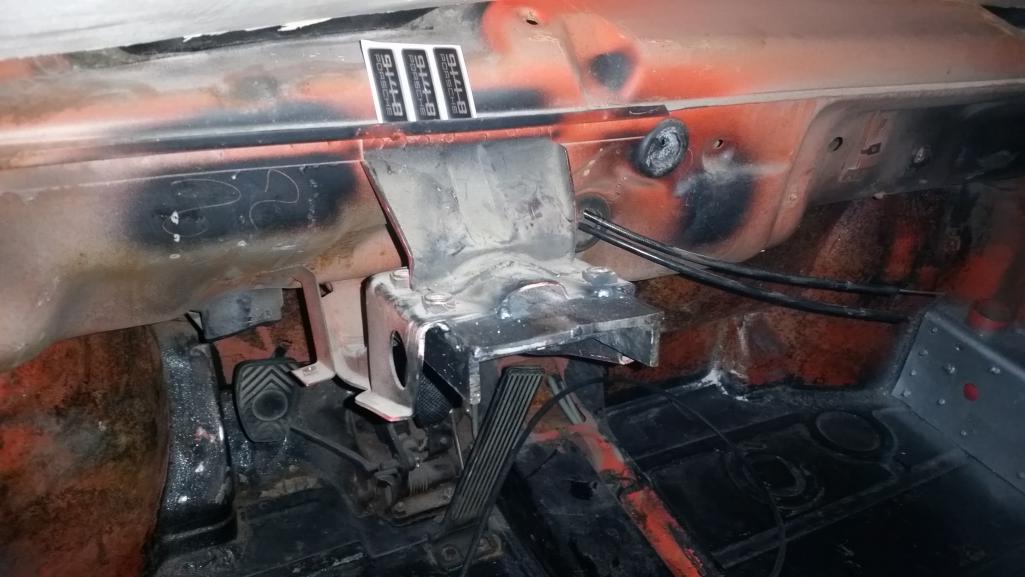 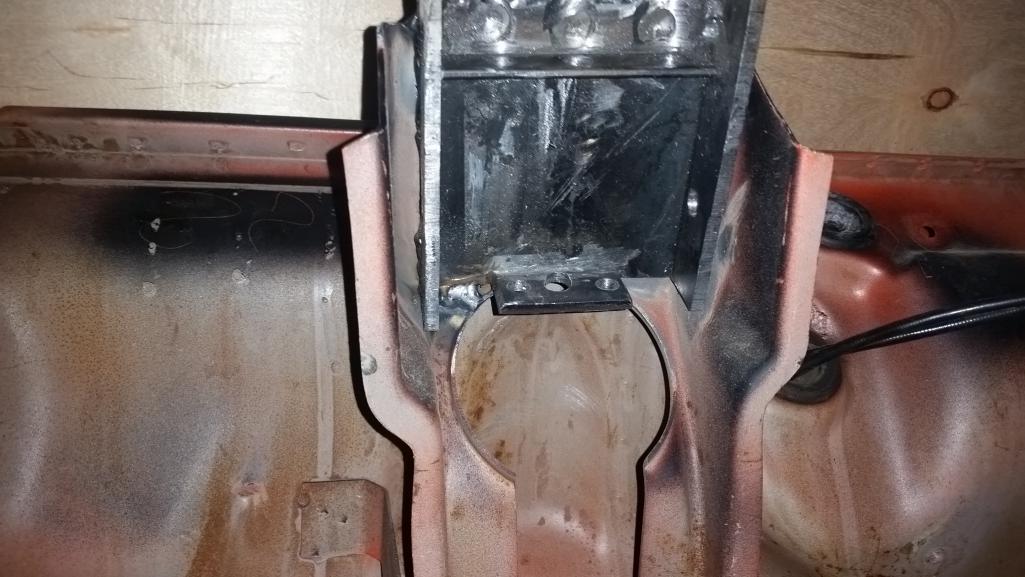 |
| Andyrew |
 Sep 13 2015, 10:59 PM Sep 13 2015, 10:59 PM
Post
#410
|
|
Spooling.... Please wait           Group: Members Posts: 13,377 Joined: 20-January 03 From: Riverbank, Ca Member No.: 172 Region Association: Northern California 
|
|
| Andyrew |
 Sep 13 2015, 11:02 PM Sep 13 2015, 11:02 PM
Post
#411
|
|
Spooling.... Please wait           Group: Members Posts: 13,377 Joined: 20-January 03 From: Riverbank, Ca Member No.: 172 Region Association: Northern California 
|
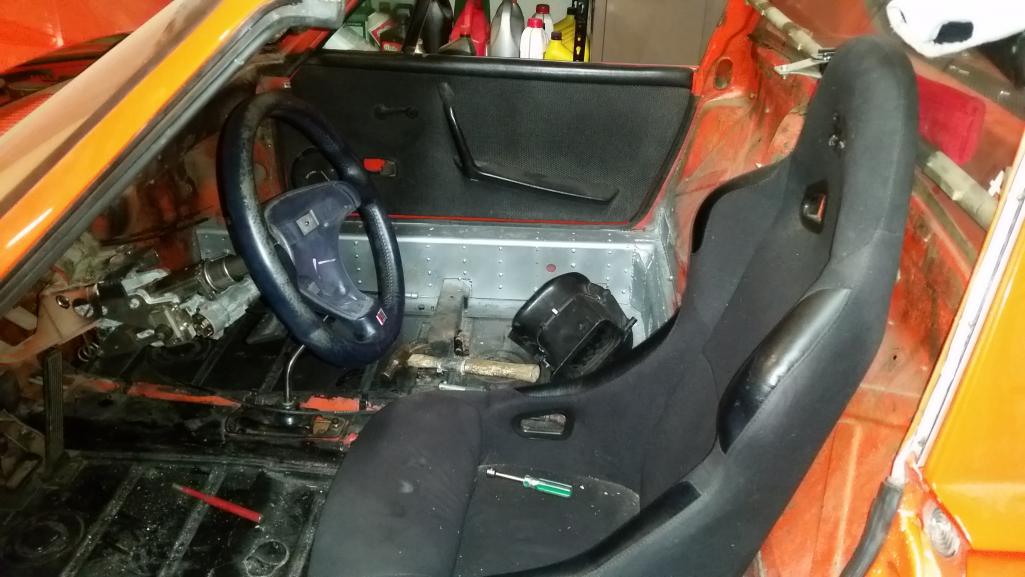
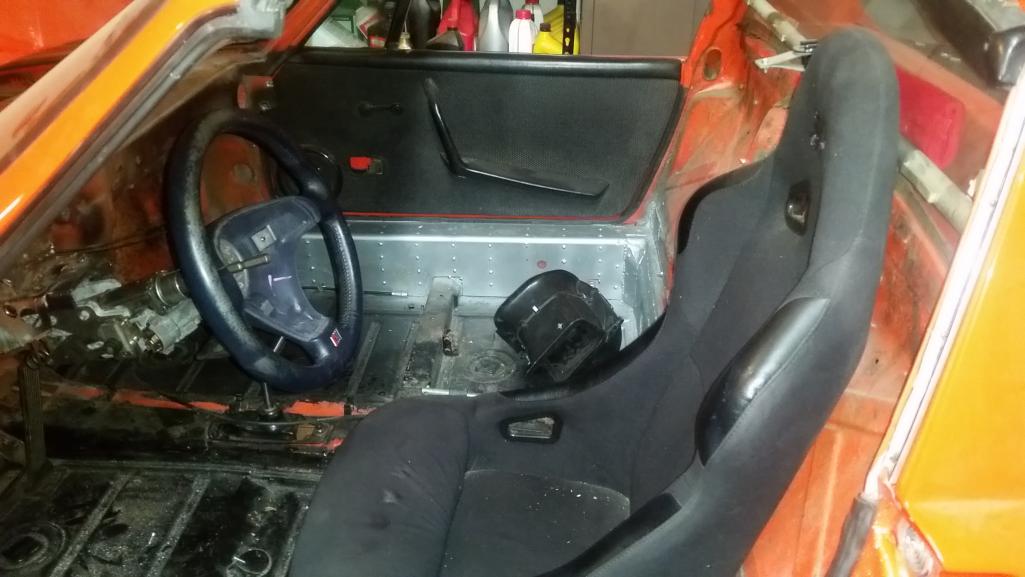
Before all the way up and tilted down.
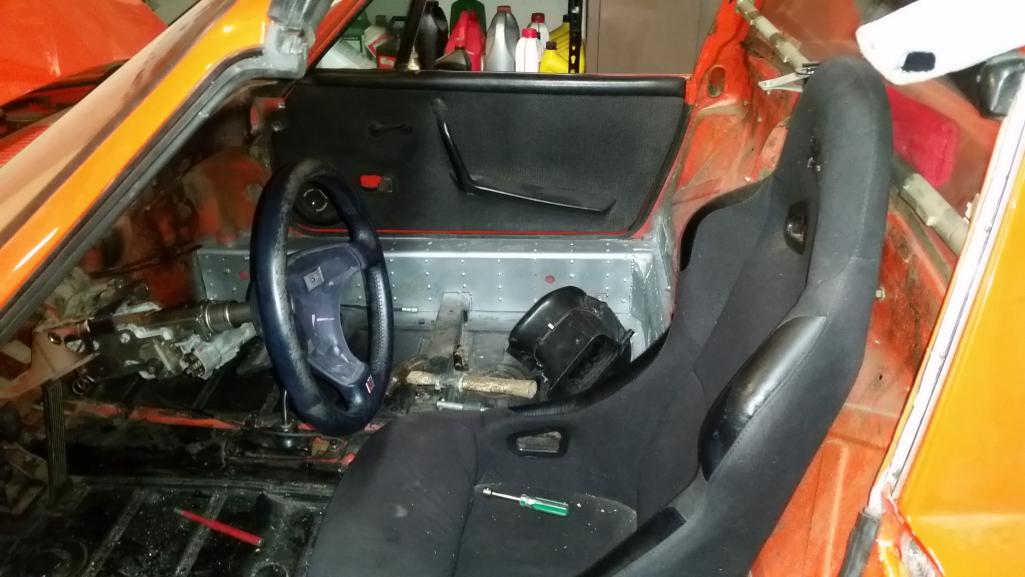 After all the way up and tilted down. 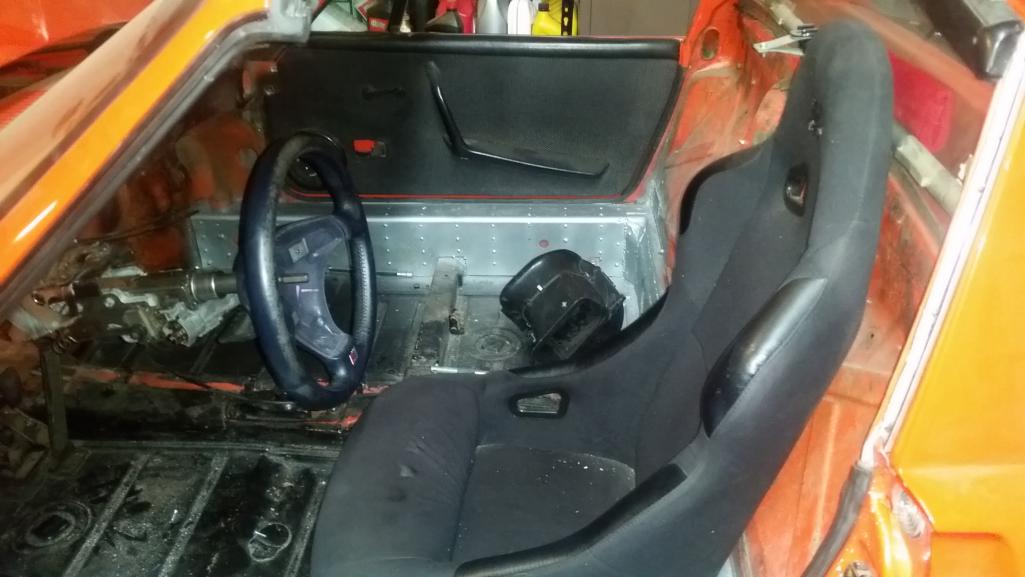 It only moved it away from the driver maybe 1/2 an inch, but I think it made a big difference in the driving position. I am very happy with it where it is. Now I will modify the steering shaft and get all that squared away! |
| mgp4591 |
 Sep 14 2015, 12:39 AM Sep 14 2015, 12:39 AM
Post
#412
|
|
914 Guru      Group: Members Posts: 5,483 Joined: 1-August 12 From: Salt Lake City Ut Member No.: 14,748 Region Association: Intermountain Region 
|
So are you going to have a fixed seat or adjustable like stock? I agree that getting the column just right is essential for any mods- I'm planning on that using the stock SVX steering column but I've got tilt and telescopic, however not much in the latter. I'm getting all kinds of ideas from your last few pictures and getting antsy sitting in this frickn' wheelchair- I want to start working on stuff!! (IMG:style_emoticons/default/headbang.gif)
|
| Andyrew |
 Sep 14 2015, 08:34 AM Sep 14 2015, 08:34 AM
Post
#413
|
|
Spooling.... Please wait           Group: Members Posts: 13,377 Joined: 20-January 03 From: Riverbank, Ca Member No.: 172 Region Association: Northern California 
|
Drivers seat is on forward and back rails as low as possible. Passenger seat is on stock 914 rail.
I am 6'0 with a lot of mid body height. The Audi steering wheel is quite a lot bigger than the Momo I had in there previously. I'll keep looking around for a factory Audi wheel that is smaller and possibly pushed back , if I can find something then I think it'll help quite a bit as well. |
| Andyrew |
 Sep 14 2015, 11:58 AM Sep 14 2015, 11:58 AM
Post
#414
|
|
Spooling.... Please wait           Group: Members Posts: 13,377 Joined: 20-January 03 From: Riverbank, Ca Member No.: 172 Region Association: Northern California 
|
I might have found a solution that will push the steering wheel back some more.
The Audi steering wheel is VERY profiled. It is a good 4" in profile. This NRG adapter is low profile, say 1 1/2", Combine that with a nice flat steering wheel and not only do I get to actually use the telescoping feature, I can get a smaller steering wheel. Need to measure to ensure that the stalks are not going to get in the way. http://thmotorsports.com/nrg-innovations/n...h/i-286499.aspx |
| Andyrew |
 Sep 21 2015, 01:16 PM Sep 21 2015, 01:16 PM
Post
#415
|
|
Spooling.... Please wait           Group: Members Posts: 13,377 Joined: 20-January 03 From: Riverbank, Ca Member No.: 172 Region Association: Northern California 
|
Steering column is done (IMG:style_emoticons/default/smile.gif)
Lots of mods to the steering linkage, but its very solid and seems smooth enough. Its also in the original position that the 914 steering knuckle was so that's a plus. 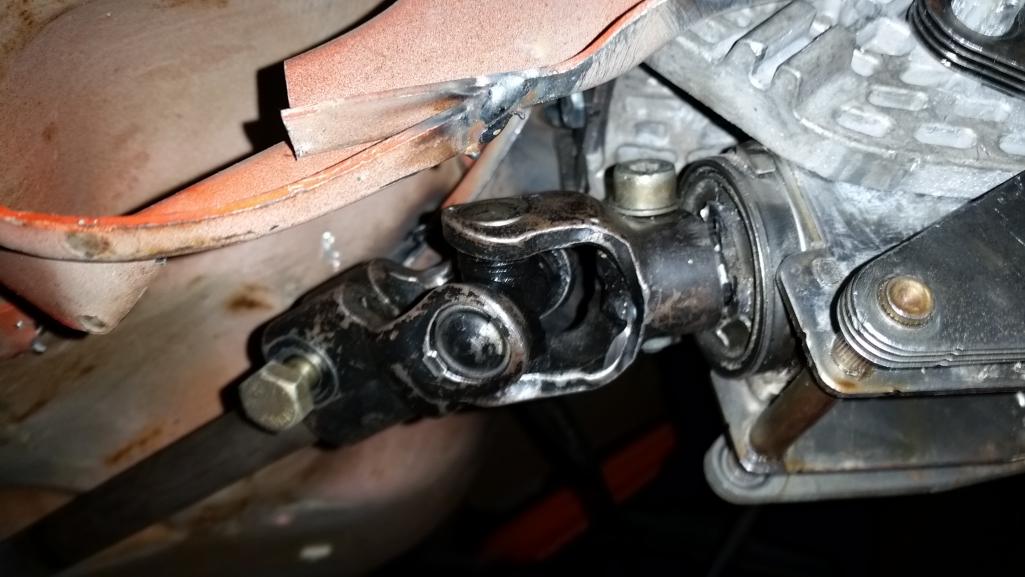 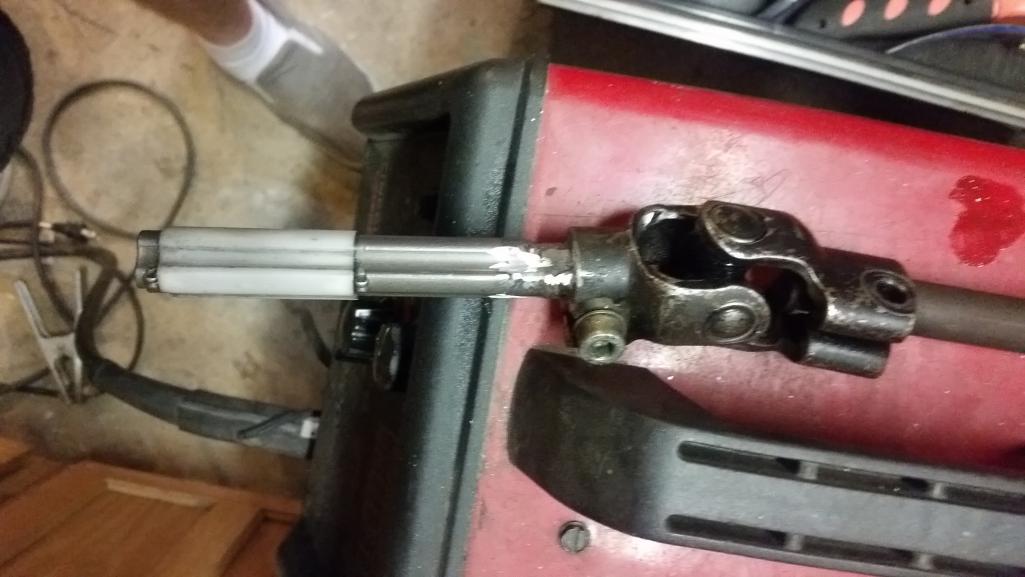 Modifications to the steering knuckle and column moved the knuckle assembly forward almost an inch. |
| Andyrew |
 Sep 21 2015, 01:37 PM Sep 21 2015, 01:37 PM
Post
#416
|
|
Spooling.... Please wait           Group: Members Posts: 13,377 Joined: 20-January 03 From: Riverbank, Ca Member No.: 172 Region Association: Northern California 
|
Gotta love those Germans.... Audi apparently individually wraps and connects all their different wiring harnesses separately.. They also have white ID tags on all their harnesses with part numbers that I can look up (most of the time) and ID what exactly they are for! So I took the big chassis wiring harness (You remember, this one..) (IMG:http://www.914world.com/bbs2/uploads/post-172-1441612878_thumb.jpg) And I removed all the wiring harness looms that I will not be using in the car.. And we made... Note I did remove one harness after this pic, and I havent touched the engine side (Note not engine harness, just all the wires on the engine side you can see they all have black plastic shrouding) So it will likely be a bit smaller all said and done. 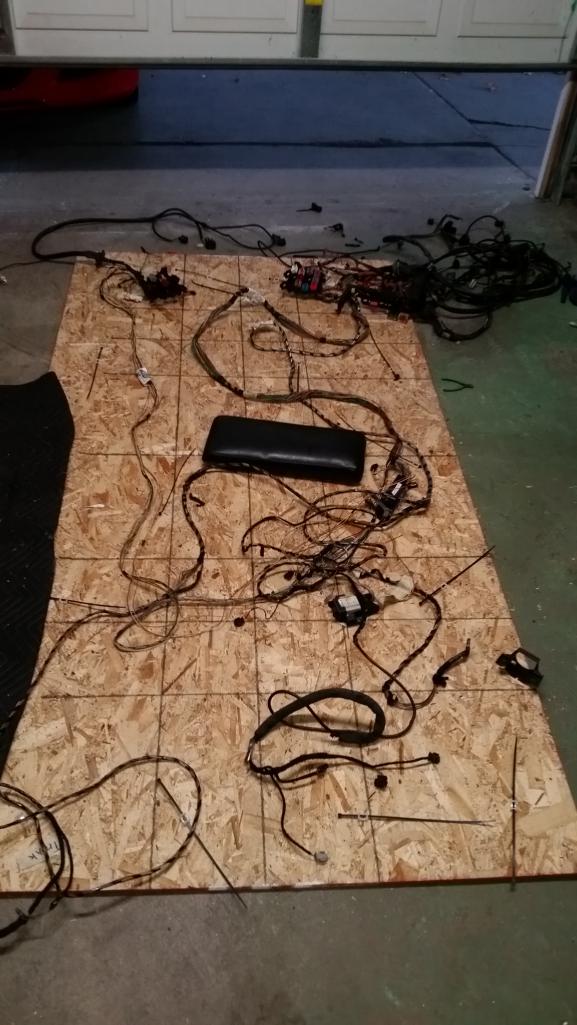 And we got this left over! Total weight of the removed wiring was ~ 20lbs! 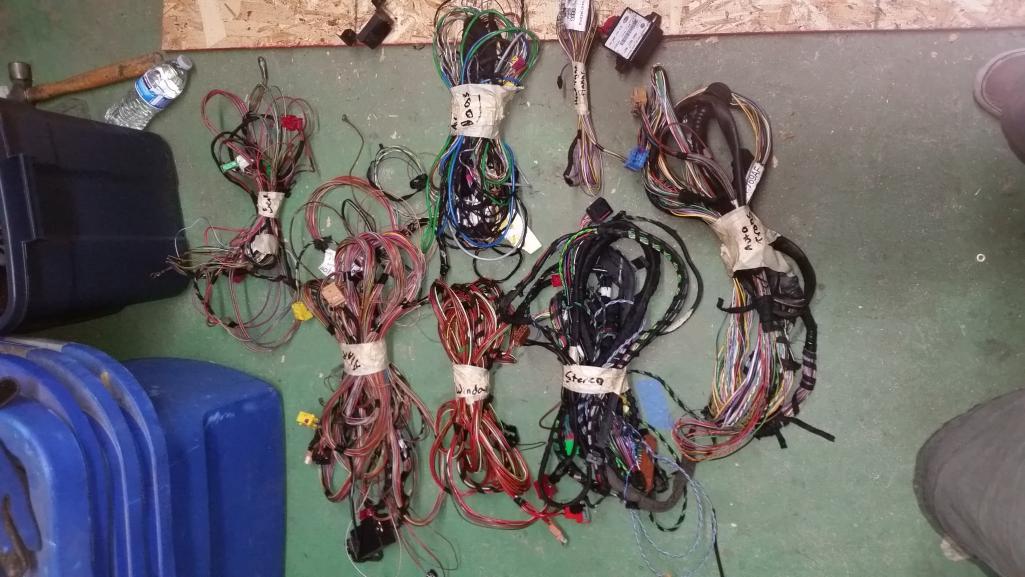 If I ever need to I can add the harnesses back relatively easy! Next is to go through the dash harness and remove the similar wires that I dont need. |
| Andyrew |
 Sep 21 2015, 01:47 PM Sep 21 2015, 01:47 PM
Post
#417
|
|
Spooling.... Please wait           Group: Members Posts: 13,377 Joined: 20-January 03 From: Riverbank, Ca Member No.: 172 Region Association: Northern California 
|
I only have 2 harnesses left interior side of the chassis harness. the "body" which is basically all the lights, and "ABS" which houses all the stability control stuff and the abs stuff.
|
| 76-914 |
 Sep 21 2015, 03:53 PM Sep 21 2015, 03:53 PM
Post
#418
|
|
Repeat Offender & Resident Subaru Antagonist           Group: Members Posts: 13,634 Joined: 23-January 09 From: Temecula, CA Member No.: 9,964 Region Association: Southern California 
|
My OG plan was to do as you have done Andrew, albeit Subaru. Then I realized that I may not live long enough to see it to completion, (IMG:style_emoticons/default/hissyfit.gif) . You however, have time on your side and I like your approach. WORD: don't drink or smoke anything when messing with the electrical. Your brain is left scrambled after a few hours of re-wiring anyway so there is no sense in starting out that way. (IMG:style_emoticons/default/blink.gif) (IMG:style_emoticons/default/wacko.gif) I notice you try to work on it a little every day. Smart, if only for 1/2 hour at a time! At this rate you will be back on the road before Christmas. (IMG:style_emoticons/default/beerchug.gif) Kent
|
| Andyrew |
 Sep 21 2015, 05:10 PM Sep 21 2015, 05:10 PM
Post
#419
|
|
Spooling.... Please wait           Group: Members Posts: 13,377 Joined: 20-January 03 From: Riverbank, Ca Member No.: 172 Region Association: Northern California 
|
My wife is currently busy with her masters degree schoolwork, so I get to spend ~ an hour or two on it 2-3 nights a week and then about 4 hours on it on the weekend (More if I get up early).
I dont think Christmas is in the cards at all... (IMG:style_emoticons/default/smile.gif) If I can make it by Christmas of NEXT year I will be happy. The good thing about the wiring that I am doing right now is that the more I do the more sense everything makes. Im taking quite a bunch of pictures that are not posted, but I try to post everything that could be helpful to the next build (I might just do another Audi build... This is really starting to make sense... Probably not another one with ESP or power brakes, but maybe ABS...) |
| Mike Bellis |
 Sep 21 2015, 07:38 PM Sep 21 2015, 07:38 PM
Post
#420
|
|
Resident Electrician      Group: Members Posts: 8,346 Joined: 22-June 09 From: Midlothian TX Member No.: 10,496 Region Association: None 

|
Take it from me my friend... Once you start on wiring keep going. Do not take time off the project. No vacations. No long weekends away. No breaks! Not until you have it sorted out.
Once it's in your head, keep it there. A month off the car will be a real PITA to get back to. |
| Andyrew |
 Oct 1 2015, 02:21 PM Oct 1 2015, 02:21 PM
Post
#421
|
|
Spooling.... Please wait           Group: Members Posts: 13,377 Joined: 20-January 03 From: Riverbank, Ca Member No.: 172 Region Association: Northern California 
|
(IMG:http://www.914world.com/bbs2/uploads/post-17633-1444102844.png)
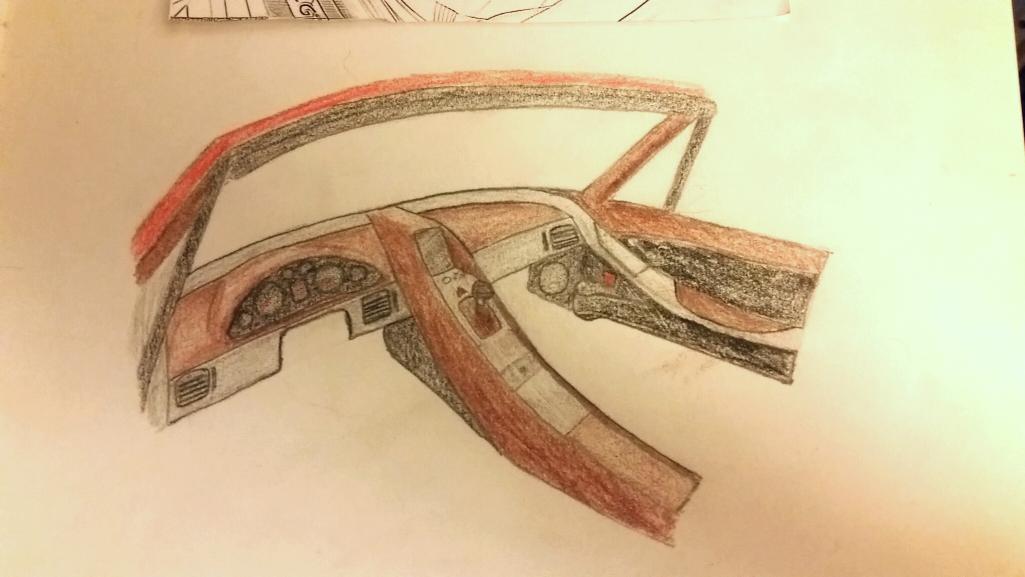
It appears as if I need to do an intro for the "Build Off Challenge" So here are the details Andrew Dalen Andyrew Modesto, Ca 73 914 1.7 (Previously 5.7 SBC swap) New engine: Audi 1.8 Turbo (Low boost: 275hp, Daily boost: 400hp, Race boost: 500+HP) Exterior Color: Orange (Hugger Orange) Interior color: Cinnamon Whisp/ Black Suede, Silver Paint Wiring: Audi wiring 100% Engine management: Modified OEM Audi ECU ABS: Yes Traction control and Stability control: Yes Launch control: Yes Cruise control: Yes Climate control: Yes OBD2 full control: Yes Front and rear trunk: Yes! Anticipated total budget required: $6500 less sold parts The 5 large obstacles that I need to overcome are below. 1. Wiring layout/strip and integration into 914 wiring(Lights and wipers) A. Finish ID'ing every plug B. Finish stripping wiring (Dash harness, body harness, and engine harness) C. Finish removing 914 wiring as well as existing wire identification D. Install Audi harnesses - 1. Locate and test install engine harness in body. - 2. Locate and install dash harness in body. - 3. Locate and install body harness in body. - 4. Install engine harness in body. E. Run power lines to the battery F. Install battery and check for any shorts G. Wire up lights and wipers (IMG:http://www.914world.com/bbs2/uploads/post-172-1441612878_thumb.jpg) (This was just one of three harnesses required) 2. ABS Module integration (replumb all brake lines, abs sensor and pickup integration, revised pedal box) A. B. C. D. E. (IMG:http://www.914world.com/bbs2/uploads/post-172-1441615551_thumb.jpg) 3. Audi engine/trans install A. Remove v8 and cut out all non essential brackets and shelving in the engine bay. B. Mount the mock up engine/trans together and locate it in the engine bay. C. Cut out sections of the trunk for clearance D. Create motor and trans mounts and mount engine/trans E. Mount turbo and route plumbing for intercooler F. Mock up and measure cv joints for order G. Mount new fuel pump and run lines H. Rebuild engine and install forged rods I. Locate water pump, water reservor and lines J. Plum intercooler pump, reservor, lines and radiator K. Plumb oil cooler lines and run turbo lines L. Run transmission shifter cables to the cabin, bleed clutch M. Fabricate exhaust system N. Oil and water in engine, hood up electrical connections except spark plugs, crank engine for 2 minutes to generate oil pressure and check for leaks. O. Check ECU for error codes and address as needed. P. Finalize connections and fire engine. Q. Figure out what went wrong, fix it, and actually start the engine R. (IMG:style_emoticons/default/piratenanner.gif) (IMG:style_emoticons/default/driving.gif) (IMG:http://www.914world.com/bbs2/uploads/post-172-1428991066.jpg) 4. Audi a/c and heater box mounted and plumbed in the front trunk, factory Audi climate control integration. A. B. C. D. E. (IMG:http://www.914world.com/bbs2/uploads/post-172-1441616589_thumb.jpg) 5. Full custom interior build from scratch (custom dash, doors,center,back,ect. Tablet install for radio/nav/onboard diagnostics) A. B. C. D. E. (IMG:http://www.914world.com/bbs2/uploads/post-172-1429336661_thumb.jpg) (IMG:http://www.914world.com/bbs2/uploads/post-172-1429337218_thumb.jpg) (Note, this is draft one, I already have a new concept in mind for the interior that I have been drawing up) You can see from the pics earlier in the thread that the bodywork is done and painted. Trunks will be painted in the build as well as probably a repaint of the engine bay. I also will redo the bumpers, but this may not make it into the build. |
| madmax914 |
 Oct 2 2015, 04:43 PM Oct 2 2015, 04:43 PM
Post
#422
|
|
Member   Group: Members Posts: 204 Joined: 16-February 14 From: Salem, Oregon Member No.: 17,007 Region Association: Pacific Northwest |
I'm suffering from turbo envy! This will be an awesome build. I've been watching this for several months now, that 1.8L motor is impressive!
|
| Andyrew |
 Oct 11 2015, 03:46 PM Oct 11 2015, 03:46 PM
Post
#423
|
|
Spooling.... Please wait           Group: Members Posts: 13,377 Joined: 20-January 03 From: Riverbank, Ca Member No.: 172 Region Association: Northern California 
|
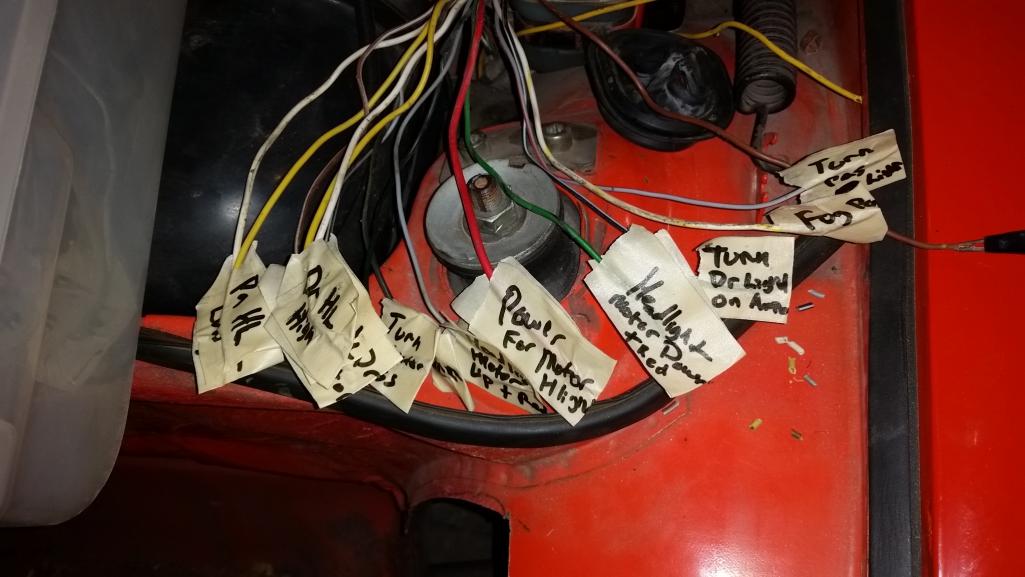 Figured out my front end wiring 914 side. I was waiting for a friend to come by and help me figure out some of the audi wiring and I have been waisting a lot of time thinking about wiring but it didnt happen, so..... 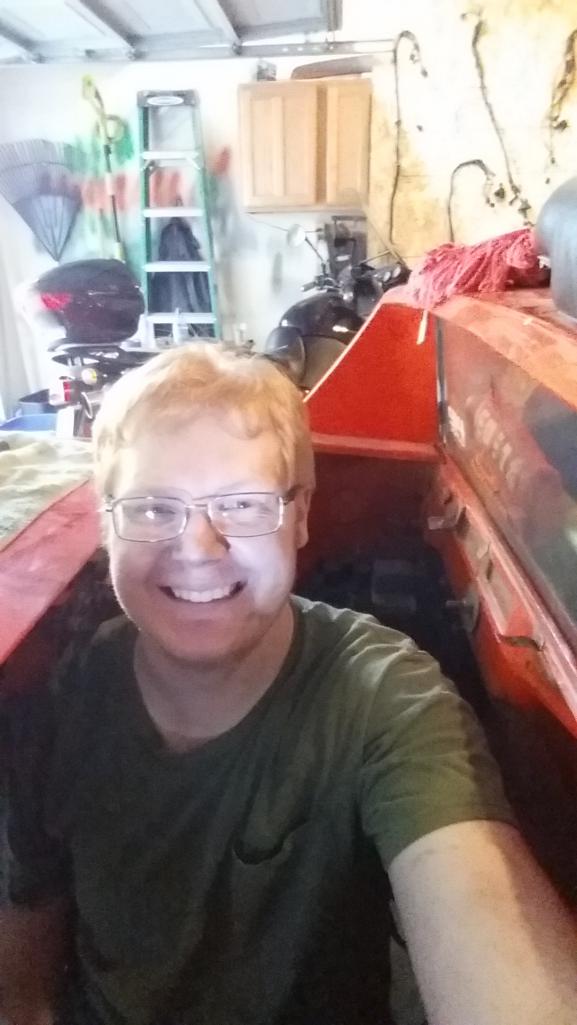 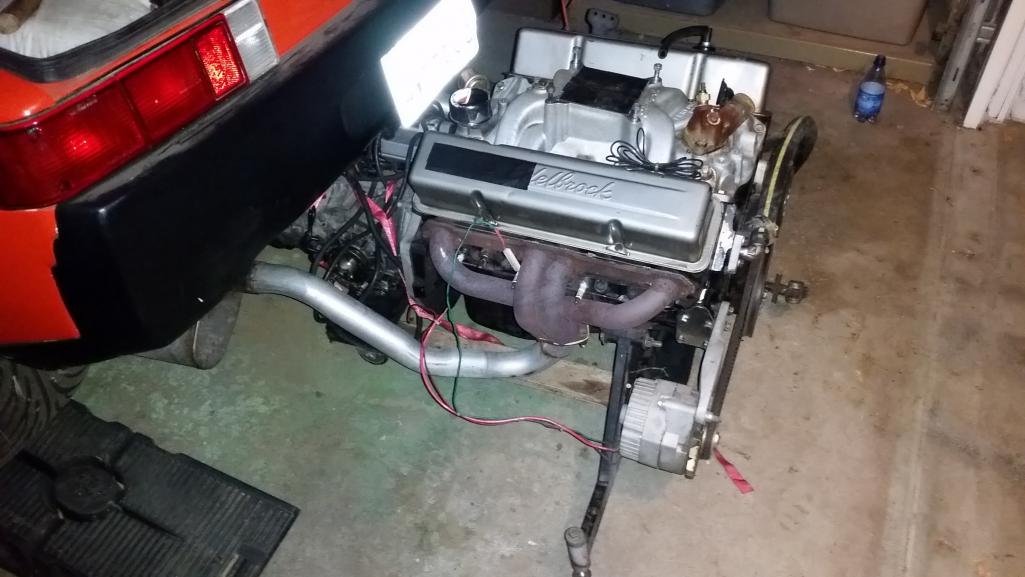 I pulled the v8 engine (buyer found), Ill be putting this in a members 914 in a couple of weeks. Looks like it takes about 4 hours to pull the engine myself with breaks and figuring out how to lift the car up. Ordered some spot weld cutting bits so the next thing is cleaning up the engine bay and removing the shelf. Once that is all done I can mock the engine and trans up and work on mounts, then when its all mounted I can switch back to finishing up the wiring |
| 76-914 |
 Oct 12 2015, 08:25 AM Oct 12 2015, 08:25 AM
Post
#424
|
|
Repeat Offender & Resident Subaru Antagonist           Group: Members Posts: 13,634 Joined: 23-January 09 From: Temecula, CA Member No.: 9,964 Region Association: Southern California 
|
What is it about wiring? The easiest part of a rebuild; physically speaking. Mentally; the most demanding part. I can see an entire build in my mind except the electrical. (IMG:style_emoticons/default/sad.gif) It's like entering a swamp. (IMG:style_emoticons/default/dry.gif)
|
| Andyrew |
 Oct 12 2015, 08:52 AM Oct 12 2015, 08:52 AM
Post
#425
|
|
Spooling.... Please wait           Group: Members Posts: 13,377 Joined: 20-January 03 From: Riverbank, Ca Member No.: 172 Region Association: Northern California 
|
The biggest thing for me is that since I am simply using the Audi wiring harness I need to keep all the major components. I have about 30 plugs that I can not identify yet and I have yet to completely label the engine harness (However I have a full diagram that is labeled). I had a buddy that has stripped a couple of Audi's that knows most of the plugs in the car so I wanted him to come and help me ID the plugs I couldnt identify yet so I can determine if there are any more harnesses I could remove, or at least so I can place the harness in the correct place. Once that is all done I can work down the list of my TO DO's on my wiring.
NOTE: I updated post 422 to reflect my wiring to do's and my engine related to do's. |
| Andyrew |
 Oct 13 2015, 12:16 AM Oct 13 2015, 12:16 AM
Post
#426
|
|
Spooling.... Please wait           Group: Members Posts: 13,377 Joined: 20-January 03 From: Riverbank, Ca Member No.: 172 Region Association: Northern California 
|
|
  |
1 User(s) are reading this topic (1 Guests and 0 Anonymous Users)
0 Members:

|
Lo-Fi Version | Time is now: 26th November 2024 - 03:38 AM |
Invision Power Board
v9.1.4 © 2024 IPS, Inc.


