|
|

|
Porsche, and the Porsche crest are registered trademarks of Dr. Ing. h.c. F. Porsche AG.
This site is not affiliated with Porsche in any way. Its only purpose is to provide an online forum for car enthusiasts. All other trademarks are property of their respective owners. |
|
|
  |
| jsayre914 |
 Jan 18 2012, 11:09 AM Jan 18 2012, 11:09 AM
Post
#141
|
|
Speed Up !!!     Group: Members Posts: 3,206 Joined: 10-February 08 From: Timonium MD 21093 Member No.: 8,696 Region Association: MidAtlantic Region |
I went with the antique tags. Drive the car every day. I always have extra parts in the car (working on it) and I have never had a problem. I also have a speeding ticket on those plates (IMG:style_emoticons/default/rolleyes.gif) and the issue never came up. I think there is a big gray area on the antique tags.
p.s. I live right next to brimmers tag and title and penndot if I can help in any way. As far as the pics YES there are certain angles they require. Piece of cake (IMG:style_emoticons/default/beerchug.gif) |
| saigon71 |
 Jan 19 2012, 07:28 AM Jan 19 2012, 07:28 AM
Post
#142
|
|
Advanced Member     Group: Members Posts: 2,006 Joined: 1-June 09 From: Dillsburg, PA Member No.: 10,428 Region Association: MidAtlantic Region 

|
Light work on the car yesterday. Got a set of letters ready and installed. Seems as though every time I touch one of the original speed nuts, the associated stud breaks. Lost another "H" trying to tighten it up. (IMG:style_emoticons/default/mad.gif)
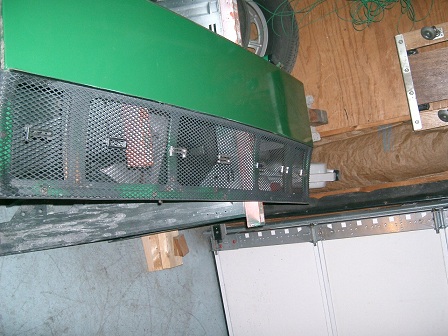 Sprayed acrylic enamel on the passenger side door vent: 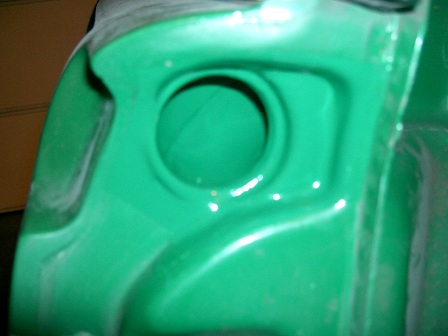 |
| struckn |
 Jan 19 2012, 02:16 PM Jan 19 2012, 02:16 PM
Post
#143
|
|
Senior Member    Group: Members Posts: 1,069 Joined: 9-November 11 From: South Central York Pennsyvania Member No.: 13,764 Region Association: MidAtlantic Region |
I went with the antique tags. Drive the car every day. I always have extra parts in the car (working on it) and I have never had a problem. I also have a speeding ticket on those plates (IMG:style_emoticons/default/rolleyes.gif) and the issue never came up. I think there is a big gray area on the antique tags. p.s. I live right next to brimmers tag and title and penndot if I can help in any way. As far as the pics YES there are certain angles they require. Piece of cake (IMG:style_emoticons/default/beerchug.gif) I have three vehicles with Antique Pa. Tags and I'll be going that way with my '74 when it is due for regestration renewal in Sept. You'll need four pictures, front, rear, right side left side. Also they want an etching of the vin but I used a close up digital picture which they accepted. The pictures don't have to be current if you have some from before you started restoring and frankly other then the vin shot they don't come to your house to varify. If you want shots of mine let me know, only thing we might need to do is put your current tag on it for the rear shot. Pendot seems to have a policy to reject the first time you submit. One time they said my 69 Chevy Pick up had the wrong hub caps and I had to find two original hubcaps for the side shots require and resubmit. Strangely they missed that the truck is lowered, nosed and decked and has several other non stock mods. My K5 Blazer was rejected me because I had a trailer hitch, which I had to remove and redo pictures to resubmit. Then I put the hitch back on. They missed that I have a non stock Grill. The great thing with Antique Tags is $$$ no more Annual Registration or Inspections required for a long as you own the car. You're supposed to only drive it in the daytime and only to Shows, Parades or to a Shop for maintenance, which could be your garage. I had a Cop ask me what the restrictions were because they don't know and aren't really interested in enforcing. So go for it. Also, the insurance is dirt cheap for Antique cars and they don't care how often you drive it because they don't have a lot of Claims to pay to people don't rack up high milage and who love and take extreme care of their cars. Usually less then $100 per year and JC Taylor doesn't charge for more then two if I recall. Some companies have a 5,000 mile annual clause so if you commute daily to work they could reject a claim possibly. |
| jsayre914 |
 Jan 19 2012, 02:41 PM Jan 19 2012, 02:41 PM
Post
#144
|
|
Speed Up !!!     Group: Members Posts: 3,206 Joined: 10-February 08 From: Timonium MD 21093 Member No.: 8,696 Region Association: MidAtlantic Region |
(IMG:style_emoticons/default/agree.gif)
besides.... who would drive an antique car to work 100 plus miles every day (IMG:style_emoticons/default/rolleyes.gif) |
| saigon71 |
 Jan 19 2012, 10:16 PM Jan 19 2012, 10:16 PM
Post
#145
|
|
Advanced Member     Group: Members Posts: 2,006 Joined: 1-June 09 From: Dillsburg, PA Member No.: 10,428 Region Association: MidAtlantic Region 

|
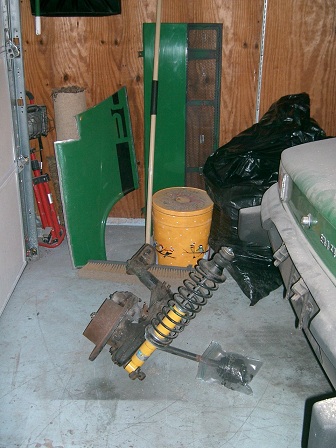 Seam sealed a few areas: 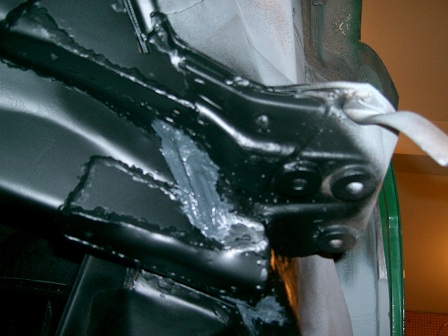 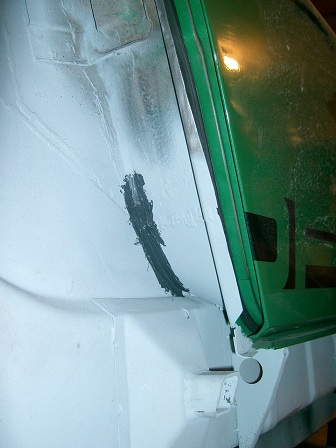 For the first time in about a year and a half, my car has four complete fenders! Final fitted and tack welded it in place. It took me a long time to get everything right. I had to go back a couple of times and grind a spot weld off, tweak the metal and re-weld: 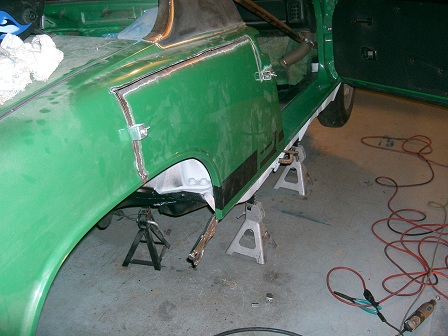 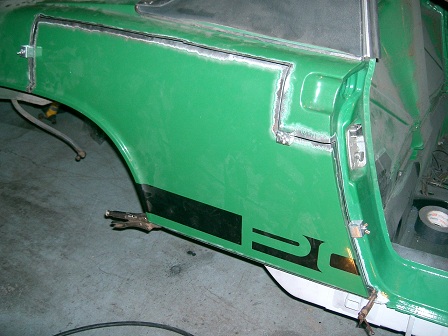 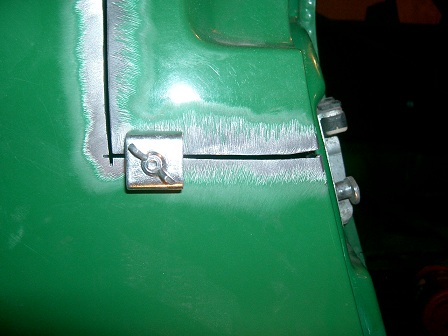 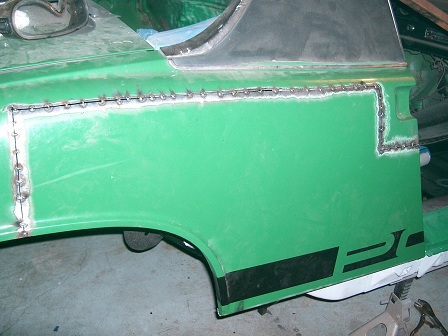 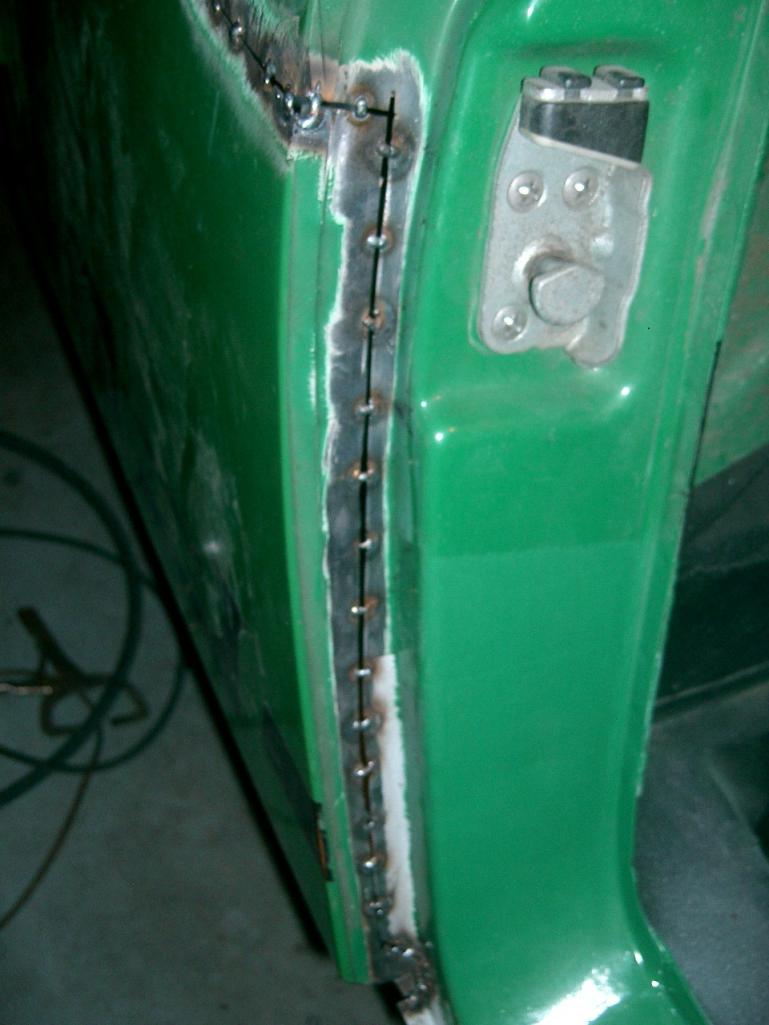 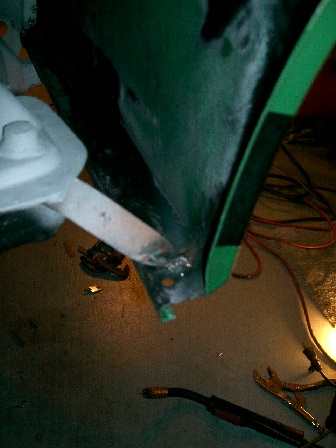 The door needs to be lowered about 1/16, but overall things are looking pretty good: 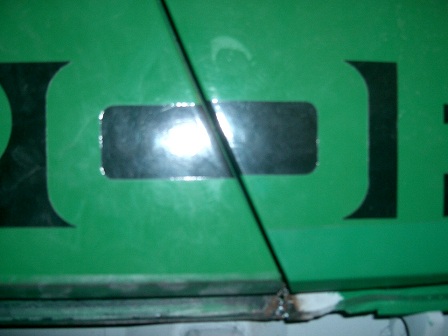 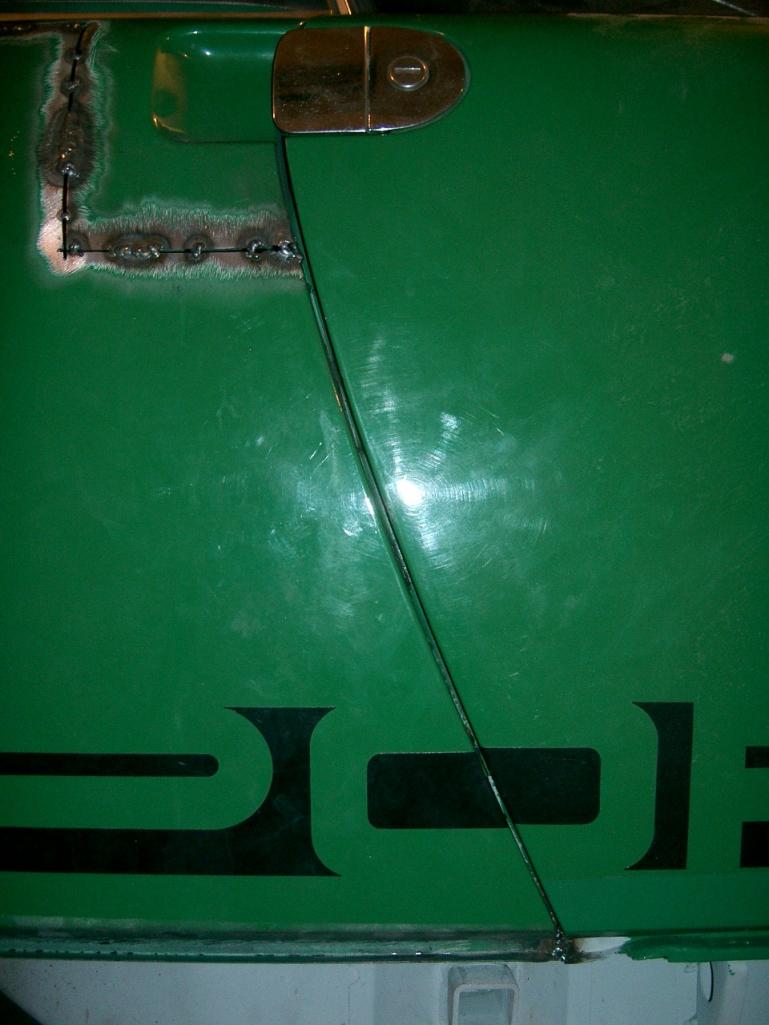 |
| saigon71 |
 Jan 22 2012, 03:11 PM Jan 22 2012, 03:11 PM
Post
#146
|
|
Advanced Member     Group: Members Posts: 2,006 Joined: 1-June 09 From: Dillsburg, PA Member No.: 10,428 Region Association: MidAtlantic Region 

|
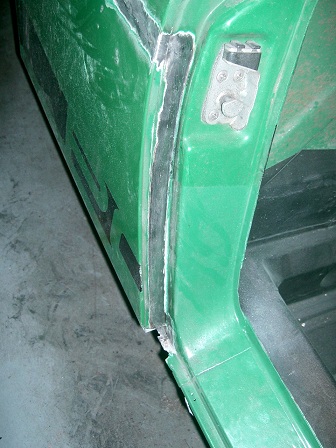
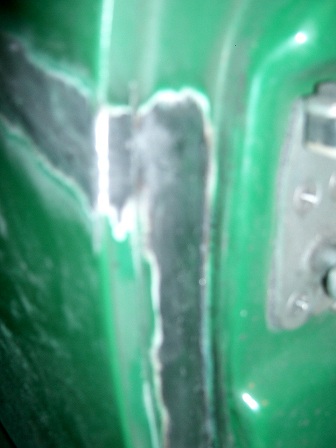
Finished welding up the seams on the fender. I took my time and went in about 1" bursts rotating around the panel until it was done. The toughest part was the lower door jamb where it meets the door sill. I had to go back and re-weld this area about five times to get it right. I will need to use a thin coat of bondo on the exterior:
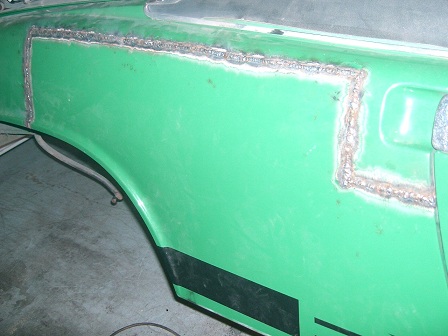 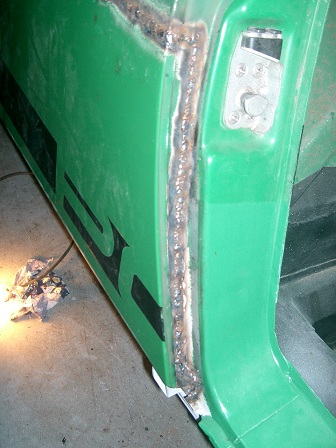 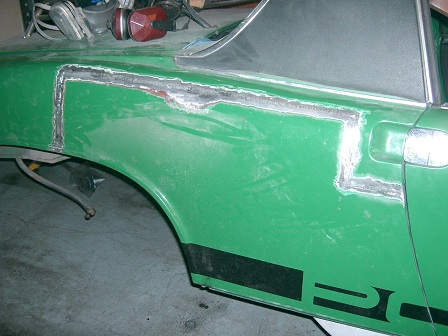   |
| saigon71 |
 Jan 25 2012, 08:24 AM Jan 25 2012, 08:24 AM
Post
#147
|
|
Advanced Member     Group: Members Posts: 2,006 Joined: 1-June 09 From: Dillsburg, PA Member No.: 10,428 Region Association: MidAtlantic Region 

|
It has been a while since I bought good quality (Dupont) automotive paint. Yesterday I picked up all the painting supplies (paint, primer, activator, etc) I needed to paint the car...got jacked for $350...this stuff ain't cheap! I went with single stage acrylic enamel.
Applied bondo to the outer seam of the rear fender. Hard to believe how many hours I have invested in this one repair: 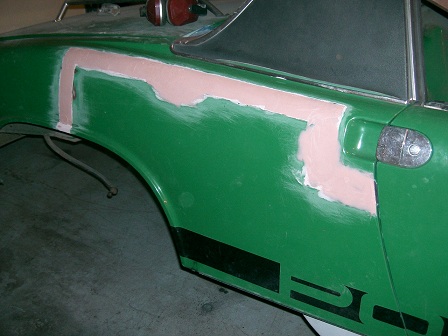 Primed the inside of the fender well: 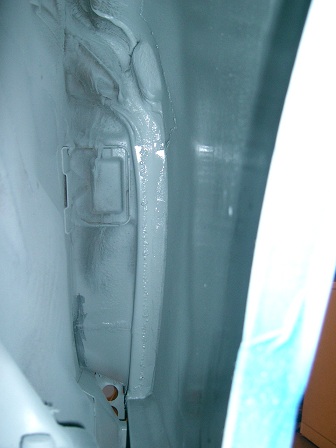 Seam sealed the inner fender: 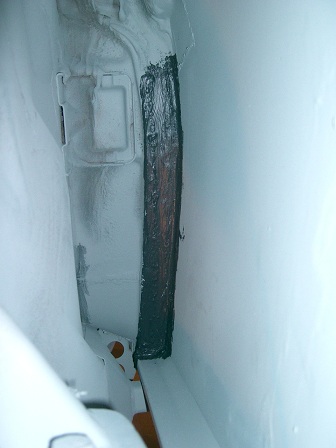 I noticed a small bubble on the paint below the windshield on the passenger side. Went to work with a small, sharp screwdriver. Scraped the area down to bare metal and treated with ospho: 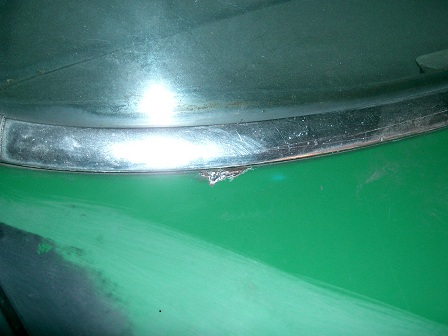 Took a look at the drivers side "hell hole" area and jack post. While this is in much better shape than the passenger side, it is still pretty bad. There are rivets & bondo holding the jack post support on. It would be nice to be able to fix this area without cutting the fender. A screwdriver easily made its way through at the outer seam: 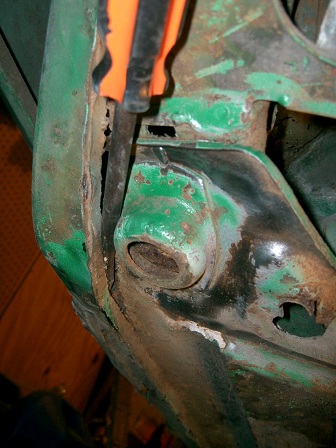 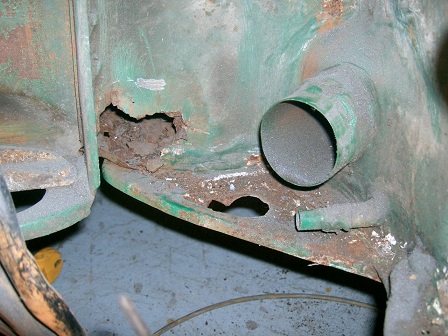 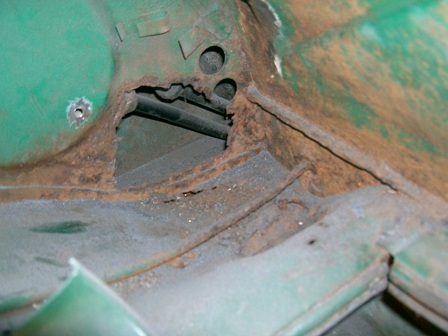 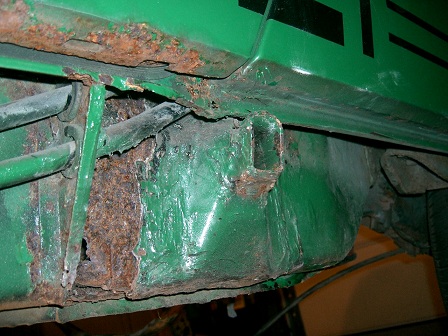 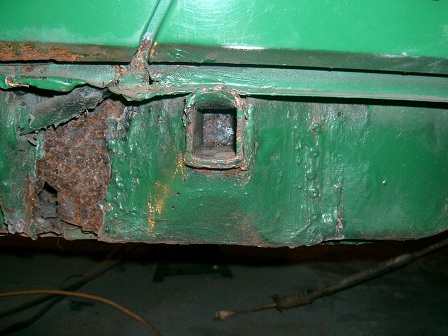 |
| saigon71 |
 Jan 29 2012, 09:28 AM Jan 29 2012, 09:28 AM
Post
#148
|
|
Advanced Member     Group: Members Posts: 2,006 Joined: 1-June 09 From: Dillsburg, PA Member No.: 10,428 Region Association: MidAtlantic Region 

|
My Dad's old Sears Craftsman 2 HP, 20 gallon oil-free air compressor gave out on me Thursday night. It had a heck of a run. Started getting really loud then siezed up. I am still finding ball bearings and chunks of metal throughout the garage. (IMG:style_emoticons/default/sad.gif)
I needed a new compressor quick, so I bought a 30 gal twin cylinder oil filled, cast iron Husky at HD. I like it so far and it is much quieter than the old one. Had to re-organize the garage as the built in electric garage heater was blowing hot air on the cylinders of the new compressor. Ladies, please...one at a time here. (IMG:style_emoticons/default/biggrin.gif) How could you not be impressed with this unique blend of washers, dryers, mig welders, air compressors, laundry supplies, hot water heaters and Porsche parts: 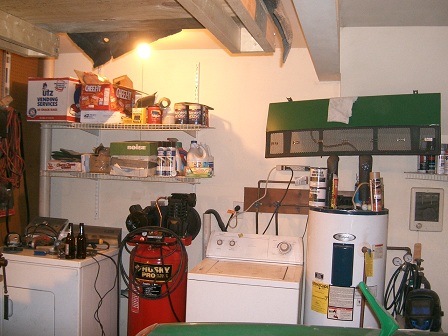 After three coats of bondo and three coats of spot putty, I am STILL finding imperfections in the fender: 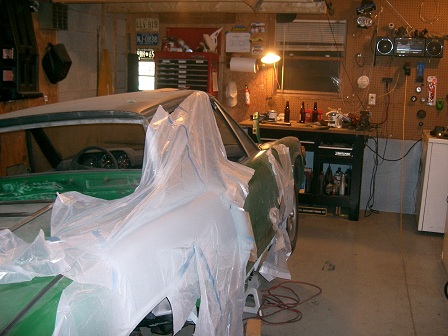 I got zero replies for my WTB drivers side engine shelf post in the classifieds, so in between work on the fender, I started fabricating what I need. I cut out the old shelf about 1/4" forward of the blower motor mount. Naturally, I nicked the steel brake line that rides directly below the shelf. (IMG:style_emoticons/default/dry.gif) I started with the recessed area for the motor and went from there using 20 GA sheet metal: 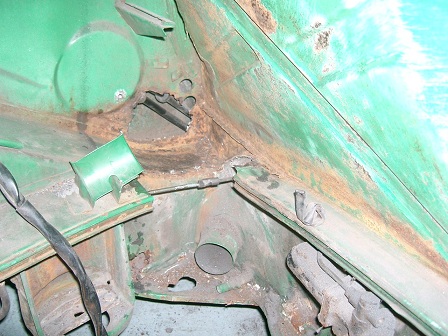 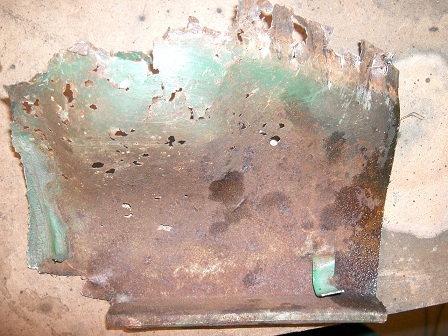 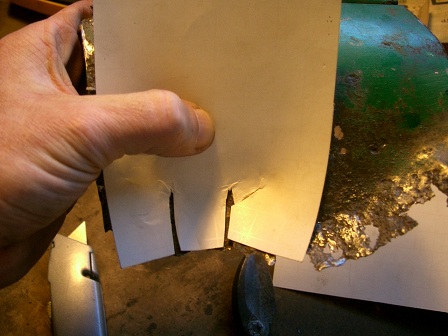 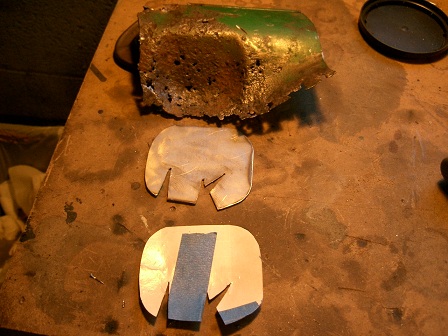 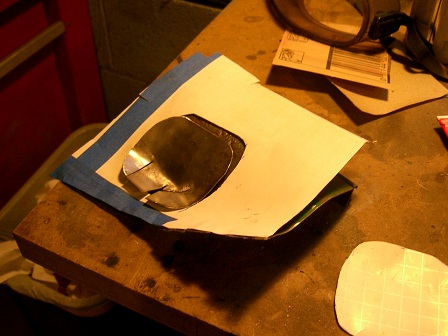 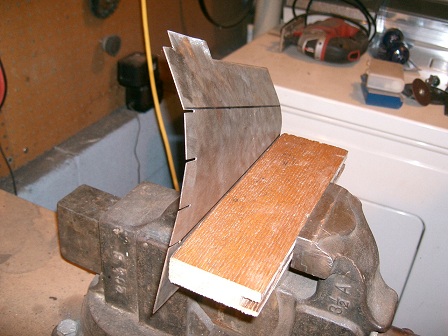 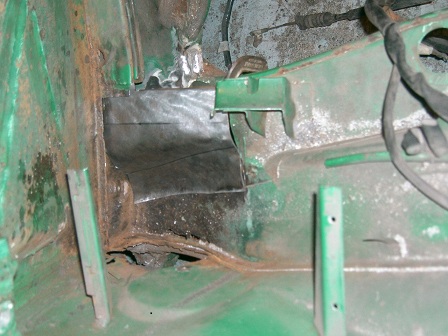 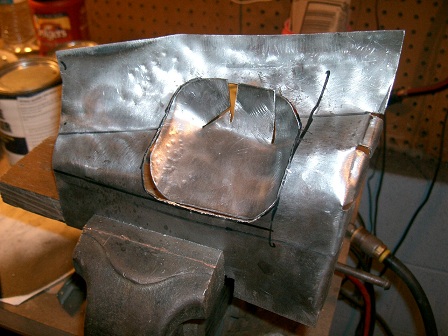 |
| saigon71 |
 Feb 2 2012, 07:03 AM Feb 2 2012, 07:03 AM
Post
#149
|
|
Advanced Member     Group: Members Posts: 2,006 Joined: 1-June 09 From: Dillsburg, PA Member No.: 10,428 Region Association: MidAtlantic Region 

|
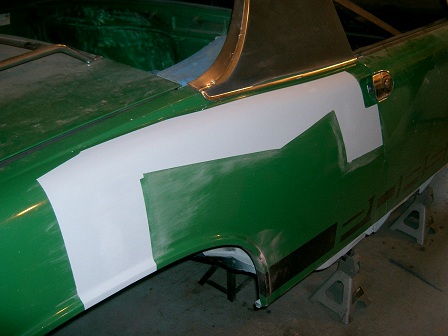
Slightly lesser known than the LE "Grasshopper" and "Bumblebee" models...I present the very rare "Green M&M" 914. (IMG:style_emoticons/default/biggrin.gif) One final coat of spot putty got the fender where I wanted it:
 Conditioned the airbox seal and re-installed the airbox. I remember reading about what a bitch this thing was to install...I agree with all comments on the subject! (IMG:style_emoticons/default/mad.gif) 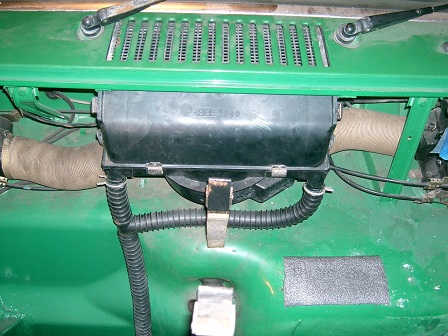 I have an airdam on the way from a member of 914world who told me that both sides were the same. Took measurements off the drivers side and drilled holes for the passenger side: 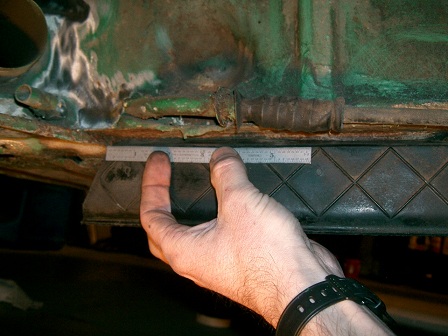 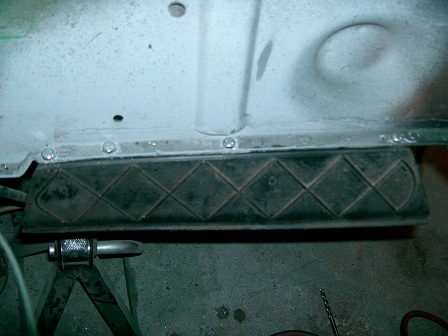 Like many before me, I ground down the edge of a socket extension to make a CHT tool. I found BOSCH 012 on Ebay, reasonably priced. My D-jet was running pretty well when I pulled it, but "hunted" at idle. I will put in a new CHT sensor before the engine goes in: 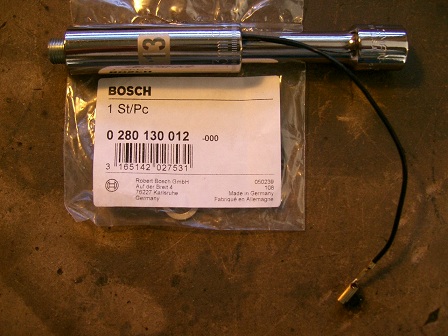 Finished welding up the front section of the drivers side engine shelf. This part turned out well. The recess is a little deeper than the original, but will be just fine: 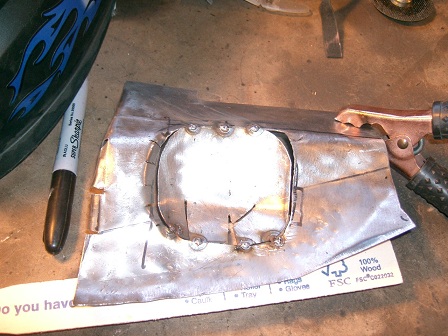 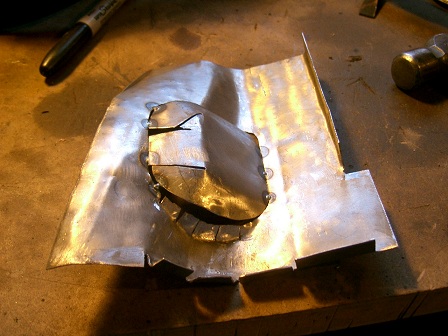 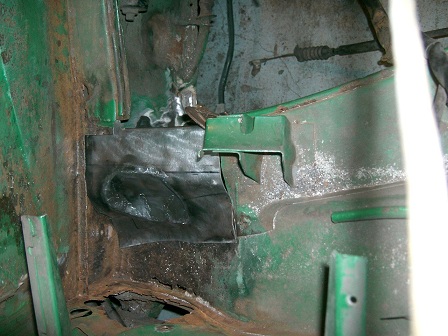 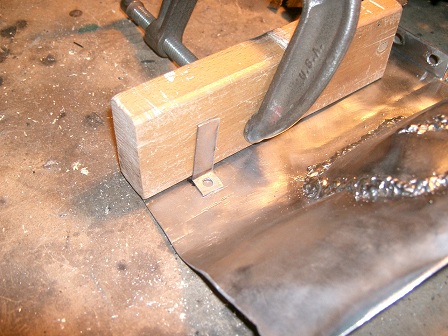 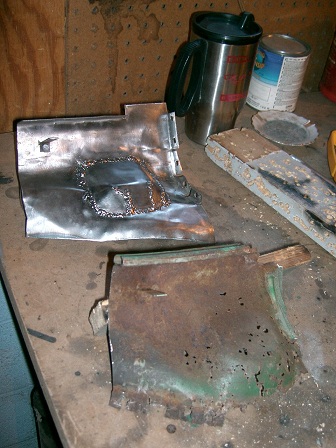 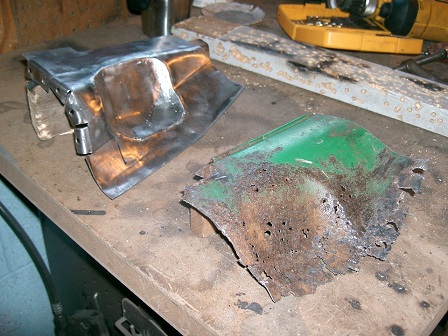 |
| saigon71 |
 Feb 2 2012, 07:23 AM Feb 2 2012, 07:23 AM
Post
#150
|
|
Advanced Member     Group: Members Posts: 2,006 Joined: 1-June 09 From: Dillsburg, PA Member No.: 10,428 Region Association: MidAtlantic Region 

|
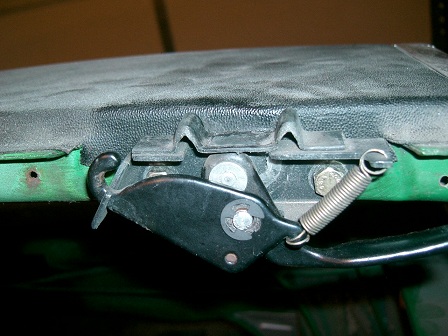
Picked up an "E" clip at the local Ace Hardware to fix the rear roof hold down:
 I didn't want to have to pull the suspension back off for paint, so I shot color in the fender well and the underside of the suspension consoles: 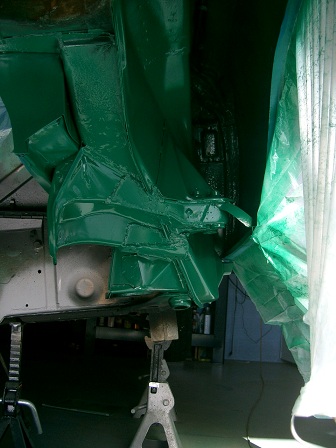 Wrestled the trailing arm assembly into place with a floor jack and a pry bar. The strap that holds the rear part of the fender was in the way, so I had to adjust it with a big pair of vice grips, a hammer and a large drift. The strap will have to be re-welded at a later time: 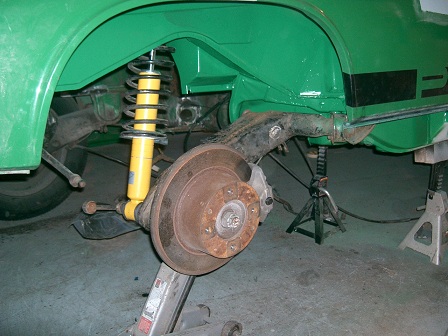 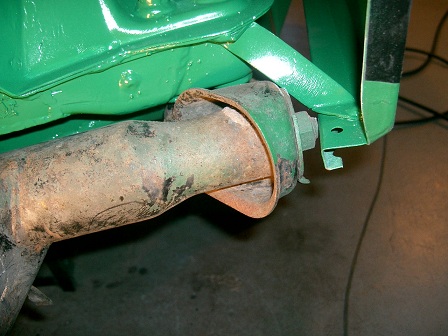 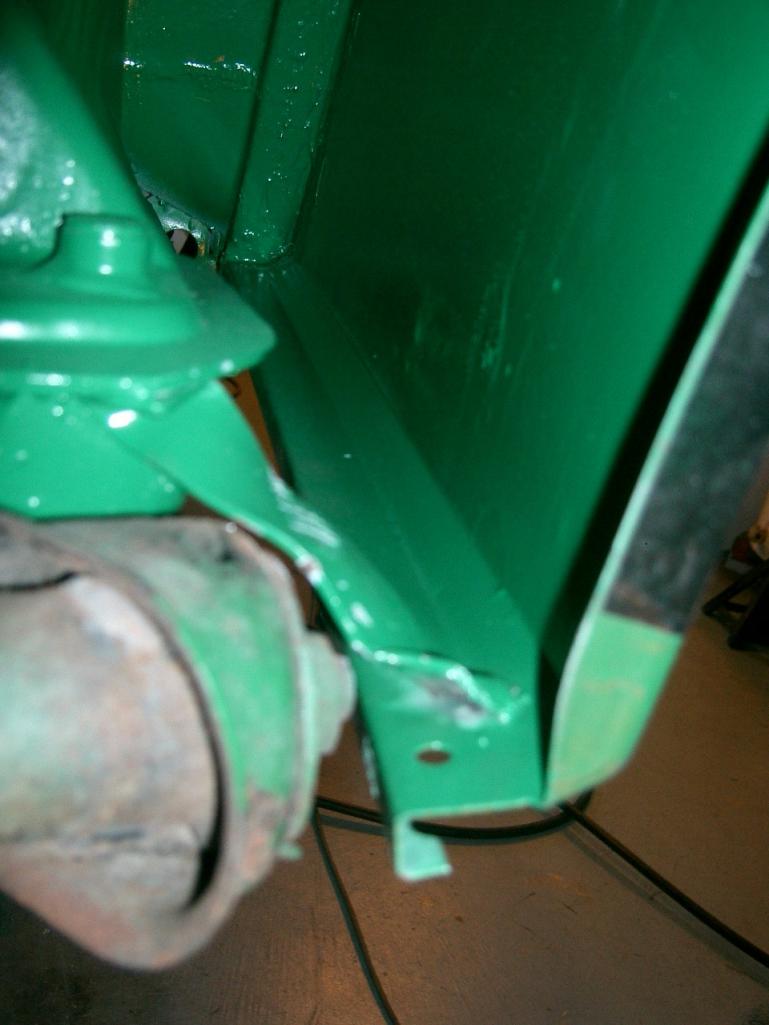 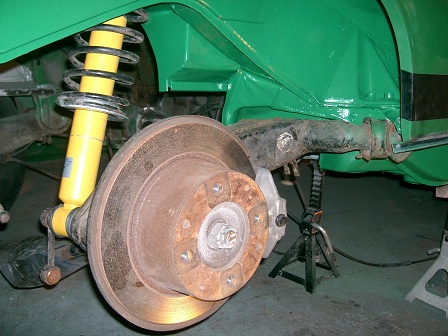 For the first time in about a year and a half, the car sat on four wheels and saw sunlight. The J-man stopped over to help roll it out of the garage and back it in so I can gain better access to the drivers side: 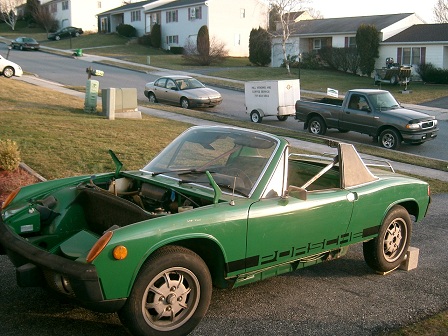 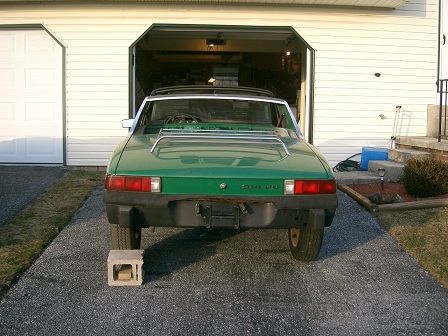 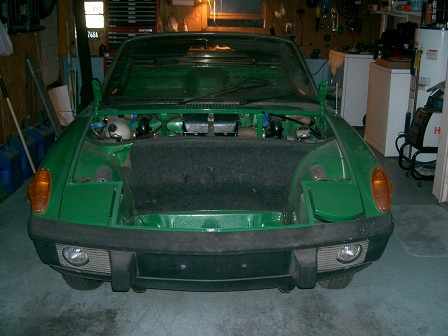 |
| saigon71 |
 Feb 2 2012, 07:43 AM Feb 2 2012, 07:43 AM
Post
#151
|
|
Advanced Member     Group: Members Posts: 2,006 Joined: 1-June 09 From: Dillsburg, PA Member No.: 10,428 Region Association: MidAtlantic Region 

|
Went to work with a screwdriver on the bottom of the drivers side long. The worst spot on the bottom is at the curve between the inner & outer firewall where it curves to meet the long:
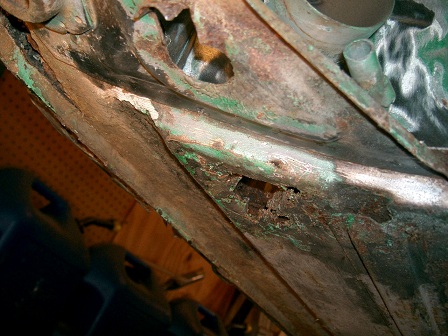 The sail vinyl on the passenger side was peeling off at the bottom and it looks like it "shrunk" a little bit as it would not go below the line of the crome trim. Installing new vinyl is not in the cards at this time, so I gently pryed up the vinyl, applied 3M adhesive using a fine paint brush and clamped a piece of kindling on to hold everything in place. I was left with two small bubbles about an inch up from the bottom: 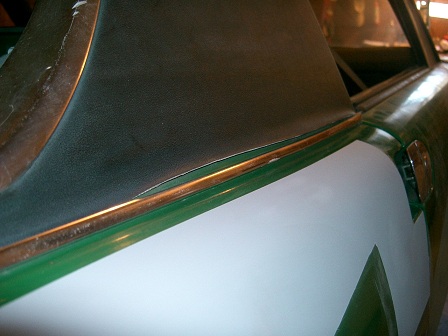 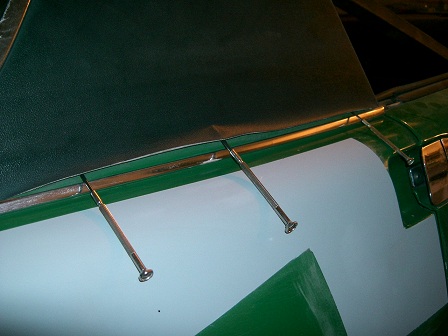 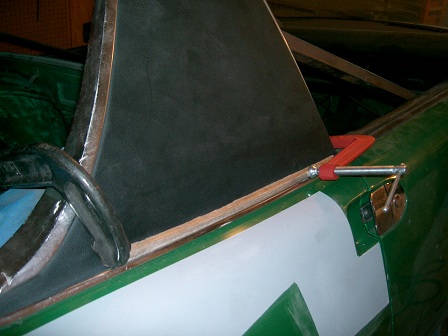 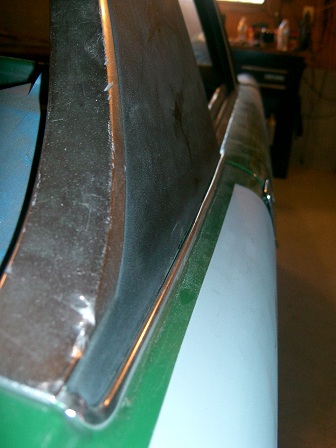 Started cleaning/inspecting the tunnel. I had to remove the shift rod for better access. The car was shifting pretty well before, so I measured the spline depth at the shifter as a starting point for re-assembly. Overall, the tunnel itself doesn't appear to be too bad...but I discovered a few small holes about half way back: 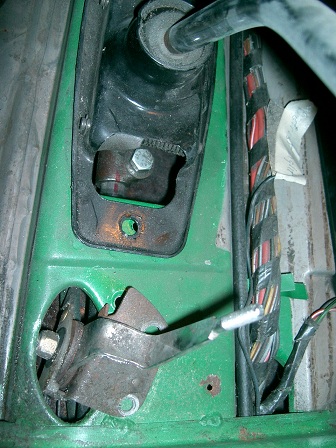 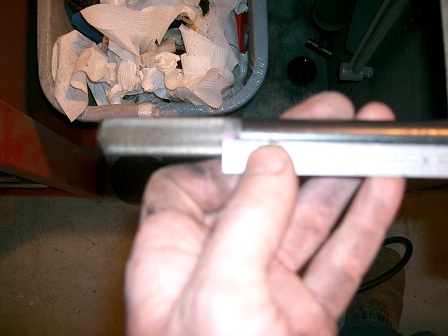 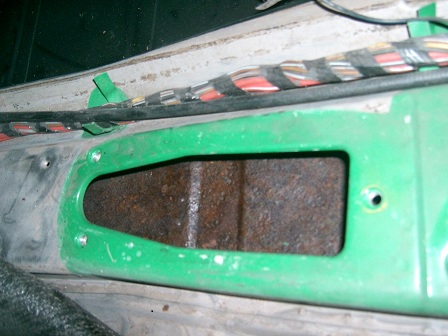 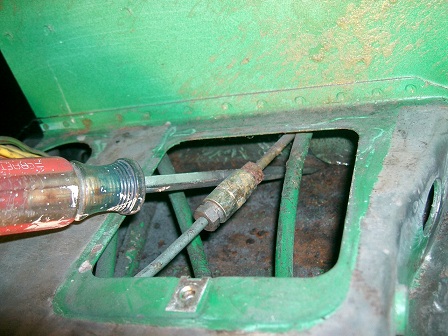 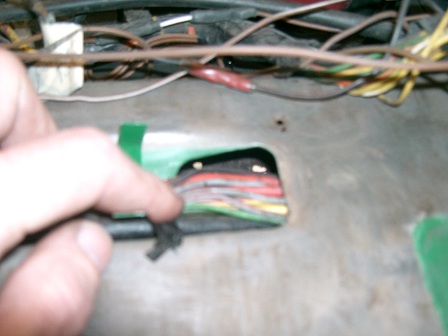 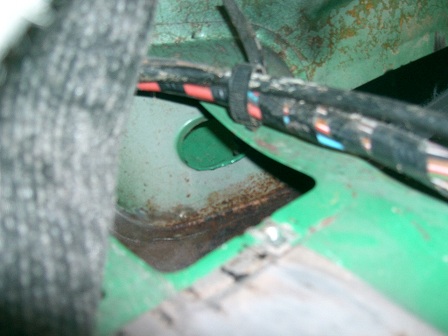 |
| hot_shoe914 |
 Feb 2 2012, 07:52 AM Feb 2 2012, 07:52 AM
Post
#152
|
|
on ramp passer     Group: Members Posts: 3,806 Joined: 20-November 07 From: Earle, Ar. Member No.: 8,354 Region Association: None |
Looking good, keep it up. (IMG:style_emoticons/default/smilie_pokal.gif) (IMG:style_emoticons/default/smilie_pokal.gif) (IMG:style_emoticons/default/smilie_pokal.gif)
|
| jonferns |
 Feb 2 2012, 09:24 AM Feb 2 2012, 09:24 AM
Post
#153
|
|
Advanced Member     Group: Members Posts: 2,081 Joined: 29-March 07 From: New Jersey Member No.: 7,631 Region Association: North East States 
|
Wow, great progress, looking forward to more (IMG:style_emoticons/default/beerchug.gif)
|
| Eric_Shea |
 Feb 2 2012, 11:14 AM Feb 2 2012, 11:14 AM
Post
#154
|
|
PMB Performance                Group: Admin Posts: 19,289 Joined: 3-September 03 From: Salt Lake City, UT Member No.: 1,110 Region Association: Rocky Mountains  |
Amazing Bob. (IMG:style_emoticons/default/smilie_pokal.gif)
|
| scotty b |
 Feb 2 2012, 11:45 AM Feb 2 2012, 11:45 AM
Post
#155
|
|
rust free you say ?                Group: Members Posts: 16,375 Joined: 7-January 05 From: richmond, Va. Member No.: 3,419 Region Association: None |
(IMG:style_emoticons/default/smile.gif) (IMG:style_emoticons/default/beerchug.gif)
now get crakin' (IMG:style_emoticons/default/whip[1].gif) (IMG:style_emoticons/default/whip[1].gif) (IMG:style_emoticons/default/mad.gif) (IMG:style_emoticons/default/poke.gif) (IMG:style_emoticons/default/poke.gif) |
| jsayre914 |
 Feb 2 2012, 11:56 AM Feb 2 2012, 11:56 AM
Post
#156
|
|
Speed Up !!!     Group: Members Posts: 3,206 Joined: 10-February 08 From: Timonium MD 21093 Member No.: 8,696 Region Association: MidAtlantic Region |
I am soooo excited to see it at hershey this year.
Great progress, and I think it looks awesome out of the garage (IMG:style_emoticons/default/biggrin.gif) (IMG:style_emoticons/default/smash.gif) (IMG:style_emoticons/default/first.gif) |
| saigon71 |
 Feb 2 2012, 04:24 PM Feb 2 2012, 04:24 PM
Post
#157
|
|
Advanced Member     Group: Members Posts: 2,006 Joined: 1-June 09 From: Dillsburg, PA Member No.: 10,428 Region Association: MidAtlantic Region 

|
Thanks! It dawned on me last week that Hershey is about 80 days away...it's "go time!" (IMG:style_emoticons/default/sawzall-smiley.gif) (IMG:style_emoticons/default/welder.gif) (IMG:style_emoticons/default/beer3.gif)
Eric - I get your posts confused with Zachs now - not sure why. (IMG:style_emoticons/default/biggrin.gif) Joe - looks like we may both be putting an engine in shortly before Hershey. Let me know if you need a hand with the install and I will do the same. We live pretty close. |
| Eric_Shea |
 Feb 2 2012, 09:23 PM Feb 2 2012, 09:23 PM
Post
#158
|
|
PMB Performance                Group: Admin Posts: 19,289 Joined: 3-September 03 From: Salt Lake City, UT Member No.: 1,110 Region Association: Rocky Mountains  |
QUOTE Eric - I get your posts confused with Zachs now - not sure why. I'm the skinnier, better looking one. |
| Eric_Shea |
 Feb 2 2012, 09:24 PM Feb 2 2012, 09:24 PM
Post
#159
|
|
PMB Performance                Group: Admin Posts: 19,289 Joined: 3-September 03 From: Salt Lake City, UT Member No.: 1,110 Region Association: Rocky Mountains  |
QUOTE The J-man stopped over to help roll it Riiiiiiiiiiiiiight (IMG:style_emoticons/default/smoke.gif) |
| saigon71 |
 Feb 4 2012, 09:14 AM Feb 4 2012, 09:14 AM
Post
#160
|
|
Advanced Member     Group: Members Posts: 2,006 Joined: 1-June 09 From: Dillsburg, PA Member No.: 10,428 Region Association: MidAtlantic Region 

|
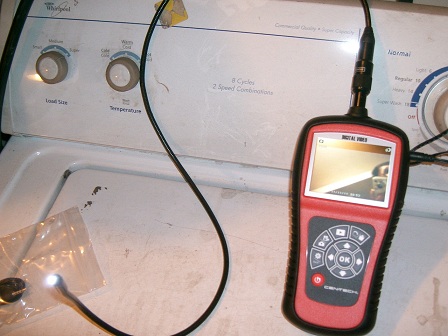
Picked up a pretty awesome tool on Monday. I wanted to be able to look in the tunnel and the rusted out areas between the inner and outer firewall to know how much I need to cut out:
 With the car sitting on all fours, I relieved the tension on the passenger side body brace turnbuckle. The gap is slightly smaller at the bottom of the door, but it opens and closes very well: 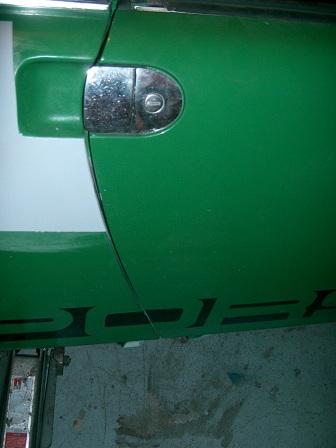 Leveled the car and installed the battery tray. The Optima 34R battery is a full inch taller than the old Interstate that came with the car. After tack welding it in place, Hollywood stopped over and helped me get the engine bay cover on (with rain tray installed) to make sure everything would clear. With the terminals on the inboard side, there is interference with the rain tray...I should have bought the 34. It should be fun returning a battery purchased off the internet. Plus, I will beed to trim about 1/8" off the bottom of the battery case for proper fit. Side note...the MFG installed the red protective cap on the negative terminal and the black one on the positive. (IMG:style_emoticons/default/dry.gif) 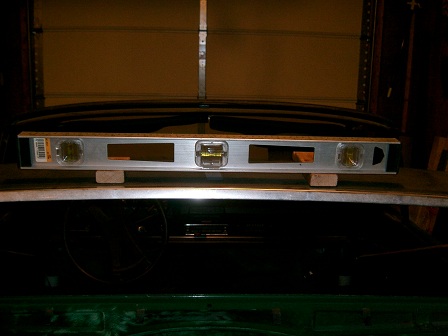 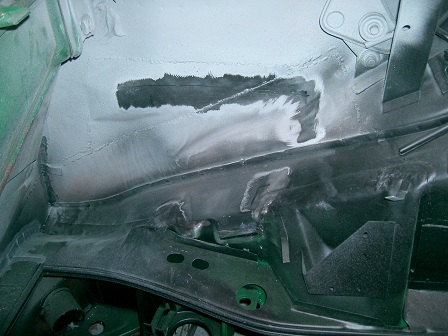 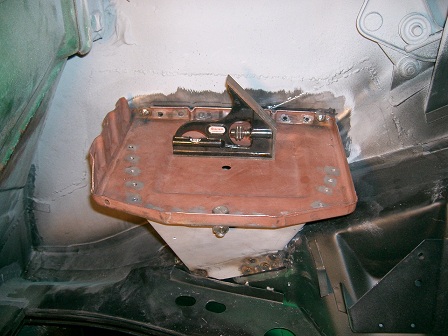 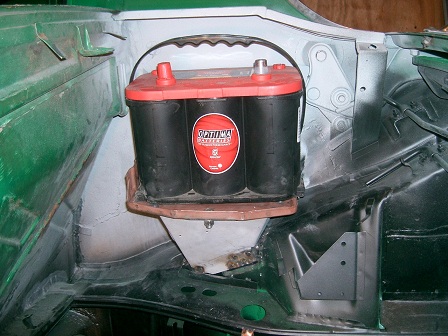 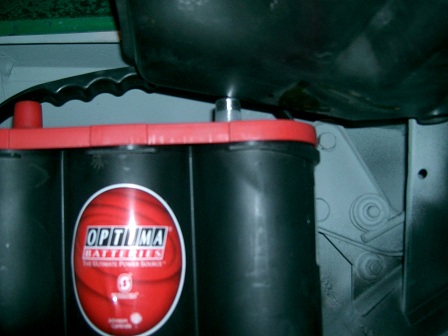 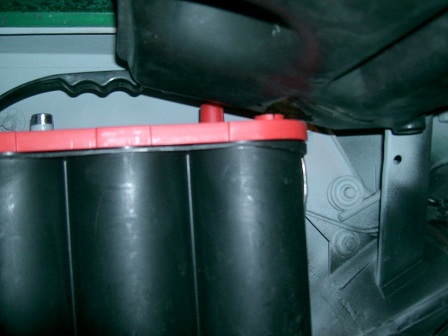 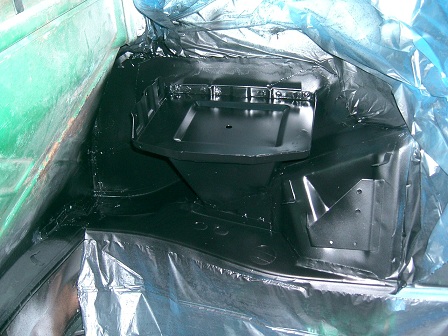 |
  |
1 User(s) are reading this topic (1 Guests and 0 Anonymous Users)
0 Members:

|
Lo-Fi Version | Time is now: 29th December 2024 - 11:22 AM |
Invision Power Board
v9.1.4 © 2024 IPS, Inc.


