|
|
|
Porsche, and the Porsche crest are registered trademarks of Dr. Ing. h.c. F. Porsche AG.
This site is not affiliated with Porsche in any way. Its only purpose is to provide an online forum for car enthusiasts. All other trademarks are property of their respective owners. |
|
|

  |

| saigon71 |
 Dec 2 2012, 08:25 AM Dec 2 2012, 08:25 AM
Post
#241
|
|
Advanced Member  Group: Members Posts: 2,007 Joined: 1-June 09 From: Dillsburg, PA Member No.: 10,428 Region Association: MidAtlantic Region |
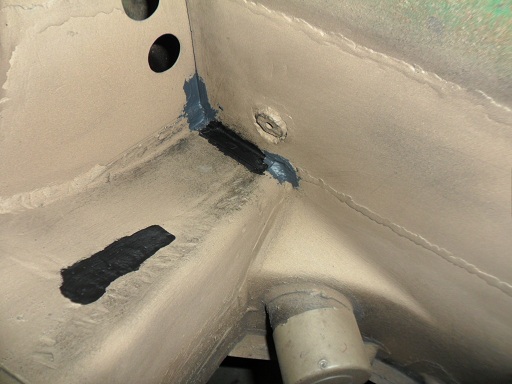
Needed to zip up the seam on the inner wheelhouse forward of the firewall:
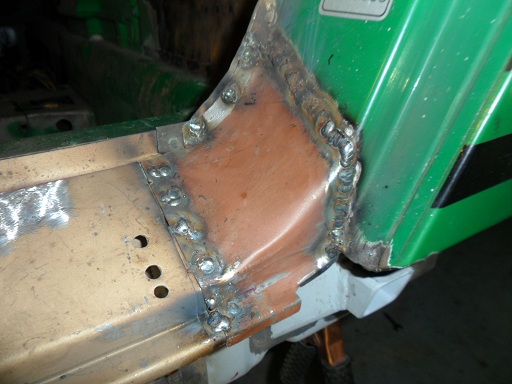
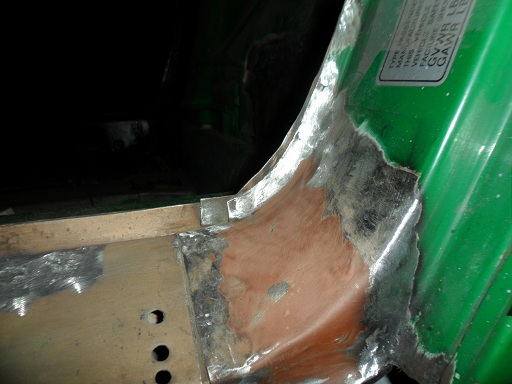
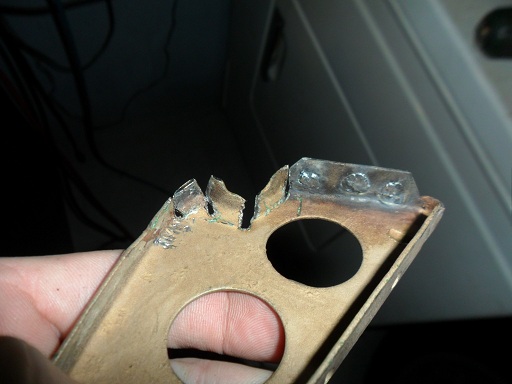
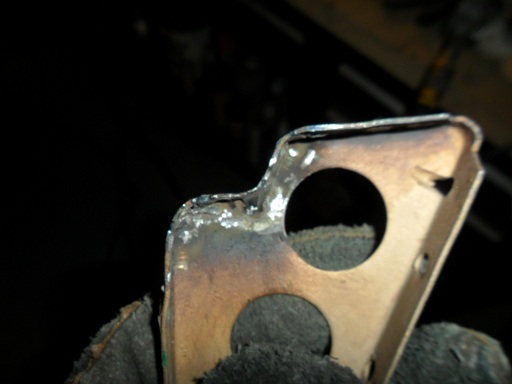
 Re-attached a section where the firewall meets the door jamb where I previously drilled out the spot welds:   Welded in the firewall patch. I started with the rosettes where the panel meets the door jamb, then tack welded the panel on the back to hold it in place. Seam welded from the passenger compartment, then touched up the engine compartment side: 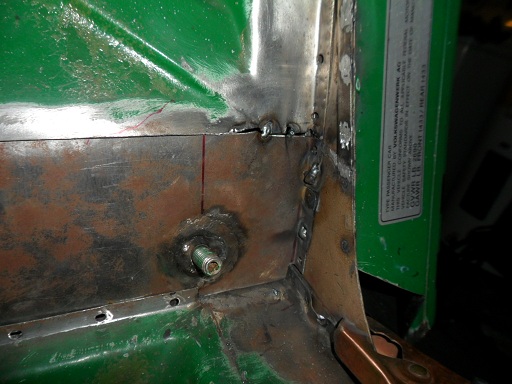 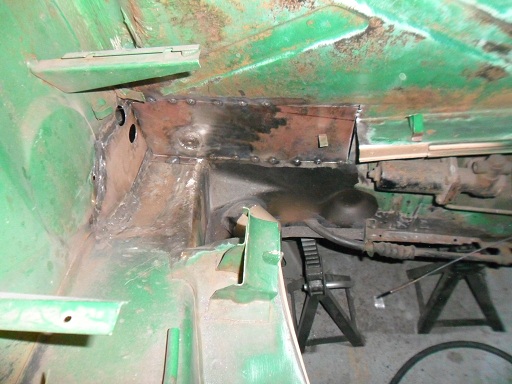 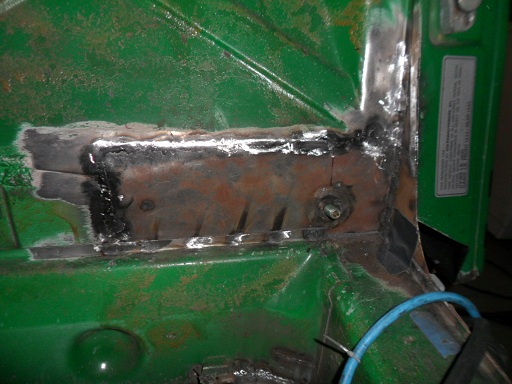 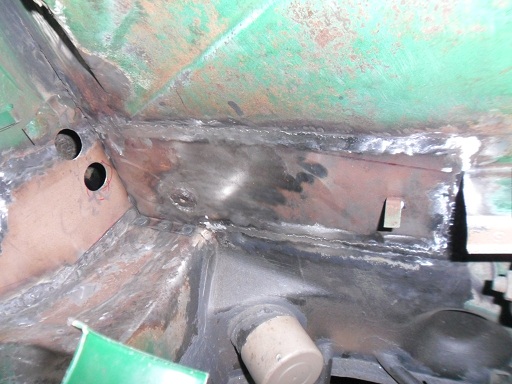 |
   |

 
|
| saigon71 |
Dec 2 2012, 08:37 AM
Post
#242
|
|
Advanced Member Group: Members Posts: 2,007 Joined: 1-June 09 From: Dillsburg, PA Member No.: 10,428 Region Association: MidAtlantic Region |
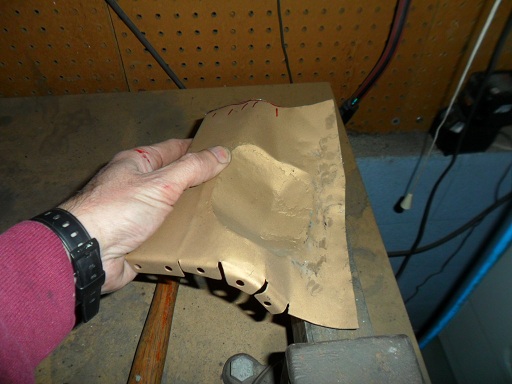
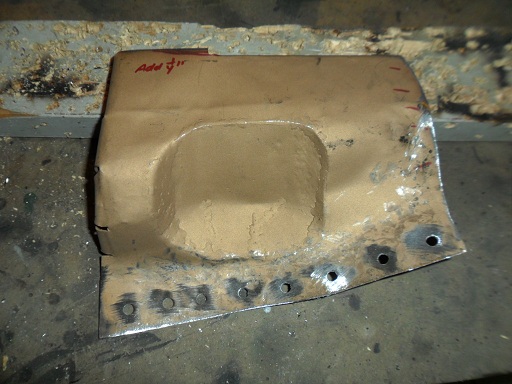
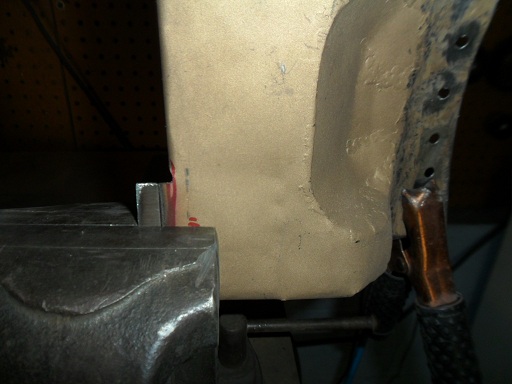
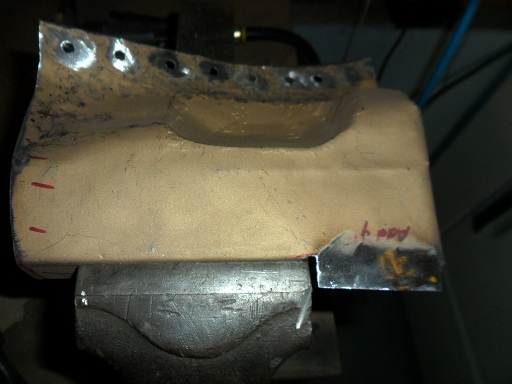
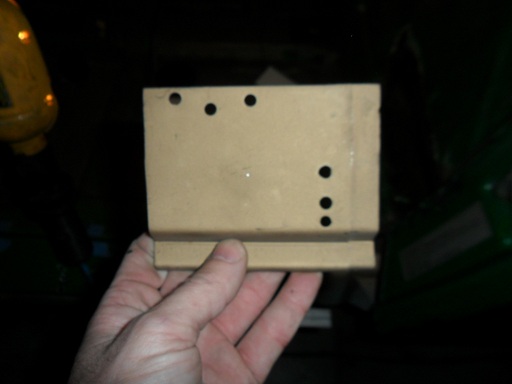
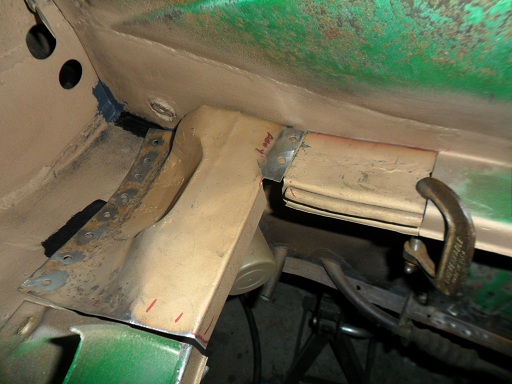
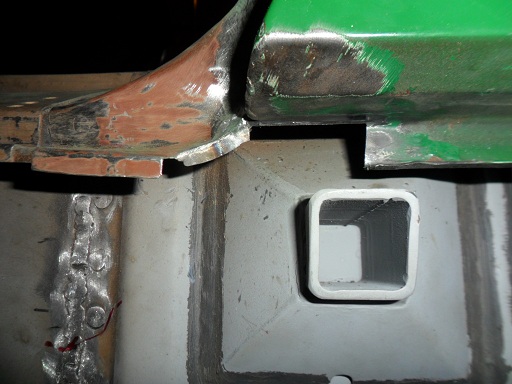
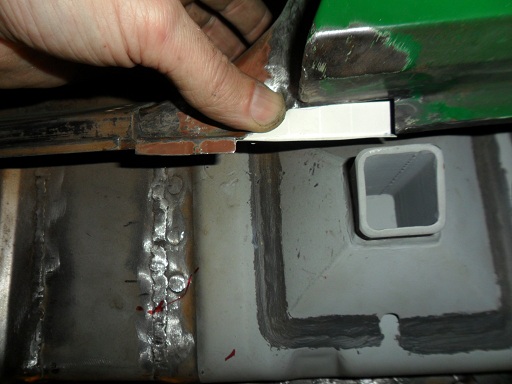
The repaired section of the front engine bay shelf and the fabricated drivers side engine bay shelf had to be fitted at the same time. It took a lot of forming and some trimming to get everything to line up right. Needed to add about 1/4" to the tab where the side and front piece meet:
         |
|
|
|
| Eric_Shea |
Dec 2 2012, 09:15 PM
Post
#243
|
|
PMB Performance Group: Admin Posts: 19,289 Joined: 3-September 03 From: Salt Lake City, UT Member No.: 1,110 Region Association: Rocky Mountains |
This year for sure riiiiiiiiiiiiiight?!?!? (IMG:style_emoticons/default/biggrin.gif)
|
|
|
|
| OllieG |
Dec 3 2012, 03:10 AM
Post
#244
|
|
OllieG Group: Members Posts: 212 Joined: 6-July 11 From: UK Member No.: 13,282 Region Association: England |
Great work as usual...I don't know how the hell you made that shelf piece with the indent...amazing!
|
|
|
|
| bcheney |
Dec 3 2012, 05:33 AM
Post
#245
|
|
Senior Member Group: Members Posts: 1,341 Joined: 16-November 03 From: Orlando, FL Member No.: 1,348 Region Association: South East States |
QUOTE(OllieG @ Dec 3 2012, 04:10 AM)  Great work as usual...I don't know how the hell you made that shelf piece with the indent...amazing! Keep up the momentum...I just finished mine and it was well worth all the effort, energy and money! |
|
|
|
| jsayre914 |
Dec 3 2012, 12:08 PM
Post
#246
|
|
Speed Up !!! Group: Members Posts: 3,208 Joined: 10-February 08 From: Timonium MD 21093 Member No.: 8,696 Region Association: MidAtlantic Region |
Looks great Bob !
At least tow it to Hershey next year so we can see it (IMG:style_emoticons/default/rolleyes.gif) |
|
|
|
| saigon71 |
Dec 3 2012, 10:14 PM
Post
#247
|
|
Advanced Member Group: Members Posts: 2,007 Joined: 1-June 09 From: Dillsburg, PA Member No.: 10,428 Region Association: MidAtlantic Region |
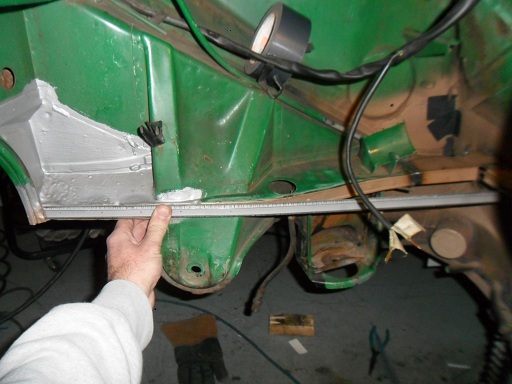
Welded the last section of the drivers side door sill on. Used a 12" rule to make sure everything was true:
    Started fitting the lower chunk of the door jam. Hated to cut such a small piece out of the replacement from Restoration Design, but had to do it to as the rest of the jam looked good. I used the old piece for a rough measurement of where to cut, then trimmed to fit: 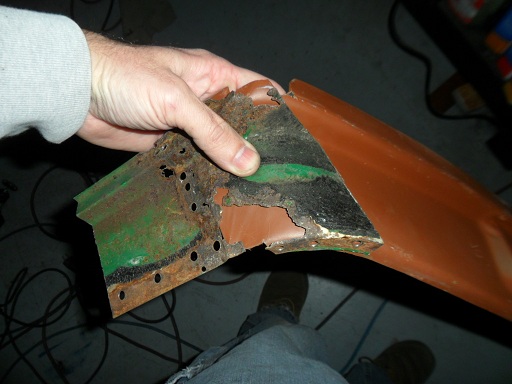 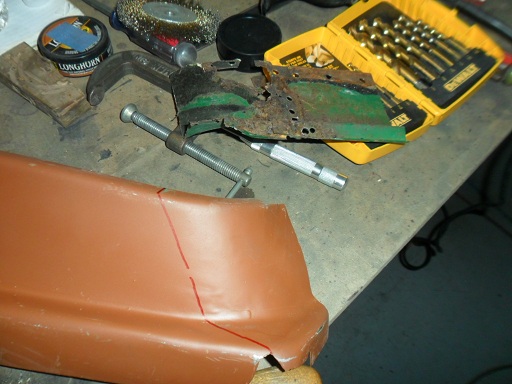 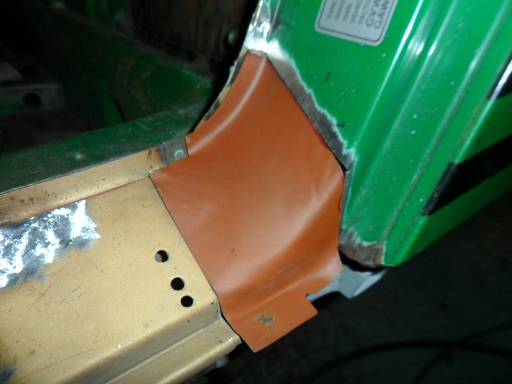 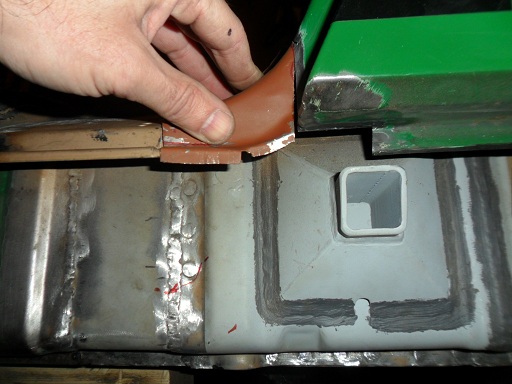 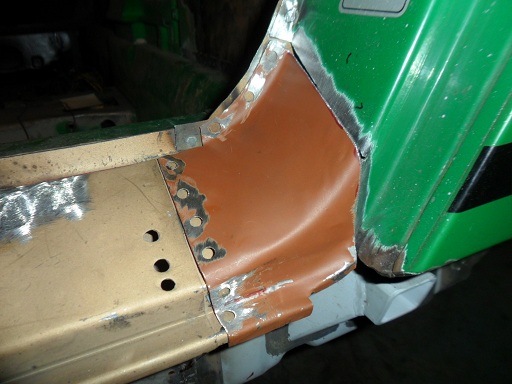 |
|
|
|
| cary |
Dec 3 2012, 10:17 PM
Post
#248
|
|
Advanced Member Group: Members Posts: 3,900 Joined: 26-January 04 From: Sherwood Oregon Member No.: 1,608 Region Association: Pacific Northwest |
Nice work Bob ............. Lookn good.
|
|
|
|
| saigon71 |
Dec 3 2012, 10:18 PM
Post
#249
|
|
Advanced Member Group: Members Posts: 2,007 Joined: 1-June 09 From: Dillsburg, PA Member No.: 10,428 Region Association: MidAtlantic Region |
QUOTE(Eric_Shea @ Dec 2 2012, 10:15 PM) Got burned for some ca$h last year thinking "for sure." But it looks more likely for Hershey 2013. (IMG:style_emoticons/default/biggrin.gif) |
|
|
|
| saigon71 |
Dec 3 2012, 10:21 PM
Post
#250
|
|
Advanced Member Group: Members Posts: 2,007 Joined: 1-June 09 From: Dillsburg, PA Member No.: 10,428 Region Association: MidAtlantic Region |
QUOTE(OllieG @ Dec 3 2012, 04:10 AM) Great work as usual...I don't know how the hell you made that shelf piece with the indent...amazing! Thanks Ollie. Lots of work invested in that part. Will see how it all works out soon! |
|
|
|
| saigon71 |
Dec 3 2012, 10:28 PM
Post
#251
|
|
Advanced Member Group: Members Posts: 2,007 Joined: 1-June 09 From: Dillsburg, PA Member No.: 10,428 Region Association: MidAtlantic Region |
QUOTE(bcheney @ Dec 3 2012, 06:33 AM) QUOTE(OllieG @ Dec 3 2012, 04:10 AM) Great work as usual...I don't know how the hell you made that shelf piece with the indent...amazing! Keep up the momentum...I just finished mine and it was well worth all the effort, energy and money! Thanks. How long did it take you? Is there a built thread...I would like to check it out! |
|
|
|
| saigon71 |
Dec 3 2012, 10:37 PM
Post
#252
|
|
Advanced Member Group: Members Posts: 2,007 Joined: 1-June 09 From: Dillsburg, PA Member No.: 10,428 Region Association: MidAtlantic Region |
QUOTE(jsayre914 @ Dec 3 2012, 01:08 PM) Looks great Bob ! At least tow it to Hershey next year so we can see it (IMG:style_emoticons/default/rolleyes.gif) Thanks Joe. The only way the car will be there is under it's own power. May need help with an engine/tranny install this winter. Hopefully some local help is available. (IMG:style_emoticons/default/biggrin.gif) |
|
|
|
| saigon71 |
Dec 8 2012, 09:40 PM
Post
#253
|
|
Advanced Member Group: Members Posts: 2,007 Joined: 1-June 09 From: Dillsburg, PA Member No.: 10,428 Region Association: MidAtlantic Region |
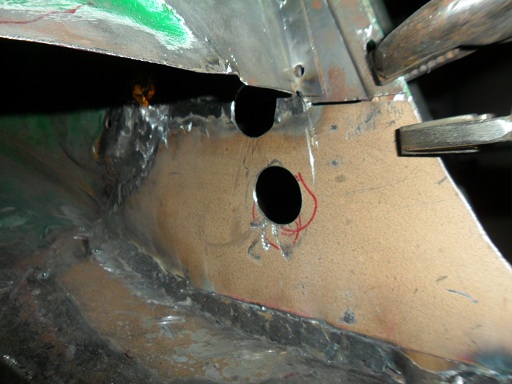
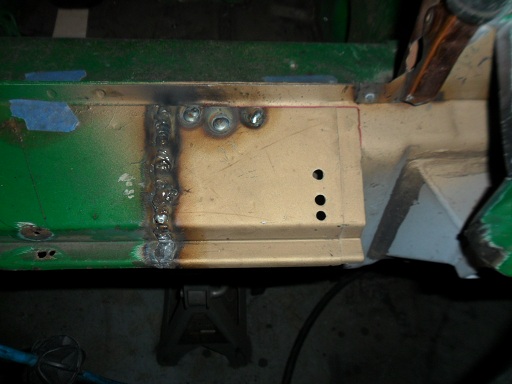
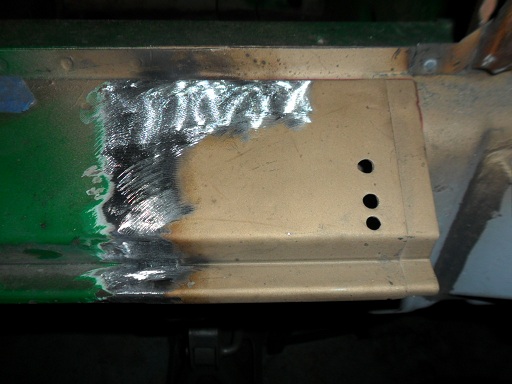
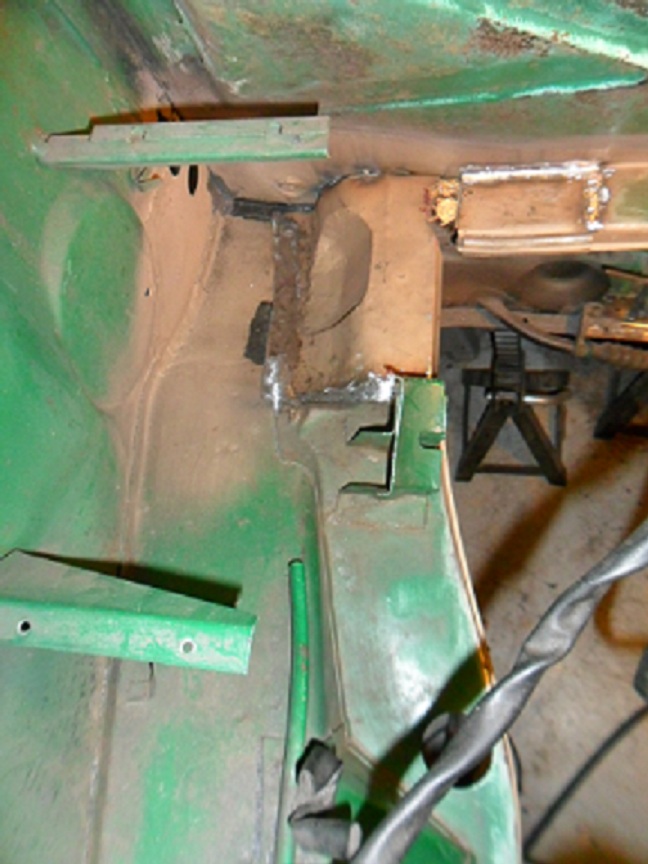
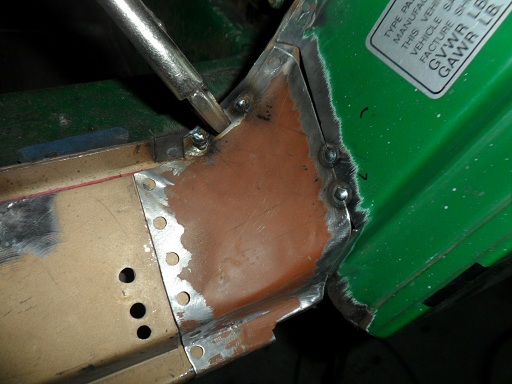
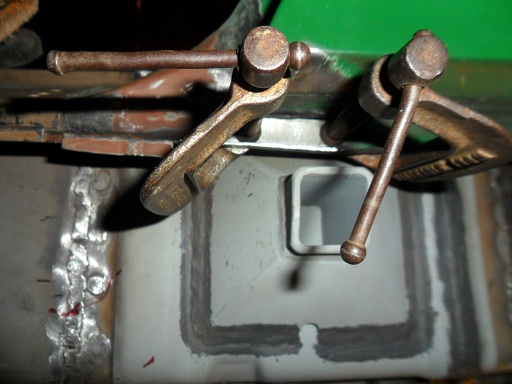
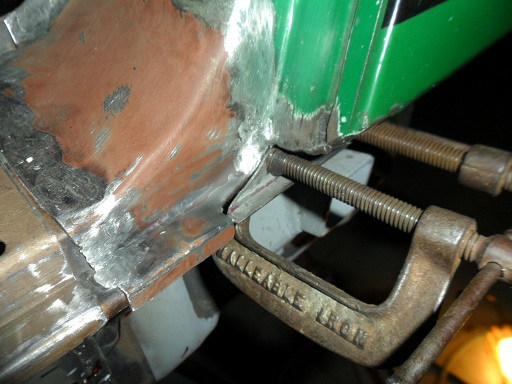
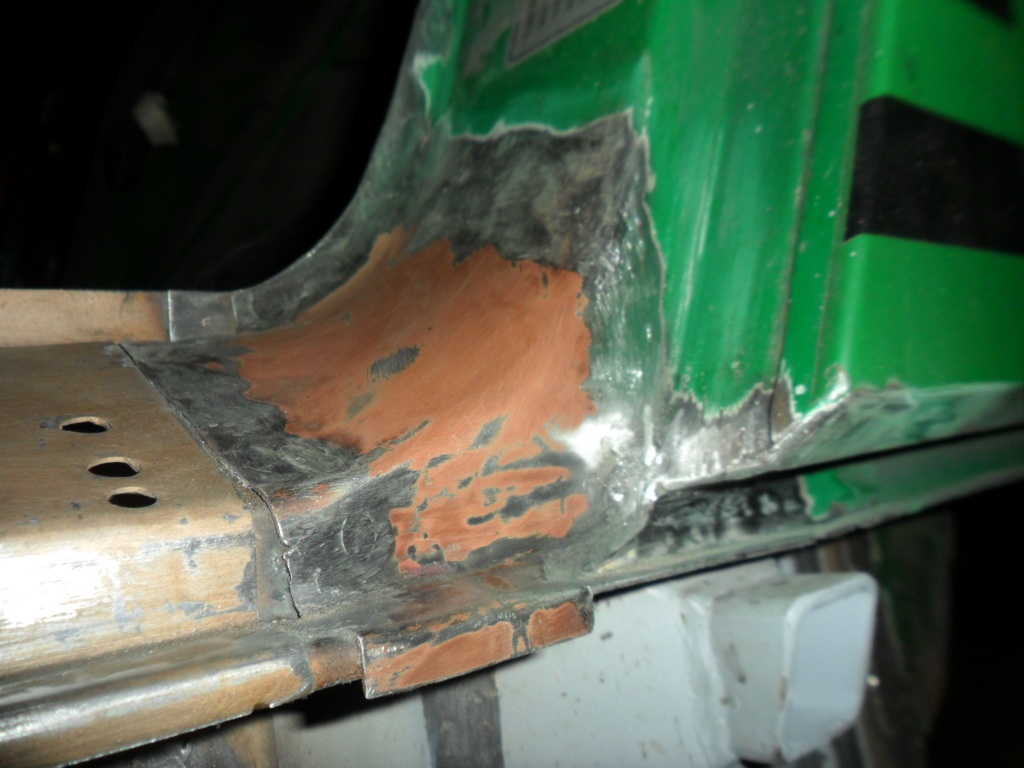
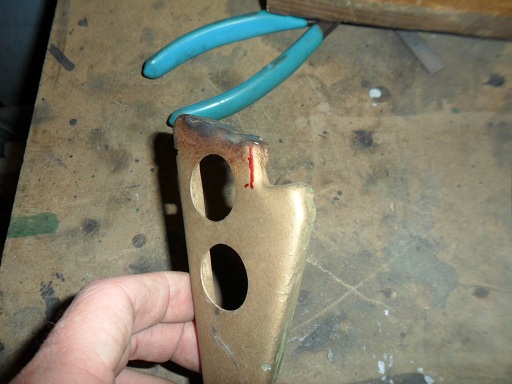
Welded the drivers side engine shelf and reworked piece of front engine bay sheet metal in. I hit a couple areas with seam sealer before welding, as they would be difficult to get at after the piece was installed. It took a wide variety of grinding wheels and Dremmel tools to gring down the welds in the tight areas. Overall, it went well, but I took a hit from some molten metal in the arm and scalp when filling the rosettes on the bottom...just very minor burns:
      |
|
|
|
| saigon71 |
Dec 8 2012, 09:52 PM
Post
#254
|
|
Advanced Member Group: Members Posts: 2,007 Joined: 1-June 09 From: Dillsburg, PA Member No.: 10,428 Region Association: MidAtlantic Region |
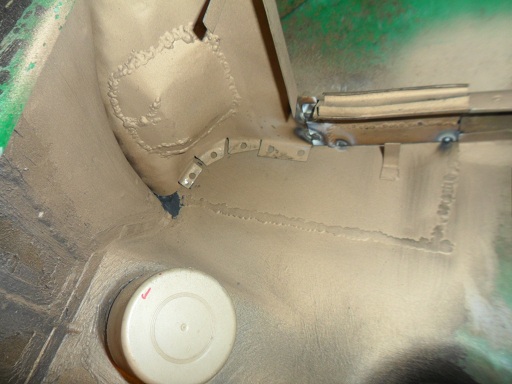
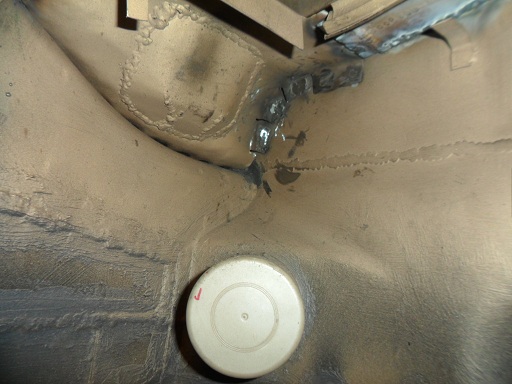
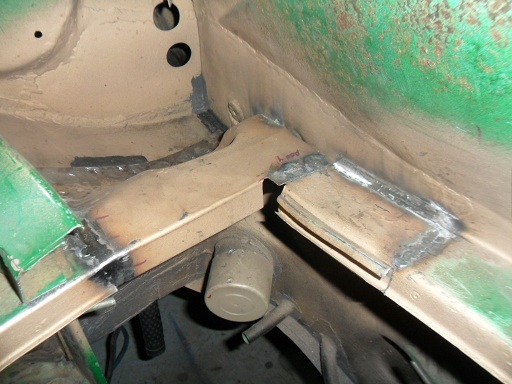
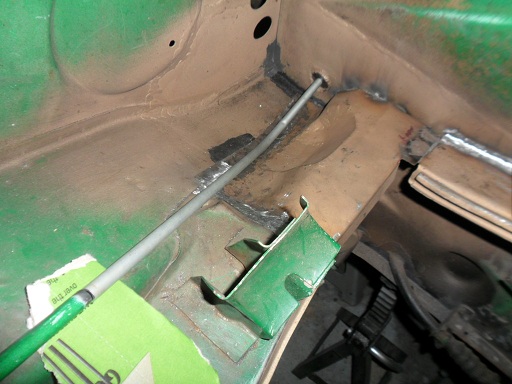
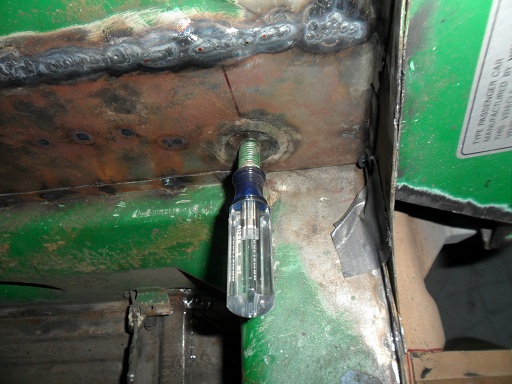
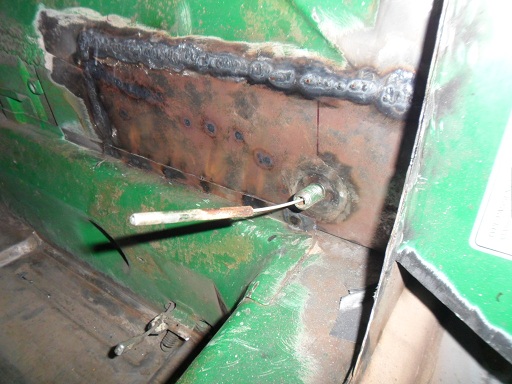
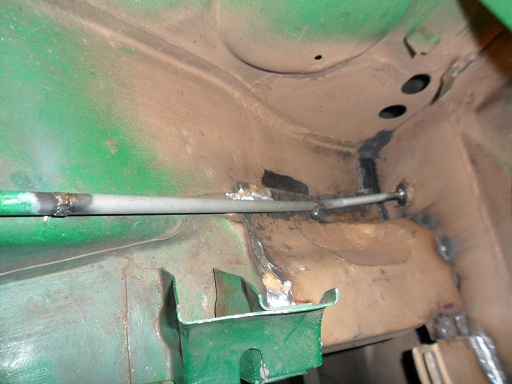
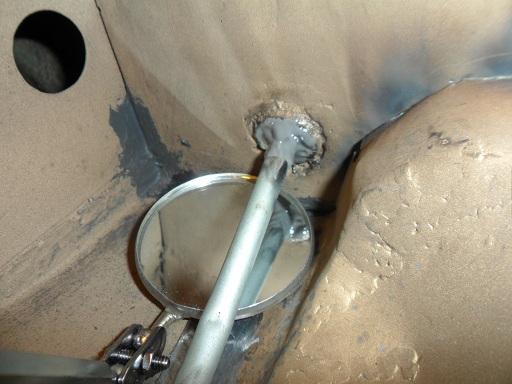
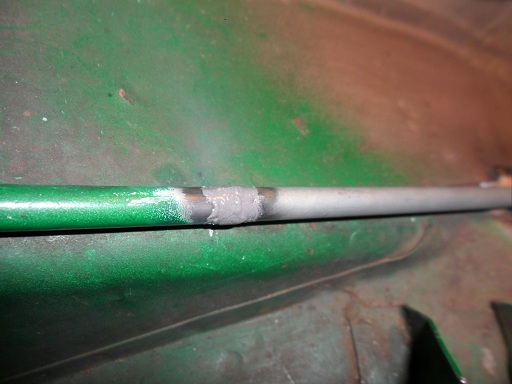
14" or so of the tube that holds the enging bay lid cable was rusted away. I had a chunk of brake line in the shop, so I cut it down, bent it and tack welded it in. Used a #1 phillips screwdriver through the firewall hole to keep it centered up front. Ran the cable through to make sure the alignment was correct, then applied a coat of JB weld over the seams:
        |
|
|
|
| hot_shoe914 |
Dec 8 2012, 10:47 PM
Post
#255
|
|
on ramp passer Group: Members Posts: 3,806 Joined: 20-November 07 From: Earle, Ar. Member No.: 8,354 Region Association: None |
QUOTE(saigon71 @ Dec 3 2012, 10:37 PM) QUOTE(jsayre914 @ Dec 3 2012, 01:08 PM) Looks great Bob ! At least tow it to Hershey next year so we can see it (IMG:style_emoticons/default/rolleyes.gif) Thanks Joe. The only way the car will be there is under it's own power. May need help with an engine/tranny install this winter. Hopefully some local help is available. (IMG:style_emoticons/default/biggrin.gif) You get to that point Bob and I will drive up there and help you install it myself. |
|
|
|
| saigon71 |
Dec 9 2012, 04:35 PM
Post
#256
|
|
Advanced Member Group: Members Posts: 2,007 Joined: 1-June 09 From: Dillsburg, PA Member No.: 10,428 Region Association: MidAtlantic Region |
With my fantasy football season in ruins, I blew off the early games and welded in the bottom section of the door jam from Restoration Design. I have had consistent problems lately (bad batch?) with Eastwood's Copper Weld-Thru primer, so I switched to a product I found at Home Depot. Eastwood sent me replacements cans for the ones I had problems with - they kept clogging and left a rough finish. When the replacements did the same thing, they issued a full refund. I started with the inside rosettes and worked my way out. Had to beat it into place with a hammer & drift as I went. It took about seven passes of welding/grinding on the vertical part of the jam to build the metal up to where I wanted it...very time consuming, just as the passenger side was:
    |
|
|
|
| saigon71 |
Dec 9 2012, 04:45 PM
Post
#257
|
|
Advanced Member Group: Members Posts: 2,007 Joined: 1-June 09 From: Dillsburg, PA Member No.: 10,428 Region Association: MidAtlantic Region |
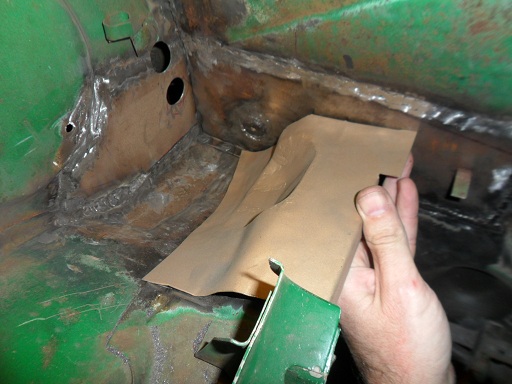
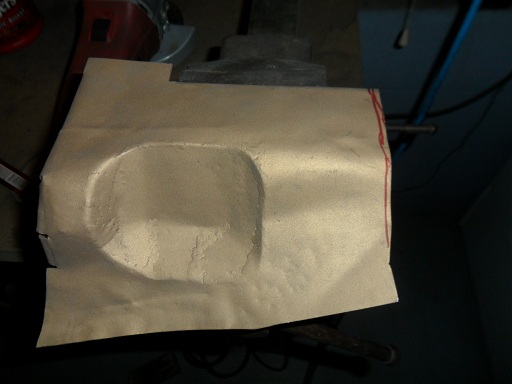
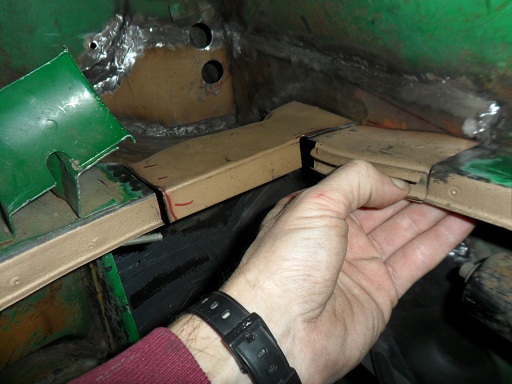
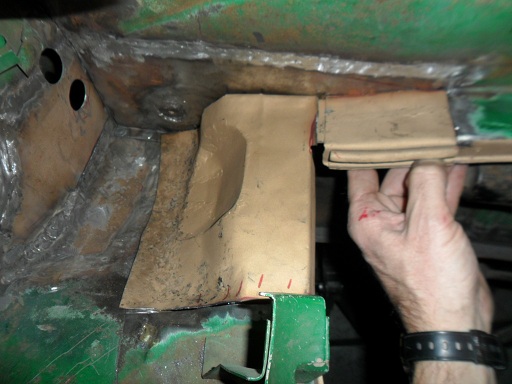
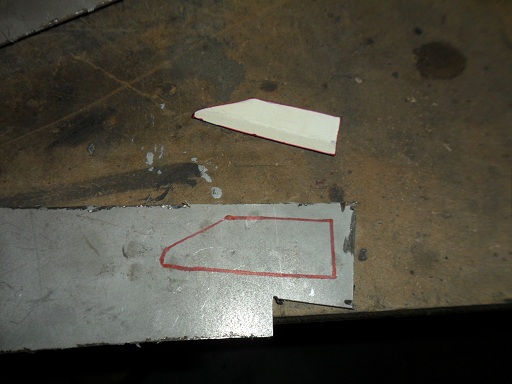
Had to fabricate a small patch piece that connects the lower fender to the door jam. Made a template and banged it out (IMG:style_emoticons/default/welder.gif) (IMG:style_emoticons/default/sawzall-smiley.gif) of leftover galvaneal steel from Restoration Design:
       |
|
|
|
| saigon71 |
Dec 9 2012, 04:52 PM
Post
#258
|
|
Advanced Member Group: Members Posts: 2,007 Joined: 1-June 09 From: Dillsburg, PA Member No.: 10,428 Region Association: MidAtlantic Region |
QUOTE(hot_shoe914 @ Dec 8 2012, 11:47 PM) QUOTE(saigon71 @ Dec 3 2012, 10:37 PM) QUOTE(jsayre914 @ Dec 3 2012, 01:08 PM) Looks great Bob ! At least tow it to Hershey next year so we can see it (IMG:style_emoticons/default/rolleyes.gif) Thanks Joe. The only way the car will be there is under it's own power. May need help with an engine/tranny install this winter. Hopefully some local help is available. (IMG:style_emoticons/default/biggrin.gif) You get to that point Bob and I will drive up there and help you install it myself. Start saving your gas money Shoe! (IMG:style_emoticons/default/biggrin.gif) |
|
|
|
| saigon71 |
Dec 10 2012, 05:51 PM
Post
#259
|
|
Advanced Member Group: Members Posts: 2,007 Joined: 1-June 09 From: Dillsburg, PA Member No.: 10,428 Region Association: MidAtlantic Region |
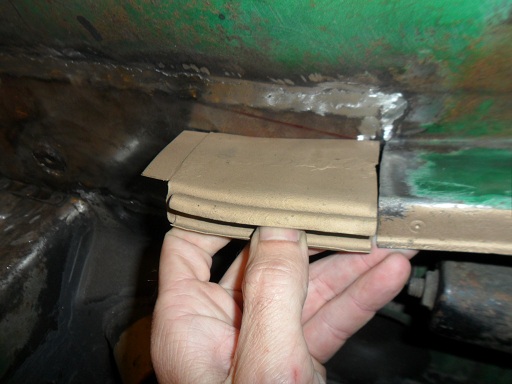
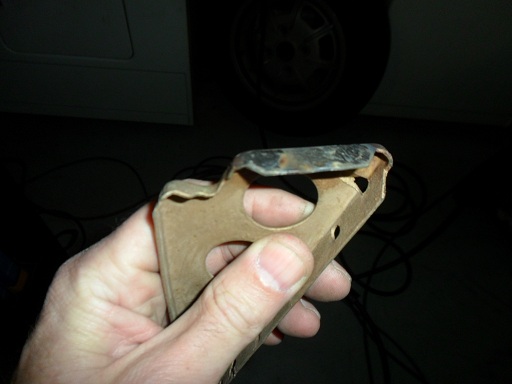
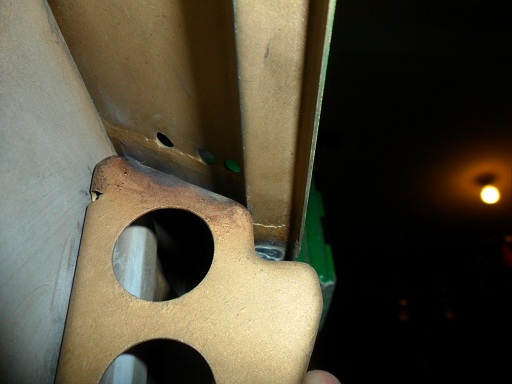
Dug the used sill triangles out of the scrap heap. Had to fill the holes in top of one of them. The rear one needed to be "slimmed down" to fit under the door sill in the area I used modified a piece of clam shell to patch the long. Sprayed the areas to be welded with weld-thru primer:
       |
|
|
|
| saigon71 |
Dec 10 2012, 06:00 PM
Post
#260
|
|
Advanced Member Group: Members Posts: 2,007 Joined: 1-June 09 From: Dillsburg, PA Member No.: 10,428 Region Association: MidAtlantic Region |
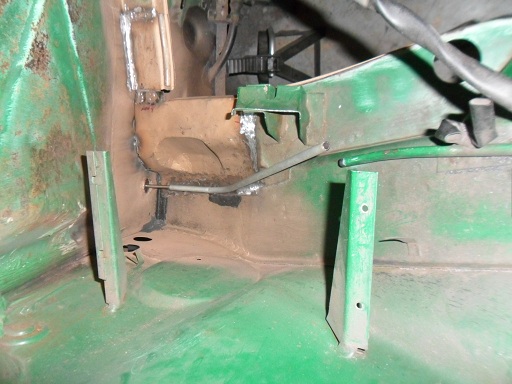
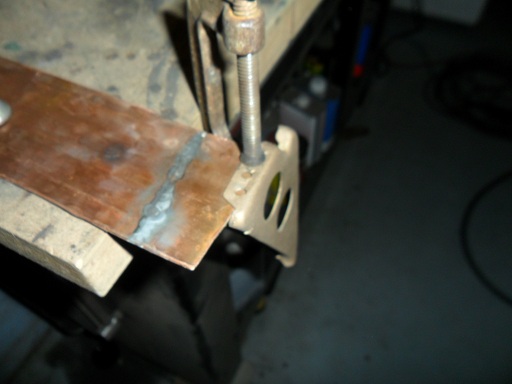
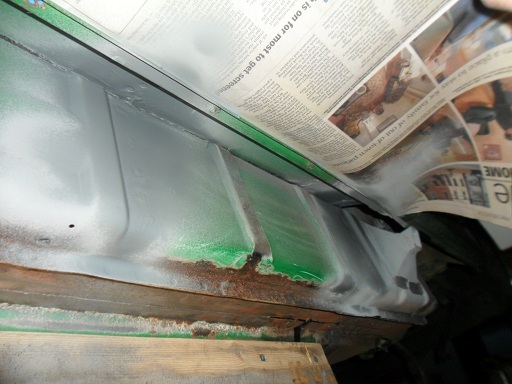
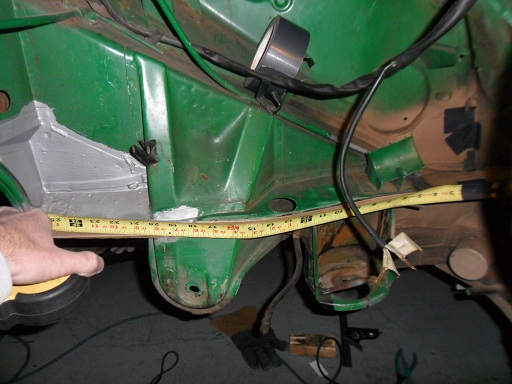
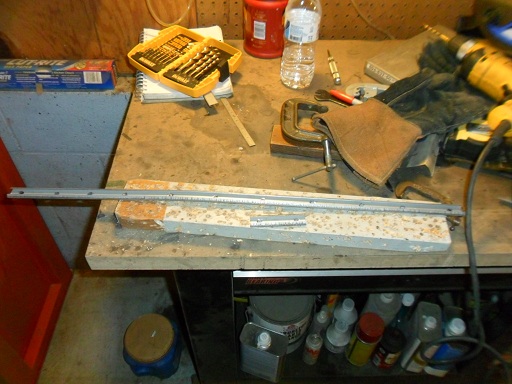
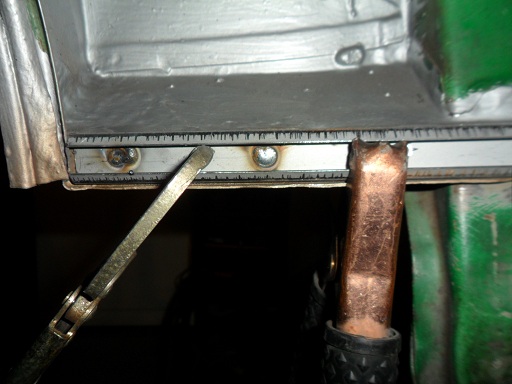
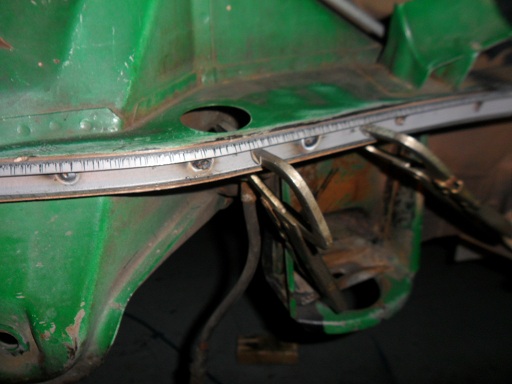
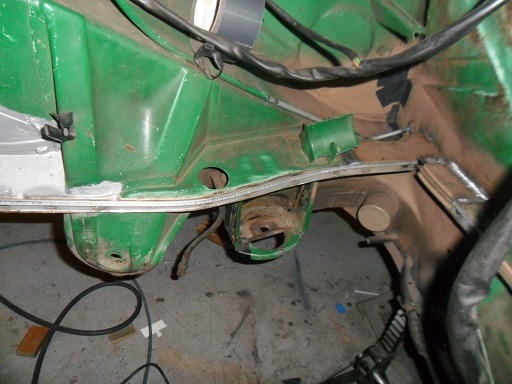
Welded the engine bay seal channel in on the drivers side and a small piece at the front. This stuff comes straight from Restoration Design. Used a tape measure pressed against the curves to get the exact measurement. Drilled holes for rosettes about every 3". Starting with the back, I welded one rosette at a time and moved the welding clamps forward as I went. This piece went in nicely and didn't even distort along the bends:
       |
|
|
|
|
1 User(s) are reading this topic (1 Guests and 0 Anonymous Users)
0 Members:

|
Lo-Fi Version | Time is now: 6th January 2025 - 04:44 AM |
Invision Power Board
v9.1.4 © 2025 IPS, Inc.