|
|
|
Porsche, and the Porsche crest are registered trademarks of Dr. Ing. h.c. F. Porsche AG.
This site is not affiliated with Porsche in any way. Its only purpose is to provide an online forum for car enthusiasts. All other trademarks are property of their respective owners. |
|
|

  |

| OllieG |
 Dec 11 2012, 03:44 AM Dec 11 2012, 03:44 AM
Post
#261
|
|
OllieG  Group: Members Posts: 212 Joined: 6-July 11 From: UK Member No.: 13,282 Region Association: England |
That's odd..the engine seal channel came pre-welded to the RD shelf I bought. It came from a German supplier...???
|
   |

 
|
| saigon71 |
Dec 11 2012, 06:46 AM
Post
#262
|
|
Advanced Member Group: Members Posts: 2,007 Joined: 1-June 09 From: Dillsburg, PA Member No.: 10,428 Region Association: MidAtlantic Region |
QUOTE(OllieG @ Dec 11 2012, 04:44 AM)  That's odd..the engine seal channel came pre-welded to the RD shelf I bought. It came from a German supplier...??? What side engine shelf? The passenger side I bought from RD had the seal channel already installed. As far as I know, nobody makes the drivers side engine shelf yet. |
|
|
|
| cary |
Dec 11 2012, 07:47 AM
Post
#263
|
|
Advanced Member Group: Members Posts: 3,900 Joined: 26-January 04 From: Sherwood Oregon Member No.: 1,608 Region Association: Pacific Northwest |
Seems I have trouble with just about any kind of rattle can spray nozzle that I get.
About half come DOA and won't fire up. Nice work ................ things are coming along good. |
|
|
|
| Gint |
Dec 11 2012, 08:51 AM
Post
#264
|
|
Mike Ginter Group: Admin Posts: 16,095 Joined: 26-December 02 From: Denver CO. Member No.: 20 Region Association: Rocky Mountains |
Nice work! I need to do the seal channel on the right side of my car one of these days. Thanks for posting your progress pics.
|
|
|
|
| saigon71 |
Dec 11 2012, 05:05 PM
Post
#265
|
|
Advanced Member Group: Members Posts: 2,007 Joined: 1-June 09 From: Dillsburg, PA Member No.: 10,428 Region Association: MidAtlantic Region |
QUOTE(cary @ Dec 11 2012, 08:47 AM) Seems I have trouble with just about any kind of rattle can spray nozzle that I get. About half come DOA and won't fire up. Nice work ................ things are coming along good. Thanks, I am trying to get a few hours in the shop each day. Overall, I have had good results with most rattle cans, even earlier batches of Eastwoods Copper Weld-Thur primer...I'm not sure what changed with the product, but I had nothing but hassles with the last batch. To Eastwood's credit, they issued a quick refund when I complained. |
|
|
|
| saigon71 |
Dec 11 2012, 05:15 PM
Post
#266
|
|
Advanced Member Group: Members Posts: 2,007 Joined: 1-June 09 From: Dillsburg, PA Member No.: 10,428 Region Association: MidAtlantic Region |
QUOTE(Gint @ Dec 11 2012, 09:51 AM) Nice work! I need to do the seal channel on the right side of my car one of these days. Thanks for posting your progress pics. You are welcome. Reading build threads by Scotty B, Jeff Hail and others gave me the courage and education to embark on this journey. The old channel comes out quickly once you find the spot welds. Spot weld cutting bit was awesome for removing them. Someone at RD told me to heat the seal channel with a torch to get it to bend, which I was prepped to do, but I found that the welding clamps alone drew it in nicely. I was happy to exclude a lit propane torch WHILE welding in the engine bay. (IMG:style_emoticons/default/dry.gif) |
|
|
|
| saigon71 |
Dec 15 2012, 12:14 PM
Post
#267
|
|
Advanced Member Group: Members Posts: 2,007 Joined: 1-June 09 From: Dillsburg, PA Member No.: 10,428 Region Association: MidAtlantic Region |
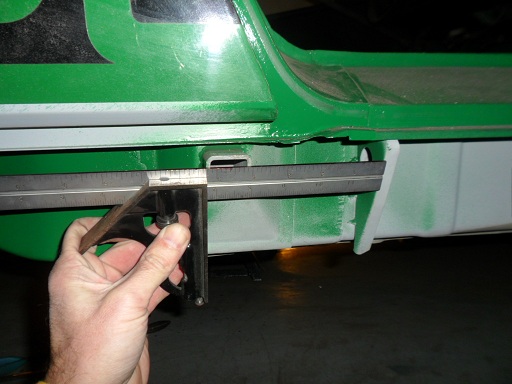
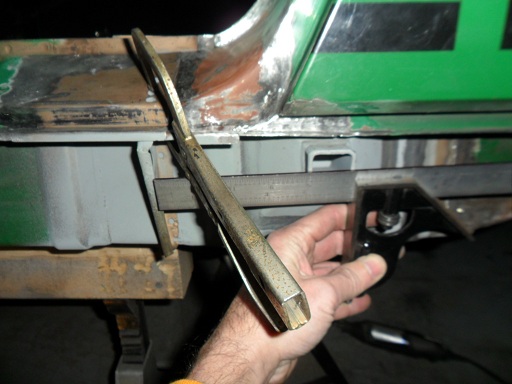
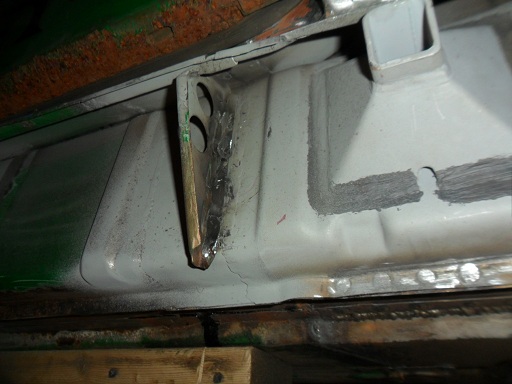
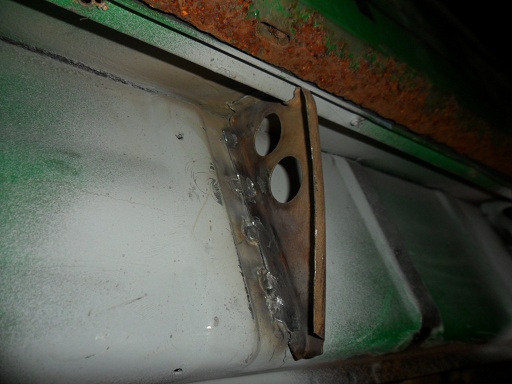
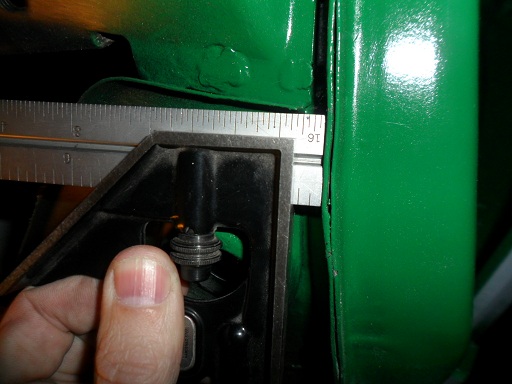
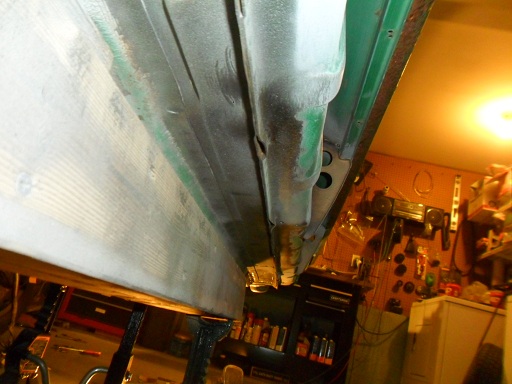
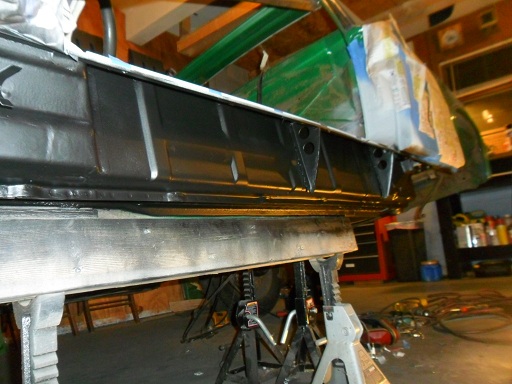
Welded in the drivers side sill triangles. Measured position of the rear off the jackpost with a combination square using measurements from the passenger side and the front using a tape measure off the front triangle. Checked for square against the bottom of the door sill before welding:
        |
|
|
|
| saigon71 |
Dec 15 2012, 12:20 PM
Post
#268
|
|
Advanced Member Group: Members Posts: 2,007 Joined: 1-June 09 From: Dillsburg, PA Member No.: 10,428 Region Association: MidAtlantic Region |
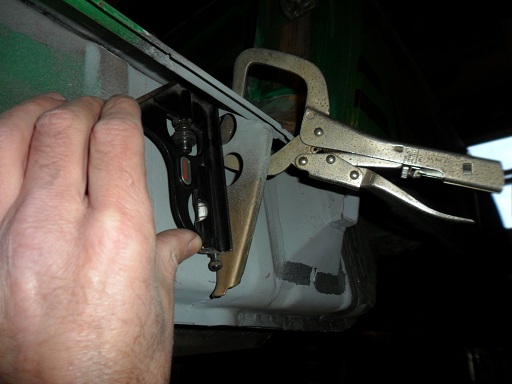
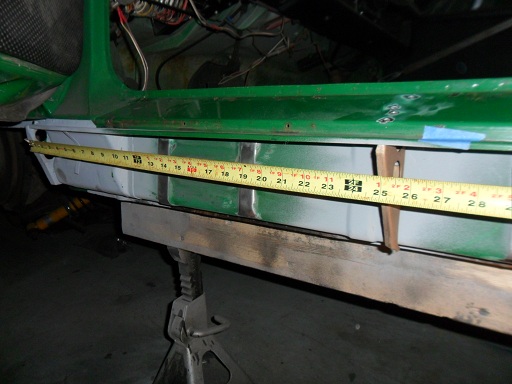
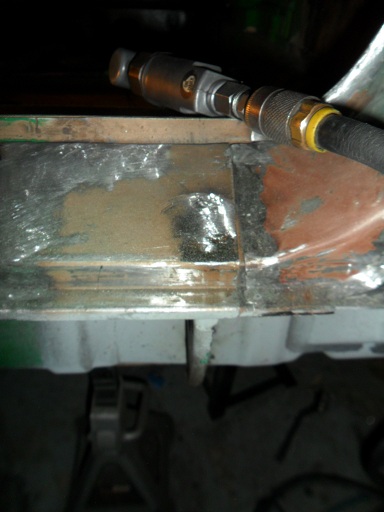
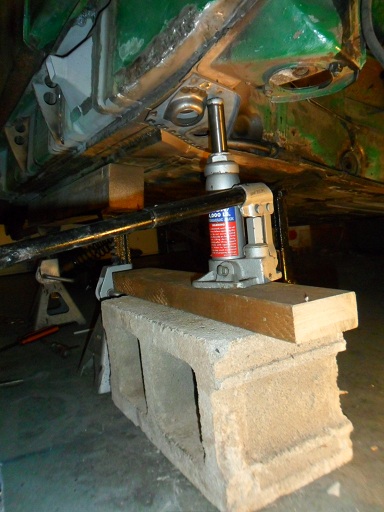
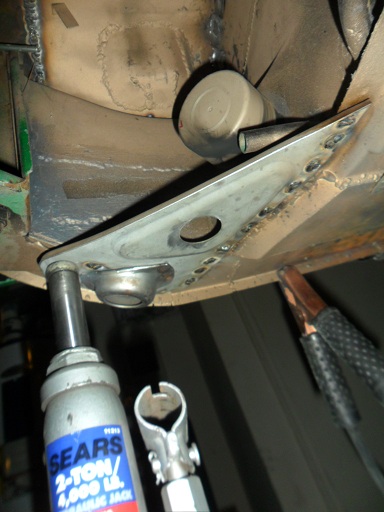
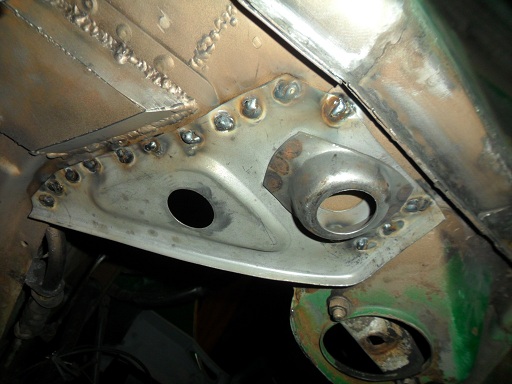
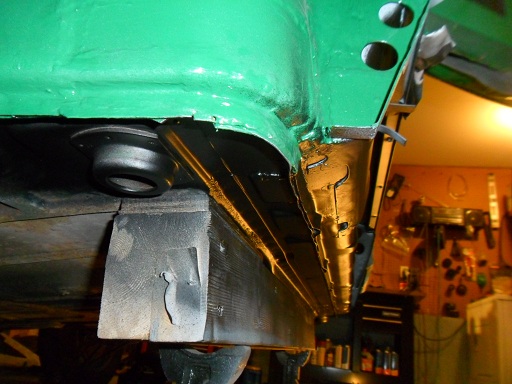
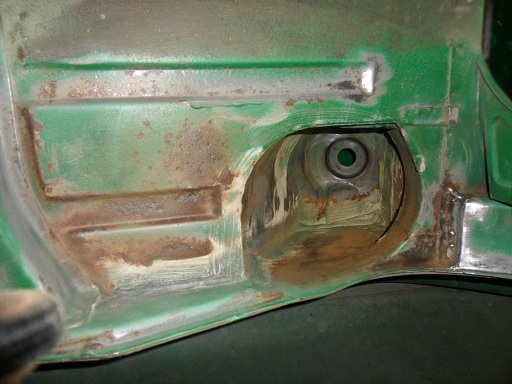
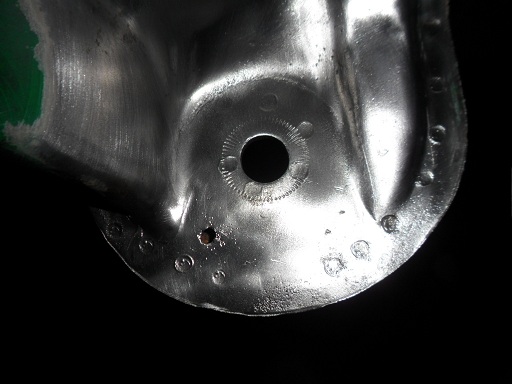
Installed the drivers side jacking donut from Restoration Design. Used a bottle jack to hold it in place. Started with the area that joins to the floor pan and worked my way back, moving the jack as I went. Took a measurement from the passenger side to determine the distance in from the longitudinal seam:
      |
|
|
|
| saigon71 |
Dec 15 2012, 12:26 PM
Post
#269
|
|
Advanced Member Group: Members Posts: 2,007 Joined: 1-June 09 From: Dillsburg, PA Member No.: 10,428 Region Association: MidAtlantic Region |
Prepped and applied ospho on the door sill, clam shell, outer floor pan and rear wheelhouse area. Always amazed at how black some areas get with very little visable rust after applying ospho:
        |
|
|
|
| saigon71 |
Dec 16 2012, 09:22 PM
Post
#270
|
|
Advanced Member Group: Members Posts: 2,007 Joined: 1-June 09 From: Dillsburg, PA Member No.: 10,428 Region Association: MidAtlantic Region |
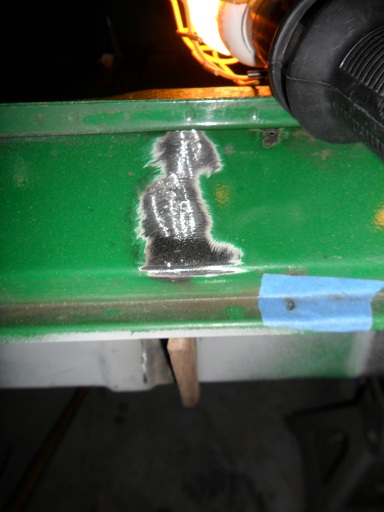
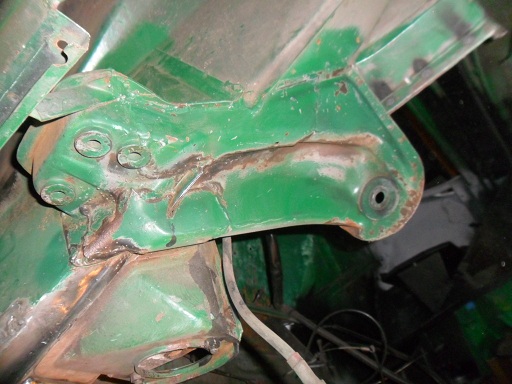
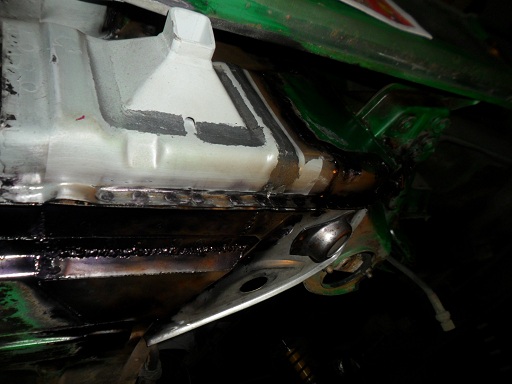
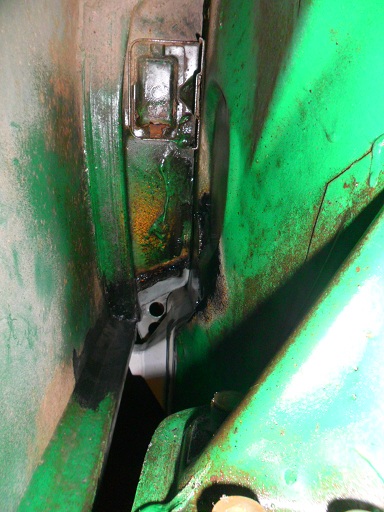
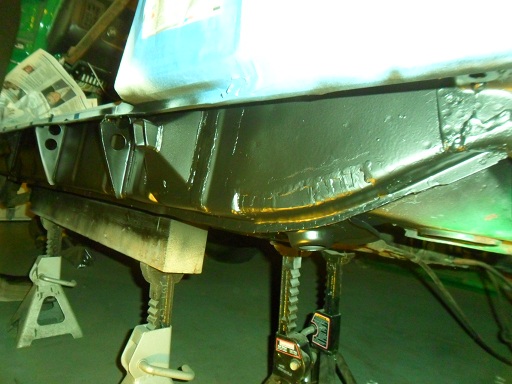
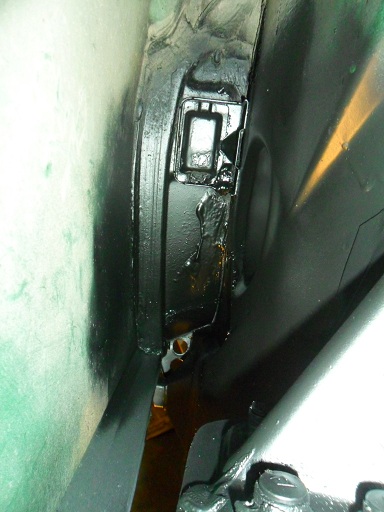
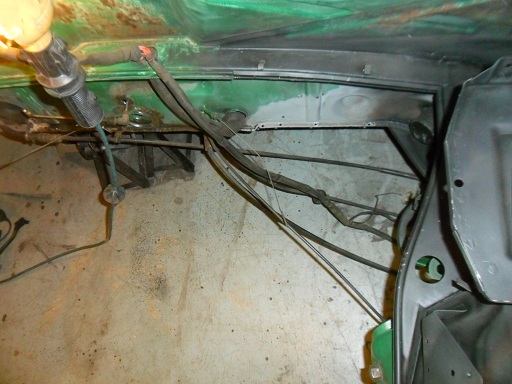
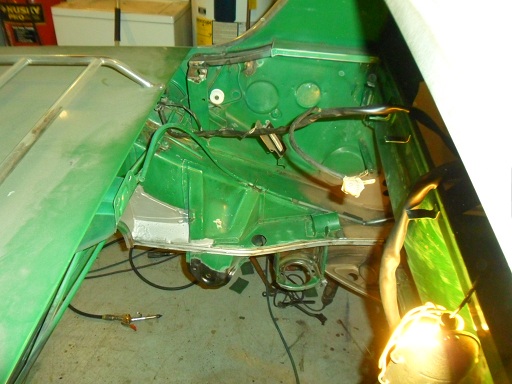
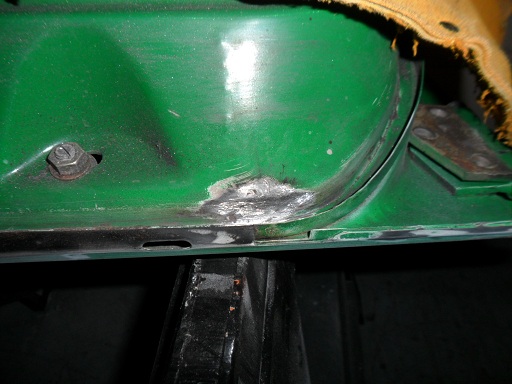
After hearing a few horror stories about engine decklid hinge points breaking loose, I took a close look at mine. Passenger side looked fine, but the drivers side was weak...the lowest spot weld had failed. Cleaned the area, used a hammer and drift to bang the lower section back in and seam welded the edge:
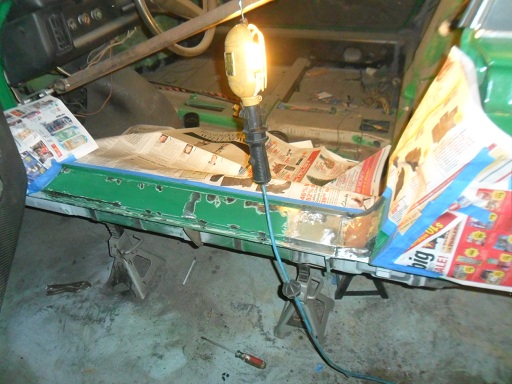
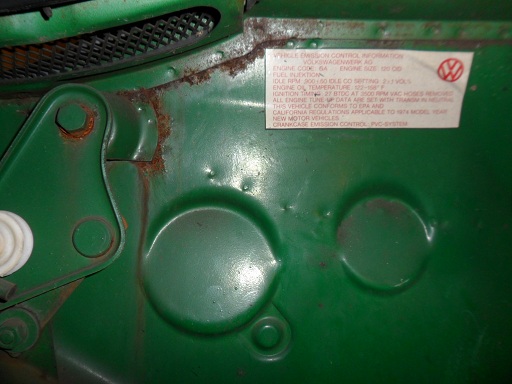 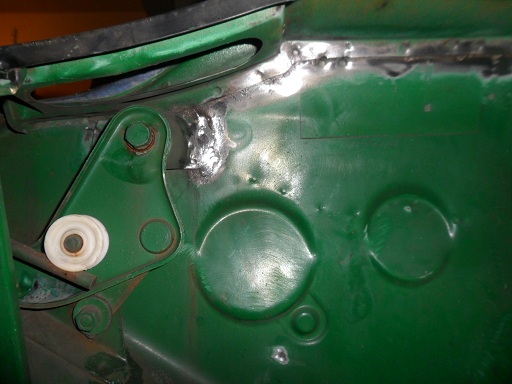 Prepped the door sill & sprayed primer. With the cold weather setting in, I heat up the garage, shoot a coat on the car, immediately open the garage door & window to get the fumes out and repeat as necessary:  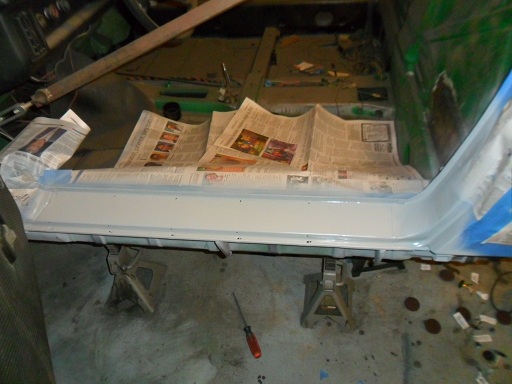 Started the final prep for ospho/primer/paint in the engine bay. There is surface rust in a lot of places. This is taking a ton of time. I have been using a combination of wire wheels with a drill, die grinder with scotch brite pads, dremmel tool with with wire wheel attachments and gool old wire brush to remove any loose material. The factory firewall heat barrier will be replaced with one purchased from Mark that won't hold water: 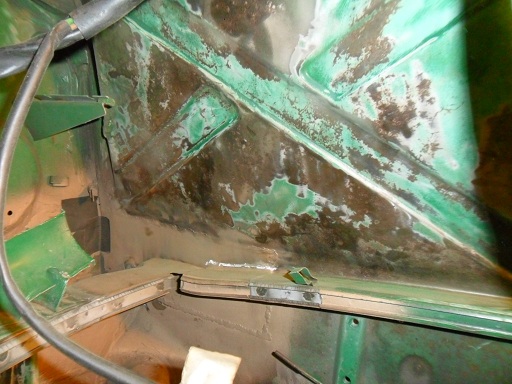 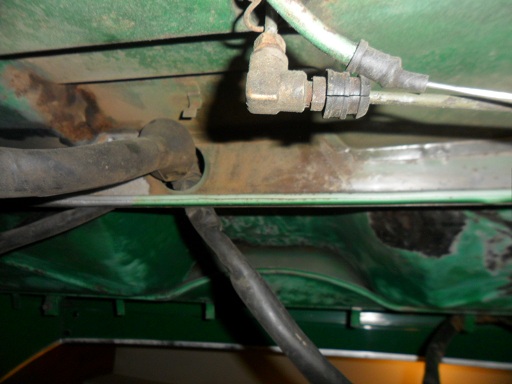 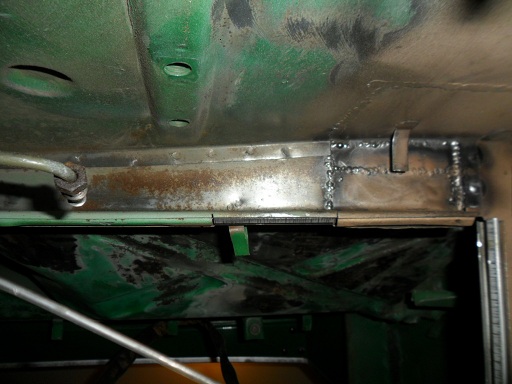 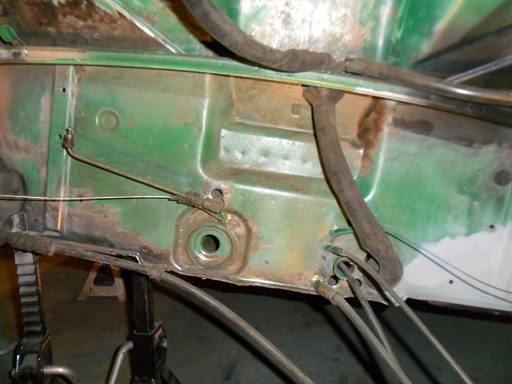 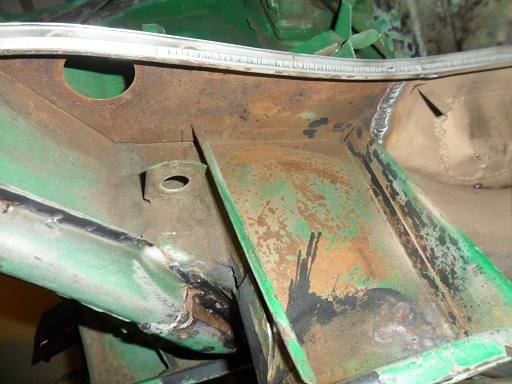 |
|
|
|
| cary |
Dec 16 2012, 10:00 PM
Post
#271
|
|
Advanced Member Group: Members Posts: 3,900 Joined: 26-January 04 From: Sherwood Oregon Member No.: 1,608 Region Association: Pacific Northwest |
Bob, looks like a productive day.
|
|
|
|
| saigon71 |
Dec 17 2012, 09:46 PM
Post
#272
|
|
Advanced Member Group: Members Posts: 2,007 Joined: 1-June 09 From: Dillsburg, PA Member No.: 10,428 Region Association: MidAtlantic Region |
Light work on the teener today. Sprayed two coats of Rust Encapsulator on the clam shell, part of floor pan, rear fender well and suspension ear:
     |
|
|
|
| saigon71 |
Dec 21 2012, 09:33 PM
Post
#273
|
|
Advanced Member Group: Members Posts: 2,007 Joined: 1-June 09 From: Dillsburg, PA Member No.: 10,428 Region Association: MidAtlantic Region |
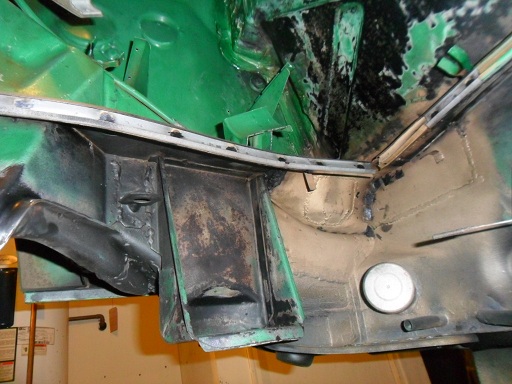
While crawling out from under the engine bay, I noticed a lot of surface rust in and around the drivers side shock tower. Checked the passenger side and it was much better. Hit the area with a wire wheel to prep for ospho:
  Seam sealed the drivers side door sill and inner fender well, paying careful attention to the patch on the inner wheelhouse. Decided against braising the door jam as the factory did, mostly because I don't have any braising equipment (IMG:style_emoticons/default/biggrin.gif) : 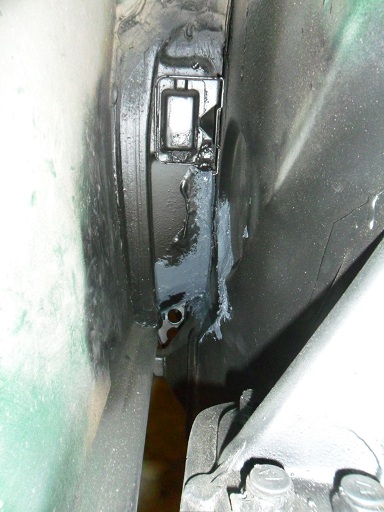 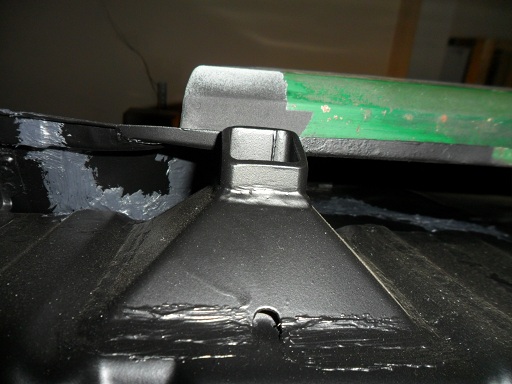 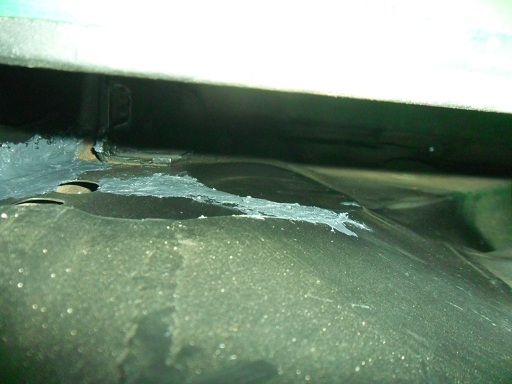 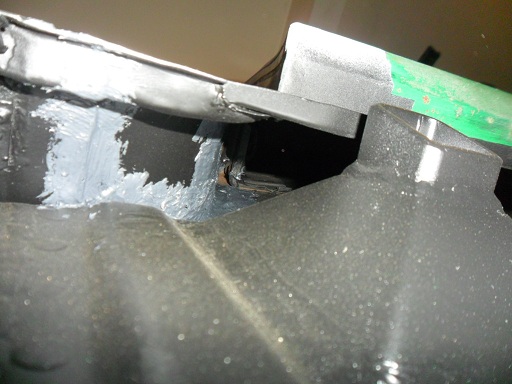 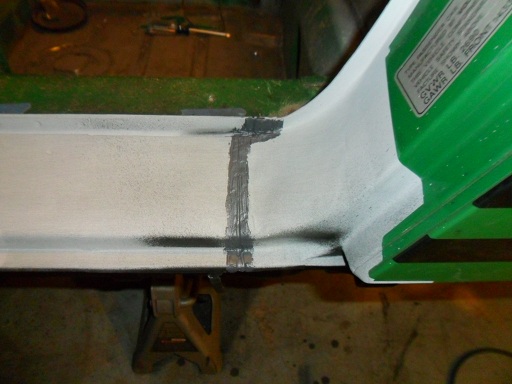 |
|
|
|
| saigon71 |
Dec 21 2012, 09:51 PM
Post
#274
|
|
Advanced Member Group: Members Posts: 2,007 Joined: 1-June 09 From: Dillsburg, PA Member No.: 10,428 Region Association: MidAtlantic Region |
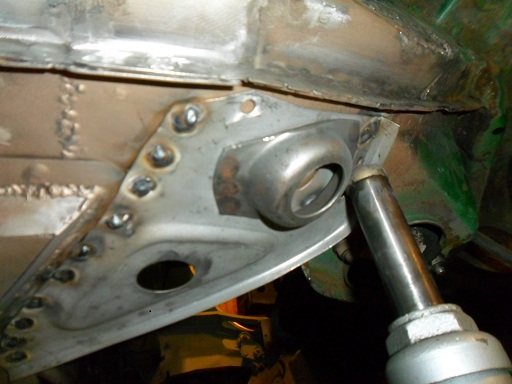
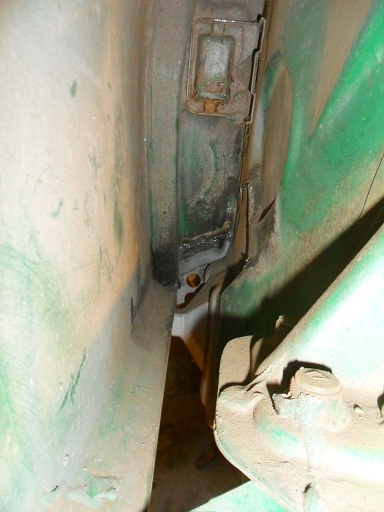
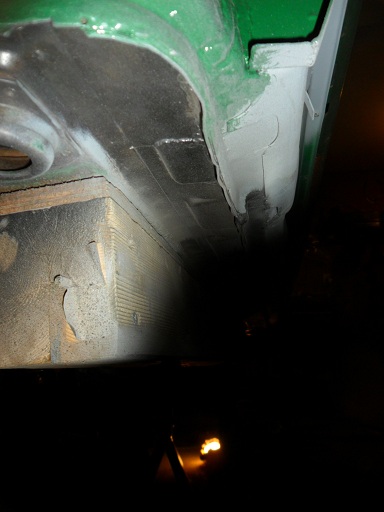
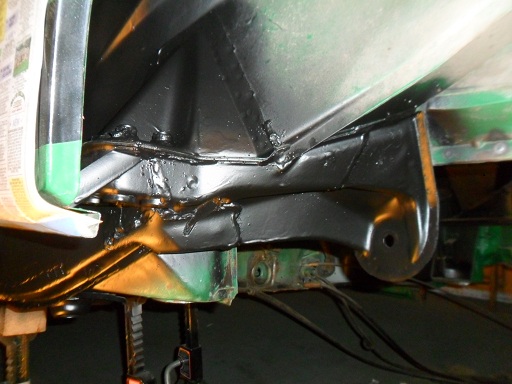
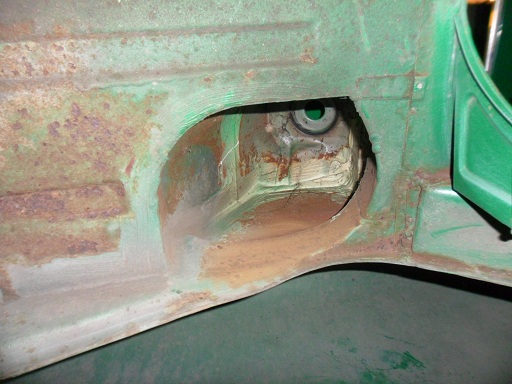
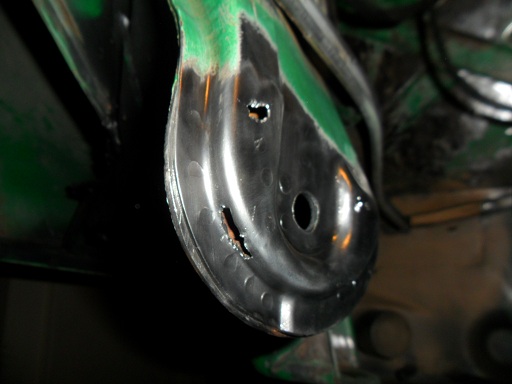
On another trip out from under the car, I caught a glimpse of something that didn't quite look right on the inner drivers side suspension ear. A few taps with a hammer and screwdriver and I was through...made me very nervous about the integrity of the entire piece, as the drian hole was completely clogged. Hit the whole lower section with a wire wheel and hammer/screwdriver. Discovered a hole on the outside as well. Will be contacting Chris Foley @ tangerine racing about his suspension arm reinforcing kit. While I'm glad I found it now, it will set me back a bit:
  |
|
|
|
| saigon71 |
Dec 26 2012, 07:48 AM
Post
#275
|
|
Advanced Member Group: Members Posts: 2,007 Joined: 1-June 09 From: Dillsburg, PA Member No.: 10,428 Region Association: MidAtlantic Region |
Hit the entire engine bay with scotch brite, gave it a good cleaning and applied a coat of Ospho:
    Applied Ospho to rusted area in and around shock tower:  Found some surface rust in the fenderwell. Hit it with a wire wheel and applied ospho: 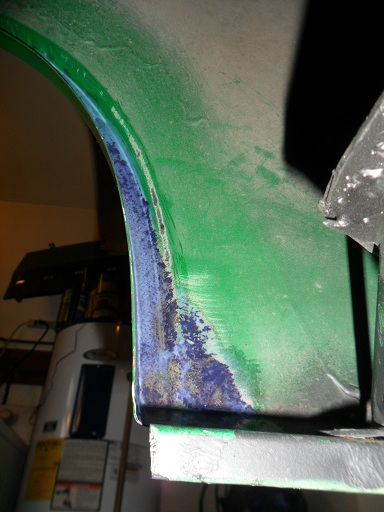 Hollywood stopped over & helped me remove the door and rear trunk lid...the garage is filling up again: 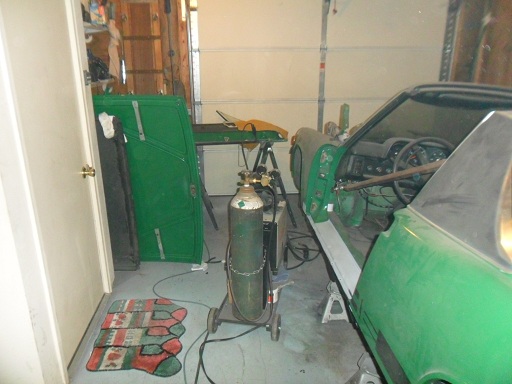 |
|
|
|
| wingnut86 |
Dec 26 2012, 07:52 AM
Post
#276
|
|
...boola la boo boola boo... Group: Members Posts: 1,053 Joined: 22-April 10 From: South Carolina Member No.: 11,645 Region Association: South East States |
Great progress!
|
|
|
|
| saigon71 |
Dec 26 2012, 08:01 AM
Post
#277
|
|
Advanced Member Group: Members Posts: 2,007 Joined: 1-June 09 From: Dillsburg, PA Member No.: 10,428 Region Association: MidAtlantic Region |
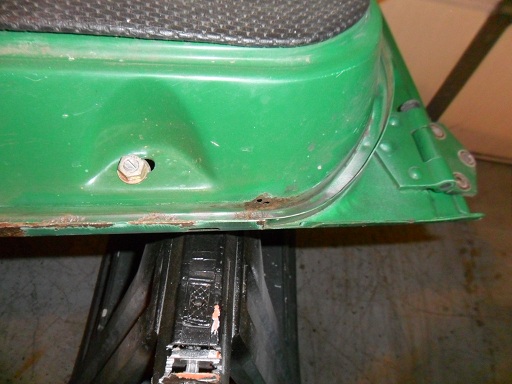
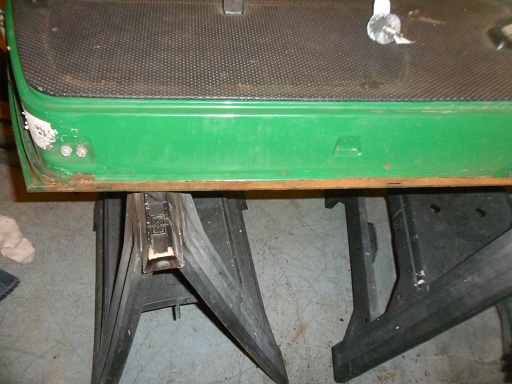
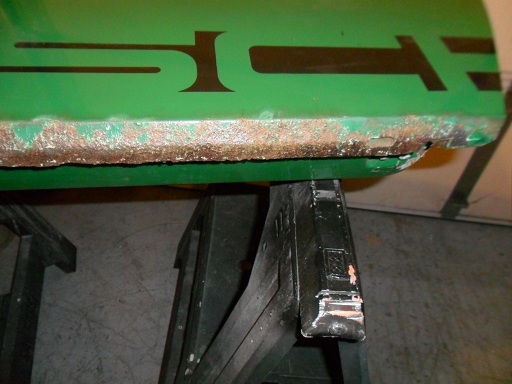
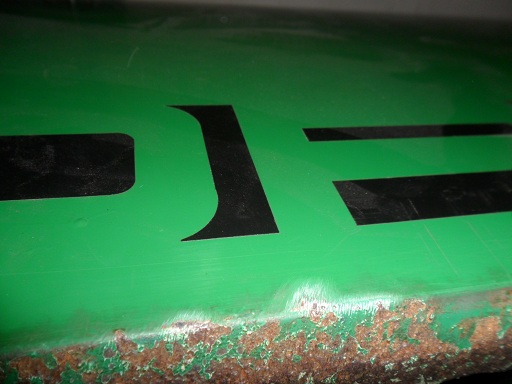
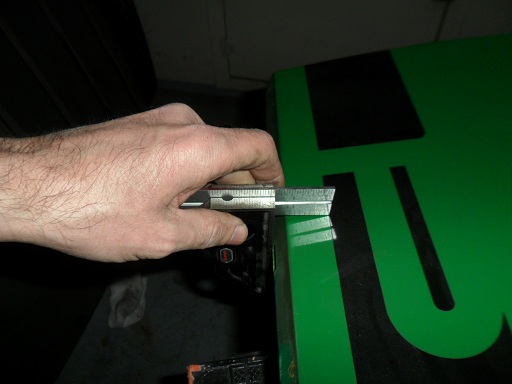
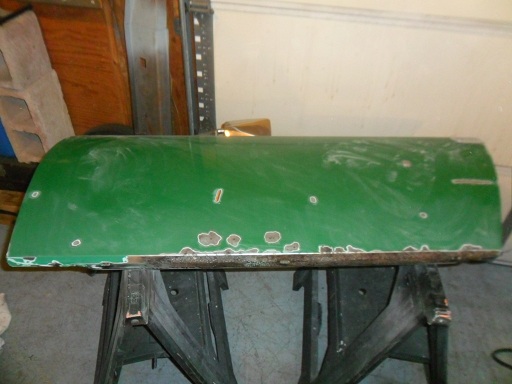
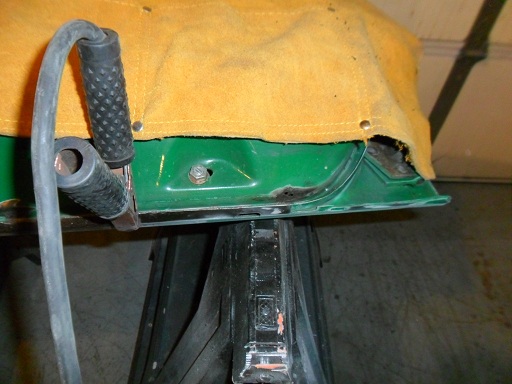
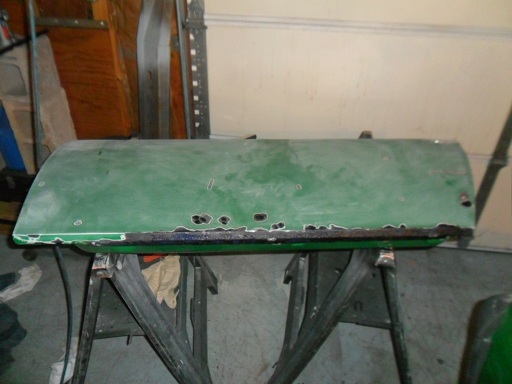
Wanted to pull the door off again so I could give it a close inspection. I thought it was in much worse shape than it actually was and even started looking for a donor door. It was just surface rust on the lower door skin and seal channel with a single small rust hole near the front. Welded the hole shut up front. Measured the placement of the negative "PORSCHE" decal and removed it as there were a few rust bubbles under it. Cleaned everything with a wire wheel & scotch brite wheels and applied a coat of ospho to the rusty areas:
         |
|
|
|
| ChrisFoley |
Dec 26 2012, 09:18 AM
Post
#278
|
|
I am Tangerine Racing Group: Members Posts: 7,969 Joined: 29-January 03 From: Bolton, CT Member No.: 209 Region Association: None |
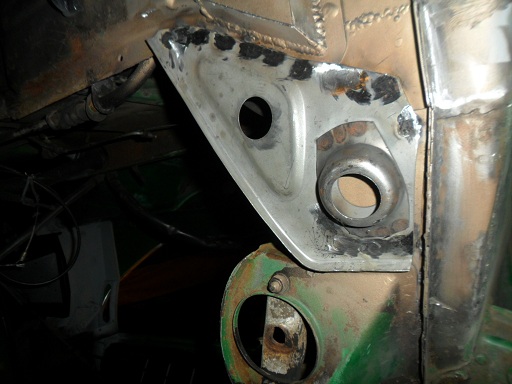
QUOTE(saigon71 @ Dec 15 2012, 01:20 PM) Donut was installed improperly at the factory. The bottom should be flat to the ground. I've seen that before. |
|
|
|
| ChrisFoley |
Dec 26 2012, 09:20 AM
Post
#279
|
|
I am Tangerine Racing Group: Members Posts: 7,969 Joined: 29-January 03 From: Bolton, CT Member No.: 209 Region Association: None |
QUOTE(saigon71 @ Dec 21 2012, 10:51 PM) Will be contacting Chris Foley @ tangerine racing about his suspension arm reinforcing kit. A pair of console reinforcements will be shipped today Bob! (IMG:style_emoticons/default/beerchug.gif) |
|
|
|
| IronHillRestorations |
Dec 26 2012, 09:36 AM
Post
#280
|
|
I. I. R. C. Group: Members Posts: 6,793 Joined: 18-March 03 From: West TN Member No.: 439 Region Association: None |
I hate to tell you this, but that suspension console is probably bad. If you have rust holes like that, it's always worse than it looks.
|
|
|
|
|
2 User(s) are reading this topic (2 Guests and 0 Anonymous Users)
0 Members:

|
Lo-Fi Version | Time is now: 6th January 2025 - 05:21 AM |
Invision Power Board
v9.1.4 © 2025 IPS, Inc.