|
|
|
Porsche, and the Porsche crest are registered trademarks of Dr. Ing. h.c. F. Porsche AG.
This site is not affiliated with Porsche in any way. Its only purpose is to provide an online forum for car enthusiasts. All other trademarks are property of their respective owners. |
|
|

  |

| saigon71 |
 Dec 26 2012, 08:13 PM Dec 26 2012, 08:13 PM
Post
#281
|
|
Advanced Member  Group: Members Posts: 2,007 Joined: 1-June 09 From: Dillsburg, PA Member No.: 10,428 Region Association: MidAtlantic Region |
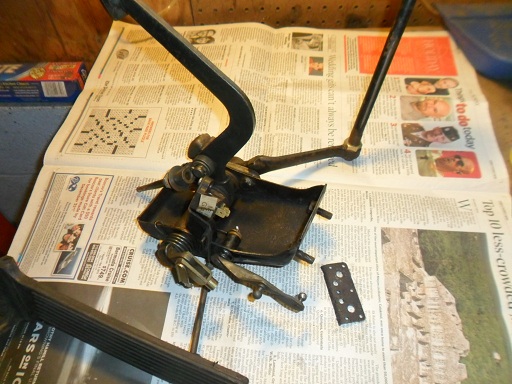
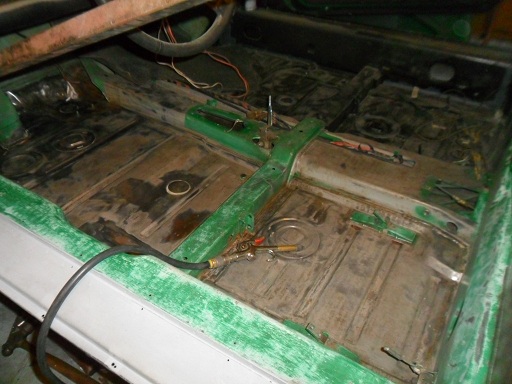
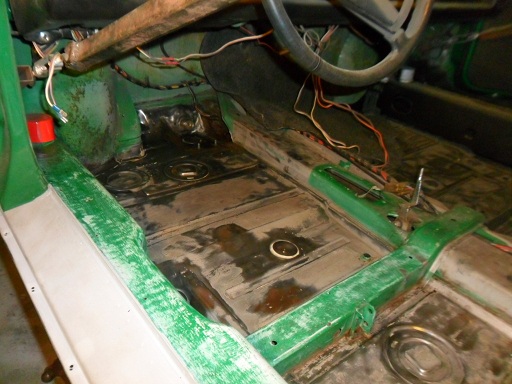
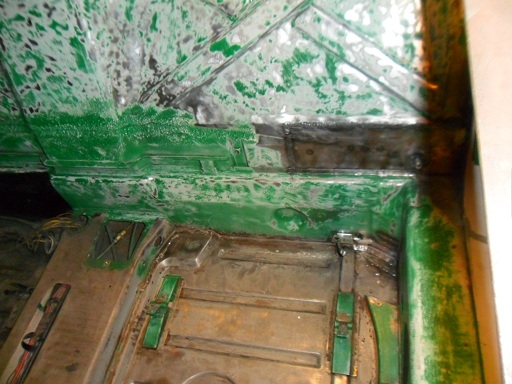
Had to pull the pedal cluster out in to clean the drivers side pan for opsho. Followed the Pelican article, which was helpful, except that my clutch cable was screwed in...not a "cup" connector. Disconnected the accellerator cable, then removed the bolts. Screwed the clutch cable out after getting the pedal assembly loose. If I remember right, the PO said that they had this unit rebuilt at some point. Ripping around the neighborhood a few years back, everything worked well, so I cleaned it and banged a coat of ospho on the surface rust:
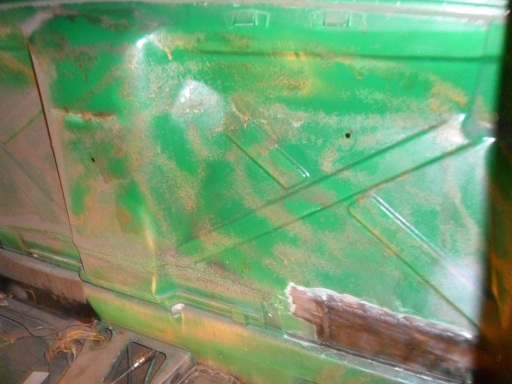
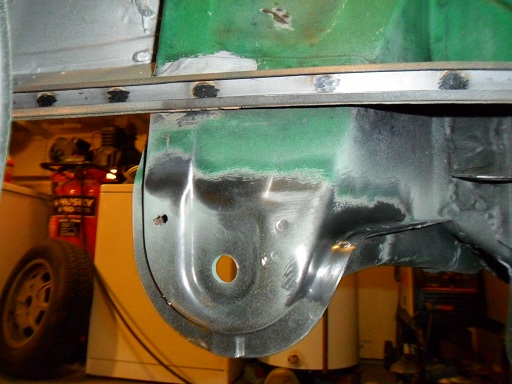
 Hit an area on the left front of the car with ospho after discovering more surface rust while removing the petal cluster: 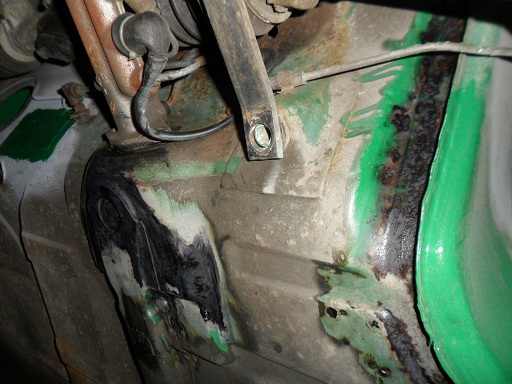 Had to weld the tab of a replacement piece to the interior of the car. This piece was fabricated to repair the drivers side fender well. I must have forgotten about it: 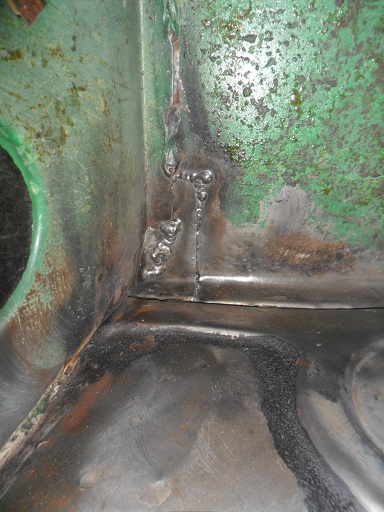 |
   |

 
|
| saigon71 |
Dec 26 2012, 08:21 PM
Post
#282
|
|
Advanced Member Group: Members Posts: 2,007 Joined: 1-June 09 From: Dillsburg, PA Member No.: 10,428 Region Association: MidAtlantic Region |
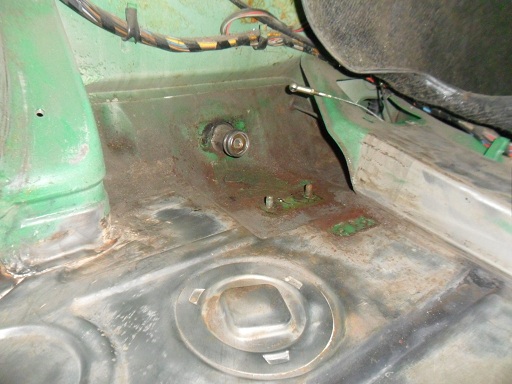
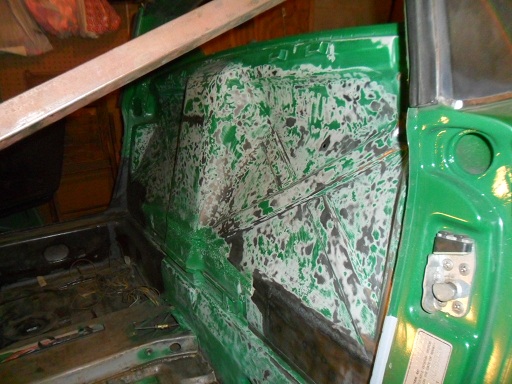
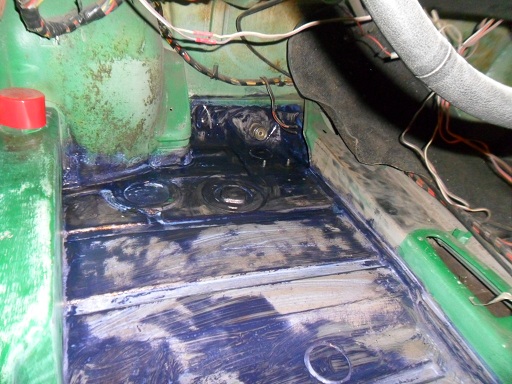
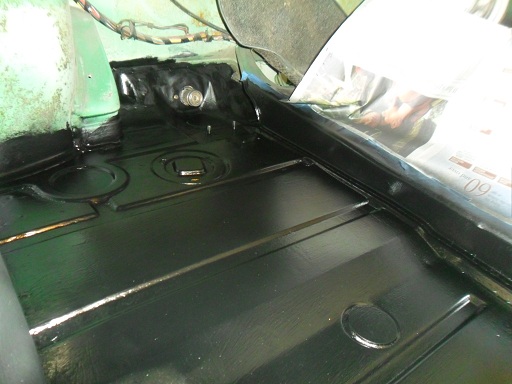
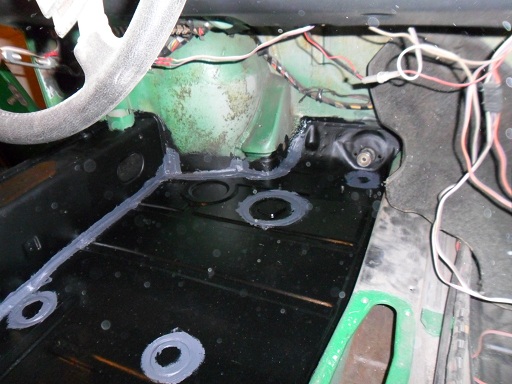
Removed the glue and cleaned the rear firewall with a host of chemical glue removers, wire wheels & scotch brite pads...what a job! I wasn't concerned about the residual glue as much as rust that could be hiding beneath it. Cleaned, prepped and applied ospho on the drivers side pan and firewall as needed:
        |
|
|
|
| saigon71 |
Dec 26 2012, 08:30 PM
Post
#283
|
|
Advanced Member Group: Members Posts: 2,007 Joined: 1-June 09 From: Dillsburg, PA Member No.: 10,428 Region Association: MidAtlantic Region |
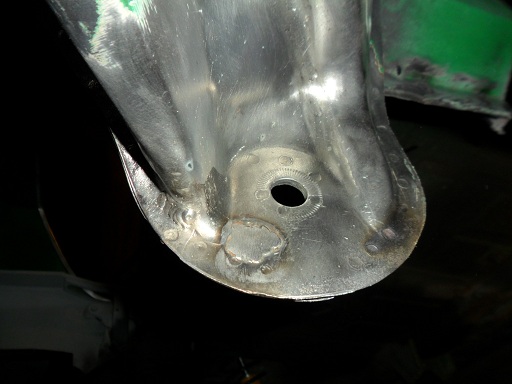
QUOTE(Racer Chris @ Dec 26 2012, 10:18 AM)  QUOTE(saigon71 @ Dec 15 2012, 01:20 PM) Donut was installed improperly at the factory. The bottom should be flat to the ground. I've seen that before. Brutal...That piece was purchased from Restoration Design. I thought it looked a bit odd when installing it, but didn't have a stock one to reference. Great, something else to deal with. (IMG:style_emoticons/default/dry.gif) |
|
|
|
| saigon71 |
Dec 26 2012, 08:32 PM
Post
#284
|
|
Advanced Member Group: Members Posts: 2,007 Joined: 1-June 09 From: Dillsburg, PA Member No.: 10,428 Region Association: MidAtlantic Region |
QUOTE(Racer Chris @ Dec 26 2012, 10:20 AM) QUOTE(saigon71 @ Dec 21 2012, 10:51 PM) Will be contacting Chris Foley @ tangerine racing about his suspension arm reinforcing kit. A pair of console reinforcements will be shipped today Bob! (IMG:style_emoticons/default/beerchug.gif) Excellent - thanks Chris! |
|
|
|
| ChrisFoley |
Dec 26 2012, 10:07 PM
Post
#285
|
|
I am Tangerine Racing Group: Members Posts: 7,969 Joined: 29-January 03 From: Bolton, CT Member No.: 209 Region Association: None |
QUOTE(saigon71 @ Dec 26 2012, 09:13 PM) Had to pull the pedal cluster out in to clean the drivers side pan for opsho. Followed the Pelican article, which was helpful, except that my clutch cable was screwed in...not a "cup" connector. Disconnected the accellerator cable, then removed the bolts. Screwed the clutch cable out after getting the pedal assembly loose. If I remember right, the PO said that they had this unit rebuilt at some point. Ripping around the neighborhood a few years back, everything worked well, so I cleaned it and banged a coat of ospho on the surface rust: Usually the clevis is removed from the pedal arm before unscrewing it from the cable. But sometimes the clevis pin is corroded in place, and your approach becomes necessary anyhow. The cup connector goes on the throttle cable. |
|
|
|
| saigon71 |
Jan 7 2013, 06:39 PM
Post
#286
|
|
Advanced Member Group: Members Posts: 2,007 Joined: 1-June 09 From: Dillsburg, PA Member No.: 10,428 Region Association: MidAtlantic Region |
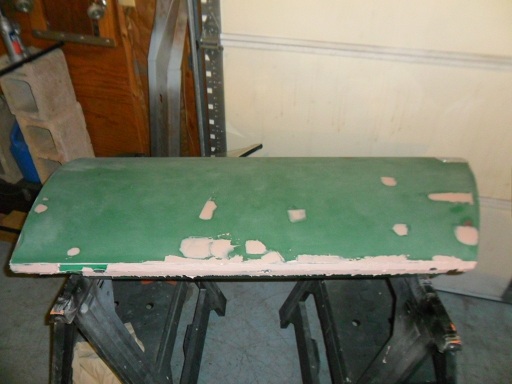
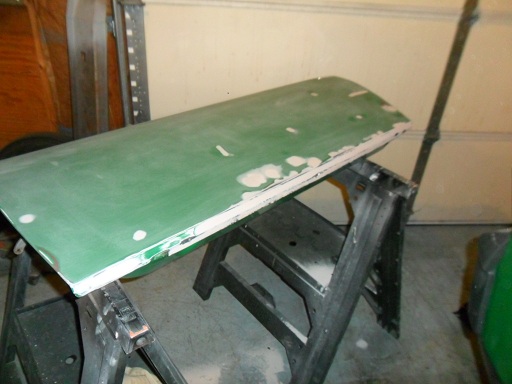
Hit the door with a light coat of filler and spot putty:
  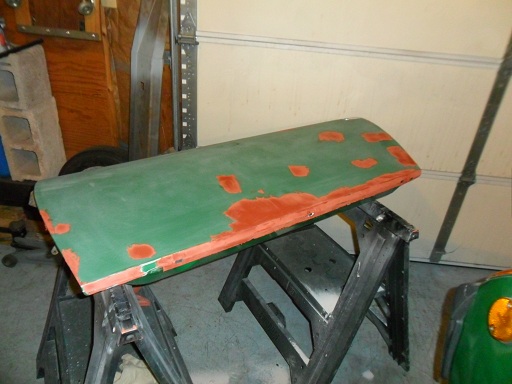 Hit a few areas with surface rust with some opsho & rustoleum: 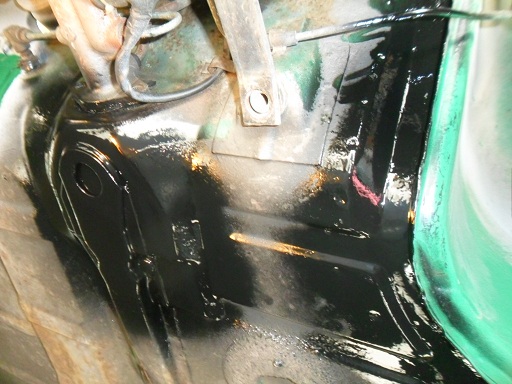 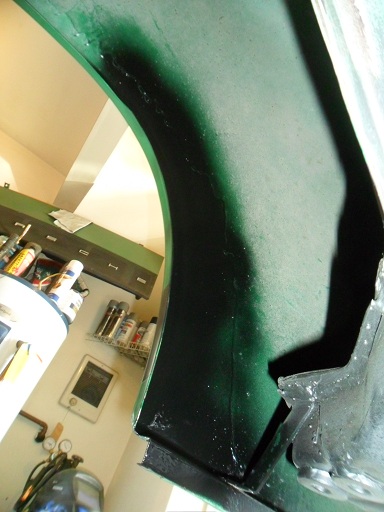 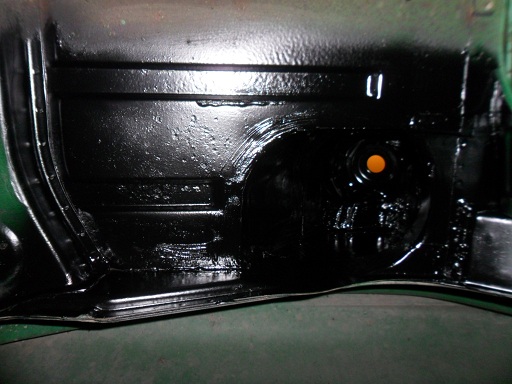 |
|
|
|
| saigon71 |
Jan 7 2013, 06:43 PM
Post
#287
|
|
Advanced Member Group: Members Posts: 2,007 Joined: 1-June 09 From: Dillsburg, PA Member No.: 10,428 Region Association: MidAtlantic Region |
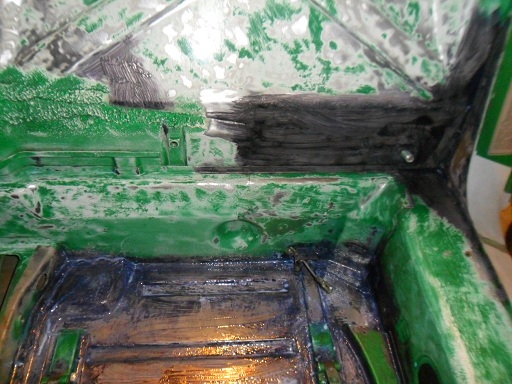
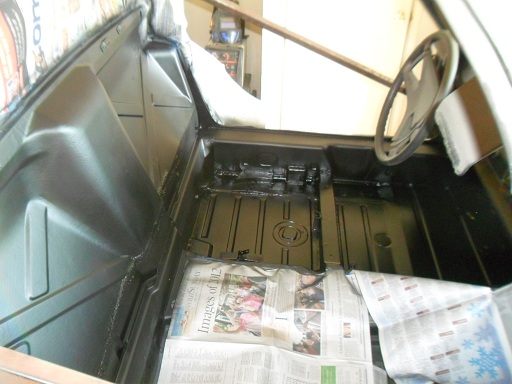
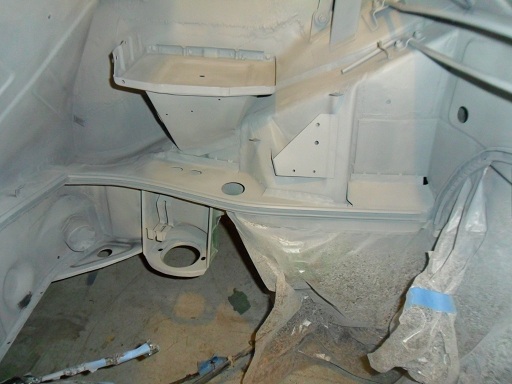
Finished the drivers side floor pan and most of the inner firewall with with 2 coats of rust encapsulator and seam sealer:
    |
|
|
|
| turk22 |
Jan 7 2013, 08:35 PM
Post
#288
|
|
Treetop Flyer Group: Members Posts: 735 Joined: 27-July 12 From: Cincinnati OH Member No.: 14,725 Region Association: Upper MidWest |
Looks great, your moving right along. Great work!
|
|
|
|
| saigon71 |
Jan 11 2013, 02:35 PM
Post
#289
|
|
Advanced Member Group: Members Posts: 2,007 Joined: 1-June 09 From: Dillsburg, PA Member No.: 10,428 Region Association: MidAtlantic Region |
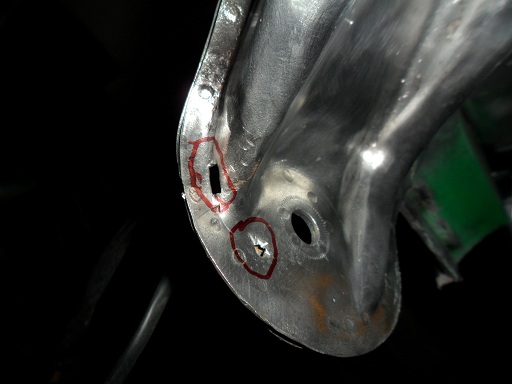
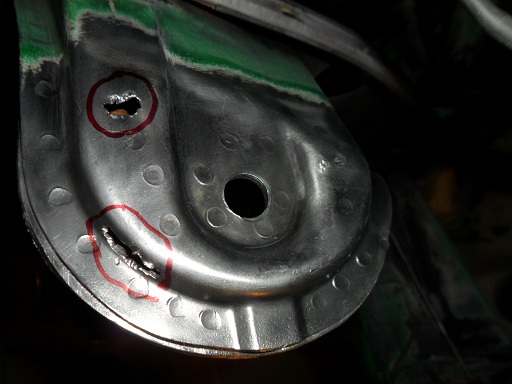
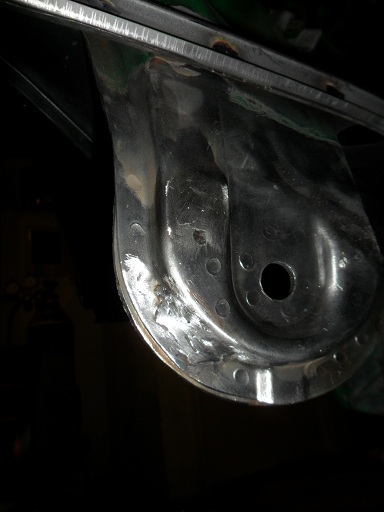
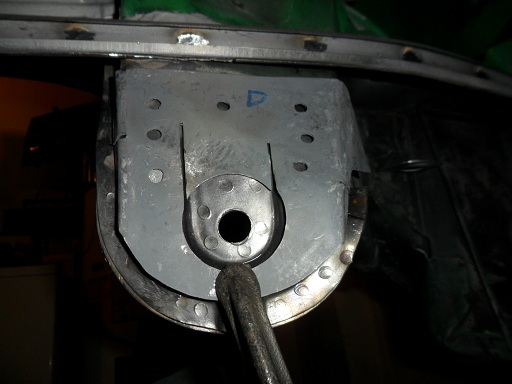
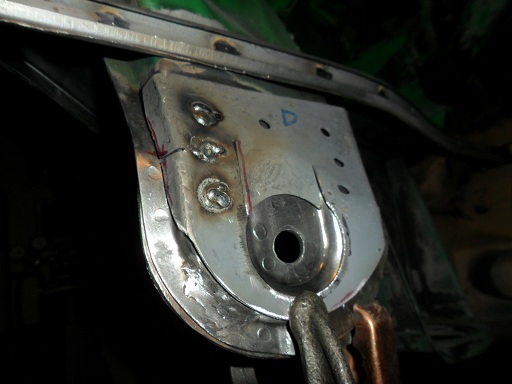
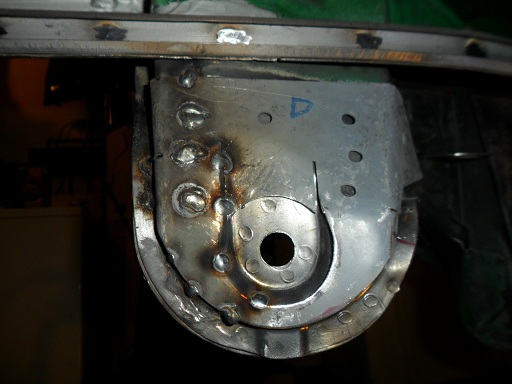
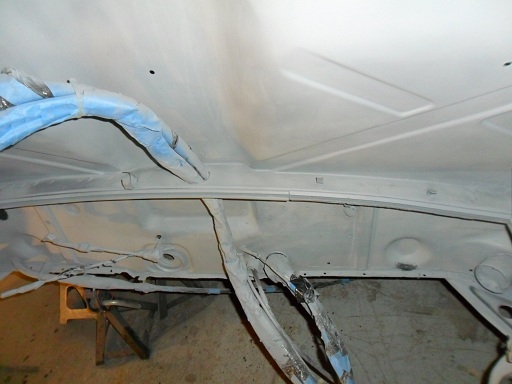
Spripped the paint back with a wire wheel further up the drivers side suspension console to check for any more rust through. Hit any area that showed any kind of surface pitting with a hammer and screwdriver to verify its integrity. In the end, I was left with four small holes, two on the inside and two on the outside. Welded the holes as prep for the installation of the Tangerine inner console reinforcement:
       |
|
|
|
| saigon71 |
Jan 11 2013, 02:37 PM
Post
#290
|
|
Advanced Member Group: Members Posts: 2,007 Joined: 1-June 09 From: Dillsburg, PA Member No.: 10,428 Region Association: MidAtlantic Region |
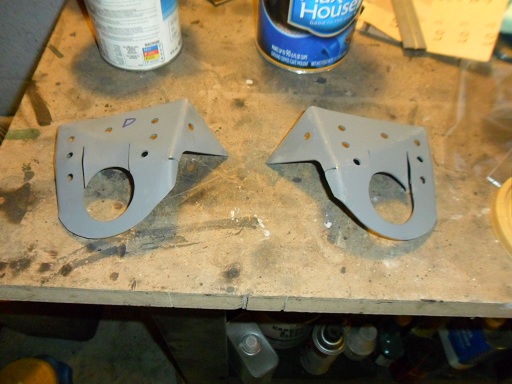
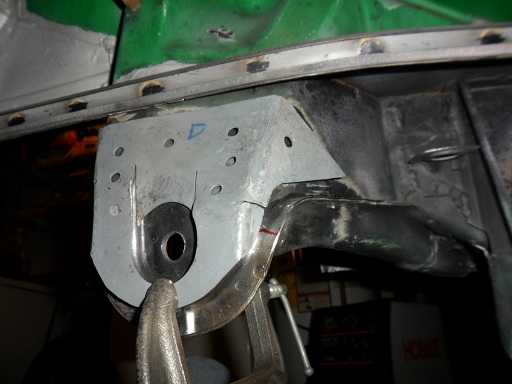
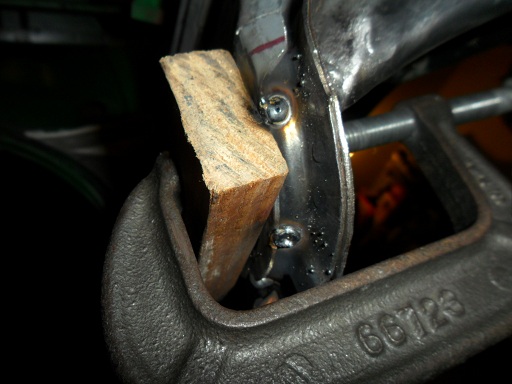
Started fitting the inner suspension console reinforcement:
    |
|
|
|
| saigon71 |
Jan 11 2013, 02:43 PM
Post
#291
|
|
Advanced Member Group: Members Posts: 2,007 Joined: 1-June 09 From: Dillsburg, PA Member No.: 10,428 Region Association: MidAtlantic Region |
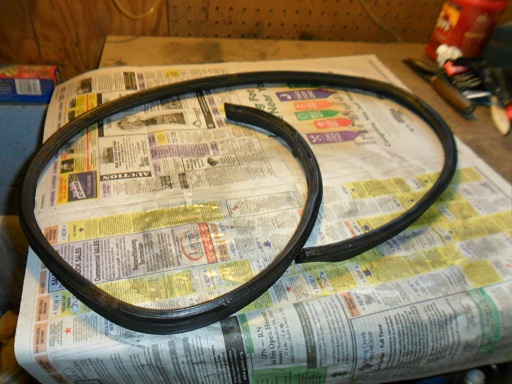
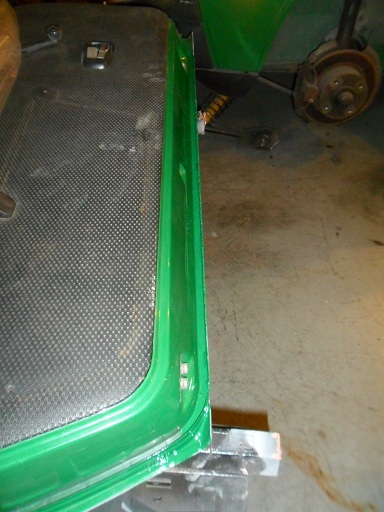
Ran the drivers side door seal through the dishwasher a few times & treated it with RV slide out seal conditioner:
 Shot two coats of primer on the drivers side door. Upon opening the garage door to let the fumes out, a gust of wind blew the plastic back onto the wet paint. It will need some touch up: 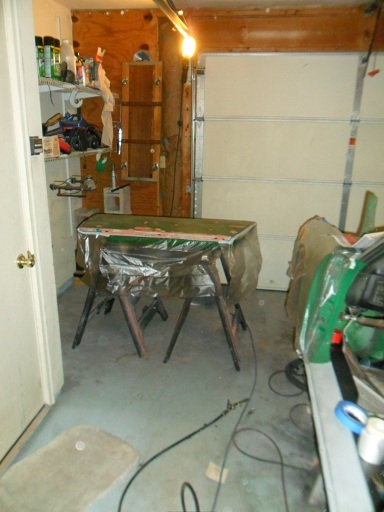 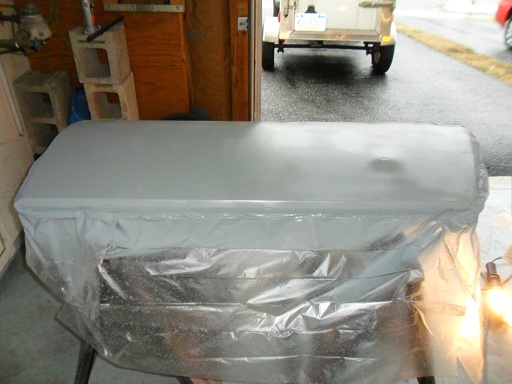 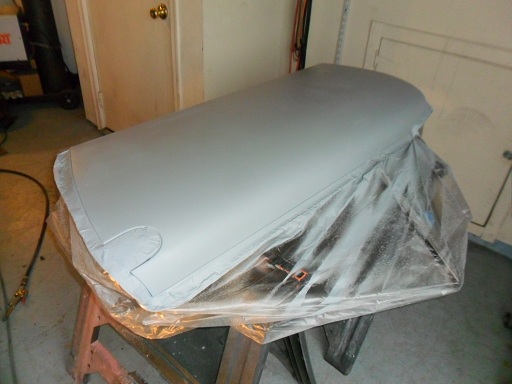 Completely out of space, the front trunk of my teener is now doubling as a hamper for work clothes (IMG:style_emoticons/default/blink.gif) : 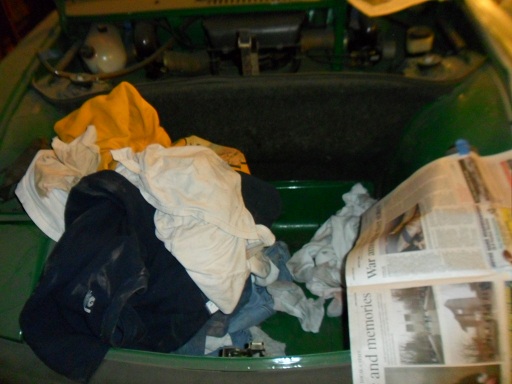 |
|
|
|
| jsayre914 |
Jan 11 2013, 04:16 PM
Post
#292
|
|
Speed Up !!! Group: Members Posts: 3,208 Joined: 10-February 08 From: Timonium MD 21093 Member No.: 8,696 Region Association: MidAtlantic Region |
|
|
|
|
| OllieG |
Jan 12 2013, 05:06 AM
Post
#293
|
|
OllieG Group: Members Posts: 212 Joined: 6-July 11 From: UK Member No.: 13,282 Region Association: England |
Great stuff as always Bob..
What was your rationale for putting the suspension re-inforcement in? |
|
|
|
| saigon71 |
Jan 12 2013, 08:06 AM
Post
#294
|
|
Advanced Member Group: Members Posts: 2,007 Joined: 1-June 09 From: Dillsburg, PA Member No.: 10,428 Region Association: MidAtlantic Region |
QUOTE(jsayre914 @ Jan 11 2013, 05:16 PM) Yes. (IMG:style_emoticons/default/biggrin.gif) Had the original D-Jet 2.0 running pretty well a few months after purchase. Used to rip around the neighborhood in the teener. It was awesome! That was the year 2009. |
|
|
|
| saigon71 |
Jan 12 2013, 08:22 AM
Post
#295
|
|
Advanced Member Group: Members Posts: 2,007 Joined: 1-June 09 From: Dillsburg, PA Member No.: 10,428 Region Association: MidAtlantic Region |
QUOTE(OllieG @ Jan 12 2013, 06:06 AM) Great stuff as always Bob.. What was your rationale for putting the suspension re-inforcement in? Thanks Ollie. After discovering those small rust holes in the bottom of the suspension console, I was pretty nervous about the structural integrity of the area as these cars tend to rust from the inside out. I don't want to end up dealing with any more major structural repairs down the road and saw this product as my best way to strengthen the suspension console. |
|
|
|
| saigon71 |
Jan 14 2013, 07:05 PM
Post
#296
|
|
Advanced Member Group: Members Posts: 2,007 Joined: 1-June 09 From: Dillsburg, PA Member No.: 10,428 Region Association: MidAtlantic Region |
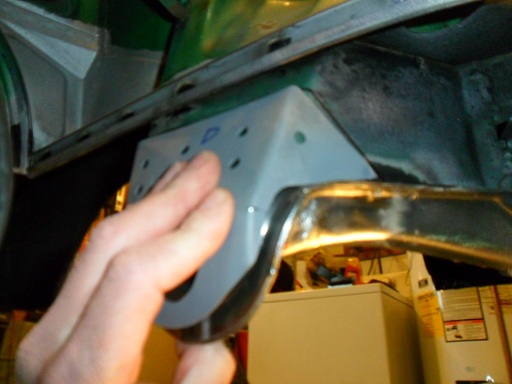
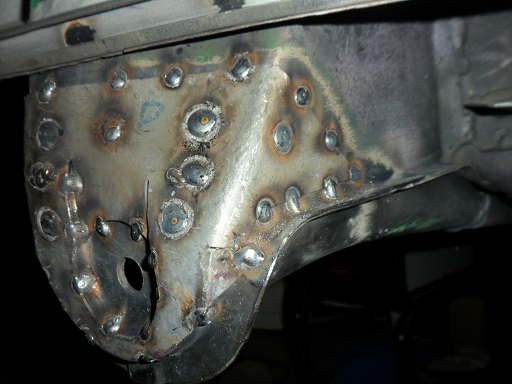
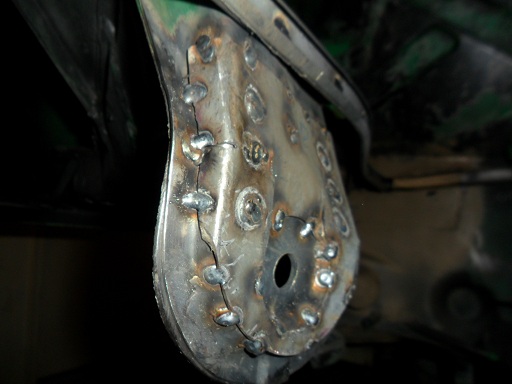
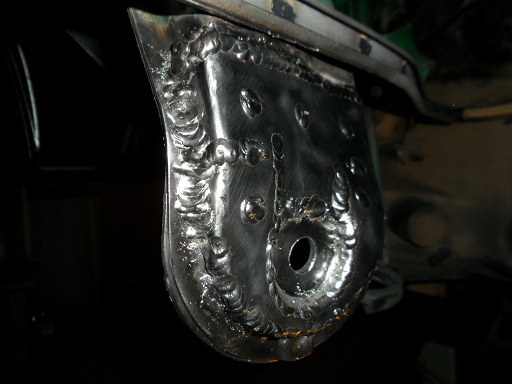
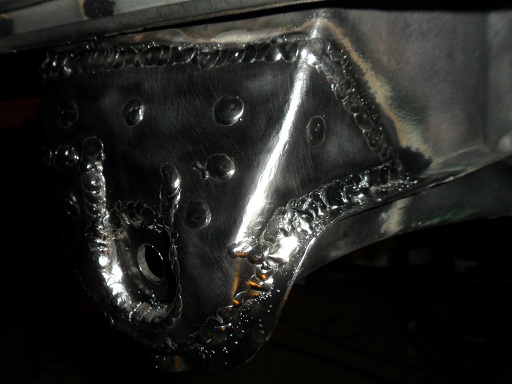
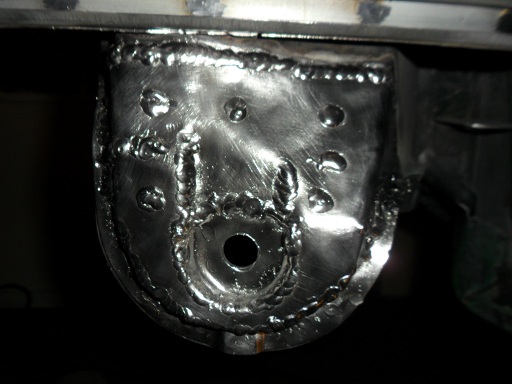
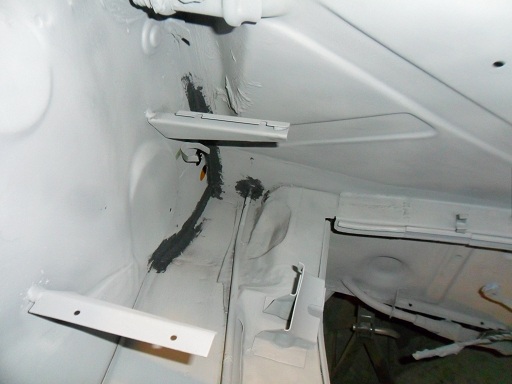
Welded the inner console reinforcement from Tangerine Racing on tonight. I started at the back of it and worked my way forward with tack welds to get it in place, then zipped up all the seams, cooling regularly with compressed air after every 3/4 inch or so burst. I was welding thicker (16 gauge) metal, so the settings were different on the mig...took me a while to get used to it. Gave everything a good cleaning with a wire wheel, then went back and touched up a few areas with the welder on a lower wire feed:
        |
|
|
|
| wingnut86 |
Jan 14 2013, 10:05 PM
Post
#297
|
|
...boola la boo boola boo... Group: Members Posts: 1,053 Joined: 22-April 10 From: South Carolina Member No.: 11,645 Region Association: South East States |
Damn Bob, good torch work for a rookie;-)
I gotta learn mig all over again. I was always good with the torch and reshaping metal as a kid, wish I hadn't stopped to play with electronics for 35 years - welding has improved, but it's still a job that exudes satisfaction when you are done, especially if done right:-)) Dave |
|
|
|
| saigon71 |
Jan 19 2013, 04:03 PM
Post
#298
|
|
Advanced Member Group: Members Posts: 2,007 Joined: 1-June 09 From: Dillsburg, PA Member No.: 10,428 Region Association: MidAtlantic Region |
Brushed two coats of acrylic enamel on the section of door channel with surface rust (previously oshpo'd):
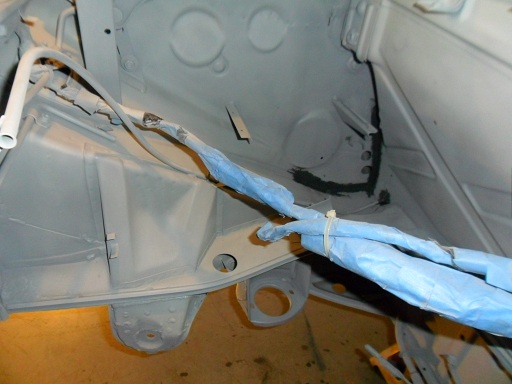
 Before buying the cheap HVLP paint gun from HF, I read the reviews on it. Everyone who had success with it recommended a thorough cleaning before use. I tore the gun completely down and cleaned everything up. There was some type of silicone substance packed in there. Ran some mineral spirits through it under pressure to clear it out after putting it all back together: 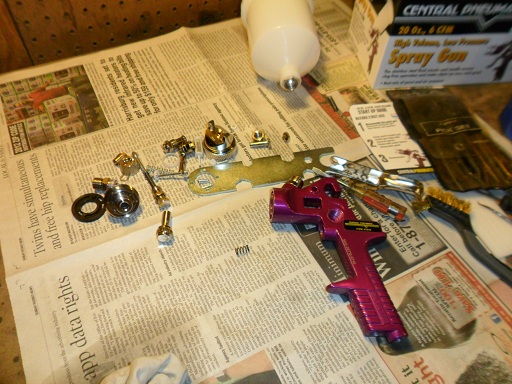 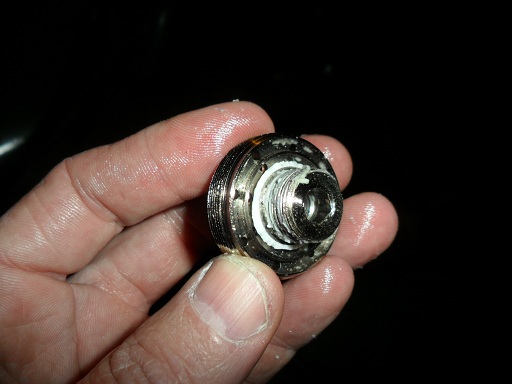 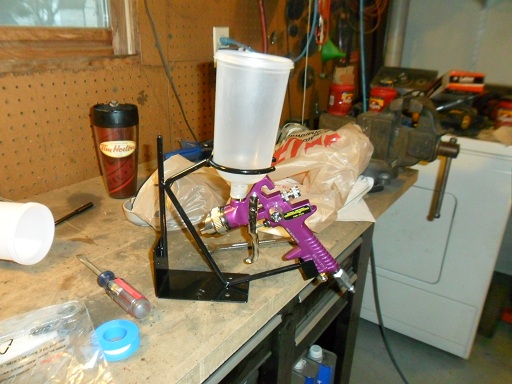 Started taping everything off for primer and paint in the engine bay. Masking this area was a royal PITA! To cover the wiring harnesses, I cut strips of plastic from a trash bag to wrap the wires & masking tape to hold it in place: 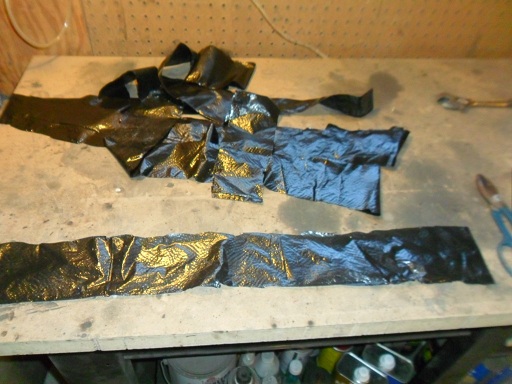 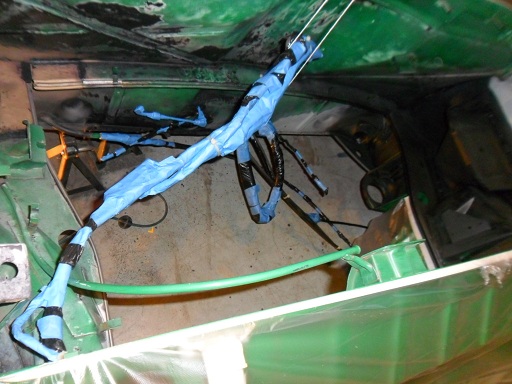 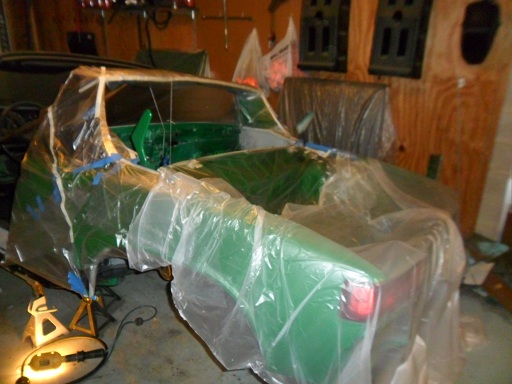 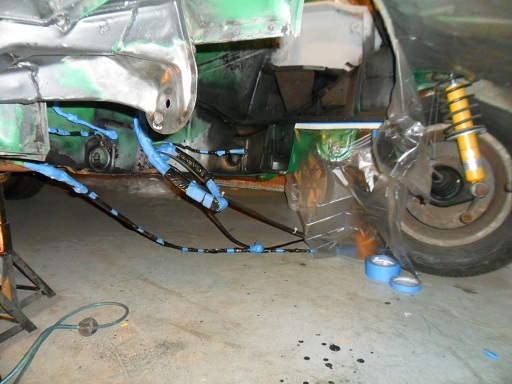 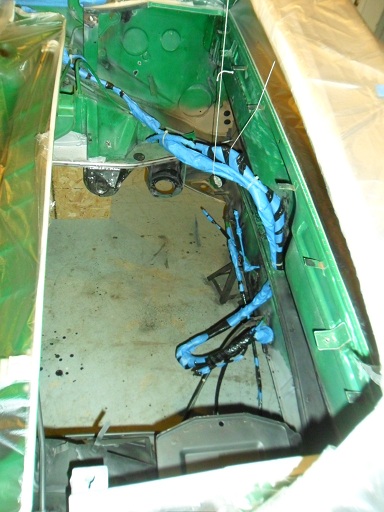 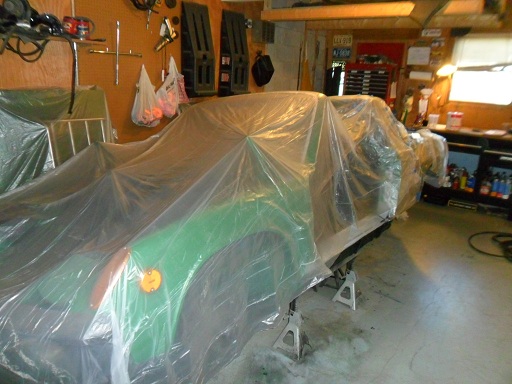 |
|
|
|
| saigon71 |
Jan 19 2013, 04:13 PM
Post
#299
|
|
Advanced Member Group: Members Posts: 2,007 Joined: 1-June 09 From: Dillsburg, PA Member No.: 10,428 Region Association: MidAtlantic Region |
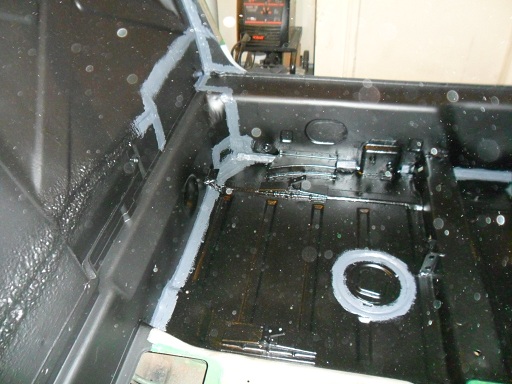
Drained the compressor tank of water and added an inline water separator to the air hose. Set the pressure regulator to 50PSI as recommended by the paint gun manufacturer. Practiced using the spray gun on an old piece of plywood to get used to the settings, then shot two coats of primer in the engine bay. Getting into all the crevices with a gravity feed paint gun was rough. I had to go back and hit a few small areas underneath with Rustoleum primer as I couldn’t position the paint gun properly. The gun clogged on me several times and I ended up with a rough, almost "sandy" finish in a few areas...not sure if it was due to overspray, the gun, or the amateur using the gun. Hit the whole area with sandpaper and/or scotch brite to prep for color, then applied a coat of seam sealer to the drivers side:
    |
|
|
|
| saigon71 |
Jan 19 2013, 05:20 PM
Post
#300
|
|
Advanced Member Group: Members Posts: 2,007 Joined: 1-June 09 From: Dillsburg, PA Member No.: 10,428 Region Association: MidAtlantic Region |
QUOTE(wingnut86 @ Jan 14 2013, 11:05 PM) Damn Bob, good torch work for a rookie;-) I gotta learn mig all over again. I was always good with the torch and reshaping metal as a kid, wish I hadn't stopped to play with electronics for 35 years - welding has improved, but it's still a job that exudes satisfaction when you are done, especially if done right:-)) Dave Thanks Dave. My welding is becoming respectable as this project continues. I really do enjoy it! (the welding part at least) (IMG:style_emoticons/default/dry.gif) I am sure that your welding skills will come back to you with just a little practice. I was fair with a torch and arc welder before buying the mig set up I have now. Bob |
|
|
|
|
1 User(s) are reading this topic (1 Guests and 0 Anonymous Users)
0 Members:

|
Lo-Fi Version | Time is now: 6th January 2025 - 02:34 AM |
Invision Power Board
v9.1.4 © 2025 IPS, Inc.