|
|
|
Porsche, and the Porsche crest are registered trademarks of Dr. Ing. h.c. F. Porsche AG.
This site is not affiliated with Porsche in any way. Its only purpose is to provide an online forum for car enthusiasts. All other trademarks are property of their respective owners. |
|
|

  |

| saigon71 |
 Jan 20 2013, 07:06 PM Jan 20 2013, 07:06 PM
Post
#301
|
|
Advanced Member  Group: Members Posts: 2,007 Joined: 1-June 09 From: Dillsburg, PA Member No.: 10,428 Region Association: MidAtlantic Region |
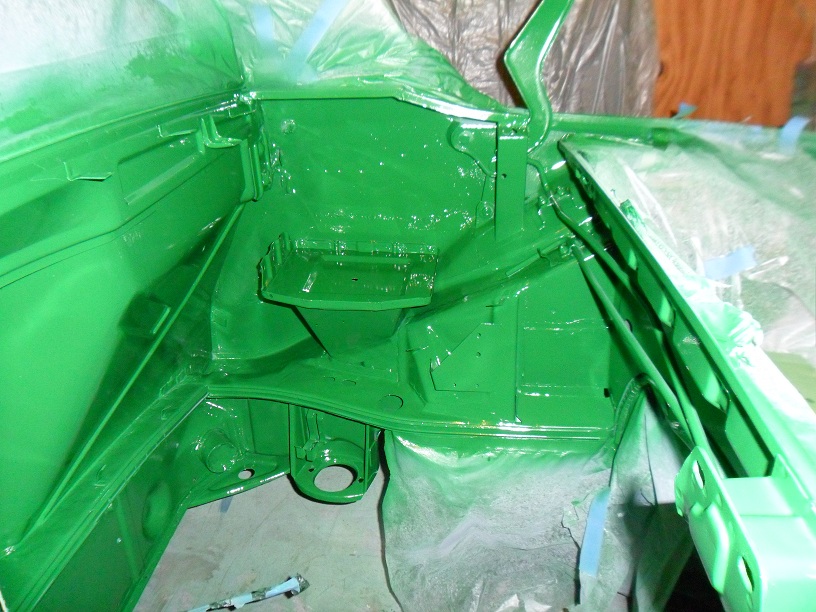
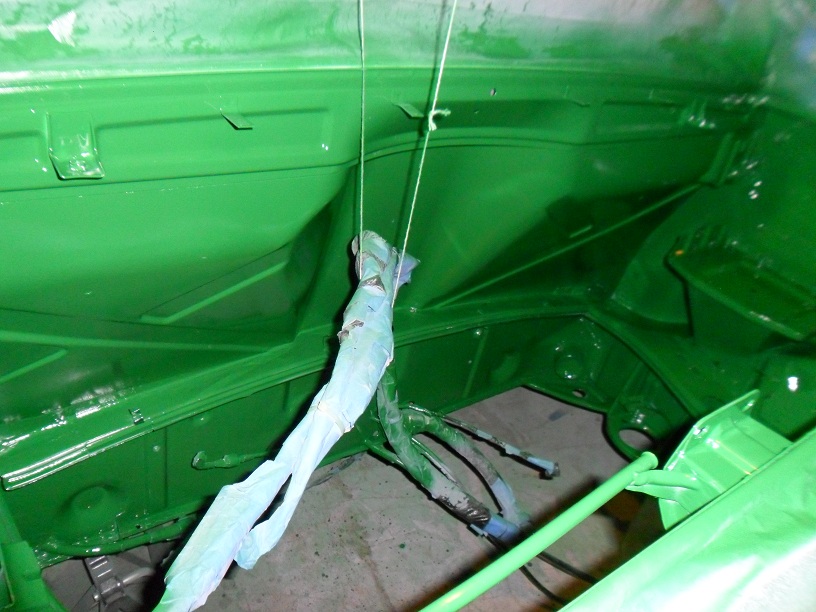
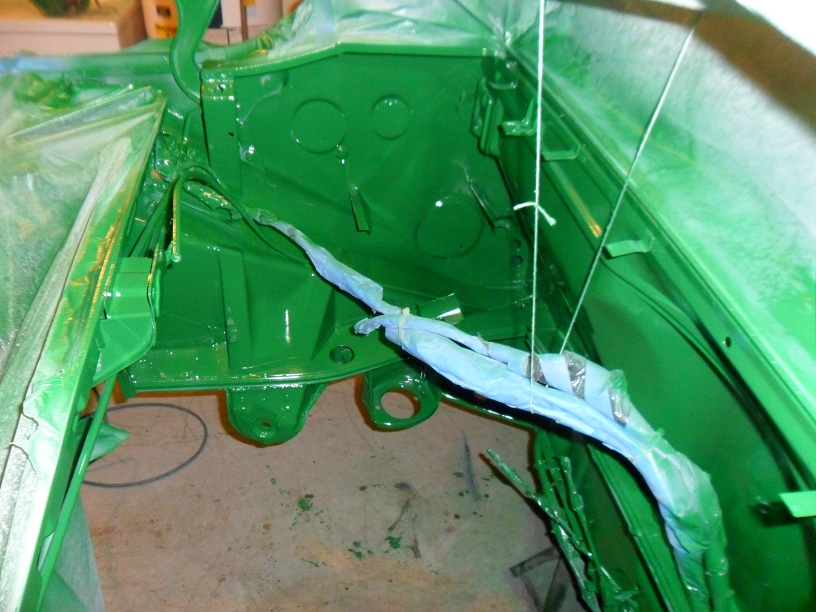
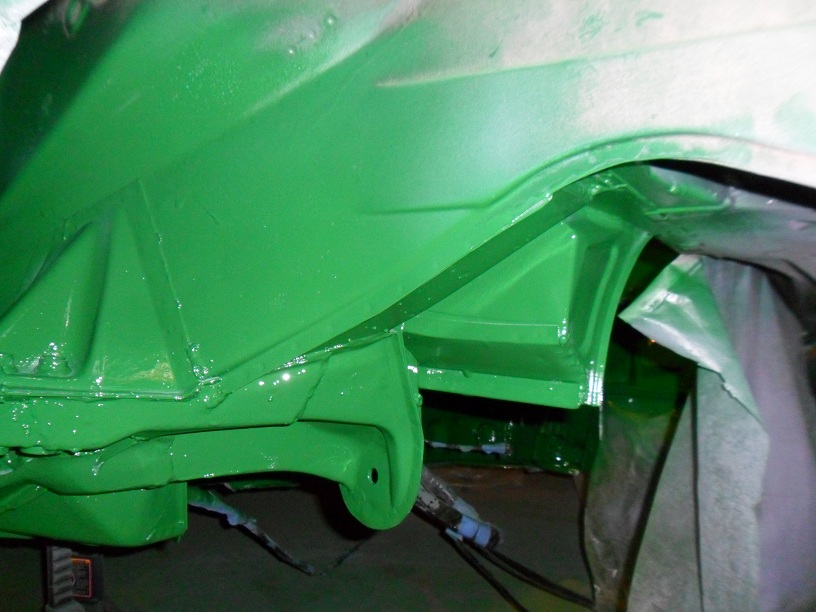
Gave the engine bay a final once over with scotch brite and sandpaper, blew it out with compressed air, wiped everything down with a tack cloth, then shot 3 coats of acrylic enamel. There are so many curves & edges in this area, I tried to keep the coats light to avoid runs. It was tight working in there with a paint gun, respirator & wires & cables in the way. I looked like a slightly milder version of the incredible hulk when I was done. I had two cans of rattle can paint to match that I used for areas that I couldnt get to with a gun. I had a few runs when I first started on the firewall...adjusted the trigger on the gun for less paint:
     |
   |

 
|
| wingnut86 |
Jan 20 2013, 08:14 PM
Post
#302
|
|
...boola la boo boola boo... Group: Members Posts: 1,053 Joined: 22-April 10 From: South Carolina Member No.: 11,645 Region Association: South East States |
|
|
|
|
| OllieG |
Jan 21 2013, 04:04 AM
Post
#303
|
|
OllieG Group: Members Posts: 212 Joined: 6-July 11 From: UK Member No.: 13,282 Region Association: England |
Looks good to me Bob...and with any luck you won't have to do that ever again!
How d'you keep your garage so tidy?! Mine's a mess although I guess I'm still doing alot of paint and underseal stripping. It's about -5 centigrade outside right now and my garage isn't heated....brrr. Ollie. |
|
|
|
| saigon71 |
Jan 31 2013, 05:45 PM
Post
#304
|
|
Advanced Member Group: Members Posts: 2,007 Joined: 1-June 09 From: Dillsburg, PA Member No.: 10,428 Region Association: MidAtlantic Region |
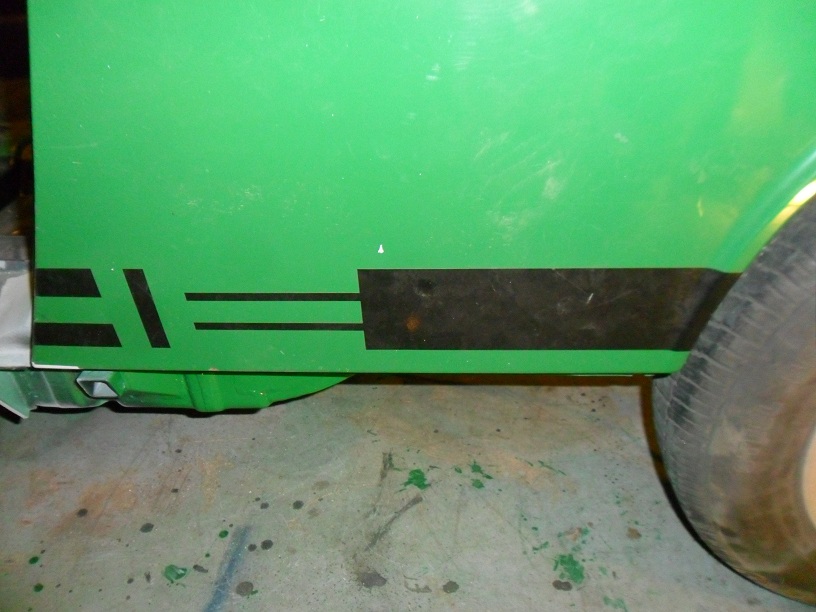
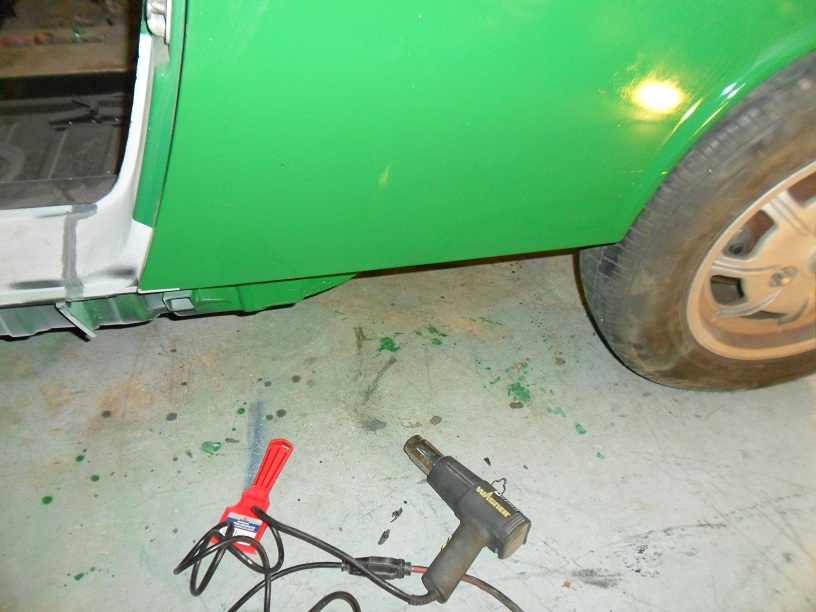
Used a heat gun on low setting and a plastic razor blade to remove the PORSCHE decals from the car. Once the heat gun softened the plastic, it peeled right off:
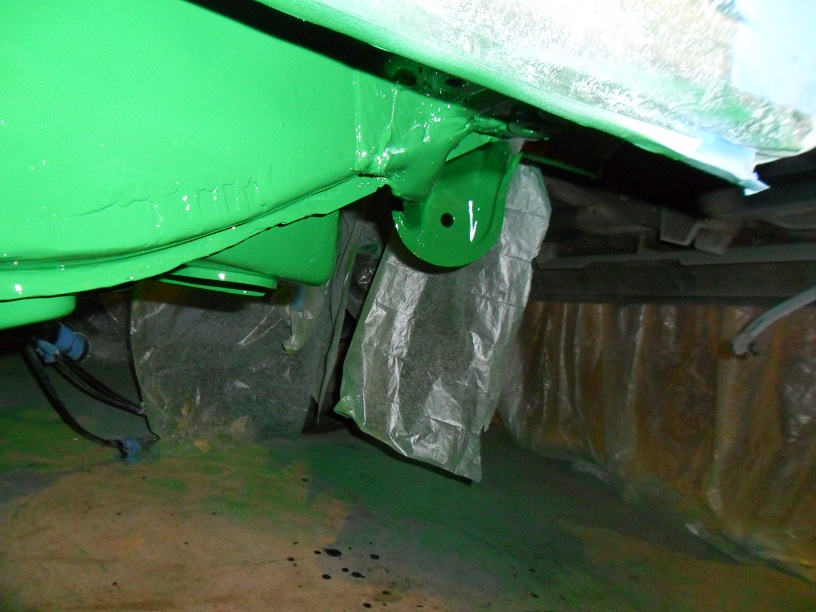
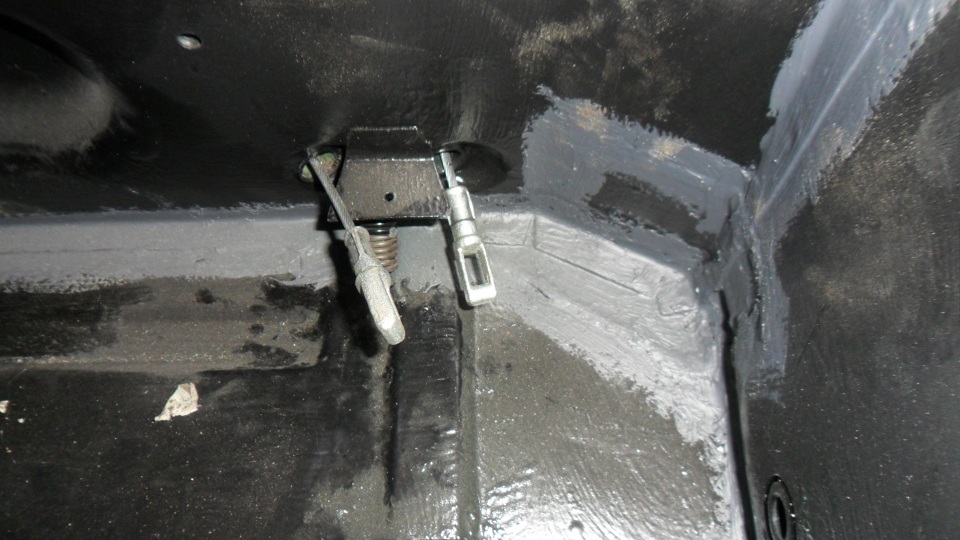
  Strafed my emergency brake cable with a wire wheel while cleaning the engine bay& damaged the plastic. The ebrake worked well a few years ago, so I used a piece of heat shrink to cover the damaged area: 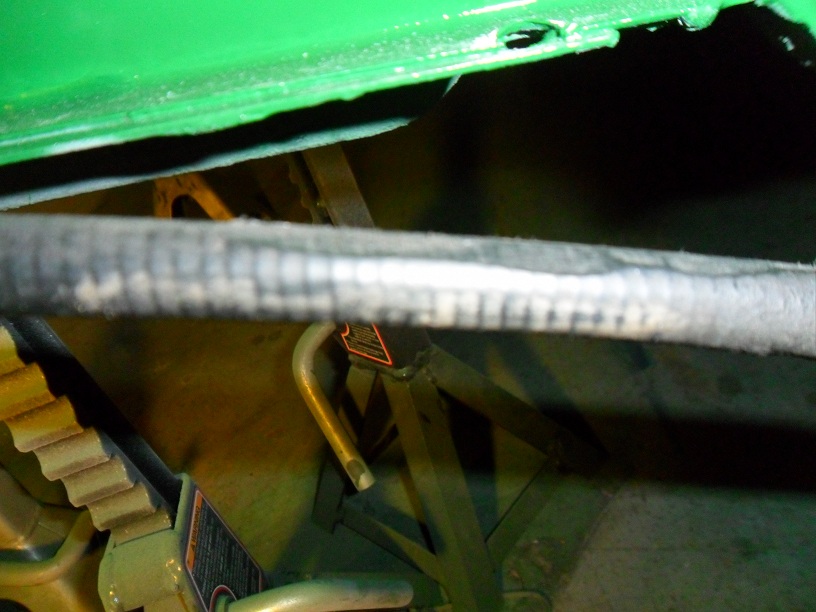 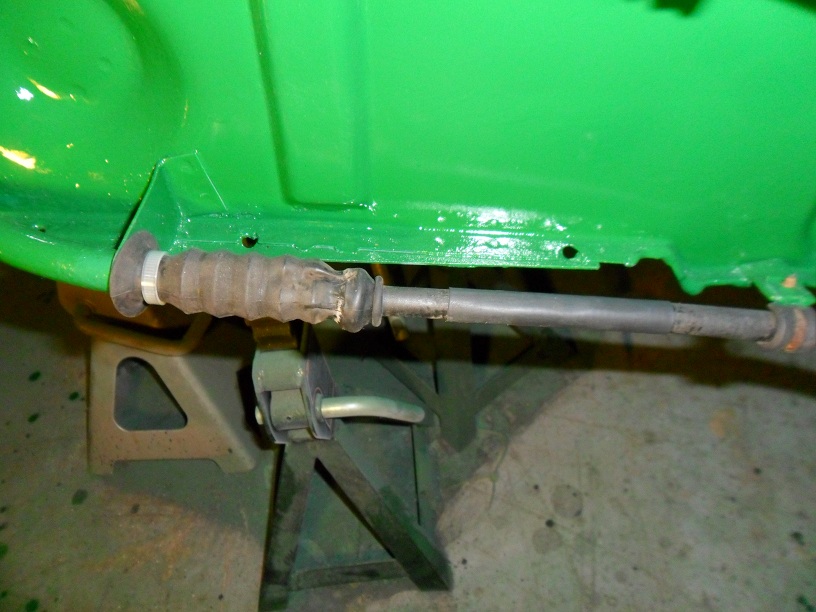 Had to go back and add some more weld to the passenger side fender brace. I had to bang it up a little with a hammer and drift to get the suspension bolted on. I couldn't get it to sit properly without a lot of heavy banging on the lower part of the fender, so I worked with it the way it was. Brushed on two coats of acrylic enamel: 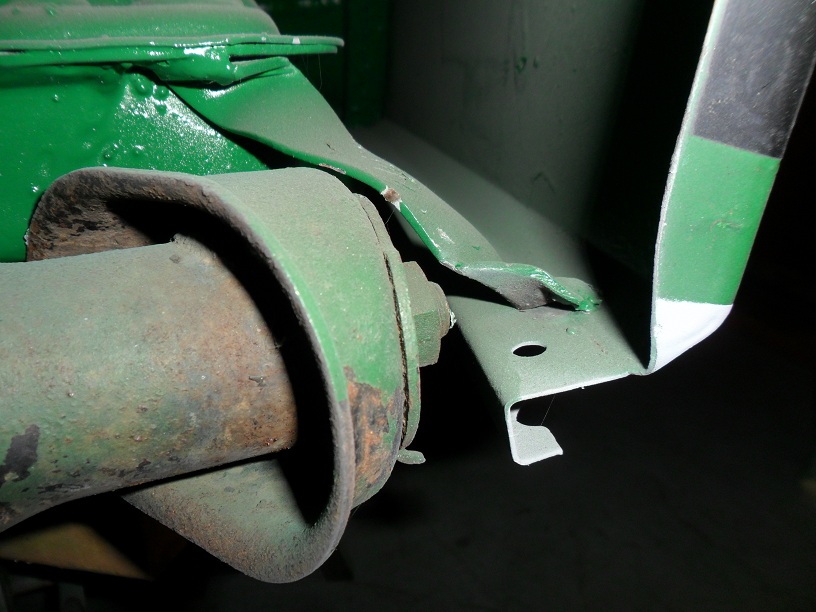 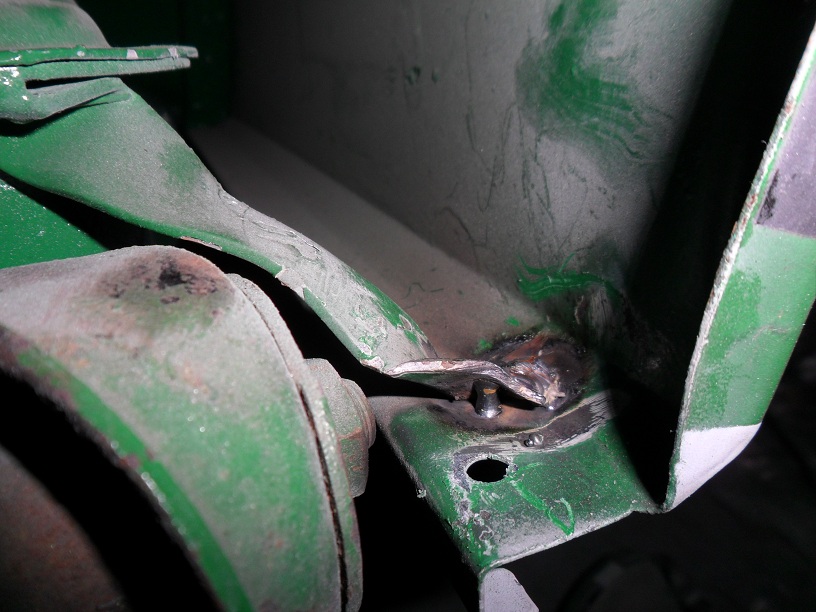 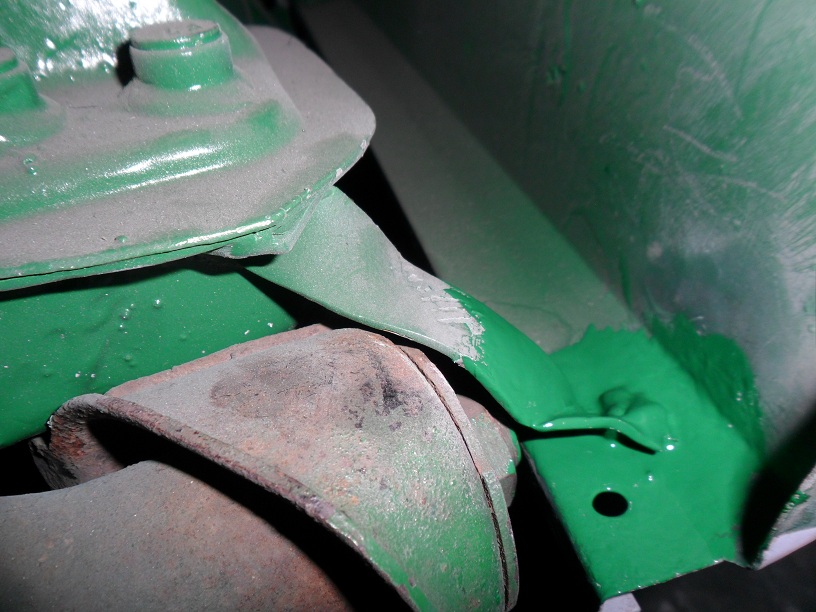 Put two coats of color on a section of the rear firewall and door jam:  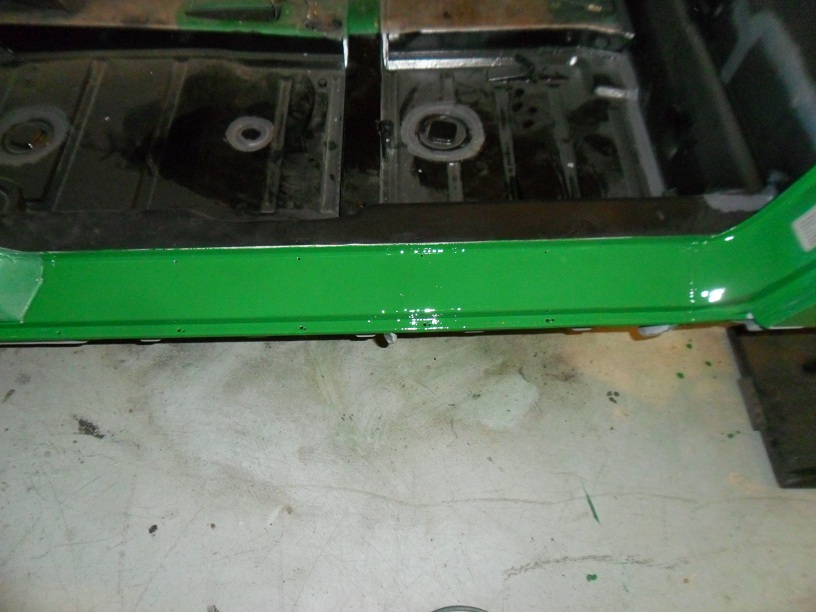 |
|
|
|
| saigon71 |
Jan 31 2013, 05:54 PM
Post
#305
|
|
Advanced Member Group: Members Posts: 2,007 Joined: 1-June 09 From: Dillsburg, PA Member No.: 10,428 Region Association: MidAtlantic Region |
(IMG:style_emoticons/default/barf.gif) Bolted the drivers side suspension:
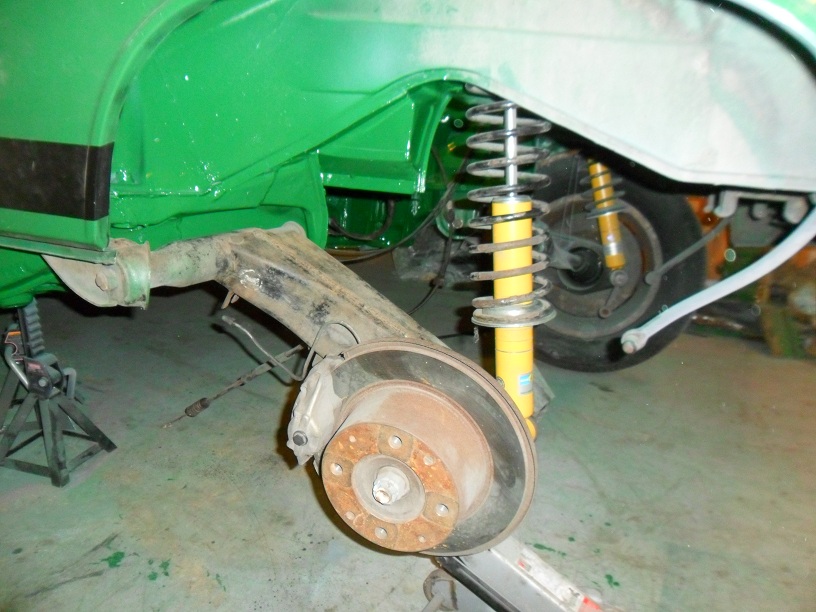 The body braces came off last week. I cleaned up the areas and brushed on two coats of acrylic enamel. Hollywood and Flying J came over to help me push it up on ramps to gain better access to the floor pan: 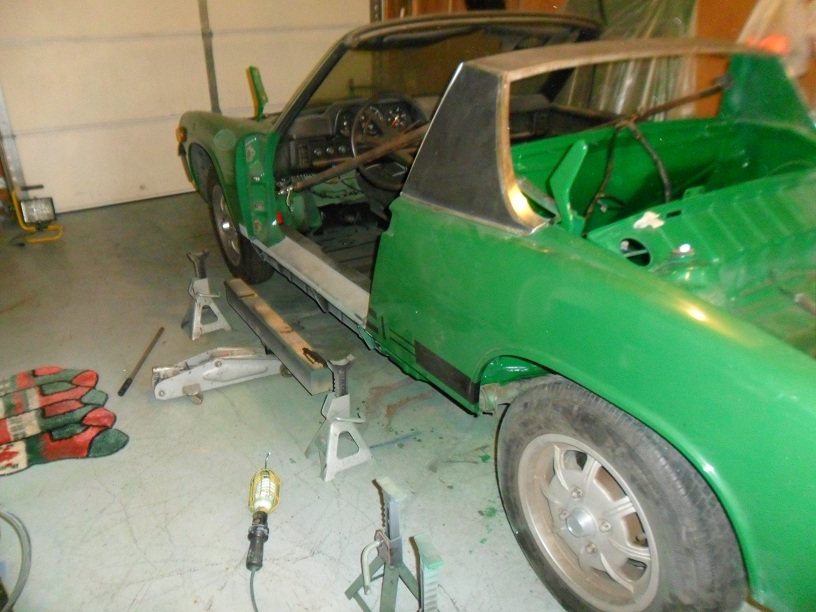 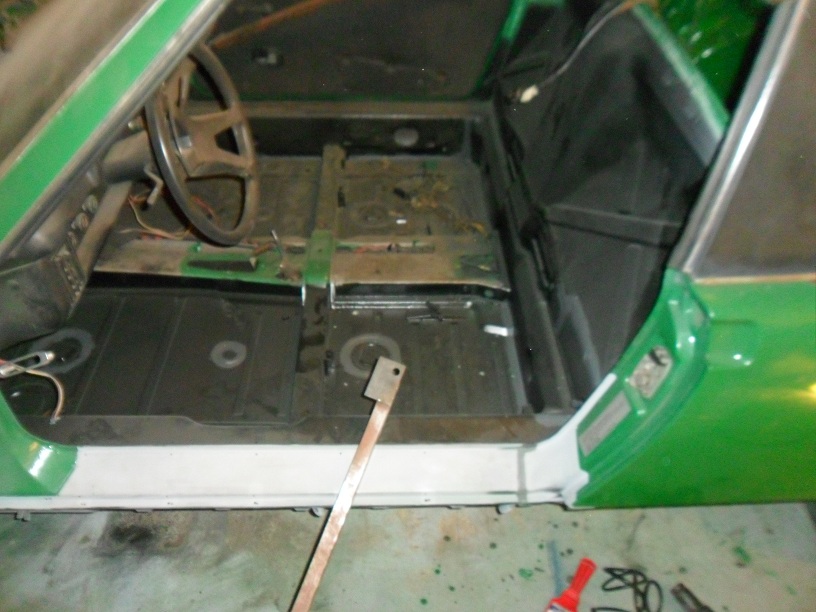 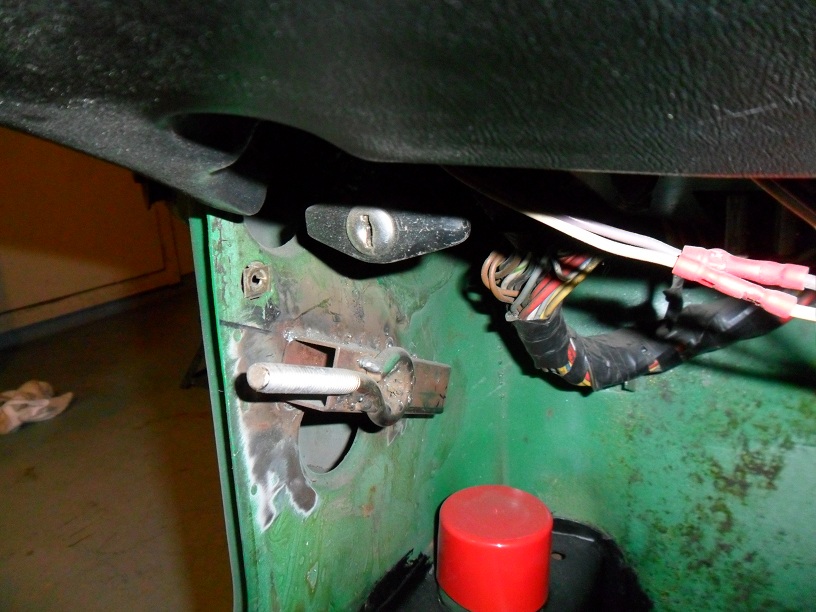 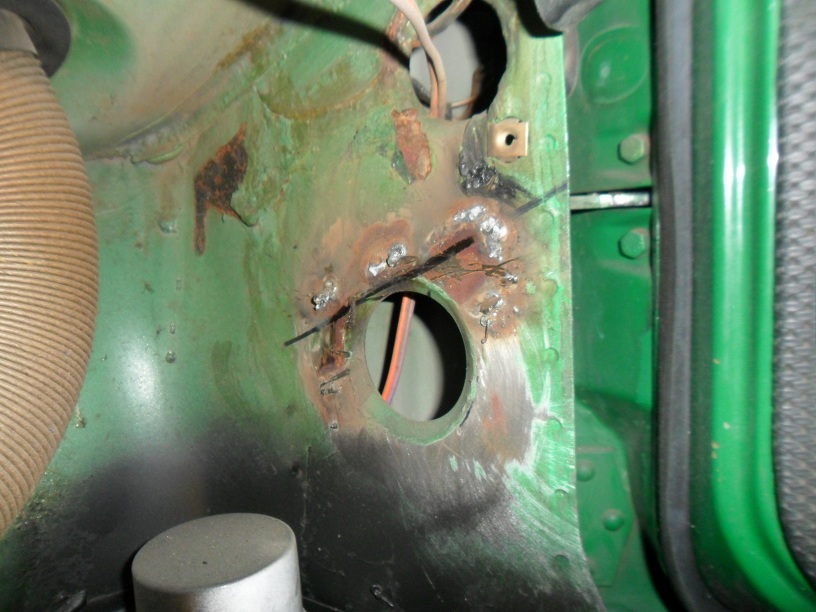 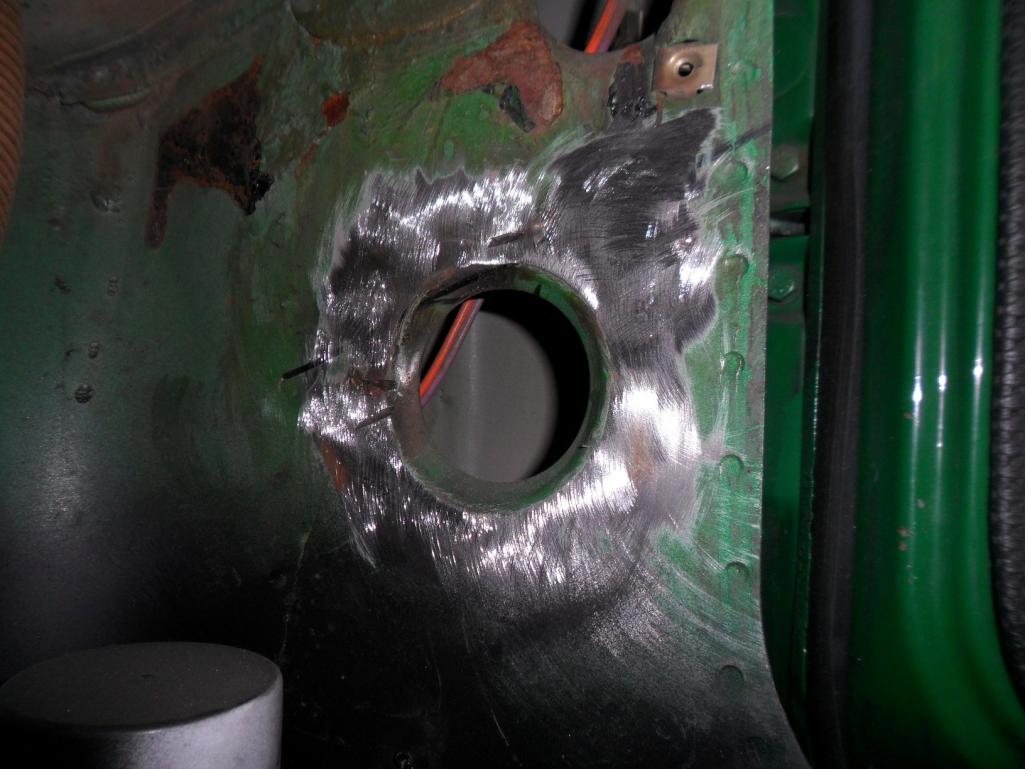  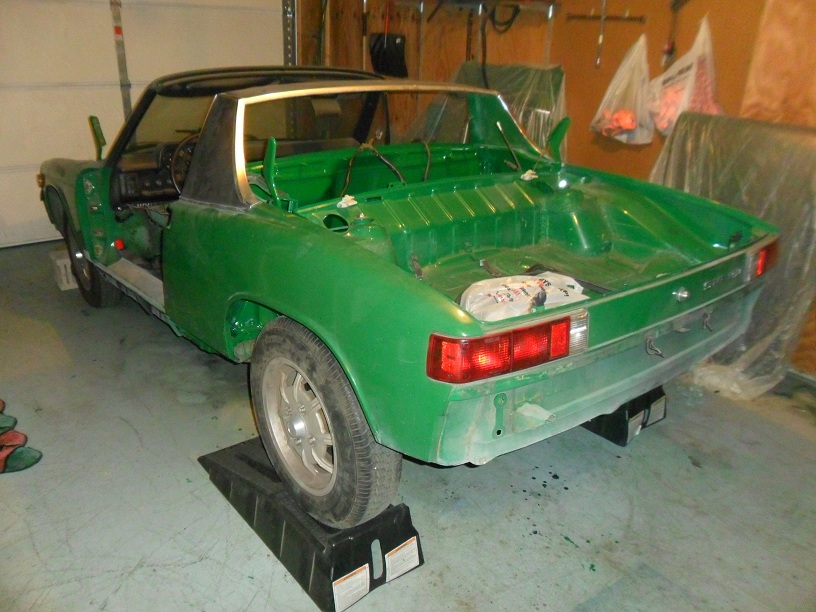 |
|
|
|
| saigon71 |
Jan 31 2013, 06:16 PM
Post
#306
|
|
Advanced Member Group: Members Posts: 2,007 Joined: 1-June 09 From: Dillsburg, PA Member No.: 10,428 Region Association: MidAtlantic Region |
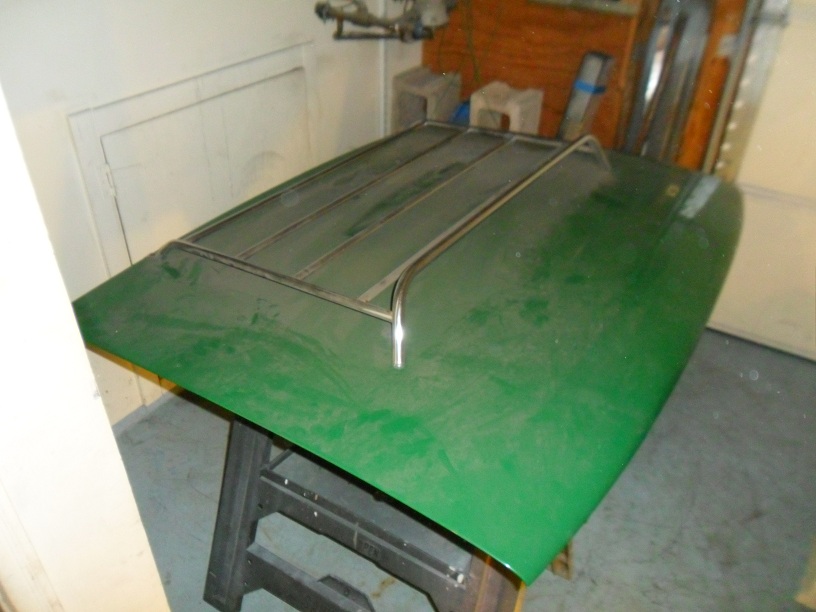
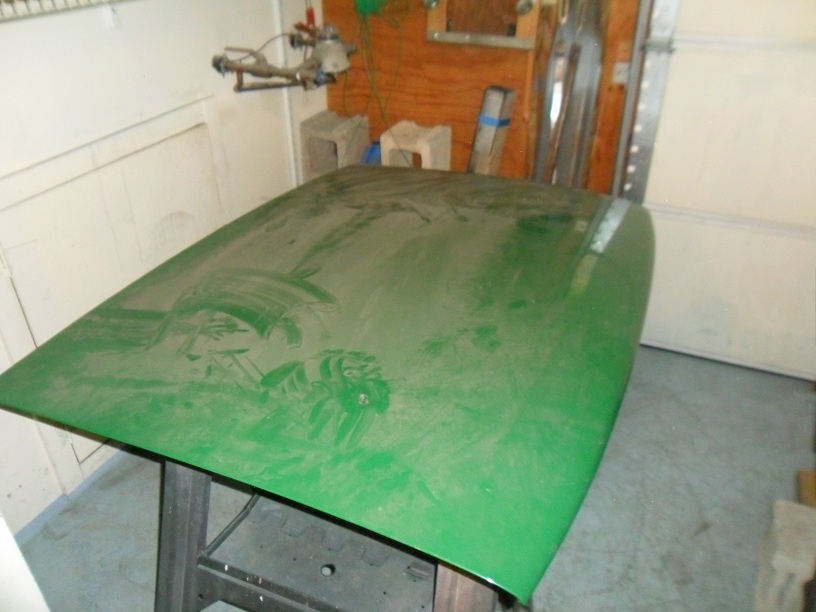
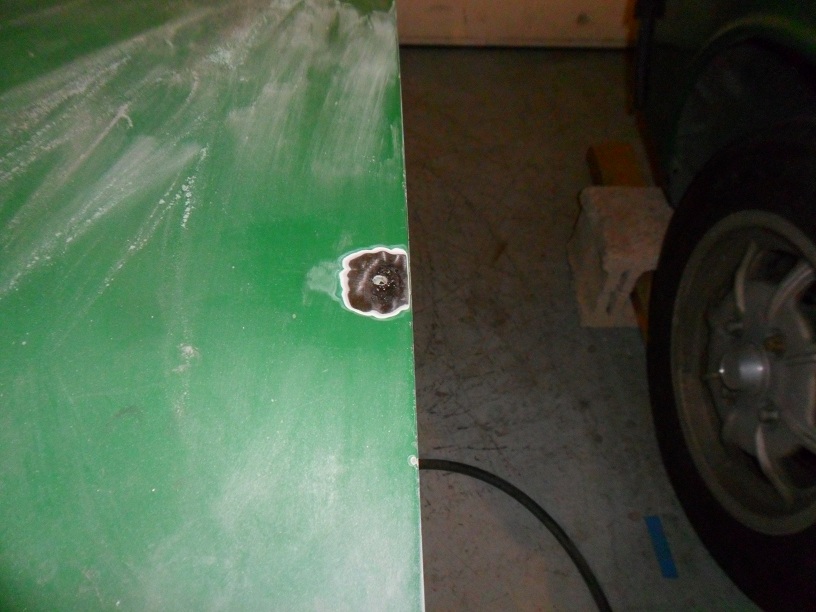
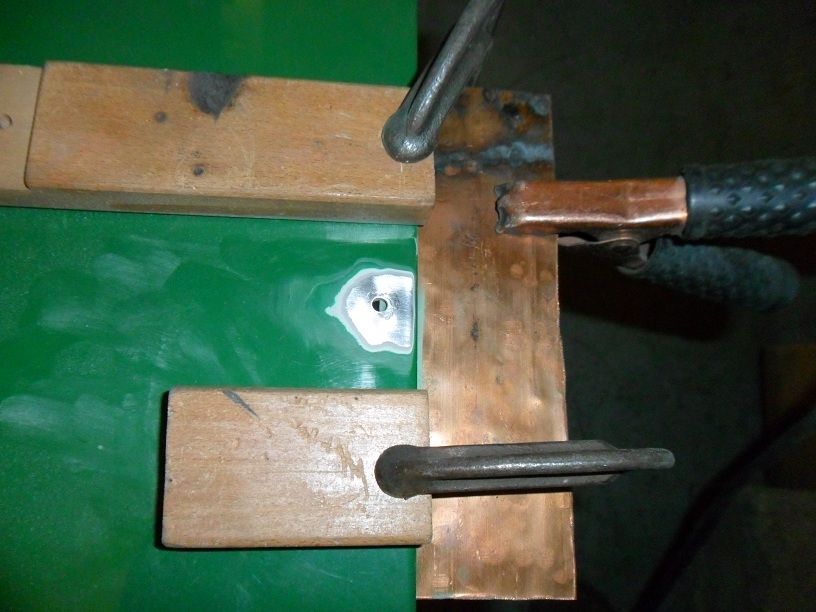
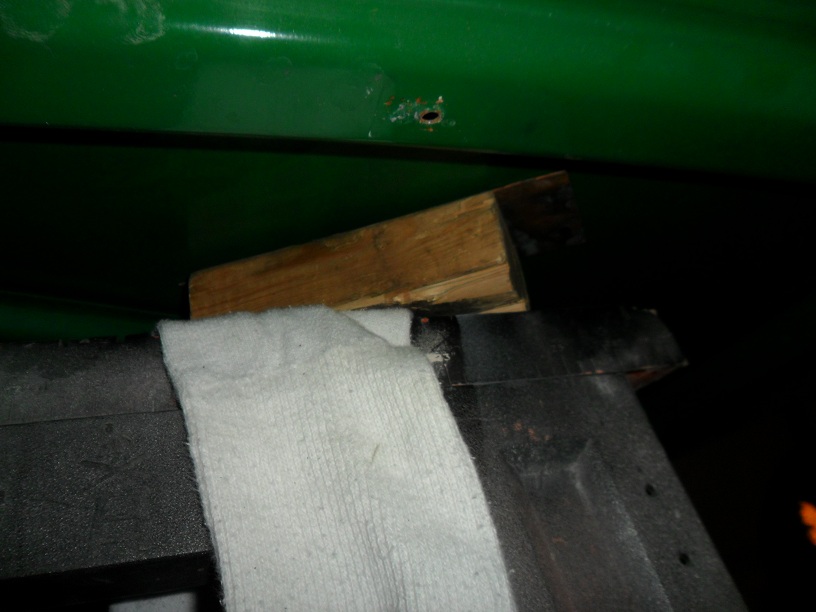
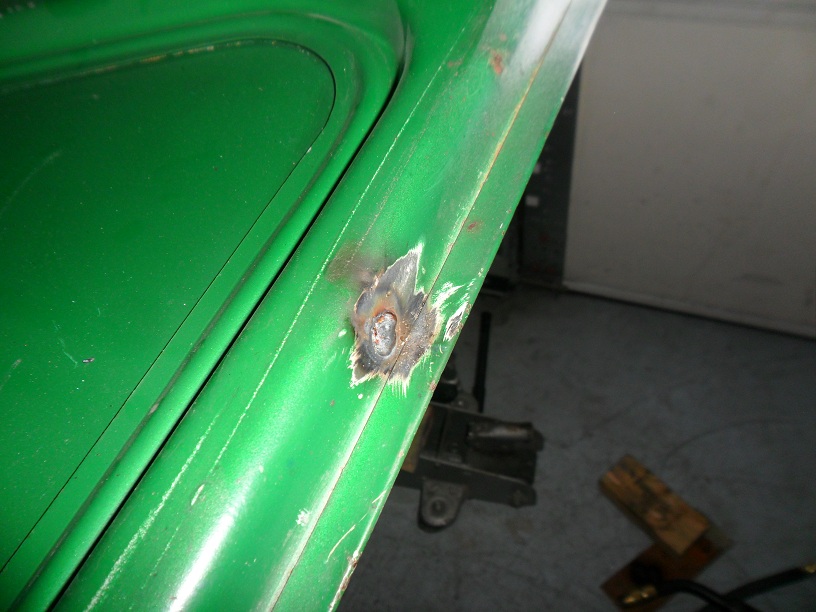
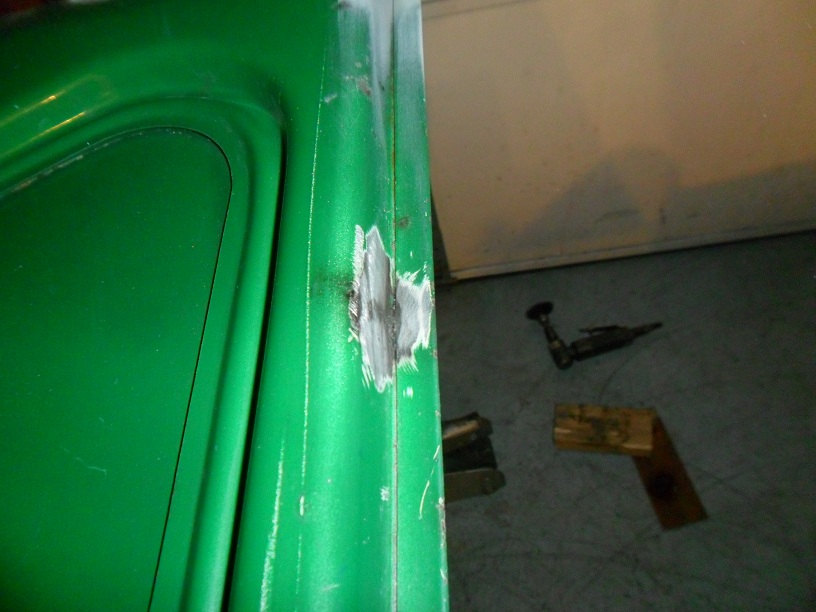
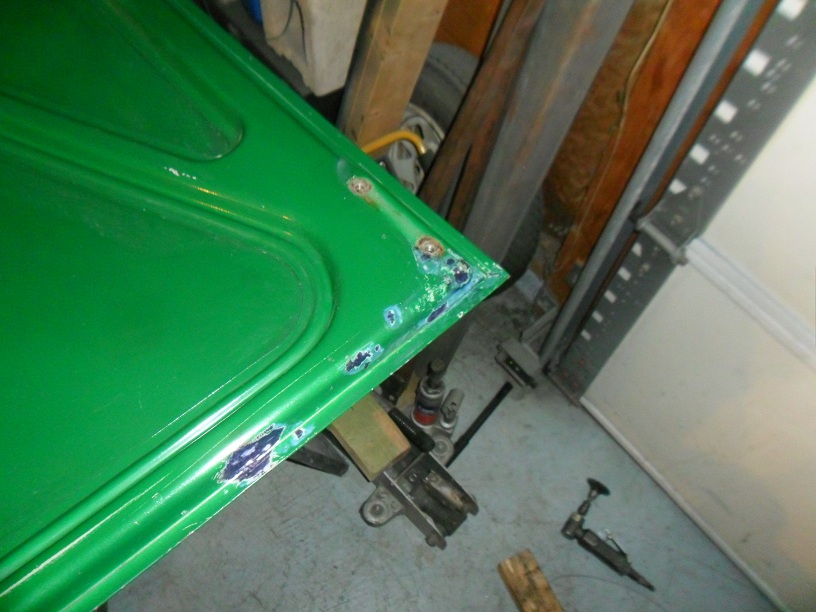
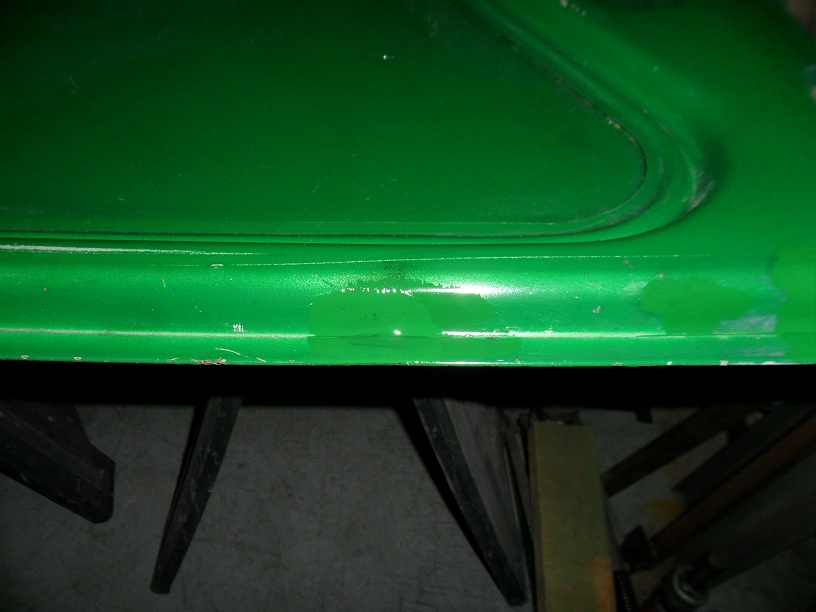
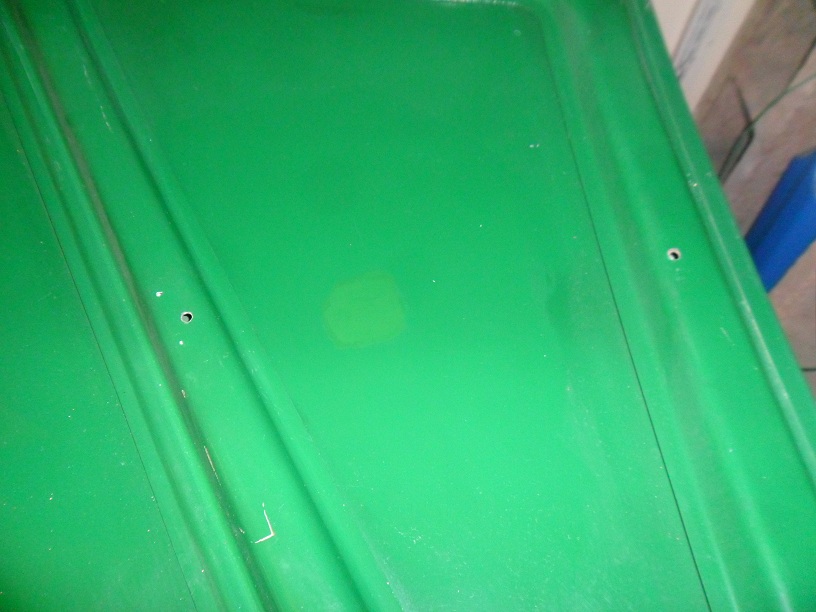
I was never a fan of the luggage rack that came with my 914, so I removed it and welded the holes shut with a copper backing plate. Overall, it was a smooth operation:
          |
|
|
|
| saigon71 |
Jan 31 2013, 06:20 PM
Post
#307
|
|
Advanced Member Group: Members Posts: 2,007 Joined: 1-June 09 From: Dillsburg, PA Member No.: 10,428 Region Association: MidAtlantic Region |
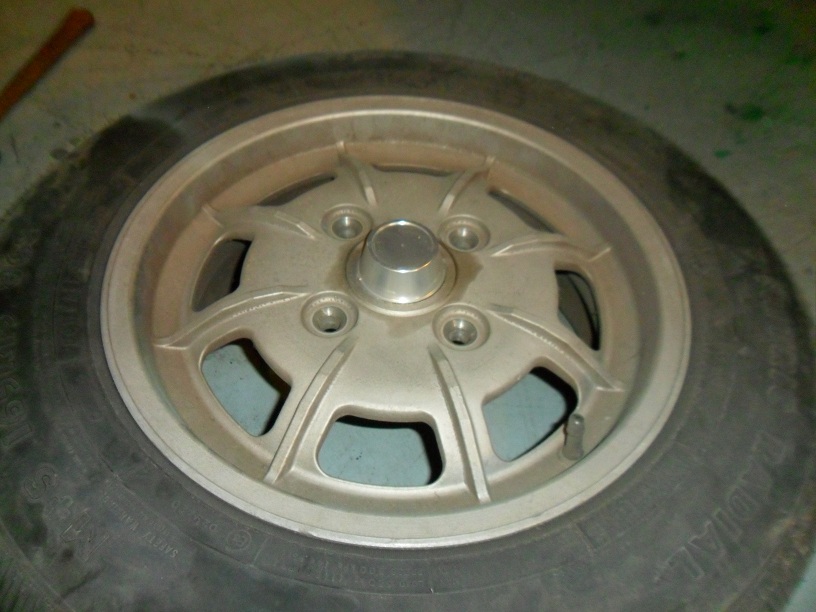
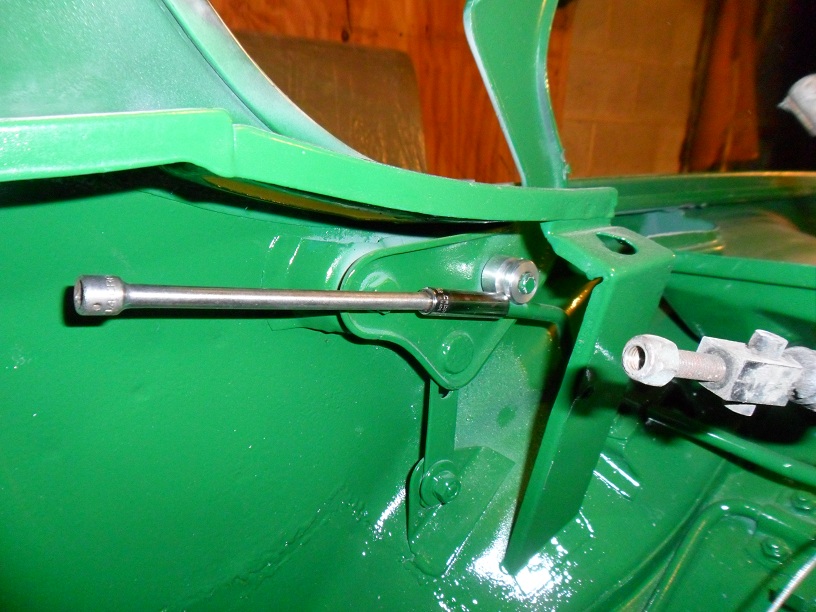
Started putting parts back on the car. The first one was Mikeys center cap which I bought about two years ago. Installed aluminum rollers for the engine bay deck lid using a deep well socket and extension, re-installed the brake proportioning valve:
   |
|
|
|
| saigon71 |
Jan 31 2013, 06:32 PM
Post
#308
|
|
Advanced Member Group: Members Posts: 2,007 Joined: 1-June 09 From: Dillsburg, PA Member No.: 10,428 Region Association: MidAtlantic Region |
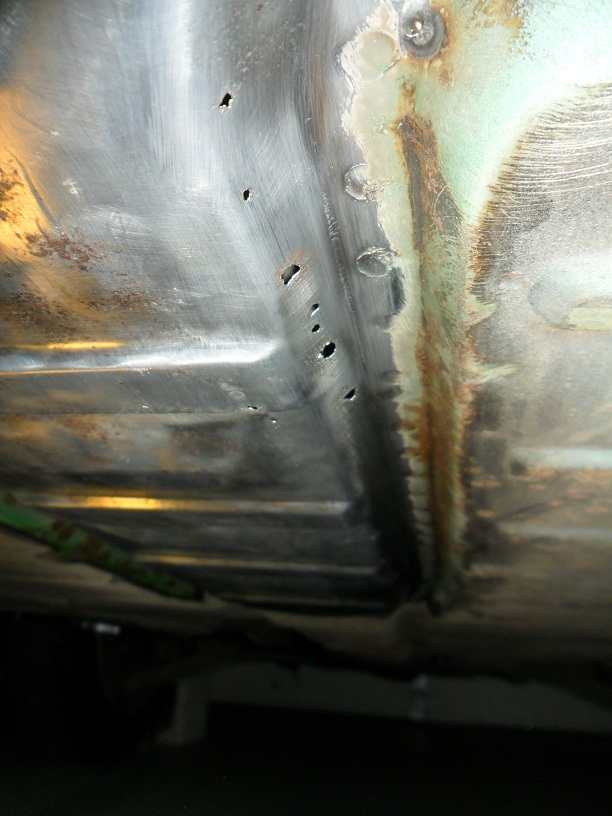
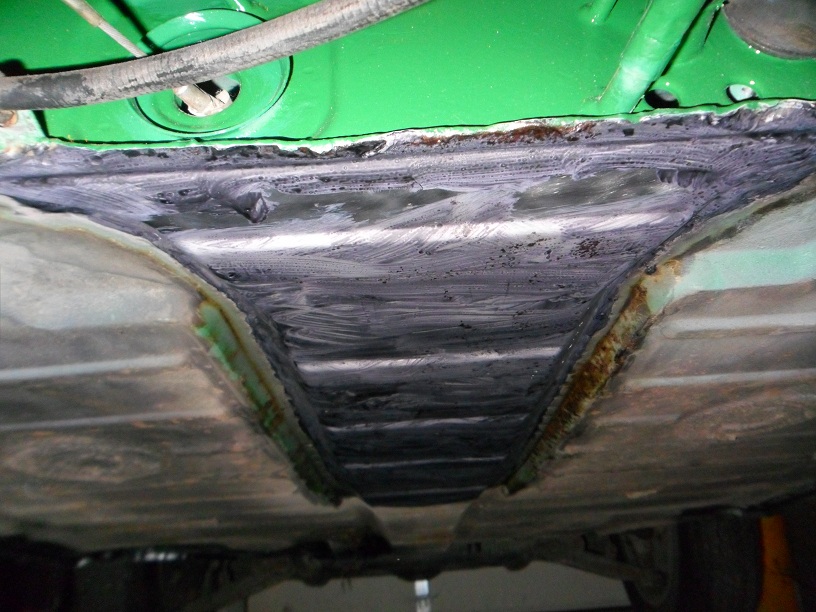
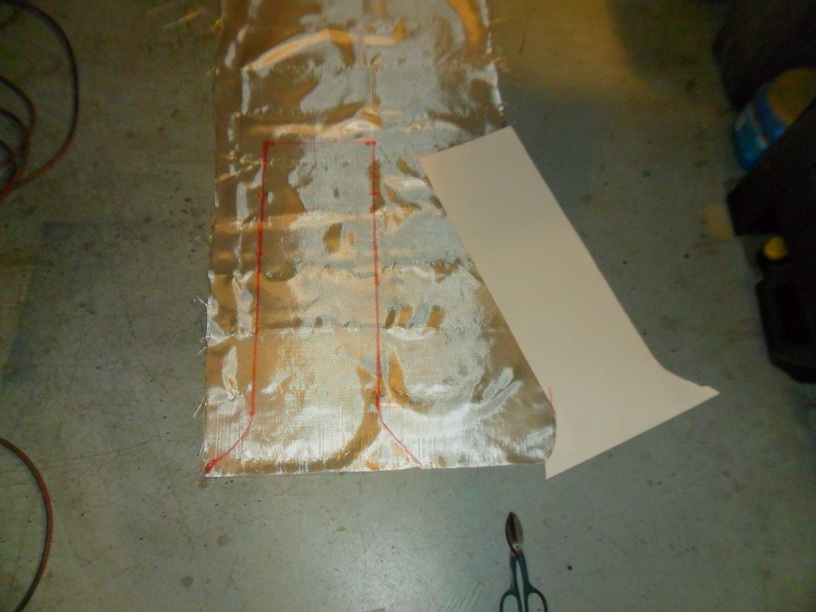
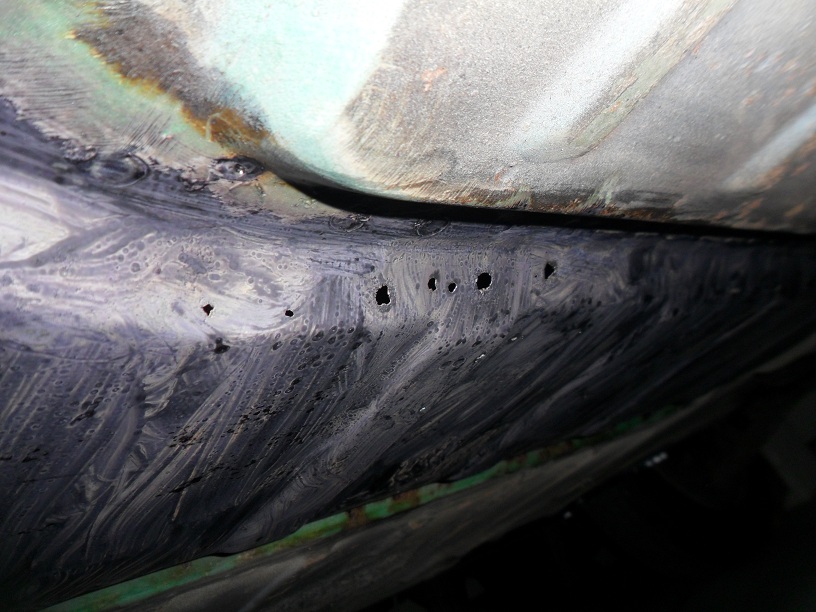
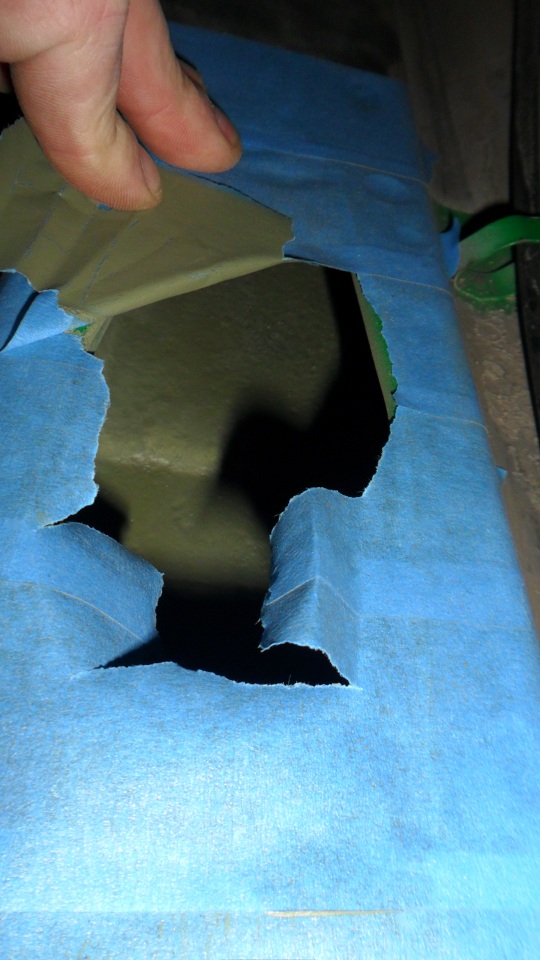
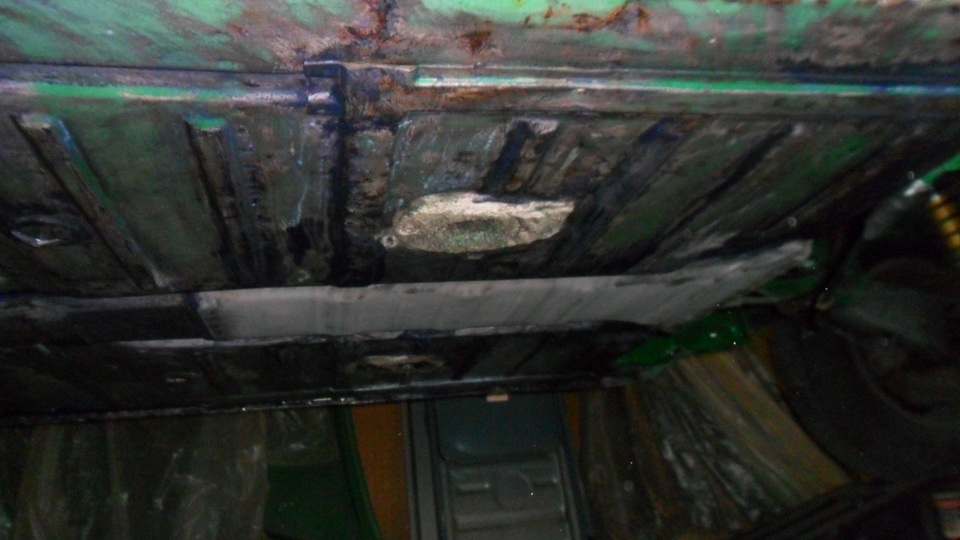
I knew there were a few small holes in the underside of the center tunnel. I hit the area with a wire wheel and gave it a closer inspection. A good cleaning revealed more than a few pin holes...I estimate about 30 or so holes spanning the rear 24" of the tunnel. Cleaned the bottom areas of the adjacent floor pan - they looked good, aside from some surface rust. I was pretty irritated with all the rust thru and really want to be driving the car this spring...wasn't thinking clearly, so I Ospho'd the area and even cut a fiberglass cloth patch for a quick repair. After some thought over the last few days, I decided to order a new floorpan from Restoration Design, cut out and replace what I need. My deal all along was to do this right, once and then enjoy the car without more major rust work:
     |
|
|
|
| saigon71 |
Jan 31 2013, 06:36 PM
Post
#309
|
|
Advanced Member Group: Members Posts: 2,007 Joined: 1-June 09 From: Dillsburg, PA Member No.: 10,428 Region Association: MidAtlantic Region |
Had to go back with a brush and touch up a few areas in the engine bay that were impossible to reach with the spray gun or rattle can:
Attached image(s) 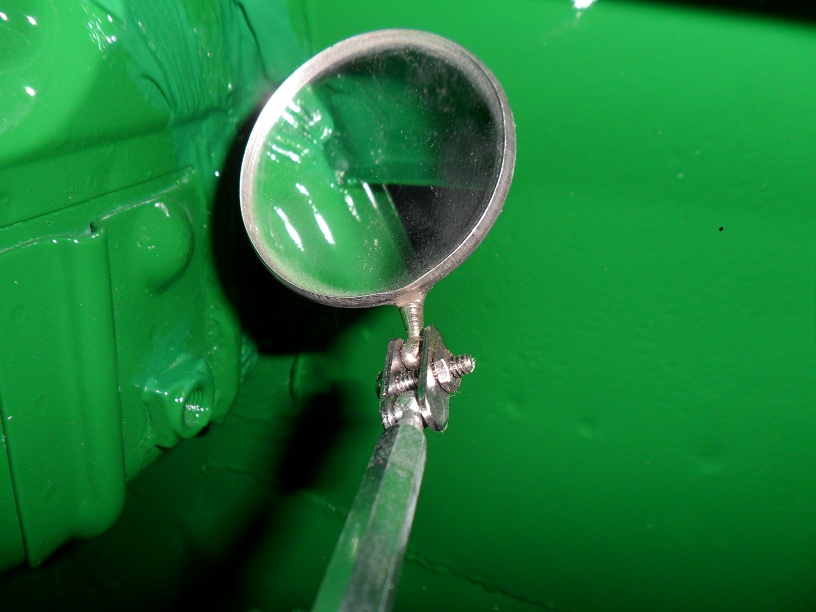
|
|
|
|
| jsayre914 |
Jan 31 2013, 06:52 PM
Post
#310
|
|
Speed Up !!! Group: Members Posts: 3,208 Joined: 10-February 08 From: Timonium MD 21093 Member No.: 8,696 Region Association: MidAtlantic Region |
(IMG:style_emoticons/default/piratenanner.gif)
Looks great Bob! (as usual) (IMG:style_emoticons/default/popcorn[1].gif) (IMG:style_emoticons/default/poke.gif) |
|
|
|
| cary |
Jan 31 2013, 09:01 PM
Post
#311
|
|
Advanced Member Group: Members Posts: 3,900 Joined: 26-January 04 From: Sherwood Oregon Member No.: 1,608 Region Association: Pacific Northwest |
You keep working this hard.
We're going to put you on like permanent. LOL. Looks like your tearing it up. I might have to skip the Super Bowl and get back to work. |
|
|
|
| jdlmodelt |
Jan 31 2013, 09:29 PM
Post
#312
|
|
James D. Lane Group: Members Posts: 345 Joined: 30-November 12 From: Colorado Member No.: 15,210 Region Association: Southwest Region |
Un stinking believable! I am inspired to do real repairs on my 76 as a result of the crazy incredible repairs you did on this! wow!
|
|
|
|
| OllieG |
Feb 1 2013, 02:46 AM
Post
#313
|
|
OllieG Group: Members Posts: 212 Joined: 6-July 11 From: UK Member No.: 13,282 Region Association: England |
QUOTE My deal all along was to do this right ...hear hear, glad you didn't go any further with that fibreglass, I think you'd have been kicking yourself ever since. Seems like you're turning a corner now you're starting to put it all back together. Great! |
|
|
|
| saigon71 |
Feb 1 2013, 09:09 AM
Post
#314
|
|
Advanced Member Group: Members Posts: 2,007 Joined: 1-June 09 From: Dillsburg, PA Member No.: 10,428 Region Association: MidAtlantic Region |
QUOTE(OllieG @ Jan 21 2013, 05:04 AM)  Looks good to me Bob...and with any luck you won't have to do that ever again! How d'you keep your garage so tidy?! Mine's a mess although I guess I'm still doing alot of paint and underseal stripping. It's about -5 centigrade outside right now and my garage isn't heated....brrr. Ollie. The shop is kept clean out of necessity. My laundry facilities reside in the garage, so I have to keep it clean (or at least give it a good cleaning before laundry day). (IMG:style_emoticons/default/smile.gif) It still gets out of hand sometimes. On the bright side, I have heat! Two small electric heaters with thermostats are able to keep my small shop warm on the coldest of days. The HVLP paint gun really helped cut down on overspray. After each coat of primer or paint, I open the garage door and window for about 15 minutes and let the area vent. Bob |
|
|
|
| saigon71 |
Feb 6 2013, 09:36 AM
Post
#315
|
|
Advanced Member Group: Members Posts: 2,007 Joined: 1-June 09 From: Dillsburg, PA Member No.: 10,428 Region Association: MidAtlantic Region |
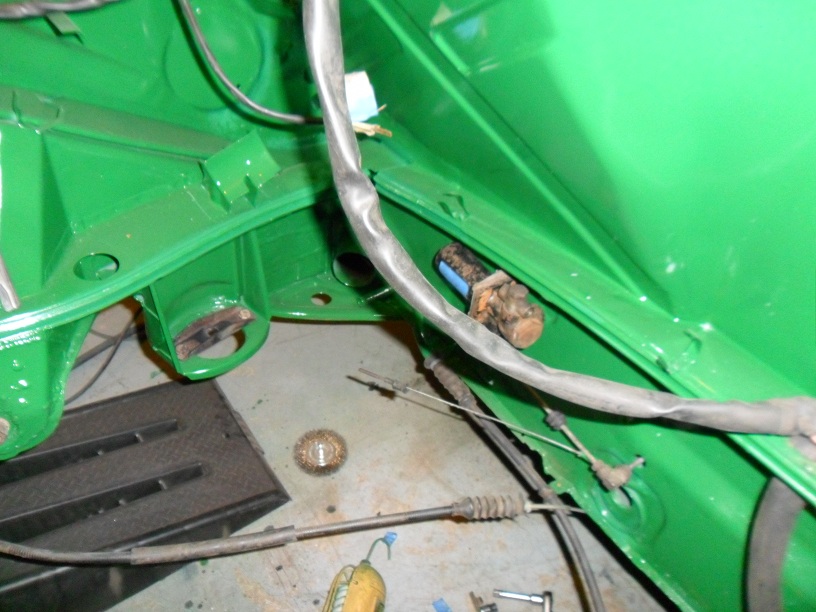
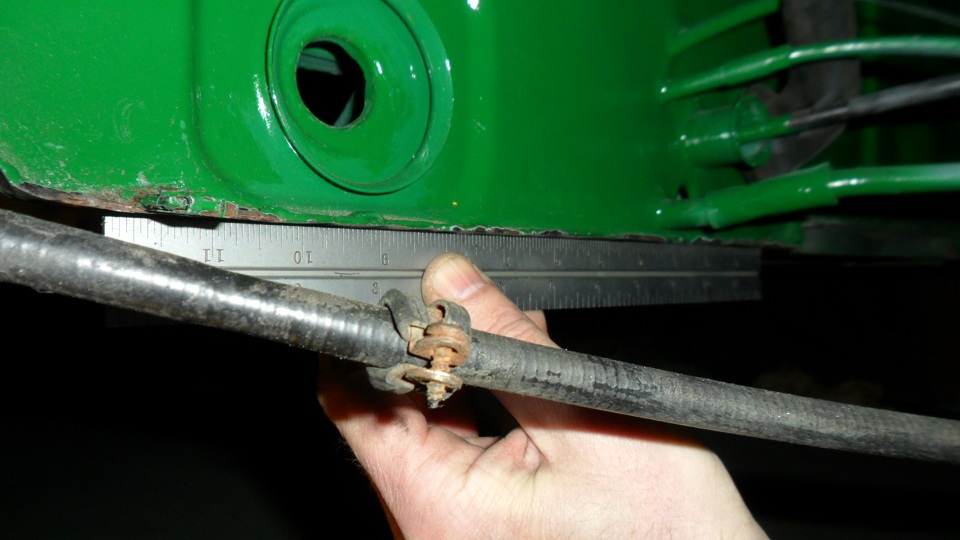
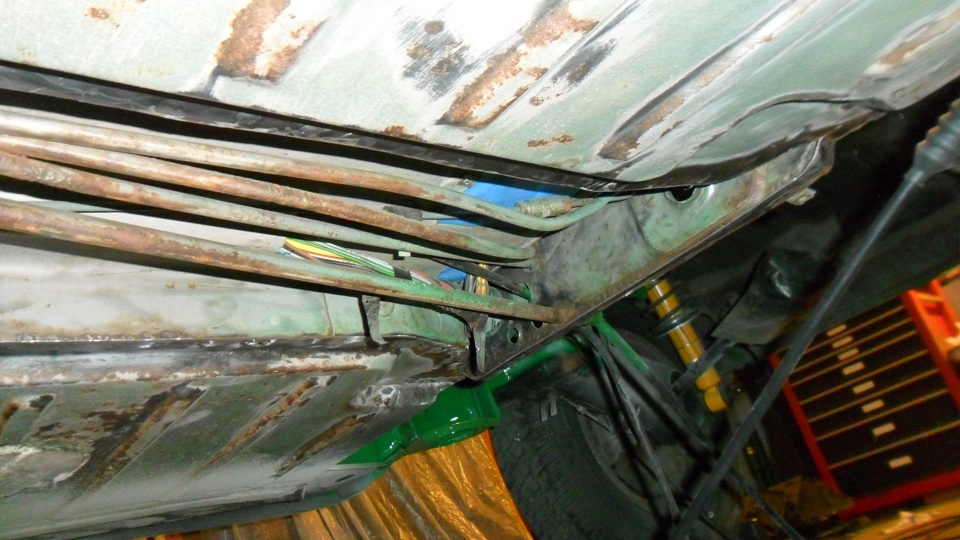
My e-brake cables weren't in terrible condition, but after closer inspection, I decided to replace them with a set ordered from PMB. It just didn't make sense to NOT replace these "while im in there."
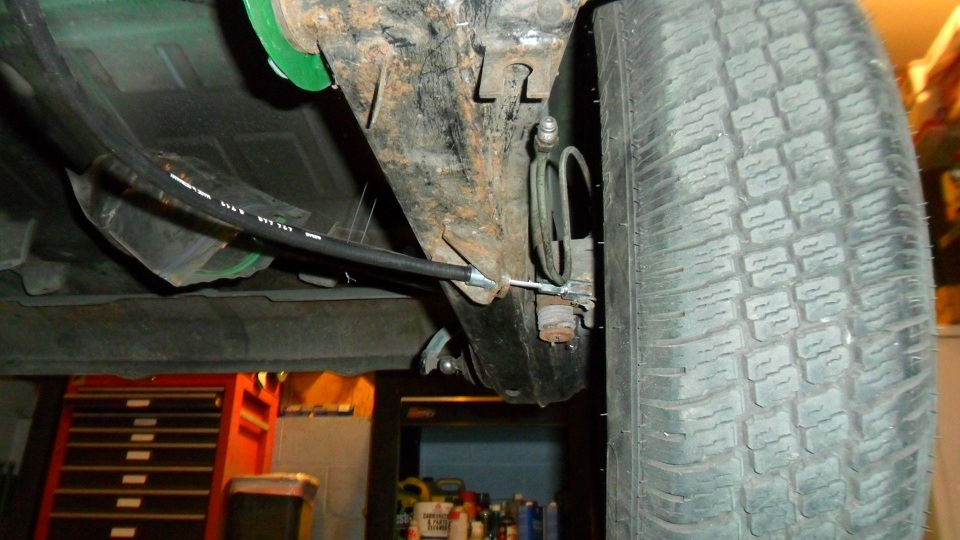 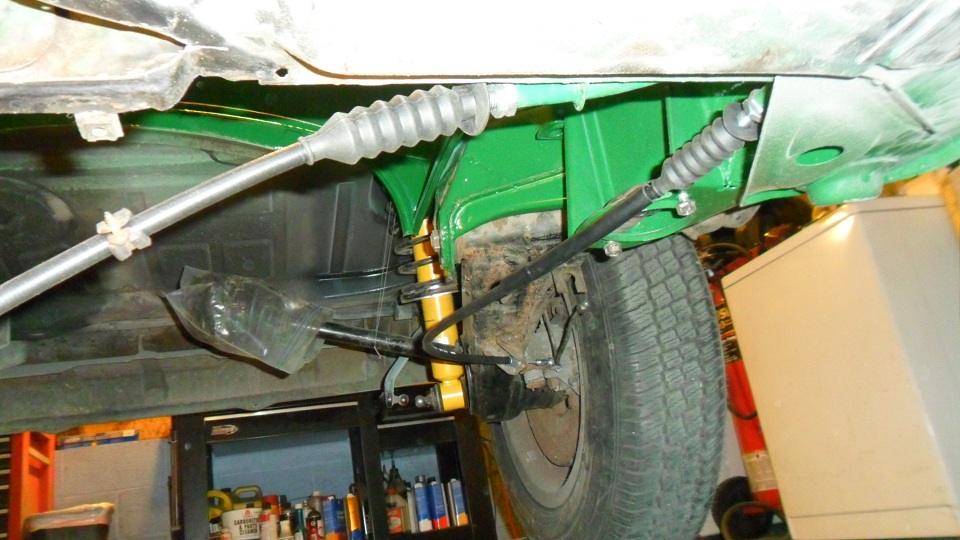  I needed more room under the car to inspect the entire floor pan, so I raised the front as well: 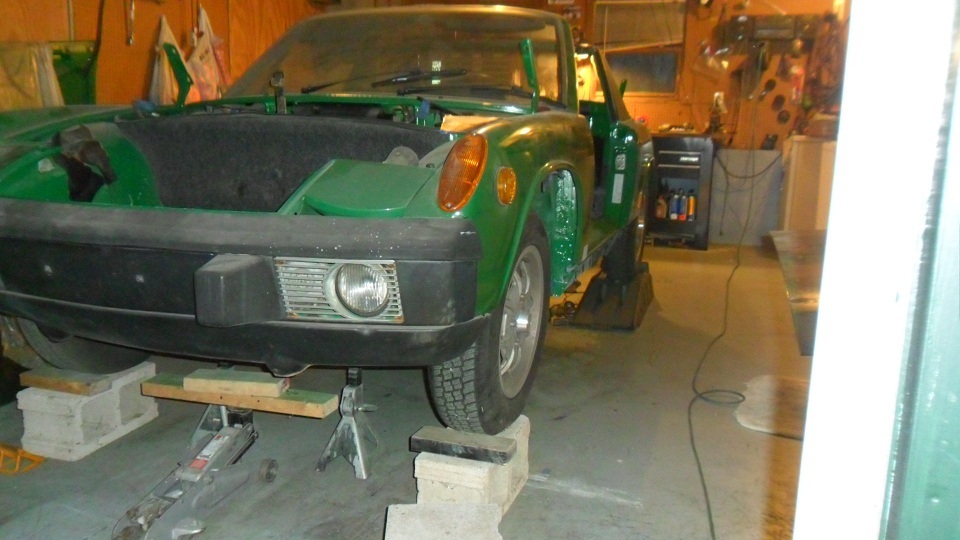 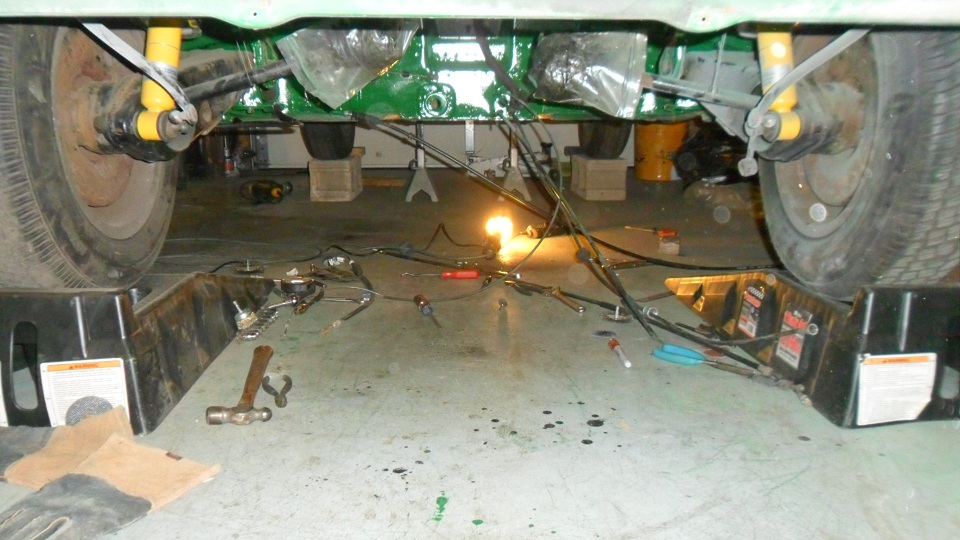 Started to fiddle with the new rear sway bar bushings: 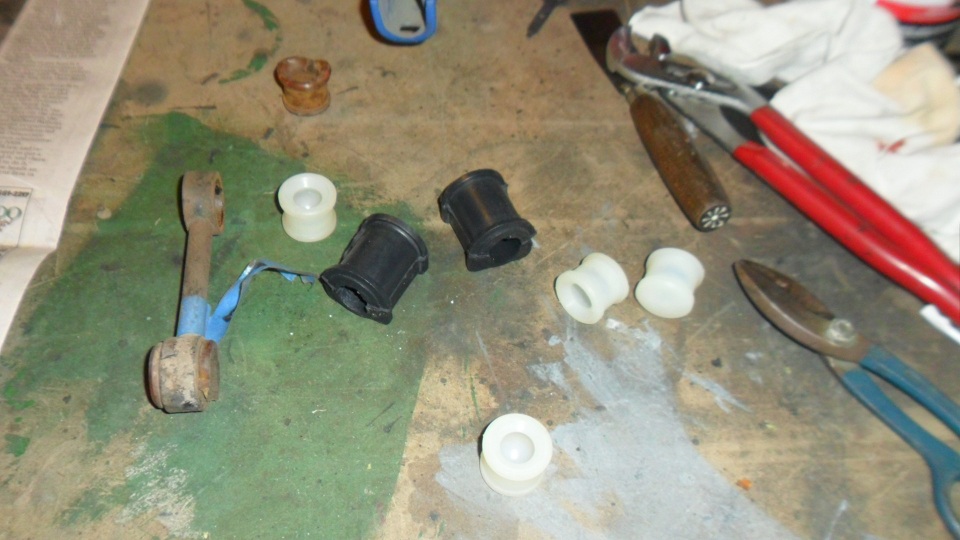 Applied a thin coat of bondo to the filled holes in the rear trunk: 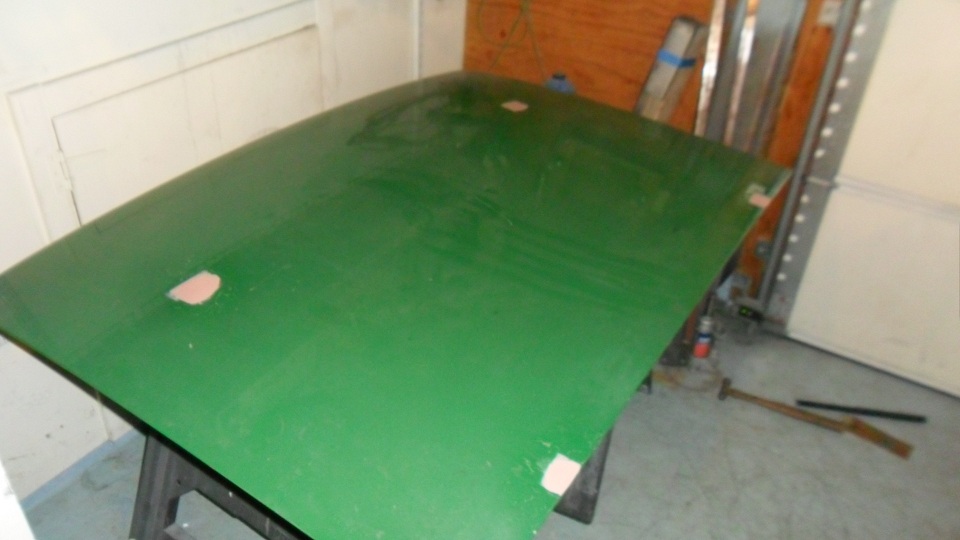 |
|
|
|
| saigon71 |
Feb 6 2013, 09:51 AM
Post
#316
|
|
Advanced Member Group: Members Posts: 2,007 Joined: 1-June 09 From: Dillsburg, PA Member No.: 10,428 Region Association: MidAtlantic Region |
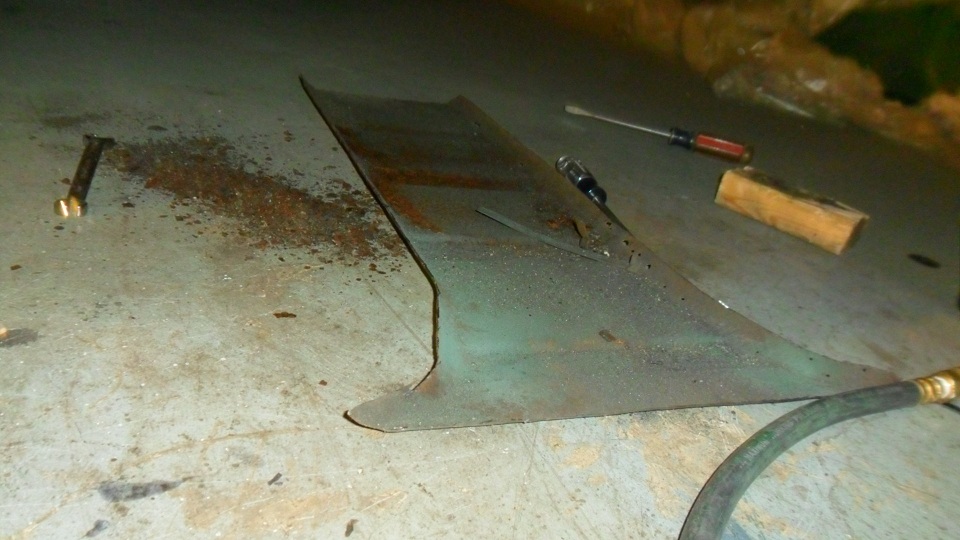
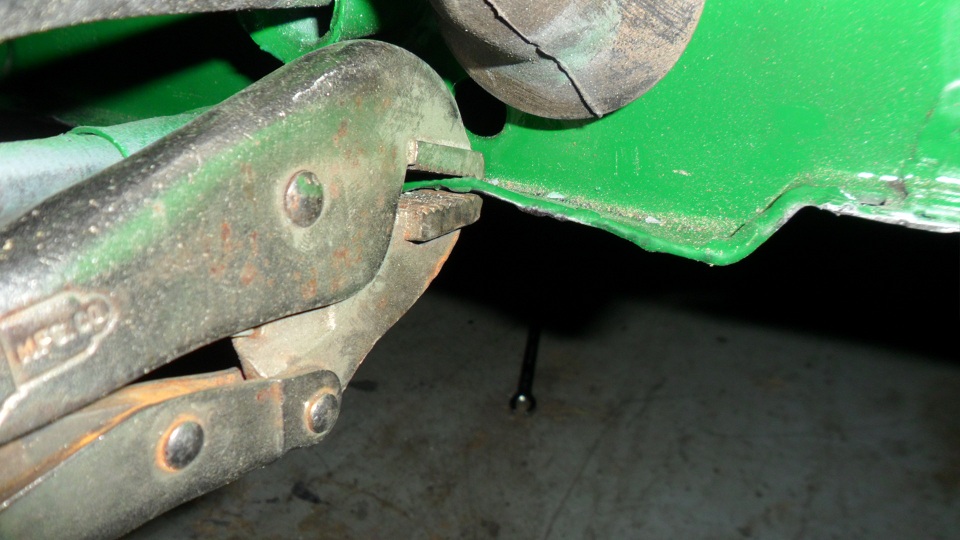
Ordered a new rear floor pan from Restoration Design. Cut out the damaged area with a die grinder and cutting wheel right at the seam where the tunnel is spot welded to the floor pan. I took a good look around in there and discovered very little rust on the verticals of the tunnel where it meets the pan. The tubes show some surface rust, but no rust-thru. Started cleaning the area with a Dremmel tool and wire wheel attachment. The plan is to clean everything in the tunnel well, treat the surface rust, and rosette weld the new section to the existing pan from the bottom. I really hate welding upside down, but I think it is my best option. I know it's not a concours repair, but I feel it will be a good strong repair as the original spot welds that connect the tunnel to the pan will remail intact. To prep, I had to grind down some weld on the rear edge and straighten it:
             |
|
|
|
| saigon71 |
Feb 12 2013, 09:15 AM
Post
#317
|
|
Advanced Member Group: Members Posts: 2,007 Joined: 1-June 09 From: Dillsburg, PA Member No.: 10,428 Region Association: MidAtlantic Region |
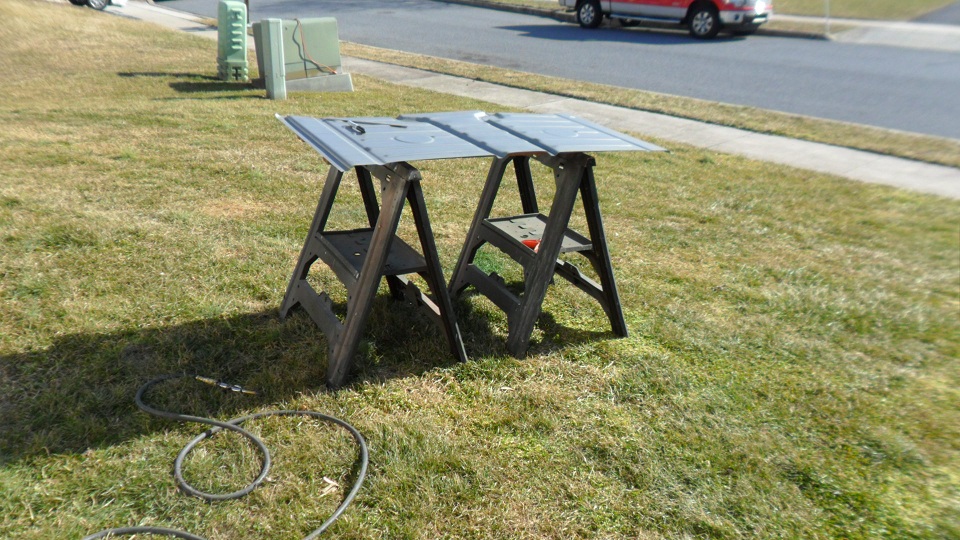
With the temperature over 40 on Sunday, I was able to cut down the new floor from Restoration Design outside. I bought the "rear floor pan half" and cut out the center tunnel, leaving enough of a flange to drill for rosette welds. My die grinder kept binding on me, so I switched to the angle grinder. Found it ironic that I ended up buying an entire floor pan after all the time spent fabricating and installing the rear section on both sides...lesson learned:
 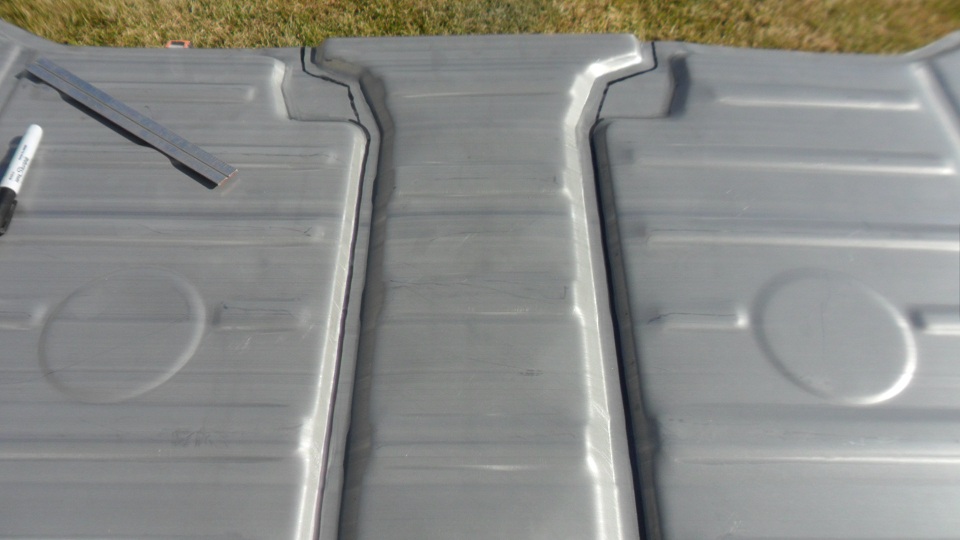   Finished sanding the rear trunk lid and banged on two coats of primer: 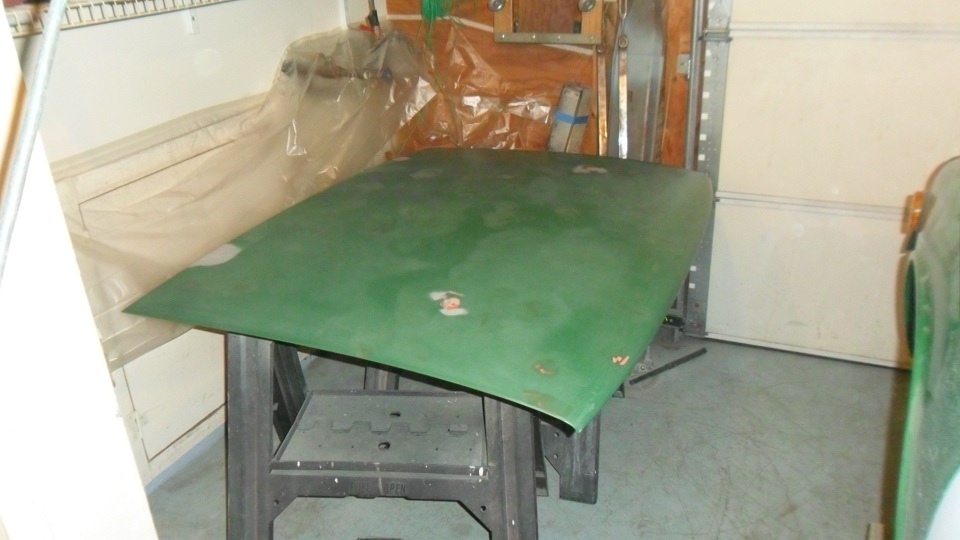 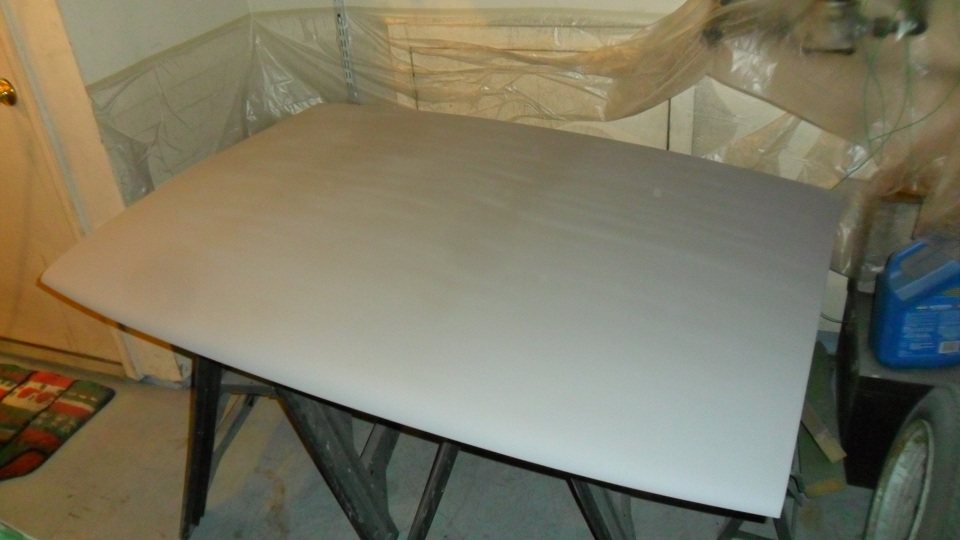 Finally got three of four bushings installed in the drop links for the rear sway bar. I did a lot of reading on how others did this before actually starting. After trying heat guns & boiling water on the stove, I ended up having my best results boiling the inserts in a coffee cup with water in the microwave, applying pressure with a vice and working the edges in with a small dull screwdriver. I ruined one before figuring out the technique & ordered a new set: 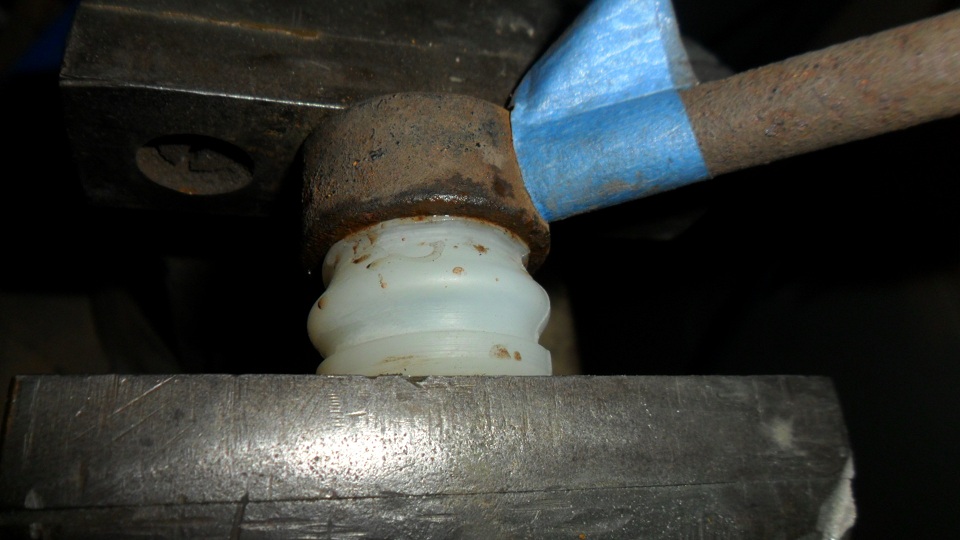 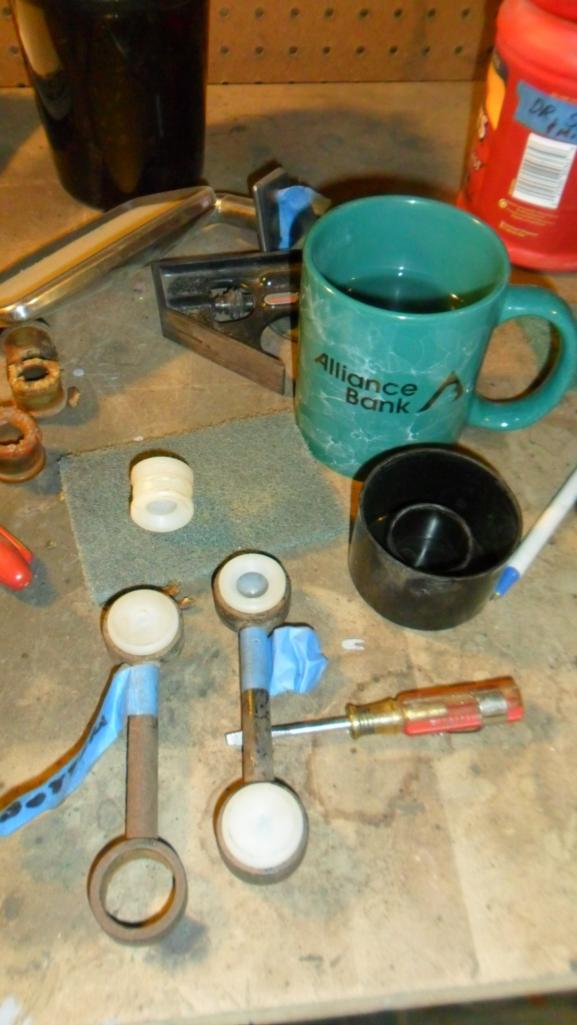 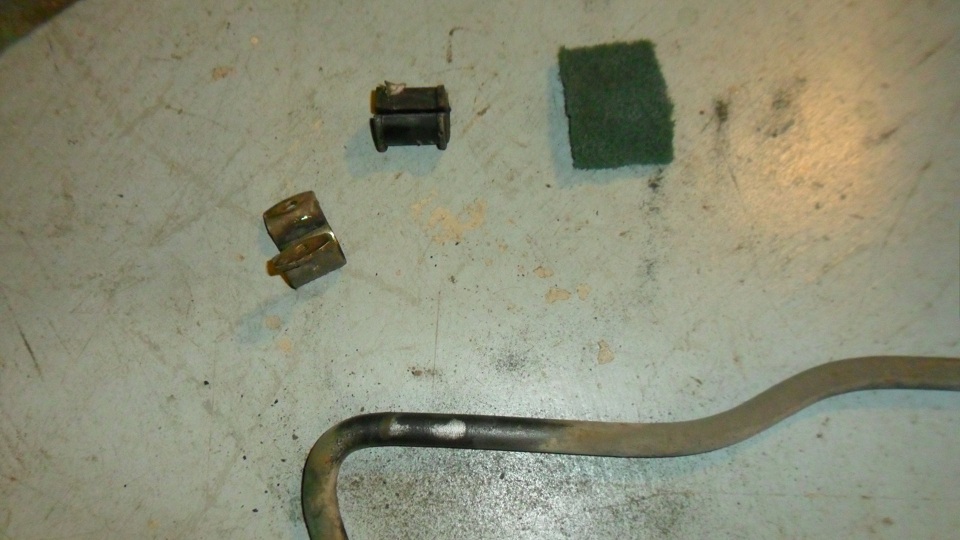 |
|
|
|
| saigon71 |
Feb 12 2013, 09:24 AM
Post
#318
|
|
Advanced Member Group: Members Posts: 2,007 Joined: 1-June 09 From: Dillsburg, PA Member No.: 10,428 Region Association: MidAtlantic Region |
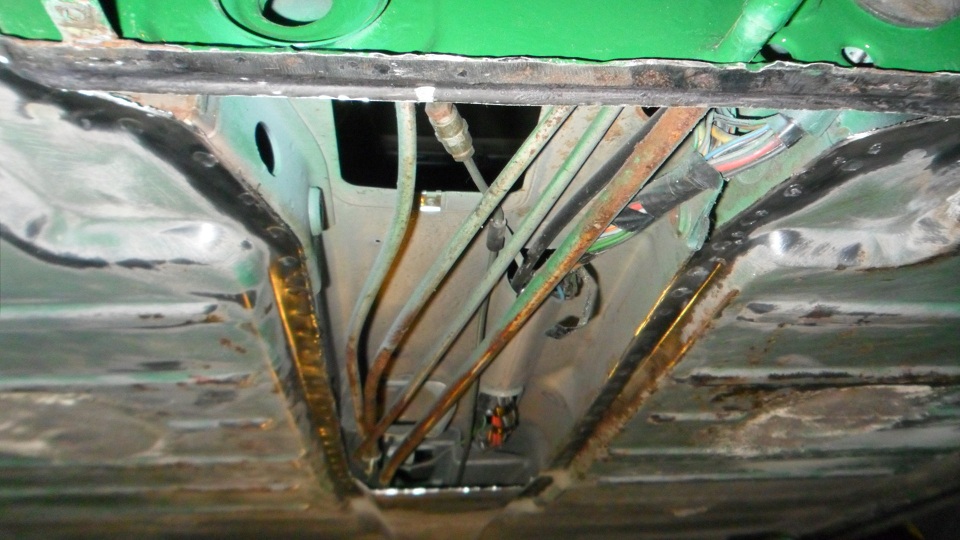
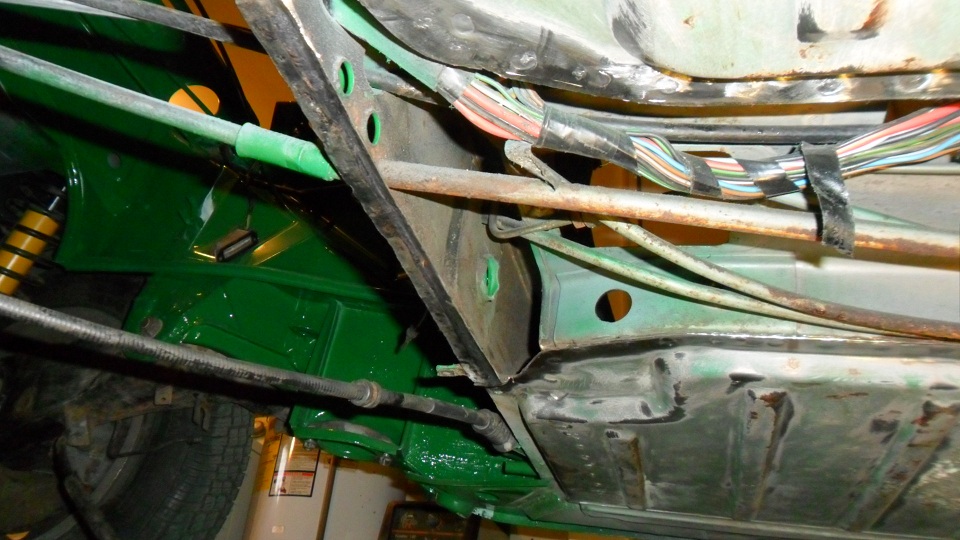
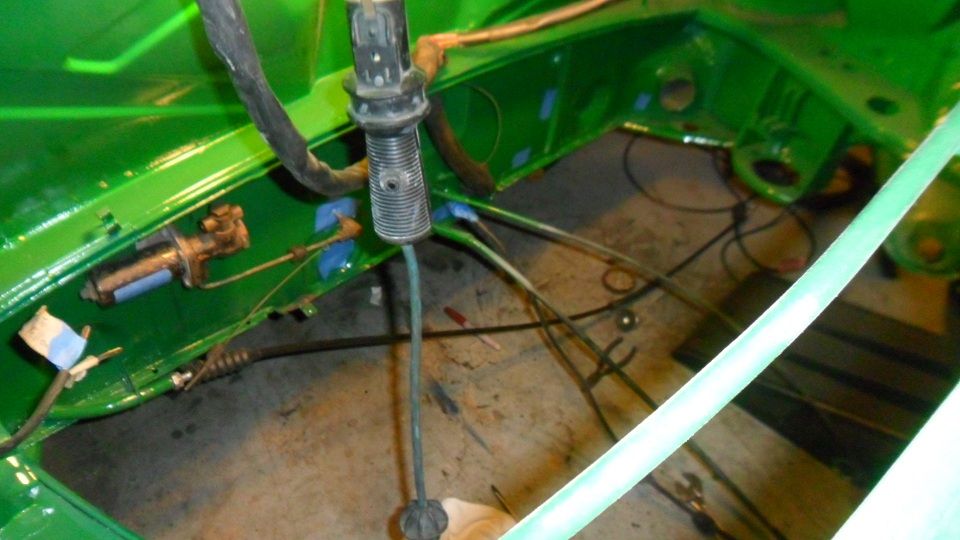
I realized that I would never have better access to some areas of the center tunnel & areas in between the inner & outer firewall than I do now. Ran an extension magnet in between the firewalls & tunnel & drug out a bunch of grinding dust. Followed up with a blast of compressed air, then applied a coat of Eastwoods "Internal Frame Coating" to all areas before buttoning up the bottom. I have an extension wand & nozzle that lets the product get into places that are otherwise unreachable:
        |
|
|
|
| saigon71 |
Feb 22 2013, 04:44 PM
Post
#319
|
|
Advanced Member Group: Members Posts: 2,007 Joined: 1-June 09 From: Dillsburg, PA Member No.: 10,428 Region Association: MidAtlantic Region |
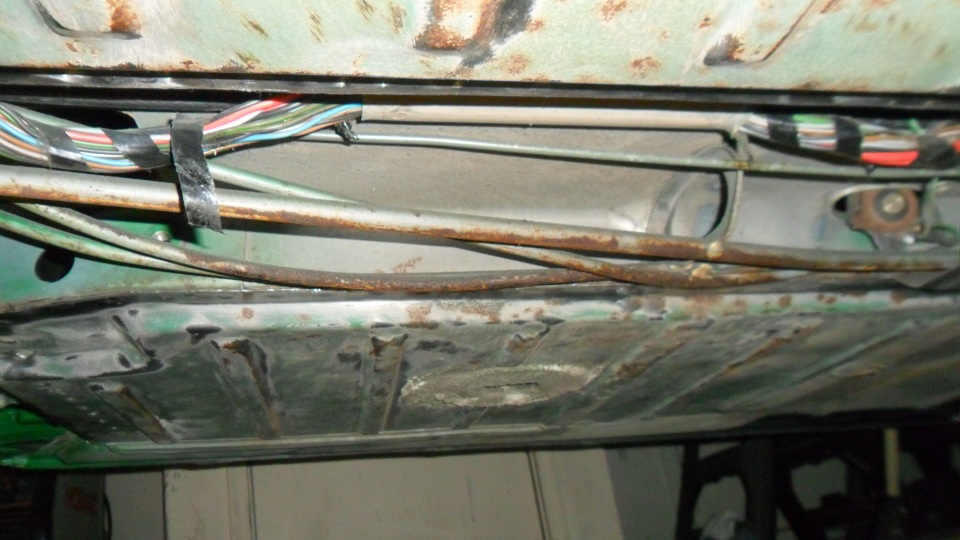
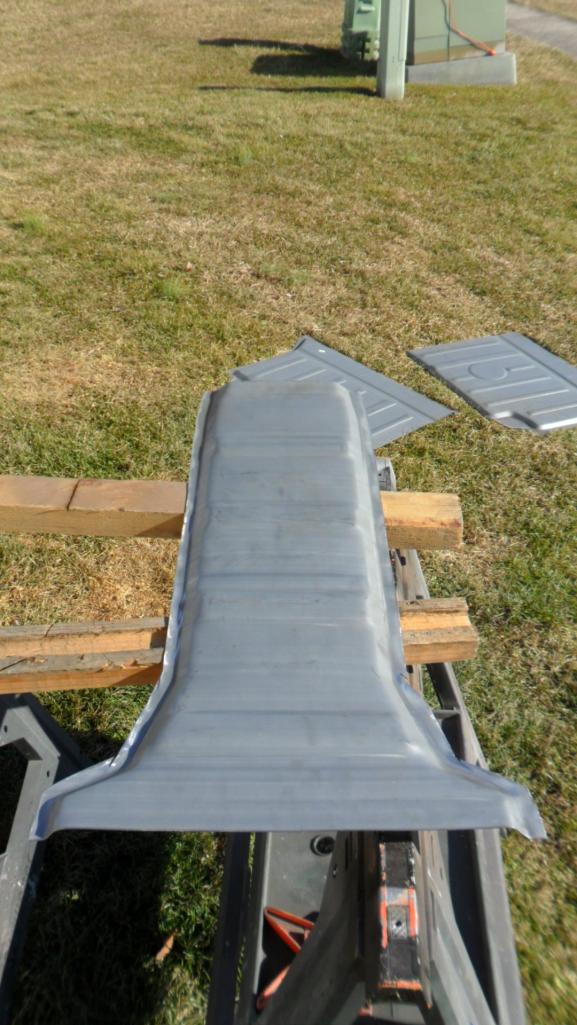
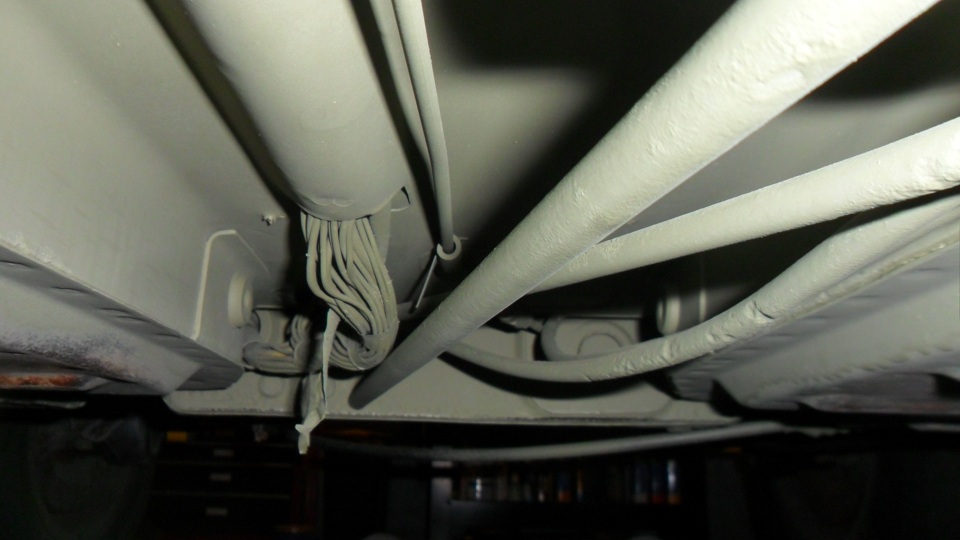
Fitted & installed the bottom section of tunnel on the car. Used a floor jack and an assortment of 2X4's to line everything up. Measured off the ridge of the remaining pan for proper fore/aft orientation. I was left will a little excess at the rear that had to be trimmed off. Drilled holes for rosette welds & coated everything with weld thru primer. Started at the rear and worked my way forward. Angle cut a 2X4 and used a bottle jack to apply up pressure along the sides & front.
My biggest concern was getting burned during this operation...I did not. After filling the first eight or so rosette welds, I pulled the welding helmet off and leaned up...forgetting that I had the rear trunklid on sawhorses very near my head. (IMG:style_emoticons/default/sad.gif) Managed to bury my scalp about 1/4" deep on the corner of the trunk lid & immediately had a face full of blood. Managed to get the bleeding stopped, so I was able to avoid a trip to urgent care for stitches. The head wound set me back a few days. 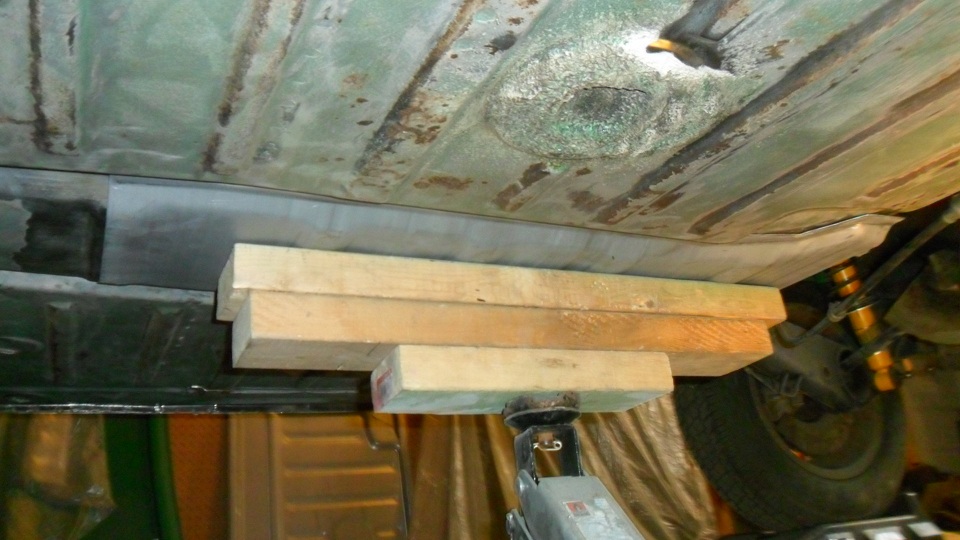 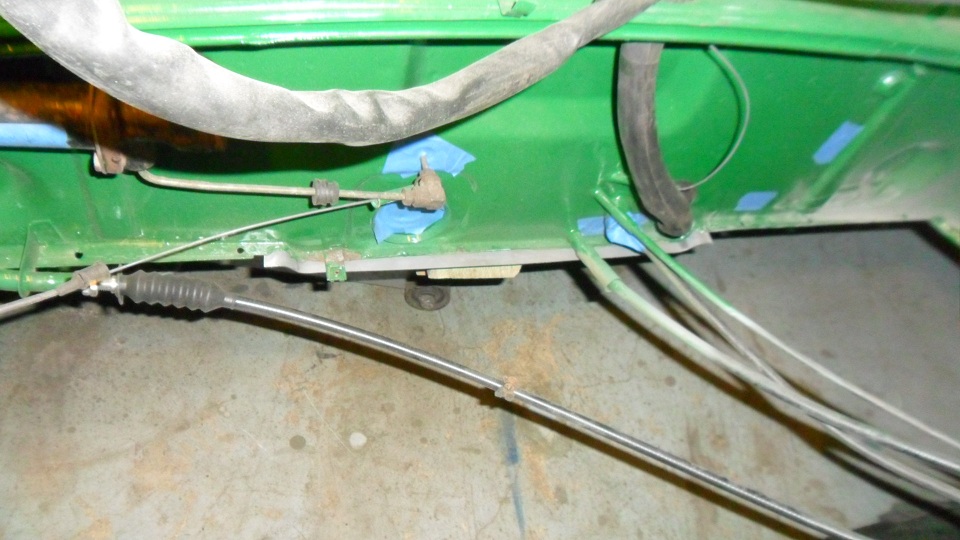 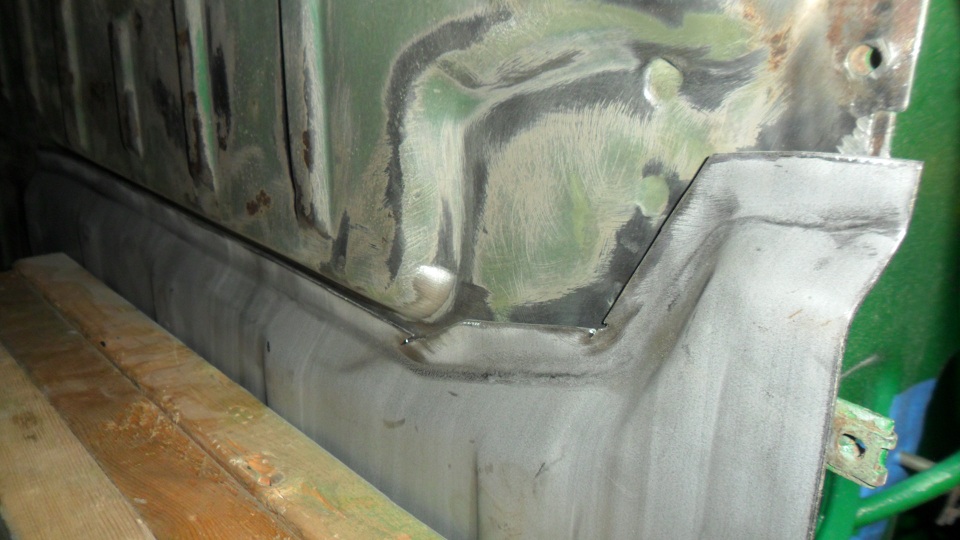 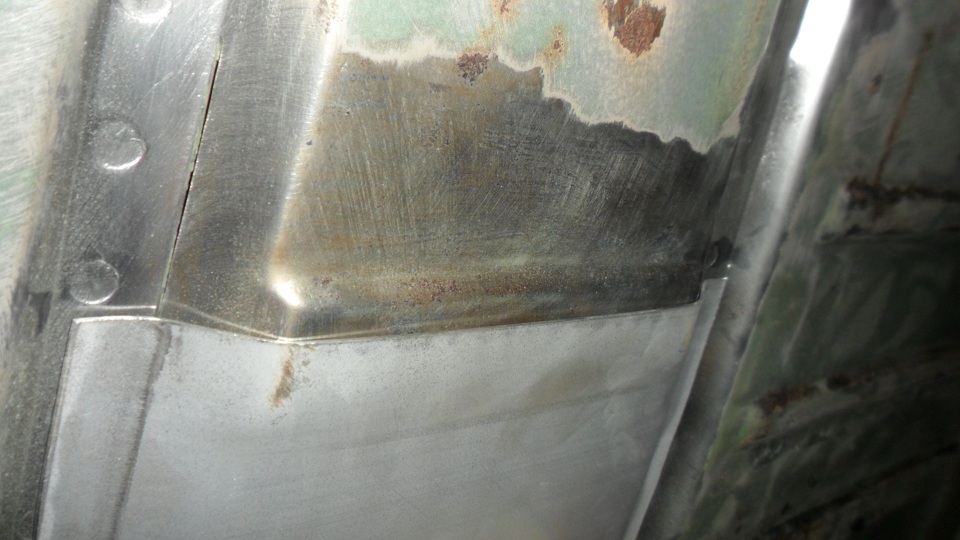 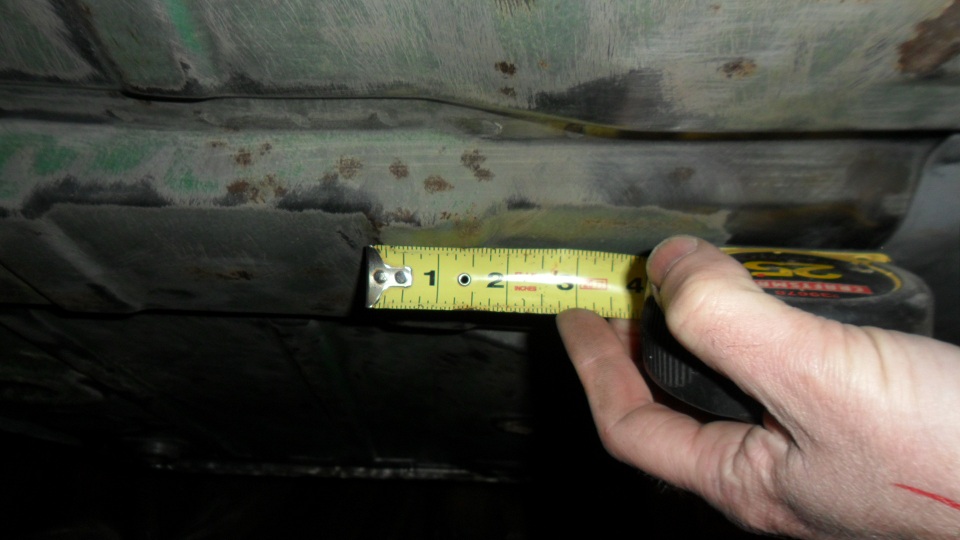 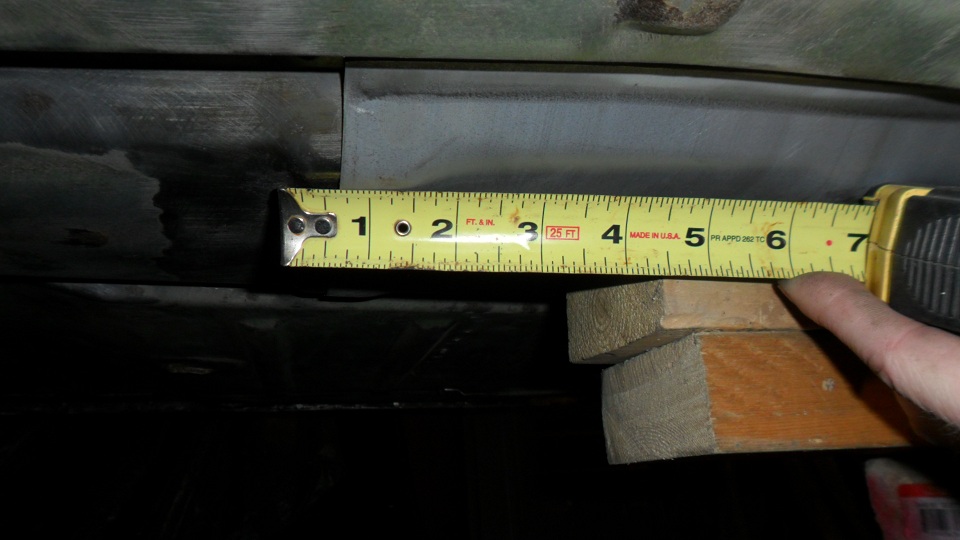 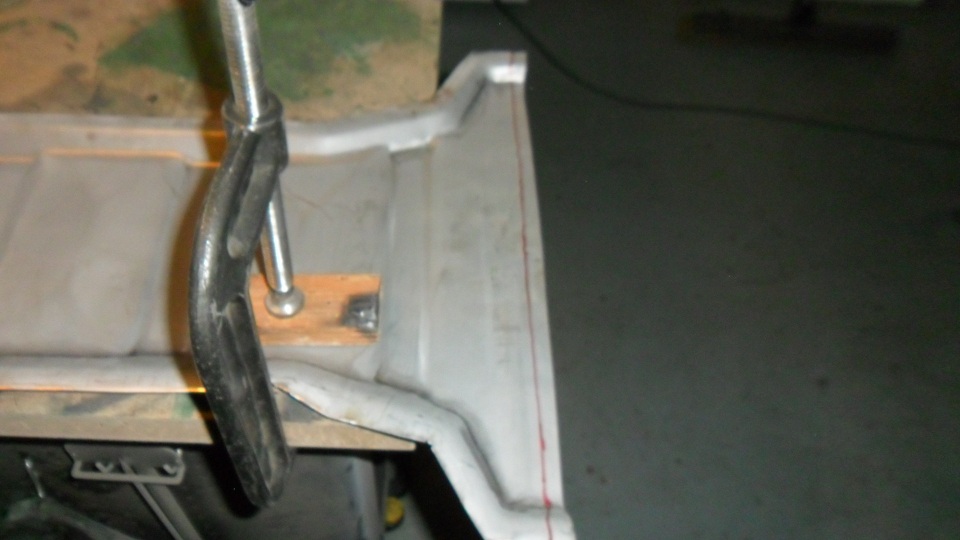 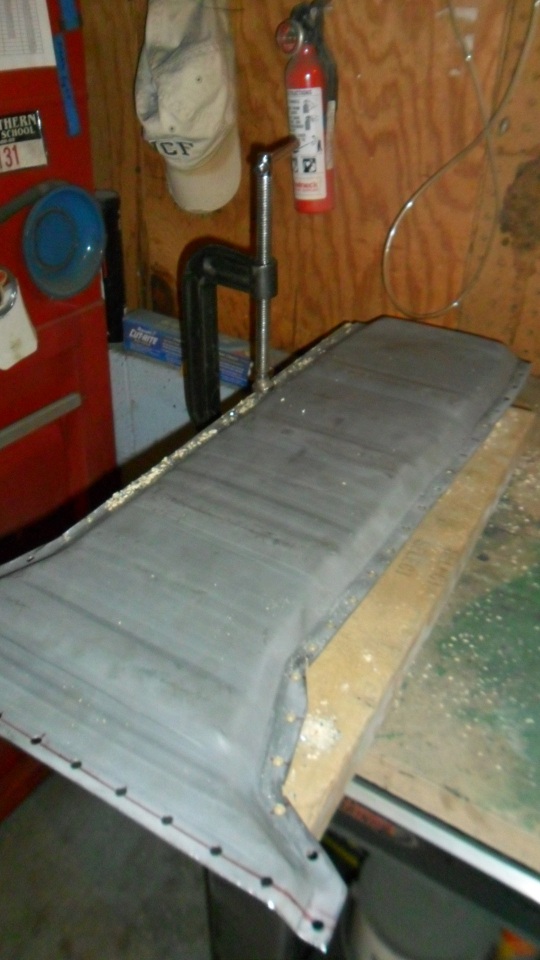  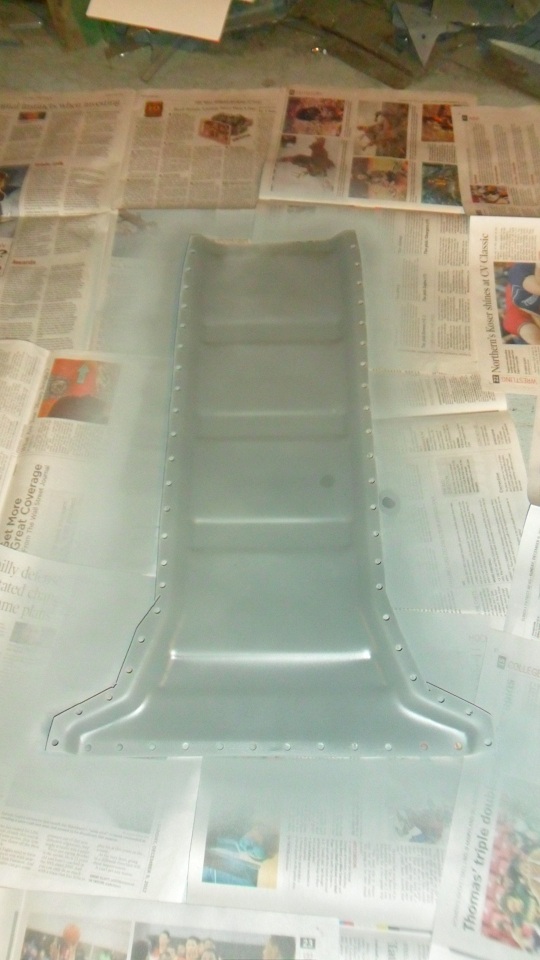 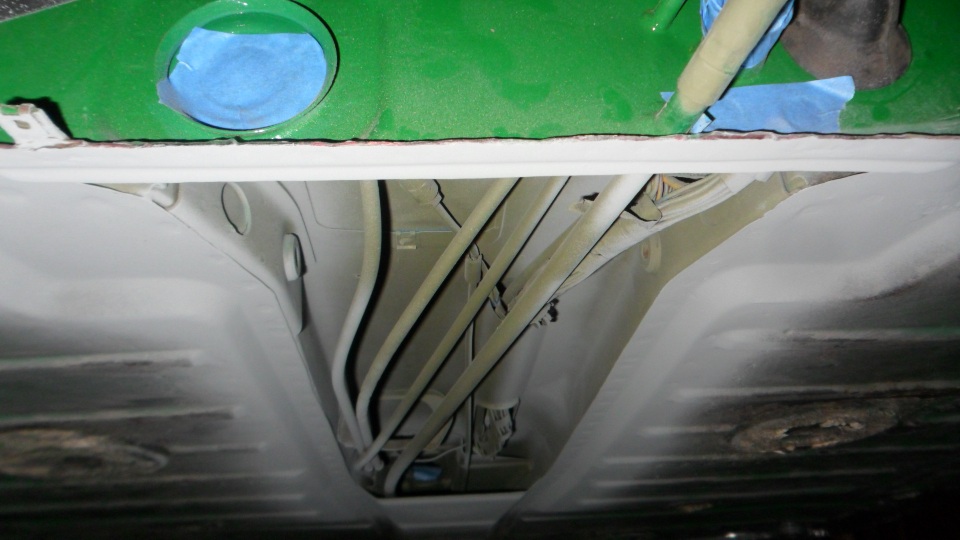 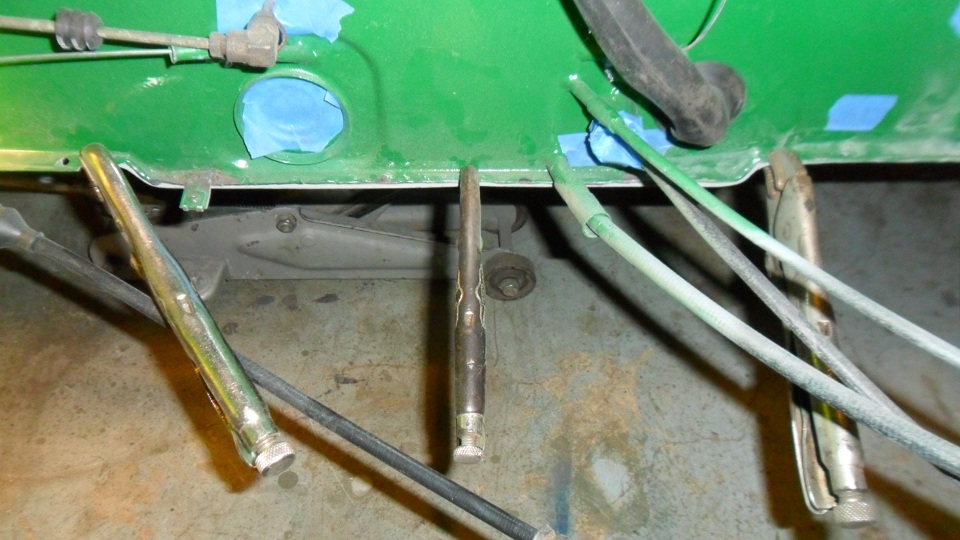 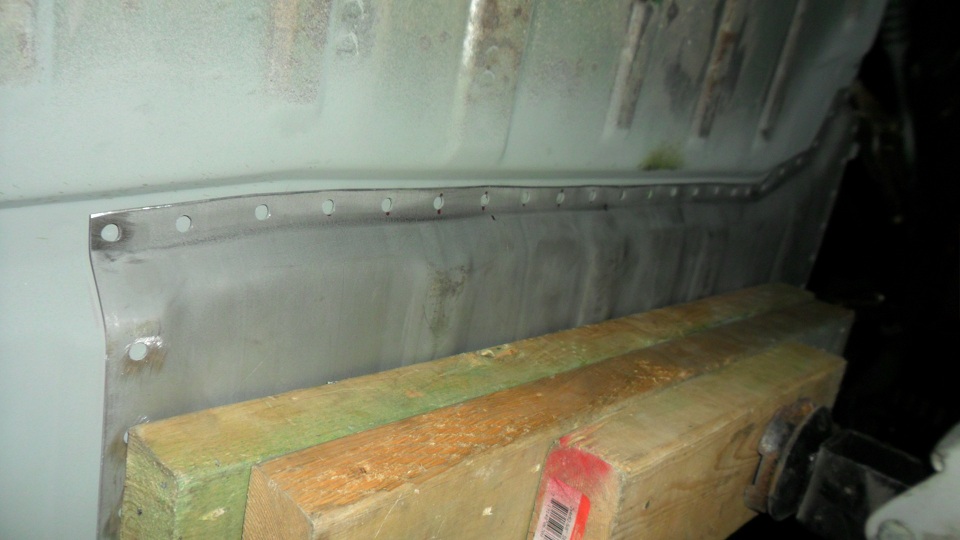 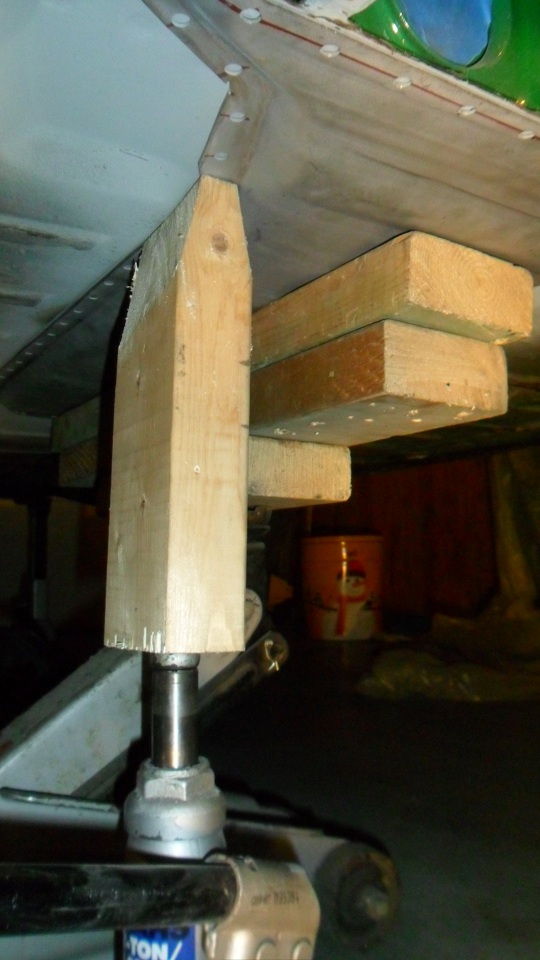 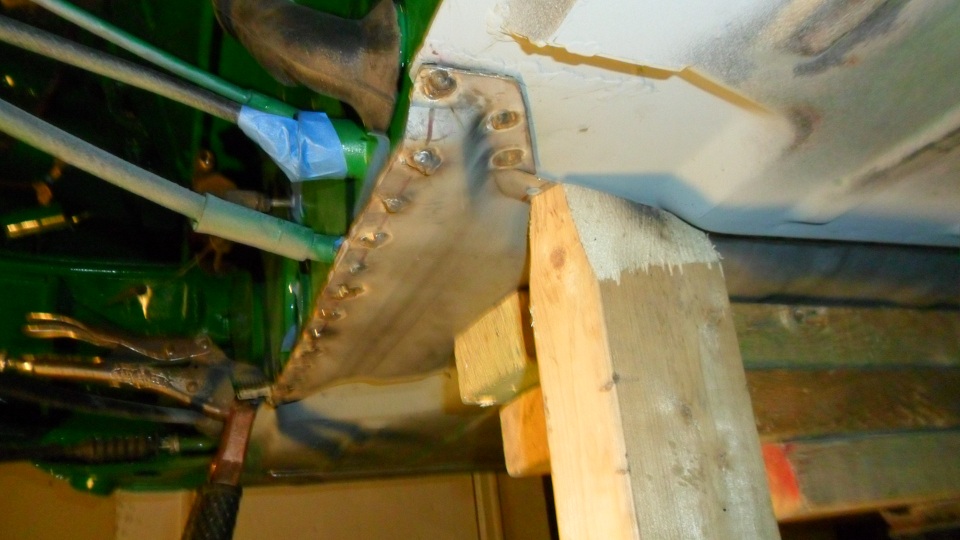 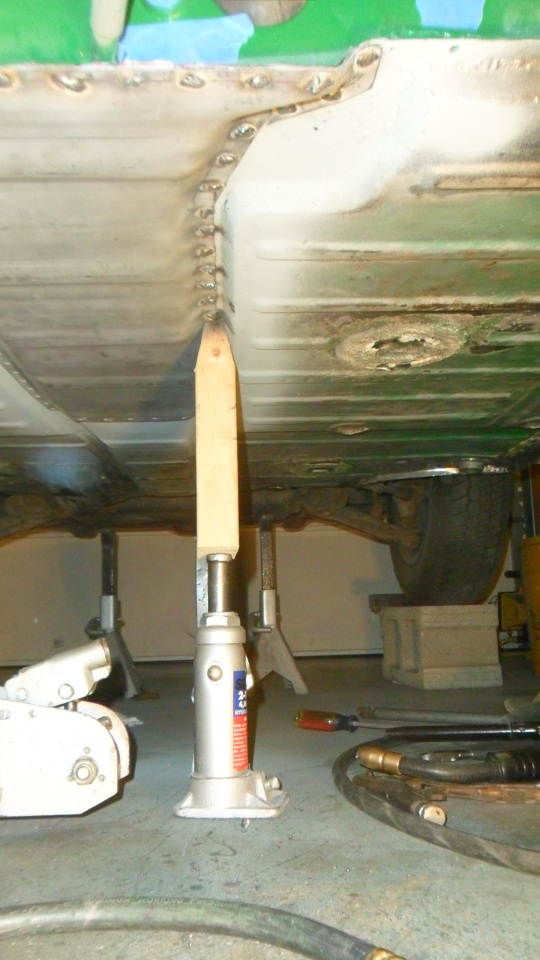 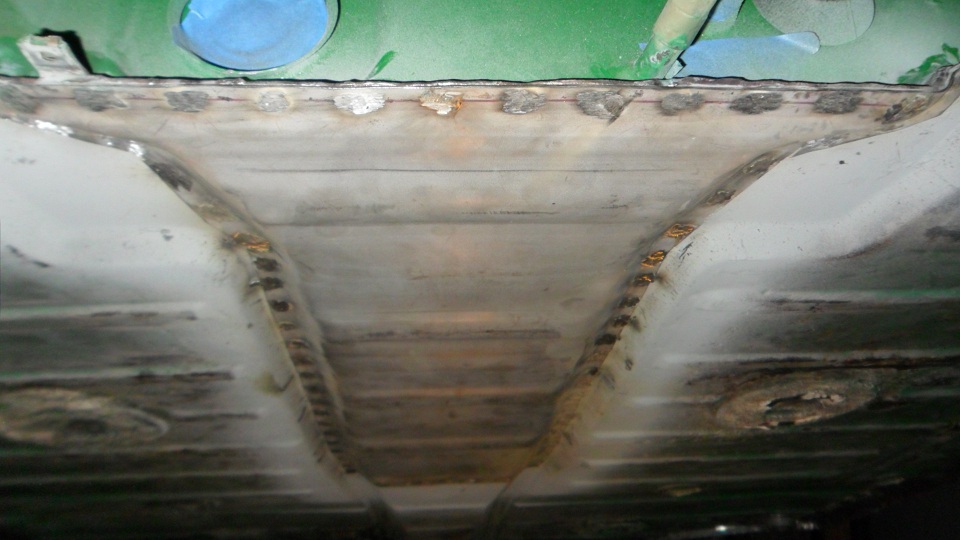 |
|
|
|
| saigon71 |
Feb 22 2013, 05:11 PM
Post
#320
|
|
Advanced Member Group: Members Posts: 2,007 Joined: 1-June 09 From: Dillsburg, PA Member No.: 10,428 Region Association: MidAtlantic Region |
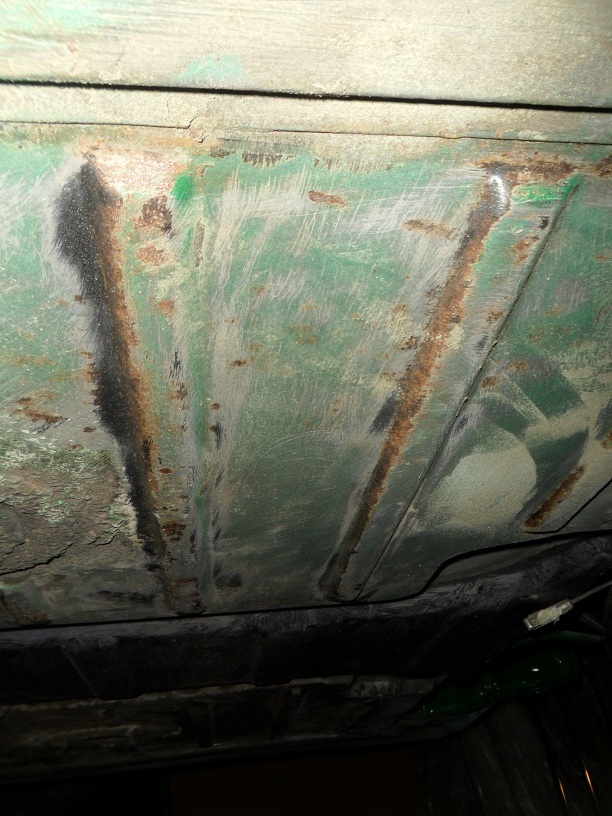
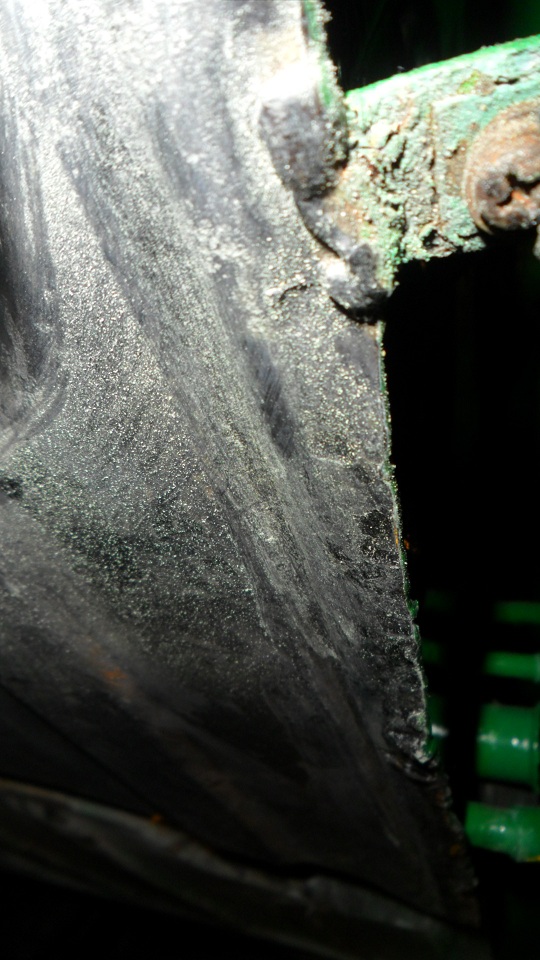
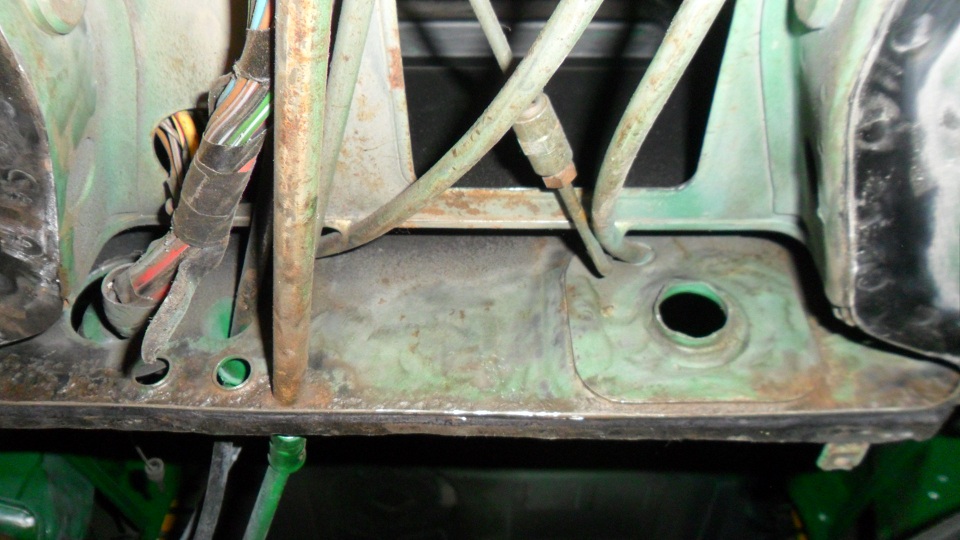
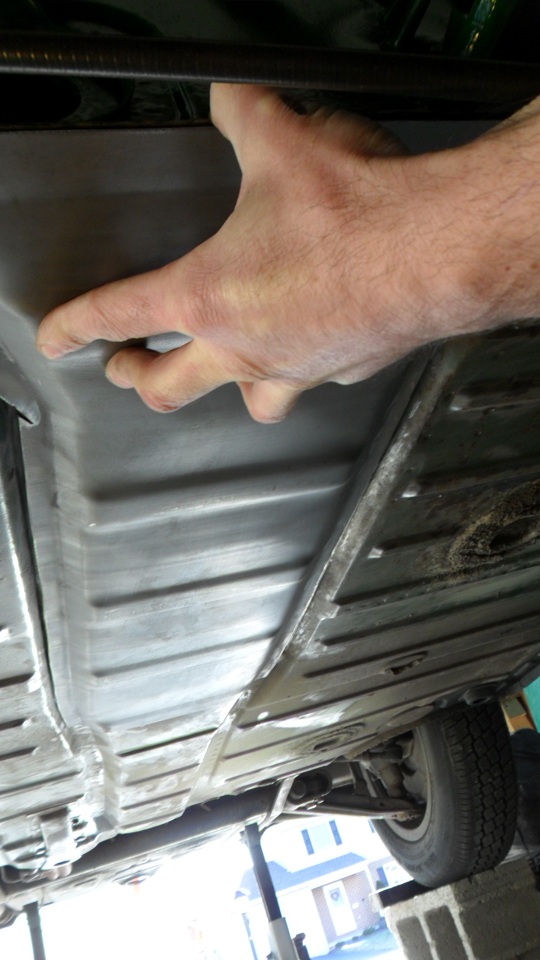
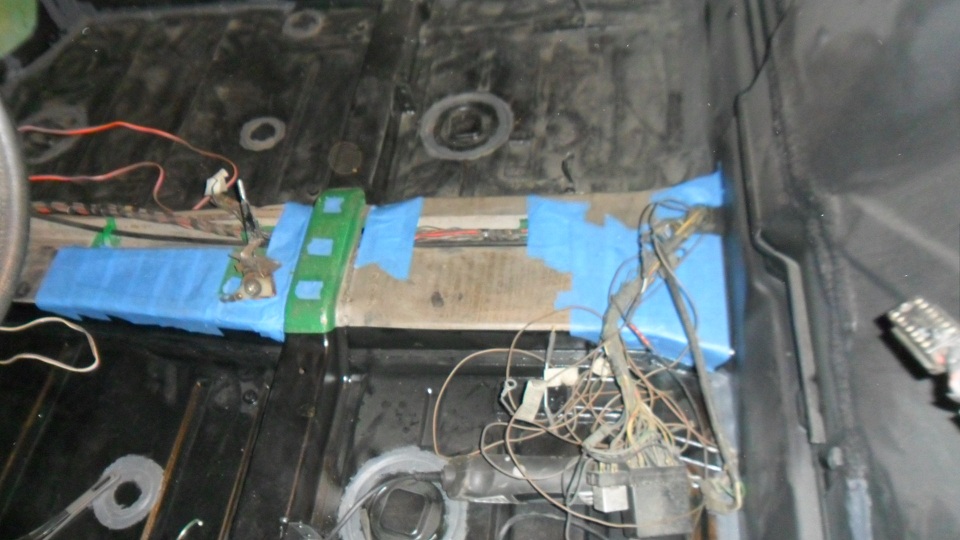
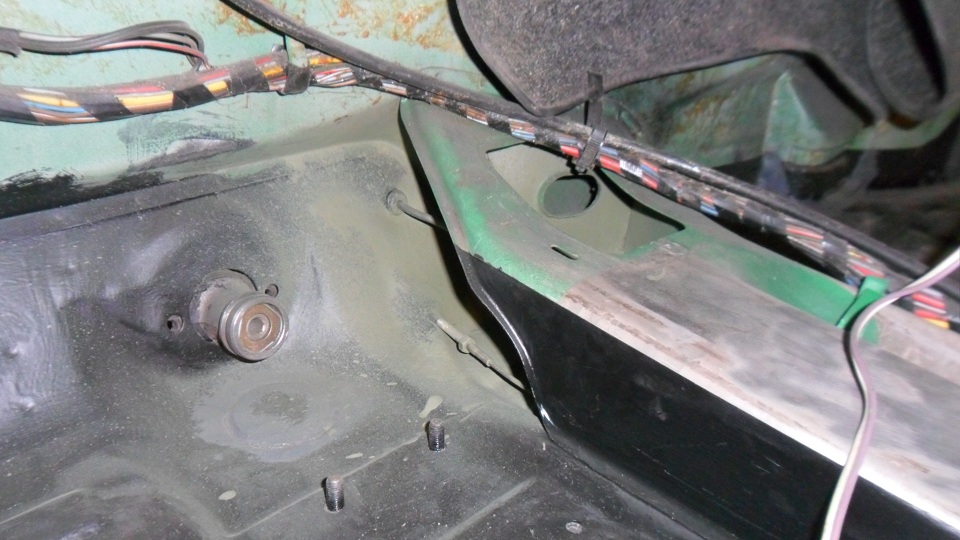
Refinishing the floor pan was supposed to be a weekend project for me after I got the car on the road. But after finding all the rust in the tunnel, I decided to knock it out now. Wire brushed all suspicious areas, blasted with compressed air, wiped everything down with mineral spirits and brushed on a coat of ospho. After seeing how much rust the old undercoating hid, I will be painting the pan with good old rustoleum so I can see if there are problems down the road:
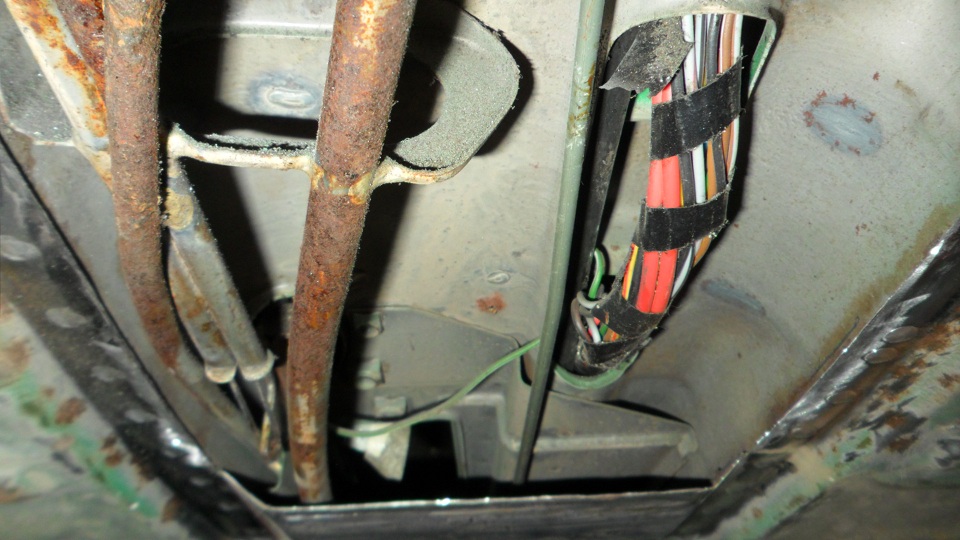
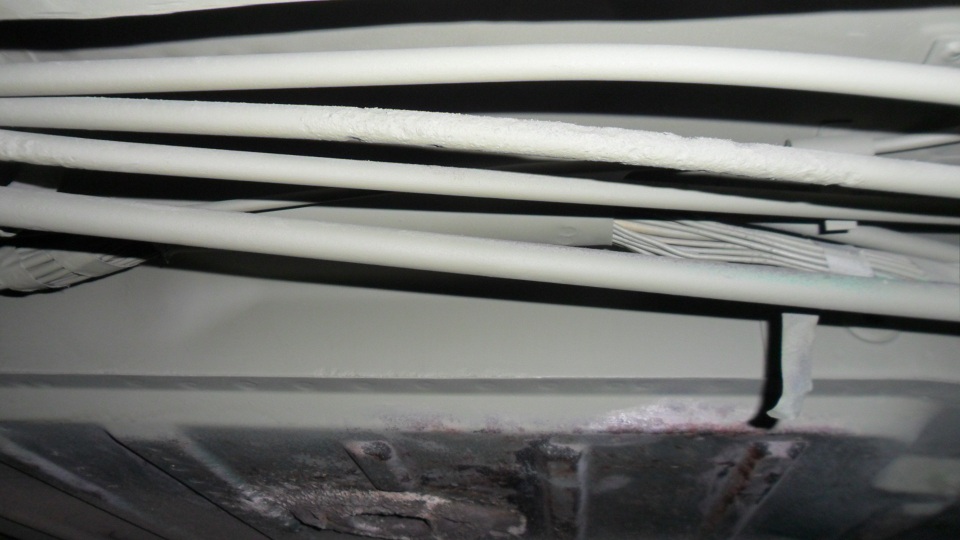
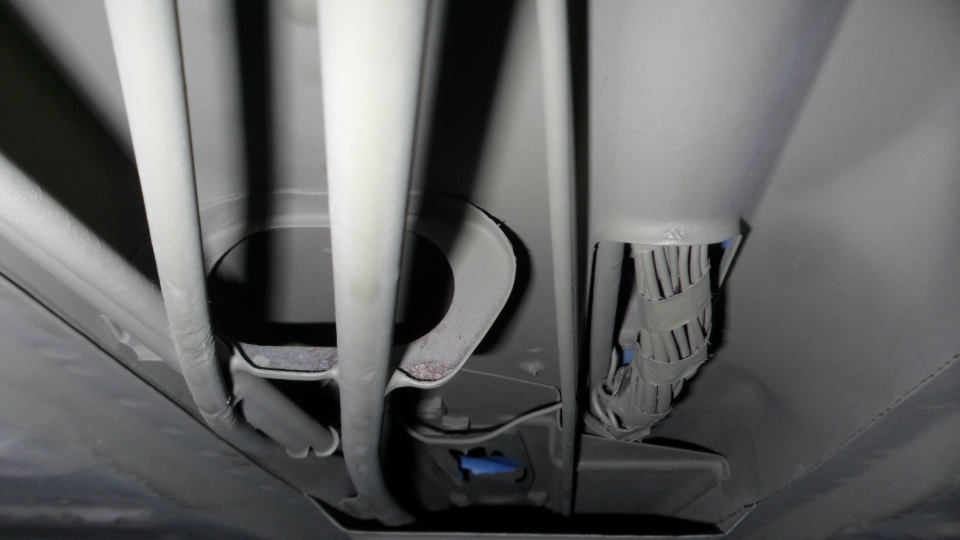
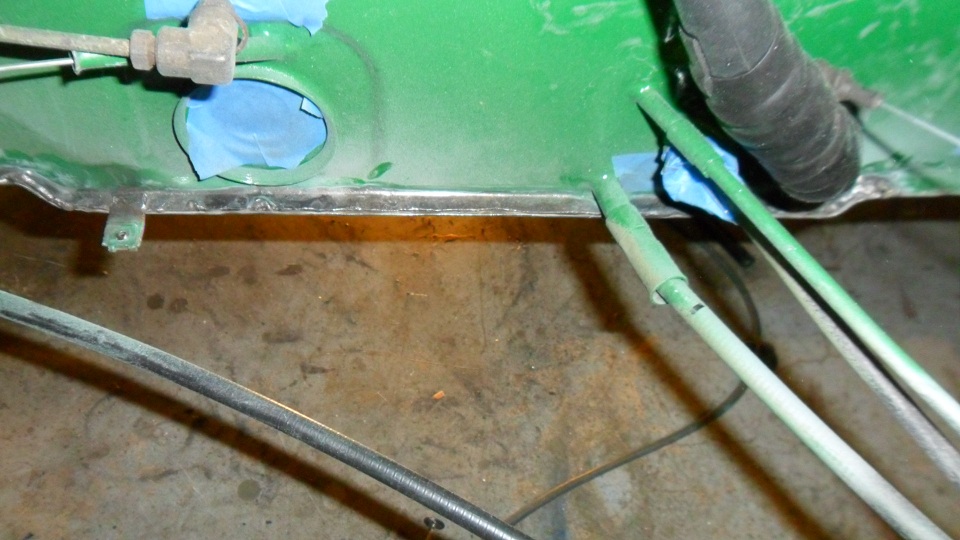  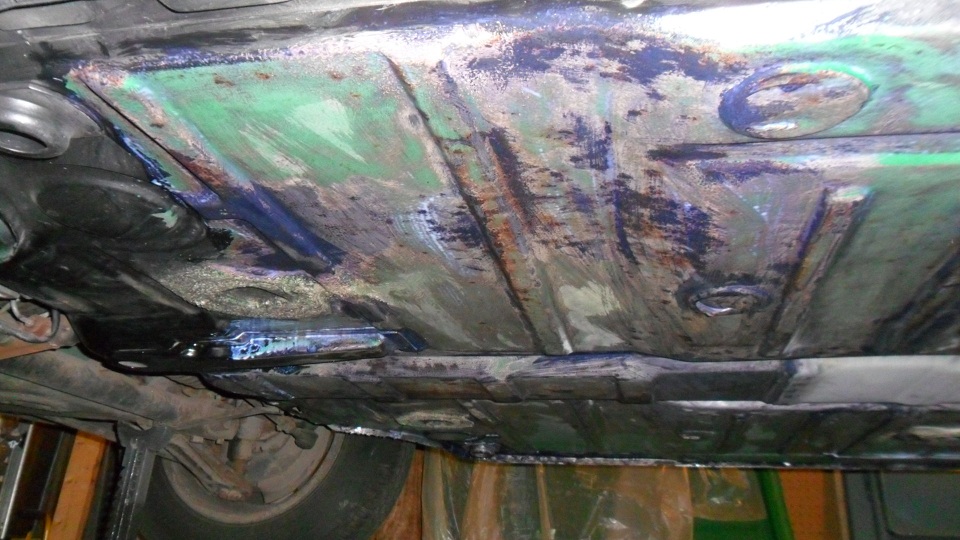 Burnt some of the rust encapsulator off the top side of the pan when welding from below. Hit the areas with a wire brush and brushed on another coat: 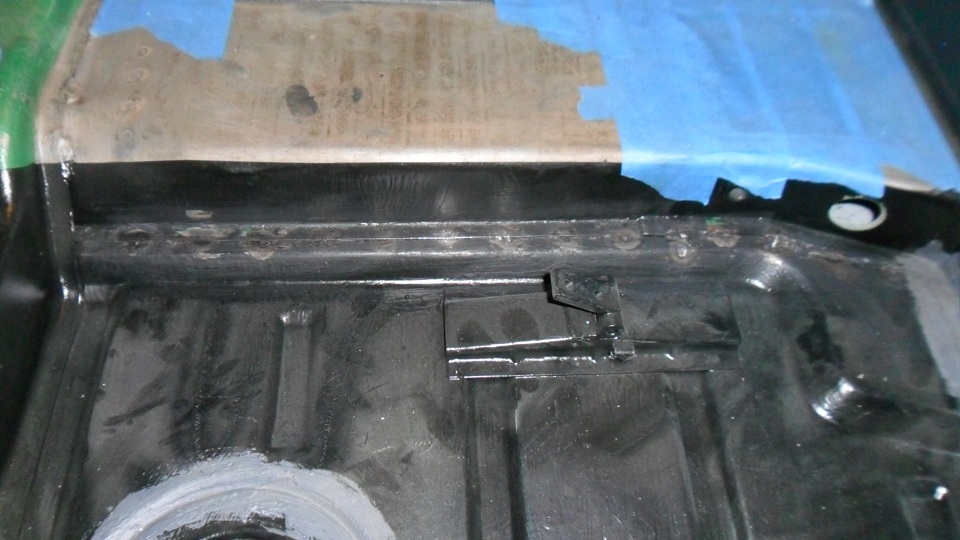  My snorkel tube had some holes near the bottom of it. I did not want to pull the wiring harness out to install one from 914 rubber, so I used some mastic rubber waterproof tape...I am pleased with how it turned out and hope it will hold up over time: 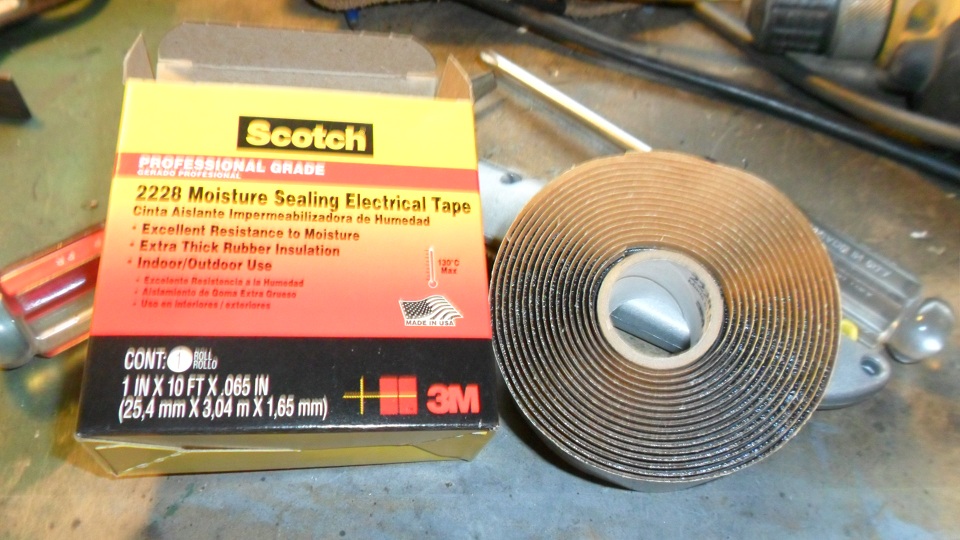 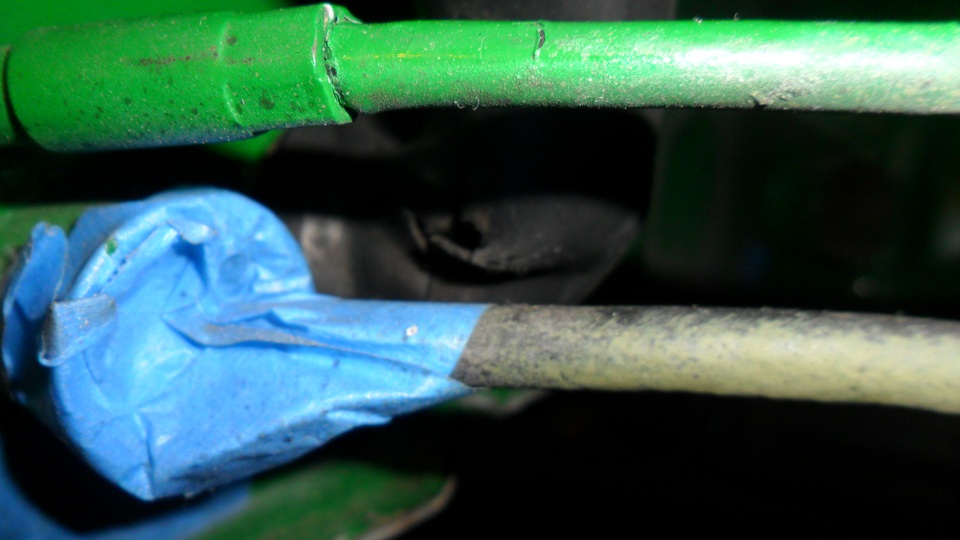 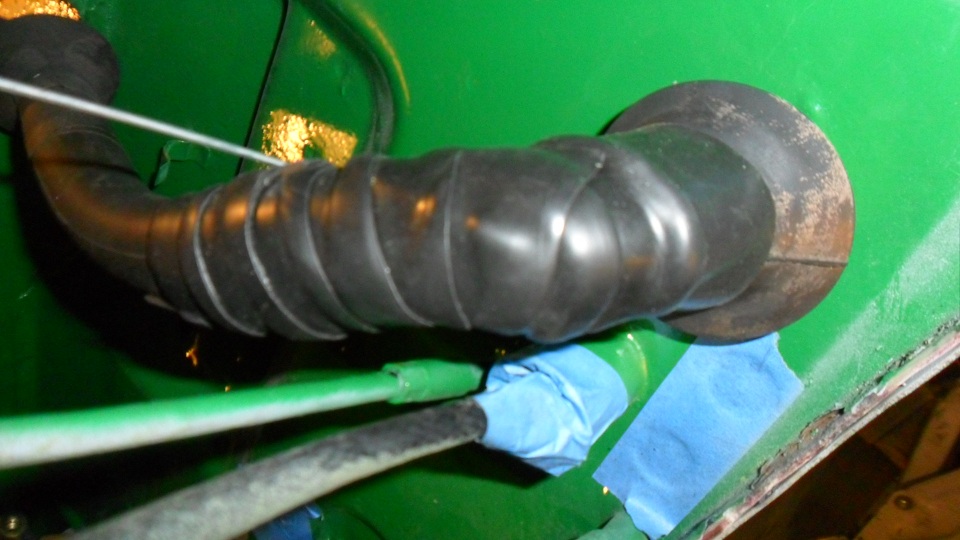 The dishwasher did a great job cleaning the rear trunk seals: 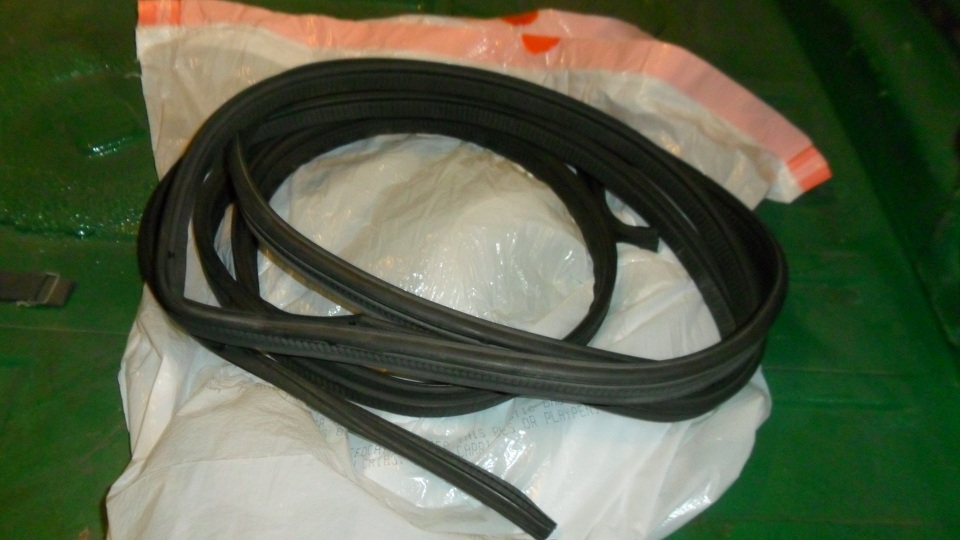 |
|
|
|
|
2 User(s) are reading this topic (2 Guests and 0 Anonymous Users)
0 Members:

|
Lo-Fi Version | Time is now: 6th January 2025 - 03:10 AM |
Invision Power Board
v9.1.4 © 2025 IPS, Inc.