|
|

|
Porsche, and the Porsche crest are registered trademarks of Dr. Ing. h.c. F. Porsche AG.
This site is not affiliated with Porsche in any way. Its only purpose is to provide an online forum for car enthusiasts. All other trademarks are property of their respective owners. |
|
|
  |
| jsayre914 |
 Jun 22 2011, 04:13 PM Jun 22 2011, 04:13 PM
Post
#61
|
|
Speed Up !!!     Group: Members Posts: 3,206 Joined: 10-February 08 From: Timonium MD 21093 Member No.: 8,696 Region Association: MidAtlantic Region |
(IMG:style_emoticons/default/smilie_pokal.gif)
Wow Bob, your almost done, Looks great!! (IMG:style_emoticons/default/smile.gif) |
| dlee6204 |
 Jun 22 2011, 04:19 PM Jun 22 2011, 04:19 PM
Post
#62
|
|
Howdy     Group: Members Posts: 2,162 Joined: 30-April 06 From: Burnsville, NC Member No.: 5,956 |
Wow, keep up the good work! (IMG:style_emoticons/default/smilie_pokal.gif)
|
| Series9 |
 Jun 23 2011, 07:05 PM Jun 23 2011, 07:05 PM
Post
#63
|
|
Lesbians taste like chicken.      Group: Members Posts: 5,444 Joined: 22-August 04 From: DeLand, FL Member No.: 2,602 Region Association: South East States |
It's nice to watch someone else work. (IMG:style_emoticons/default/sunglasses.gif)
You're doing a great job. Keep it up. (IMG:style_emoticons/default/beerchug.gif) |
| scotty b |
 Jun 23 2011, 07:24 PM Jun 23 2011, 07:24 PM
Post
#64
|
|
rust free you say ?                Group: Members Posts: 16,375 Joined: 7-January 05 From: richmond, Va. Member No.: 3,419 Region Association: None |
It's nice to watch someone else work. (IMG:style_emoticons/default/sunglasses.gif) You're doing a great job. Keep it up. (IMG:style_emoticons/default/beerchug.gif) (IMG:style_emoticons/default/agree.gif) |
| saigon71 |
 Jul 20 2011, 02:37 PM Jul 20 2011, 02:37 PM
Post
#65
|
|
Advanced Member     Group: Members Posts: 2,006 Joined: 1-June 09 From: Dillsburg, PA Member No.: 10,428 Region Association: MidAtlantic Region 

|
Problems with both the Mazda and motorcycle have cut into my 914 time over the last few weeks, but I was able to get some more done.
Drilled holes in new metal patch on drivers side, installed new allen bolts and re-ran front hood cable. 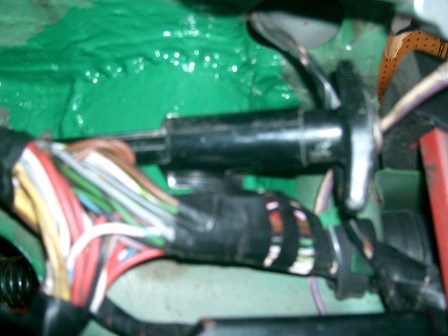 Took a wire wheel to the inner wheelhouse section to prep for primer...discovered a lot of surface rust in ths area that will require treatment before primer. 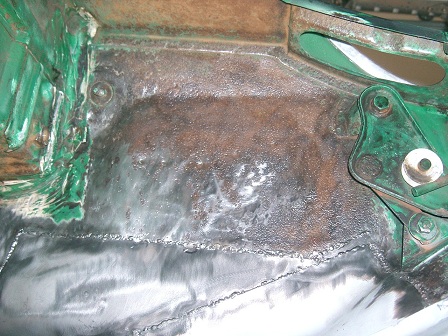 After reading other build threads on here, I have been pretty vigilant about keeping an eye on the door gaps and taking my time welding to keep the heat down. I have made a couple of small tweaks along the way, but the gaps have held well. Checking gaps after welding in the upper wheelhouse section, there was a more noticeable difference. After some adjustments to the turnbuckle, I was able to able to get it within .030" of the drivers side and still have the door close OK. The door now requires more effort to close it and will need some final tweaking. 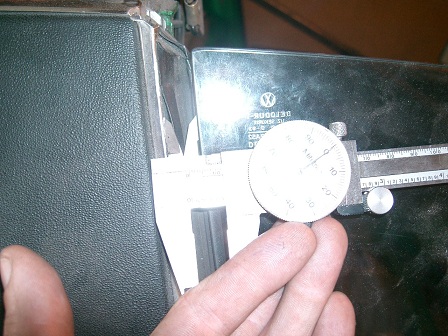 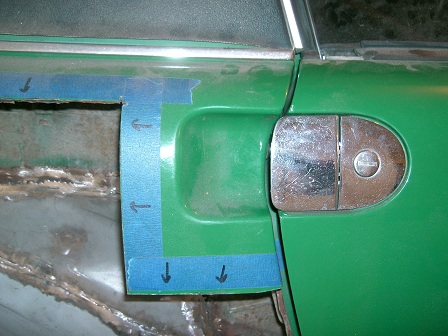 |
| saigon71 |
 Jul 20 2011, 02:47 PM Jul 20 2011, 02:47 PM
Post
#66
|
|
Advanced Member     Group: Members Posts: 2,006 Joined: 1-June 09 From: Dillsburg, PA Member No.: 10,428 Region Association: MidAtlantic Region 

|
Ended up with a bit of a mess where the floorpan meets the firewall on the passenger side & will have to make pieces to fill the areas. Hindsight being 20/20, I would have bought this section(s) welded them in and been done by now.
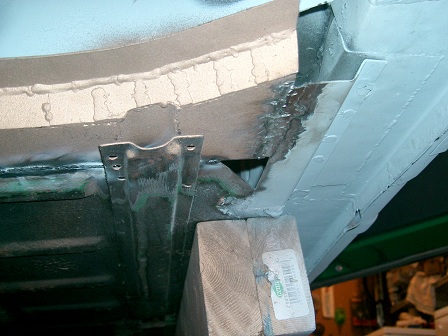 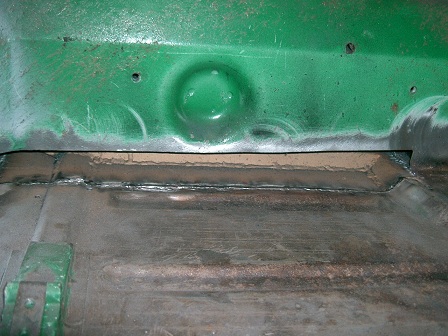 Needed to fabricate the verticals of both the inner and outer firewall. I was able to get a close measurement by measuring the rise of the old piece and adding the width of the metal cutting wheel. Something warped in the floor, leaving too narrow of a gap on the outside. Had to drive a solid wedge between the original firewall and new floorpan to pry these apart for the correct spacing and weld a chunk in to hold it in place. The wood splitting mall was crude but effective. 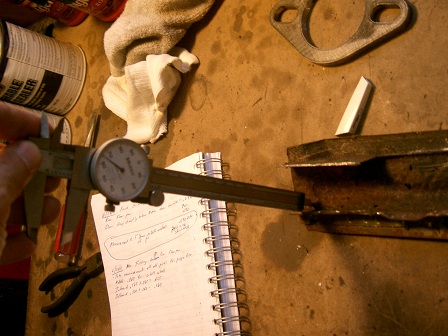 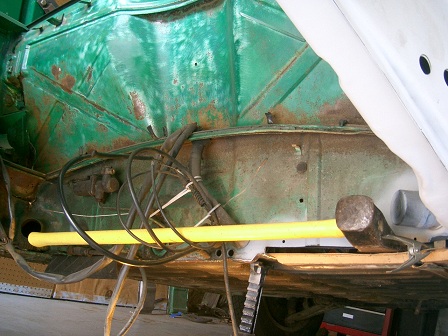 |
| saigon71 |
 Jul 20 2011, 02:52 PM Jul 20 2011, 02:52 PM
Post
#67
|
|
Advanced Member     Group: Members Posts: 2,006 Joined: 1-June 09 From: Dillsburg, PA Member No.: 10,428 Region Association: MidAtlantic Region 

|
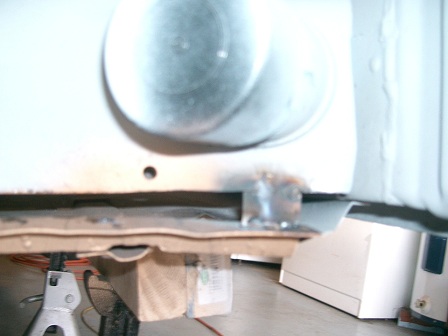 Outer firewall patch: 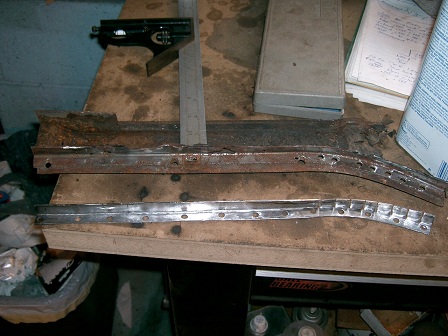 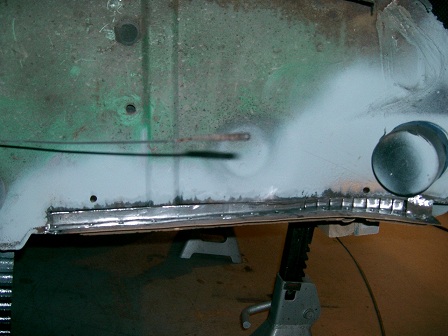 |
| saigon71 |
 Jul 20 2011, 02:56 PM Jul 20 2011, 02:56 PM
Post
#68
|
|
Advanced Member     Group: Members Posts: 2,006 Joined: 1-June 09 From: Dillsburg, PA Member No.: 10,428 Region Association: MidAtlantic Region 

|
For the front firewall patch, I opted to make a template to simplify things:
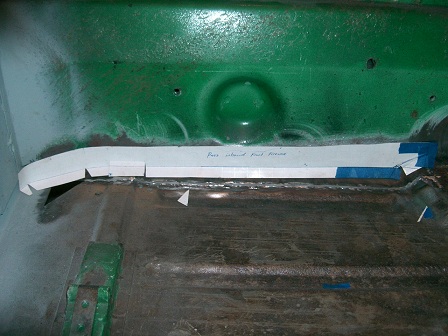 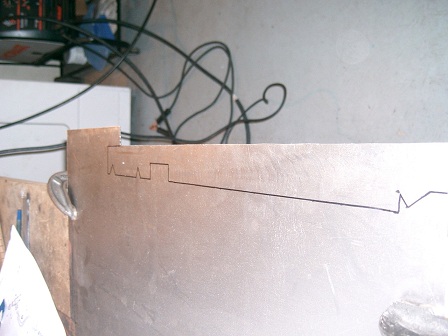 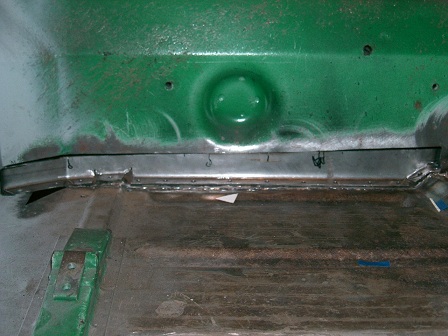 Both pieces finished: 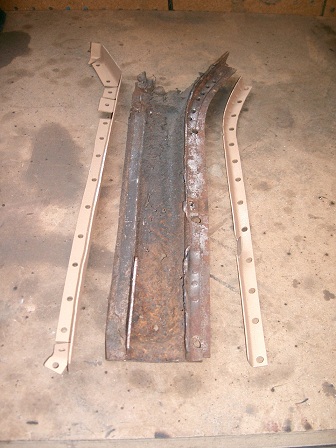 |
| AndyB |
 Jul 20 2011, 06:16 PM Jul 20 2011, 06:16 PM
Post
#69
|
|
The Governor is watching me    Group: Members Posts: 1,115 Joined: 10-April 10 From: Philadelphia New York Member No.: 11,595 Region Association: North East States |
Bob you are making great progress keep it up
|
| saigon71 |
 Aug 2 2011, 07:45 PM Aug 2 2011, 07:45 PM
Post
#70
|
|
Advanced Member     Group: Members Posts: 2,006 Joined: 1-June 09 From: Dillsburg, PA Member No.: 10,428 Region Association: MidAtlantic Region 

|
Welded in the lower inner vertical firewall piece:
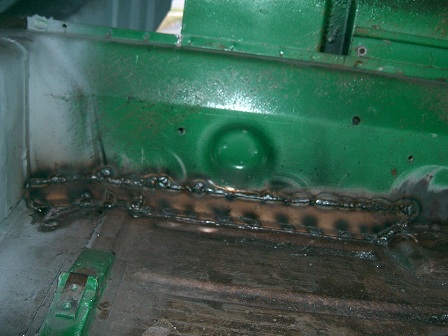 I had a large rusted section above the long on the firewall that had to be farbricated and replaced. Went with a posterboard template to get the shape accurate: 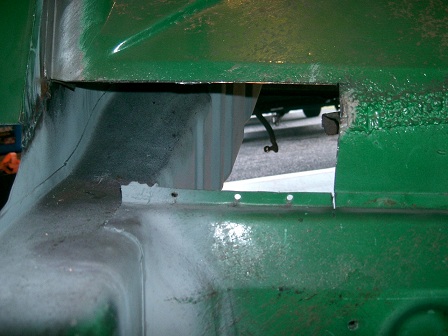 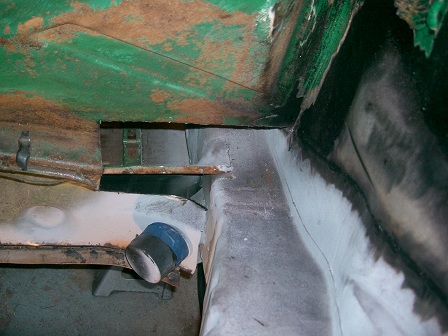 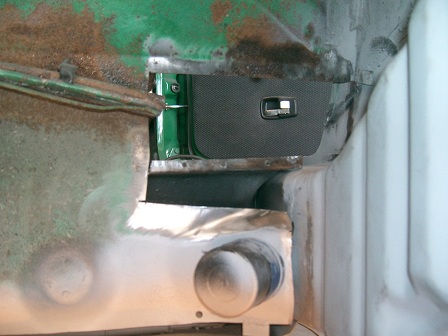 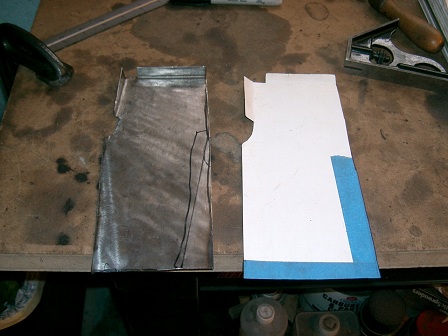 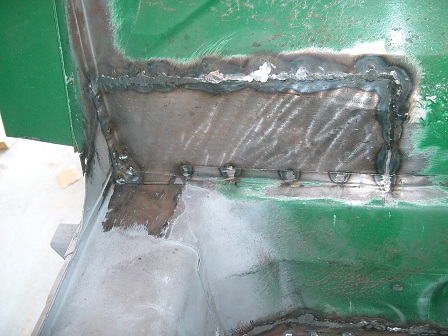 Finally, a solid inner floorpan on the passenger side! (IMG:style_emoticons/default/beerchug.gif) I decided to prep this 1/4 of the pan for finish...one coat of rust converter applied: 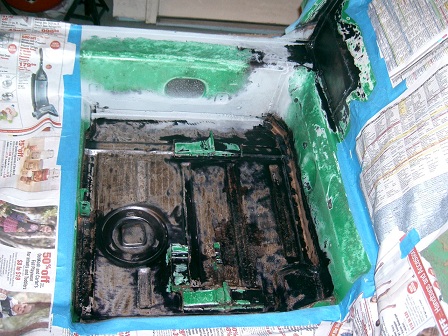 |
| jonferns |
 Aug 2 2011, 07:55 PM Aug 2 2011, 07:55 PM
Post
#71
|
|
Advanced Member     Group: Members Posts: 2,081 Joined: 29-March 07 From: New Jersey Member No.: 7,631 Region Association: North East States 
|
Nice work (IMG:style_emoticons/default/smilie_pokal.gif)
|
| hot_shoe914 |
 Aug 2 2011, 08:31 PM Aug 2 2011, 08:31 PM
Post
#72
|
|
on ramp passer     Group: Members Posts: 3,806 Joined: 20-November 07 From: Earle, Ar. Member No.: 8,354 Region Association: None |
Looking good Bob, I better see this car at Hershey if I drive up for the 3rd year in a row. (IMG:style_emoticons/default/first.gif)
|
| saigon71 |
 Aug 30 2011, 06:04 PM Aug 30 2011, 06:04 PM
Post
#73
|
|
Advanced Member     Group: Members Posts: 2,006 Joined: 1-June 09 From: Dillsburg, PA Member No.: 10,428 Region Association: MidAtlantic Region 

|
Seeing two stellar teeners at Matt's cookout as hurricane Irene approached made me realize it was time to get back to work.
18 GA patch pieces were made to close up the hole in the outer firewall: 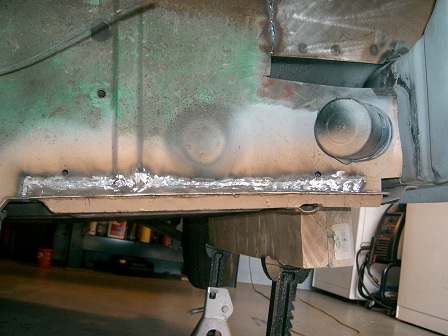 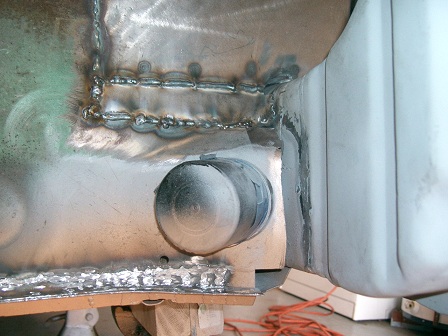 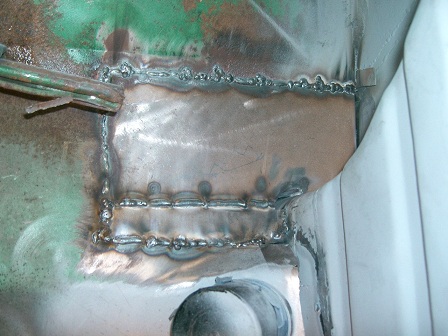 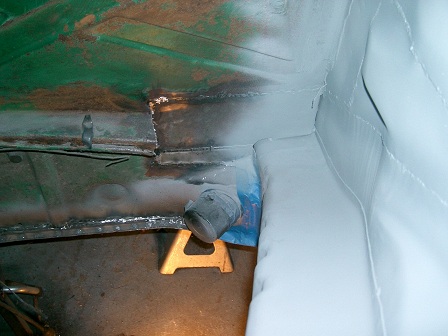 Finished the rear passenger side floor pan on the inside. Two coats ospho (on rusty areas) followed by two coats rust bullet (again, only on rusty or pitted areas) two coats rust encapsulator and new seam sealer. It was nice to look at a small section of the car and say "this is done." (IMG:style_emoticons/default/biggrin.gif) 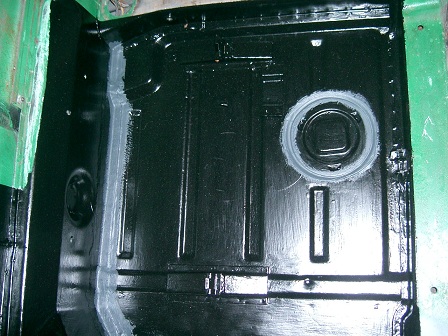 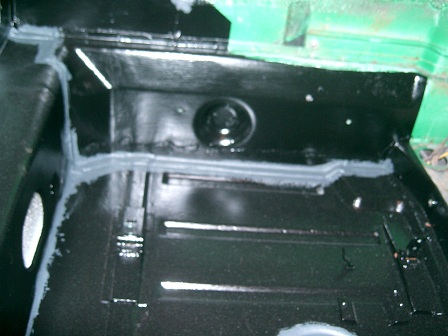 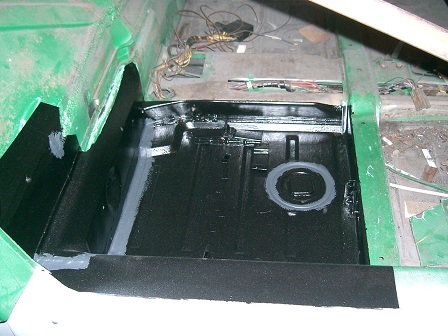 The jigsaw puzzle that is the rear floor pan on the passenger side continues to get pieced together. It became very complicated trying to make this part all in one shot, so I decided to go with a section at a time and weld it all together: 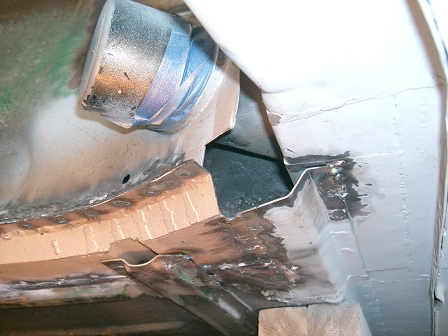 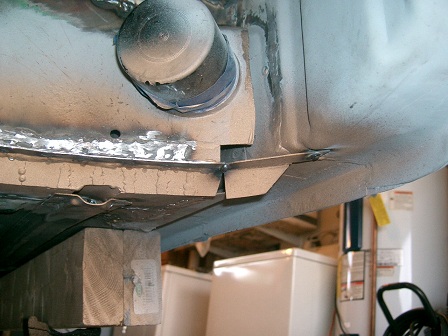 Experienced some cracking after applying the initial primer on the upper wheelhouse. I suspect it is from over-doing it on the rust converter, as I have run into this before using the product. From now on, I will only apply one coat. Wire brushed affected areas and re-sprayed primer: 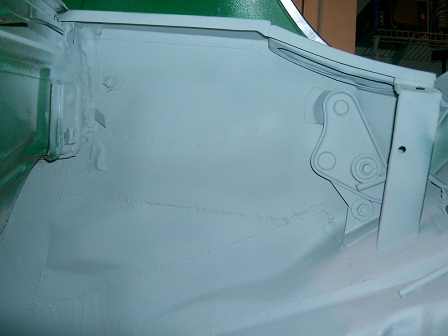 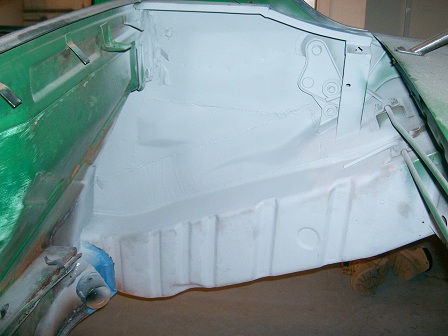 |
| saigon71 |
 Sep 4 2011, 05:22 AM Sep 4 2011, 05:22 AM
Post
#74
|
|
Advanced Member     Group: Members Posts: 2,006 Joined: 1-June 09 From: Dillsburg, PA Member No.: 10,428 Region Association: MidAtlantic Region 

|
My welding skills have improved significantly, but it still seems like I spend a ton of time grinding...
Tying the firewall, floorpan, and inner long together has been a challenge. Two small patch panels were fabricated and welded in where the outer firewall curves rearward to meet the inner long. Final piece welded into the floorpan where it meets the long. Took the wire wheel to the whole area to prep for a light Ospho treatment in one area and I hope to get this area primed tomorrow: 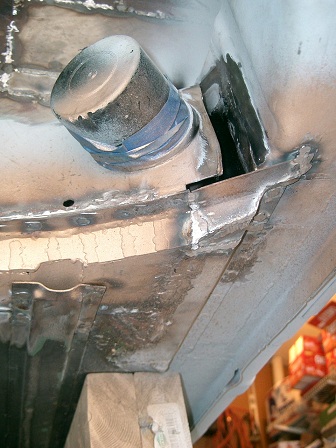 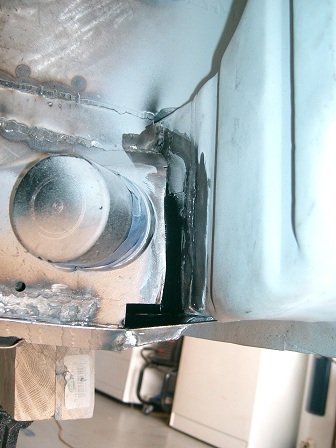 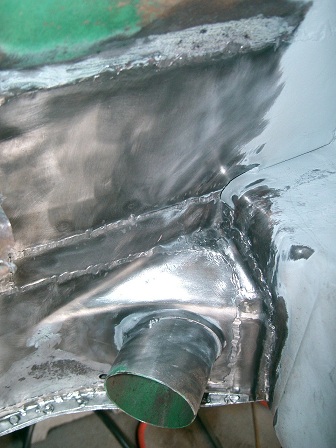 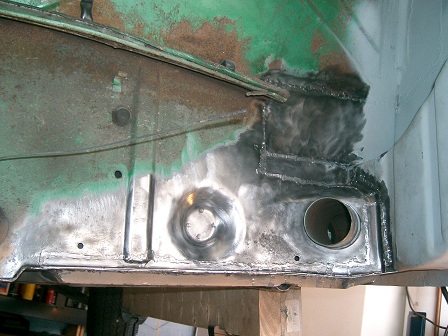 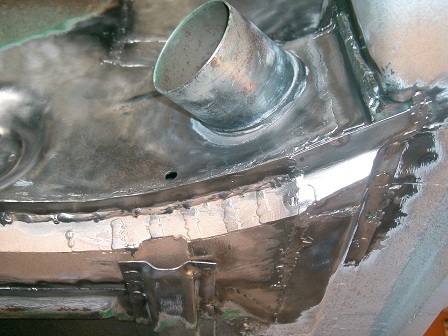 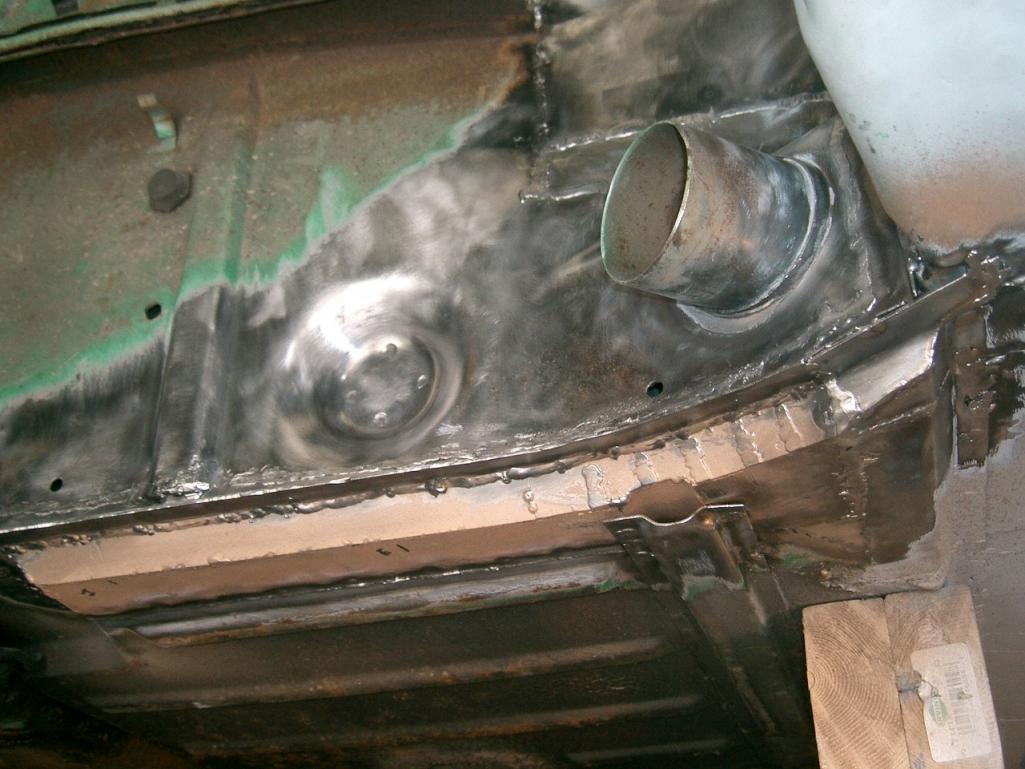 Tomas donated a used set of plastic MC lines to the cause as my originals were accidently strafed by a wire wheel. While the Ospho was drying, I installed them, taking any means possible not to disturb the new master cylinder. Thanks Tomas! Started cleaning up my rusty muffler bracket as well: 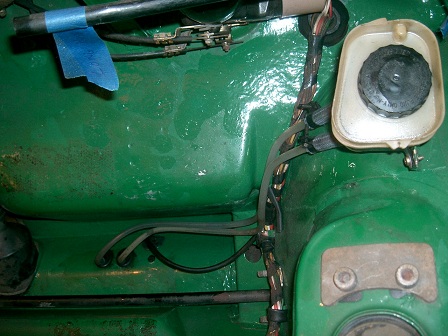 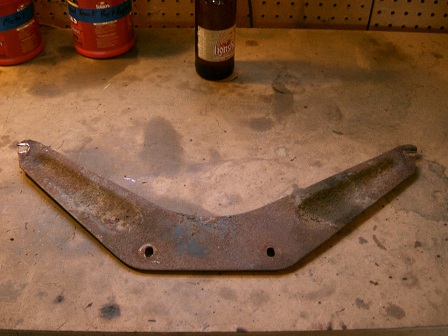 |
| FourBlades |
 Sep 4 2011, 11:38 AM Sep 4 2011, 11:38 AM
Post
#75
|
|
From Wreck to Rockin     Group: Members Posts: 2,056 Joined: 3-December 07 From: Brevard, FL Member No.: 8,414 Region Association: South East States 
|
Great progress! (IMG:style_emoticons/default/smilie_pokal.gif) You are getting there. (IMG:style_emoticons/default/piratenanner.gif) It will be worth it. (IMG:style_emoticons/default/beerchug.gif) John |
| saigon71 |
 Sep 5 2011, 07:04 PM Sep 5 2011, 07:04 PM
Post
#76
|
|
Advanced Member     Group: Members Posts: 2,006 Joined: 1-June 09 From: Dillsburg, PA Member No.: 10,428 Region Association: MidAtlantic Region 

|
Shot two coats of primer on the rebuilt pass side firewall/floor pan. It was a lot of patchwork, but I am pleased with how it all worked out. (IMG:style_emoticons/default/biggrin.gif)
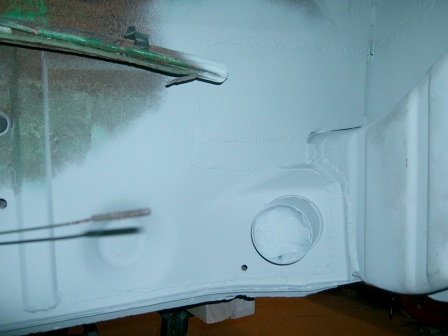 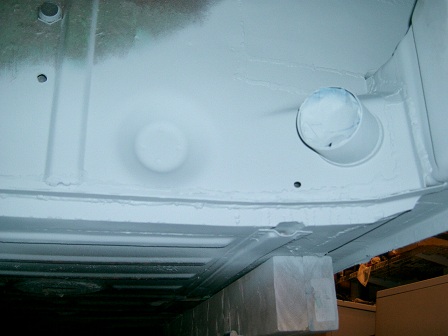 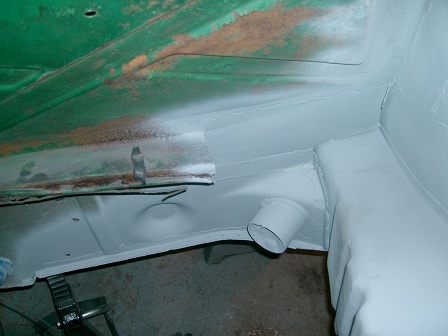 Cleaned, treated and painted the exhaust bracket. 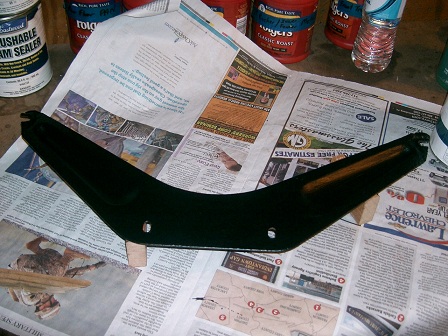 |
| Cairo94507 |
 Sep 5 2011, 07:19 PM Sep 5 2011, 07:19 PM
Post
#77
|
|
Michael           Group: Members Posts: 10,131 Joined: 1-November 08 From: Auburn, CA Member No.: 9,712 Region Association: Northern California 
|
Very nice work; you should be proud.
|
| AndyB |
 Sep 19 2011, 04:02 AM Sep 19 2011, 04:02 AM
Post
#78
|
|
The Governor is watching me    Group: Members Posts: 1,115 Joined: 10-April 10 From: Philadelphia New York Member No.: 11,595 Region Association: North East States |
(IMG:style_emoticons/default/piratenanner.gif) (IMG:style_emoticons/default/piratenanner.gif) Looking good Bob whats the current status?
|
| saigon71 |
 Oct 14 2011, 05:47 PM Oct 14 2011, 05:47 PM
Post
#79
|
|
Advanced Member     Group: Members Posts: 2,006 Joined: 1-June 09 From: Dillsburg, PA Member No.: 10,428 Region Association: MidAtlantic Region 

|
The outer suspension console and engine mount were completely shot on my car, so I bought a relatively rust free chunk of longitudinal from a member of 914world and started disassembly. What a PITA drilling out all of the spot welds and grinding down the outer welds, then beating the pieces apart with a large hammer and screwdriver. My "original" inner suspension console must have been replaced at some point, because it was in better condition than the one I bought as part of the used longitudinal. All three pieces were treated with POR-15 on the inside while the weldable areas were shot with weld thru primer. I continually ran a piece of safety wire through the drain hole of the inner console while treating with POR to make sure the drain remained open.
Parts: 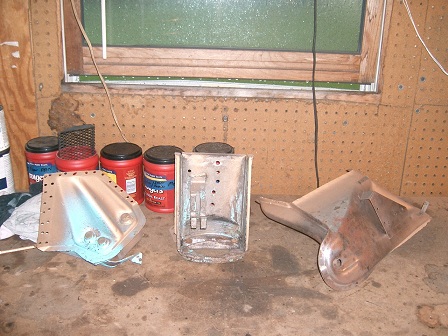 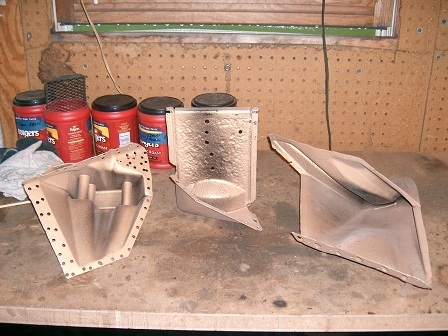 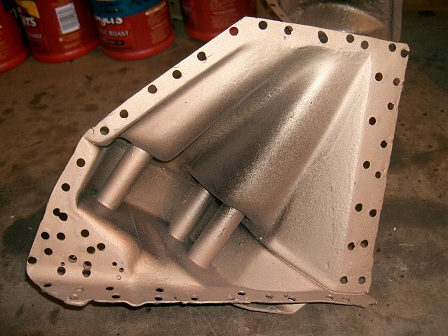 I decided to start with the inner console. It was a real bitch trying to measure exactly 28 1/4 inches from the hole in the center of the firewall to the front of the suspension ear hole with a tape measure while holding everything in place. Plus, this needs to be spot on for proper alignment. I decided to cut a piece of steel brake line to exactly 28.25" to simplify the task. 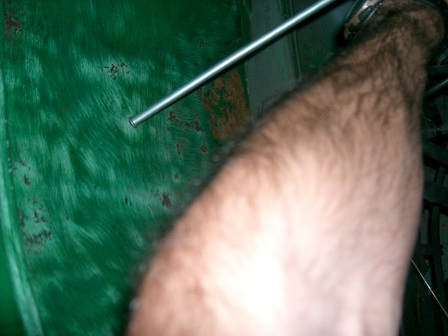 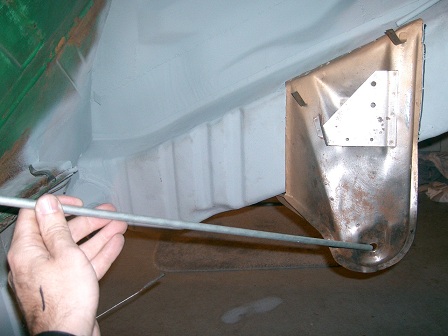 The inner console had a little bit of "rock" to it on the new long that seemed to be coming from the indent behind the bracket. Had to beat this area with a hammer for proper fit: 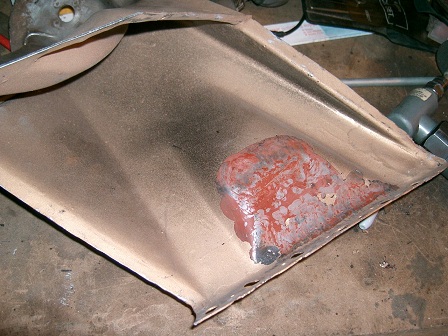 Still nervous about having the measurements EXACTLY right before tack welding this thing in place...I decided to call it a night. 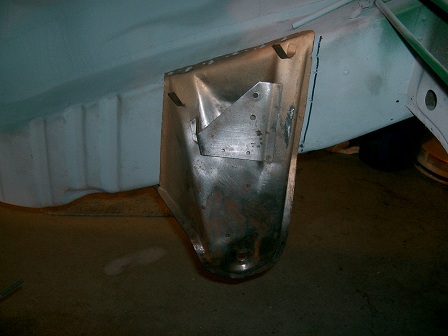 |
| trojanhorsepower |
 Oct 14 2011, 06:37 PM Oct 14 2011, 06:37 PM
Post
#80
|
|
Senior Member    Group: Members Posts: 867 Joined: 21-September 03 From: Marion, NC Member No.: 1,179 Region Association: None |
Great Job!
Keep it up! |
  |
27 User(s) are reading this topic (27 Guests and 0 Anonymous Users)
0 Members:

|
Lo-Fi Version | Time is now: 28th December 2024 - 03:19 AM |
Invision Power Board
v9.1.4 © 2024 IPS, Inc.


