|
|

|
Porsche, and the Porsche crest are registered trademarks of Dr. Ing. h.c. F. Porsche AG.
This site is not affiliated with Porsche in any way. Its only purpose is to provide an online forum for car enthusiasts. All other trademarks are property of their respective owners. |
|
|
  |
| saigon71 |
 Oct 26 2011, 08:14 PM Oct 26 2011, 08:14 PM
Post
#81
|
|
Advanced Member     Group: Members Posts: 2,006 Joined: 1-June 09 From: Dillsburg, PA Member No.: 10,428 Region Association: MidAtlantic Region 

|
Got the inner suspension console tack welded in place today.
Figured out the slight rock I had in the piece was from two previous rosette welds on the new longitudinal not ground completely flush. I spent quite a bit of time bending, hammering and adjusting the areas to be welded on this piece, to make sure it fit as good as possible. There is a slight gap at the top of suspension console that will be addressed with a big hammer and block of wood after the rest of it is tacked on. Took one more measurement, from both the front and rear firewall, dead on both ways. I started with the leading edge, because of the alignment mark. I was amazed to see how much the whole console moved forward from two tack welds! Re-checked the measurements and they were off. Had to grind off the spot welds with a dremmel tool and start over again. The trailing edge needed some side pressure before tacking it on, so I broke out the special tools. Needed to put a little pressure on the bottom of the console before tacking the bottom on. 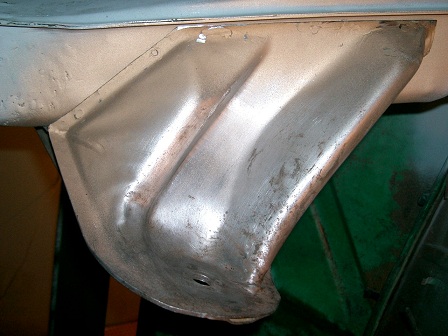 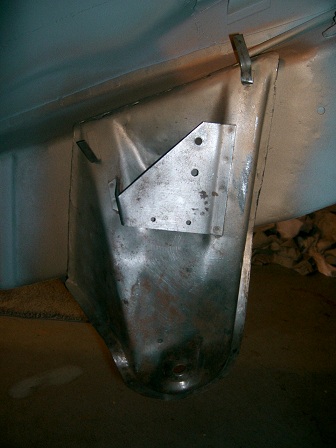 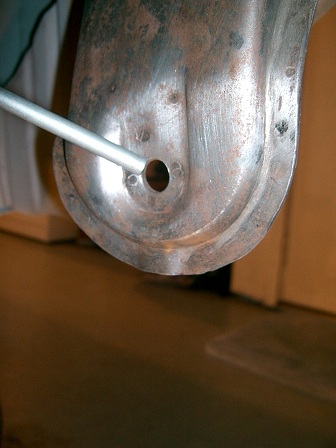 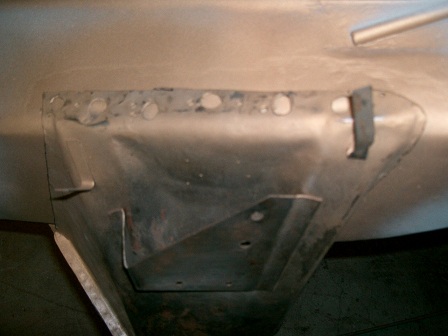 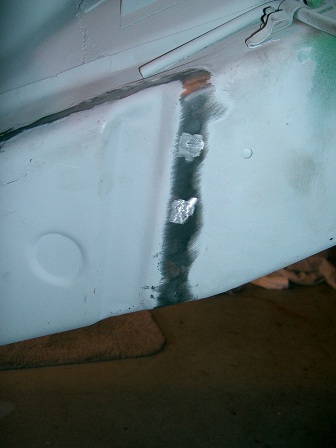 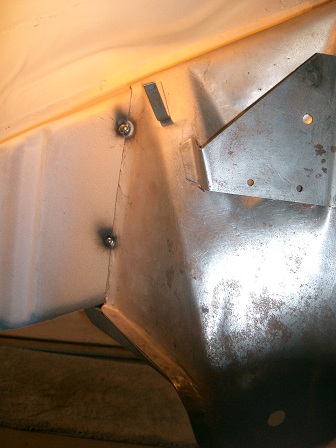 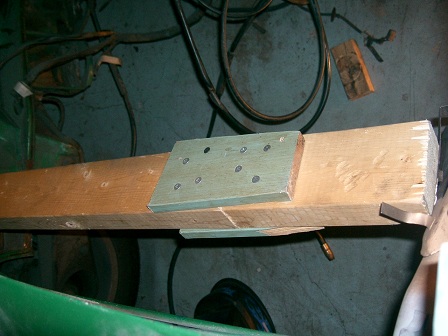 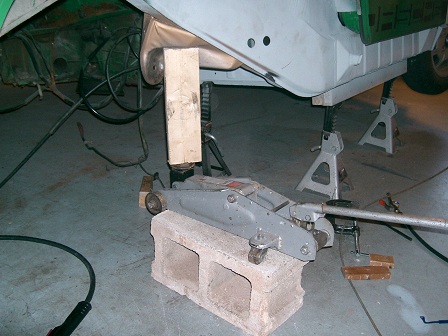 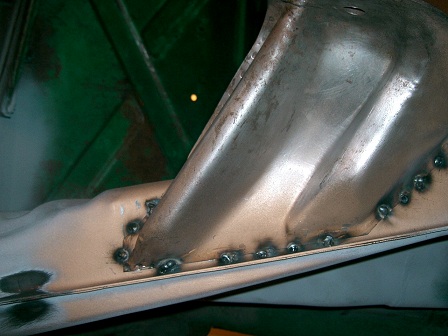 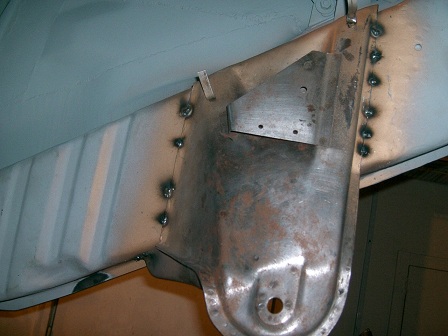 |
| saigon71 |
 Nov 4 2011, 08:51 PM Nov 4 2011, 08:51 PM
Post
#82
|
|
Advanced Member     Group: Members Posts: 2,006 Joined: 1-June 09 From: Dillsburg, PA Member No.: 10,428 Region Association: MidAtlantic Region 

|
Before finishing all the welding on this piece, I double checked all measurements. Firewall hole to front of inner console hole was still dead on and side to side came in at 33.5".
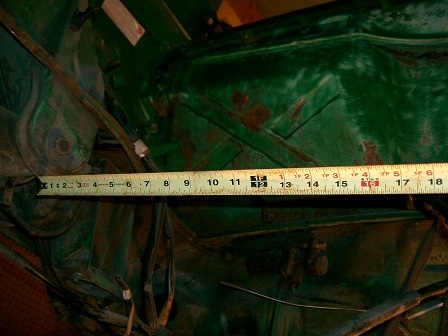 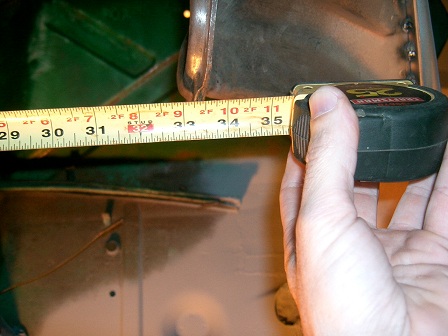 As another sanity check, I leveled the car and took a measurement from the garage floor to the bottom of the ear and checked it against the original drivers side...both were right at 14.25". 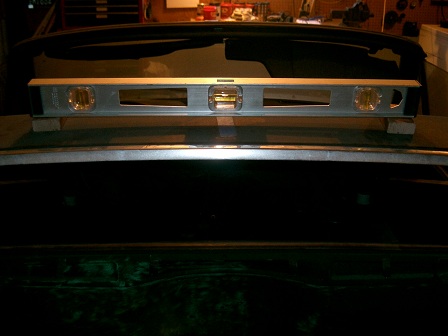 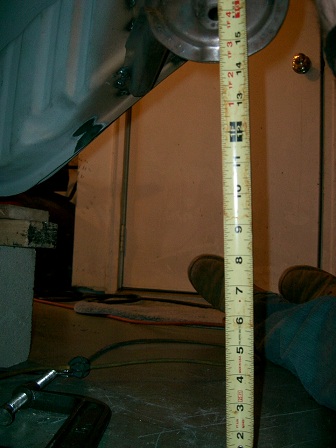 There was a slight gap (less than 1/8") at the top of this piece where it forms around the top of the long...reformed with a big hammer while tack welded in place. Top edge before adjustment: 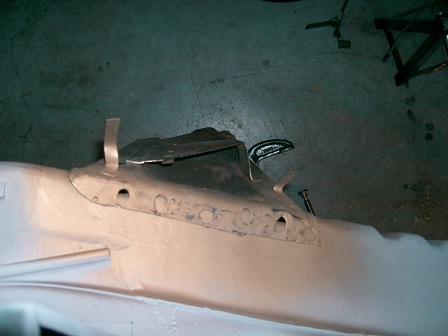 I decided to seam weld this piece on. I am re-using a replacement piece in very good shape installed by the PO. There wasn't enough meat on the some of the edges to drill holes for rosettes. I had to re-use the previous monster rosette holes on the top. I took my time and cooled the area with compressed air after every few welds. The roughest part was welding the bottom area near the seam where the inner and outer long meet upside down. (IMG:style_emoticons/default/welder.gif) 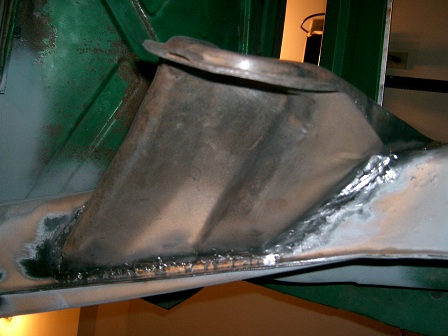 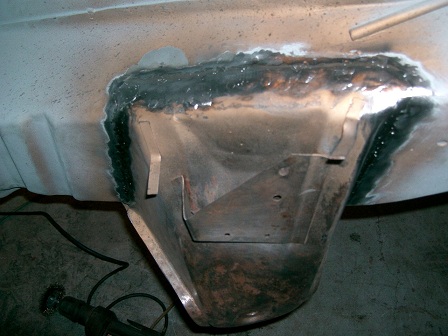 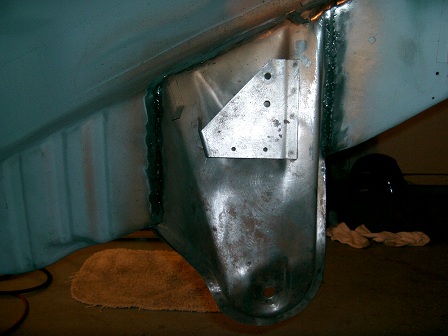 |
| scotty b |
 Nov 5 2011, 04:53 AM Nov 5 2011, 04:53 AM
Post
#83
|
|
rust free you say ?                Group: Members Posts: 16,375 Joined: 7-January 05 From: richmond, Va. Member No.: 3,419 Region Association: None |
(IMG:style_emoticons/default/smile.gif) (IMG:style_emoticons/default/first.gif) Well done my man
|
| maf914 |
 Nov 5 2011, 11:15 AM Nov 5 2011, 11:15 AM
Post
#84
|
|
Not a Guru!     Group: Members Posts: 3,049 Joined: 30-April 03 From: Central Florida Member No.: 632 Region Association: None 
|
Beautiful work! Thanks for posting all of your photos. Excellent! (IMG:style_emoticons/default/smilie_pokal.gif)
|
| saigon71 |
 Nov 17 2011, 08:18 PM Nov 17 2011, 08:18 PM
Post
#85
|
|
Advanced Member     Group: Members Posts: 2,006 Joined: 1-June 09 From: Dillsburg, PA Member No.: 10,428 Region Association: MidAtlantic Region 

|
Indexing the right engine bar mount took some time. I had saved the original chunk of long I removed the mount from, so I re-aligned the holes and took a measurement from the edge of the inner suspension console to the edge of the mount and came up with 1 3/8". The suspension console that I welded in was aftermarket and did not have as much meat on the edges as the factory piece. I measured off the start of the bend of the installed console and marked a line on the long to match the factory edge. Up & down was verified at 3 5/16" (taken from the original long) with a combination square from the top of the mount to the top of the edge of the suspension console.
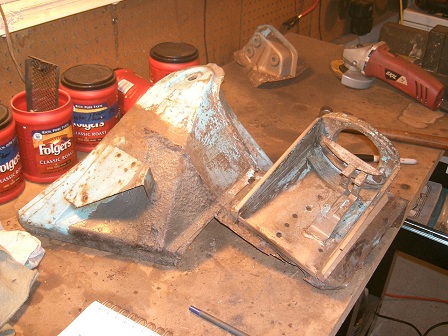 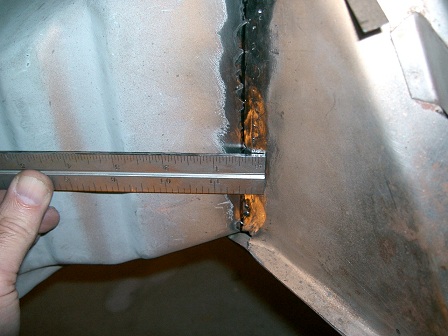 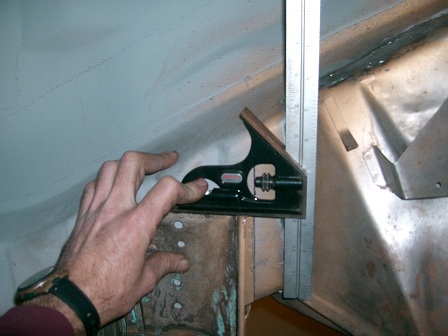 Used a big C clamp & jack to hold it in position for welding and verified all measurements one more time: 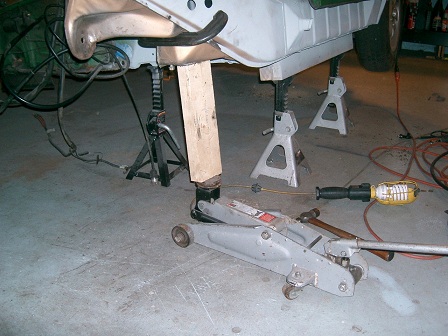 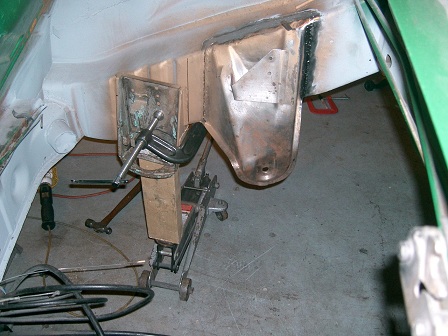 Re-filled the factory rosettes and seam welded a few 1" or so sections on both sides. 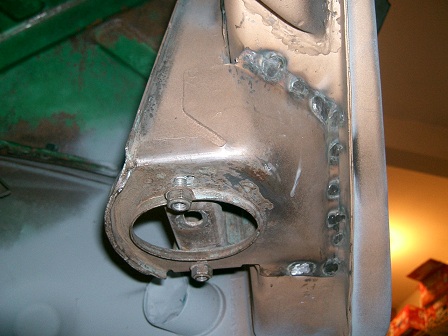 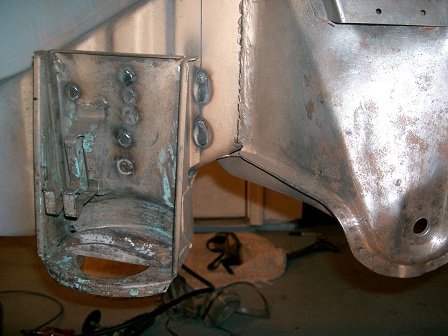 |
| pete-stevers |
 Nov 17 2011, 08:29 PM Nov 17 2011, 08:29 PM
Post
#86
|
|
saved from fire!     Group: Members Posts: 2,645 Joined: 10-October 04 From: Abbotsford,BC, Canada Member No.: 2,914 Region Association: Pacific Northwest 
|
impressive!!! (IMG:style_emoticons/default/piratenanner.gif)
|
| AndyB |
 Nov 18 2011, 05:00 AM Nov 18 2011, 05:00 AM
Post
#87
|
|
The Governor is watching me    Group: Members Posts: 1,115 Joined: 10-April 10 From: Philadelphia New York Member No.: 11,595 Region Association: North East States |
(IMG:style_emoticons/default/stick.gif) Looking good Bob dont make me break out the whip. You know its right around the corner. Your work is looking really good. Glad you are remeasuring everything before welding
|
| saigon71 |
 Nov 18 2011, 09:57 AM Nov 18 2011, 09:57 AM
Post
#88
|
|
Advanced Member     Group: Members Posts: 2,006 Joined: 1-June 09 From: Dillsburg, PA Member No.: 10,428 Region Association: MidAtlantic Region 

|
(IMG:style_emoticons/default/stick.gif) Looking good Bob dont make me break out the whip. You know its right around the corner. Your work is looking really good. Glad you are remeasuring everything before welding Thanks Andy. No need to break out the whip as the car will be at Hershey. (IMG:style_emoticons/default/biggrin.gif) I have decided to make the car reliable and roadworthy by tackling all of the big stuff that I need to. Everything else will become a "weekend project" after I start driving it. (IMG:style_emoticons/default/driving.gif) |
| saigon71 |
 Nov 19 2011, 07:54 PM Nov 19 2011, 07:54 PM
Post
#89
|
|
Advanced Member     Group: Members Posts: 2,006 Joined: 1-June 09 From: Dillsburg, PA Member No.: 10,428 Region Association: MidAtlantic Region 

|
Fitted the engine shelf yesterday & today. This piece caused me a lot of frustration, largely because the front and rear firewall sections that hold the engine seal channel were not there to index from.
I got nervous that the engine mount was welded in too high, so I leveled the car and took measurements from the floor to the bottom of the mount. Driver and passenger side both came in at exactly 12". Additionally, I double checked all other measurements on the engine mount. Everything was good. The shelf itself needed to be flattened a bit in the front where it meets the inner long. I also had to adjust the top edge of the engine mount in the front where I had welded a repair in. 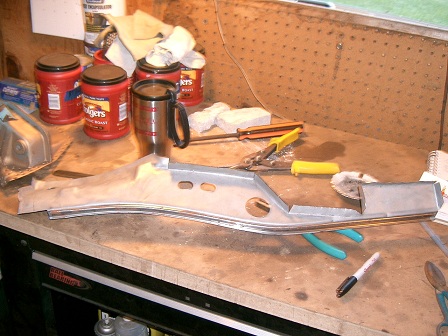 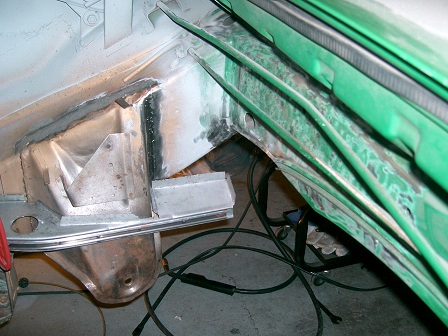 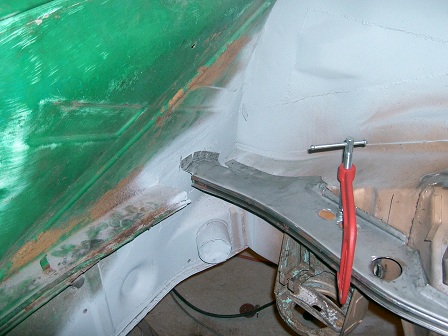 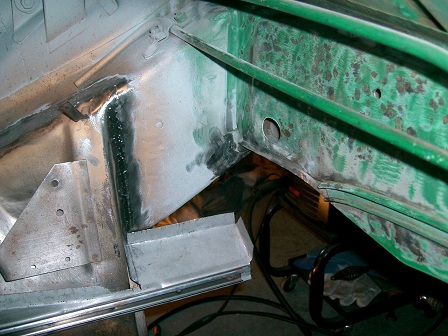 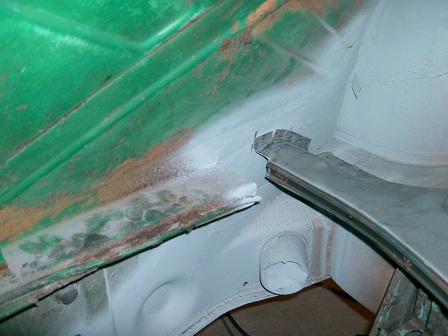 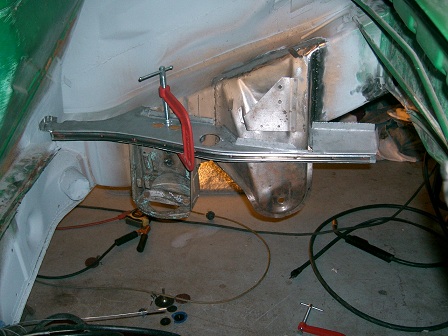 I will need to fabricate both front & rear firewall metal to tie them into the engine shelf. Waiting until these pieces are made until I start welding anything. Filled holes in the rear firewall left from removal of the old sheet metal. 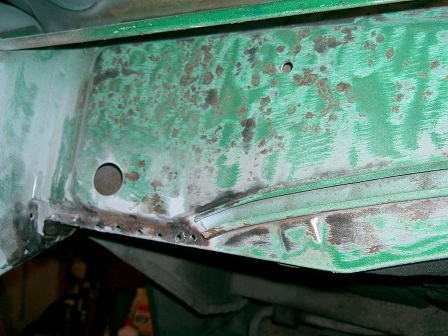 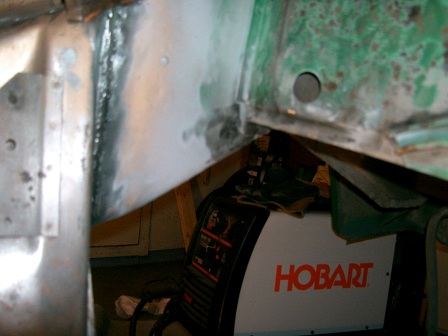 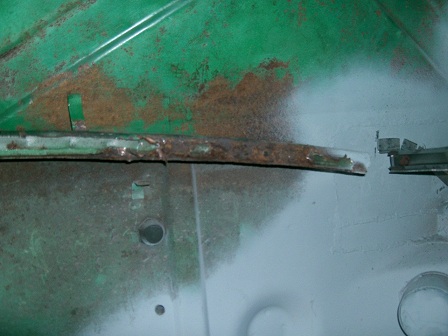 |
| type47 |
 Nov 20 2011, 07:20 AM Nov 20 2011, 07:20 AM
Post
#90
|
|
Viermeister     Group: Members Posts: 4,254 Joined: 7-August 03 From: Vienna, VA Member No.: 994 Region Association: MidAtlantic Region |
Oh, death knell for projects; a deadline... Nice work, keep the pix coming (IMG:style_emoticons/default/aktion035.gif) |
| saigon71 |
 Nov 25 2011, 10:20 AM Nov 25 2011, 10:20 AM
Post
#91
|
|
Advanced Member     Group: Members Posts: 2,006 Joined: 1-June 09 From: Dillsburg, PA Member No.: 10,428 Region Association: MidAtlantic Region 

|
Fabricated and installed the section of rear firewall that holds the rear engine bay seal. I leveled the car and measured from the floor to the lower edge of the engine shelf on the drivers side (19 5/16") so I could determine proper height of the passenger side engine shelf:
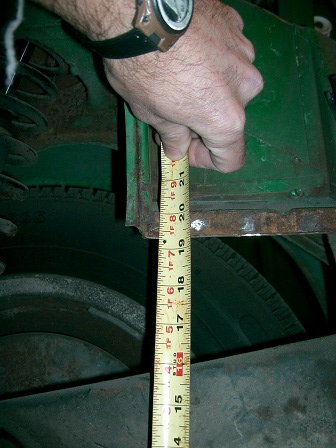 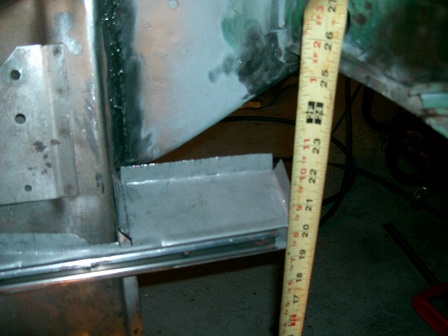 Made a template out of poster board for the replacement piece. I was able to use the mirror image of the drivers side to get the proper curve: 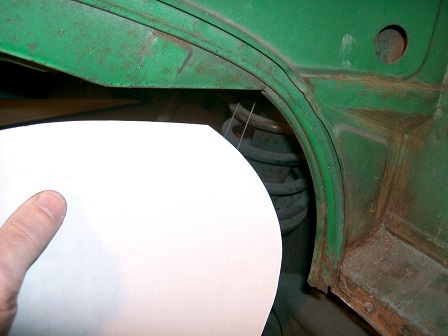 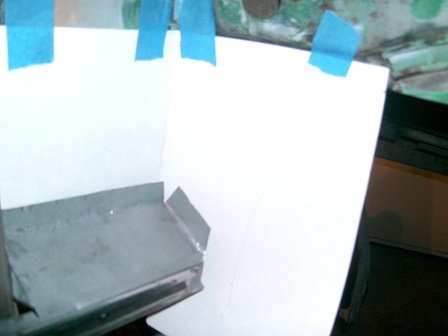 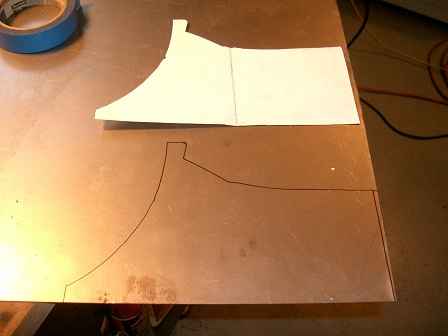 I measured the thickness of the original metal - it was about 19GA. I opted to use 18GA metal for the repair panel. Finished product: 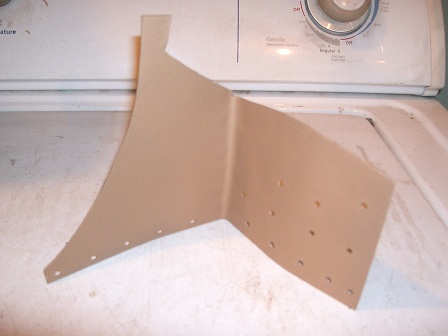 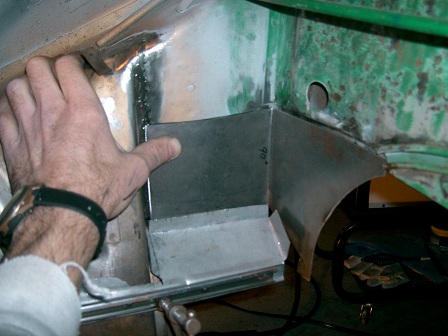 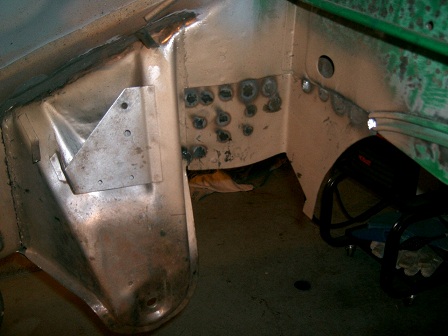 |
| rallysport70 |
 Nov 25 2011, 07:50 PM Nov 25 2011, 07:50 PM
Post
#92
|
|
Member   Group: Members Posts: 64 Joined: 1-May 09 From: Albany, NY Member No.: 10,321 Region Association: North East States |
Very nice work, keep the pics coming.
|
| saigon71 |
 Nov 25 2011, 08:09 PM Nov 25 2011, 08:09 PM
Post
#93
|
|
Advanced Member     Group: Members Posts: 2,006 Joined: 1-June 09 From: Dillsburg, PA Member No.: 10,428 Region Association: MidAtlantic Region 

|
Got some more done today. Started treating rust on the front firewall engine shelf. Part of it is missing and some areas have a little rust - thru, so I fabricated a doubler that will be welded on the bottom. It will serve two purposes...beef up the remaining factory shelf and serve as a backer/support for the piece I need to fabricate to tie in the passenger side engine shelf. I had to make relief cuts every 3/4" so I could match the factory bend:
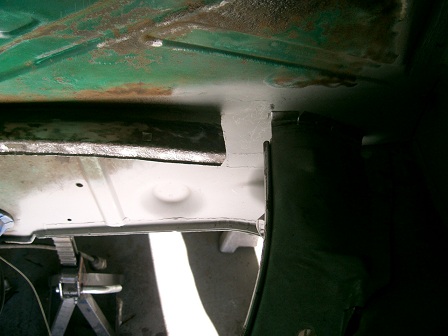 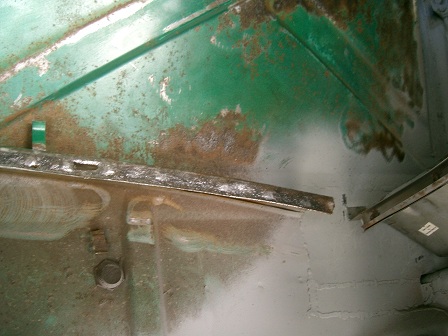 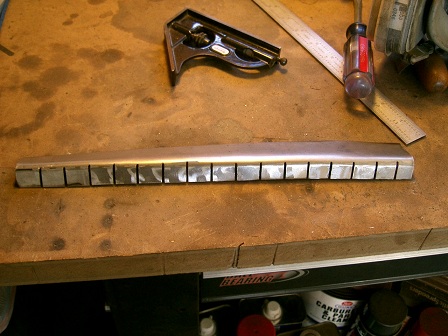 There were a couple of small holes under the gas tank on the passenger side that needed to be patched. This will not be a show car, just a fun, reliable daily driver. I cleaned the area, fabricated a doubler for the bottom, rosette welded it on and sealed the edges with JB-Weld: 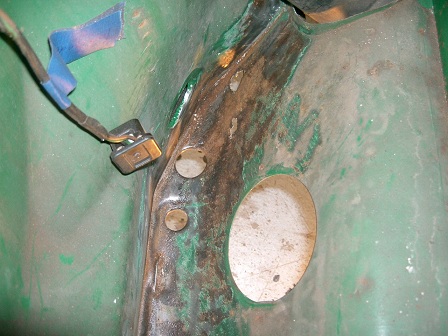 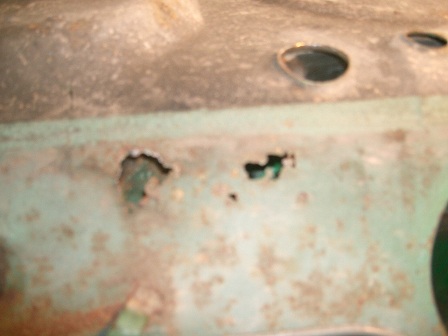 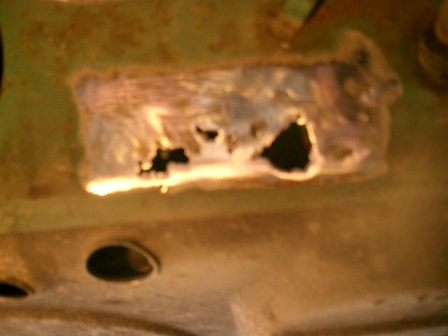 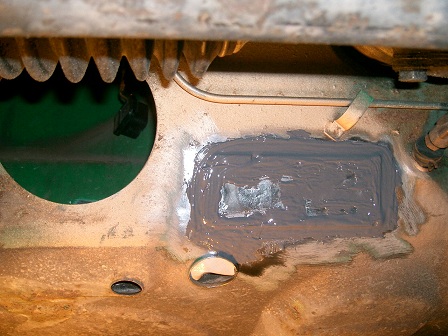 Started fitting the outside suspension ear before I ran out of steam. 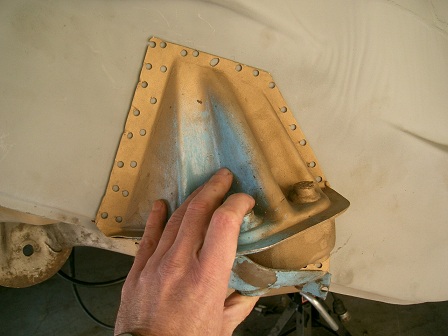 |
| Socalandy |
 Nov 25 2011, 09:24 PM Nov 25 2011, 09:24 PM
Post
#94
|
|
Its got to be Yellow!!!     Group: Members Posts: 2,432 Joined: 29-August 09 From: Orange Member No.: 10,742 Region Association: Southern California  |
|
| saigon71 |
 Nov 26 2011, 07:11 PM Nov 26 2011, 07:11 PM
Post
#95
|
|
Advanced Member     Group: Members Posts: 2,006 Joined: 1-June 09 From: Dillsburg, PA Member No.: 10,428 Region Association: MidAtlantic Region 

|
Thanks Andy...do you have a build thread going? I am surprised that you have these rust issues on the left coast! (IMG:style_emoticons/default/sawzall-smiley.gif) Bob |
| saigon71 |
 Nov 26 2011, 07:21 PM Nov 26 2011, 07:21 PM
Post
#96
|
|
Advanced Member     Group: Members Posts: 2,006 Joined: 1-June 09 From: Dillsburg, PA Member No.: 10,428 Region Association: MidAtlantic Region 

|
With the nice weather, I had to finish some painting on the house...but I was able to get a little more done.
Welded the engine bay seal channel on the rear firewall. This product was not available pre-bent from Restoration Design, so I had to make relief cuts to get the proper bend: 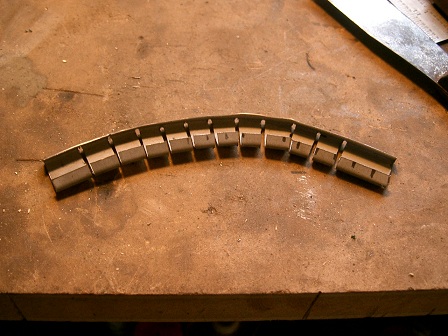 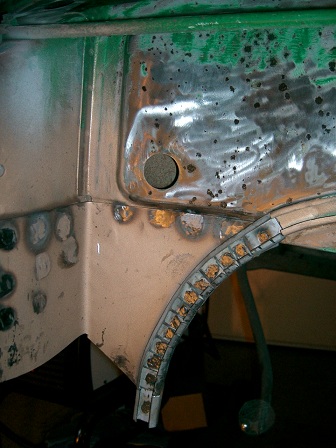 Treated the rear driver side engine shelf with ospho: 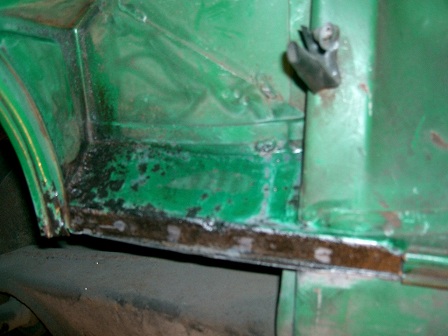 Brushed two top coats of acrylic enamel on the patch panel, passenger side under the gas tank: 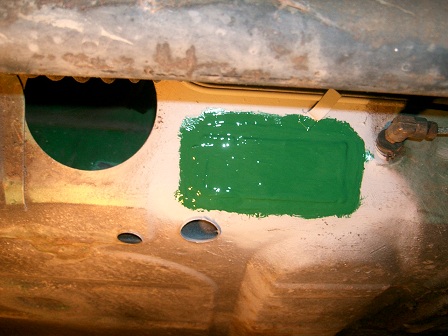 |
| Socalandy |
 Nov 26 2011, 07:26 PM Nov 26 2011, 07:26 PM
Post
#97
|
|
Its got to be Yellow!!!     Group: Members Posts: 2,432 Joined: 29-August 09 From: Orange Member No.: 10,742 Region Association: Southern California  |
Thanks Andy...do you have a build thread going? I am surprised that you have these rust issues on the left coast! (IMG:style_emoticons/default/sawzall-smiley.gif) Bob [/quote] Really, Its all that work your putting in on your car, no time to watch 914 World let the sharing of rust begin (IMG:style_emoticons/default/welder.gif) http://www.914world.com/bbs2/index.php?showtopic=101062 |
| saigon71 |
 Dec 11 2011, 09:22 AM Dec 11 2011, 09:22 AM
Post
#98
|
|
Advanced Member     Group: Members Posts: 2,006 Joined: 1-June 09 From: Dillsburg, PA Member No.: 10,428 Region Association: MidAtlantic Region 

|
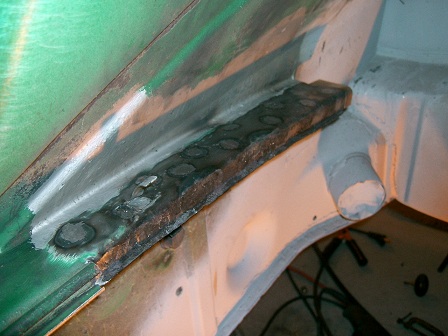
Welded the doubler plate that I fabricated for the front firewall engine bay:
 Applied two coats of rust bullet to the drivers side rear firewall: 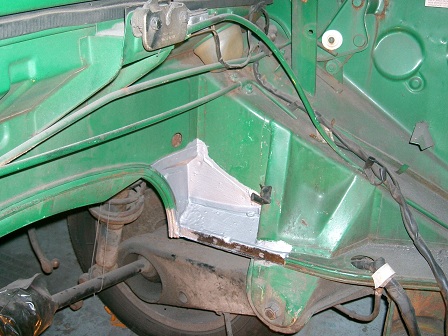 I needed to trim the lower edge of the outer suspension about 1/8" on the bottom for proper fit: 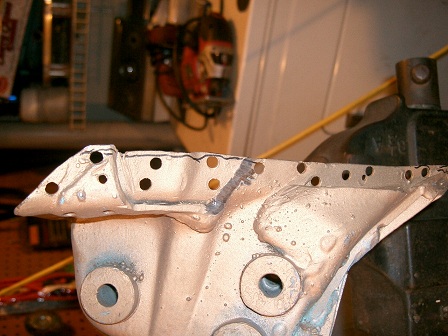 With the inner suspension console and engine bar mount in, it was time to tackle the outer suspension console. PM'ed Scotty B about the best way to index this piece. He said the best way was to take measurements before cutting out the old long. I hadn't done this, but I still had the chunk of old long in the garage so I was able to make a template. I really hated drilling holes in my brand new long, but I had to temporarily attach it with sheet metal screws to mock-fit the suspension: 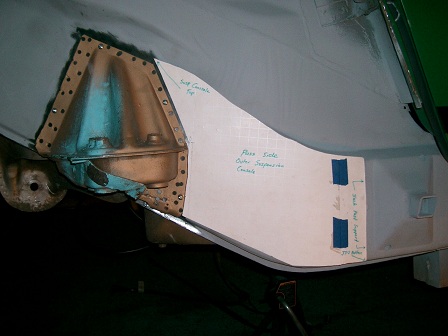 As a double-check for the template, I measured from the drivers side jack post to the front edge of the suspension console and came up with exactly 12.5". This number matched on the passenger side. Additionally, I ran a straight edge accross the bottom of the inner suspension console to make sure things made sense: 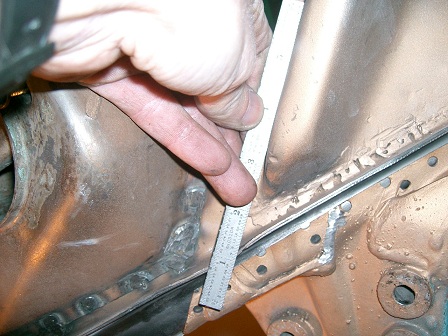 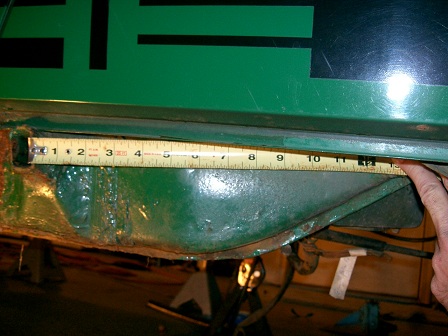 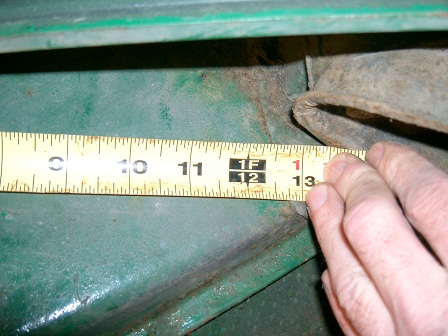 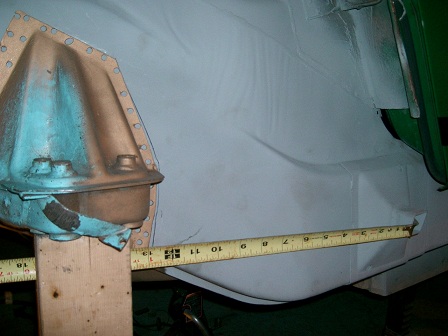 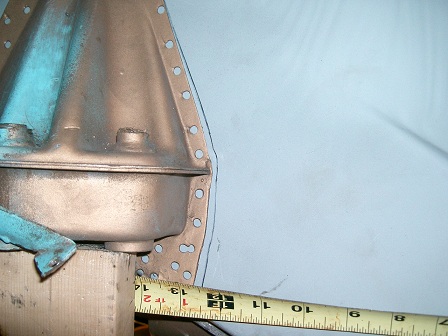 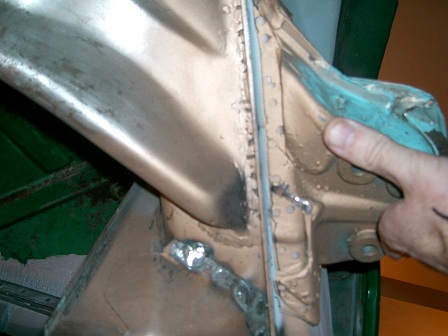 With everything in place, I decided to mock fit the suspension before starting any welding. It was a relief to see things line up properly! (IMG:style_emoticons/default/beerchug.gif) 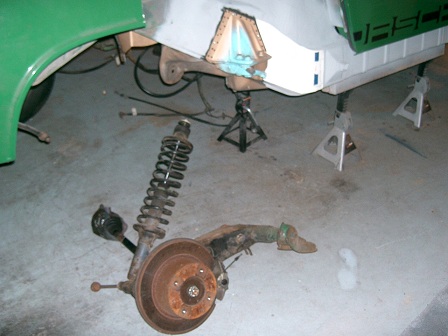 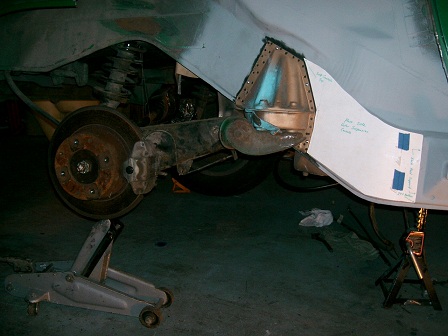 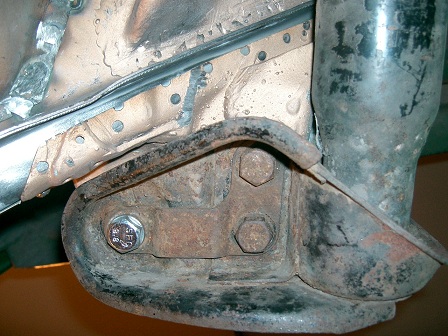 |
| scotty b |
 Dec 11 2011, 11:49 AM Dec 11 2011, 11:49 AM
Post
#99
|
|
rust free you say ?                Group: Members Posts: 16,375 Joined: 7-January 05 From: richmond, Va. Member No.: 3,419 Region Association: None |
(IMG:style_emoticons/default/first.gif)
SO you'll be driving it to Hershey in a few months right ?? (IMG:style_emoticons/default/poke.gif) (IMG:style_emoticons/default/poke.gif) |
| saigon71 |
 Dec 11 2011, 02:33 PM Dec 11 2011, 02:33 PM
Post
#100
|
|
Advanced Member     Group: Members Posts: 2,006 Joined: 1-June 09 From: Dillsburg, PA Member No.: 10,428 Region Association: MidAtlantic Region 

|
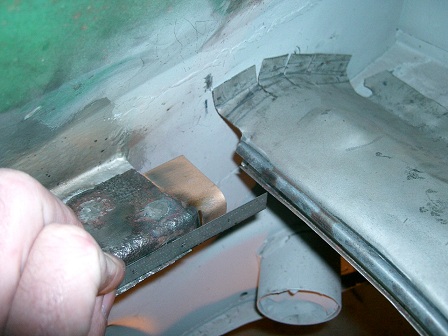
Got some quality shop time in today. Fabricated the connection piece that will tie the engine bay sheet metal together up front. Made a template and hammered out the piece I needed. I had to cut back about an inch of the engine bay seal channel on the replacement piece. A dremmel tool with a cut off wheel did a fine job:
 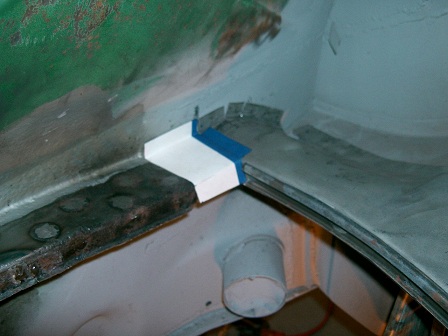 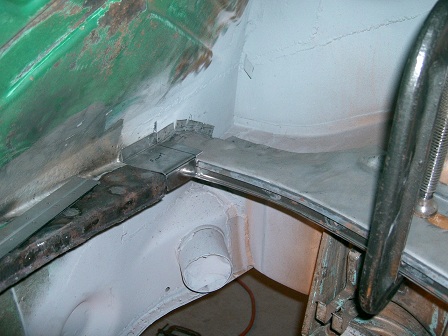 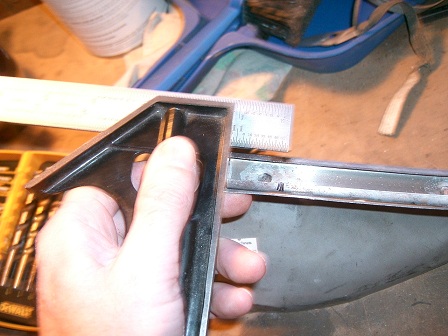 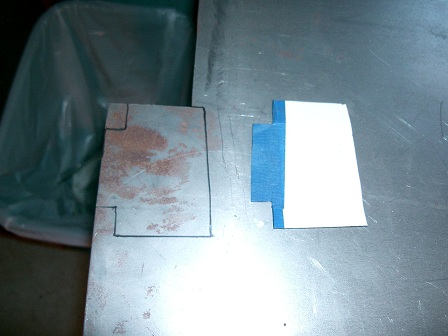 Hit the passenger area under the tank with ospho, two coats of rust encapsulator and new seam sealer: 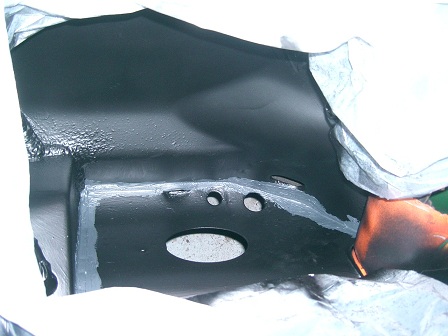 Attached image(s) 
|
  |
19 User(s) are reading this topic (19 Guests and 0 Anonymous Users)
0 Members:

|
Lo-Fi Version | Time is now: 28th December 2024 - 03:34 AM |
Invision Power Board
v9.1.4 © 2024 IPS, Inc.


