|
|

|
Porsche, and the Porsche crest are registered trademarks of Dr. Ing. h.c. F. Porsche AG.
This site is not affiliated with Porsche in any way. Its only purpose is to provide an online forum for car enthusiasts. All other trademarks are property of their respective owners. |
|
|
  |
| Andyrew |
 Jan 17 2017, 11:56 AM Jan 17 2017, 11:56 AM
Post
#381
|
|
Spooling.... Please wait           Group: Members Posts: 13,377 Joined: 20-January 03 From: Riverbank, Ca Member No.: 172 Region Association: Northern California 
|
I had previously cut a small hole in the trunk firewall to allow clearance for small air filter. I have been trying to figure a way to clean it up since. This weekend I took a stab at making a manifold flip for the EZ30 using 1-R bend 2.5" tube. I wish I had used regular steel vs. Stainless because the welds came out so poorly. I may be making another one of these in the near future. Not sure if it will help or hurt performance, but I can run a proper air filter and can finally close my trunk back off. Did you use stainless wire? You should be able to weld stainless JUST like steel. Fiddle with your settings a little till its right. |
| rnellums |
 Jan 17 2017, 12:06 PM Jan 17 2017, 12:06 PM
Post
#382
|
|
Professional Enthusiast    Group: Members Posts: 1,667 Joined: 26-November 09 From: Littleton, CO Member No.: 11,072 Region Association: Rocky Mountains |
Did you use stainless wire? You should be able to weld stainless JUST like steel. Fiddle with your settings a little till its right. Yes on the stainless wire and argon shield gas. Stainless has much lower thermal conductivity, so it heats up locally much faster than carbon steel which is part of the issue. I was in a bit of a hurry though, as my NSX was sitting outside and snow was starting to fly! Probably shouldn't rush things so much next time (IMG:style_emoticons/default/wink.gif). |
| 914pipe |
 Jan 18 2017, 08:12 PM Jan 18 2017, 08:12 PM
Post
#383
|
|
Say......TEEEEEEEN!!!!!   Group: Members Posts: 346 Joined: 31-July 04 From: Puerto Rico, now NC Member No.: 2,422 Region Association: South East States |
I was getting tired of how loud my exhaust was so I added in another muffler/crossover tonight. Much better! Marty at MSDS was kind enough to supply the mandrel bends (super easy to work with, and inexpensive too!) And the center muffler is just a cherry bomb muffler from the FLAPS. I HAVEN'T SEALED it all up yet, but so far it looks promising! Please post a video of how that sounds, I have been playing with the idea of building an exhaust like that for a few moths! (IMG:style_emoticons/default/agree.gif) Please! |
| rnellums |
 Jan 18 2017, 09:38 PM Jan 18 2017, 09:38 PM
Post
#384
|
|
Professional Enthusiast    Group: Members Posts: 1,667 Joined: 26-November 09 From: Littleton, CO Member No.: 11,072 Region Association: Rocky Mountains |
|
| rnellums |
 Oct 9 2017, 07:52 PM Oct 9 2017, 07:52 PM
Post
#385
|
|
Professional Enthusiast    Group: Members Posts: 1,667 Joined: 26-November 09 From: Littleton, CO Member No.: 11,072 Region Association: Rocky Mountains |
Not much to update here, mostly just a lot of driving. I decided I wanted something to cover the firewall, so bought a bit of quilted vinyl on Ebay and sewed in some velcro strips to cover the firewall and a home-built console. I also built an adapter to mount up the 5-spd shift knob from a Fiat 124. The perfect size, the right shift pattern, genuinely vintage, and not too expensive!
I also switched over from a in-tank pump to an external pump with top mount swagelock fittings connected to custom bent pickup tubes inside the tanks. Attached image(s) 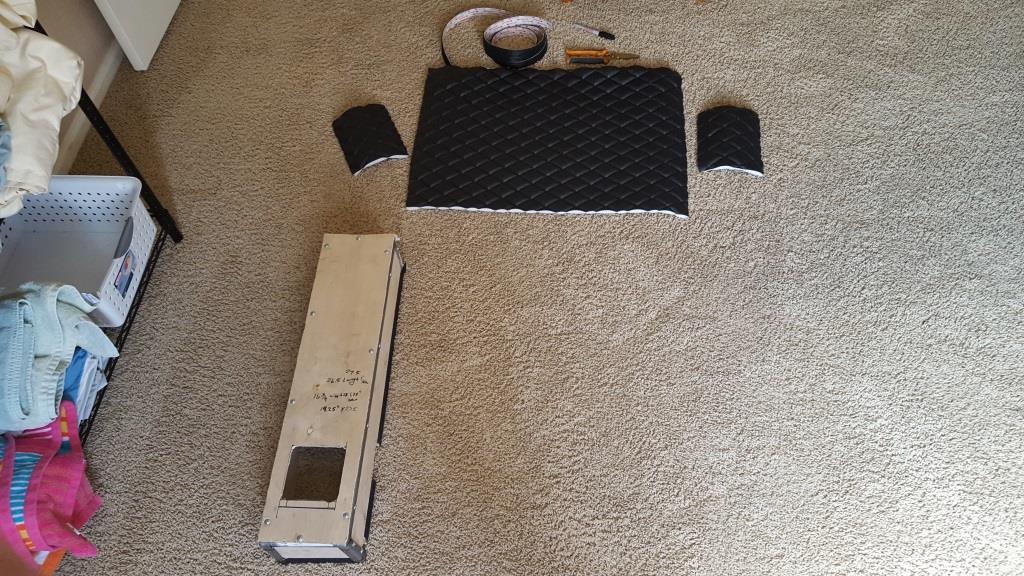 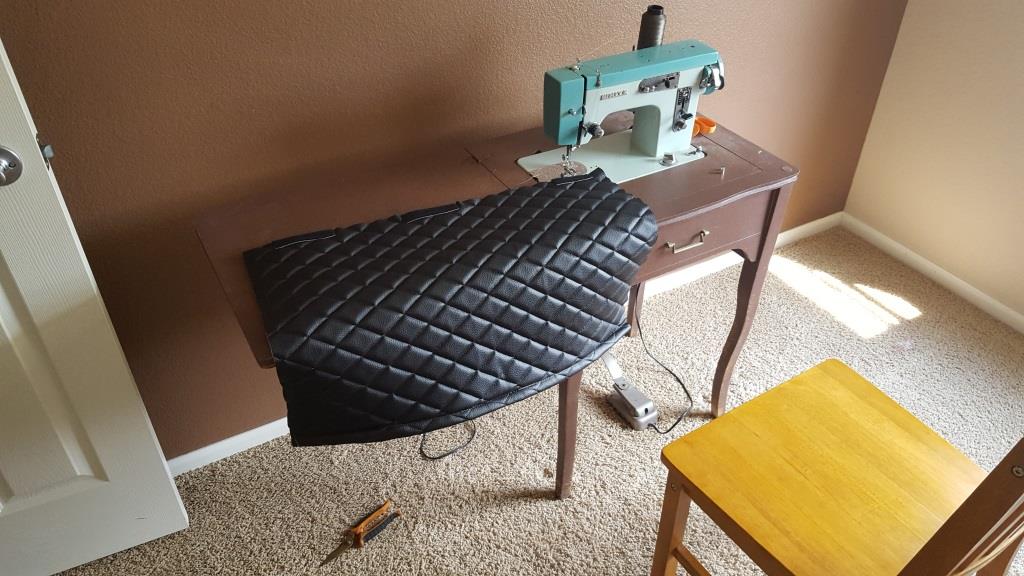 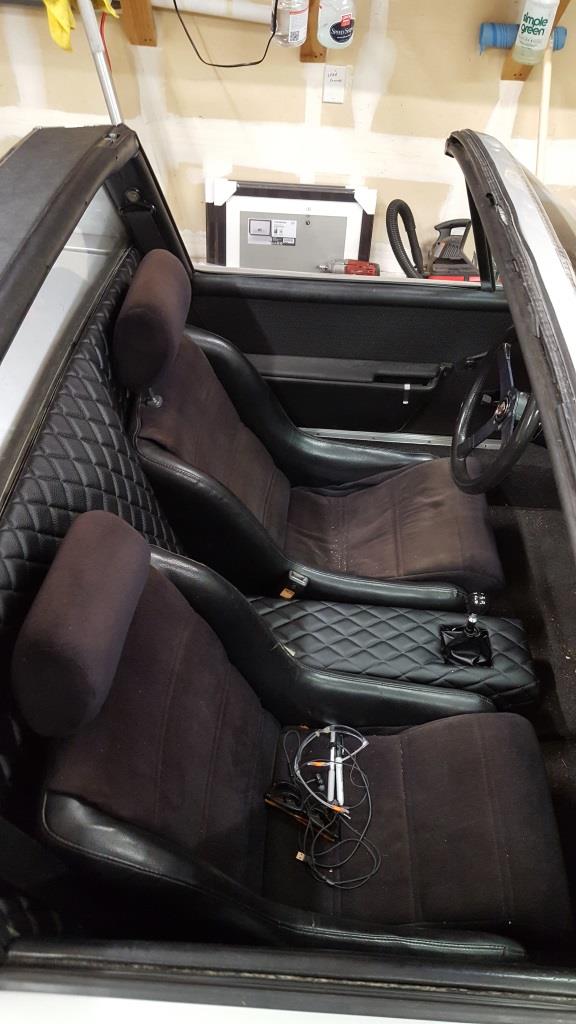 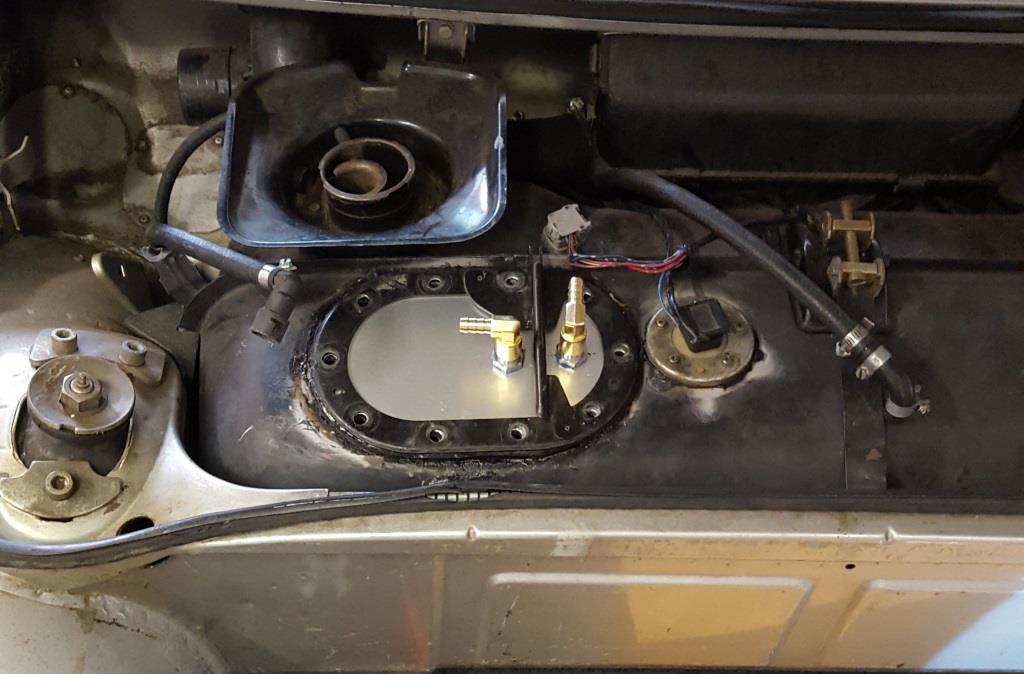
|
| 76-914 |
 Oct 10 2017, 08:46 AM Oct 10 2017, 08:46 AM
Post
#386
|
|
Repeat Offender & Resident Subaru Antagonist           Group: Members Posts: 13,647 Joined: 23-January 09 From: Temecula, CA Member No.: 9,964 Region Association: Southern California 
|
Snazzy! Looks like it came with the car. What prompted your fuel pump change over? I missed the video in the prior post, before . Sounds great. (IMG:style_emoticons/default/beerchug.gif)
|
| rnellums |
 Oct 10 2017, 12:27 PM Oct 10 2017, 12:27 PM
Post
#387
|
|
Professional Enthusiast    Group: Members Posts: 1,667 Joined: 26-November 09 From: Littleton, CO Member No.: 11,072 Region Association: Rocky Mountains |
The pump just cut out while driving, and I had to get a tow. The pump was running, but not pumping. The new system should be much more robust and easier to repair if needed.
|
| 76-914 |
 Oct 10 2017, 06:07 PM Oct 10 2017, 06:07 PM
Post
#388
|
|
Repeat Offender & Resident Subaru Antagonist           Group: Members Posts: 13,647 Joined: 23-January 09 From: Temecula, CA Member No.: 9,964 Region Association: Southern California 
|
Makes sense. I changed mine because of my faulty diagnosis. I like your approach to keeping those lines above the tank. It's nice not having to (IMG:style_emoticons/default/sheeplove.gif) with kinking a line beneath! (IMG:style_emoticons/default/beerchug.gif) You, Ray and myself need to hook up at a RRC one day when it's in UT. I'd love to compare exhaust noises and notes in general. (IMG:style_emoticons/default/beerchug.gif)
|
| greggearhead |
 Jul 9 2018, 01:55 PM Jul 9 2018, 01:55 PM
Post
#389
|
|
Newbie  Group: Members Posts: 35 Joined: 19-March 11 From: Colorado Springs, CO Member No.: 12,836 Region Association: None |
Ross let me take this on the Silver Summit rally because all my cars weren't running. It's a beast, super fun, and super easy to drive.
My step son fell in love with it so much we are building a similar one very soon. Thanks Ross. Are there pics of how you routed your pipes through the longs? Did I miss it? |
| rnellums |
 Dec 23 2024, 06:55 AM Dec 23 2024, 06:55 AM
Post
#390
|
|
Professional Enthusiast    Group: Members Posts: 1,667 Joined: 26-November 09 From: Littleton, CO Member No.: 11,072 Region Association: Rocky Mountains |
Wow. Hard to believe my last post was 2017!
Lots of updates since then, but mostly on the life side vs the car side. On the car side things have been pretty much trouble free. No major issues or malfunctions. One fuel pump failure but that's really just about it. Lots of carefree miles! Since my last posts here there have been quite a few updates to the car, mostly related to drivability / maintainability improvements. Since this is going to be a pretty big update I'll breakdown each post by update area. |
| rnellums |
 Dec 23 2024, 07:06 AM Dec 23 2024, 07:06 AM
Post
#391
|
|
Professional Enthusiast    Group: Members Posts: 1,667 Joined: 26-November 09 From: Littleton, CO Member No.: 11,072 Region Association: Rocky Mountains |
Gauges:
I've updated the water temp gauge to a more calibrated scale - still located in the left-most meter. I've also re-painted the gauge bezel satin black installed a 911 electronic speedometer to read the wheel speed sensor pickup from the Subaru transmission. I believe I've covered it before, but I use a "SpeedoHealer" adapter to convert the pulse rate from the Subaru to a calibrated pulse rate for the 911 Speedo. Attached thumbnail(s) 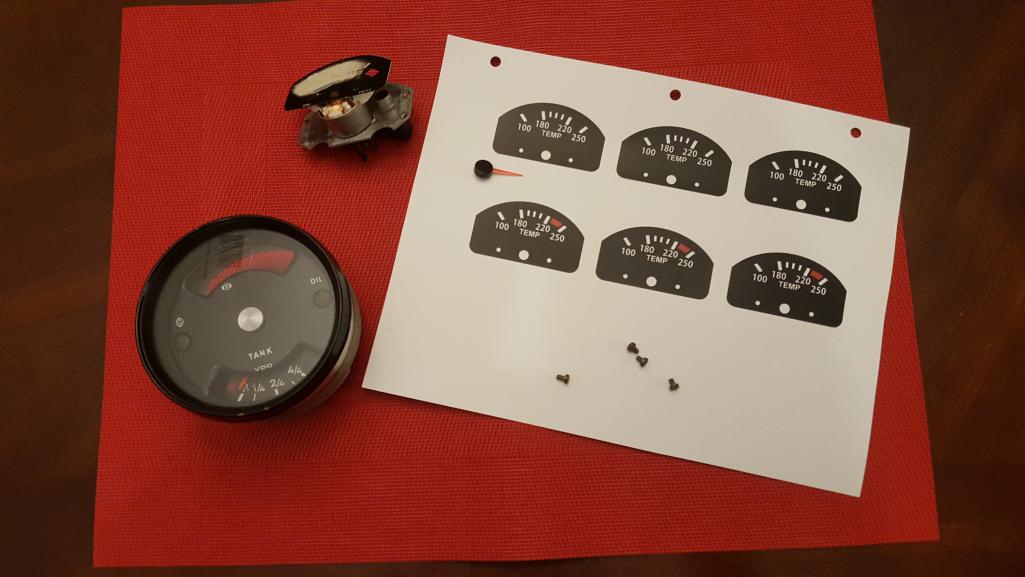 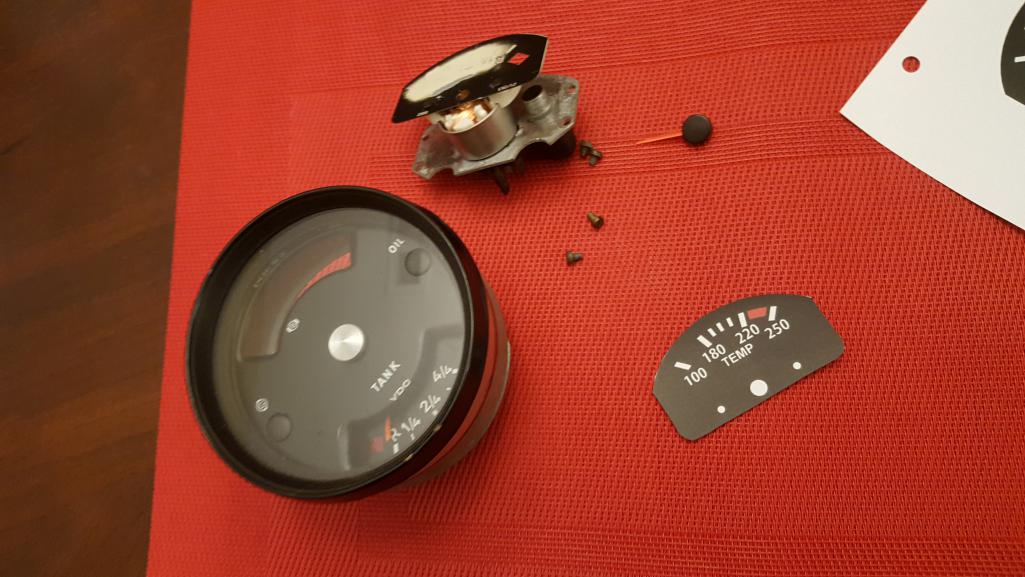
|
| rnellums |
 Dec 23 2024, 07:25 AM Dec 23 2024, 07:25 AM
Post
#392
|
|
Professional Enthusiast    Group: Members Posts: 1,667 Joined: 26-November 09 From: Littleton, CO Member No.: 11,072 Region Association: Rocky Mountains |
Suspension:
I installed new Konis earlier this fall. Nothing special, but significantly improved ride vs the old dampers. Attached thumbnail(s) 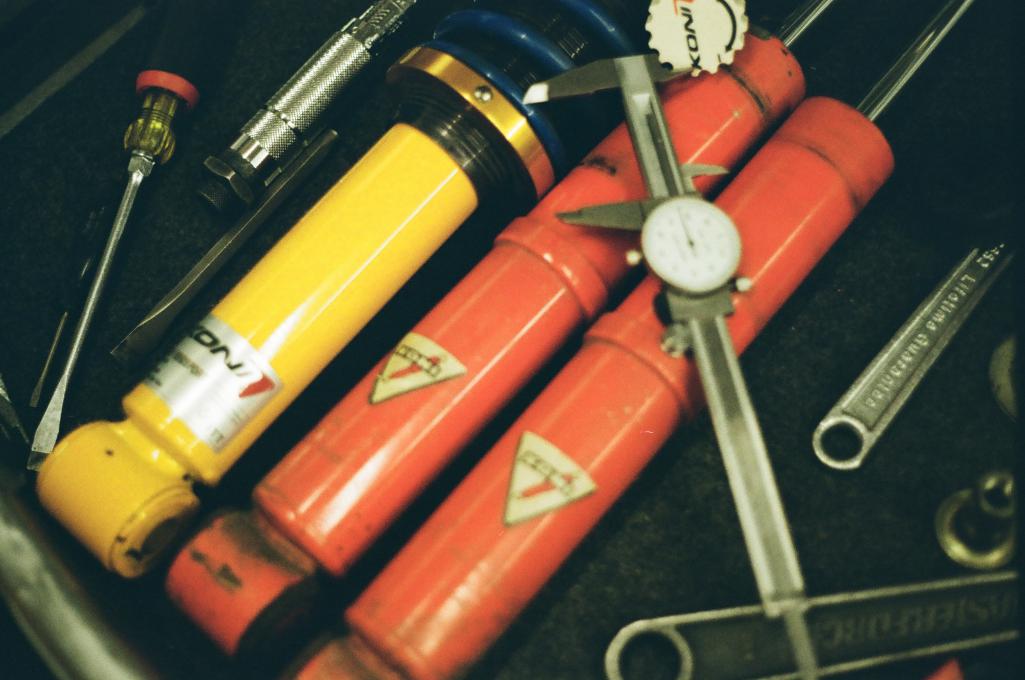
|
| rnellums |
 Dec 23 2024, 07:26 AM Dec 23 2024, 07:26 AM
Post
#393
|
|
Professional Enthusiast    Group: Members Posts: 1,667 Joined: 26-November 09 From: Littleton, CO Member No.: 11,072 Region Association: Rocky Mountains |
Front
Attached thumbnail(s) 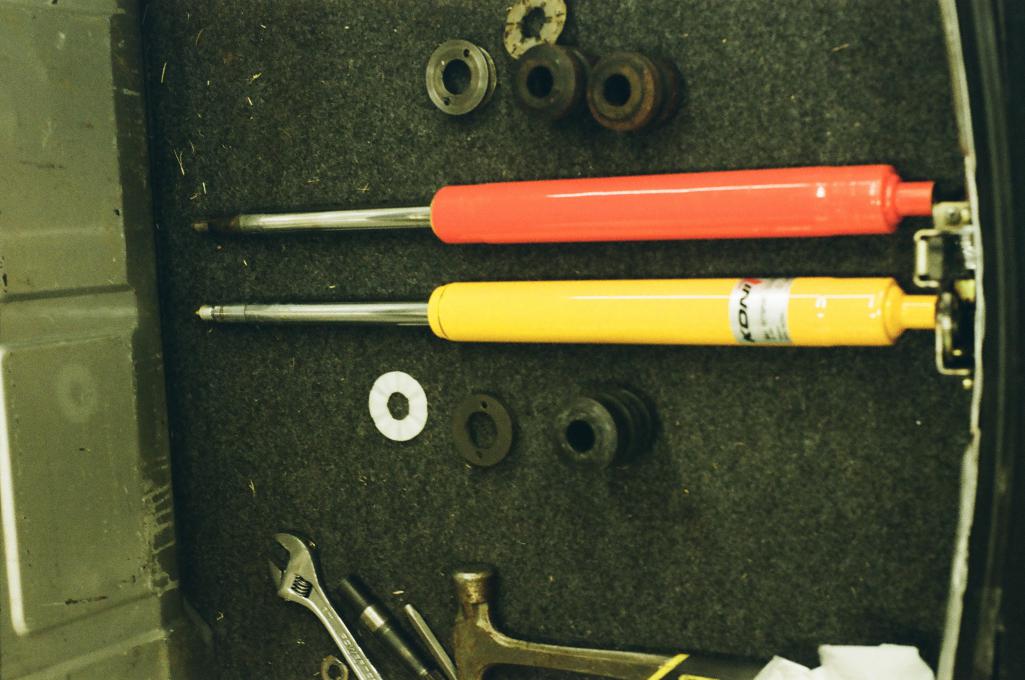
|
| rnellums |
 Dec 23 2024, 07:49 AM Dec 23 2024, 07:49 AM
Post
#394
|
|
Professional Enthusiast    Group: Members Posts: 1,667 Joined: 26-November 09 From: Littleton, CO Member No.: 11,072 Region Association: Rocky Mountains |
The torsion Springs on my engine decklid were starting to bend the decklid mounts a bit so I made this manual lift and prop setup.
Attached thumbnail(s) 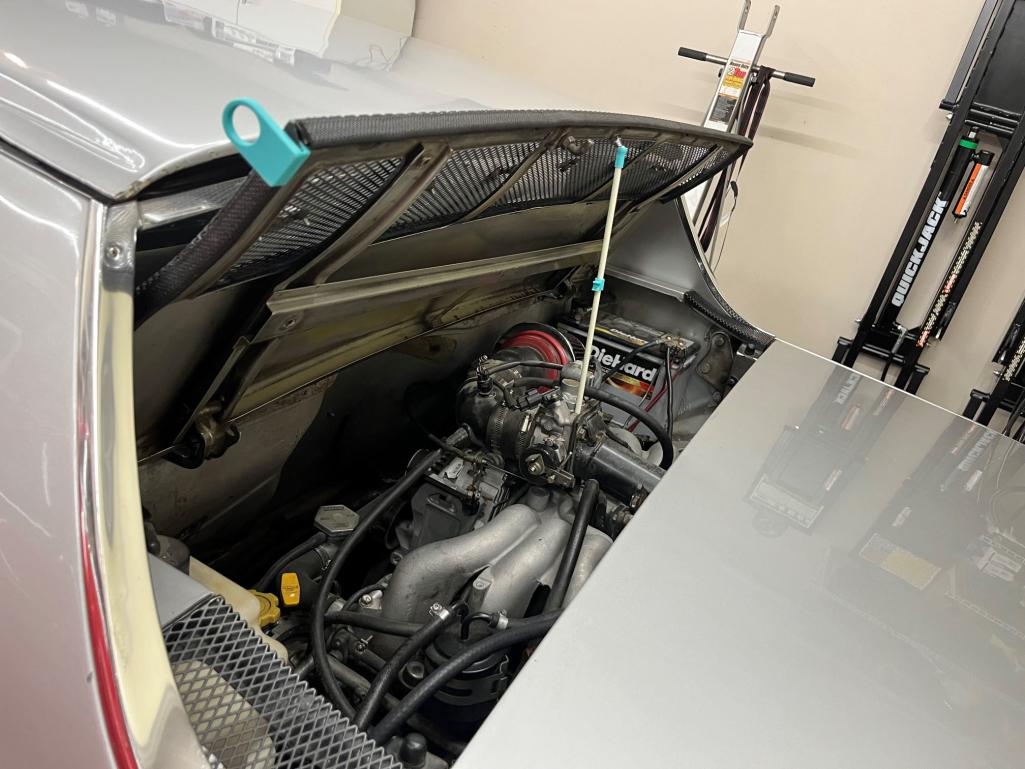 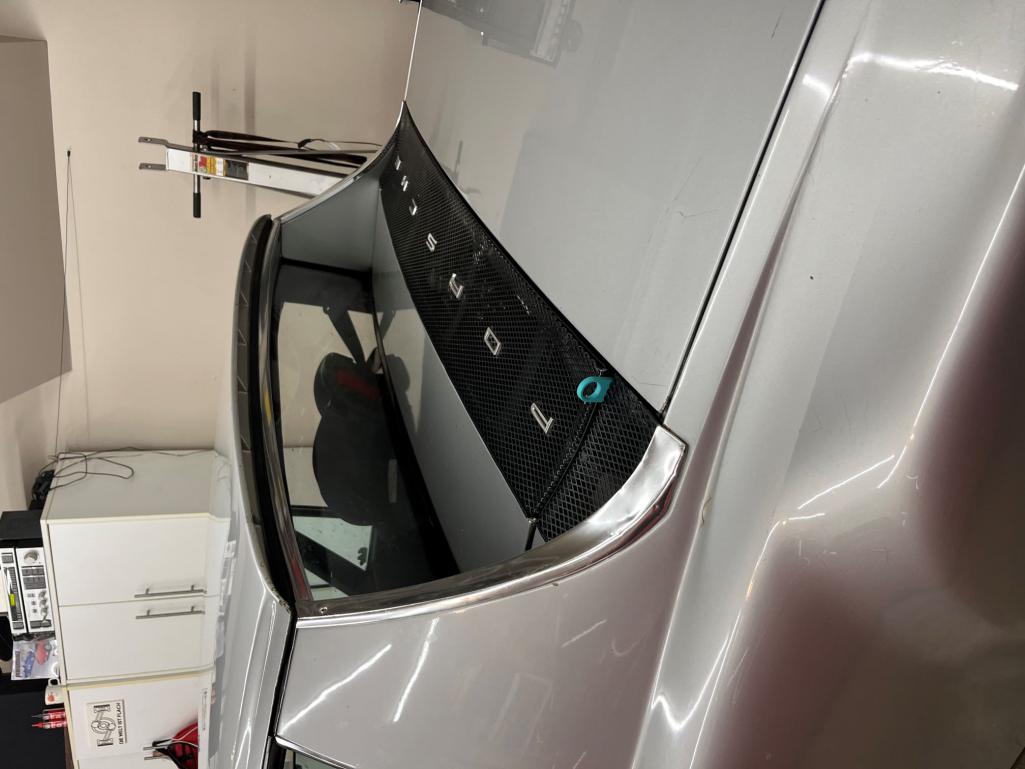 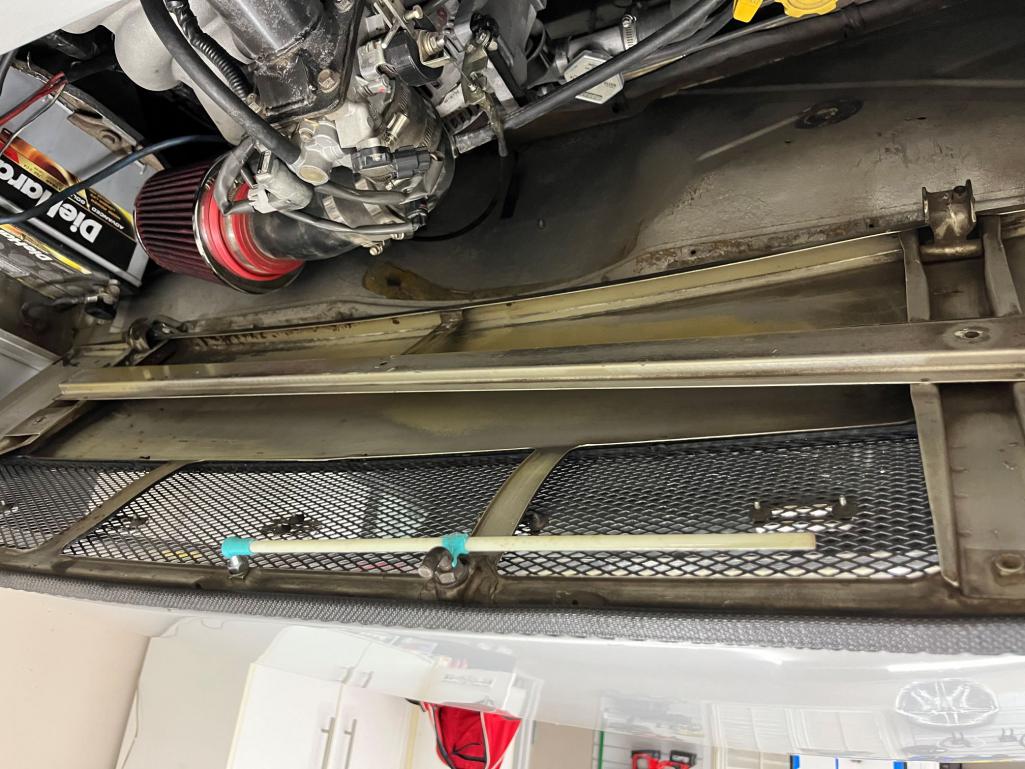 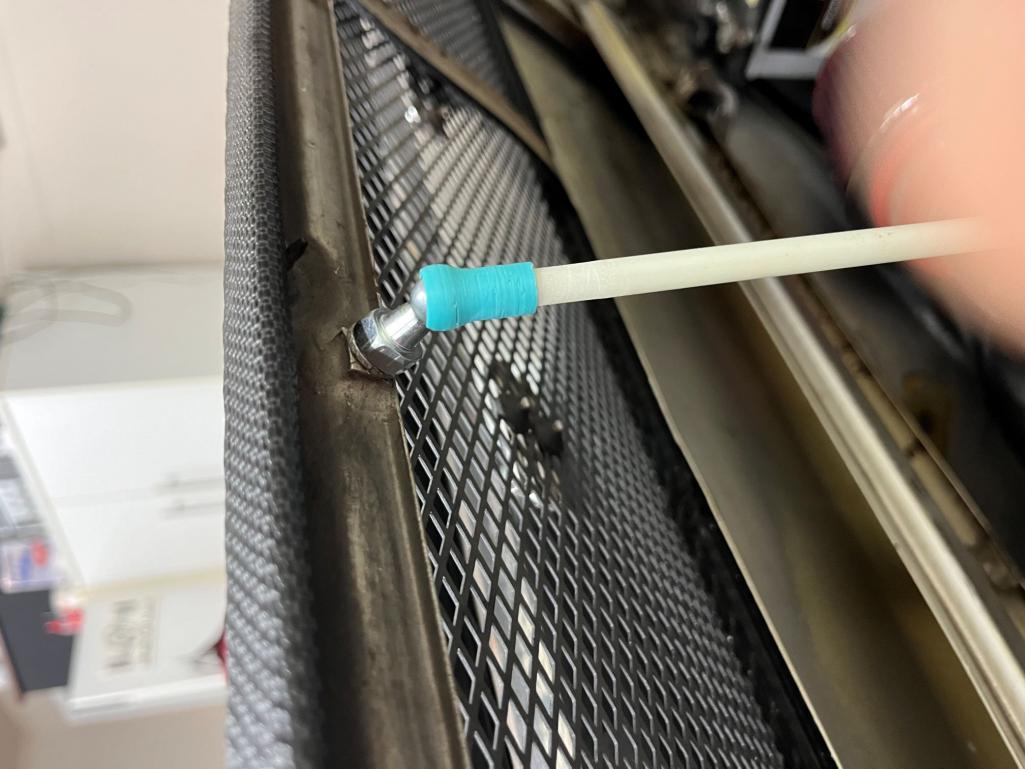
|
| rnellums |
 Dec 23 2024, 08:22 AM Dec 23 2024, 08:22 AM
Post
#395
|
|
Professional Enthusiast    Group: Members Posts: 1,667 Joined: 26-November 09 From: Littleton, CO Member No.: 11,072 Region Association: Rocky Mountains |
I had originally used in in-tank subaru fuel pump, but after that left me stranded I switched to swagelock bulkhead fitting pickups and an external fuel pump.
This worked great, but left a large garish hole in my tank and meant I had to live with the relocated fuel sender and inaccurate readings. This fall I bought a new tank (dansk, free shipping via RMEuropean) and reworked the setup to allow me to go back to using the stock expansion tank and sender location. Lost of cursing trying to get the backing nuts on the swagelock installed, but I'm pretty happy with the result. Attached thumbnail(s) 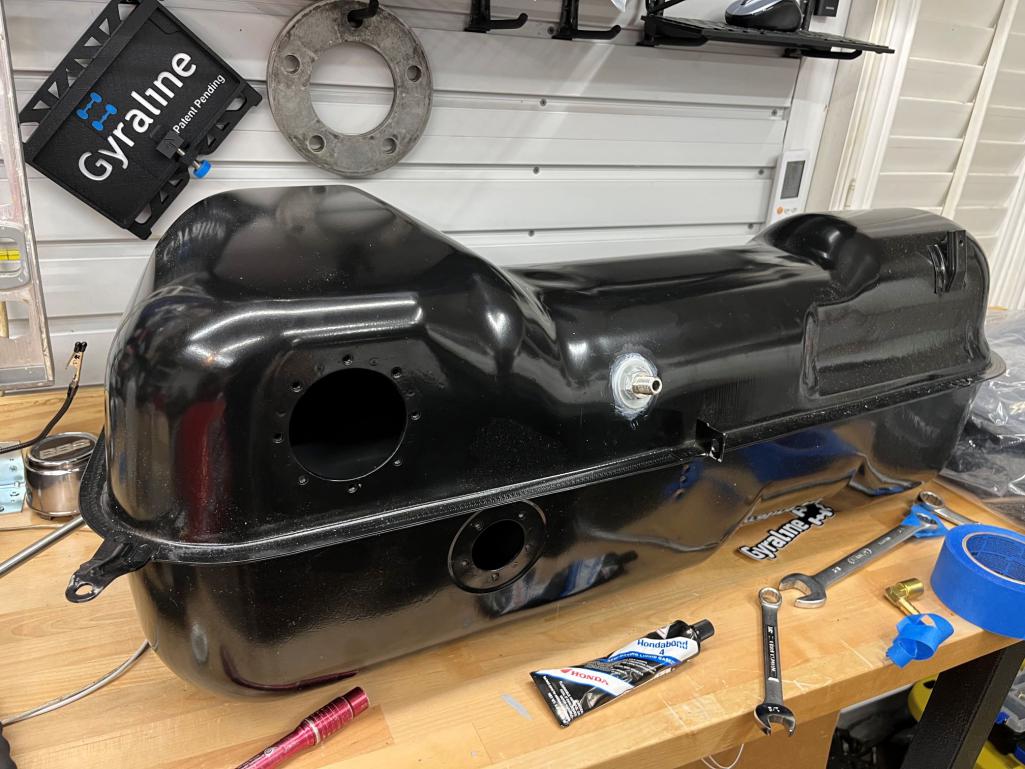 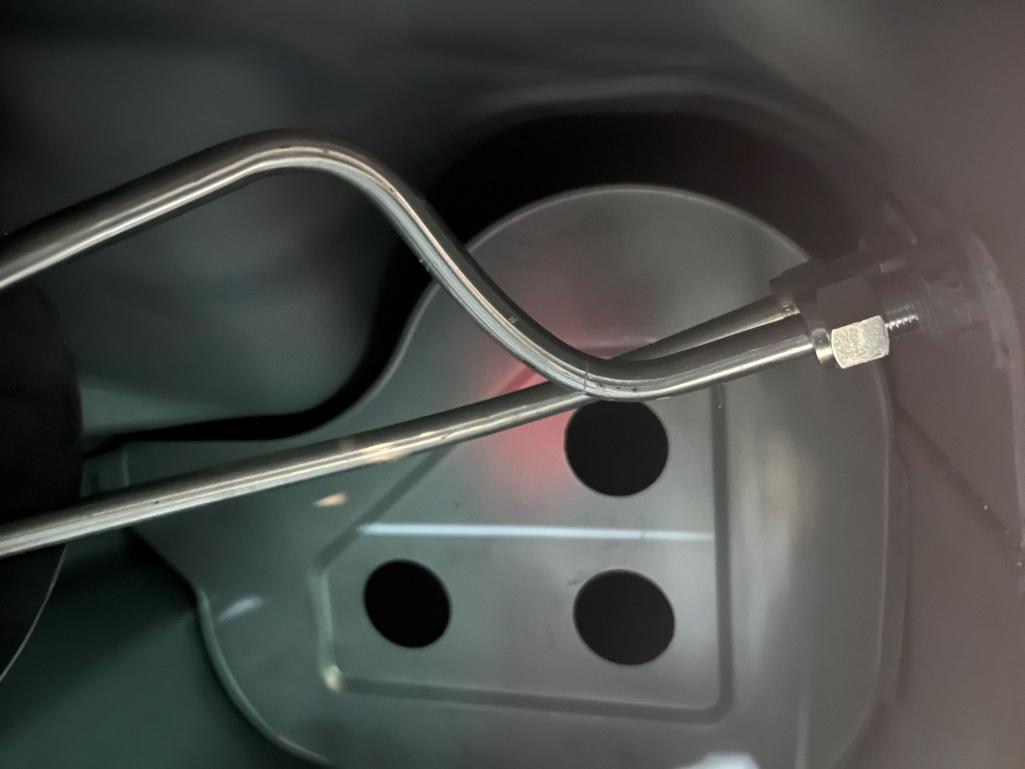 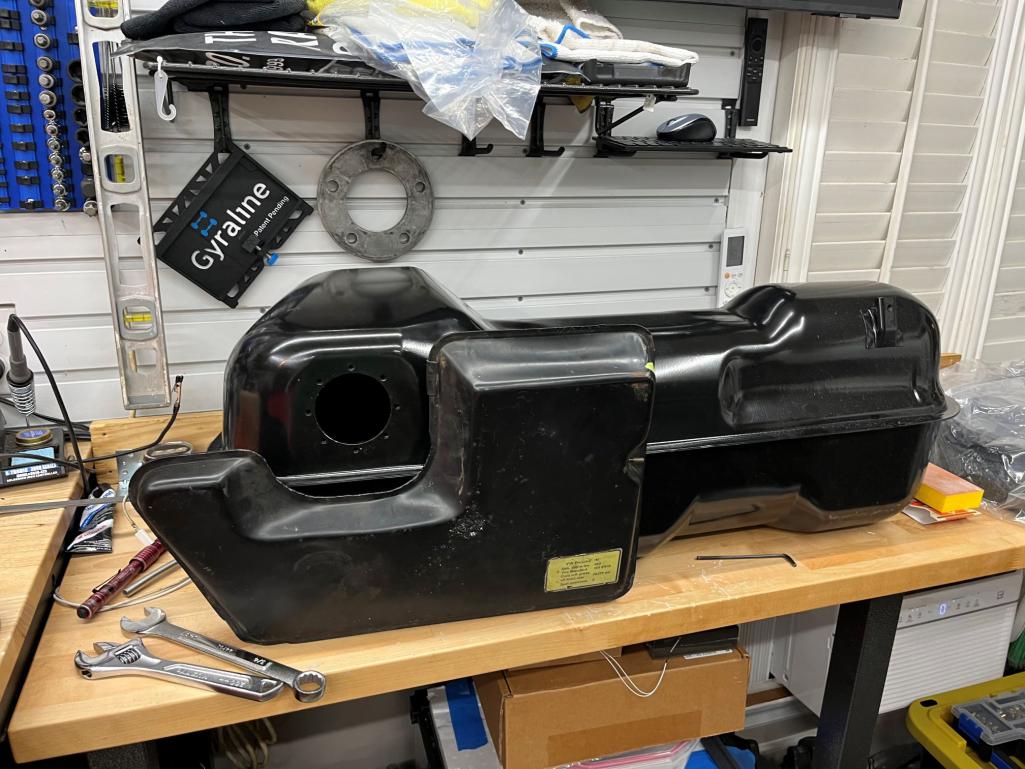 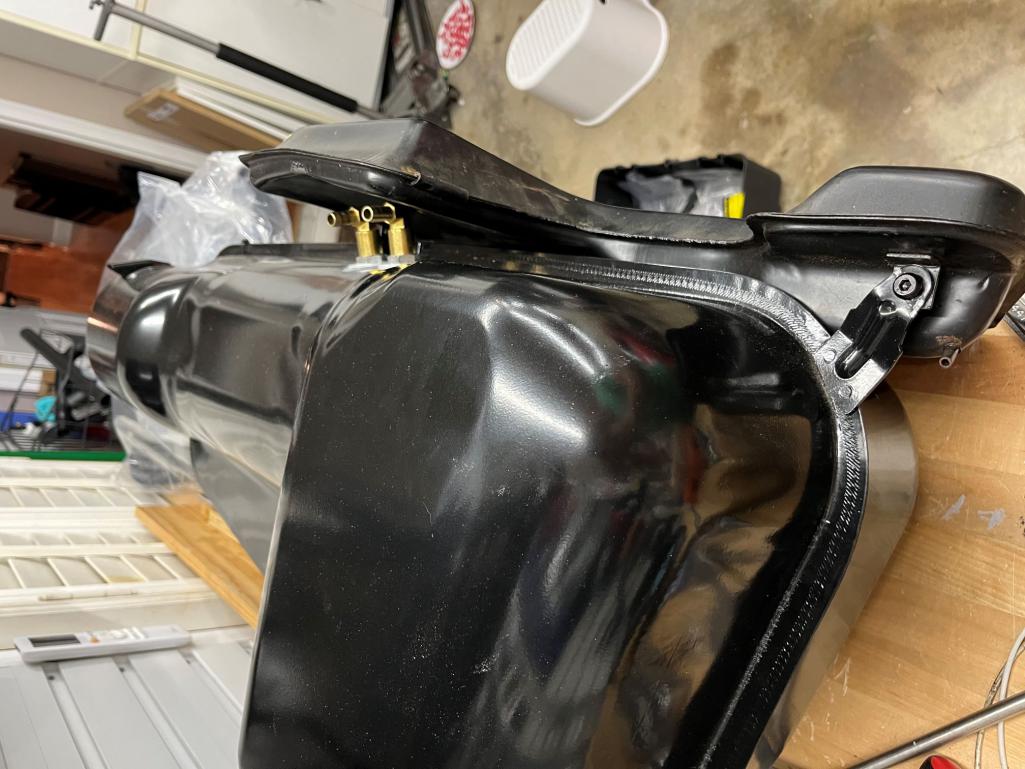 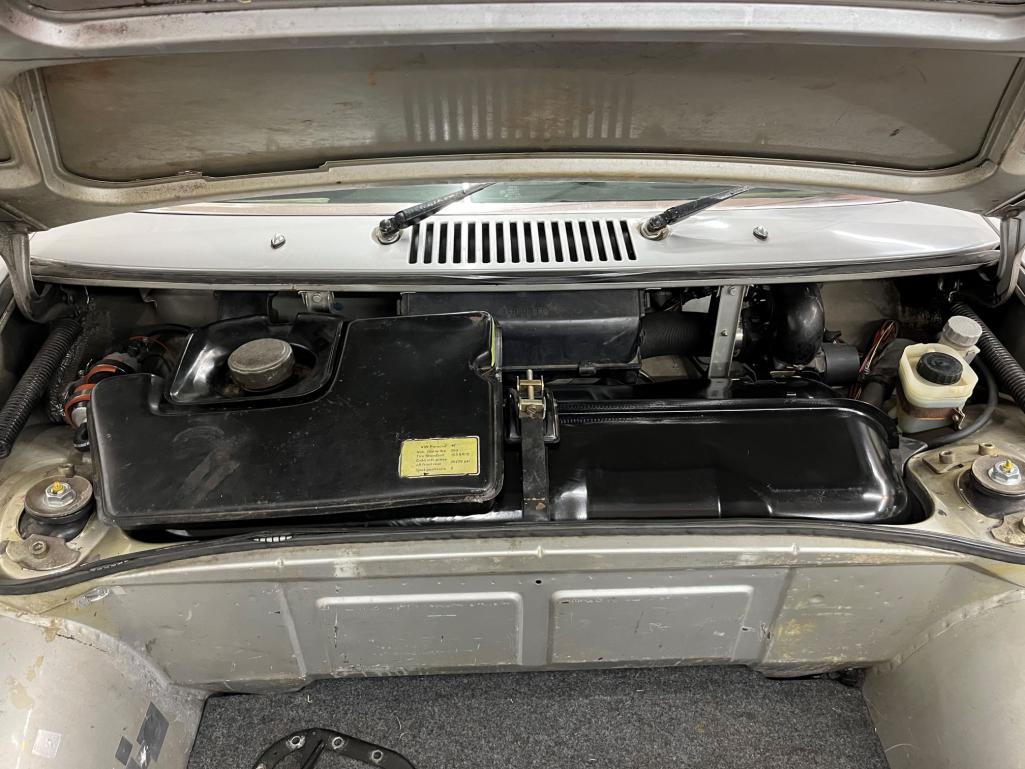
|
| rnellums |
 Dec 23 2024, 08:24 AM Dec 23 2024, 08:24 AM
Post
#396
|
|
Professional Enthusiast    Group: Members Posts: 1,667 Joined: 26-November 09 From: Littleton, CO Member No.: 11,072 Region Association: Rocky Mountains |
I also re-worked my fuel pump mount (previously hose clamed to a homemade bracket) using some 3D printed clamps I designed up.
Attached thumbnail(s) 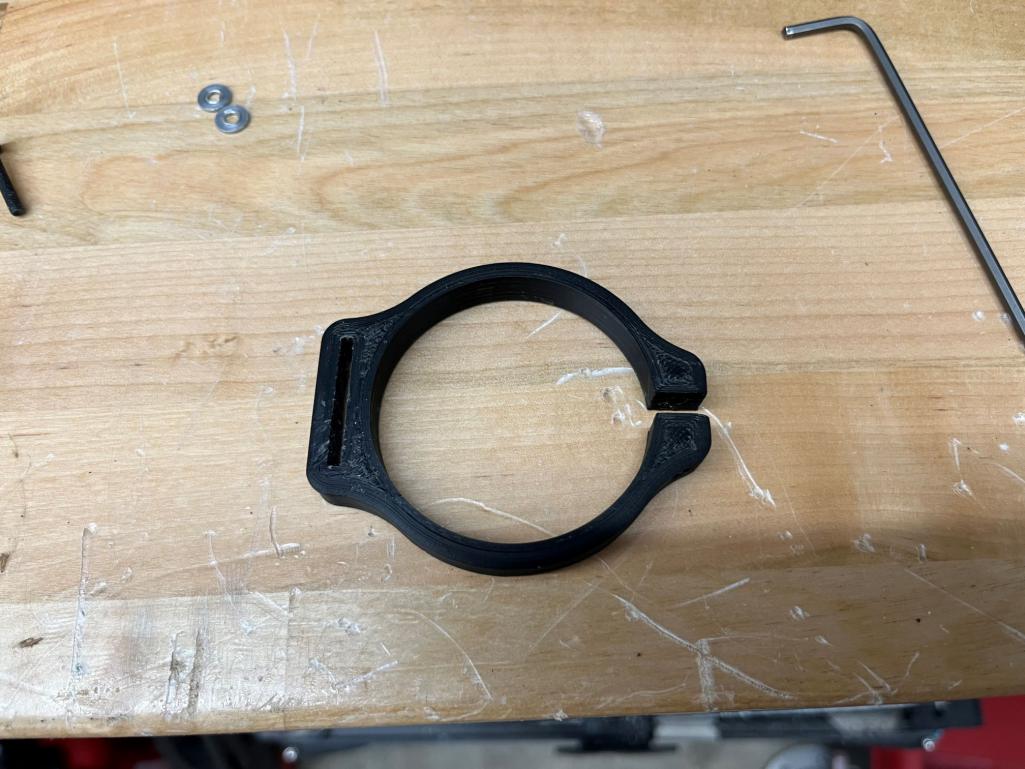 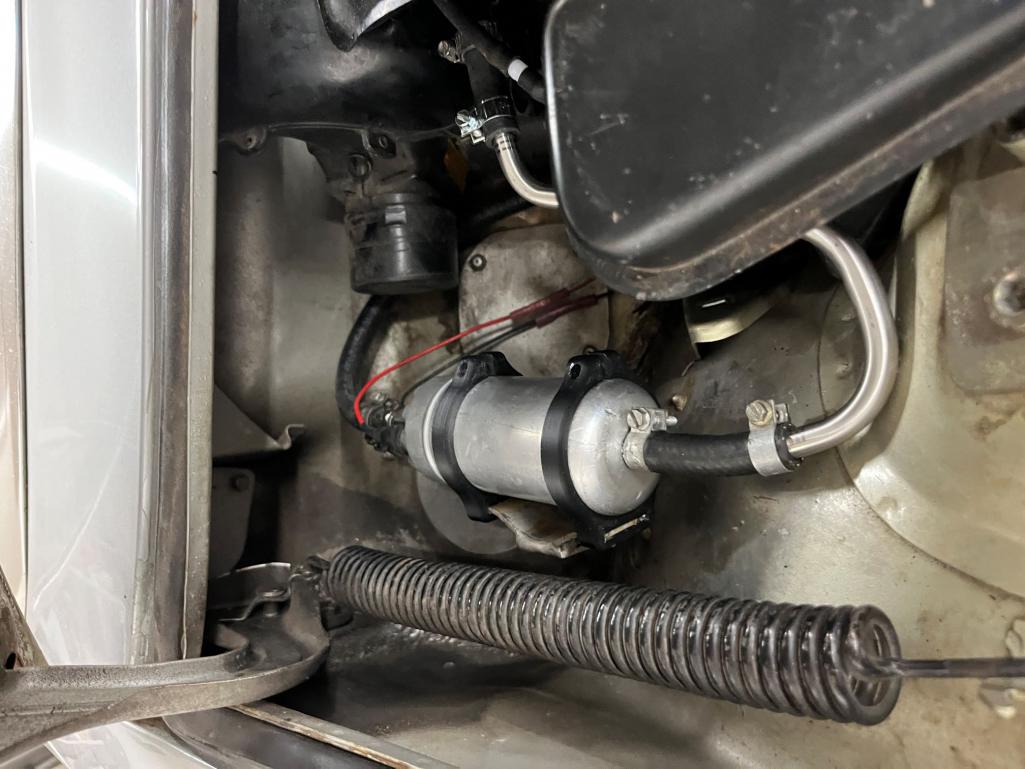 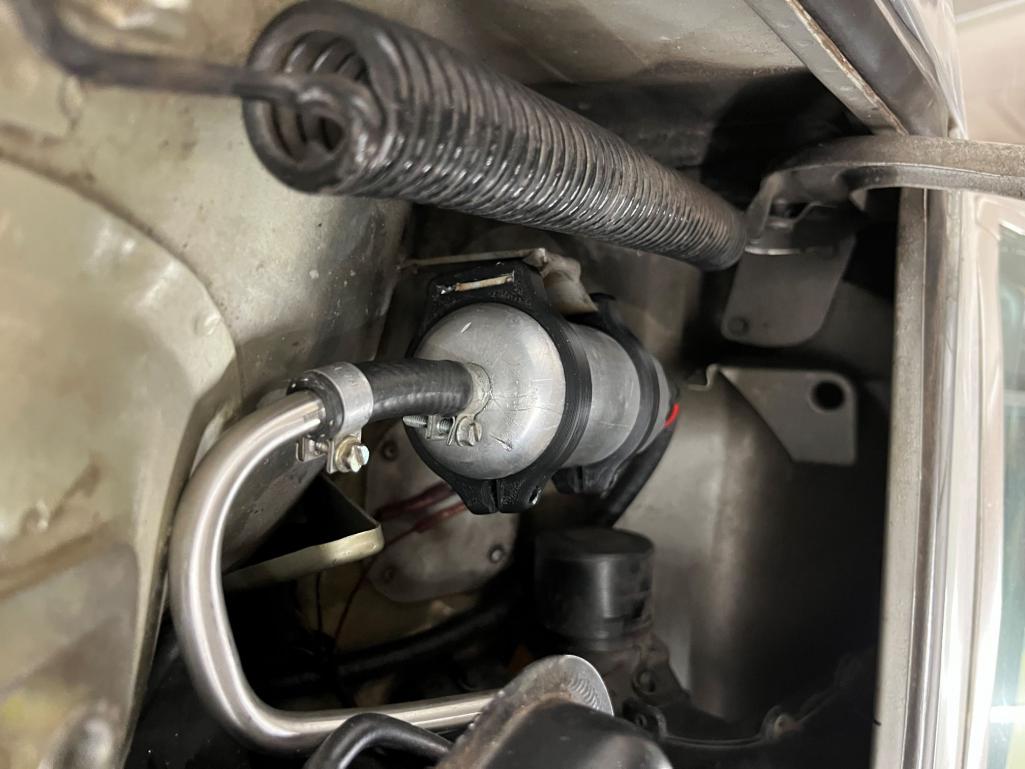
|
| rnellums |
 Dec 23 2024, 08:24 AM Dec 23 2024, 08:24 AM
Post
#397
|
|
Professional Enthusiast    Group: Members Posts: 1,667 Joined: 26-November 09 From: Littleton, CO Member No.: 11,072 Region Association: Rocky Mountains |
I relocated my clutch master cylinder reservoir as well.
Attached thumbnail(s) 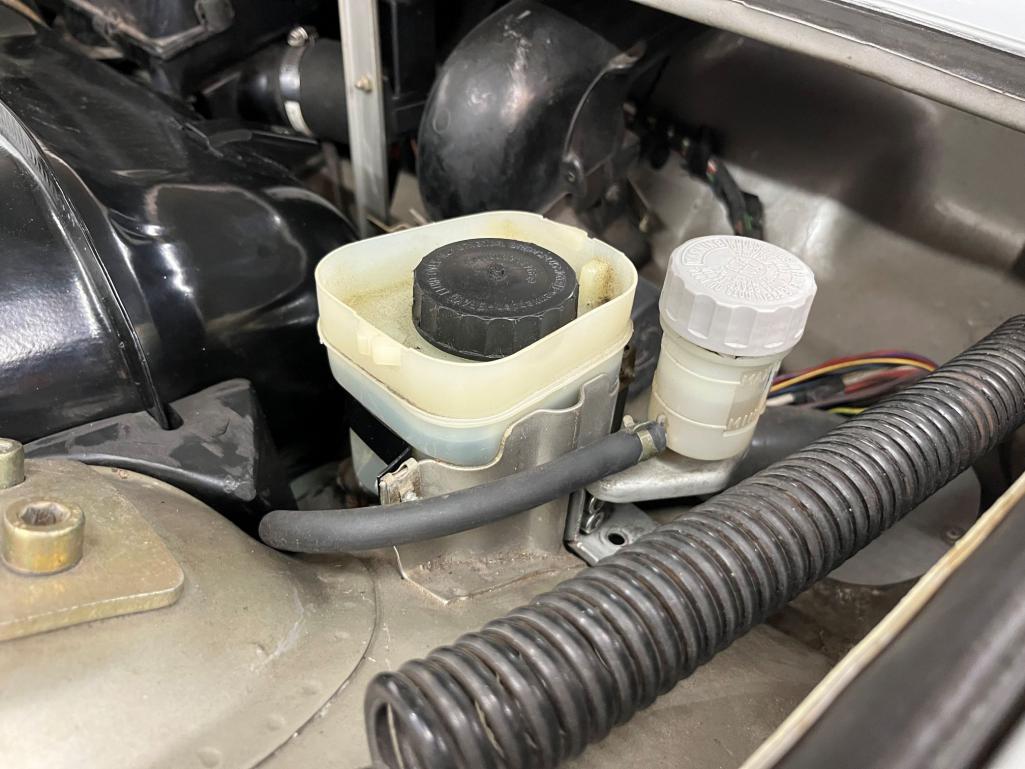
|
| rnellums |
 Dec 23 2024, 08:29 AM Dec 23 2024, 08:29 AM
Post
#398
|
|
Professional Enthusiast    Group: Members Posts: 1,667 Joined: 26-November 09 From: Littleton, CO Member No.: 11,072 Region Association: Rocky Mountains |
I had never been that happy with the MR2 shifter. I came upon a (relatively) inexpensive numeric shifter out of a GT4 and pulled the trigger. One difficulty is that the forward/back is reversed so I designed up a bellcrank linkage to convert it to the right orientation.
Its mounted to a baseplate that bolts up to the stock shifter mount points. I also bought new shift cables, ball joints, and revised the rear coldwater linkage to pinch-clamp to remove slop. Attached thumbnail(s) 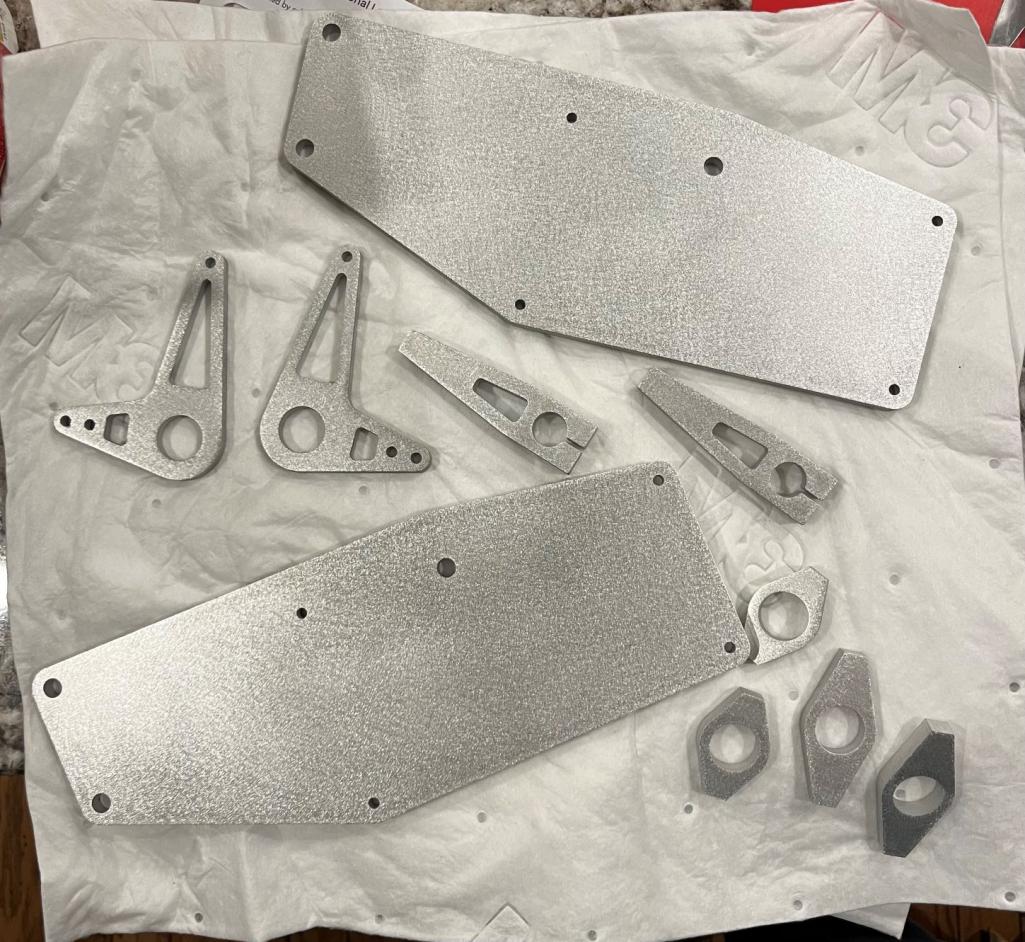 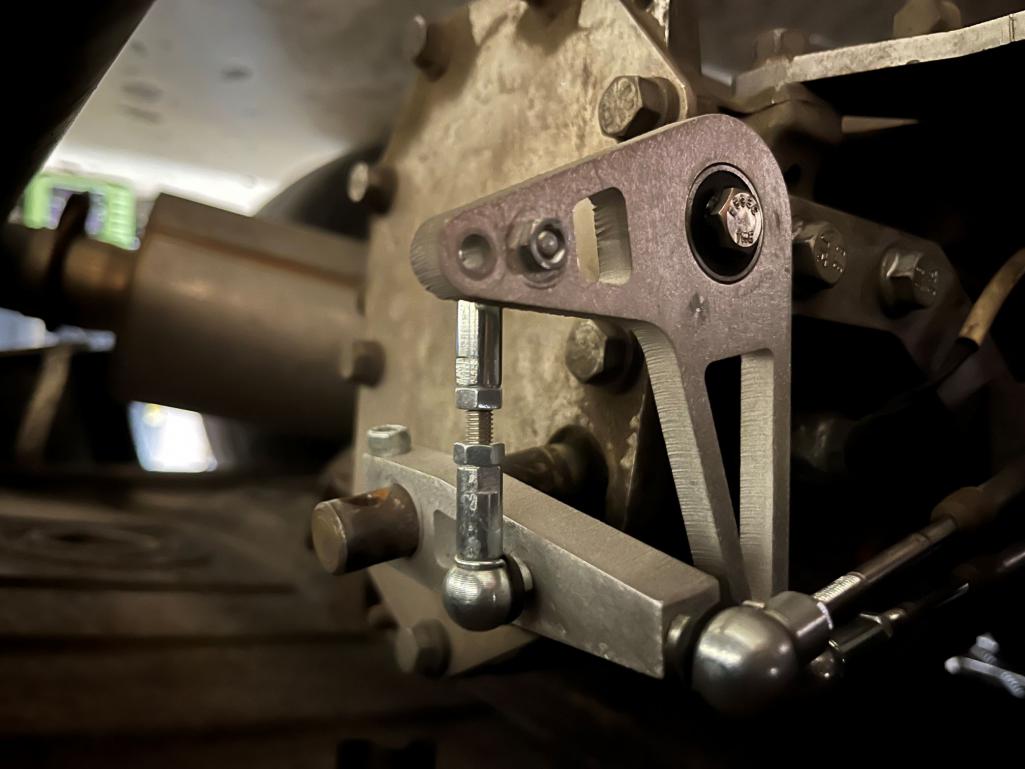 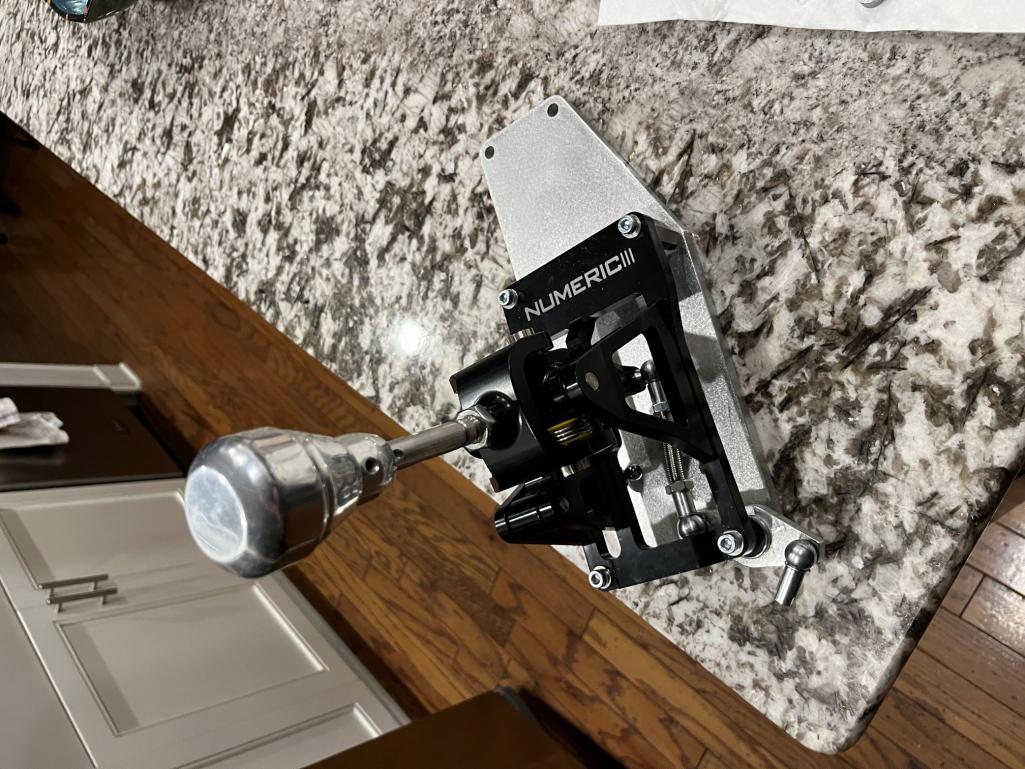 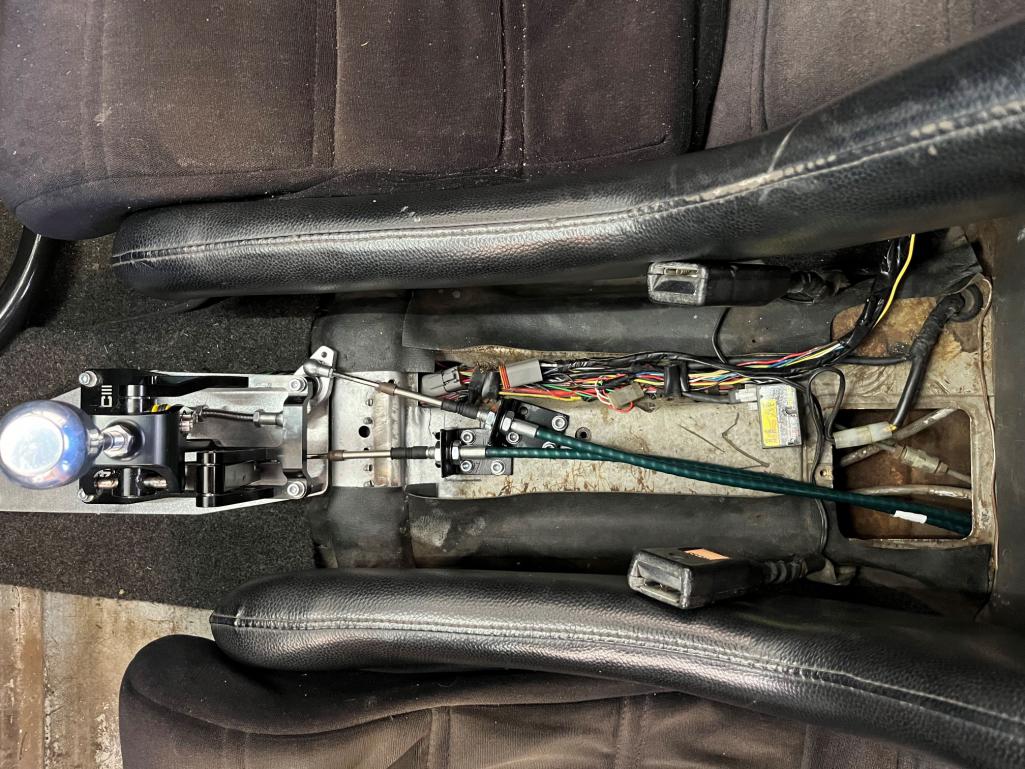 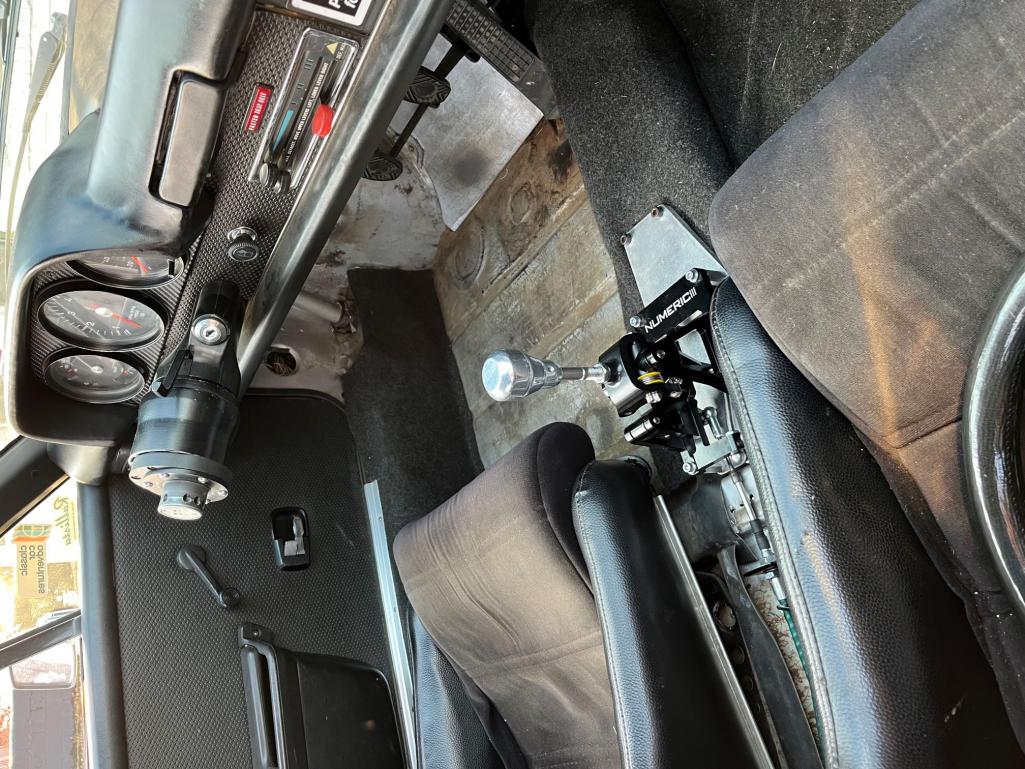 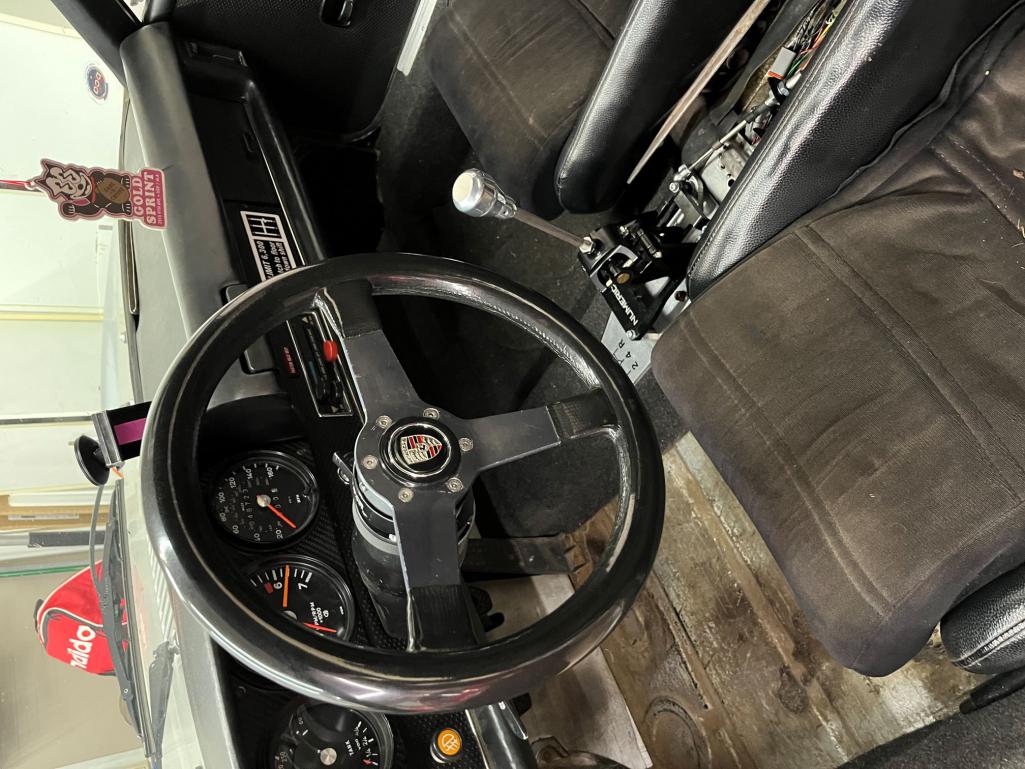
|
| rnellums |
 Dec 23 2024, 08:42 AM Dec 23 2024, 08:42 AM
Post
#399
|
|
Professional Enthusiast    Group: Members Posts: 1,667 Joined: 26-November 09 From: Littleton, CO Member No.: 11,072 Region Association: Rocky Mountains |
The new shifter meant that a new center console was needed. I knew I wanted to add heated seats eventually so I added a console with a roll top to hold the switches. It also houses the OBD port.
3D printed in pieces on my Voron 2.4. Its currently a bit wider than I'd like so I may work a revision in the next few months. Attached thumbnail(s) 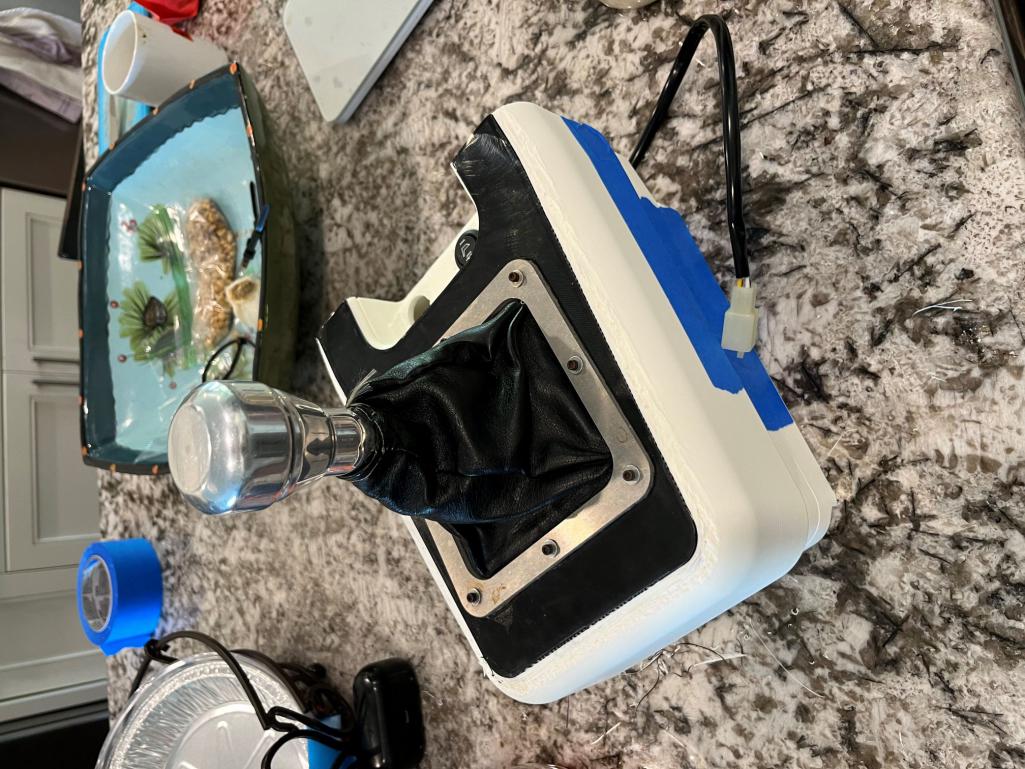 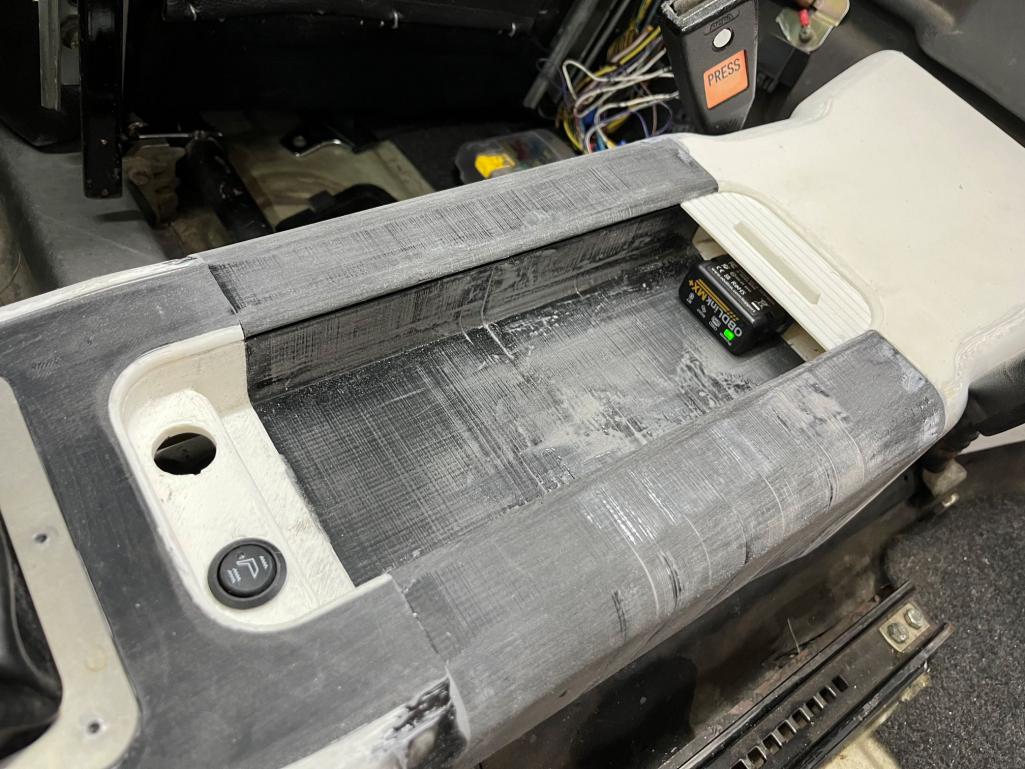 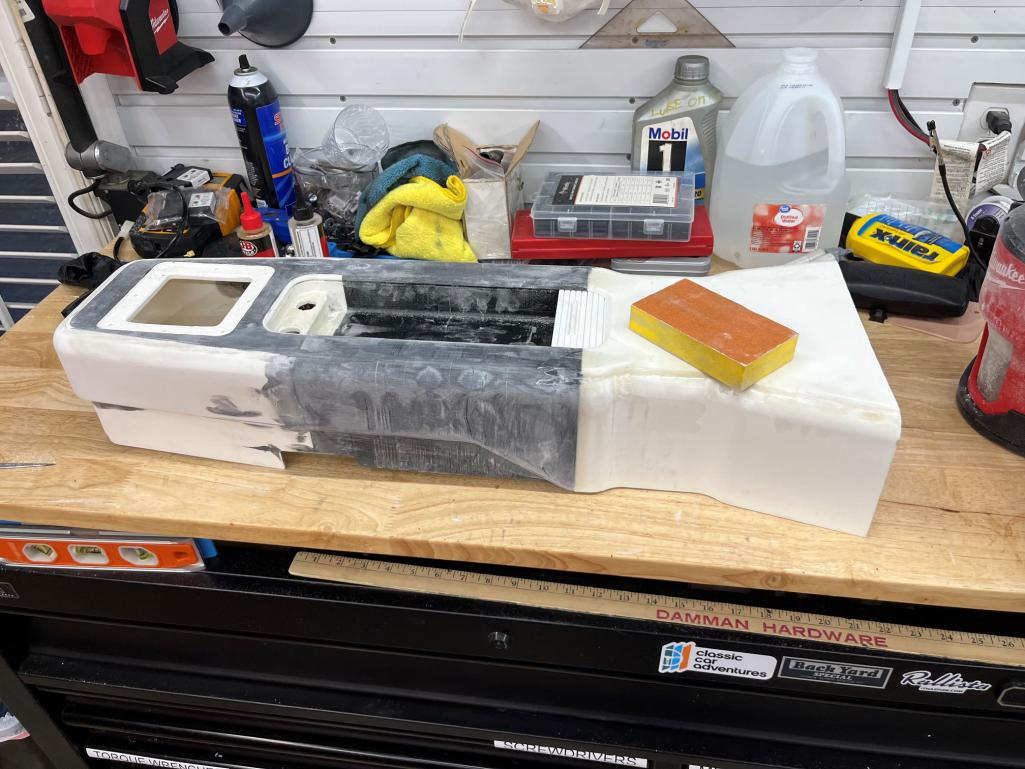 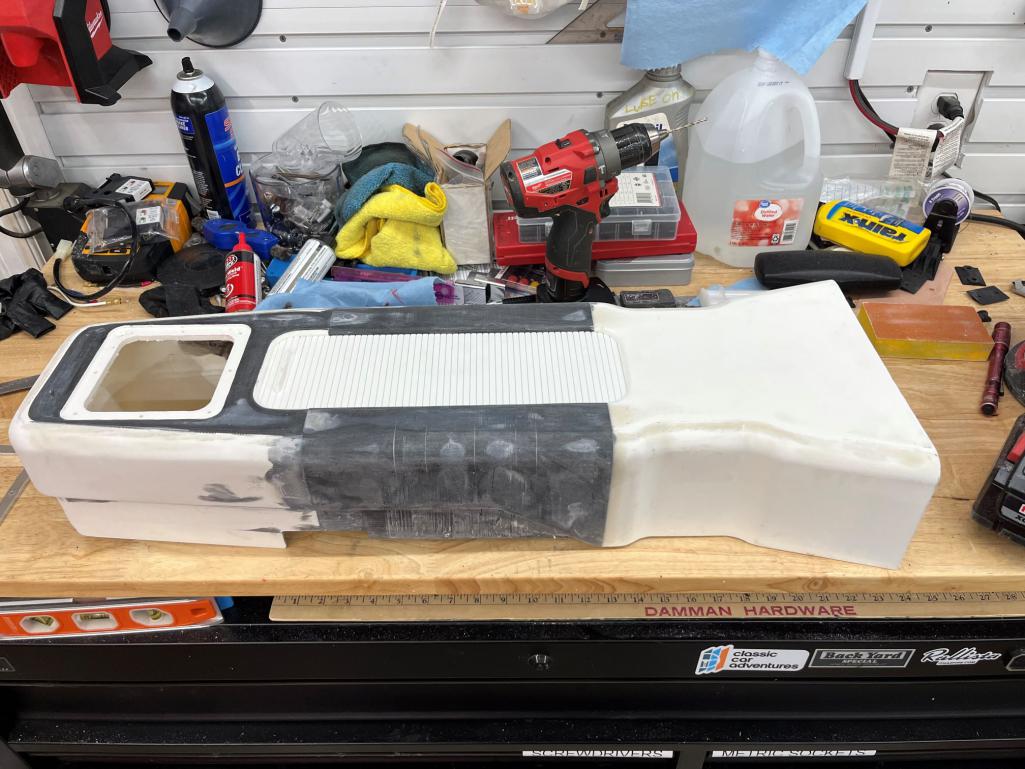 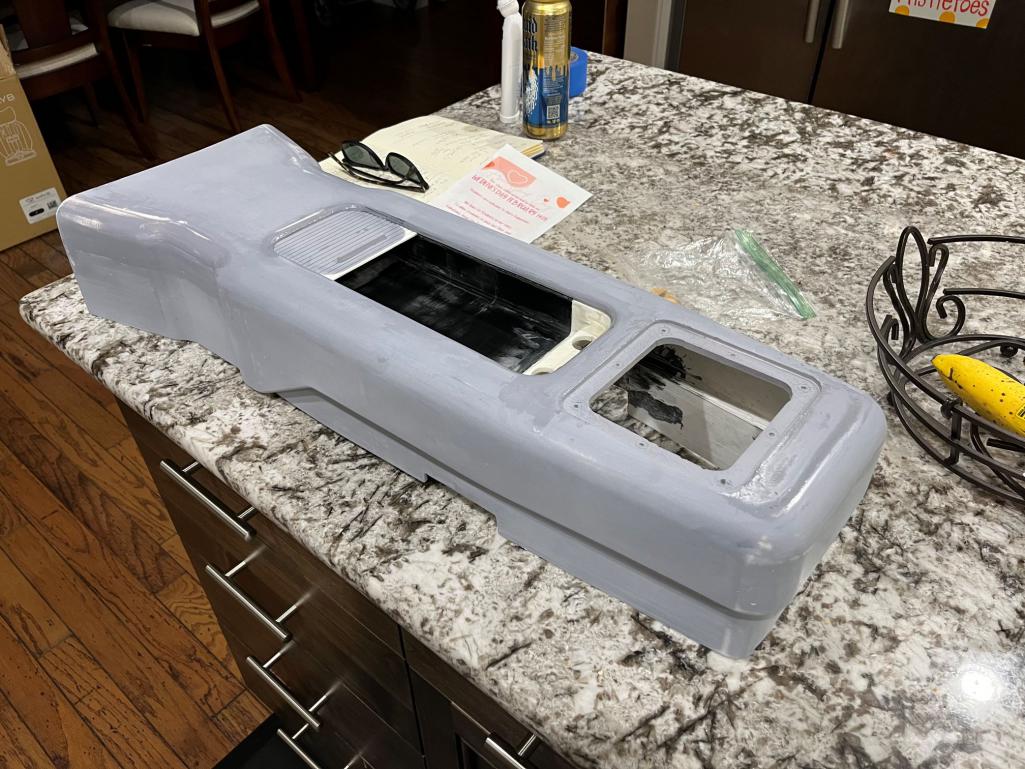 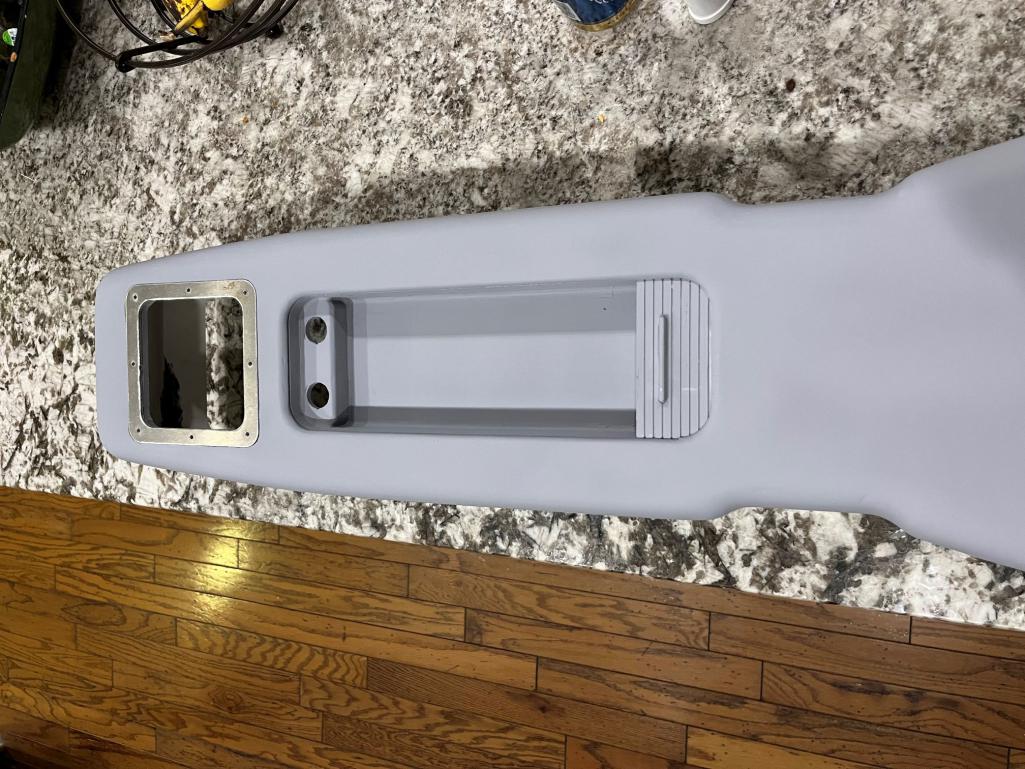 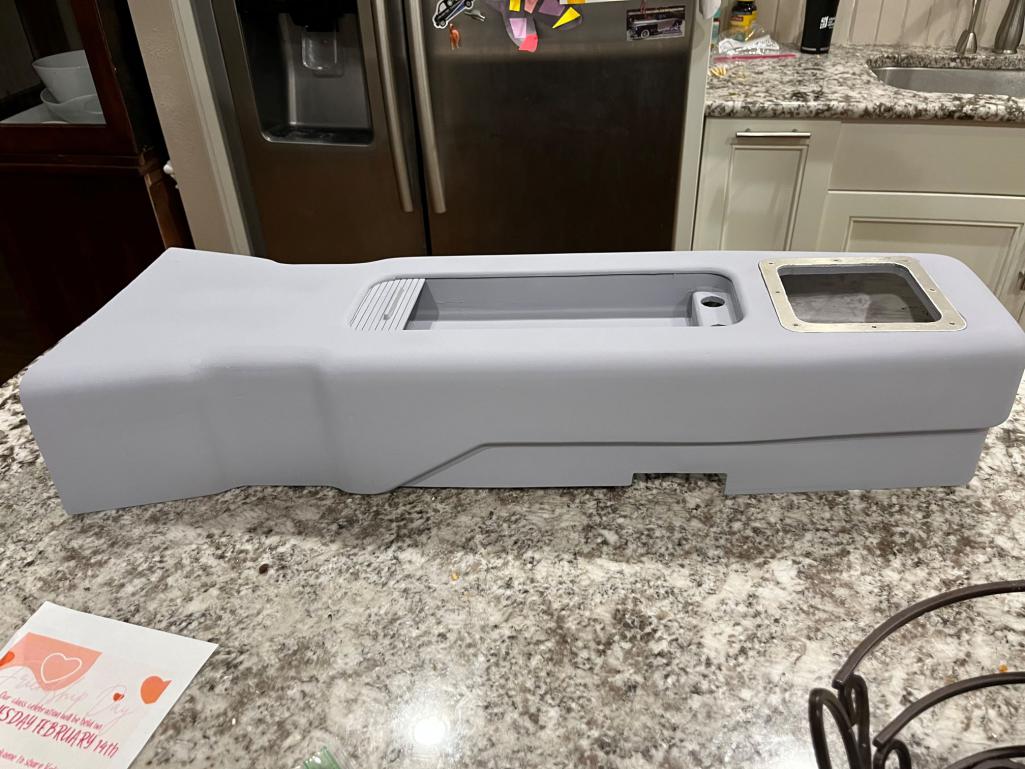 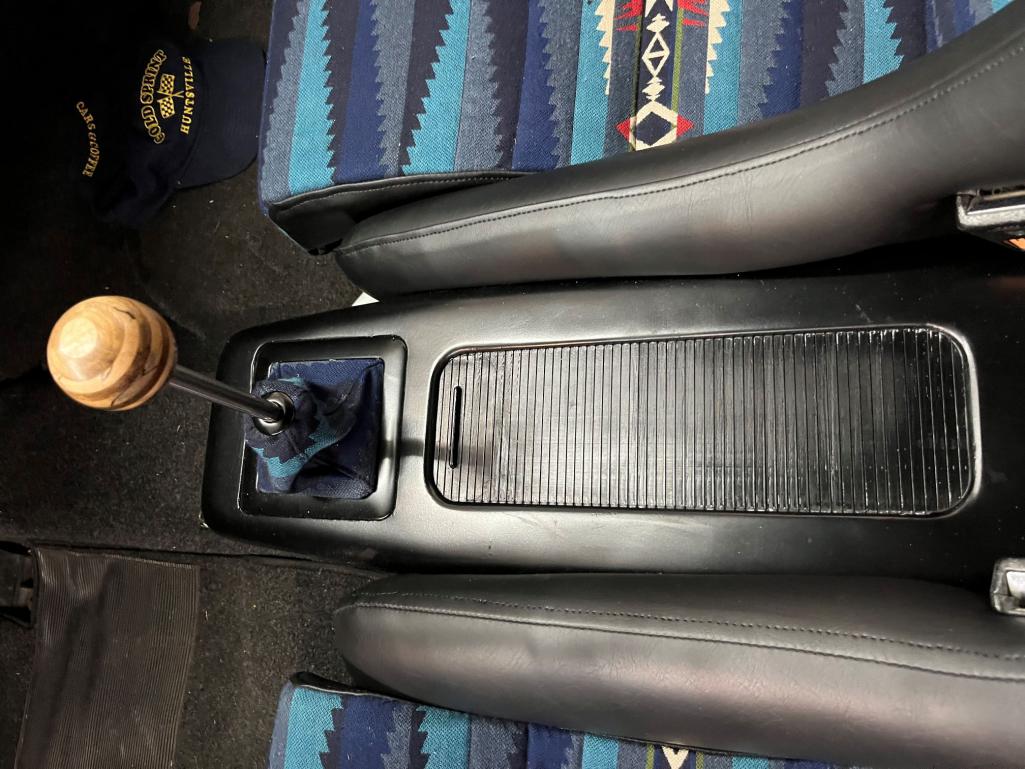
|
| rnellums |
 Dec 23 2024, 08:48 AM Dec 23 2024, 08:48 AM
Post
#400
|
|
Professional Enthusiast    Group: Members Posts: 1,667 Joined: 26-November 09 From: Littleton, CO Member No.: 11,072 Region Association: Rocky Mountains |
I have wanted to refinish my seats for a while so I finally took the plunge.
Removed the ancient foam, welded in new webbing pickups, and sewed new webbing Then I reinforced the headrest mounts, added new foam to the bolters and wrapped with new vinyl. For the inserts I went with a pendleton outdoor fabric in a throwback to my southwest roots. We'll see how well it wears. Attached thumbnail(s) 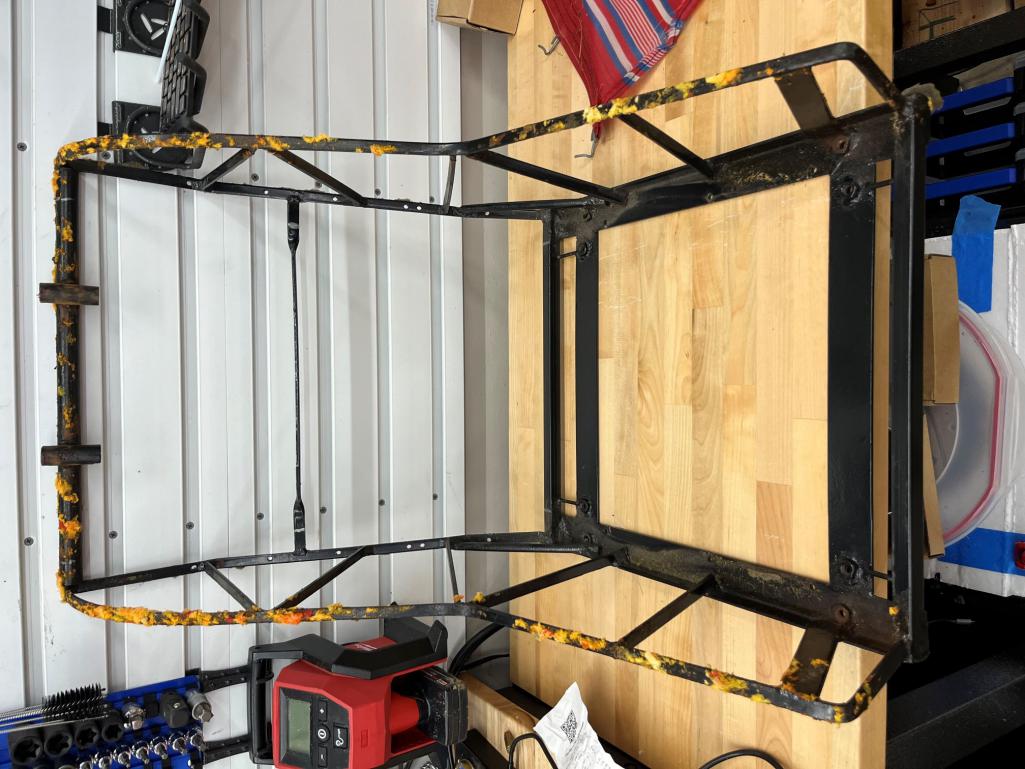 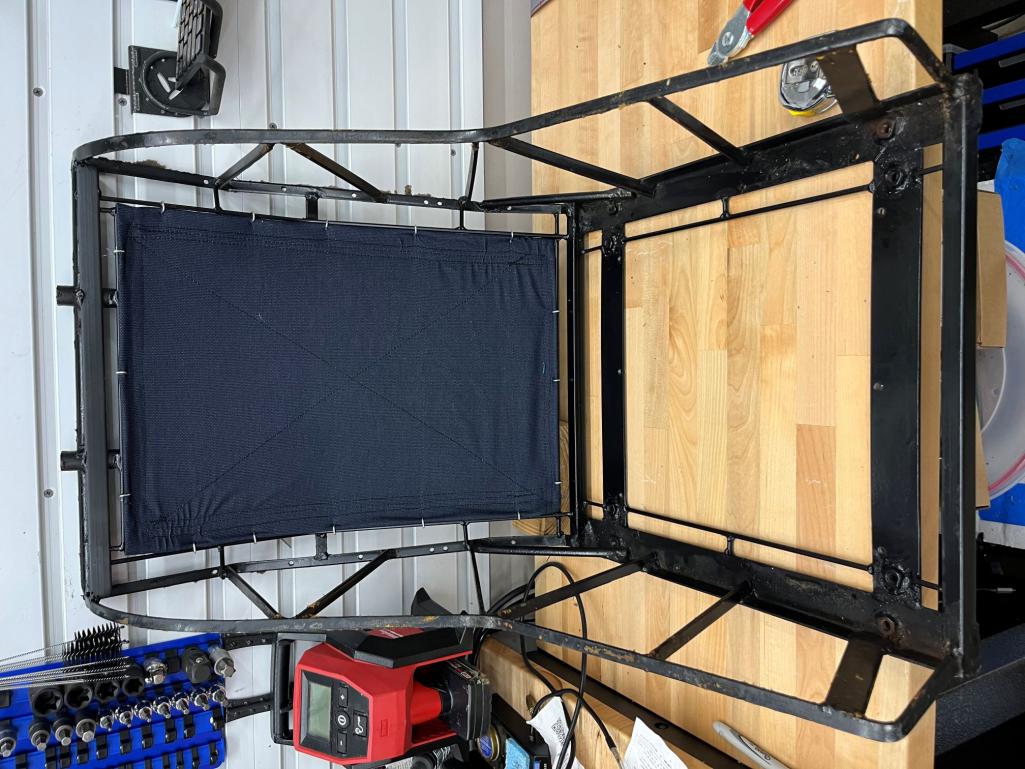 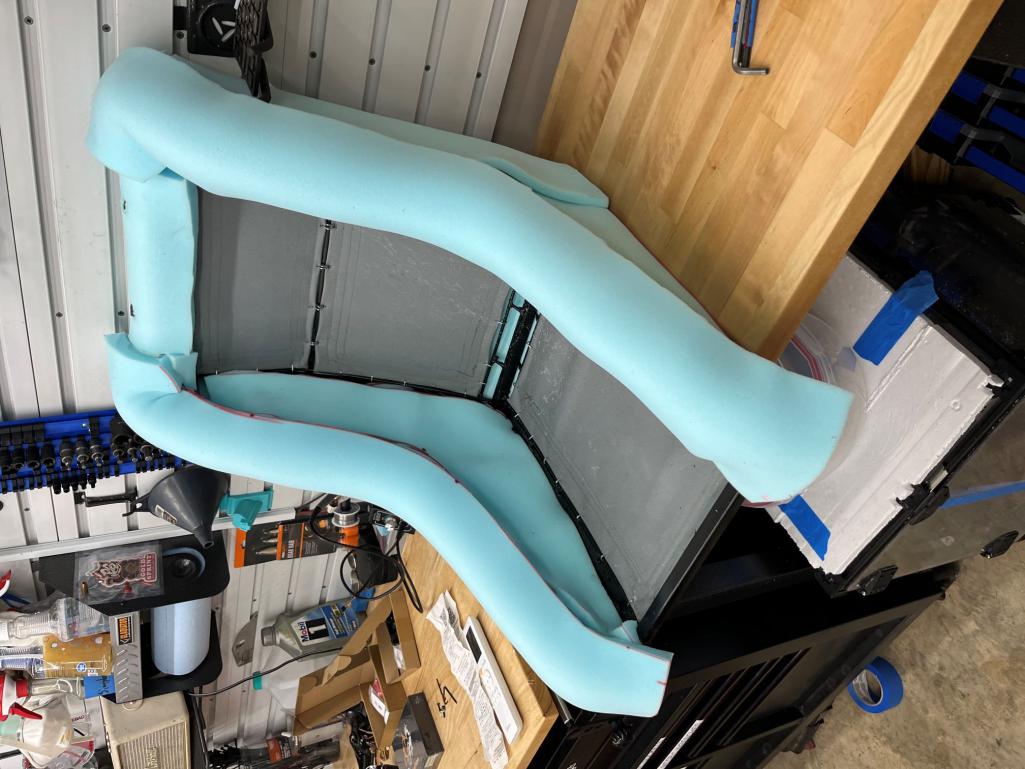 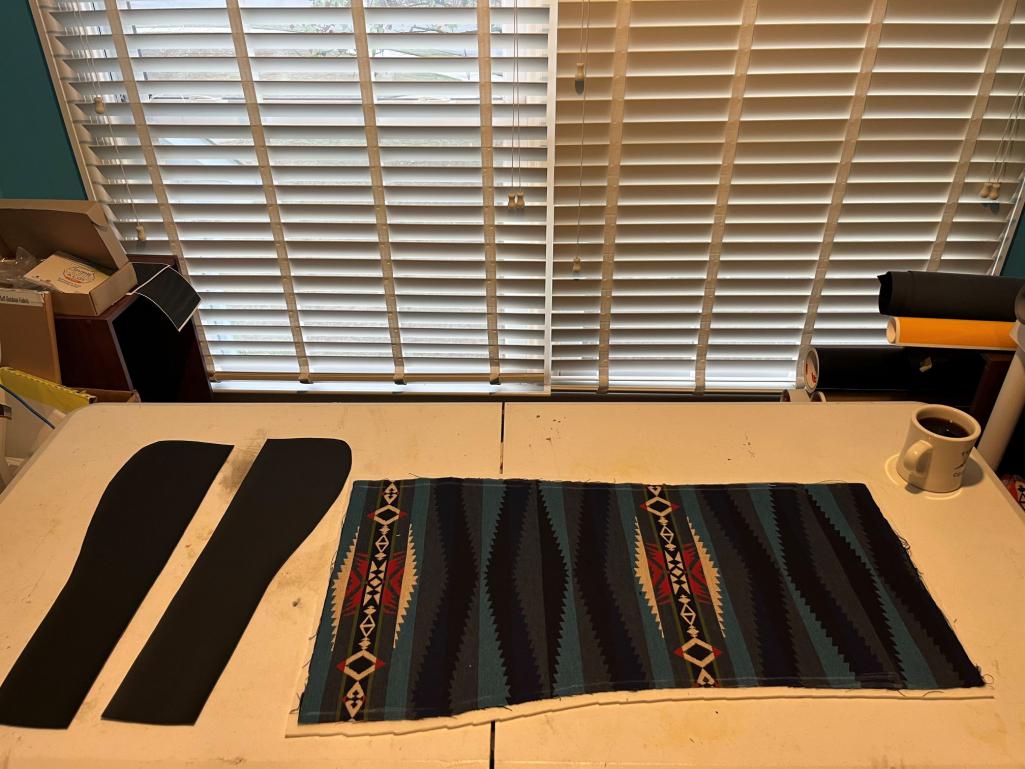 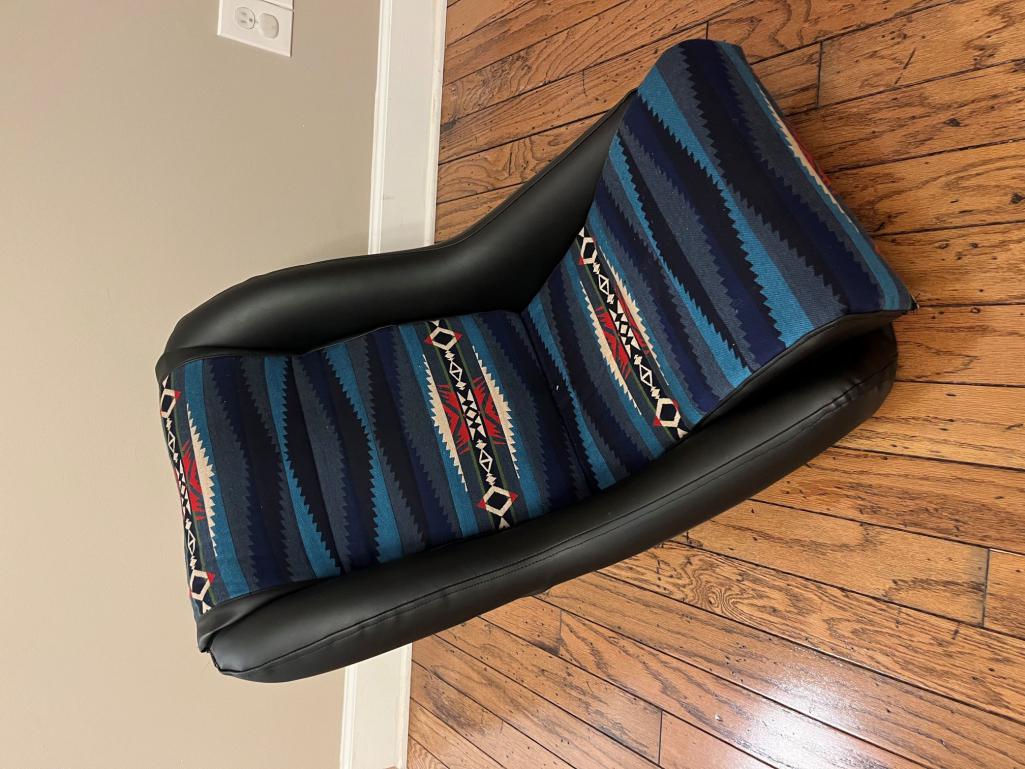 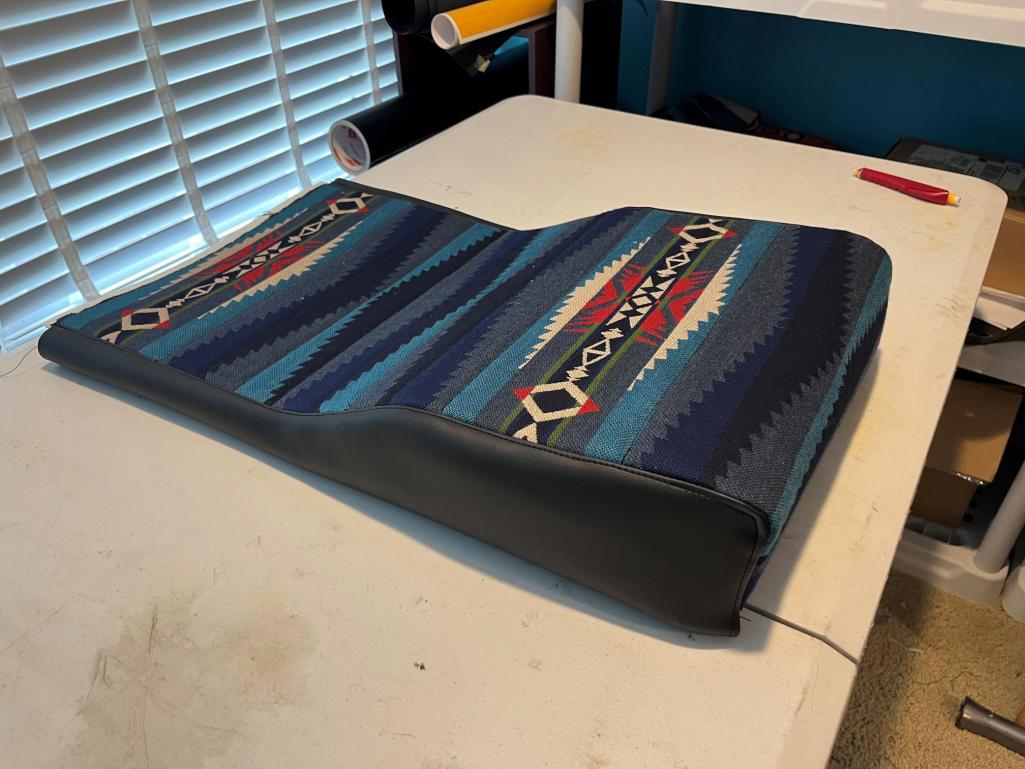 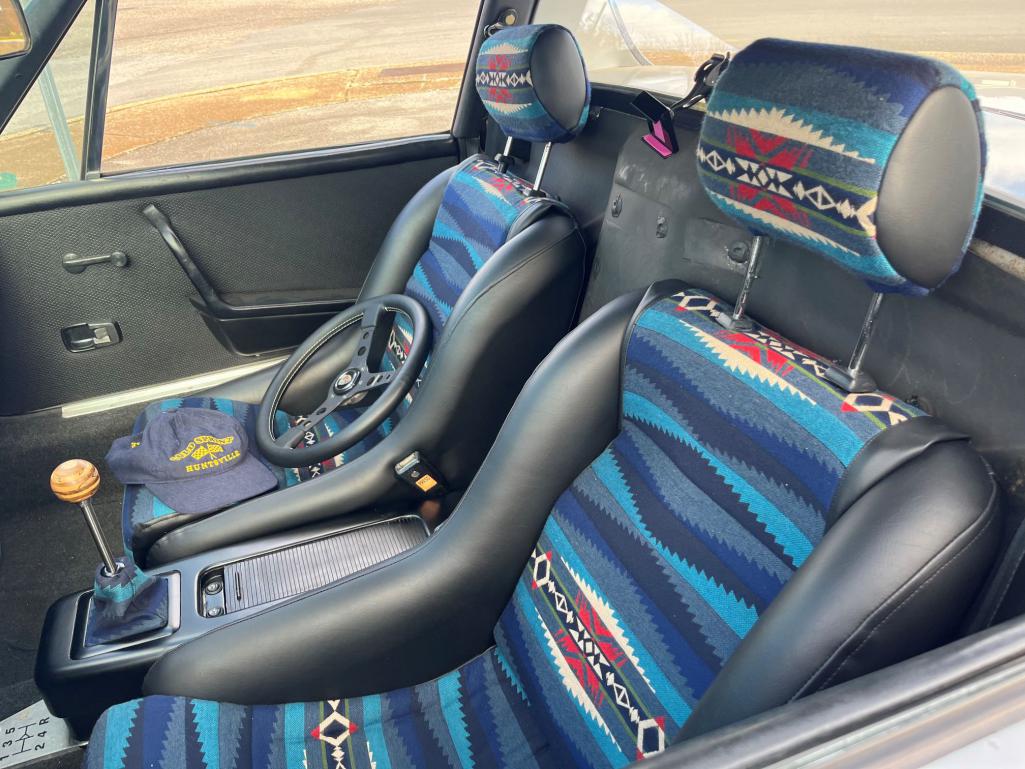
|
  |
34 User(s) are reading this topic (34 Guests and 0 Anonymous Users)
0 Members:

|
Lo-Fi Version | Time is now: 28th December 2024 - 01:37 AM |
Invision Power Board
v9.1.4 © 2024 IPS, Inc.


