|
|

|
Porsche, and the Porsche crest are registered trademarks of Dr. Ing. h.c. F. Porsche AG.
This site is not affiliated with Porsche in any way. Its only purpose is to provide an online forum for car enthusiasts. All other trademarks are property of their respective owners. |
|
|
  |
| KSCarrera |
 Jun 18 2024, 12:42 AM Jun 18 2024, 12:42 AM
Post
#16941
|
|
Member   Group: Members Posts: 316 Joined: 31-January 19 From: UK Member No.: 22,846 Region Association: England |
|
| ValcoOscar |
 Jun 18 2024, 08:07 AM Jun 18 2024, 08:07 AM
Post
#16942
|
|
Garage Life     Group: Members Posts: 2,474 Joined: 19-November 13 From: SoCal Member No.: 16,669 Region Association: Southern California 

|
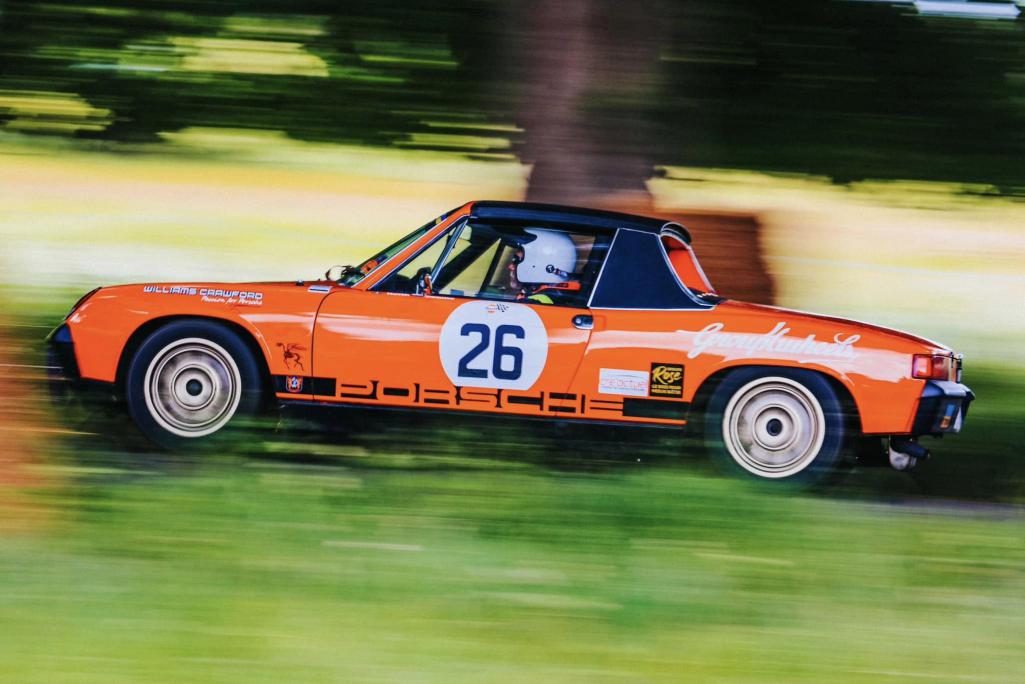
*** PHOTO OF THE DAY *** Should be a poster (IMG:style_emoticons/default/beer3.gif) (IMG:style_emoticons/default/beerchug.gif) (IMG:style_emoticons/default/beer.gif) (IMG:style_emoticons/default/piratenanner.gif) (IMG:style_emoticons/default/cheer.gif) (IMG:style_emoticons/default/first.gif) (IMG:style_emoticons/default/aktion035.gif) (IMG:style_emoticons/default/biggrin.gif) |
| Shivers |
 Jun 18 2024, 09:18 PM Jun 18 2024, 09:18 PM
Post
#16943
|
|
Senior Member     Group: Members Posts: 2,780 Joined: 19-October 20 From: La Quinta, CA Member No.: 24,781 Region Association: Southern California |
|
| Shivers |
 Jun 20 2024, 09:18 AM Jun 20 2024, 09:18 AM
Post
#16944
|
|
Senior Member     Group: Members Posts: 2,780 Joined: 19-October 20 From: La Quinta, CA Member No.: 24,781 Region Association: Southern California |
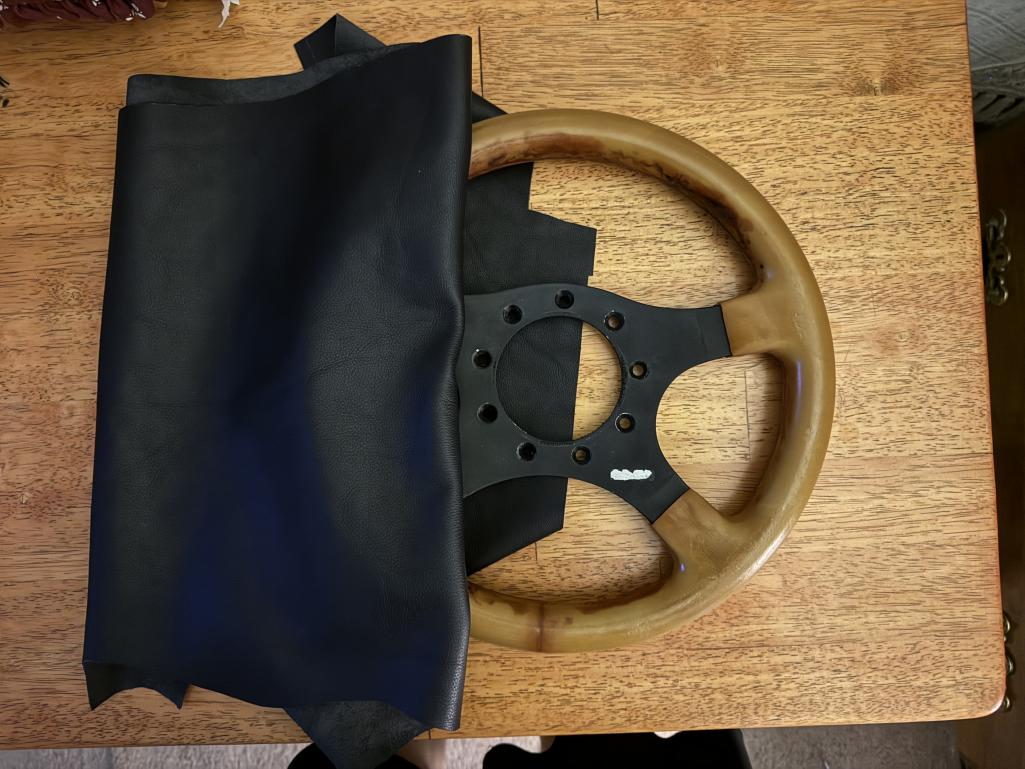
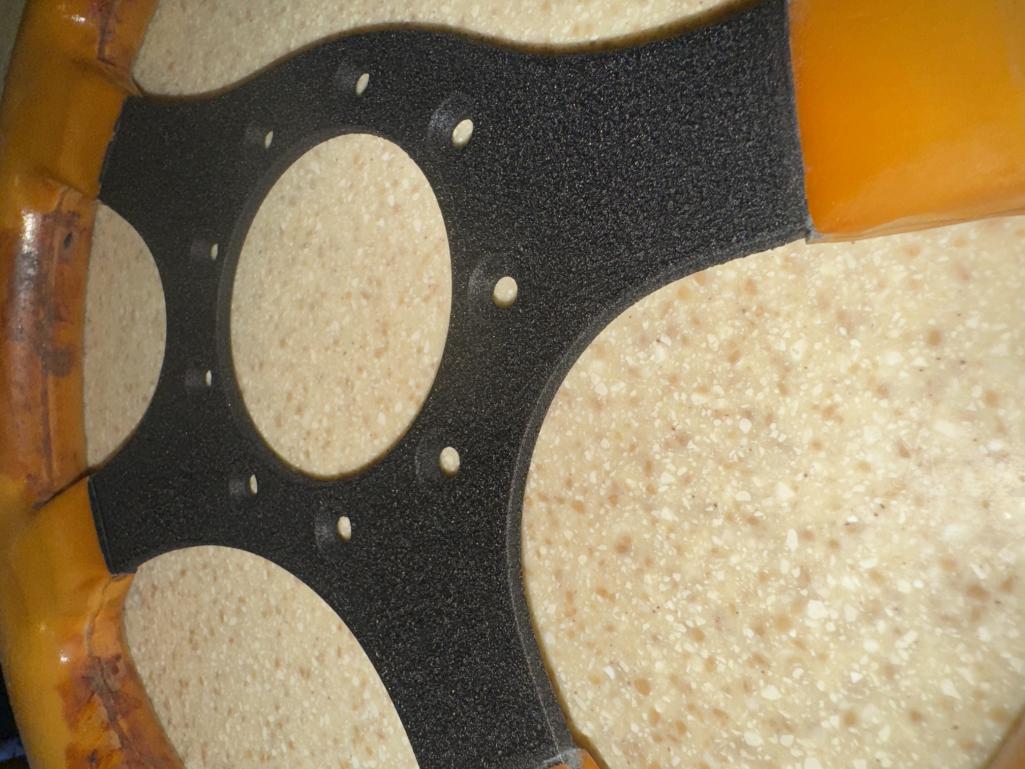
Painted the center with a wrinkle finish in preparation for wrapping. Wrapping will go slow. (IMG:style_emoticons/default/sad.gif)
 |
| technicalninja |
 Jun 20 2024, 10:04 AM Jun 20 2024, 10:04 AM
Post
#16945
|
|
Advanced Member     Group: Members Posts: 2,006 Joined: 31-January 23 From: Granbury Texas Member No.: 27,135 Region Association: Southwest Region 
|
Painted the center with a wrinkle finish in preparation for wrapping. Wrapping will go slow. (IMG:style_emoticons/default/sad.gif)  Your wrinkle finish came out excellent! What brand did you use? Any special drying tricks? |
| Shivers |
 Jun 20 2024, 10:25 AM Jun 20 2024, 10:25 AM
Post
#16946
|
|
Senior Member     Group: Members Posts: 2,780 Joined: 19-October 20 From: La Quinta, CA Member No.: 24,781 Region Association: Southern California |
Painted the center with a wrinkle finish in preparation for wrapping. Wrapping will go slow. (IMG:style_emoticons/default/sad.gif)  Your wrinkle finish came out excellent! What brand did you use? Any special drying tricks? Thanks. VHT high temp wrinkle plus ( SP201 BLACK WRINKLE. ) it takes a lot of paint. Start with light fog. Wait three minutes and start painting a heavy coat horizontally. Wait five minutes. Paint a heavy coat vertically, 5 minutes and one more heavy coat diagonally. Then you pop it into an oven at 170-200 degrees for an hour. The oven part is really important to get an even wrinkle. I used a primer but it works fine without if your painting surface it nice. Best part is and hour (+-) after is is out of the oven it is ready to work with. |
| technicalninja |
 Jun 20 2024, 11:10 AM Jun 20 2024, 11:10 AM
Post
#16947
|
|
Advanced Member     Group: Members Posts: 2,006 Joined: 31-January 23 From: Granbury Texas Member No.: 27,135 Region Association: Southwest Region 
|
Thanks!
I figured you were doing something with the drying procedure to get it that even. You doing this in your home oven? My wife would kill me! (IMG:style_emoticons/default/devil.gif) |
| Shivers |
 Jun 20 2024, 12:02 PM Jun 20 2024, 12:02 PM
Post
#16948
|
|
Senior Member     Group: Members Posts: 2,780 Joined: 19-October 20 From: La Quinta, CA Member No.: 24,781 Region Association: Southern California |
Thanks! I figured you were doing something with the drying procedure to get it that even. You doing this in your home oven? My wife would kill me! (IMG:style_emoticons/default/devil.gif) Yeah, right?!? The Mrs passed in April. I have a small one in the garage but not big enough. I did the Bilstein b6 hd’s in the inside oven too. She was in the hospital. So I did all that at night. |
| fiacra |
 Jun 23 2024, 08:21 PM Jun 23 2024, 08:21 PM
Post
#16949
|
|
Person.Woman.Man.Camera.TV   Group: Members Posts: 443 Joined: 1-March 19 From: East Bay Region - California Member No.: 22,920 Region Association: Northern California 
|
FINALLY got the car off the lift yesterday and test drove it. All went well. The list of tasks included (some of this is duplicate from an earlier post when I got all excited thinking I was finished):
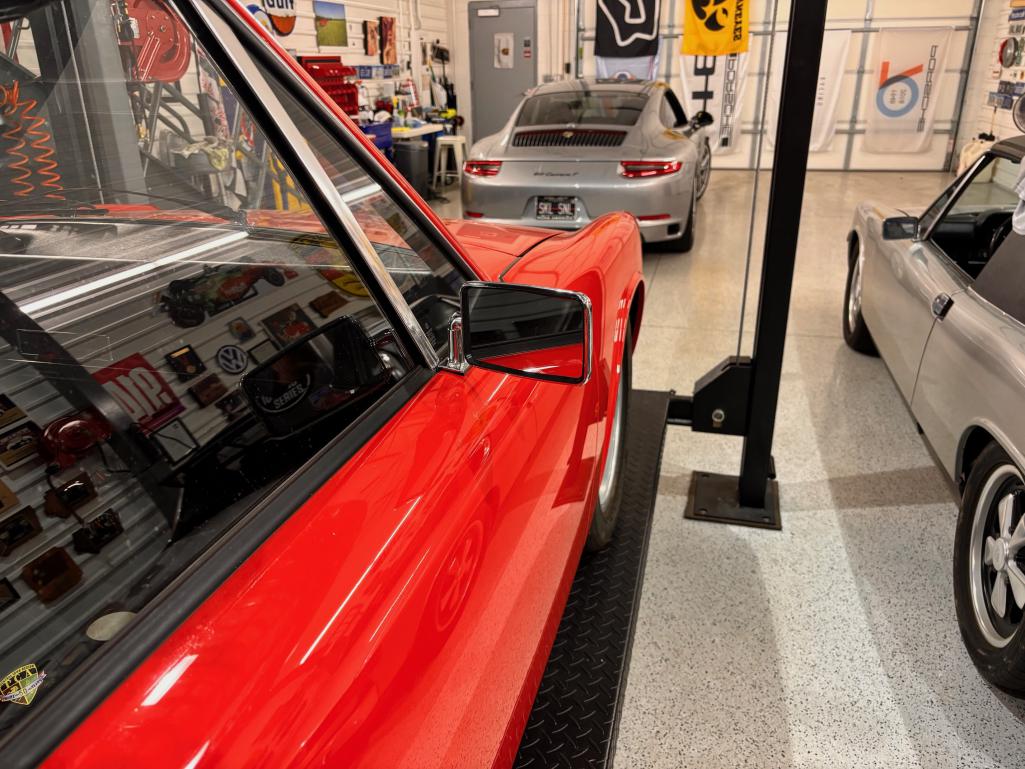
1) Replaced new master cylinder that failed after 100 miles. This time put an Ate MC in; 2) Bled the brakes, then bled the brakes, then bled the brakes; 3) New PMB soft brake lines all around; 4) New front rotors and bearings; 5) New PMB restored front calipers; 6) New front brake pads; 7) New right rear trailing arm pivot bushings; 8) Valve adjustment; 9) New valve cover gaskets. It took two tries to stop the leaking from one of them. Just couldn't get it on perfectly straight the first time; 10) New 914Rubber speedometer gear bushing; 11) New 914Rubber LE front spoiler that fits over the 914Rubber tow bar; 12) Replaced the Riviera's with a set of Fuchs with nearly new tires that came off a car that the new owner did a five lug conversion on; 13) New firewall shift bushing. Now shifts better than any 914 has a right too; 14) Put on turbo tie rods; 15) Oil and filter change; 16) Transaxle oil change. I might be a bit premature in my victory dance as I am taking it in for alignment the day after tomorrow. Trying not to drive it before then, but it did perfectly on a two mile drive. I think I got the alignment pretty close. I was at a rally the other day and told a few fellow owners I was going to replace the MC the next day. Got several looks of pity and a few pats on the back. That has got to be one of the more miserable jobs to do on our cars, and I have the benefit of having a scissor lift and good tools. Then to have to do it twice because a new MC was defective (leaking at the casting plug) was a really hard pill to swallow. Pictures with the Rivieras on and then with the Fuchs on. I think it looks a lot better, but I know this is all personal preference. 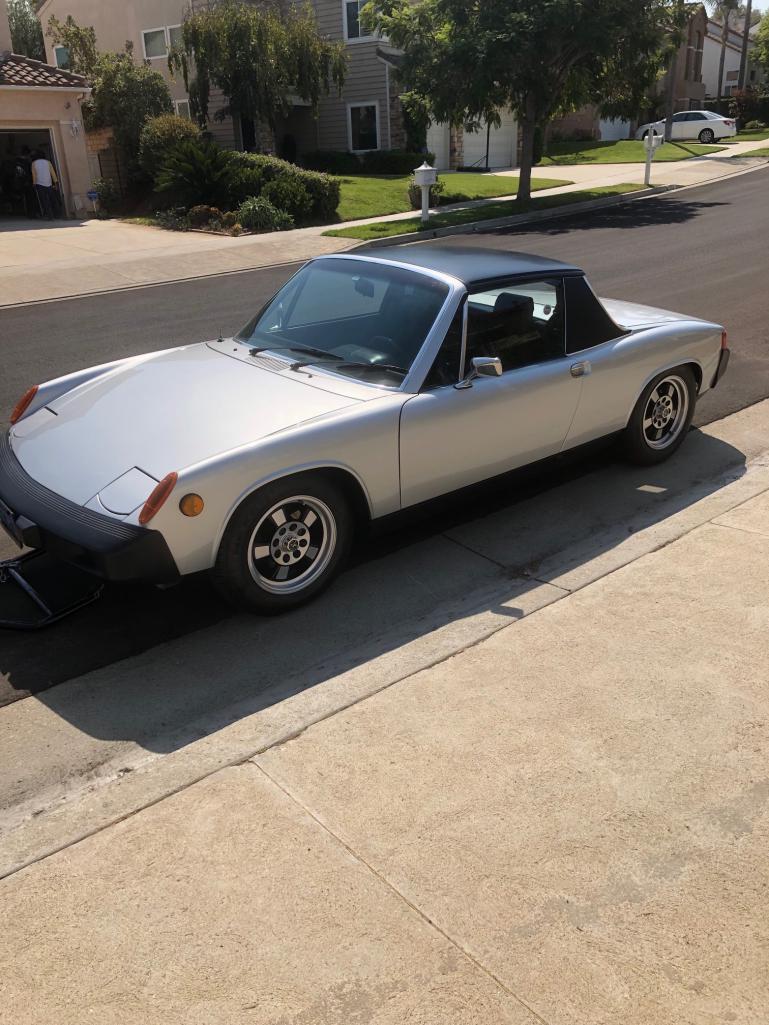 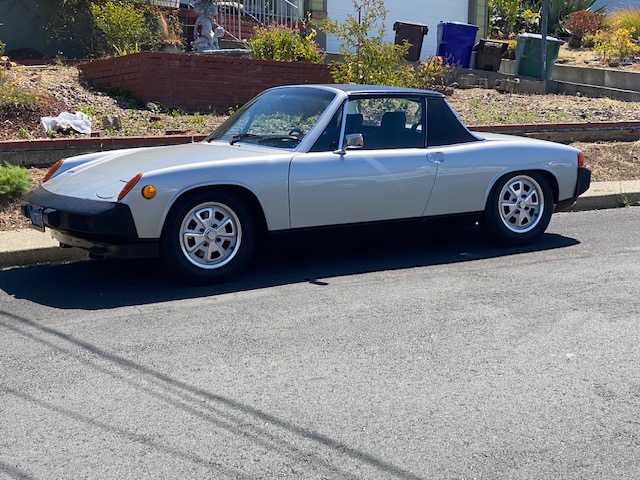 Got the daily driver up on the lift now to basically replace all of the subframe members, as well as the front and rear sway bar bushings and downlinks. Just got tired of the bumpy ride. Did the shocks and struts a few weeks back and that helped, but not enough. Decided to fire the parts cannon at it in a "while I'm there" moment. A lot easier to do certain parts of this job with other parts taken off. |
| 930cabman |
 Jun 24 2024, 12:04 PM Jun 24 2024, 12:04 PM
Post
#16950
|
|
Advanced Member     Group: Members Posts: 3,695 Joined: 12-November 20 From: Buffalo Member No.: 24,877 Region Association: North East States 
|
Thanks! I figured you were doing something with the drying procedure to get it that even. You doing this in your home oven? My wife would kill me! (IMG:style_emoticons/default/devil.gif) Yeah, right?!? The Mrs passed in April. I have a small one in the garage but not big enough. I did the Bilstein b6 hd’s in the inside oven too. She was in the hospital. So I did all that at night. Sorry to hear of your wife's passing, she must have been a saint for sure |
| Shivers |
 Jun 24 2024, 01:16 PM Jun 24 2024, 01:16 PM
Post
#16951
|
|
Senior Member     Group: Members Posts: 2,780 Joined: 19-October 20 From: La Quinta, CA Member No.: 24,781 Region Association: Southern California |
Thanks! I figured you were doing something with the drying procedure to get it that even. You doing this in your home oven? My wife would kill me! (IMG:style_emoticons/default/devil.gif) Yeah, right?!? The Mrs passed in April. I have a small one in the garage but not big enough. I did the Bilstein b6 hd’s in the inside oven too. She was in the hospital. So I did all that at night. Sorry to hear of your wife's passing, she must have been a saint for sure Thank you. Haha, to put up with me she had to be. (IMG:style_emoticons/default/biggrin.gif) I miss her |
| SKL1 |
 Jun 24 2024, 02:00 PM Jun 24 2024, 02:00 PM
Post
#16952
|
|
Senior Member    Group: Members Posts: 1,637 Joined: 19-February 11 From: north Scottsdale Member No.: 12,732 Region Association: Upper MidWest 
|
|
| FlacaProductions |
 Jun 24 2024, 03:52 PM Jun 24 2024, 03:52 PM
Post
#16953
|
|
Senior Member    Group: Members Posts: 1,800 Joined: 24-November 17 From: LA Member No.: 21,628 Region Association: Southern California 
|
Nice work!
Go Hawks. |
| Shivers |
 Jun 24 2024, 05:56 PM Jun 24 2024, 05:56 PM
Post
#16954
|
|
Senior Member     Group: Members Posts: 2,780 Joined: 19-October 20 From: La Quinta, CA Member No.: 24,781 Region Association: Southern California |
|
| Artfrombama |
 Jun 24 2024, 06:24 PM Jun 24 2024, 06:24 PM
Post
#16955
|
|
Member   Group: Members Posts: 194 Joined: 21-January 24 From: Alabama Member No.: 27,870 Region Association: South East States 
|
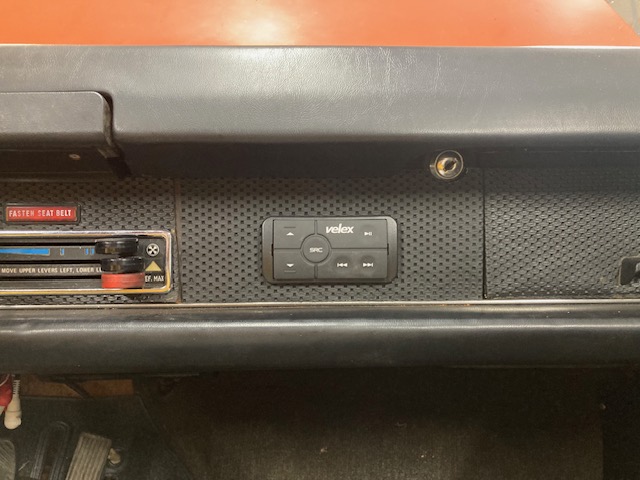
Installed a bluetooth amplifier
 Finishing up blasting and powder coating rims 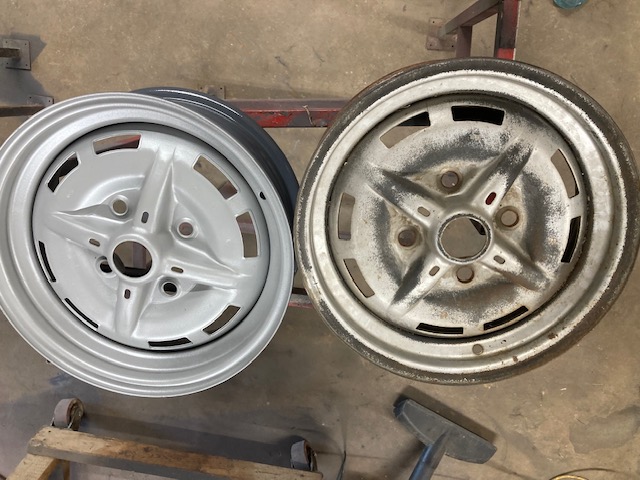 |
| Shivers |
 Jun 24 2024, 06:31 PM Jun 24 2024, 06:31 PM
Post
#16956
|
|
Senior Member     Group: Members Posts: 2,780 Joined: 19-October 20 From: La Quinta, CA Member No.: 24,781 Region Association: Southern California |
|
| Artfrombama |
 Jun 24 2024, 06:56 PM Jun 24 2024, 06:56 PM
Post
#16957
|
|
Member   Group: Members Posts: 194 Joined: 21-January 24 From: Alabama Member No.: 27,870 Region Association: South East States 
|
Installed a bluetooth amplifier  Finishing up blasting and powder coating rims  Very nice. The blutooth, is that just a head and the amp goes some place else? I'd love to have a media blaster The glass bead machine is by far the most used tools in my shop. I built the cabinet and used a nozzle, tubing and foot valve from TIP. |
| Craigers17 |
 Jun 25 2024, 12:04 PM Jun 25 2024, 12:04 PM
Post
#16958
|
|
Senior Member    Group: Members Posts: 800 Joined: 5-August 17 From: Rome, GA Member No.: 21,317 Region Association: South East States 
|
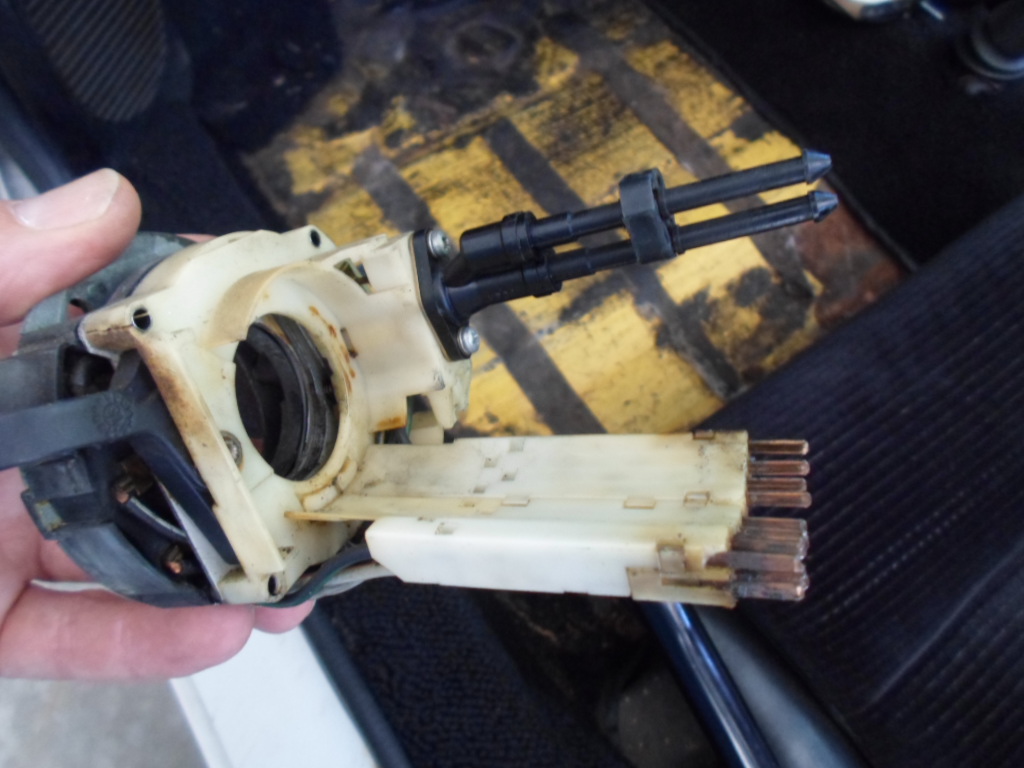
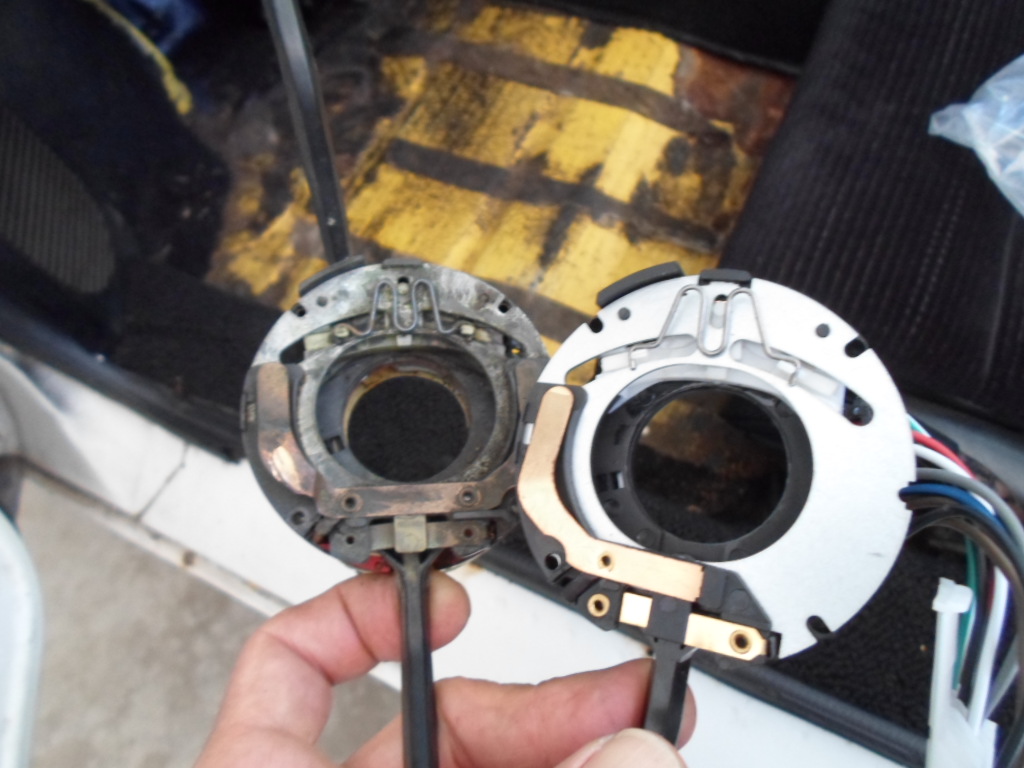
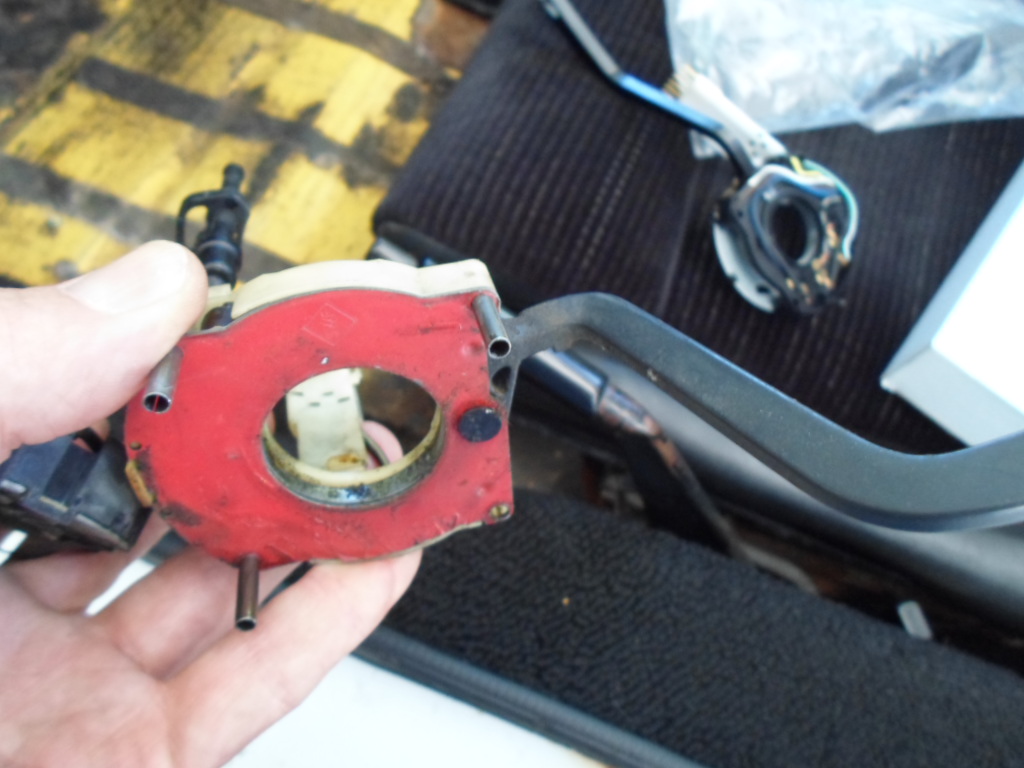
Swapped out my old turn signal stalk for a new unit. Now it cancels out correctly and I got the horn working while I was in there. After I replace the flasher relay, the signals should be functional again.
   |
| 930cabman |
 Jun 25 2024, 12:23 PM Jun 25 2024, 12:23 PM
Post
#16959
|
|
Advanced Member     Group: Members Posts: 3,695 Joined: 12-November 20 From: Buffalo Member No.: 24,877 Region Association: North East States 
|
|
| Beach914 |
 Jun 25 2024, 12:42 PM Jun 25 2024, 12:42 PM
Post
#16960
|
|
Senior Member    Group: Members Posts: 980 Joined: 28-March 10 From: Aliso Viejo Member No.: 11,519 Region Association: Southern California 
|
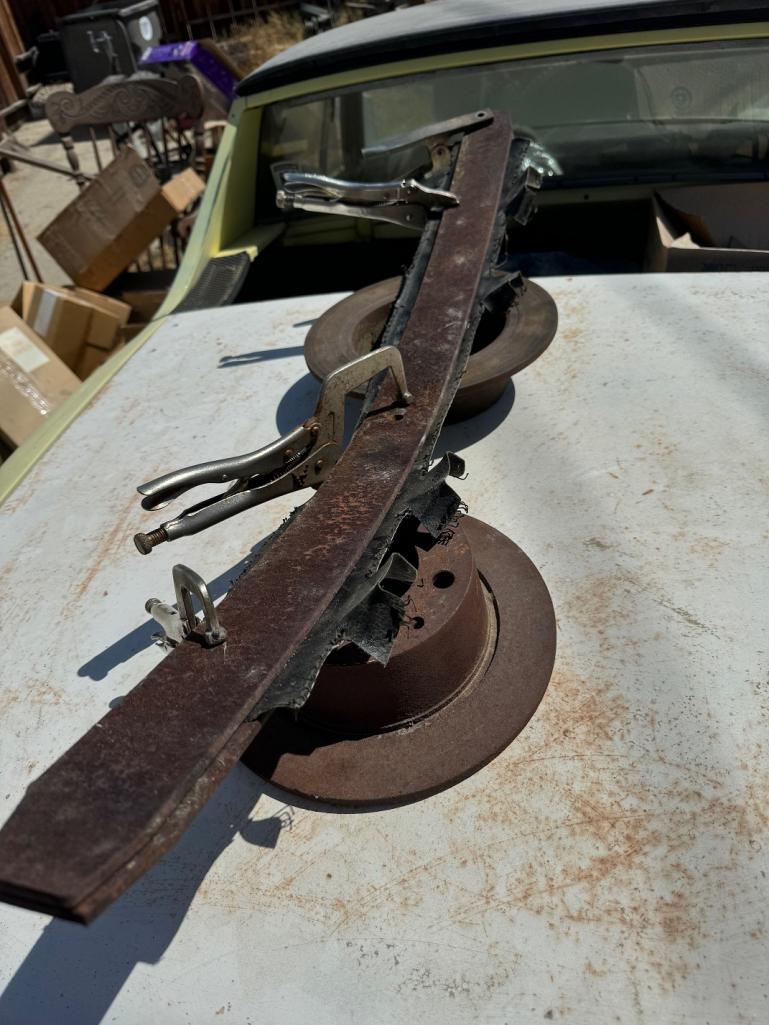
Spent a good part of Saturday trying to get these locking lug nuts off three of my 16x6 wheels on the -6. The fourth wheel had already had it removed and the ball seat and spoke ruined on the wheel (see pic). Combo pins on the removal tool shear off if the nuts were on with more than 50 ft/lbs (per instructions). Managed to remove the right front, and right rear properly with another tool I made but the pins are bending on the left front. Its on there with more than 50 ft/lbs for sure.Tempted to just use a metric tungsten carbide whole saw to but out most of the lug nut and then carefully grind out the nut with a rotary tool with a small ball shaped bit. But first I'll try to tap the holes in the lug nut, put some small allen head screws in it, and grind slots in a large socket to fit over the allens and try to torque it off.
This sucks. No fun to see a ruined $400 Fuch wheel and have to replace it. 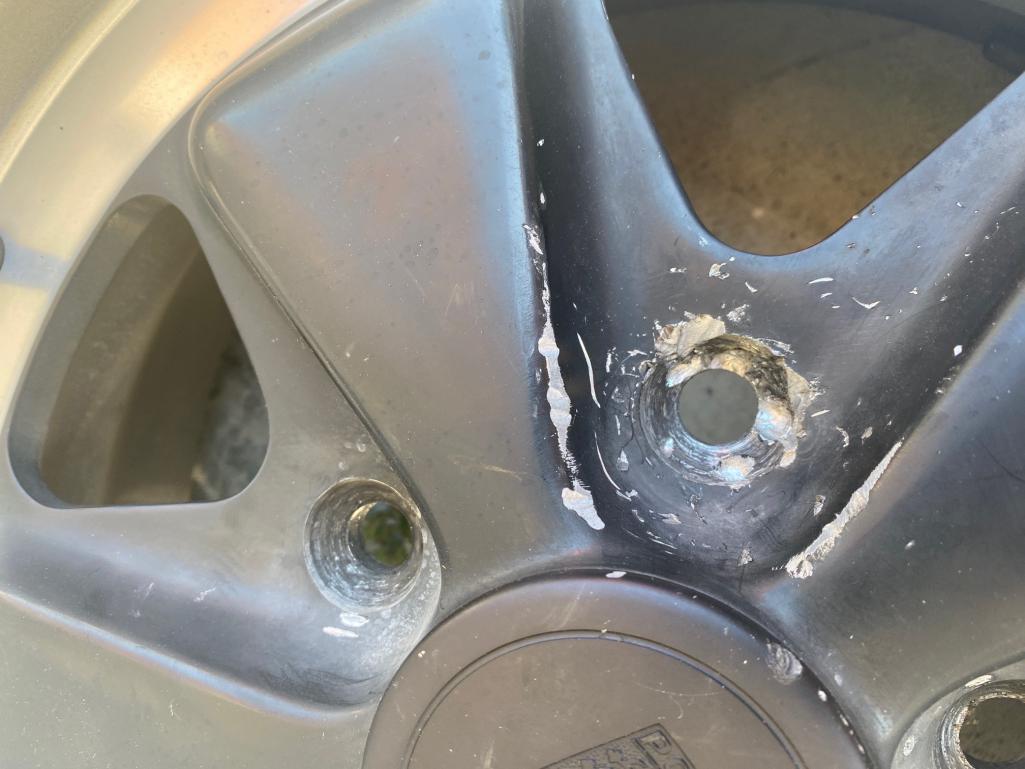 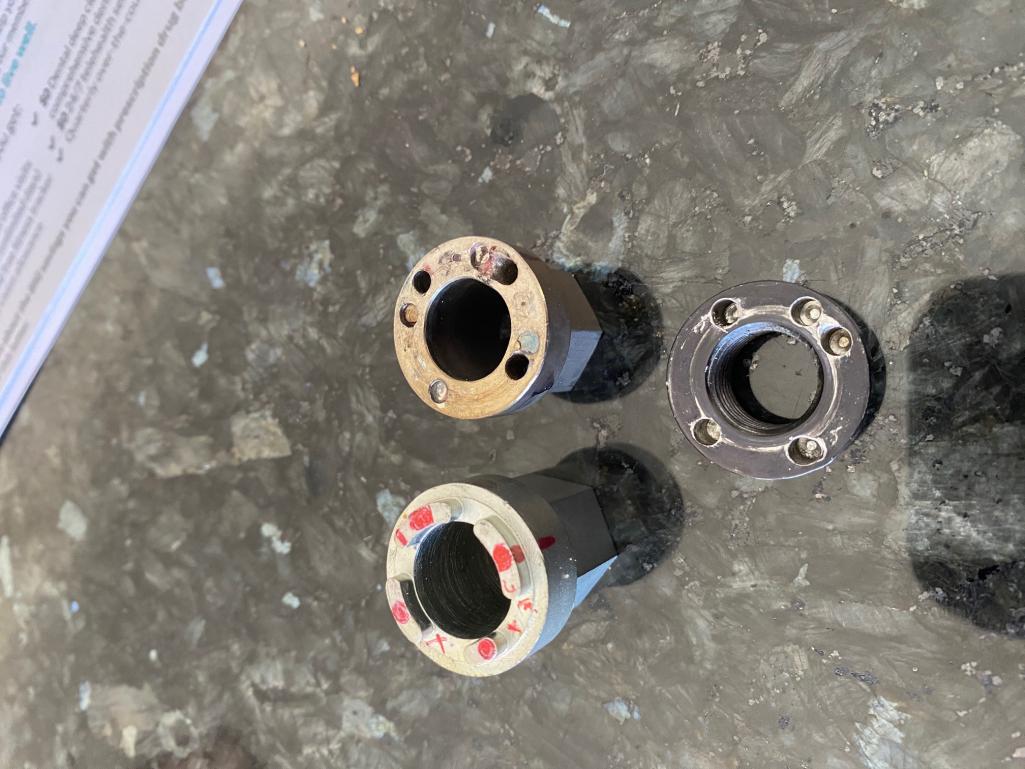 |
  |
1 User(s) are reading this topic (1 Guests and 0 Anonymous Users)
0 Members:

|
Lo-Fi Version | Time is now: 23rd November 2024 - 05:18 PM |
Invision Power Board
v9.1.4 © 2024 IPS, Inc.


