|
|

|
Porsche, and the Porsche crest are registered trademarks of Dr. Ing. h.c. F. Porsche AG.
This site is not affiliated with Porsche in any way. Its only purpose is to provide an online forum for car enthusiasts. All other trademarks are property of their respective owners. |
|
|
  |
| rick 918-S |
 Mar 2 2012, 10:28 AM Mar 2 2012, 10:28 AM
Post
#21
|
|
Hey nice rack! -Celette                Group: Members Posts: 20,785 Joined: 30-December 02 From: Now in Superior WI Member No.: 43 Region Association: Northstar Region 

|
Nice work Rick. Looks like you've been reading Cass' book. I should live so long to develop his skills... (IMG:style_emoticons/default/smash.gif) (IMG:style_emoticons/default/welder.gif) I told him last week if my wife made a little more money I would come out and be his apprentice the old school way where you pay the master craftsman not the other way around. I really miss this kind of work. If life were different this is what I would do. I pretty much took a 15 year hiatus. But I'm slowly getting back to it. At least until the next big storm and looming phone call. (IMG:style_emoticons/default/dry.gif) |
| andys |
 Mar 2 2012, 10:45 AM Mar 2 2012, 10:45 AM
Post
#22
|
|
Advanced Member     Group: Members Posts: 2,165 Joined: 21-May 03 From: Valencia, CA Member No.: 721 Region Association: None 
|
Nice work, Rick.
The problem for an occasional metal working guy like myself, is a selection of different shaped dollies. I've had to make a couple of my own just to get the right contours. It's a big advantage when you can have access to the back side of a panel. When I did my late doors that have the side impact brace, it was pretty frustrating to work....Stud gun was my friend, but it alone produces less than finished results. What did you use for shrinking? Hammer? Disc? Torch? Andys |
| rick 918-S |
 Mar 2 2012, 11:13 AM Mar 2 2012, 11:13 AM
Post
#23
|
|
Hey nice rack! -Celette                Group: Members Posts: 20,785 Joined: 30-December 02 From: Now in Superior WI Member No.: 43 Region Association: Northstar Region 

|
Nice work, Rick. The problem for an occasional metal working guy like myself, is a selection of different shaped dollies. I've had to make a couple of my own just to get the right contours. It's a big advantage when you can have access to the back side of a panel. When I did my late doors that have the side impact brace, it was pretty frustrating to work....Stud gun was my friend, but it alone produces less than finished results. What did you use for shrinking? Hammer? Disc? Torch? Andys So far just a hammer with a face like a meat tenderizer and a contoured wood block for a dolly. It's slow work. Bullseye pick out the pick hammer marks, tap in a circular motion from outside to center. Check with a file, start again on the next one. There are alot if ways to do it. This is slow and steady. You learn not to abuse the bullseye pick as you can create quite the peak if you over use it. After awhile you can get to where sometimes you don't need to bump back. I made some other heads for mine and modified the target so it swivels. This was you can tip it when you can't get a good swing. Here's what I mean about the swivel and the soft work with the bullseye pick. Here's a large door dent in this panel. If you were to try to swing a hammer from the back side you would have about a 30% change of hitting the target and not straying as you swing. 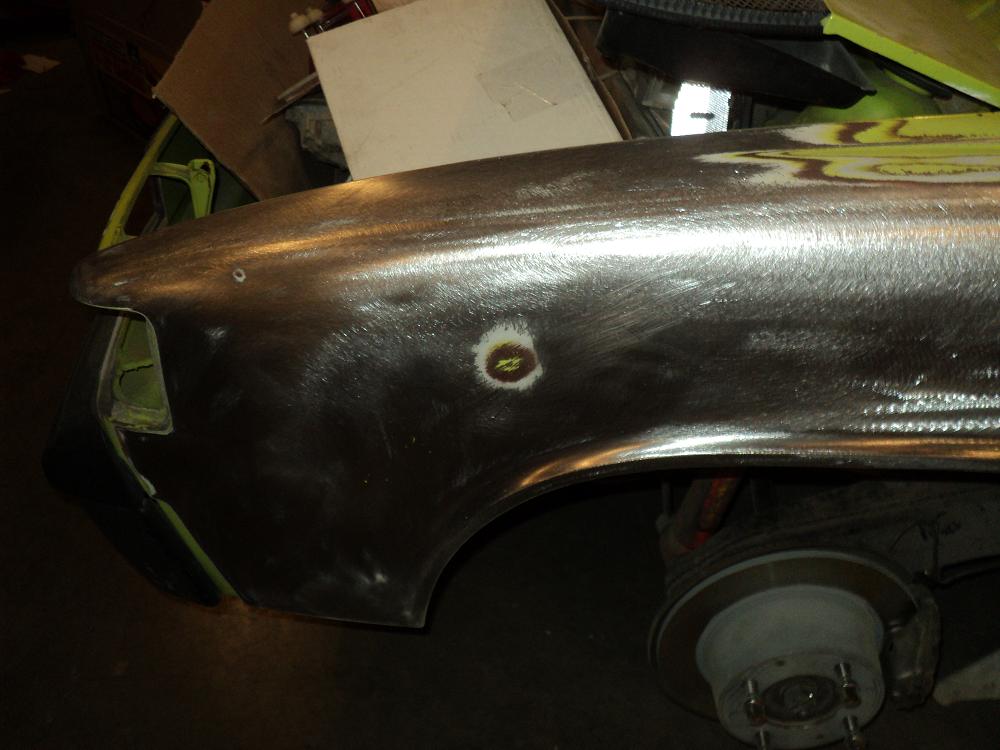 Here is the bullseye pick I used. 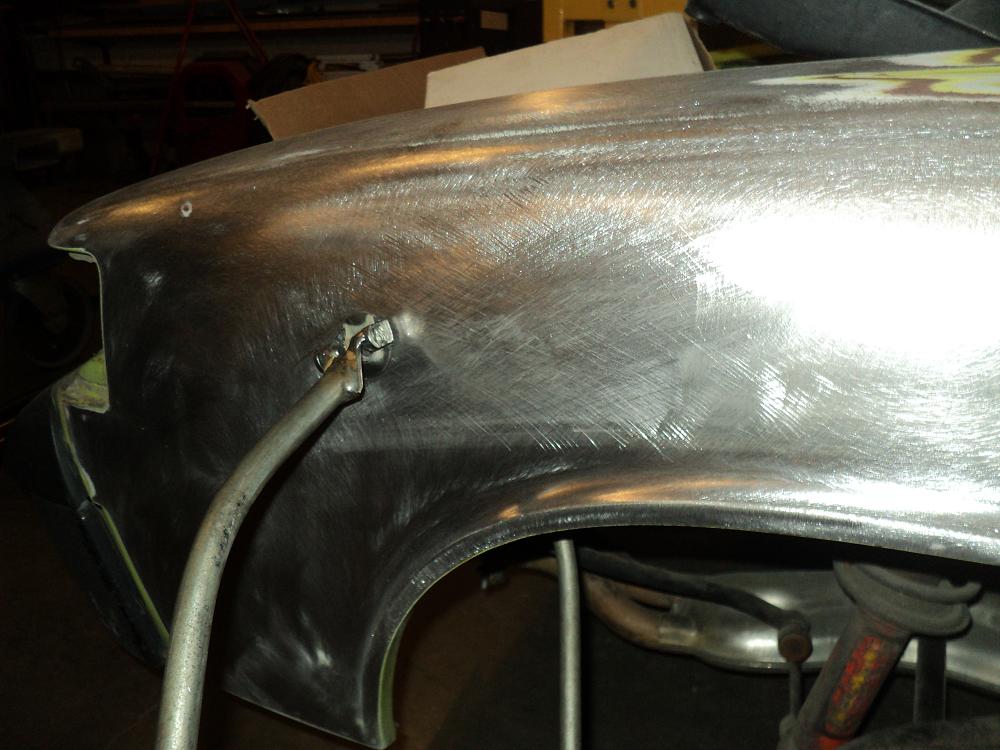 Here's the dent after I worked it slowly and checking it with a file. You can still see a light hint of factory sealer showing the panel is not over worked. 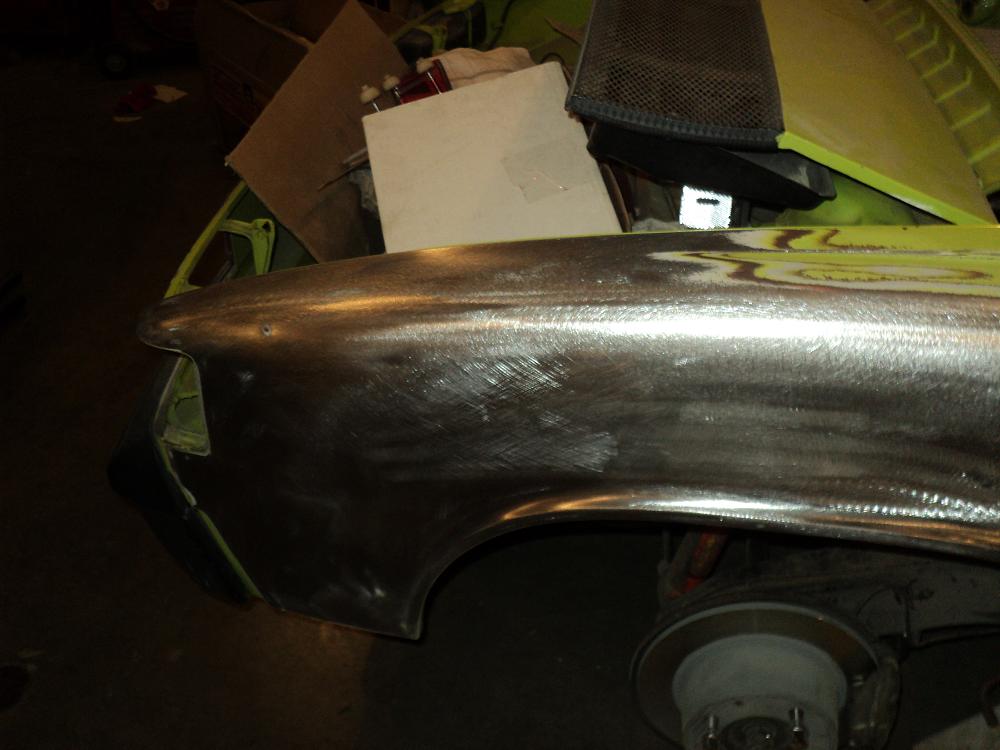 |
| bryanf |
 Mar 2 2012, 11:32 AM Mar 2 2012, 11:32 AM
Post
#24
|
|
Member   Group: Members Posts: 105 Joined: 18-January 06 From: Half Moon Bay, CA Member No.: 5,435 |
Beautiful work. I'm so glad that you ended up with that car. Can't believe that I was considering junking it...
|
| beech4rd |
 Mar 2 2012, 11:35 AM Mar 2 2012, 11:35 AM
Post
#25
|
|
Member   Group: Members Posts: 345 Joined: 10-January 07 From: Highwoods, Saugerties, NY Member No.: 7,445 Region Association: North East States 
|
Very, very impressive work. Thanks very much for this. But you leave the rest of us feeling inadequate and now we're going to need therapy. It's tough.
|
| watsonrx13 |
 Mar 2 2012, 11:43 AM Mar 2 2012, 11:43 AM
Post
#26
|
|
Advanced Member     Group: Members Posts: 2,735 Joined: 18-February 03 From: Plant City, FL Member No.: 312 Region Association: South East States |
Excellent work Rick. Are you using a 15" or 25" bullseye pick? Is there any advantage to either one?
--- Rob |
| maxwelj |
 Mar 2 2012, 01:38 PM Mar 2 2012, 01:38 PM
Post
#27
|
|
rebuilt member   Group: Benefactors Posts: 278 Joined: 8-January 04 From: Owasso, OK Member No.: 1,532 Region Association: None 

|
Rick, Great work. I'll show this to my bodyman son so he can see how it needs to be done.
Also, I'm probably not telling you anything you don't know, but one of our members had a tutorial on using a shrinking disk. Search for John Kelley or go to www.ghiaspecialties.com for more info. I think he also sells them. |
| gothspeed |
 Mar 2 2012, 04:30 PM Mar 2 2012, 04:30 PM
Post
#28
|
|
Senior Member    Group: Members Posts: 1,539 Joined: 3-February 09 From: SoCal Member No.: 10,019 Region Association: None |
Wow!!!!! (IMG:style_emoticons/default/w00t.gif) .............. it doesn't get any better than that!!!!! (IMG:style_emoticons/default/smilie_pokal.gif)
|
| Rand |
 Mar 2 2012, 04:37 PM Mar 2 2012, 04:37 PM
Post
#29
|
|
Cross Member      Group: Members Posts: 7,409 Joined: 8-February 05 From: OR Member No.: 3,573 Region Association: None |
Awesome work Rick. I love seeing things done right by people who care about quality. (IMG:style_emoticons/default/smilie_pokal.gif)
Also, I'm probably not telling you anything you don't know, but one of our members had a tutorial on using a shrinking disk. Search for John Kelley or go to www.ghiaspecialties.com for more info. I think he also sells them. I thought of John Kelly as well. He talks about how to make your own shrinking disc too, at least on one of his DVDs. A couple more links: http://www.914world.com/bbs2/index.php?showtopic=67022 http://allshops.org/cgi-bin/community/comm...d=9980138836765 |
| westtexass2k |
 Mar 2 2012, 06:22 PM Mar 2 2012, 06:22 PM
Post
#30
|
|
Newbie  Group: Members Posts: 40 Joined: 31-December 11 From: San Angelo Tx Member No.: 13,954 Region Association: None |
When I went to Ron Fornier class he talked about the shrinking disc but we never used them since we were doing scratch projects with the bag and english wheel on aluminum. The concept is about the same as the torch and quench method which can really move some material. I did hail dents by the thousands that way. Bulls eye pick also a good choice with a metal file and just keep working your way around the panel. You are doing a top notch job. I cant wait to see the finished project.
|
| bobhasissues |
 Mar 2 2012, 08:11 PM Mar 2 2012, 08:11 PM
Post
#31
|
|
seemingly endless issues with my 914   Group: Members Posts: 218 Joined: 13-February 07 From: Chicagoland Member No.: 7,532 Region Association: None |
Great work Rick.
Please post a photo of your hammers laid out with some basic descriptions of what each hammer is used for. I have a beginner hammer and dolly set but don't have any good instructional info on what purpose the various hammer faces serve. I keep telling myself I'll have to find an instructional book but never get around to it. I think everyone would appreciate any info you share. My passenger side had a few shallow dings farther back toward the taillight. When I discovered them I wondered why someone didn't try to hammer them out. The dents were concealed by the factory foam on the inside of the fender so they were not accessible. There was no damage to the foam and no rust on the inner fender. I had no means to replace the foam if I were to dig it out, so I ended up cleaning out all the old filler, epoxy primed, scuffed and used Everglass for the fill coat. Even though I would have preferred to knock those dings out, I just couldn't justify $300 for the spray on seam sealer and applicator gun. |
| rick 918-S |
 Mar 4 2012, 12:16 AM Mar 4 2012, 12:16 AM
Post
#32
|
|
Hey nice rack! -Celette                Group: Members Posts: 20,785 Joined: 30-December 02 From: Now in Superior WI Member No.: 43 Region Association: Northstar Region 

|
I stripped the drivers door and found several California rivets and a very poorly pulled dent. Here's how I went about repairing it.
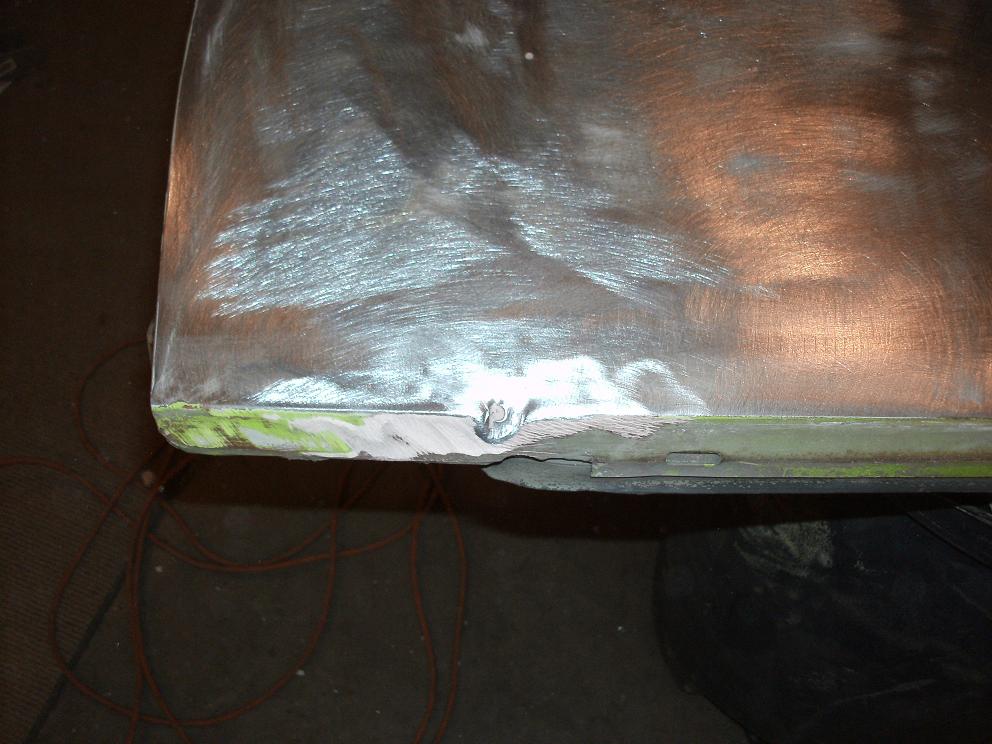 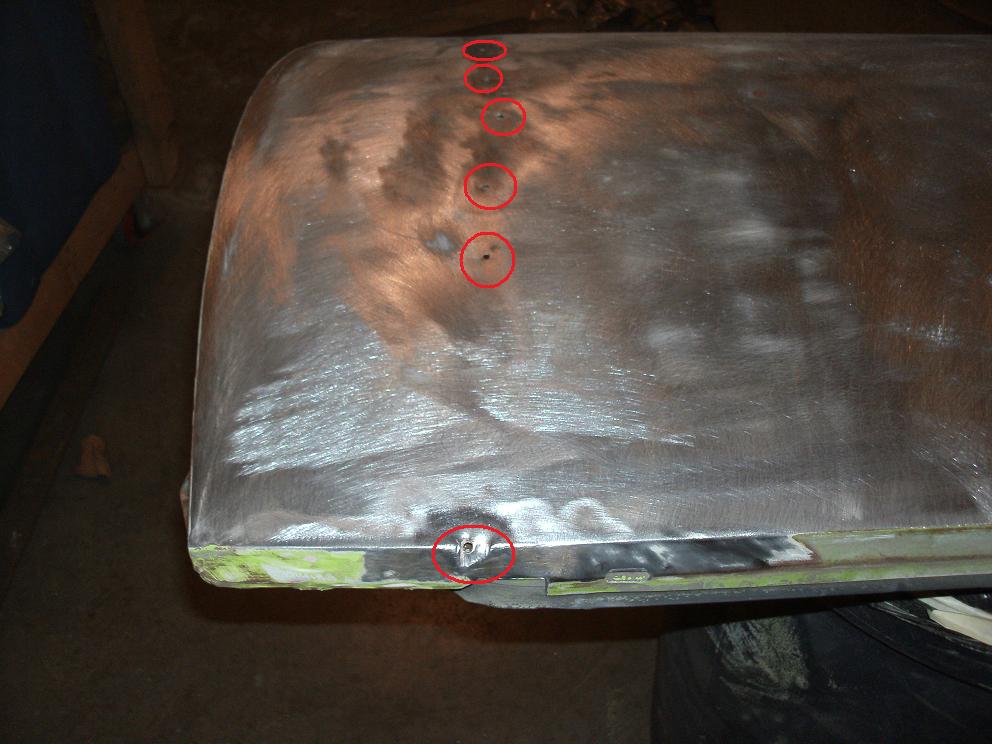 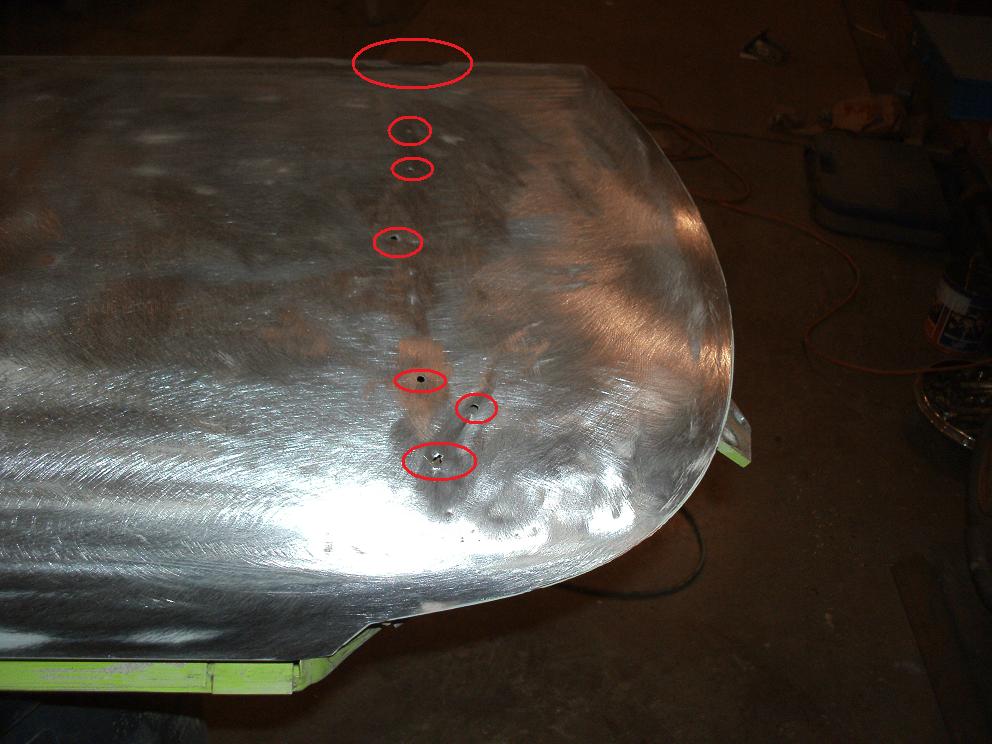 I popped one spot weld on the bottom of the skin and made a blunt chisel from a piece of 1/8" flat bar. There is a slight arch to the edge and the corners are rounded off so they won't dig into the back side of the skin. 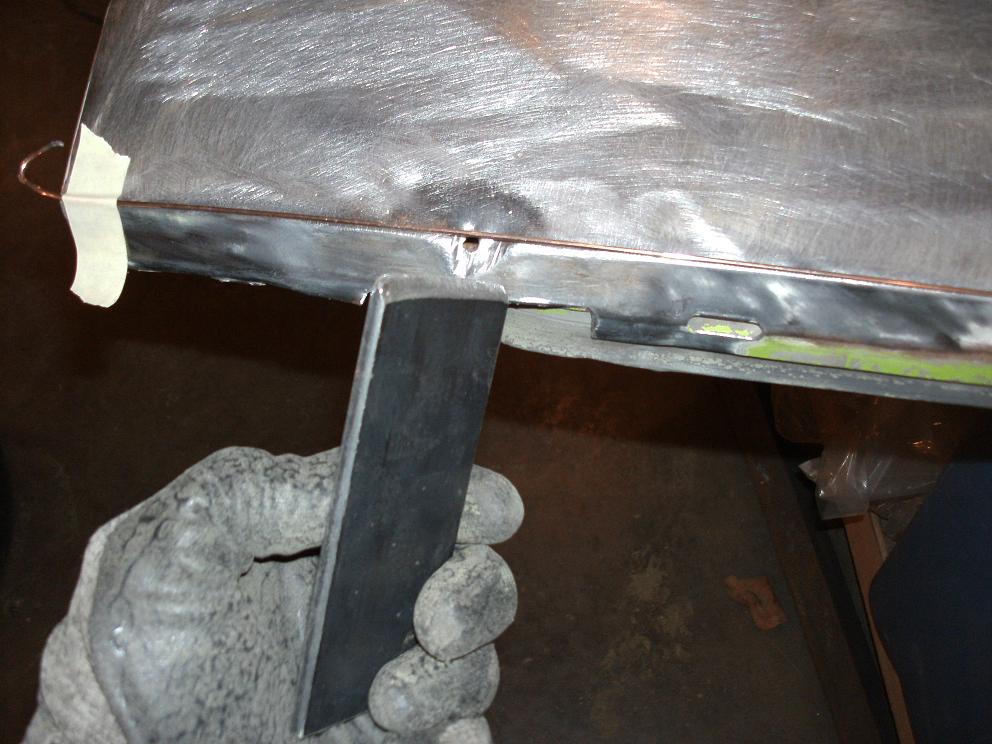 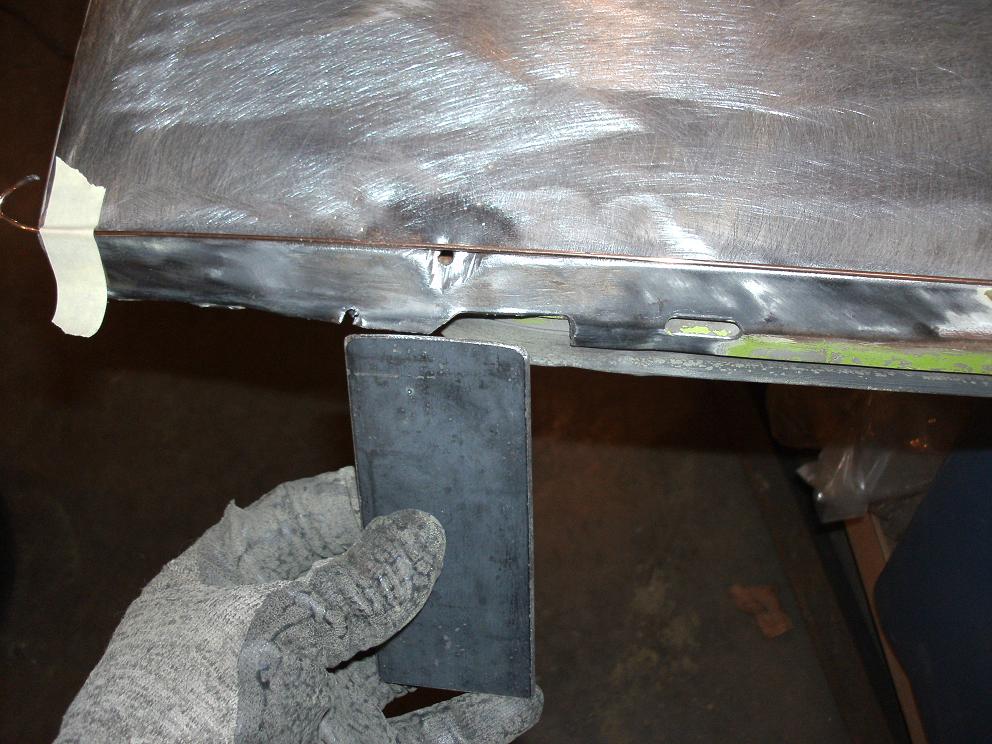 After driving the panel back into shape I tigged the spot weld back together and filled the hole. 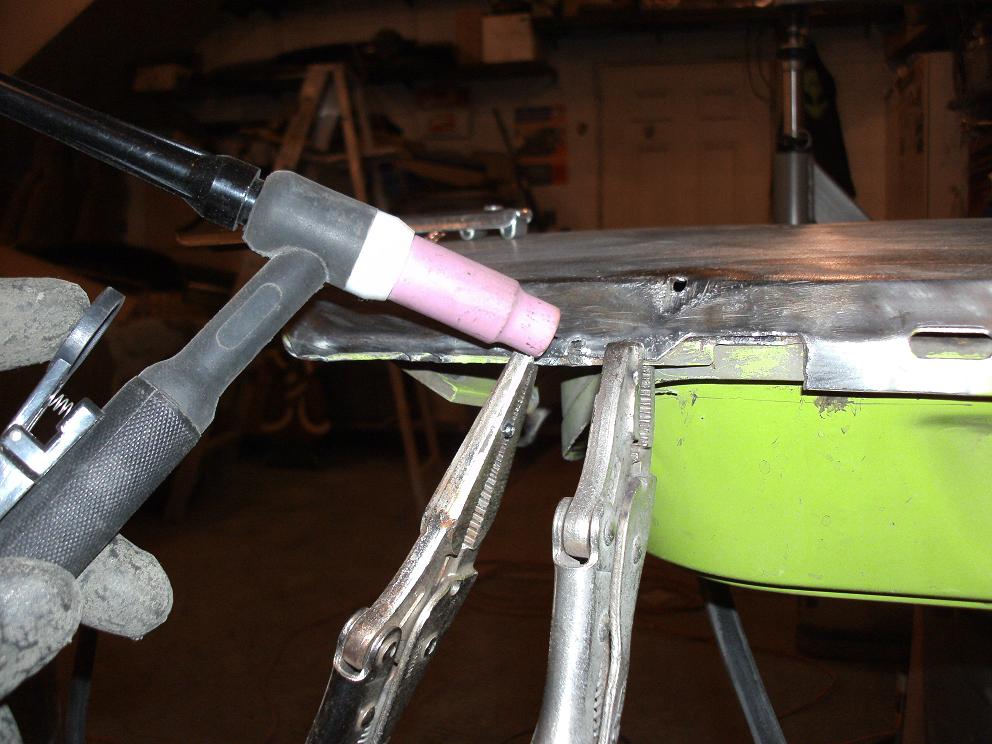 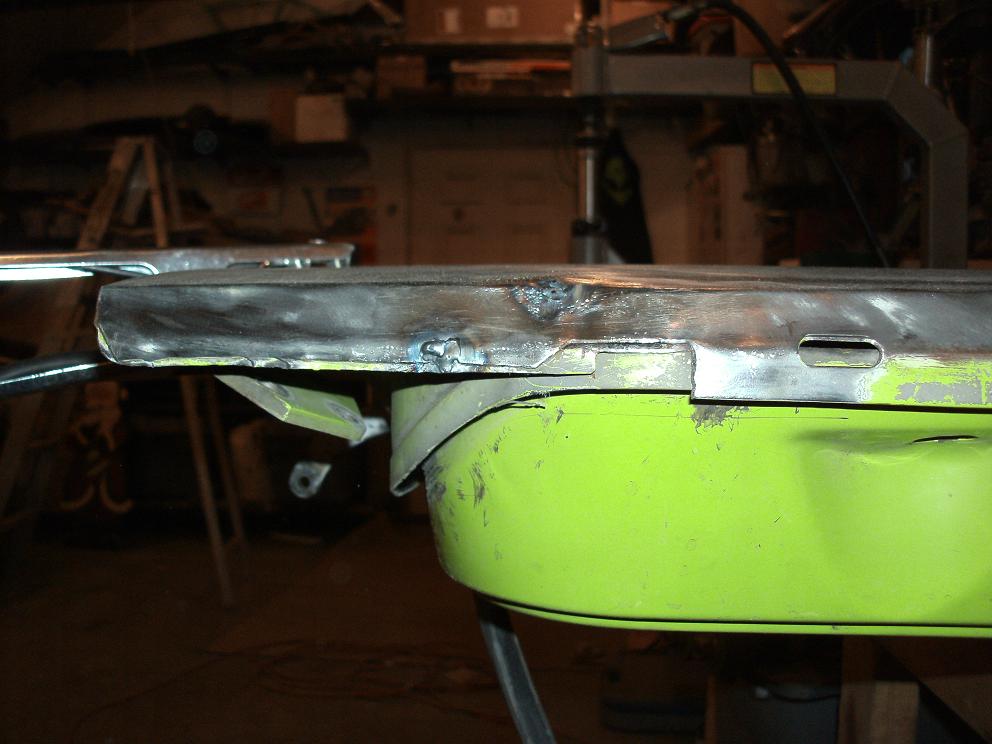 After welding a tapping the panel edge back into place. 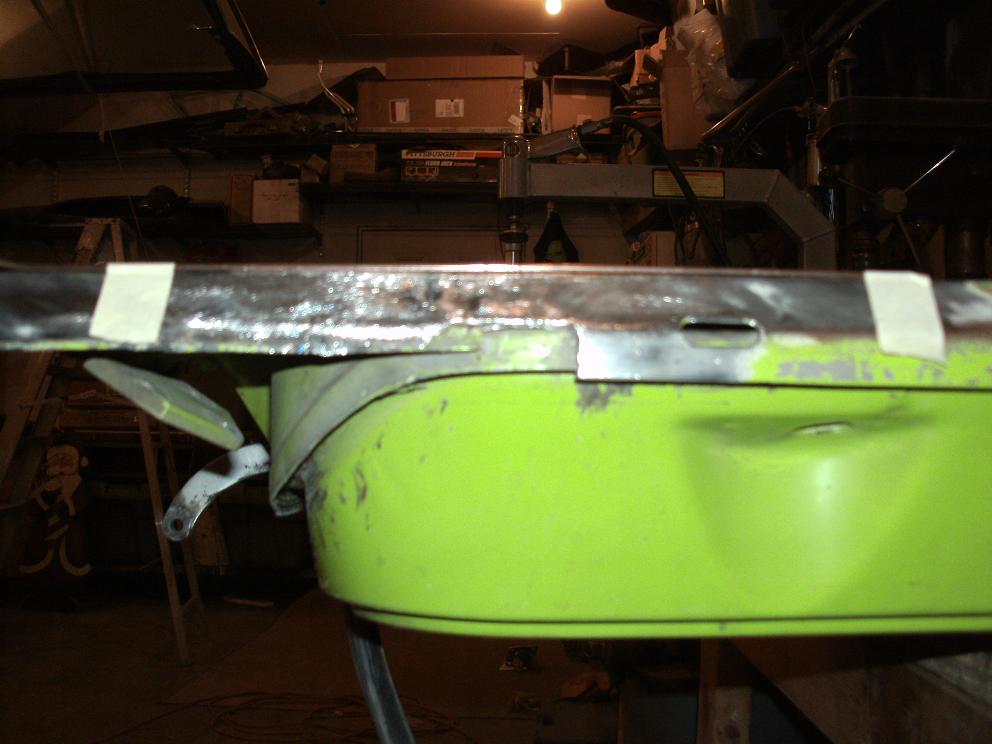 My son borrowed my pin welder to his buddy and never retrieved it. So I'm stuck trying to use my Lenco and spot weld tabs on the panel for pulling the crease. It's working but I'm going to finish when I get my pin welder back. I tig welded the California rivet holes (IMG:style_emoticons/default/welder.gif) and started pulling the crease. 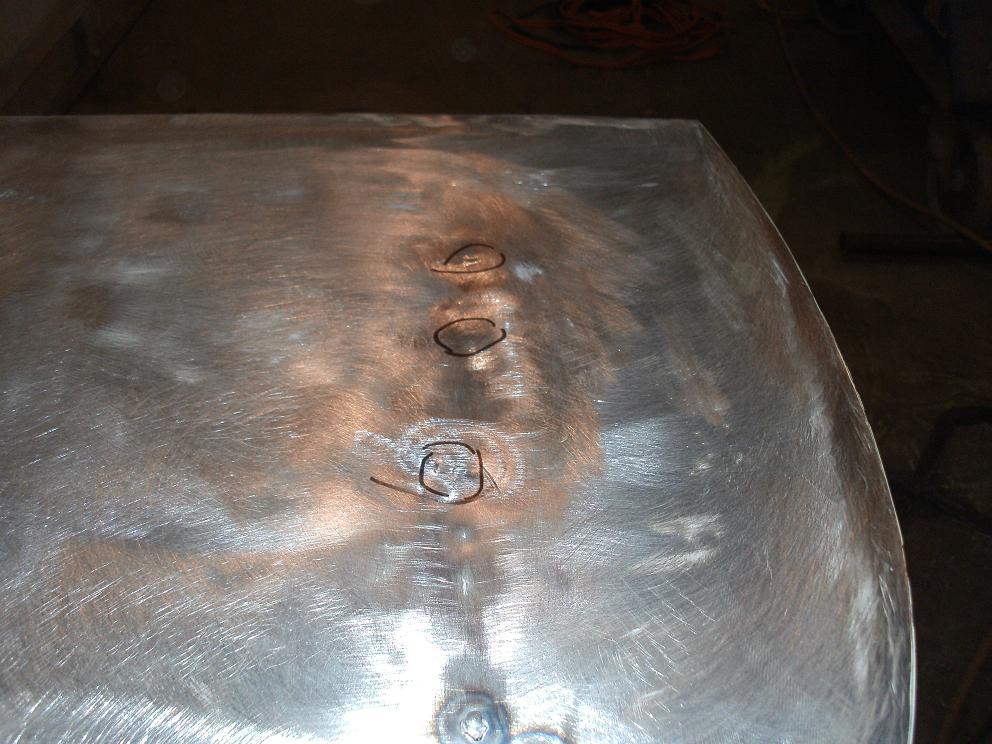 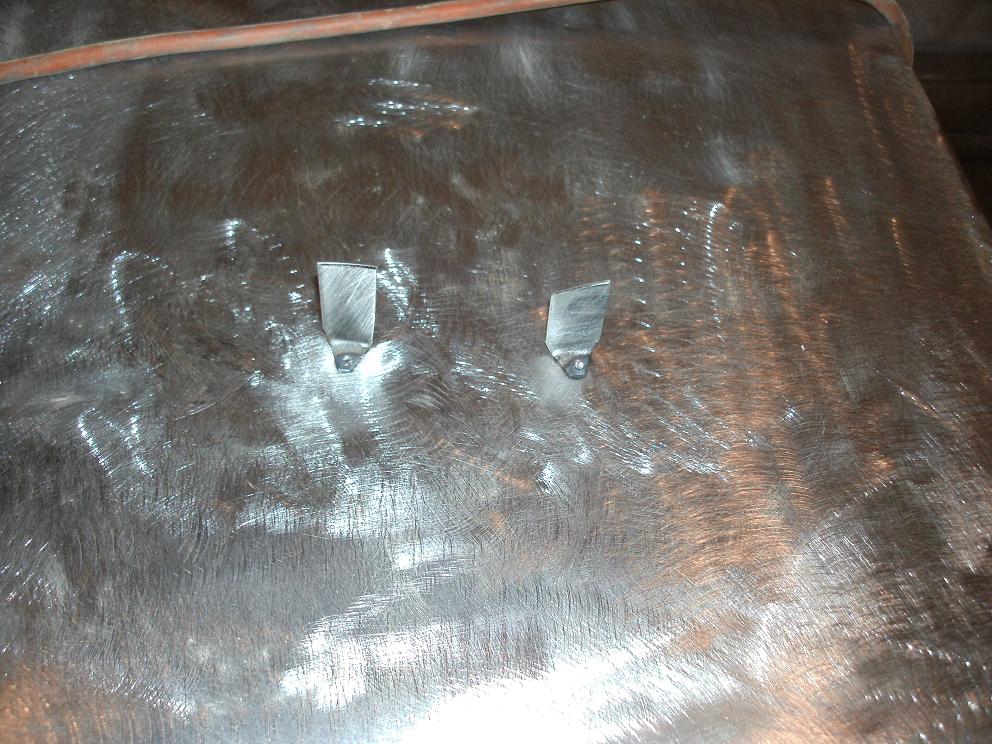 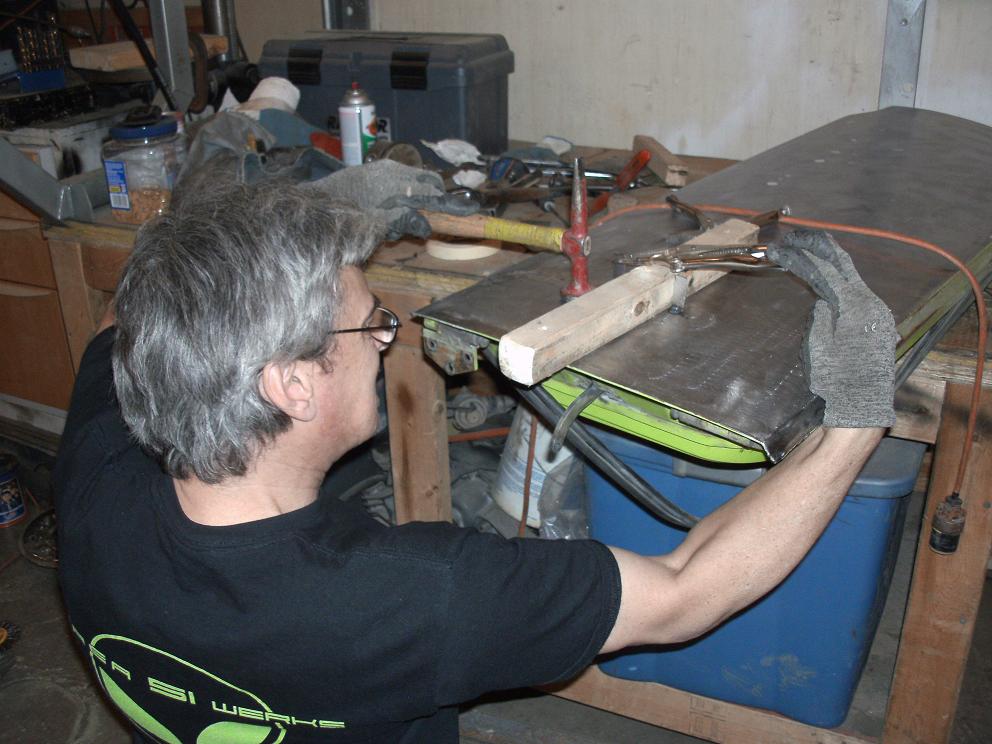 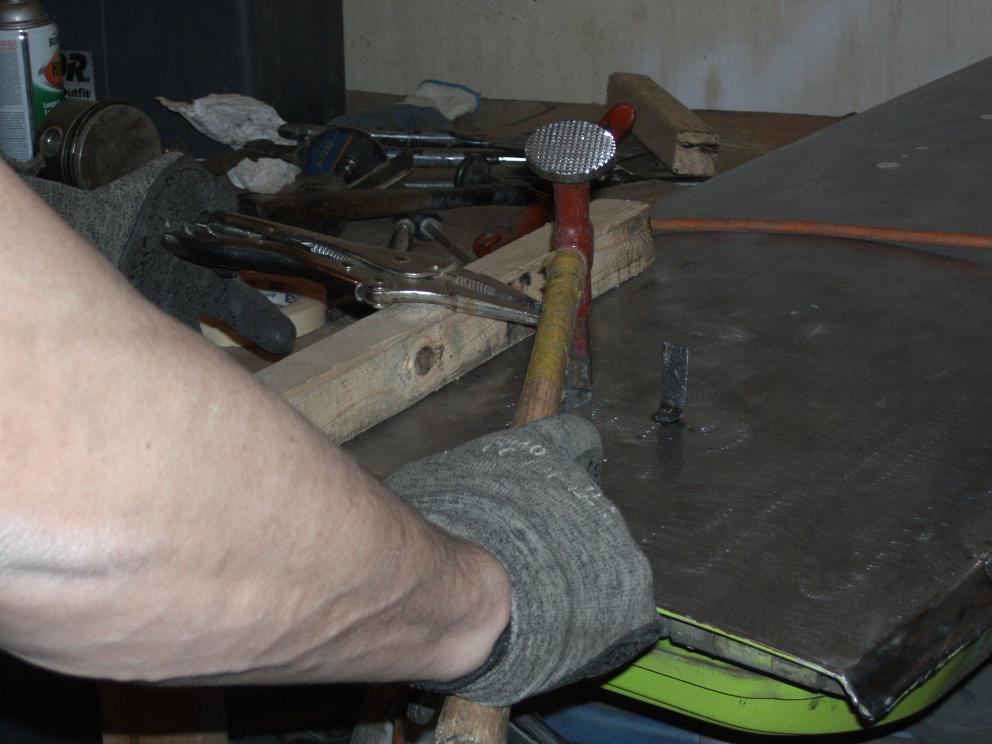 Then I tigged up the big ass holes on the top of the door from an aftermarket mirror. I cut a couple sections off a bolt to thread into the holes then tigged them in. 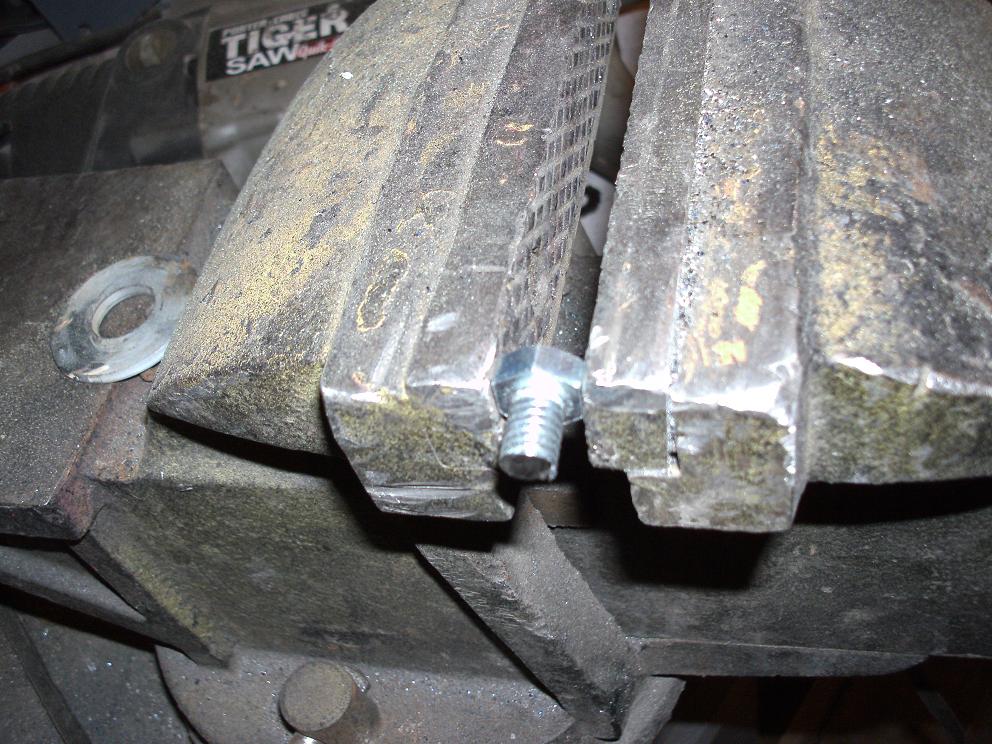 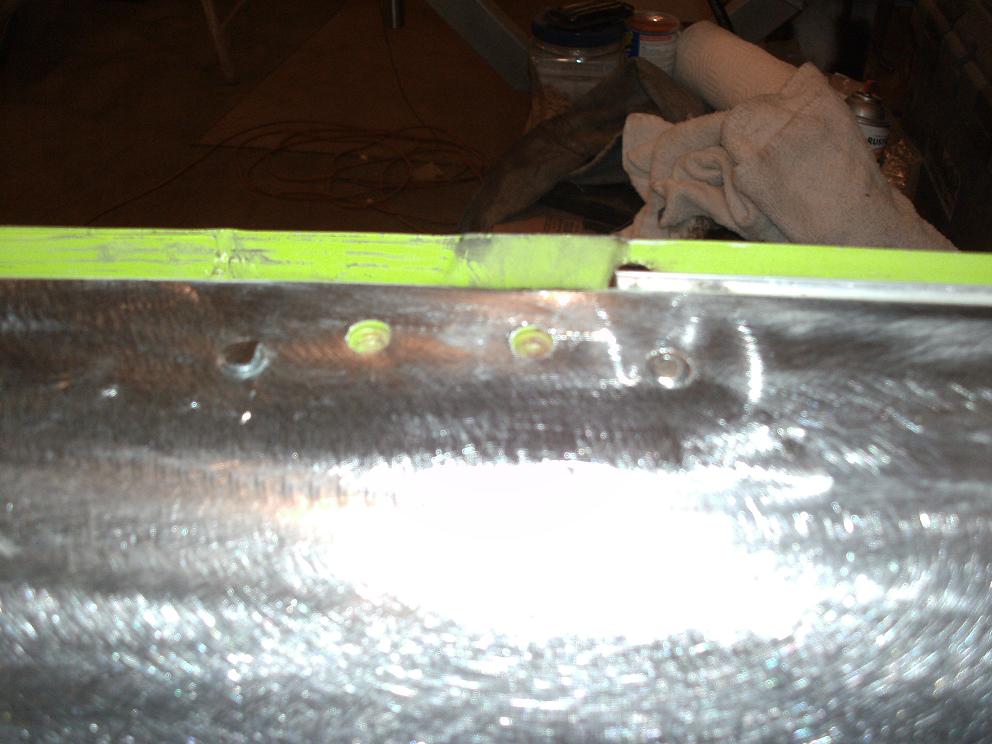  Attached image(s) 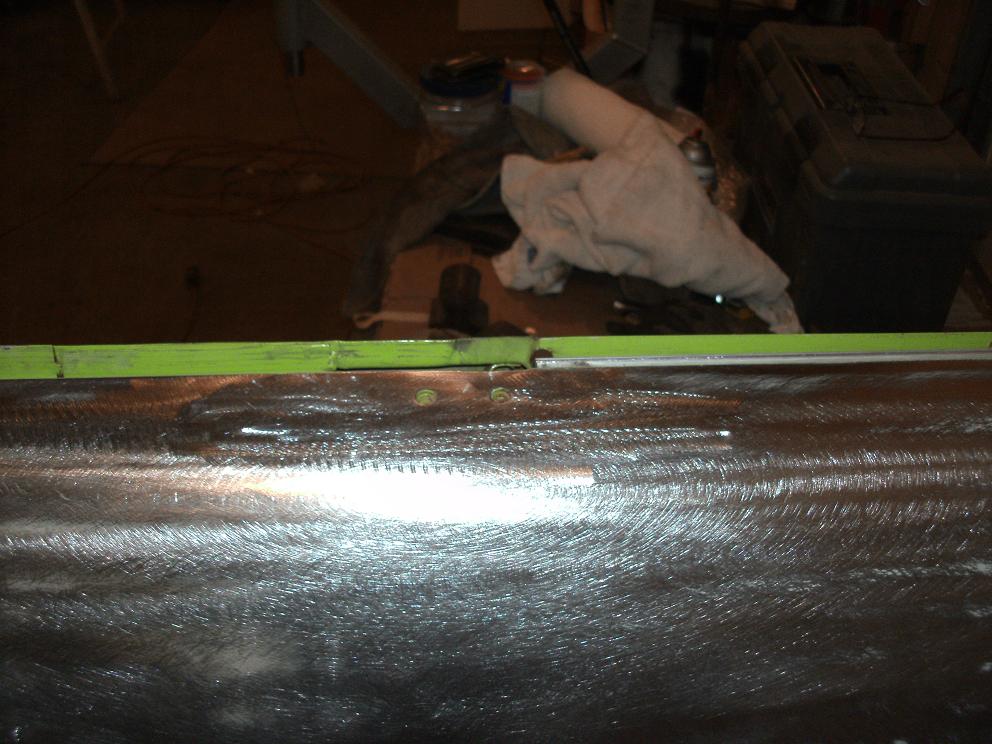
|
| EdwardBlume |
 Mar 4 2012, 07:59 AM Mar 4 2012, 07:59 AM
Post
#33
|
|
914 Wizard           Group: Members Posts: 12,338 Joined: 2-January 03 From: SLO Member No.: 81 Region Association: Central California 
|
You rock Rick! (IMG:style_emoticons/default/aktion035.gif)
|
| ruby914 |
 Mar 4 2012, 09:52 AM Mar 4 2012, 09:52 AM
Post
#34
|
|
Senior Member    Group: Members Posts: 720 Joined: 26-April 09 From: Hawthorne, Ca Member No.: 10,305 Region Association: None |
Have you ever used a shrinking disc? I haven't tried one myself a friend of mine used one aon his 55 Chevy project and got great results. I don't have one. I've been looking at them on ebay but haven't bought one. I think the side of this panel would be a good candidate with all the pick hammer marks the other guy drove into this panel. I'm having to bump them back out then block them level. It takes hours to work some of the waves it creates. So far I haven't found anything that will require the torch and quench method. Just a serious investment of time. The panel hasn't work hardened yet so I'm still ok. Rick, Thank you for sharing. This is just in time for me. It is great to see a masters work. I have every kind of dent and now see just how much work I have ahead of me. You mention work hardening. How would you know if it has work hardened and if it did how would you go about correcting that? |
| rick 918-S |
 Mar 4 2012, 10:57 AM Mar 4 2012, 10:57 AM
Post
#35
|
|
Hey nice rack! -Celette                Group: Members Posts: 20,785 Joined: 30-December 02 From: Now in Superior WI Member No.: 43 Region Association: Northstar Region 

|
I was kind of searching you tube for a good example of annealing. Sometimes when you get a panel that has had serious damage and you have to work over the panel several times to move the metal back into shape the constent hammering with cause the molecules in the panel to bunch up. You'll find it very hard to get the panel to cooperate after several passes working it with a block and hammer. You can feel the difference when it happens. the metal even sounds different when your hitting it. This will require you use a torch to expand the molecules. By lighting the torch with no oxygen and blowing soot on the panel you leave a black soot on the panel. You can carefully burn it back off. This will relax the panel and give you a second run at it.
|
| rick 918-S |
 Mar 4 2012, 08:56 PM Mar 4 2012, 08:56 PM
Post
#36
|
|
Hey nice rack! -Celette                Group: Members Posts: 20,785 Joined: 30-December 02 From: Now in Superior WI Member No.: 43 Region Association: Northstar Region 

|
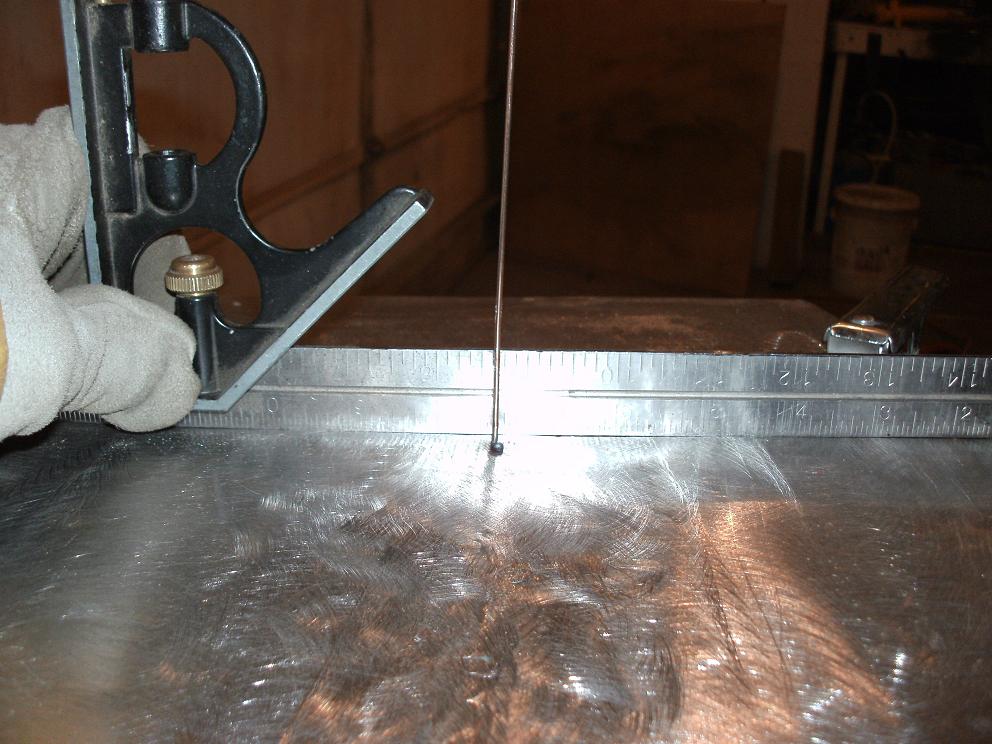
Here's the result of several hours worth of work. I ended up using the tig and tacking the tig wire to the skin like my stud gun or pin welder does. I was going to go out to my son's friends Dads house today and get my stud gun back but by the time I drove out there and back I could be done with the door as it is now. I used the tig wire like a stud. I was able to work in closer and more accurately than with the sheet metal tabs and Lenco. Here's the end result. Close enough for a light weight filler.
 |
| Eric_Shea |
 Mar 4 2012, 09:07 PM Mar 4 2012, 09:07 PM
Post
#37
|
|
PMB Performance                Group: Admin Posts: 19,289 Joined: 3-September 03 From: Salt Lake City, UT Member No.: 1,110 Region Association: Rocky Mountains  |
Rock on Rick! (IMG:style_emoticons/default/smilie_pokal.gif)
One of my favorite colors... that and your Raspberry. |
| rick 918-S |
 Mar 4 2012, 09:10 PM Mar 4 2012, 09:10 PM
Post
#38
|
|
Hey nice rack! -Celette                Group: Members Posts: 20,785 Joined: 30-December 02 From: Now in Superior WI Member No.: 43 Region Association: Northstar Region 

|
Rock on Rick! (IMG:style_emoticons/default/smilie_pokal.gif) One of my favorite colors... that and your Raspberry. As soon as this car is done The Raspberry car come in. (IMG:style_emoticons/default/assimilate.gif) |
| scotty b |
 Mar 4 2012, 09:11 PM Mar 4 2012, 09:11 PM
Post
#39
|
|
rust free you say ?                Group: Members Posts: 16,375 Joined: 7-January 05 From: richmond, Va. Member No.: 3,419 Region Association: None |
Awesome work as usual Rick (IMG:style_emoticons/default/first.gif) Get a shrinking disc, you'll love it. It takes no time to get from where you are to primer and NO skim coat with the disc
|
| rick 918-S |
 Mar 4 2012, 09:13 PM Mar 4 2012, 09:13 PM
Post
#40
|
|
Hey nice rack! -Celette                Group: Members Posts: 20,785 Joined: 30-December 02 From: Now in Superior WI Member No.: 43 Region Association: Northstar Region 

|
Awesome work as usual Rick (IMG:style_emoticons/default/first.gif) Get a shrinking disc, you'll love it. It takes no time to get from where you are to primer and NO skim coat with the disc Ya I need one. This is an example of what we should try to achive rather than leaving deep dents and drill holes in body panels. |
  |
6 User(s) are reading this topic (6 Guests and 0 Anonymous Users)
0 Members:

|
Lo-Fi Version | Time is now: 24th November 2024 - 05:44 PM |
Invision Power Board
v9.1.4 © 2024 IPS, Inc.


