|
|

|
Porsche, and the Porsche crest are registered trademarks of Dr. Ing. h.c. F. Porsche AG.
This site is not affiliated with Porsche in any way. Its only purpose is to provide an online forum for car enthusiasts. All other trademarks are property of their respective owners. |
|
|
  |
| cary |
 Jan 6 2013, 07:39 PM Jan 6 2013, 07:39 PM
Post
#121
|
|
Advanced Member     Group: Members Posts: 3,900 Joined: 26-January 04 From: Sherwood Oregon Member No.: 1,608 Region Association: Pacific Northwest 
|
Dis-assembly begins ...............
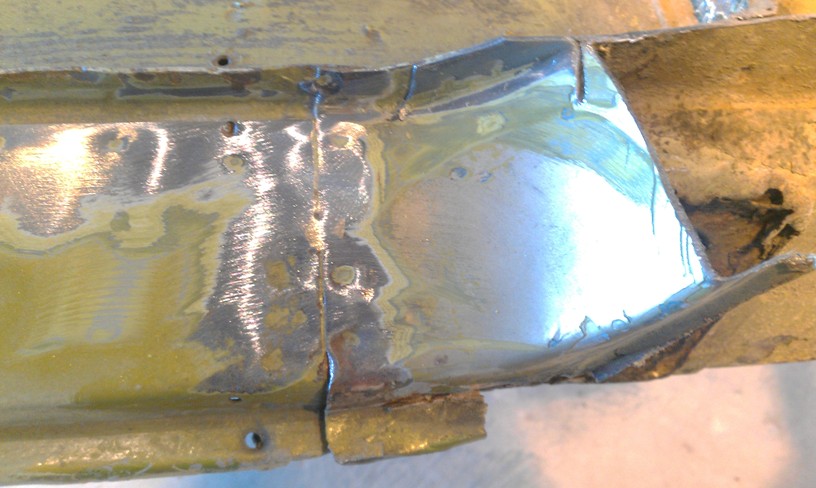 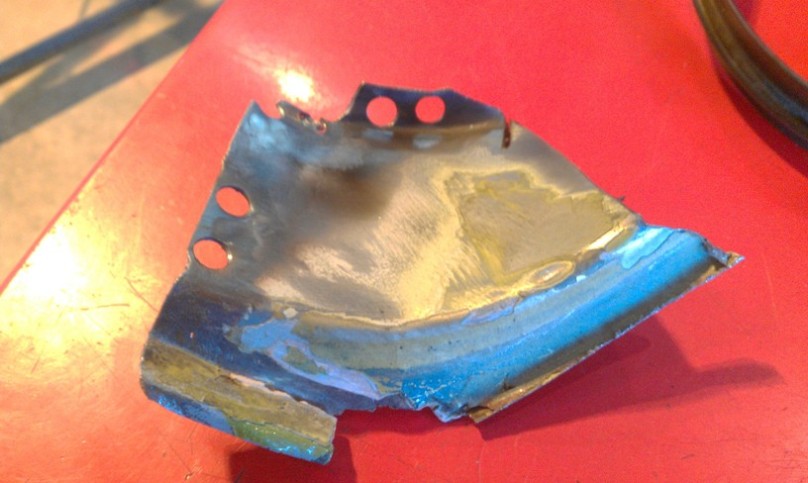 Started with removing the portion of the rear door jam. |
| cary |
 Jan 6 2013, 07:41 PM Jan 6 2013, 07:41 PM
Post
#122
|
|
Advanced Member     Group: Members Posts: 3,900 Joined: 26-January 04 From: Sherwood Oregon Member No.: 1,608 Region Association: Pacific Northwest 
|
Door sill removed ................
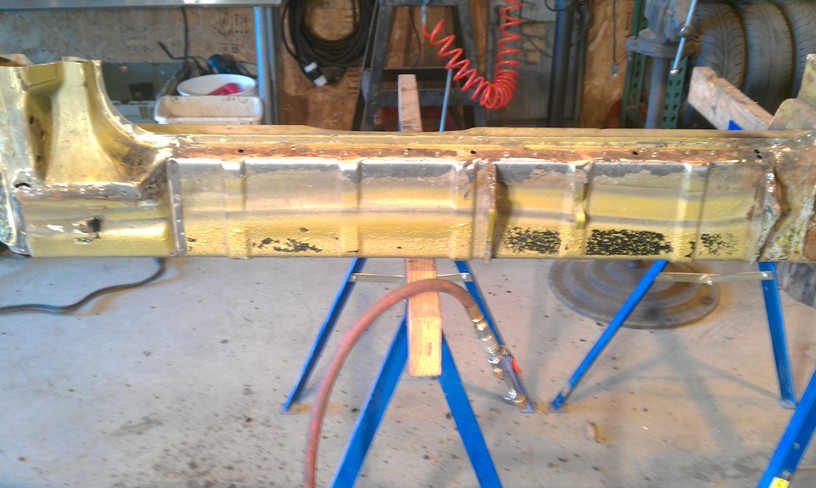 |
| cary |
 Jan 6 2013, 07:49 PM Jan 6 2013, 07:49 PM
Post
#123
|
|
Advanced Member     Group: Members Posts: 3,900 Joined: 26-January 04 From: Sherwood Oregon Member No.: 1,608 Region Association: Pacific Northwest 
|
Now getting to the portion that I really wanted to look at.
Removing the longs door hinge support. 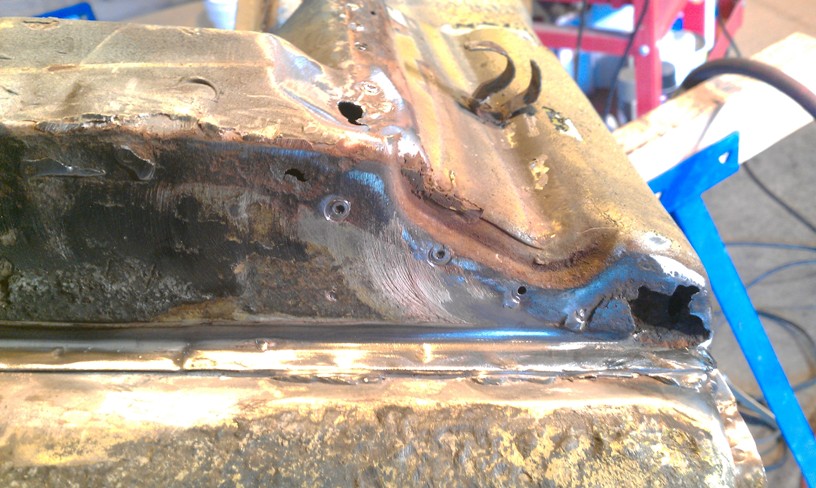 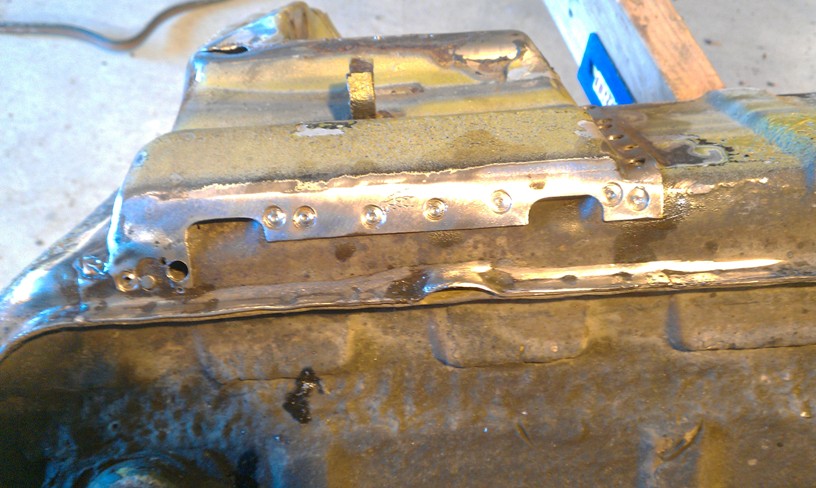 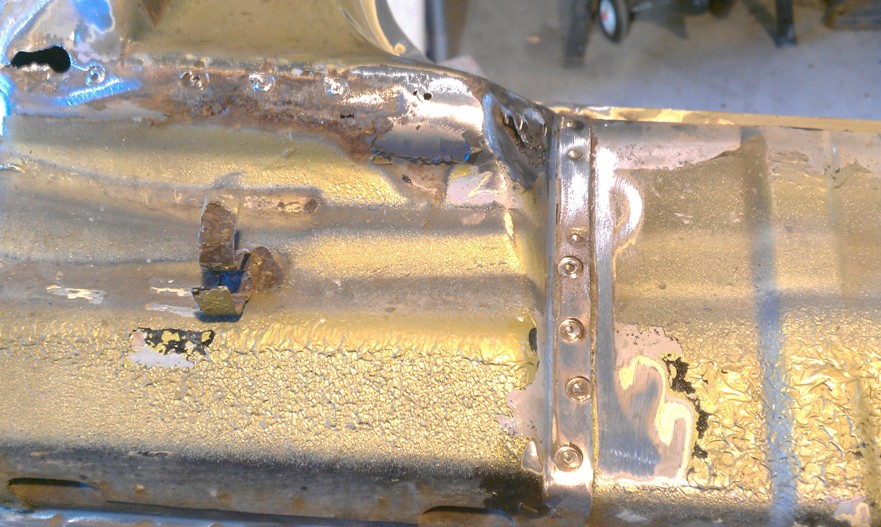 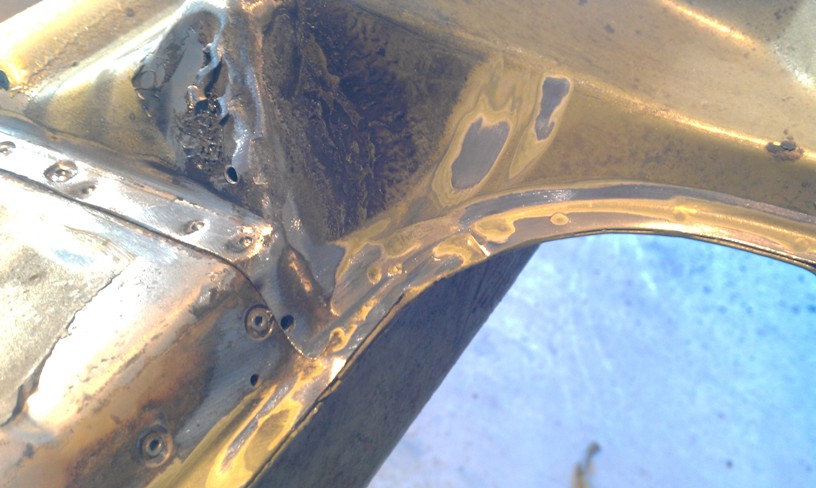 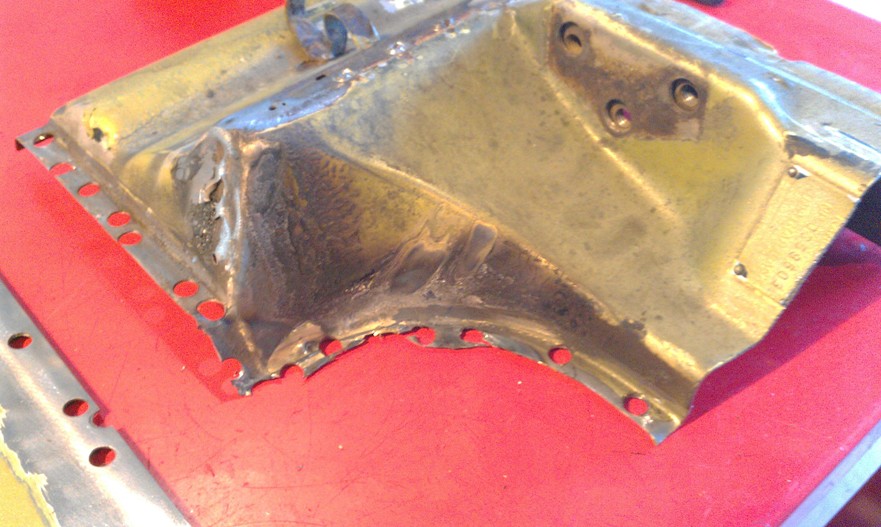 Getting out the leaded flange on the upper portion was a bitch. But I got .................... |
| cary |
 Jan 6 2013, 07:56 PM Jan 6 2013, 07:56 PM
Post
#124
|
|
Advanced Member     Group: Members Posts: 3,900 Joined: 26-January 04 From: Sherwood Oregon Member No.: 1,608 Region Association: Pacific Northwest 
|
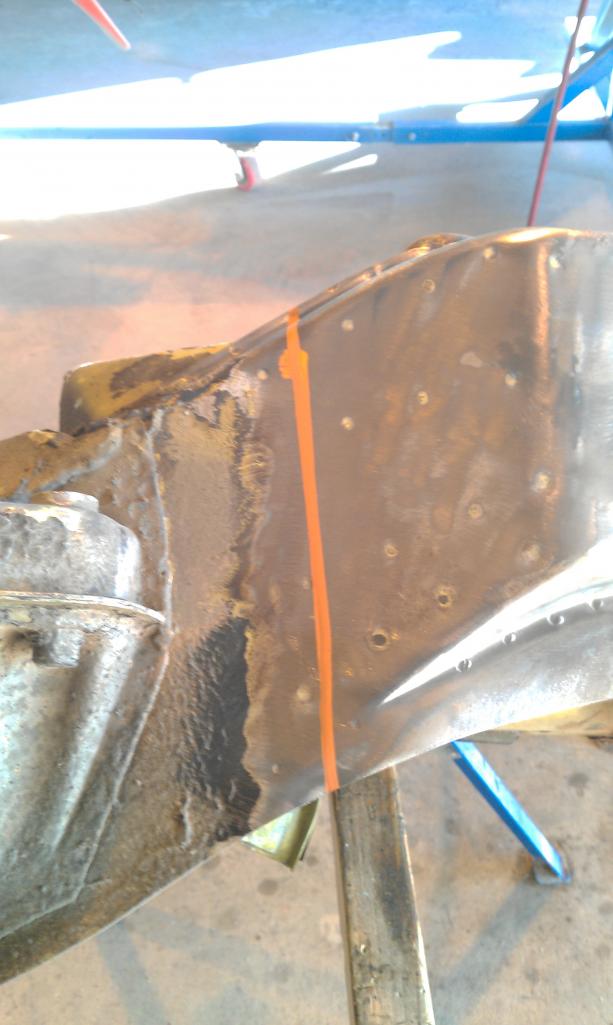
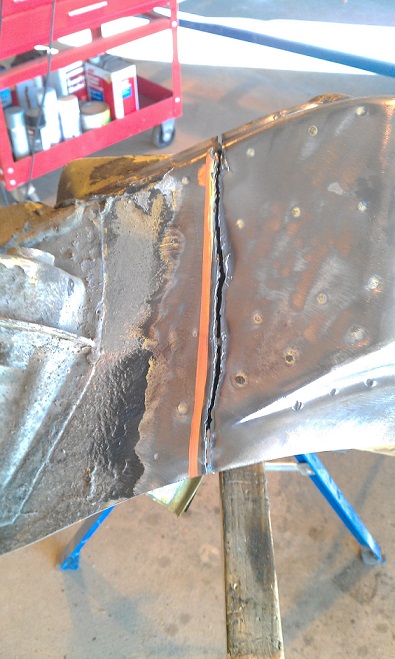
Heres a couple shots of the outer long under the door hinge support.
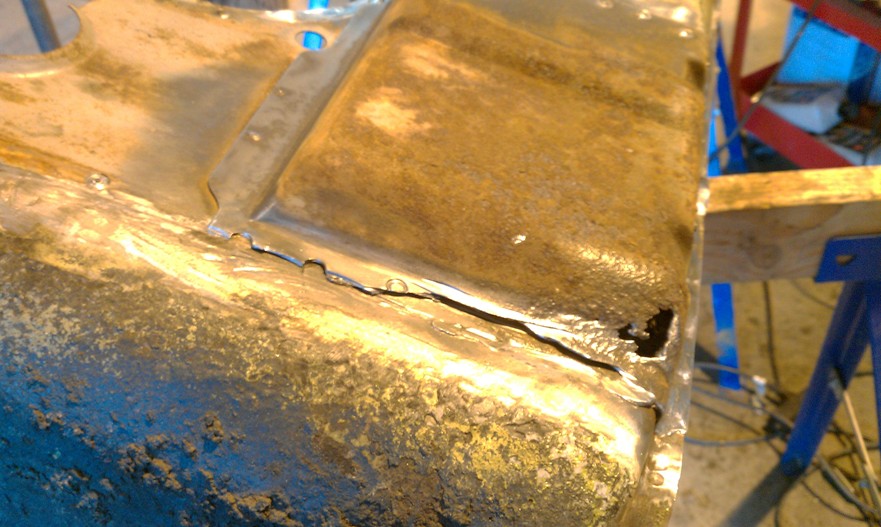 As you can see the front fender end isn't welded at all. Well that's not going to work. I'm thinking I'll seam seal it. 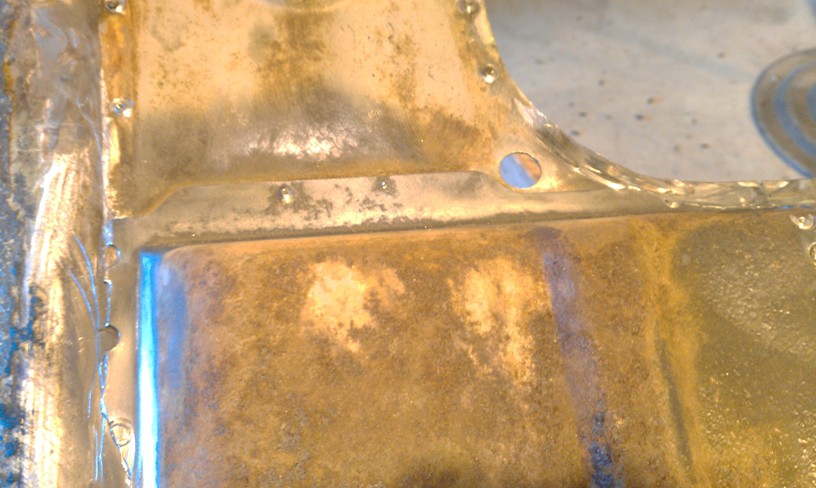 The top only has 2 spot welds. |
| cary |
 Jan 7 2013, 05:54 AM Jan 7 2013, 05:54 AM
Post
#125
|
|
Advanced Member     Group: Members Posts: 3,900 Joined: 26-January 04 From: Sherwood Oregon Member No.: 1,608 Region Association: Pacific Northwest 
|
Bad news for the Tool Whore's wallet.
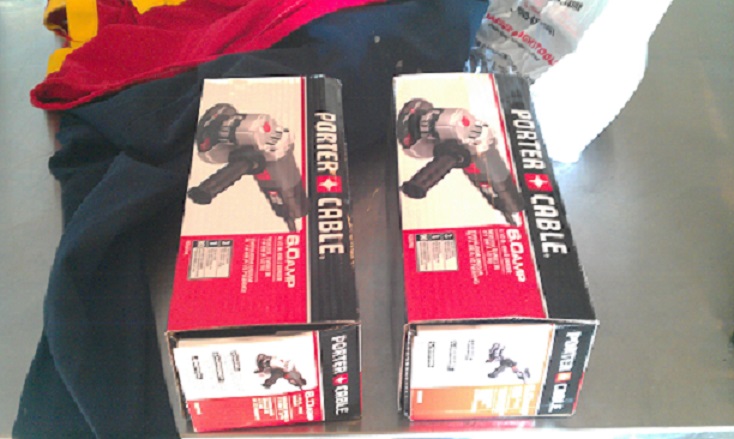
They just opened a new HF in Hillsboro. On a side note: Buying two more grinders. NAPA has a pair of 6 amp Porter Cables 4 1/2 ones sitting on their left over Christmas gift display. On a sad note: Being transferred to the companies most outdated and under-performing store. Dandy. Owners explanation. You get paid the most, go fix it. He had a pretty tough time breaking the news .............. Start today at 5am ................. |
| Archie |
 Jan 11 2013, 10:29 PM Jan 11 2013, 10:29 PM
Post
#126
|
|
Member   Group: Members Posts: 197 Joined: 23-September 09 From: Western Canada Member No.: 10,844 Region Association: Pacific Northwest |
Now back to work ..................... What have some some folks done to seal up the sail panel cavity so we don't get debris up in there. This is looking at it hanging upside on the rotisserie. You have to wonder, Cary. I found some of that round-section, open-cell construction foam pushed up into this gap between the sail panel and the outer fender panel. I thought it was stock! Seems like there should be nothing in there!! |
| cary |
 Jan 12 2013, 06:41 AM Jan 12 2013, 06:41 AM
Post
#127
|
|
Advanced Member     Group: Members Posts: 3,900 Joined: 26-January 04 From: Sherwood Oregon Member No.: 1,608 Region Association: Pacific Northwest 
|
I thought the same thing.
But when we started the body work on this car a couple years ago. There it was. I'm sure Scotty, Perry, Jeff and those that having been restoring these cars for years could give you a better explanation. I think I remember one of them explaining what the factory was thinking. But I can't remember what it was. |
| cary |
 Jan 17 2013, 06:58 AM Jan 17 2013, 06:58 AM
Post
#128
|
|
Advanced Member     Group: Members Posts: 3,900 Joined: 26-January 04 From: Sherwood Oregon Member No.: 1,608 Region Association: Pacific Northwest 
|
My dad just passed away from a fast acting Leukemia. He fainted on Dec 10th. and passed away yesterday. He was 75 and was in what appeared to be perfect health. They did make an attempt with Chemo, but it didn't work. They say it had a 66% chance. When you're a kid your dad seems like Superman. It was tough to see him shrink to almost nothing. |
| Slink |
 Jan 17 2013, 08:45 AM Jan 17 2013, 08:45 AM
Post
#129
|
|
Newbie  Group: Members Posts: 18 Joined: 16-September 09 From: New Jersey Member No.: 10,814 Region Association: None |
Cary
My deepest sympathy to you and your family. |
| wingnut86 |
 Jan 17 2013, 01:02 PM Jan 17 2013, 01:02 PM
Post
#130
|
|
...boola la boo boola boo...    Group: Members Posts: 1,053 Joined: 22-April 10 From: South Carolina Member No.: 11,645 Region Association: South East States |
Cary,
My family's condolences on the loss of your dad. Mine passed in 2006 - battled cancer 3 times and won. Appendix burst one evening and the infection took him 3 weeks later, he was 78. Hang in there. Dave |
| cary |
 Jan 21 2013, 09:33 PM Jan 21 2013, 09:33 PM
Post
#131
|
|
Advanced Member     Group: Members Posts: 3,900 Joined: 26-January 04 From: Sherwood Oregon Member No.: 1,608 Region Association: Pacific Northwest 
|
|
| cary |
 Jan 21 2013, 09:45 PM Jan 21 2013, 09:45 PM
Post
#132
|
|
Advanced Member     Group: Members Posts: 3,900 Joined: 26-January 04 From: Sherwood Oregon Member No.: 1,608 Region Association: Pacific Northwest 
|
|
| cary |
 Jan 21 2013, 09:48 PM Jan 21 2013, 09:48 PM
Post
#133
|
|
Advanced Member     Group: Members Posts: 3,900 Joined: 26-January 04 From: Sherwood Oregon Member No.: 1,608 Region Association: Pacific Northwest 
|
|
| cary |
 Jan 21 2013, 09:53 PM Jan 21 2013, 09:53 PM
Post
#134
|
|
Advanced Member     Group: Members Posts: 3,900 Joined: 26-January 04 From: Sherwood Oregon Member No.: 1,608 Region Association: Pacific Northwest 
|
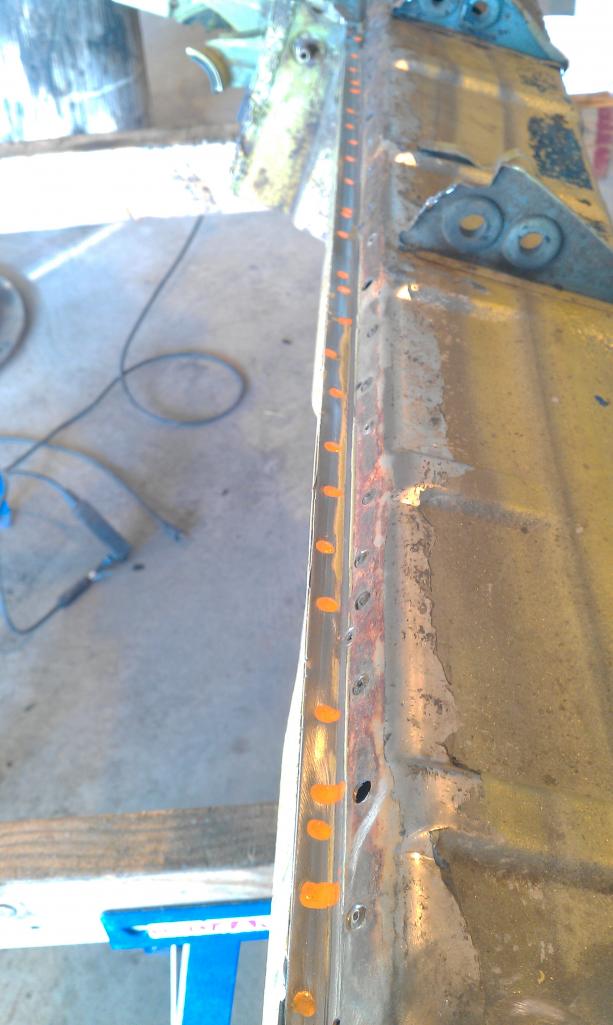
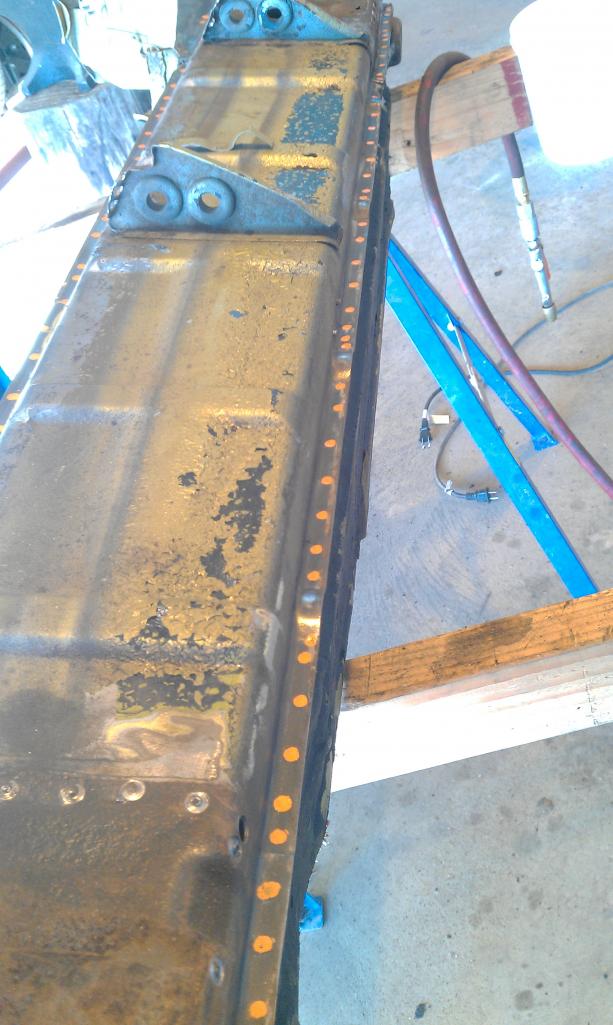
I got 85 spot welds drilled out with one Rota Cut bit. (IMG:style_emoticons/default/piratenanner.gif)
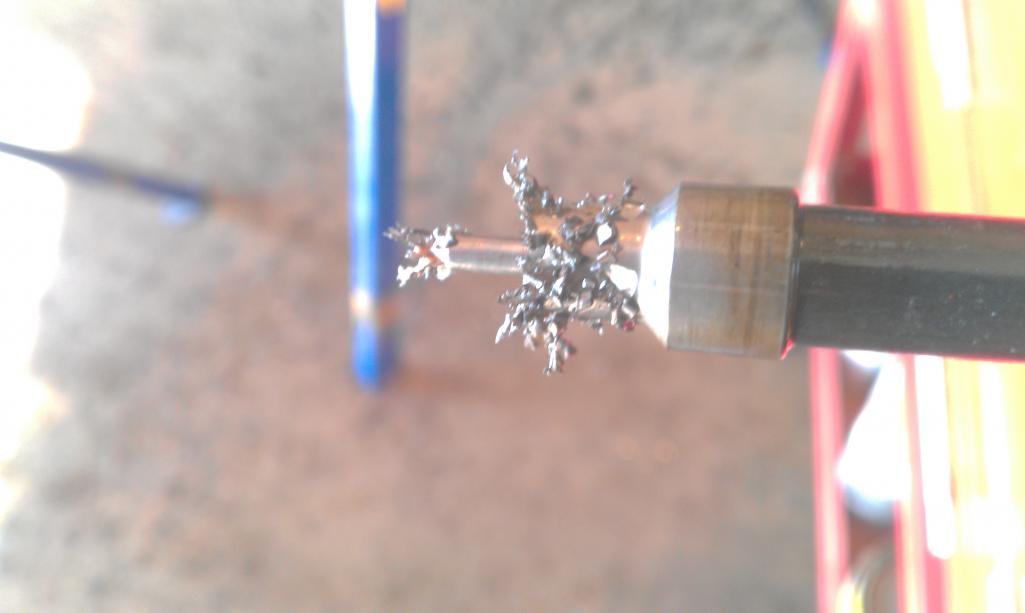 Using Perry's dip into cutting oil technique. Works like a champ. Did go through about 5 HF 7/64 pilot hole drill bits. (IMG:style_emoticons/default/mad.gif) |
| sixnotfour |
 Jan 21 2013, 09:53 PM Jan 21 2013, 09:53 PM
Post
#135
|
|
914 Wizard           Group: Members Posts: 10,707 Joined: 12-September 04 From: Life Elevated..planet UT. Member No.: 2,744 Region Association: Rocky Mountains 

|
Hold or clamp a straight edge and burn....
|
| cary |
 Jan 21 2013, 09:56 PM Jan 21 2013, 09:56 PM
Post
#136
|
|
Advanced Member     Group: Members Posts: 3,900 Joined: 26-January 04 From: Sherwood Oregon Member No.: 1,608 Region Association: Pacific Northwest 
|
Outer long removed in one solid piece. (IMG:style_emoticons/default/biggrin.gif)
Easy deal ................. 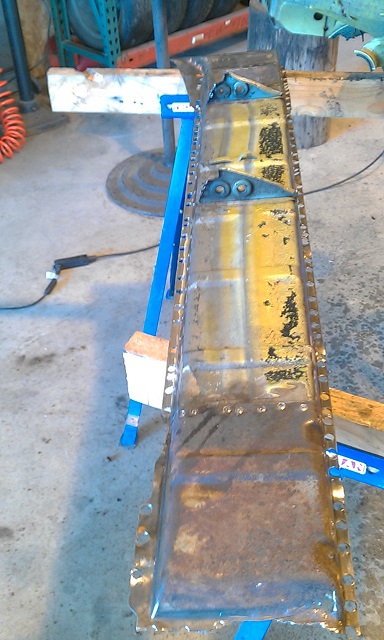 |
| cary |
 Jan 21 2013, 09:58 PM Jan 21 2013, 09:58 PM
Post
#137
|
|
Advanced Member     Group: Members Posts: 3,900 Joined: 26-January 04 From: Sherwood Oregon Member No.: 1,608 Region Association: Pacific Northwest 
|
Here she is opened up. Looks good.
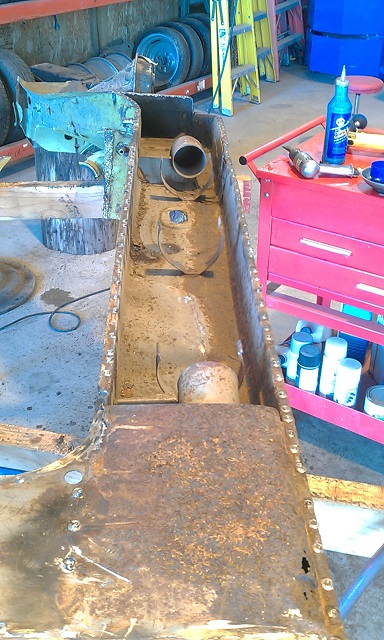 |
| cary |
 Jan 21 2013, 10:15 PM Jan 21 2013, 10:15 PM
Post
#138
|
|
Advanced Member     Group: Members Posts: 3,900 Joined: 26-January 04 From: Sherwood Oregon Member No.: 1,608 Region Association: Pacific Northwest 
|
Perry gave me lots of material. Looks like I'll have the entire front inner fender portion too.
But the bottom of the long as it starts to go up the wheelhouse will have to be created. This one is pitted and has a couple holes in the outer layer. Better than mine, but not a good as I want it to be. That's the section under the rear jack point. Could do a small patch. But to me, seems that's about the most important section on the entire car. Had a great day. Had a tearful moment when Eric Clapton came on the radio. Tears in Heaven Took a couple minutes to listen to entire song. Then got back too it. |
| cary |
 Jan 28 2013, 10:47 PM Jan 28 2013, 10:47 PM
Post
#139
|
|
Advanced Member     Group: Members Posts: 3,900 Joined: 26-January 04 From: Sherwood Oregon Member No.: 1,608 Region Association: Pacific Northwest 
|
So back to dissecting the long.
Next will be to remove the engine shelf. I want to remove it totally intact so it could be used in the future. 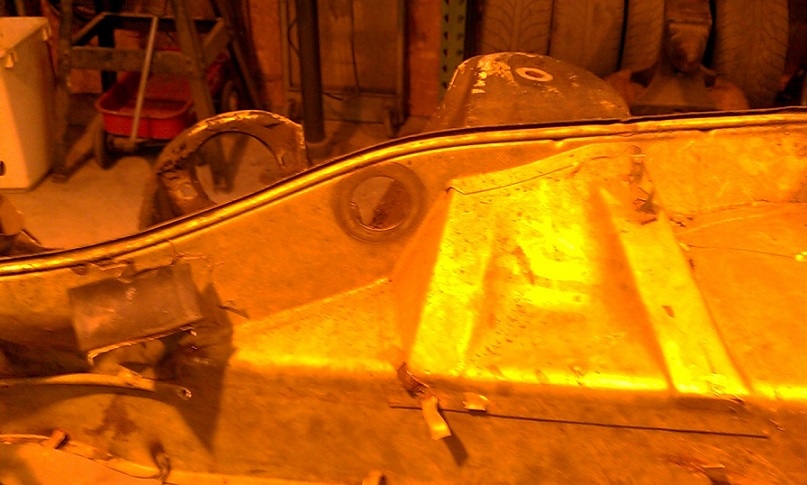 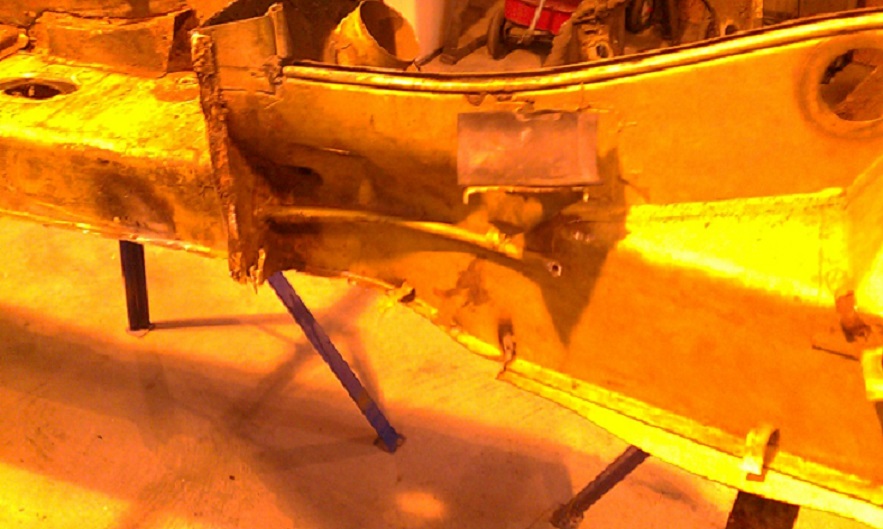 Camera doesn't like the halogen lamps...... 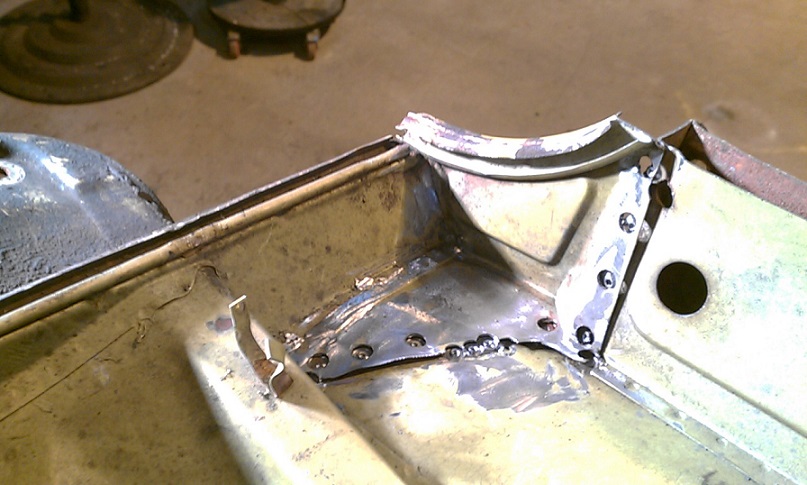 Taking off the backend with the end piece attached. No way to remove it without damaging the shelf. 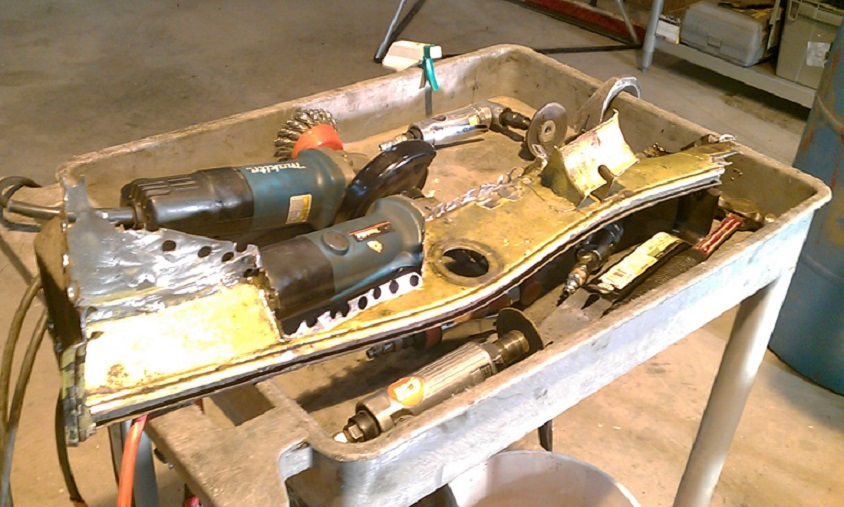 Got it out in one piece. (IMG:style_emoticons/default/biggrin.gif) (IMG:style_emoticons/default/biggrin.gif) |
| cary |
 Jan 28 2013, 10:52 PM Jan 28 2013, 10:52 PM
Post
#140
|
|
Advanced Member     Group: Members Posts: 3,900 Joined: 26-January 04 From: Sherwood Oregon Member No.: 1,608 Region Association: Pacific Northwest 
|
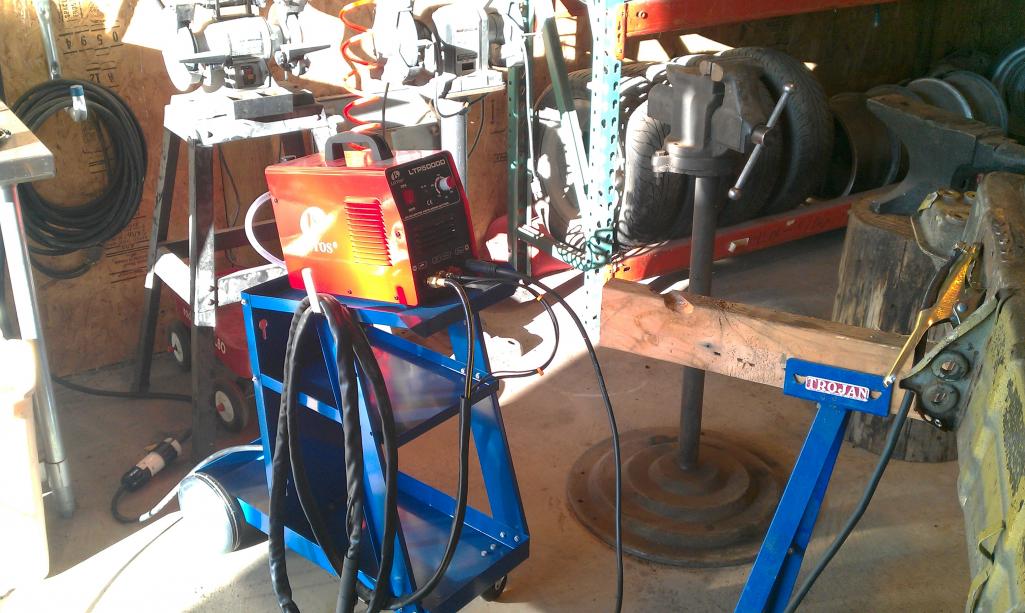
Here's the wheelhouse cut off with the plasma cutter.
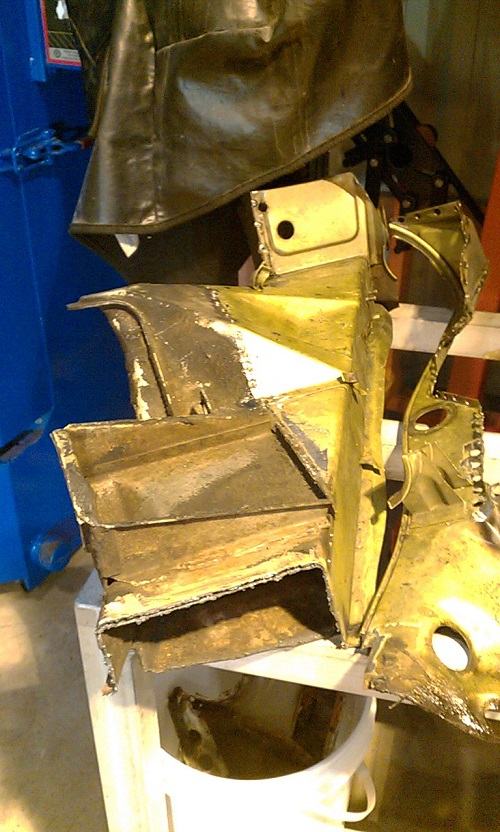 |
  |
2 User(s) are reading this topic (2 Guests and 0 Anonymous Users)
0 Members:

|
Lo-Fi Version | Time is now: 16th January 2025 - 11:51 PM |
Invision Power Board
v9.1.4 © 2025 IPS, Inc.


