|
|

|
Porsche, and the Porsche crest are registered trademarks of Dr. Ing. h.c. F. Porsche AG.
This site is not affiliated with Porsche in any way. Its only purpose is to provide an online forum for car enthusiasts. All other trademarks are property of their respective owners. |
|
|
  |
| cary |
 Sep 29 2013, 10:32 PM Sep 29 2013, 10:32 PM
Post
#226
|
|
Advanced Member     Group: Members Posts: 3,900 Joined: 26-January 04 From: Sherwood Oregon Member No.: 1,608 Region Association: Pacific Northwest 
|
So I begin to fit the passenger long .................
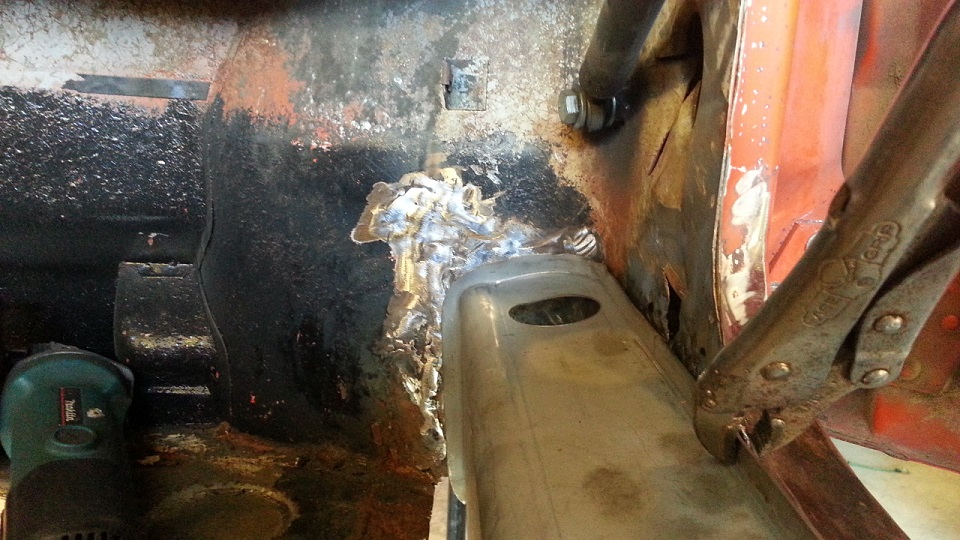 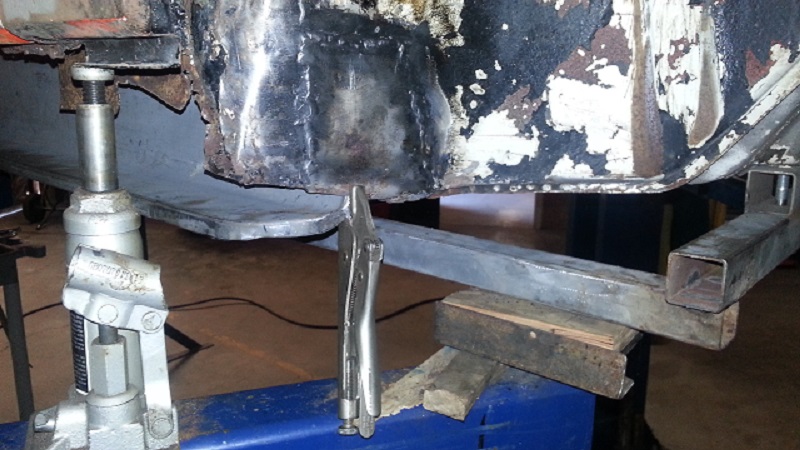 Not liking the fit to our original get it on the road repairs 10 years ago. |
| cary |
 Sep 29 2013, 10:38 PM Sep 29 2013, 10:38 PM
Post
#227
|
|
Advanced Member     Group: Members Posts: 3,900 Joined: 26-January 04 From: Sherwood Oregon Member No.: 1,608 Region Association: Pacific Northwest 
|
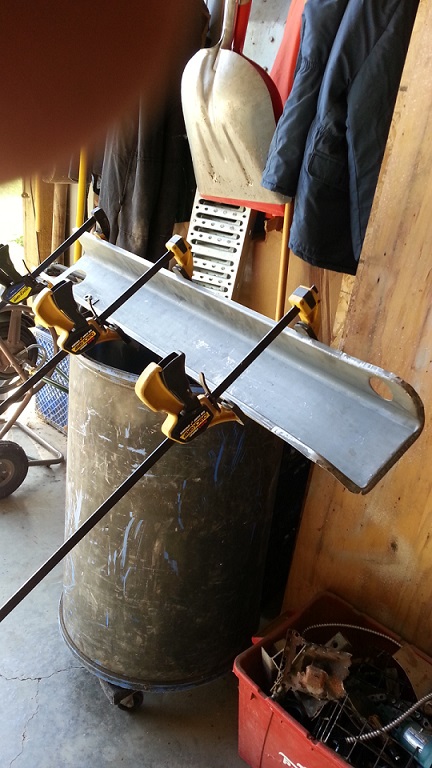 Needed to reduce the long opening about 3/8 of an inch. Easy deal ................claps did the job. 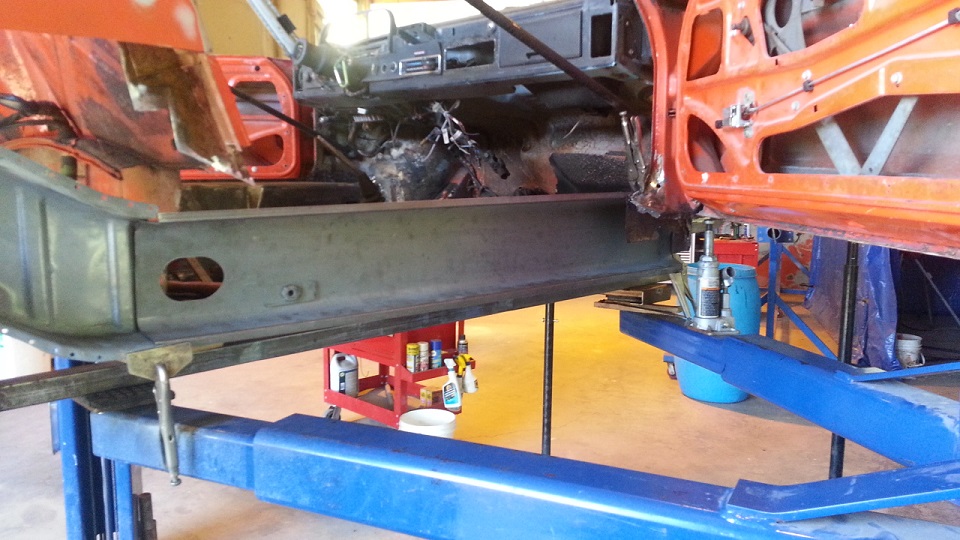 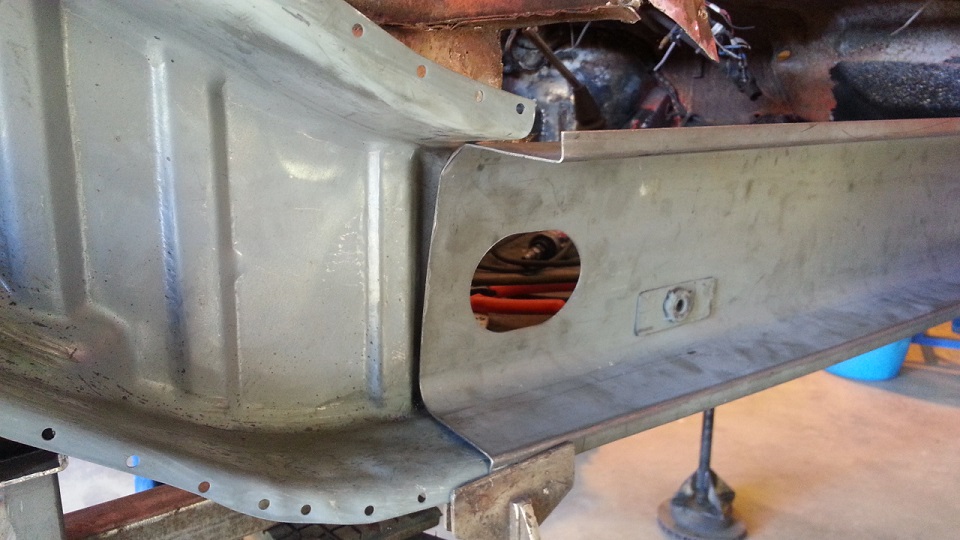 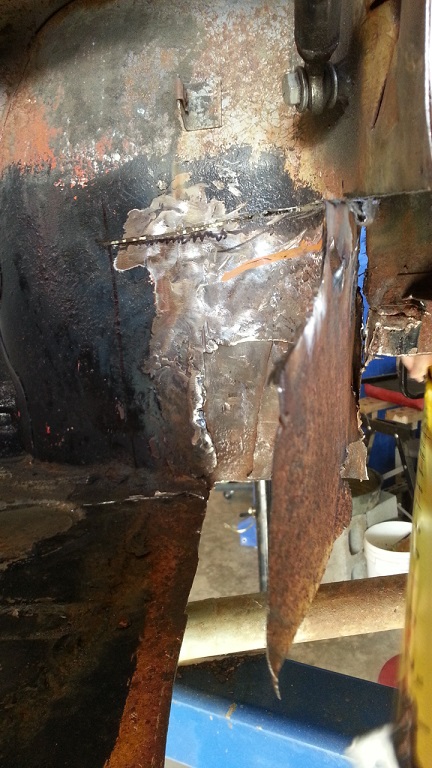 So begin I to cut out the corner ........... |
| cary |
 Sep 29 2013, 10:49 PM Sep 29 2013, 10:49 PM
Post
#228
|
|
Advanced Member     Group: Members Posts: 3,900 Joined: 26-January 04 From: Sherwood Oregon Member No.: 1,608 Region Association: Pacific Northwest 
|
So here's where we left off.
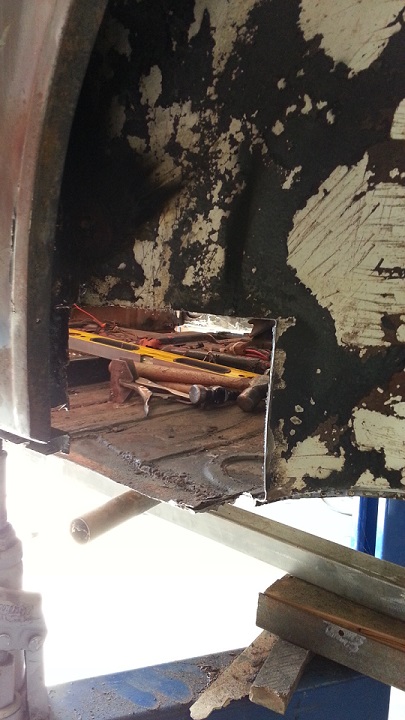 We spent most of the afternoon forming the new corner. Didn't take any pictures. (IMG:style_emoticons/default/sad.gif) (IMG:style_emoticons/default/sad.gif) |
| cary |
 Oct 1 2013, 06:29 AM Oct 1 2013, 06:29 AM
Post
#229
|
|
Advanced Member     Group: Members Posts: 3,900 Joined: 26-January 04 From: Sherwood Oregon Member No.: 1,608 Region Association: Pacific Northwest 
|
Next time I'm going to strip the entire car first .................
But this started as a while your in there project............... Lesson learned. Might have to start saving for the small Dustless Blaster. |
| jimkelly |
 Oct 1 2013, 12:20 PM Oct 1 2013, 12:20 PM
Post
#230
|
|
Delaware USA     Group: Members Posts: 4,969 Joined: 5-August 04 From: Delaware, USA Member No.: 2,460 Region Association: MidAtlantic Region |
it does seem that a stripped and sand blasted tub is the best way to begin.
I have to say, this is one of the most metal-removed long/hell hole repairs in recent memory. (IMG:style_emoticons/default/beerchug.gif) |
| cary |
 Oct 6 2013, 08:43 PM Oct 6 2013, 08:43 PM
Post
#231
|
|
Advanced Member     Group: Members Posts: 3,900 Joined: 26-January 04 From: Sherwood Oregon Member No.: 1,608 Region Association: Pacific Northwest 
|
Back to work ....................
I'm going to go to work on the inner box for the drivers side. Went back in and reread Jeff Hail's Dead thread. 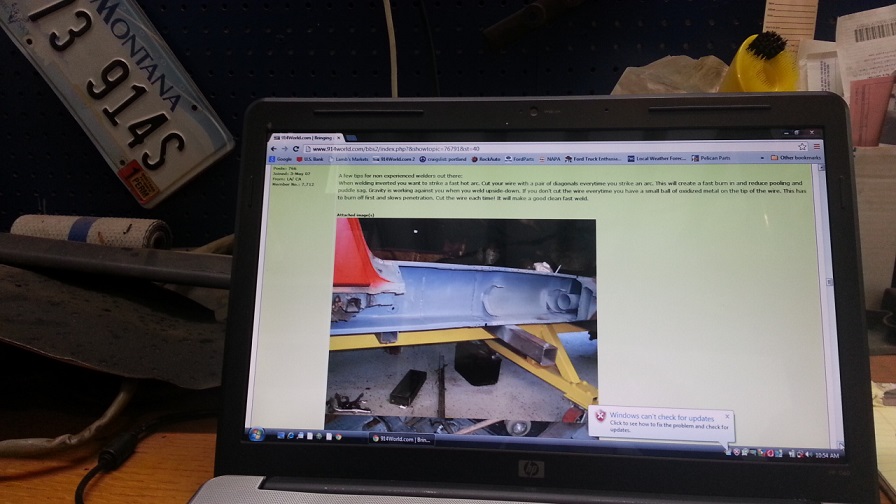 Finally using my Hot Spot at the shop. 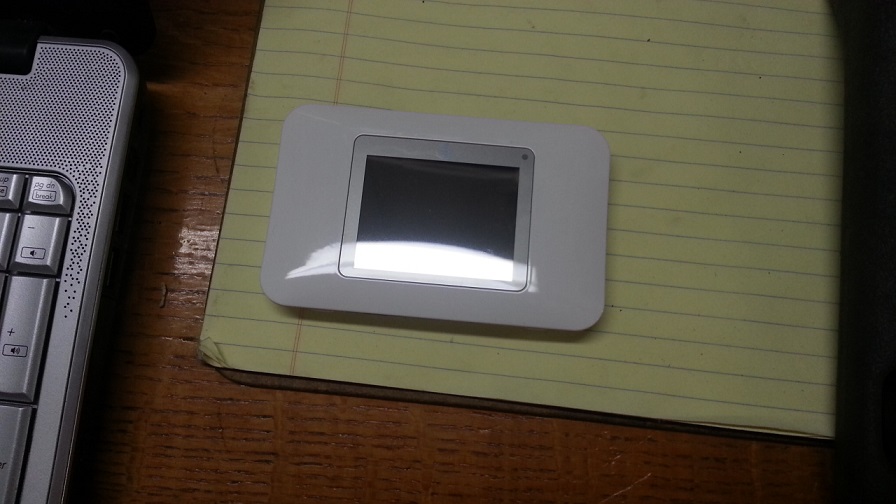 |
| cary |
 Oct 6 2013, 08:46 PM Oct 6 2013, 08:46 PM
Post
#232
|
|
Advanced Member     Group: Members Posts: 3,900 Joined: 26-January 04 From: Sherwood Oregon Member No.: 1,608 Region Association: Pacific Northwest 
|
Reworking a few of the patch seam welds on the long.
Practice, practice, practice. 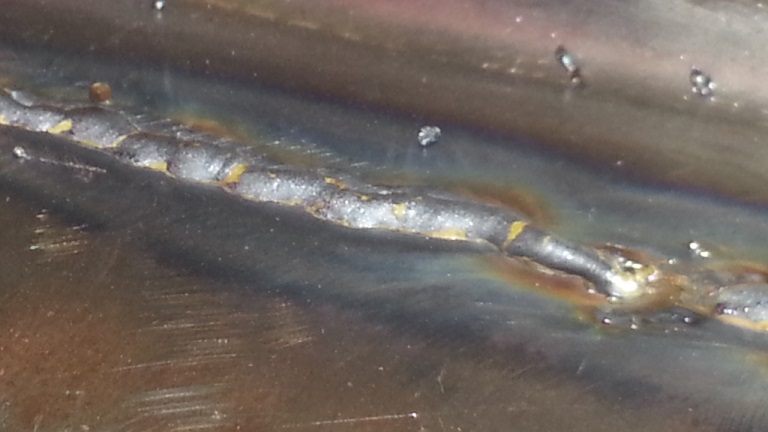 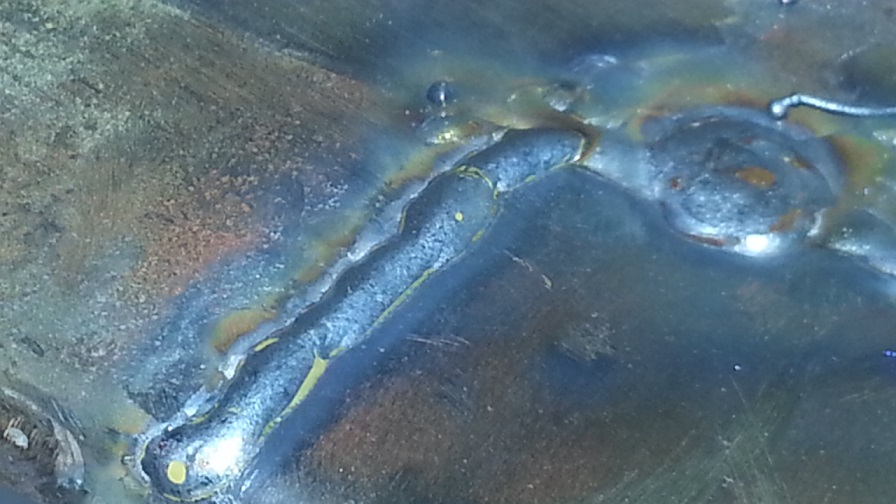 |
| cary |
 Oct 6 2013, 08:49 PM Oct 6 2013, 08:49 PM
Post
#233
|
|
Advanced Member     Group: Members Posts: 3,900 Joined: 26-January 04 From: Sherwood Oregon Member No.: 1,608 Region Association: Pacific Northwest 
|
Decided that I needed to cut off the lip.
Just couldn't get it to fit with the lip attached. 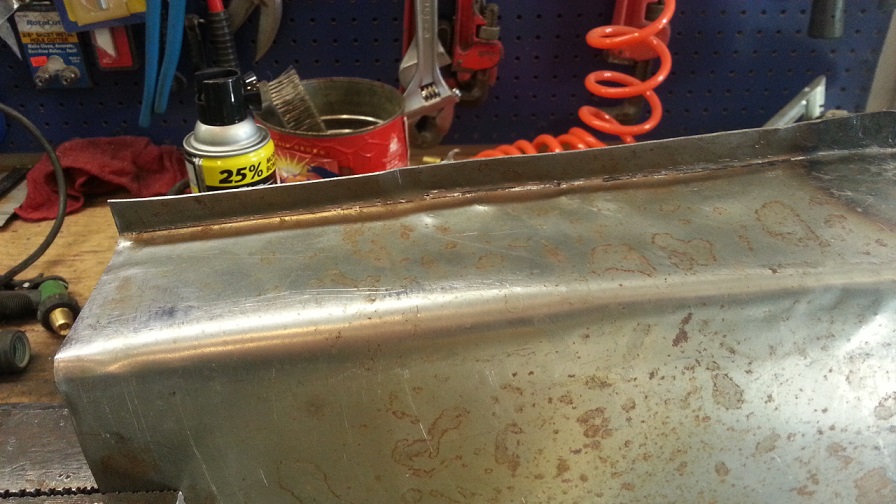 |
| cary |
 Oct 6 2013, 08:52 PM Oct 6 2013, 08:52 PM
Post
#234
|
|
Advanced Member     Group: Members Posts: 3,900 Joined: 26-January 04 From: Sherwood Oregon Member No.: 1,608 Region Association: Pacific Northwest 
|
So I decided to cut the holes in inner box.
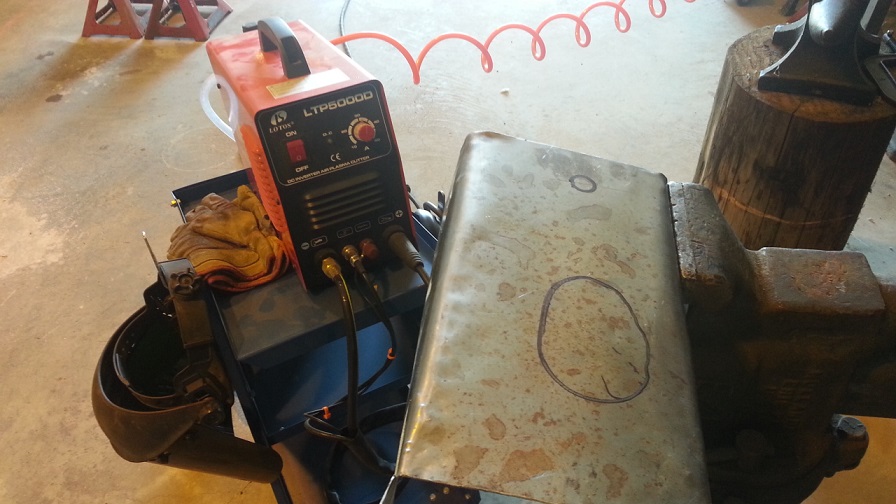 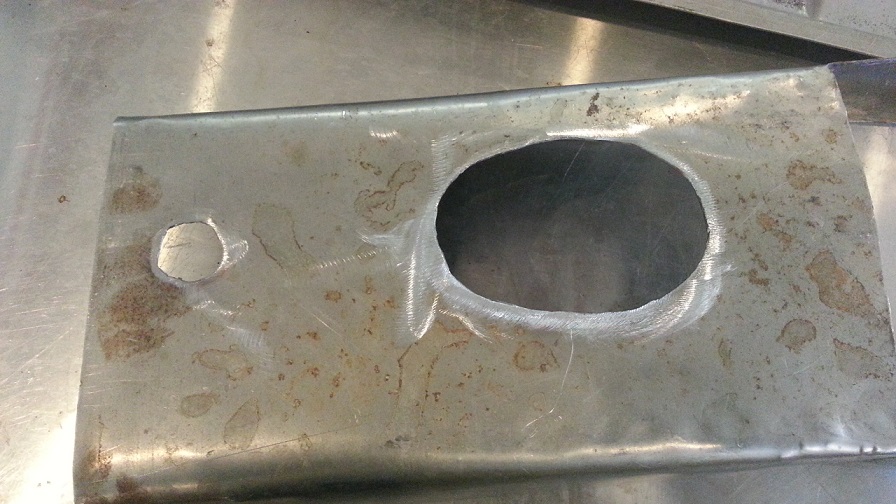 Free-Handed I'll have to come up with come sort of jig gadget. |
| cary |
 Oct 6 2013, 08:54 PM Oct 6 2013, 08:54 PM
Post
#235
|
|
Advanced Member     Group: Members Posts: 3,900 Joined: 26-January 04 From: Sherwood Oregon Member No.: 1,608 Region Association: Pacific Northwest 
|
Time for lunch ................... Off to Subway
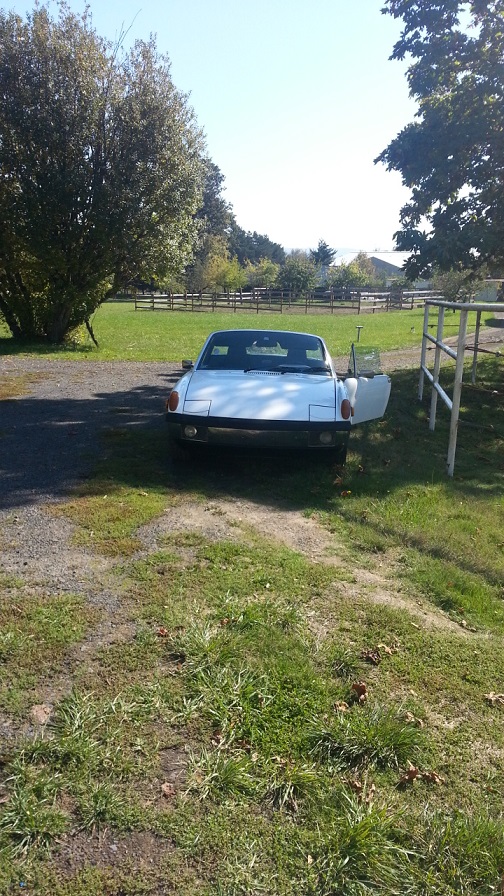 |
| cary |
 Oct 10 2013, 09:13 PM Oct 10 2013, 09:13 PM
Post
#236
|
|
Advanced Member     Group: Members Posts: 3,900 Joined: 26-January 04 From: Sherwood Oregon Member No.: 1,608 Region Association: Pacific Northwest 
|
Back to work on the inner box on the drivers long.
My welding is getting much better. Almost know what I 'm doing on good metal. 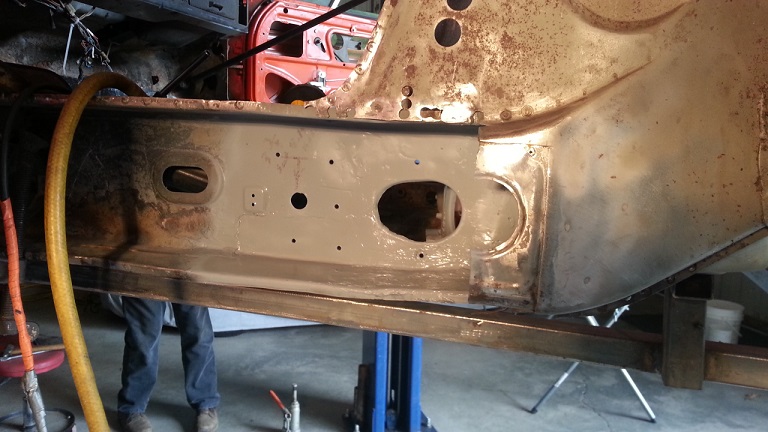 Weld thru primer sprayed on. Rosette holes drilled. 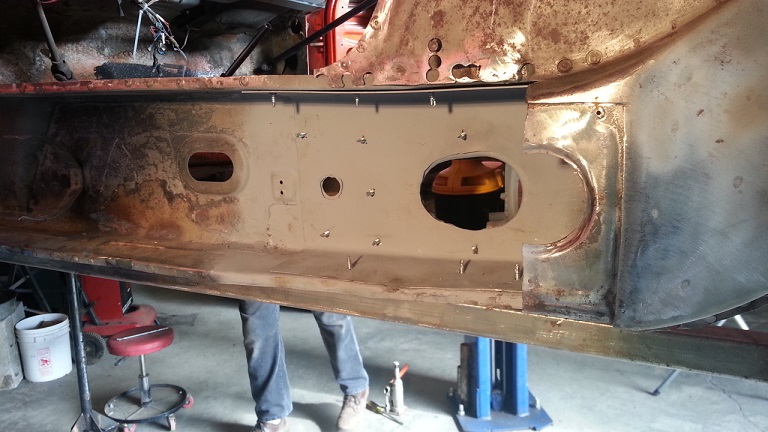 Didn't like the self taping screw technique this time. The hole on the old long needed to be bigger. There was no where to start the weld on the new metal inner box. So welded from both sides. (IMG:style_emoticons/default/sad.gif) 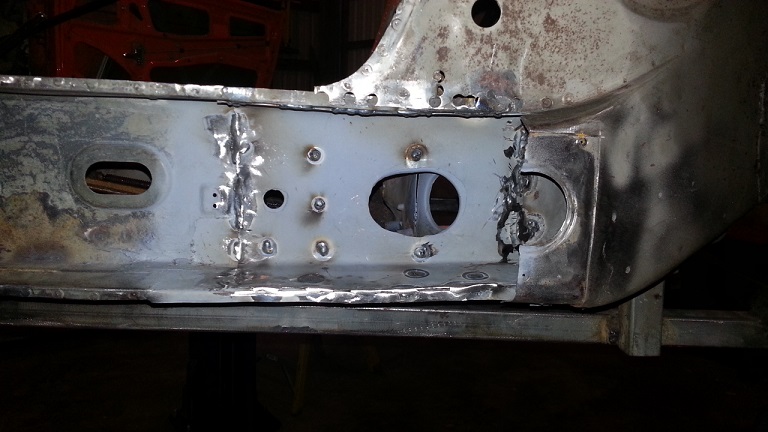 Now ready for seam sealer and primer .................. Had a good day. Super In Law made good progress on the right side front inner fender .... Didn't shoot any pictures. |
| cary |
 Nov 17 2013, 09:58 AM Nov 17 2013, 09:58 AM
Post
#237
|
|
Advanced Member     Group: Members Posts: 3,900 Joined: 26-January 04 From: Sherwood Oregon Member No.: 1,608 Region Association: Pacific Northwest 
|
A month has passed since we've accomplished much. Yesterday was a good day.
I'm working on the extending the outer drivers wheelhouse that was removed due to the cars medical condition. (IMG:style_emoticons/default/sad.gif) So I start with making a cardboard pattern. 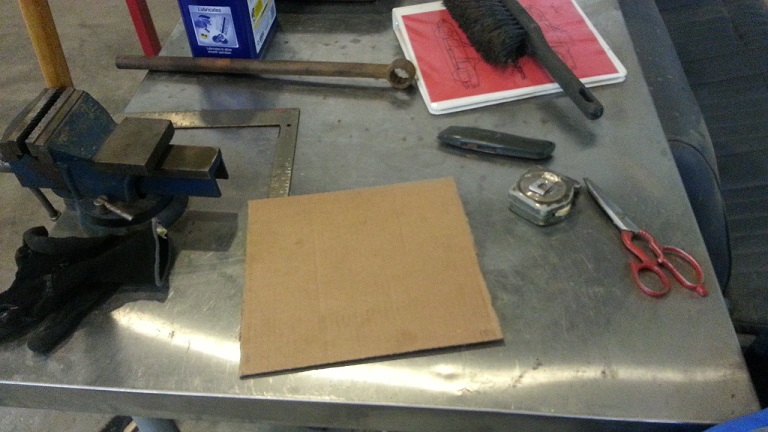 Here's where I'm working. 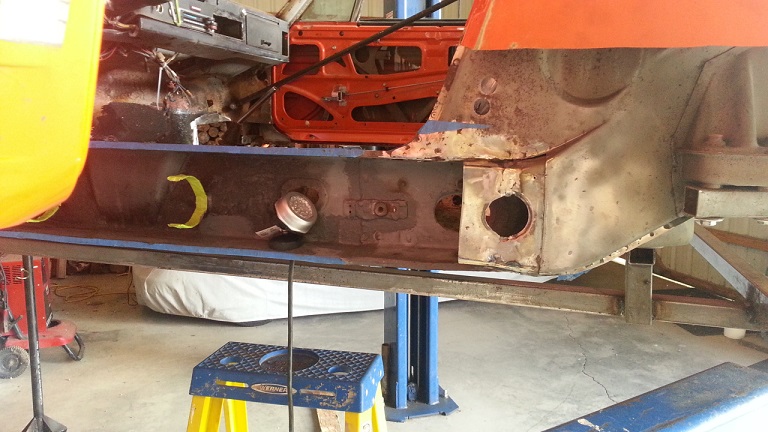 See that little magnetic light. Way cool. Bought it at Bi Mart here in Oregon. It has improved my welding about 100%. $13. When I get a chance I'll post the manufacturer info so it can be Googled. Tool Whore bought a second one. I just leave it attached to the welder. Easy to find that way. |
| cary |
 Nov 17 2013, 10:06 AM Nov 17 2013, 10:06 AM
Post
#238
|
|
Advanced Member     Group: Members Posts: 3,900 Joined: 26-January 04 From: Sherwood Oregon Member No.: 1,608 Region Association: Pacific Northwest 
|
Here's the completed extension.
Being that its the drivers side, no RD parts available. I know, most smart people would have walked away. 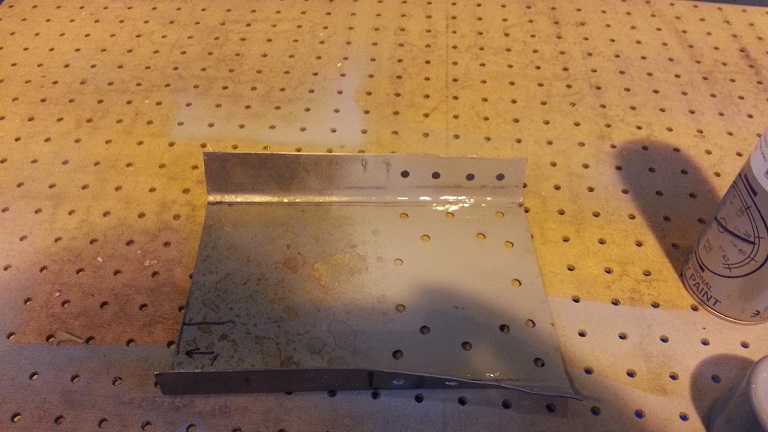 Here it is test fitted. 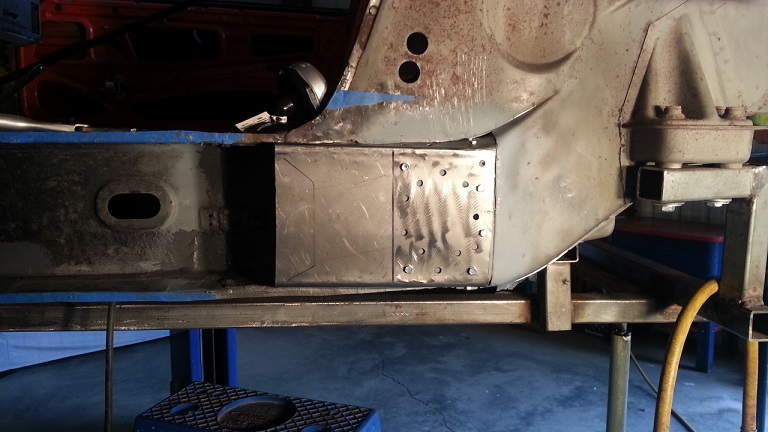 |
| cary |
 Nov 17 2013, 10:16 AM Nov 17 2013, 10:16 AM
Post
#239
|
|
Advanced Member     Group: Members Posts: 3,900 Joined: 26-January 04 From: Sherwood Oregon Member No.: 1,608 Region Association: Pacific Northwest 
|
Tool Whore side note :
Built another jack stand so I could get the lift arm out of the way. Ducking in and around that thing puts me in a poor mood. Man, I want to get this thing off the lift. I think I'm going build the jig Jeff Hail built for the next one. 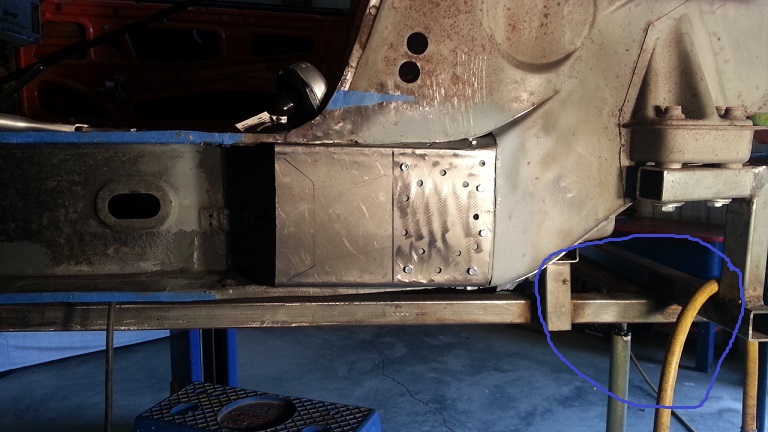 Don't worry, that is jack point #8. It's not going anywhere. |
| cary |
 Nov 17 2013, 10:35 AM Nov 17 2013, 10:35 AM
Post
#240
|
|
Advanced Member     Group: Members Posts: 3,900 Joined: 26-January 04 From: Sherwood Oregon Member No.: 1,608 Region Association: Pacific Northwest 
|
Super In Law is working on the other end.
The inner fender that the front of the long attaches to. Both sides of the this car had the disease real bad. So this repair is more about strength and function. I'm building this car to be my daily driver when finished. Rain, sleet or snow. Oh yeah, we're going to call it Icicle to match my white and blue Carrera. We'd already done one patch. But it didn't align with the new outer long. (IMG:style_emoticons/default/sad.gif) So we cut into it again and added another patch. Not exactly they way you'd want to do it on a customers car. I don't imagine anyone else we be where we are. But its something to look out for. 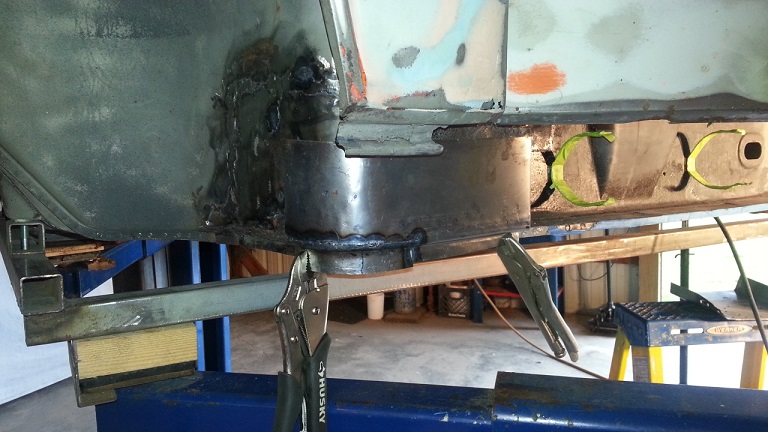 Still struggling with welding old metal to new. But we're getting it. Zig zaging really helps. Then not being a dumb ass and take your finger off the trigger. LOL. 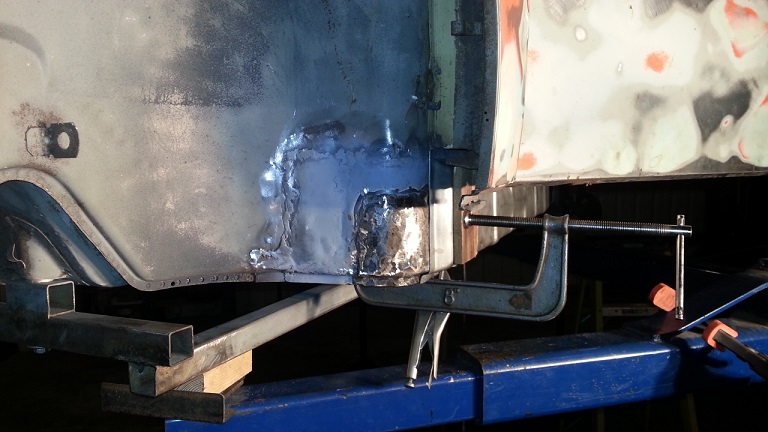 |
| cary |
 Nov 17 2013, 10:39 AM Nov 17 2013, 10:39 AM
Post
#241
|
|
Advanced Member     Group: Members Posts: 3,900 Joined: 26-January 04 From: Sherwood Oregon Member No.: 1,608 Region Association: Pacific Northwest 
|
Here's the fit we're working on.
Plus keeping the door gap at a perfect 5mm. 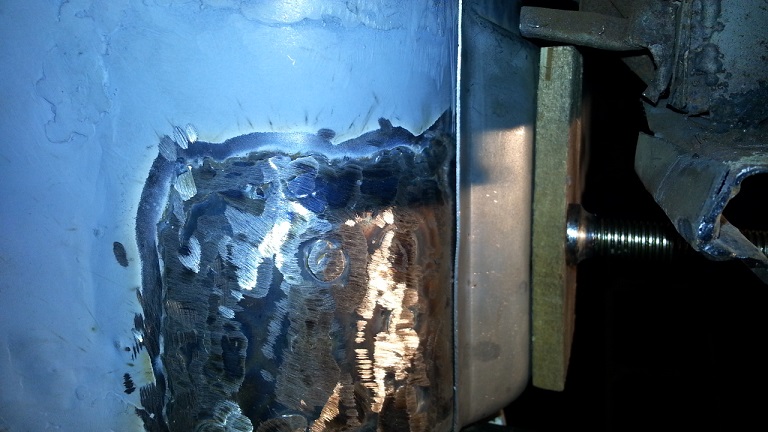 Seam sealer and under coat will make the less than stellar patch disappear like magic. But I'll know its there. (IMG:style_emoticons/default/sad.gif) (IMG:style_emoticons/default/sad.gif) |
| cary |
 Nov 17 2013, 10:41 AM Nov 17 2013, 10:41 AM
Post
#242
|
|
Advanced Member     Group: Members Posts: 3,900 Joined: 26-January 04 From: Sherwood Oregon Member No.: 1,608 Region Association: Pacific Northwest 
|
Here's the test fit at the end of the day. (IMG:style_emoticons/default/biggrin.gif) (IMG:style_emoticons/default/biggrin.gif)
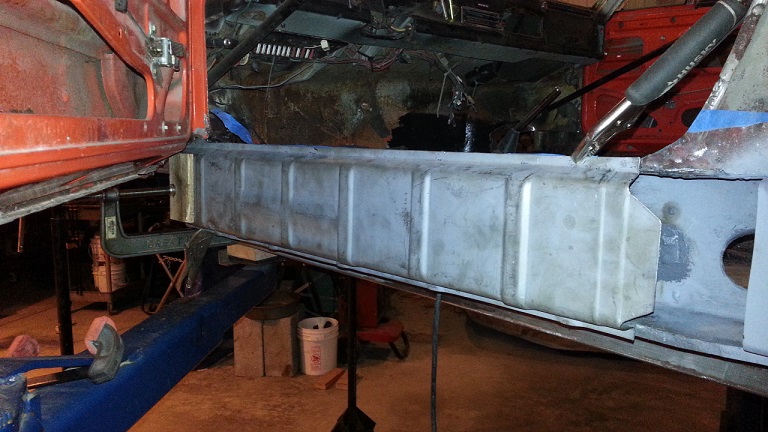 |
| cary |
 Nov 17 2013, 10:45 AM Nov 17 2013, 10:45 AM
Post
#243
|
|
Advanced Member     Group: Members Posts: 3,900 Joined: 26-January 04 From: Sherwood Oregon Member No.: 1,608 Region Association: Pacific Northwest 
|
Prepped the heater tubes for installation.
Next step is to encapsulate the inside. Finish up welding on the patch on the heater tube corner in the engine compartment. Get that all sanitary and seam sealed before the heater tube is tacked in. 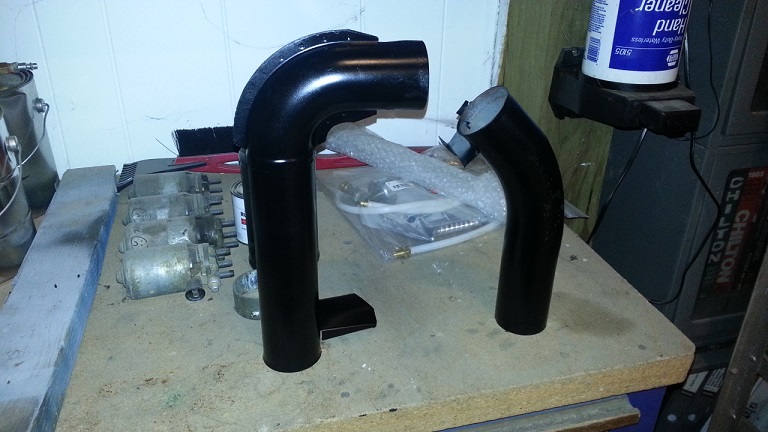 |
| FourBlades |
 Nov 17 2013, 07:03 PM Nov 17 2013, 07:03 PM
Post
#244
|
|
From Wreck to Rockin     Group: Members Posts: 2,056 Joined: 3-December 07 From: Brevard, FL Member No.: 8,414 Region Association: South East States 
|
Awesome thread man!
You are really getting there. I always found using the bzzt bzzt bzzt technique of just making one large tack weld after another to be the easiest way to deal with the old metal on these cars. You start the next tack weld while the previous one is still red hot. Putting the next tack on the edge of the red hot one prevents any problems getting the arc going cleanly. It ends up looking like this. This was tacked at 3 inch intervals all the way around and then filled in slowly. 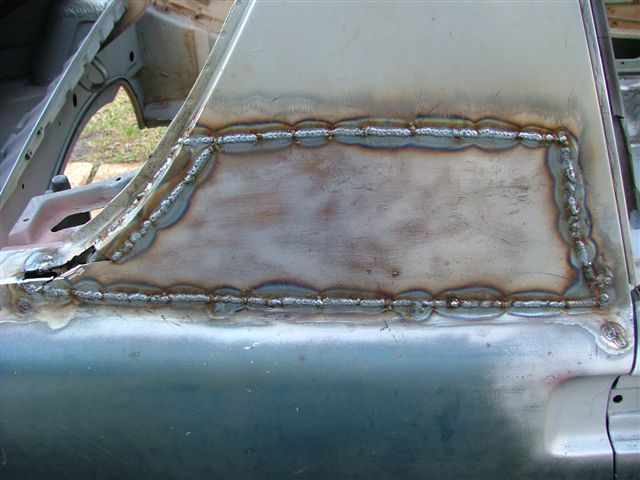 Looking forward to seeing your car back on its wheels again. John |
| cary |
 Nov 17 2013, 10:12 PM Nov 17 2013, 10:12 PM
Post
#245
|
|
Advanced Member     Group: Members Posts: 3,900 Joined: 26-January 04 From: Sherwood Oregon Member No.: 1,608 Region Association: Pacific Northwest 
|
Nice work. Thanks for the tip.
|
  |
6 User(s) are reading this topic (6 Guests and 0 Anonymous Users)
0 Members:

|
Lo-Fi Version | Time is now: 17th January 2025 - 08:02 PM |
Invision Power Board
v9.1.4 © 2025 IPS, Inc.


