|
|

|
Porsche, and the Porsche crest are registered trademarks of Dr. Ing. h.c. F. Porsche AG.
This site is not affiliated with Porsche in any way. Its only purpose is to provide an online forum for car enthusiasts. All other trademarks are property of their respective owners. |
|
|
  |
| cary |
 Jul 13 2015, 09:52 PM Jul 13 2015, 09:52 PM
Post
#466
|
|
Advanced Member     Group: Members Posts: 3,900 Joined: 26-January 04 From: Sherwood Oregon Member No.: 1,608 Region Association: Pacific Northwest 
|
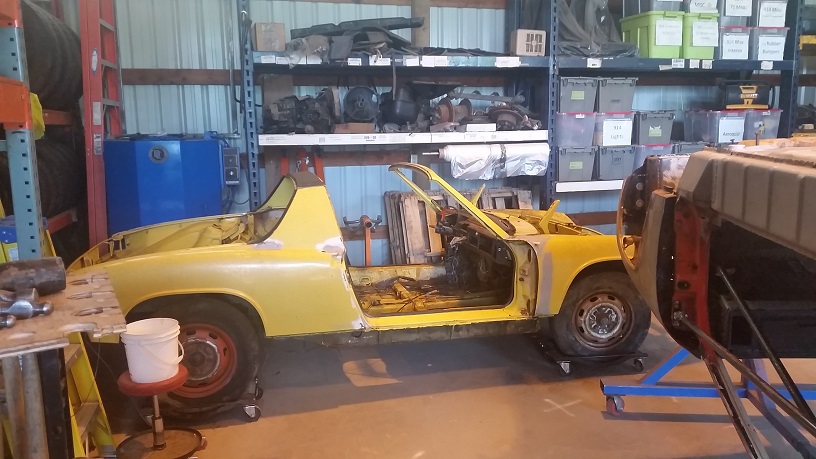
Donor in its temporary home. Super In Law spent the day with pencil and paper engineering his car stacker design.
 |
| cary |
 Jul 17 2015, 09:24 PM Jul 17 2015, 09:24 PM
Post
#467
|
|
Advanced Member     Group: Members Posts: 3,900 Joined: 26-January 04 From: Sherwood Oregon Member No.: 1,608 Region Association: Pacific Northwest 
|
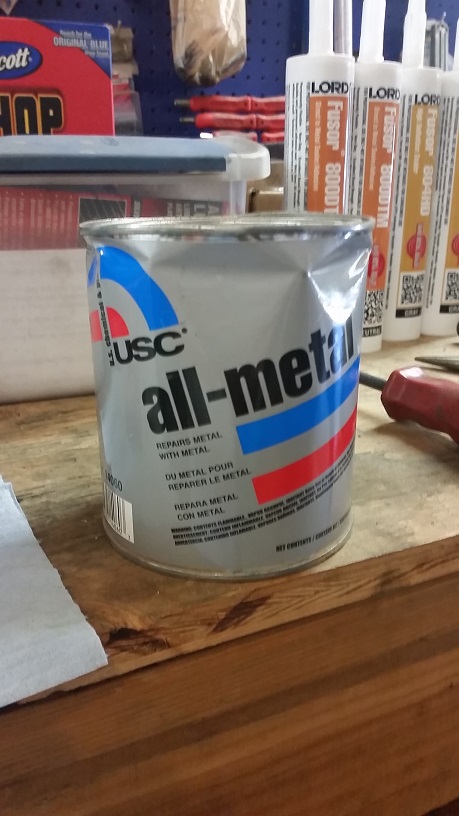
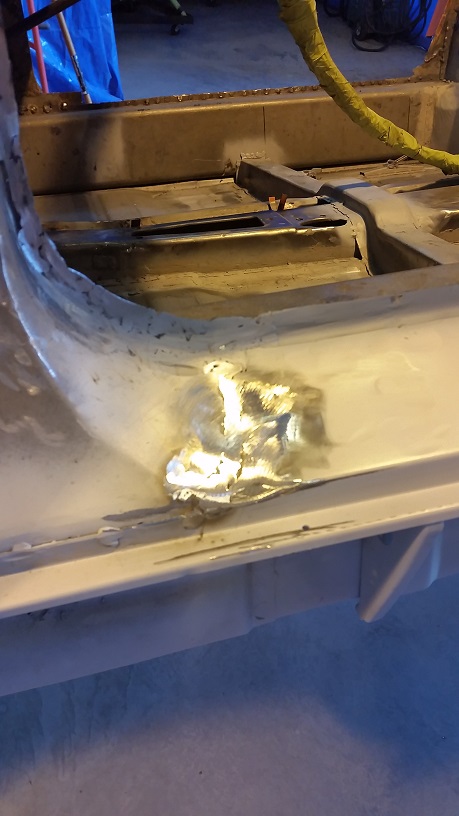
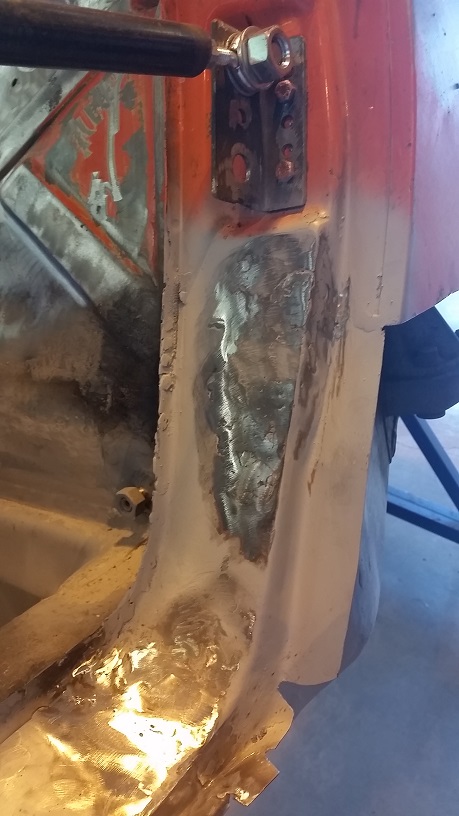
I decided that I will MIG weld the jam to sill joint. Then we'll tidy it up with All Metal body filler.
   |
| cary |
 Jul 18 2015, 08:17 AM Jul 18 2015, 08:17 AM
Post
#468
|
|
Advanced Member     Group: Members Posts: 3,900 Joined: 26-January 04 From: Sherwood Oregon Member No.: 1,608 Region Association: Pacific Northwest 
|
After getting the jam seams welded I moved on to installing the rocker end cap we fabricated some time ago. This car had quite a bit of rust repair in the inner fender/hinge post area when we made the car road worthy many years ago. Some good, some bad.
I'm just working on it being functional. If I run into this on another car. The fender will have to come off and be refitted. 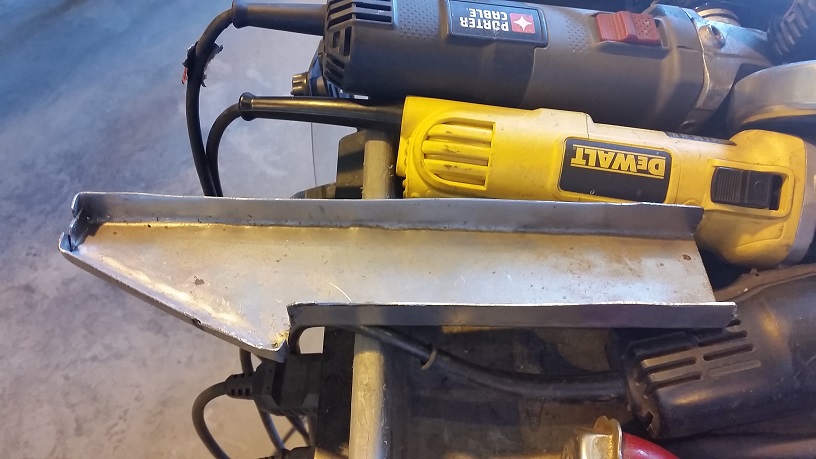 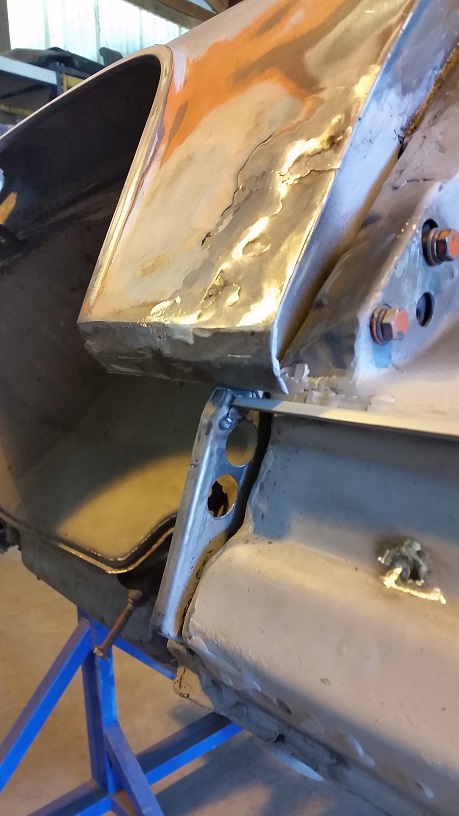 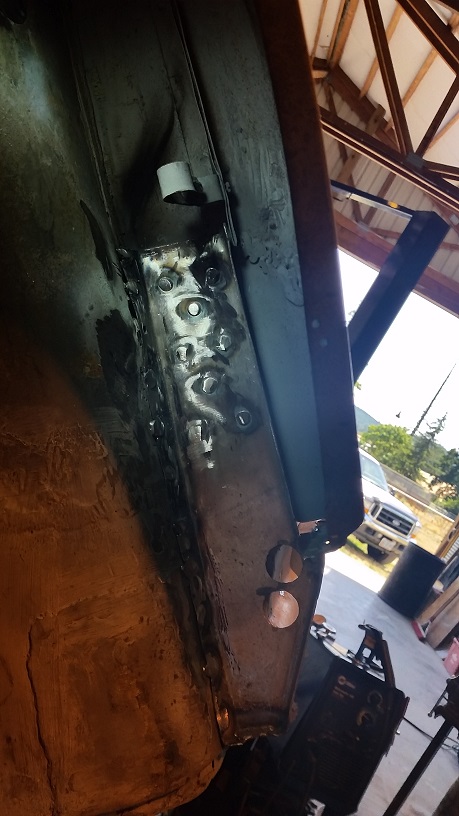 Now that I look at the bottom of that left front fender I may decide to cut that out and recreate it. But I need to keep reminding myself this is going to be a daily driver. As these cars continue to go up in value and the front fender is welded on. Maybe RD will look at making a patch panel for this area. I think there's one for both the 911 and the 356. I'll look and see what the one looks like on the donor on Monday. We cut the rocker cover channel off because it was so rotten when we took apart the car. Either way it will have to be recreated. Looks like in our first go around we did some welding and took correct shape out of the bottom edge of the fender. It kind nof rolls down and it isn't attached to the inner support. 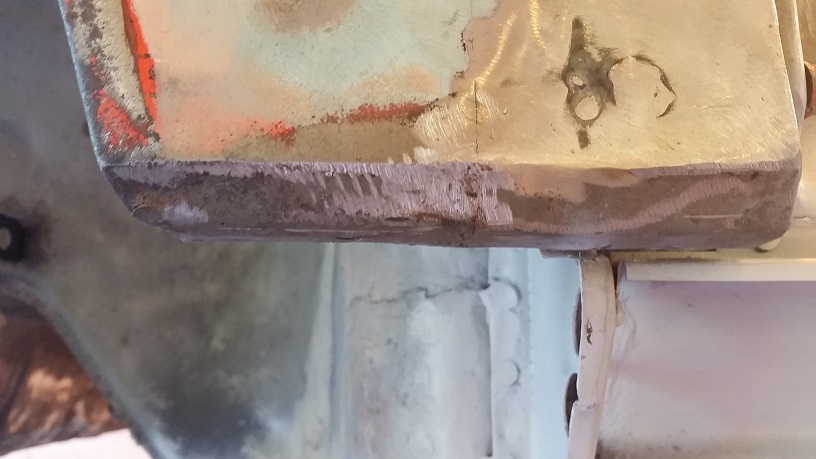 When the time comes both sides will get some VERY detailed seam sealing, both tube and spray on. Then they'll get undercoated. Then on top of that they get Mark's inner fender liners to keep the debri from getting up there in the first place. I did test fit the rocker cover. 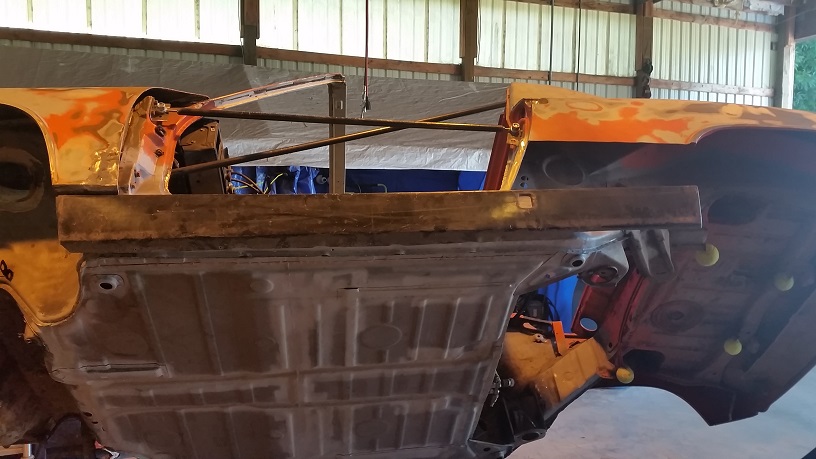 |
| cary |
 Jul 18 2015, 08:24 AM Jul 18 2015, 08:24 AM
Post
#469
|
|
Advanced Member     Group: Members Posts: 3,900 Joined: 26-January 04 From: Sherwood Oregon Member No.: 1,608 Region Association: Pacific Northwest 
|
Then I moved on to installing the right door sill. Pretty uneventful.
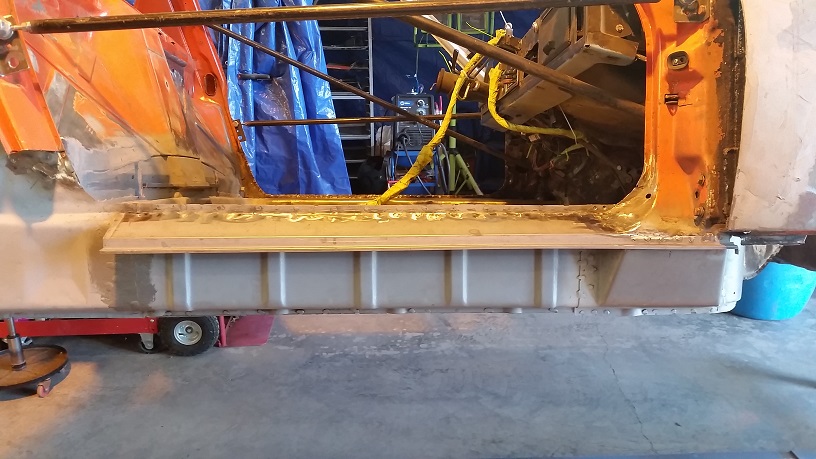 I have some welding to do around the bottom of the hinge post where I recreated the layers. Right at the bottom radius. |
| cary |
 Jul 20 2015, 08:21 PM Jul 20 2015, 08:21 PM
Post
#470
|
|
Advanced Member     Group: Members Posts: 3,900 Joined: 26-January 04 From: Sherwood Oregon Member No.: 1,608 Region Association: Pacific Northwest 
|
Onto to fitting, fiddling, cutting and installing the right door jam.
Here's where we start. Not exactly a high quality recreation. The the odd thing with both of these pieces, they seem to be made of a softer metal. 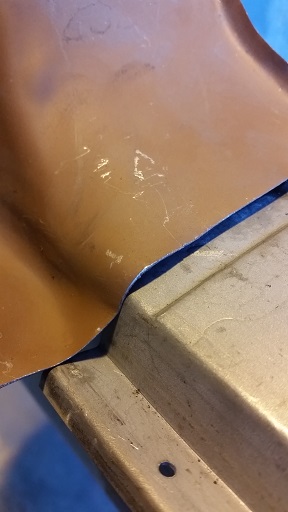 Then on to matching up the edges. (IMG:style_emoticons/default/sad.gif) (IMG:style_emoticons/default/sad.gif) 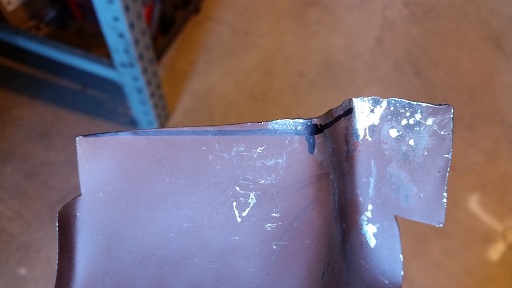 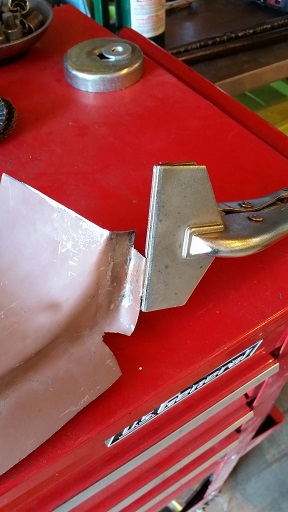 I used the fine wheel on the bench grinder to cut down and square up the edges. Now we start lining things up ................. 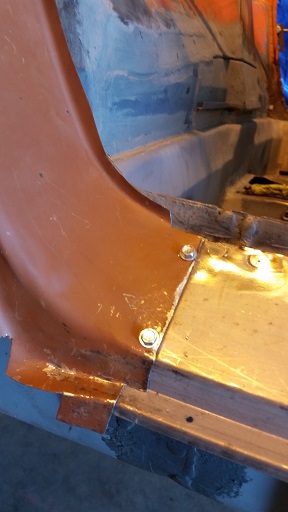 |
| cary |
 Jul 20 2015, 08:44 PM Jul 20 2015, 08:44 PM
Post
#471
|
|
Advanced Member     Group: Members Posts: 3,900 Joined: 26-January 04 From: Sherwood Oregon Member No.: 1,608 Region Association: Pacific Northwest 
|
After lining things up. I scribed the back and cut it off with the cut off wheel. When I made the cut I left the line on. It was too tight. But I'll do the same thing again.
Once again I cut it back with the bench grinder. That gave me a nice tight fit. 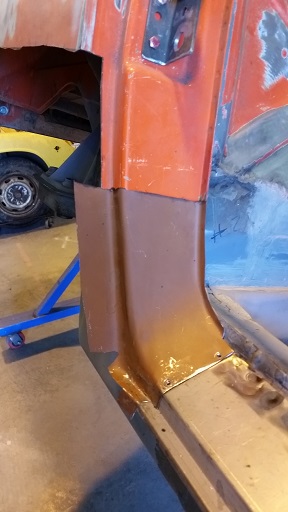 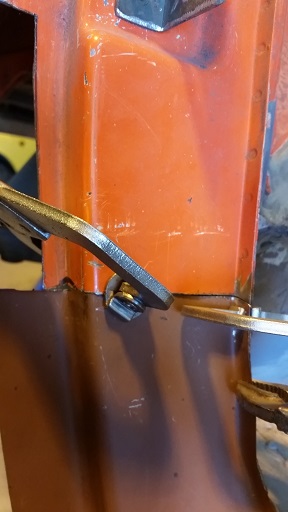 Took it back off and brushed on the weld thru primer before we went to lunch. 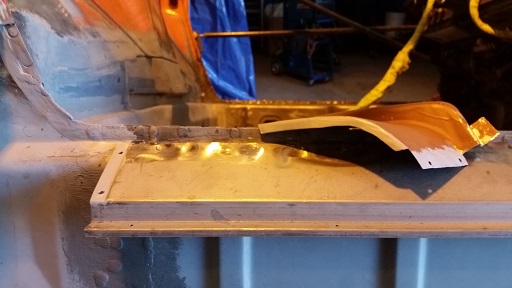 |
| cary |
 Jul 20 2015, 08:59 PM Jul 20 2015, 08:59 PM
Post
#472
|
|
Advanced Member     Group: Members Posts: 3,900 Joined: 26-January 04 From: Sherwood Oregon Member No.: 1,608 Region Association: Pacific Northwest 
|
This time I took my time. (IMG:style_emoticons/default/cheer.gif) (IMG:style_emoticons/default/cheer.gif) (IMG:style_emoticons/default/cheer.gif)
I just wish the metal was a little bit harder and a little thicker. You do need to turn up the heat just a smidgeon when you tie the welds together. Knowing that I'll be using All Metal on the sill seam I didn't over grind it. 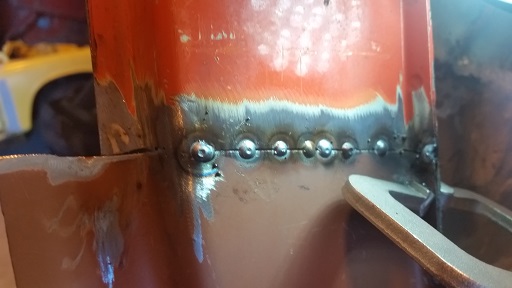 Much better. I still don't think I'll be able to weld the fender back on like Jeff ail did. But it will be pretty close. Its more about being able to keep the two pieces level. 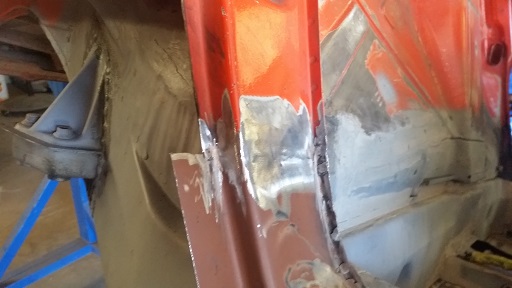 At the end of the day. She's covered with SE primer and ready for next time. 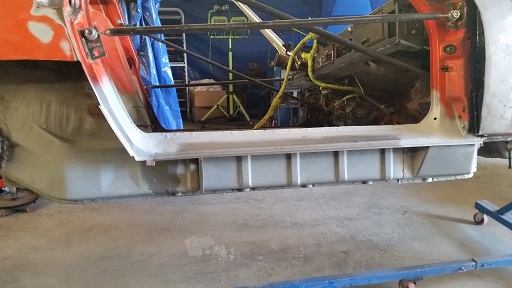 |
| cary |
 Jul 20 2015, 09:05 PM Jul 20 2015, 09:05 PM
Post
#473
|
|
Advanced Member     Group: Members Posts: 3,900 Joined: 26-January 04 From: Sherwood Oregon Member No.: 1,608 Region Association: Pacific Northwest 
|
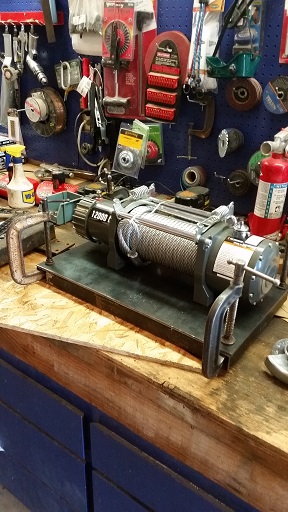
While I'm working in the big shop. Super In Law is working on the new 12,000 lb winch he bought. A little over kill for pulling cars onto the trailer. He's fabricating it to mount into the 2*2 trailer hitch. Plus we'll add a tube to the floor of the open car trailer.
 |
| cary |
 Jul 21 2015, 07:01 AM Jul 21 2015, 07:01 AM
Post
#474
|
|
Advanced Member     Group: Members Posts: 3,900 Joined: 26-January 04 From: Sherwood Oregon Member No.: 1,608 Region Association: Pacific Northwest 
|
Another installment of the Tool Whore show.
I bought 4 of these when we stopped at the steel/welding supply shop. http://www.amazon.com/Neiko-Roloc-2-Inch-Z...0F91PWYM27TTSGG Very impressive. I'll have to had them to my arsenal. But bad news, don't drop your die grinder, they snap right off. |
| cary |
 Aug 4 2015, 07:00 AM Aug 4 2015, 07:00 AM
Post
#475
|
|
Advanced Member     Group: Members Posts: 3,900 Joined: 26-January 04 From: Sherwood Oregon Member No.: 1,608 Region Association: Pacific Northwest 
|
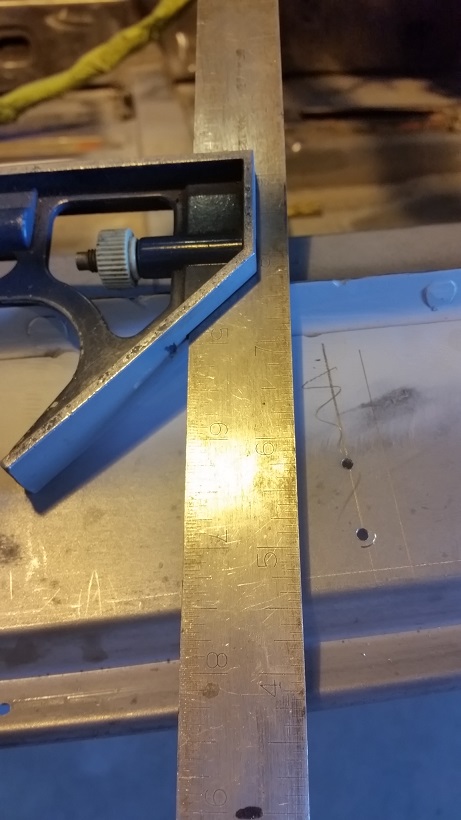
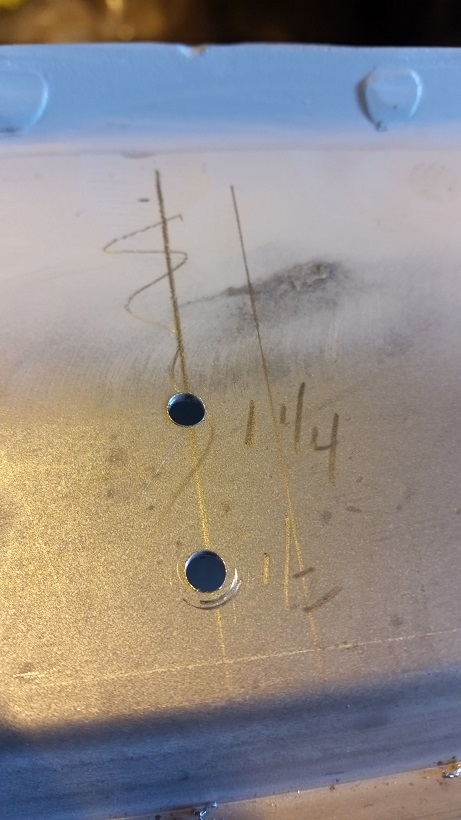
Added the sill supports to the right side. This time I decided to pre drill the top holes first.
  All tidied up and primered. 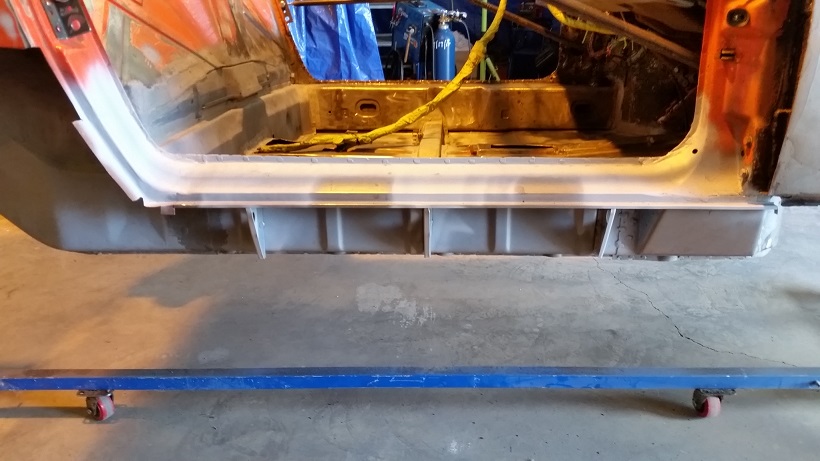 |
| cary |
 Aug 4 2015, 07:10 AM Aug 4 2015, 07:10 AM
Post
#476
|
|
Advanced Member     Group: Members Posts: 3,900 Joined: 26-January 04 From: Sherwood Oregon Member No.: 1,608 Region Association: Pacific Northwest 
|
Now on to the BIG task. I will begin to prep the entire bottom of the car for epoxy primer.
I still have a little work to do with the e-brake. But I'm getting antsy to start shooting primer to make it look like we've made some progress. I've been reluctant, because every time you do some grinder work everything gets filthy. Here's the starting point. 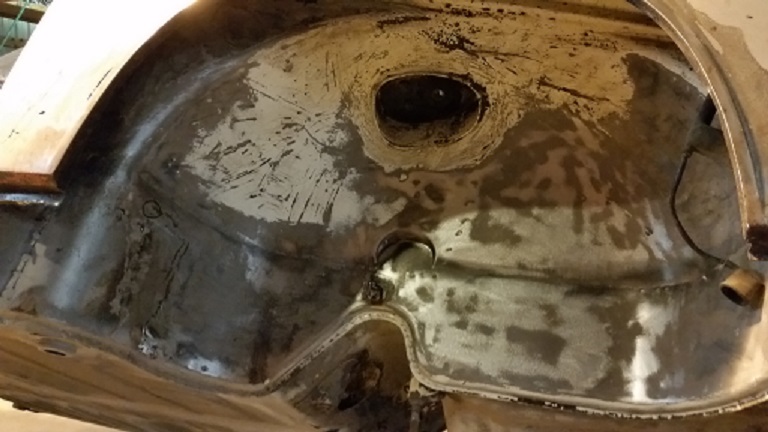 Yesterday I took a trip out to KleenBlast the blasting material supplier out in North Portland and bought 5 bags of the Fine GlassBlast. The equivalent of walnut shells. I thought I'd roll the dice .............................. |
| cary |
 Aug 4 2015, 08:41 PM Aug 4 2015, 08:41 PM
Post
#477
|
|
Advanced Member     Group: Members Posts: 3,900 Joined: 26-January 04 From: Sherwood Oregon Member No.: 1,608 Region Association: Pacific Northwest 
|
Wow, this stuff was impressive.
Even with my cheezy HF sand blaster with the upgraded deadman valve. http://abrasive-equipment.kleenindustrials...c=100|1189|1226 Doing the work was actually fun. I only had to wear a face shield and and a welding cap. In hindsight I should have wore ear plugs. I still have glass beads in my ears. Blasting using sand puts out so much dust you have wear a hood and face mask. In 2 hours I have the entire front pan ready to go. (IMG:style_emoticons/default/biggrin.gif) (IMG:style_emoticons/default/biggrin.gif) (IMG:style_emoticons/default/biggrin.gif) 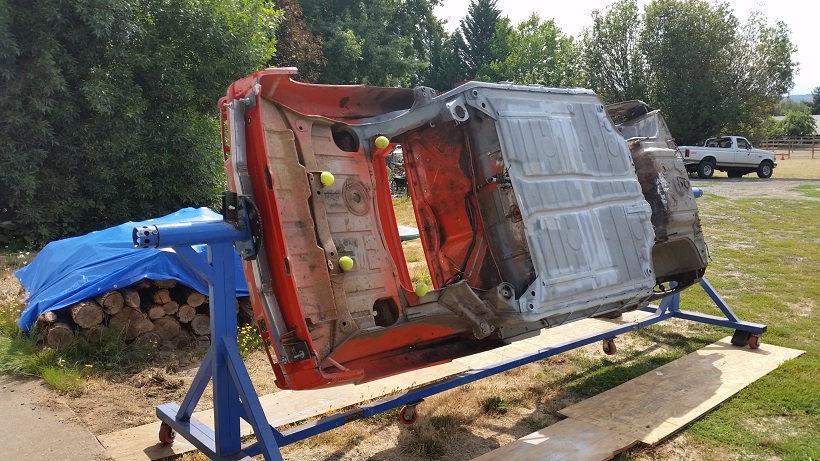 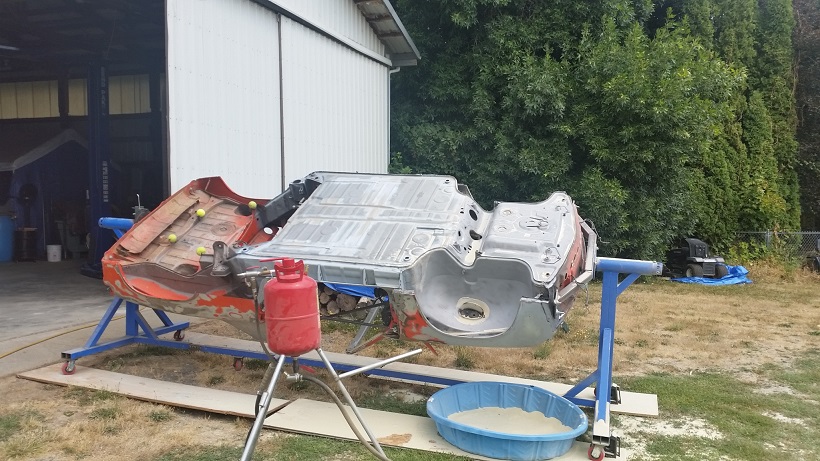 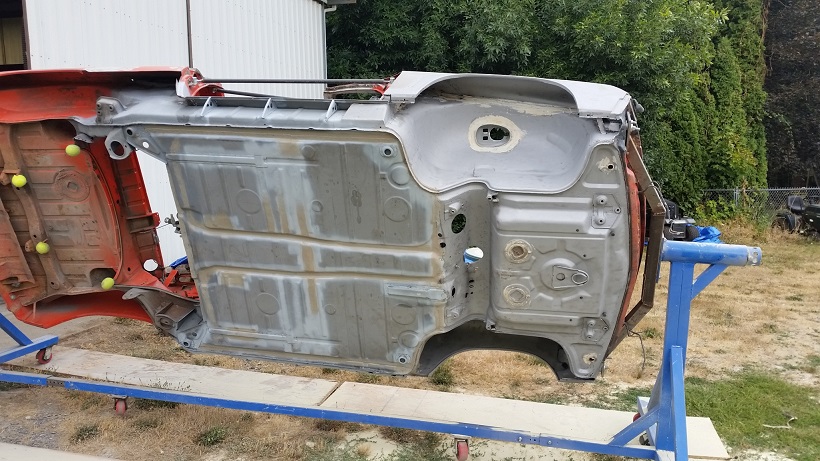 |
| dangerranger01 |
 Aug 4 2015, 08:44 PM Aug 4 2015, 08:44 PM
Post
#478
|
|
Member   Group: Members Posts: 145 Joined: 12-August 05 From: Boring, Oregon U.S.A. Member No.: 4,578 Region Association: None |
Looking good! What are the specs on your air compressor?
|
| JoeDees |
 Aug 4 2015, 08:47 PM Aug 4 2015, 08:47 PM
Post
#479
|
|
Senior Member    Group: Members Posts: 515 Joined: 10-November 14 From: Northern Kentucky Member No.: 18,106 Region Association: None |
My favorite thread did not let me down today! Love it.
|
| cary |
 Aug 4 2015, 09:01 PM Aug 4 2015, 09:01 PM
Post
#480
|
|
Advanced Member     Group: Members Posts: 3,900 Joined: 26-January 04 From: Sherwood Oregon Member No.: 1,608 Region Association: Pacific Northwest 
|
Looking good! What are the specs on your air compressor? I don't know right off the top of my head. It was working pretty hard. The first thing I'll do on Thursday is check the oil and drain the water. I did seem to slow down a couple times. So I hung up the gun and let it catch up. I will get you the numbers on Thursday night. I'm pretty sure it was largest one that Home Depot sold 10 years ago. I forgot to say that I cleaned up the front fenders too............... with the little blaster it didn't seem to heat up the flat panels. It was a good day !!! We'll go back out there on Thursday AM and get 10 bags this time. |
| cary |
 Aug 6 2015, 08:36 PM Aug 6 2015, 08:36 PM
Post
#481
|
|
Advanced Member     Group: Members Posts: 3,900 Joined: 26-January 04 From: Sherwood Oregon Member No.: 1,608 Region Association: Pacific Northwest 
|
Here is the info on the compressor
7hp 220v. 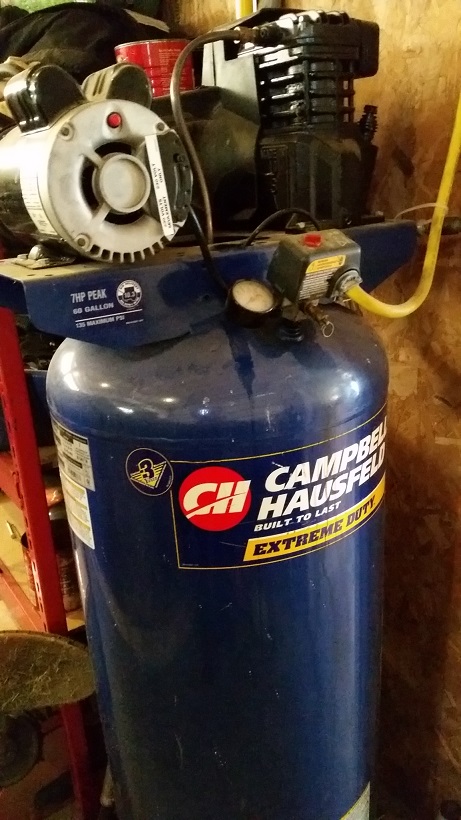 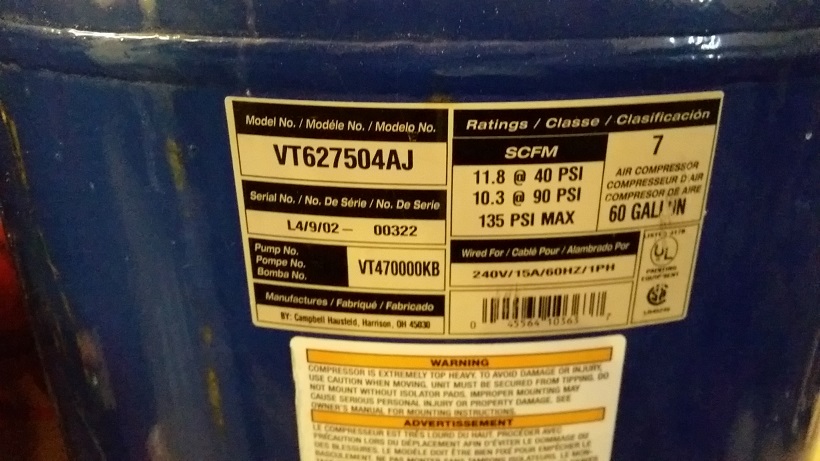 I probably drained a quart of water out of the pit-cock. It took probably 3 oz of compressor oil. What I learned today is I'm going to add a pressure gauge to the blaster pot so I can see when the compressor isn't keeping up. At a full head of steam it cuts like raped ape. As it drops below 80 psi it slows the cutting down a bit. Cheap work around Knowing what I know now. I'd buy an 80 gallon, 5 hp, two stage. That's on my pre retirement equipment upgrade list. But they start at $1600. This post has been edited by cary: Aug 7 2015, 08:10 AM |
| cary |
 Aug 6 2015, 10:08 PM Aug 6 2015, 10:08 PM
Post
#482
|
|
Advanced Member     Group: Members Posts: 3,900 Joined: 26-January 04 From: Sherwood Oregon Member No.: 1,608 Region Association: Pacific Northwest 
|
Another Episode of Tool Whore:
Stopped at HF to pick up some replacement nozzles for the dead-man valve. 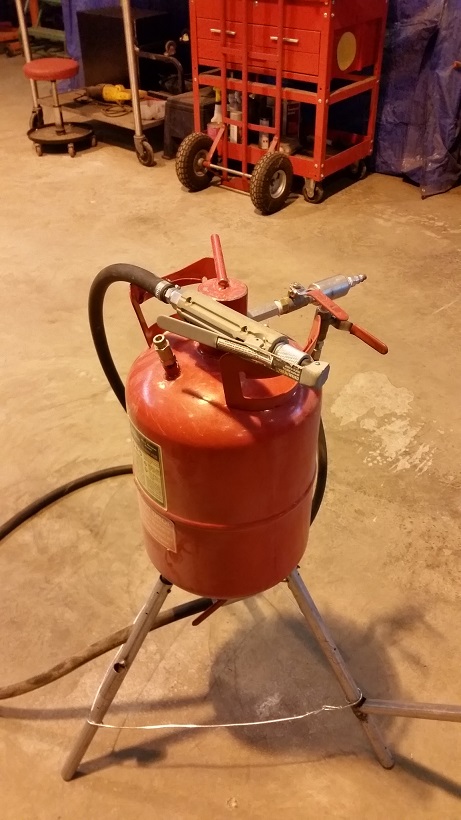 This is my 20# HF blaster. If I had to do it all over again I'd buy the 50# unit. We put the legs on it so I can wiggle it to get the material into the siphon when your getting to the end of the pot fill. 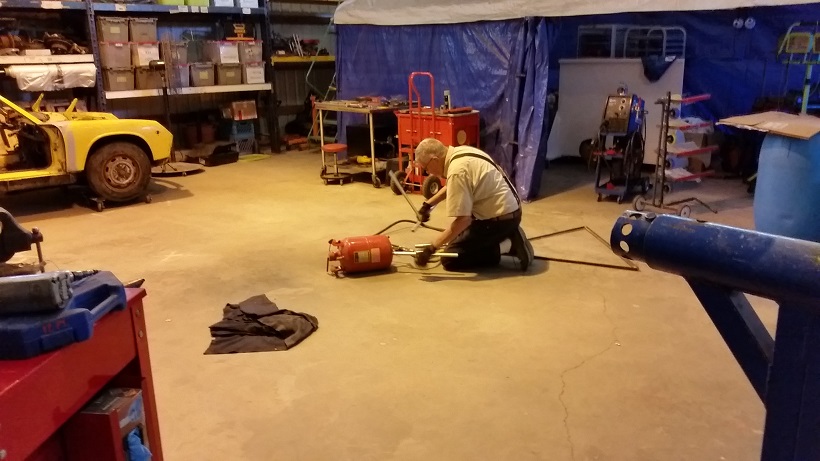 Here is Super In Law shortening the legs on the blaster. The glass beads don't have the clogging issue that sand does. 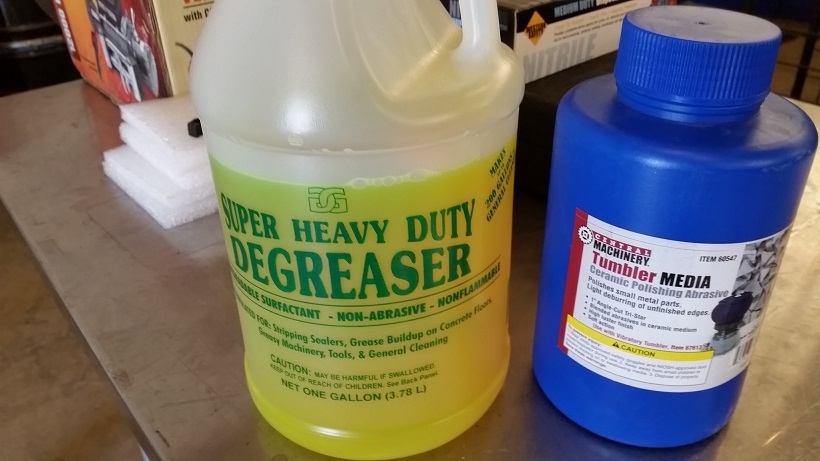 Then I picked up some new stuff for my tumbler. I got the recipe from a couple guys doing some restoration work here in PDX. Basically I was looking for a simple prep for hardware prior to going out for cad plating. Only issue with the first batch was the wing nut backing out and the slurry being flung all over the cabinets. (IMG:style_emoticons/default/mad.gif) (IMG:style_emoticons/default/mad.gif) So a word to the wise. Double nut the top before you start your batch. 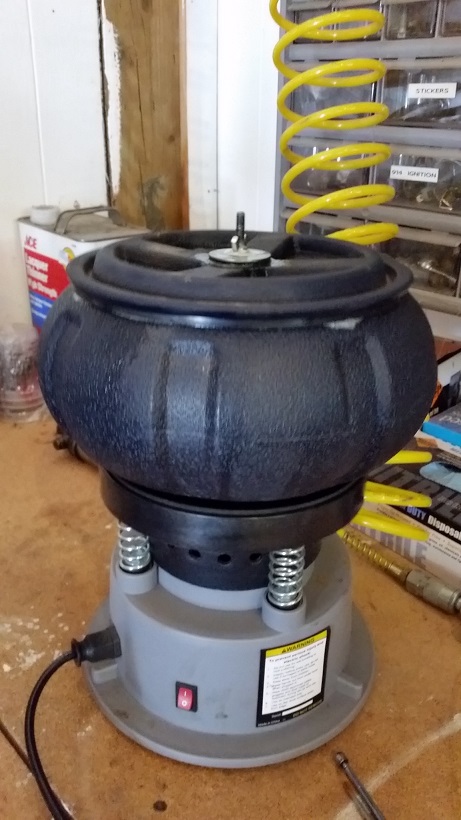 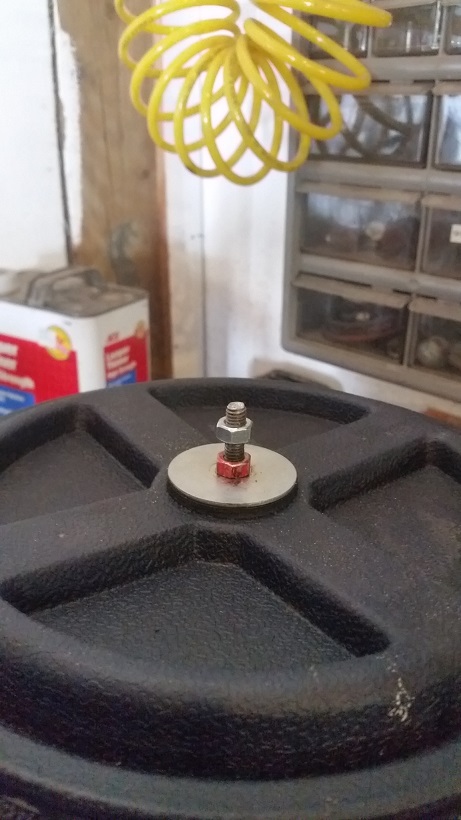 I'm going to stop at the hardware store and get a barrel nut for the bottom one. This post has been edited by cary: Aug 7 2015, 08:13 AM |
| cary |
 Aug 6 2015, 10:24 PM Aug 6 2015, 10:24 PM
Post
#483
|
|
Advanced Member     Group: Members Posts: 3,900 Joined: 26-January 04 From: Sherwood Oregon Member No.: 1,608 Region Association: Pacific Northwest 
|
This is only issue that I found after the first day of blasting.
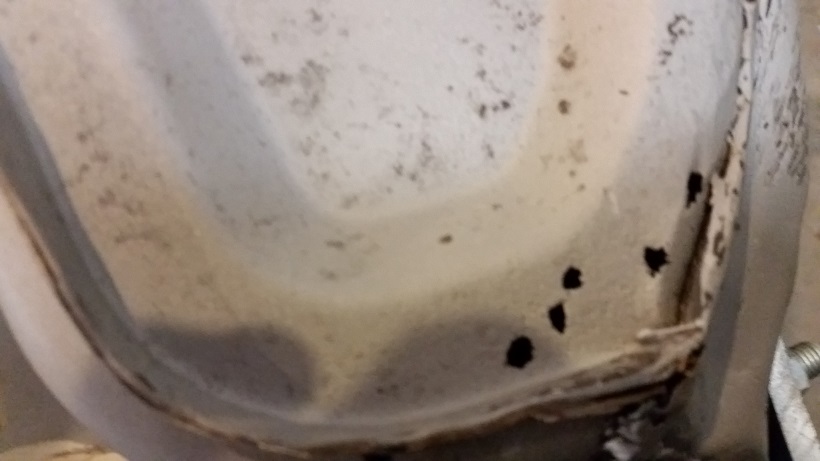 The bottom of the right head light bucket. I haven't taken a good enough look at it to determine my plan of attack. Probably just a small patch piece |
| cary |
 Aug 6 2015, 10:48 PM Aug 6 2015, 10:48 PM
Post
#484
|
|
Advanced Member     Group: Members Posts: 3,900 Joined: 26-January 04 From: Sherwood Oregon Member No.: 1,608 Region Association: Pacific Northwest 
|
Now back to the task at hand ................
Here's our load of beads from this morning. 10 bags. 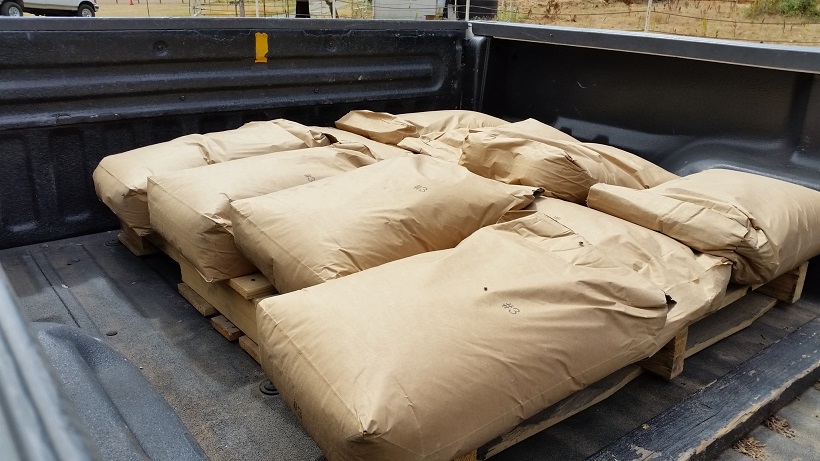 Then I get right to work. Off she comes, slick as a whistle. 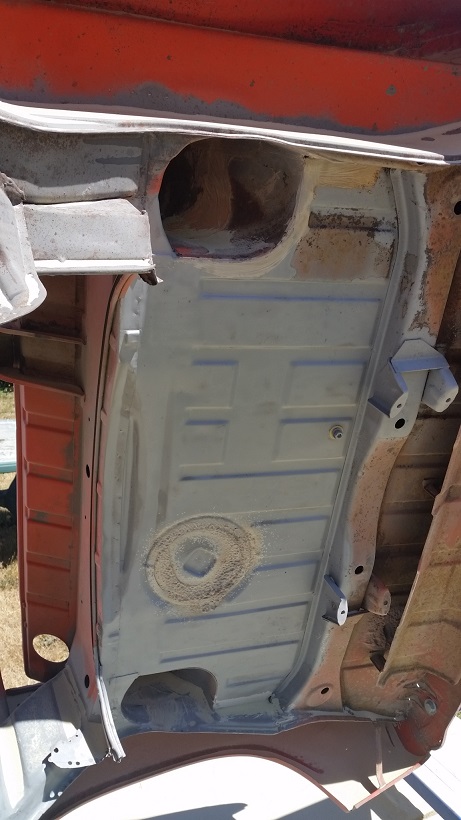 The back half of the trunk came off real easy. Then I decide to do it right, the muffler heat shield needs to come off. There's no way to get things cleaned up right with it in the way. First thing to do is locate the spot welds. 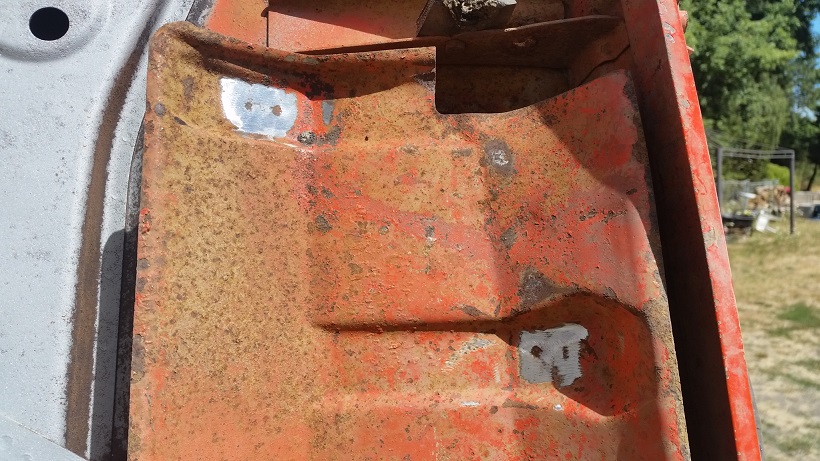 Came off pretty easy. Next time I would use 3/8" spot weld cutter. The 1/4" I usually use was too small. 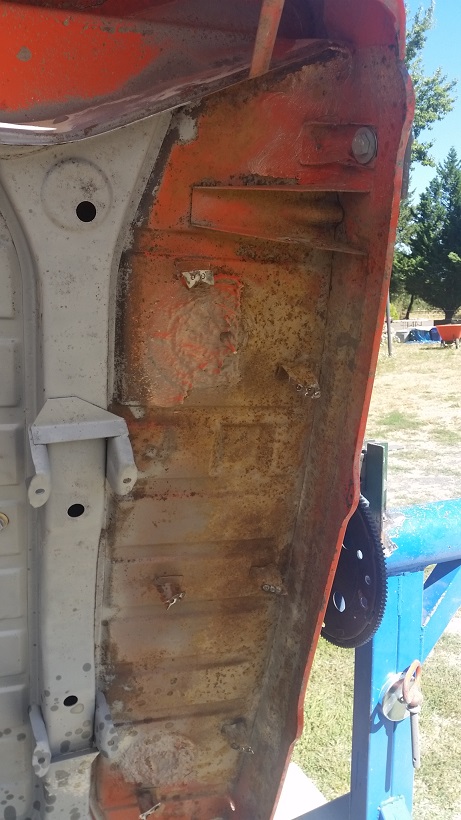 On a side note. The first 3 pot fills were done with reclaimed material. Super In Law collected it out of the pool and with a broom and dust pan. Then ran it thru a screen. Seemed to work the same. Maybe a little dustier. |
| cary |
 Aug 16 2015, 08:50 AM Aug 16 2015, 08:50 AM
Post
#485
|
|
Advanced Member     Group: Members Posts: 3,900 Joined: 26-January 04 From: Sherwood Oregon Member No.: 1,608 Region Association: Pacific Northwest 
|
Just realized that I didn't shoot a picture of under the heat shield after it was stripped. I'll shoot a couple today.
On the last trip I pulled it out and continued to work on the inside of the rear fenders. Its little harder to blast, theres no where for the blast to exit. It makes it kind of hard to see. But it continues to do a great job. I'm going to buy a replacement dead man valve, an inline water collector and a pressure gauge on the way home. The closure plate on the valve has worn out. I decided that I'll blast off the POR 15 that I applied in the trunk rather than purchase the tie in primer. I'd kind of been leaning toward just cleaning and scuffing the good paint in the trunk. But going to come off too. Here's a shot of the beginning of the POR 15 removal before it started to rain. 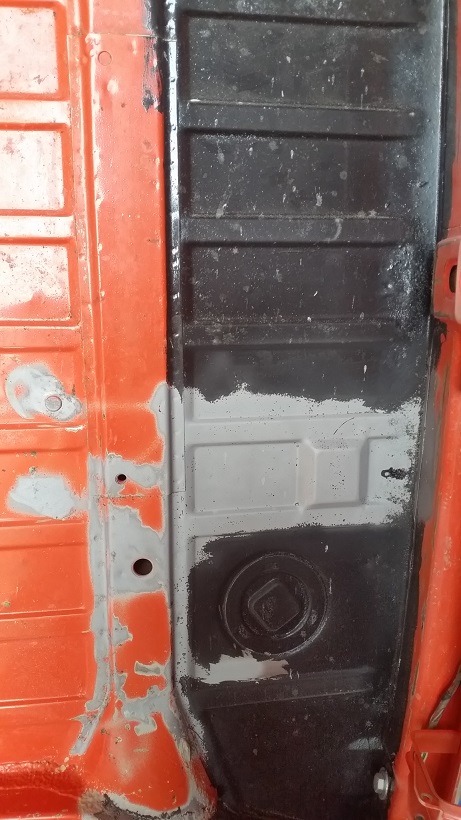 After the thunderstorm started I decided to weld in the e-brake pieces. Pretty easy to locate when I still have the donor car still sitting in the room. The front end of the guide lines up with the front of the hole in the long. The wall mount is basically centered between the end of the guide and the center support. 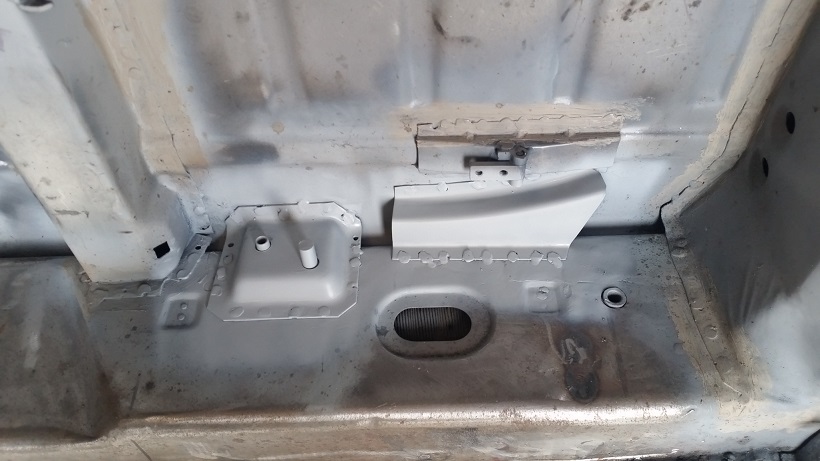 Then I grabbed the new suspension ear and began to ponder its installation. Really pretty simple. It just needs to be 3/16" out farther from the firewall than my first install. Which means it slides up the long. The problem is, that might put it in the indentation on the new upper long piece. We'll see. 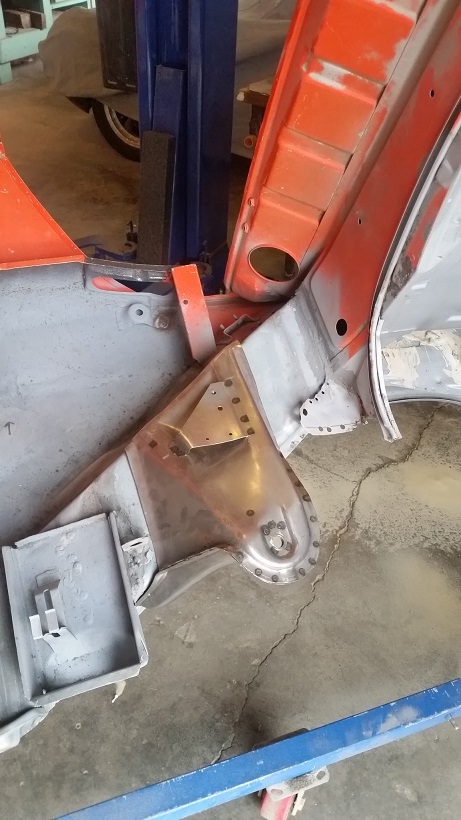 |
  |
5 User(s) are reading this topic (5 Guests and 0 Anonymous Users)
0 Members:

|
Lo-Fi Version | Time is now: 18th January 2025 - 02:04 AM |
Invision Power Board
v9.1.4 © 2025 IPS, Inc.


