|
|

|
Porsche, and the Porsche crest are registered trademarks of Dr. Ing. h.c. F. Porsche AG.
This site is not affiliated with Porsche in any way. Its only purpose is to provide an online forum for car enthusiasts. All other trademarks are property of their respective owners. |
|
|
  |
| cary |
 Aug 6 2015, 08:36 PM Aug 6 2015, 08:36 PM
Post
#481
|
|
Advanced Member     Group: Members Posts: 3,900 Joined: 26-January 04 From: Sherwood Oregon Member No.: 1,608 Region Association: Pacific Northwest 
|
Here is the info on the compressor
7hp 220v. 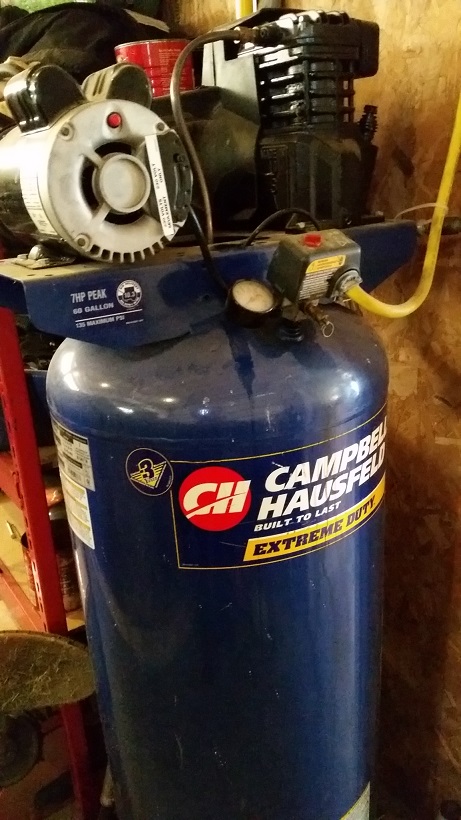 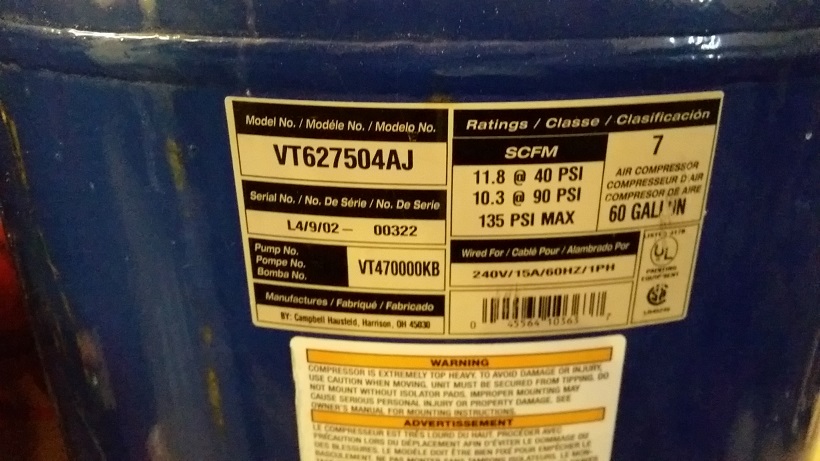 I probably drained a quart of water out of the pit-cock. It took probably 3 oz of compressor oil. What I learned today is I'm going to add a pressure gauge to the blaster pot so I can see when the compressor isn't keeping up. At a full head of steam it cuts like raped ape. As it drops below 80 psi it slows the cutting down a bit. Cheap work around Knowing what I know now. I'd buy an 80 gallon, 5 hp, two stage. That's on my pre retirement equipment upgrade list. But they start at $1600. This post has been edited by cary: Aug 7 2015, 08:10 AM |
| cary |
 Aug 6 2015, 10:08 PM Aug 6 2015, 10:08 PM
Post
#482
|
|
Advanced Member     Group: Members Posts: 3,900 Joined: 26-January 04 From: Sherwood Oregon Member No.: 1,608 Region Association: Pacific Northwest 
|
Another Episode of Tool Whore:
Stopped at HF to pick up some replacement nozzles for the dead-man valve. 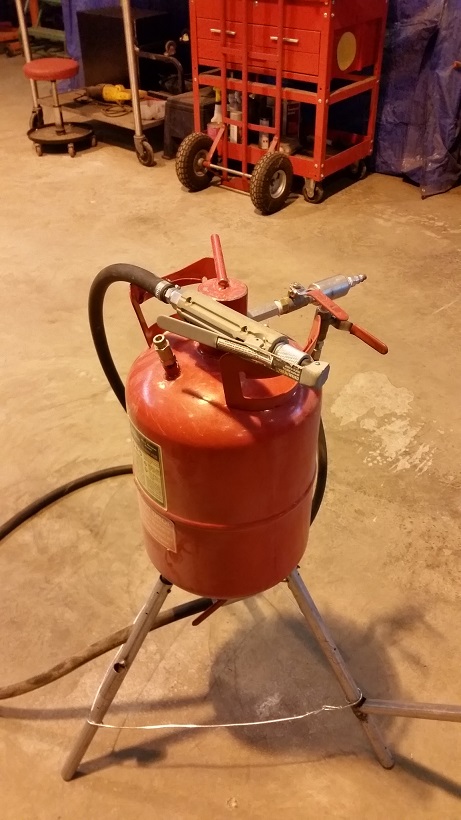 This is my 20# HF blaster. If I had to do it all over again I'd buy the 50# unit. We put the legs on it so I can wiggle it to get the material into the siphon when your getting to the end of the pot fill. 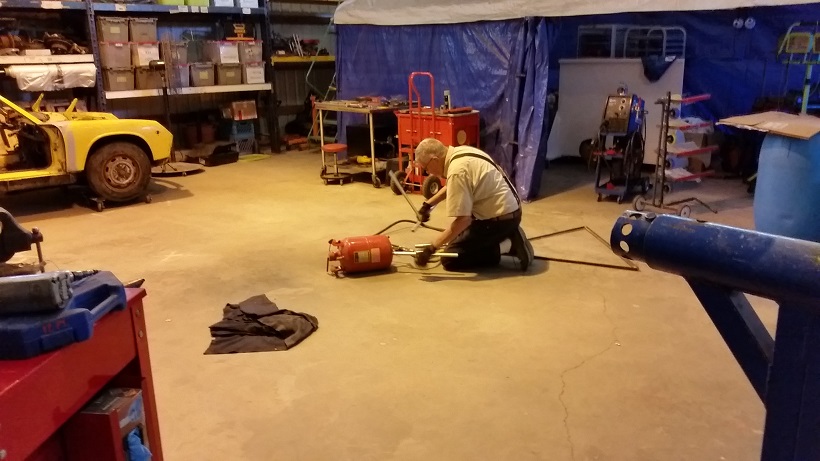 Here is Super In Law shortening the legs on the blaster. The glass beads don't have the clogging issue that sand does. 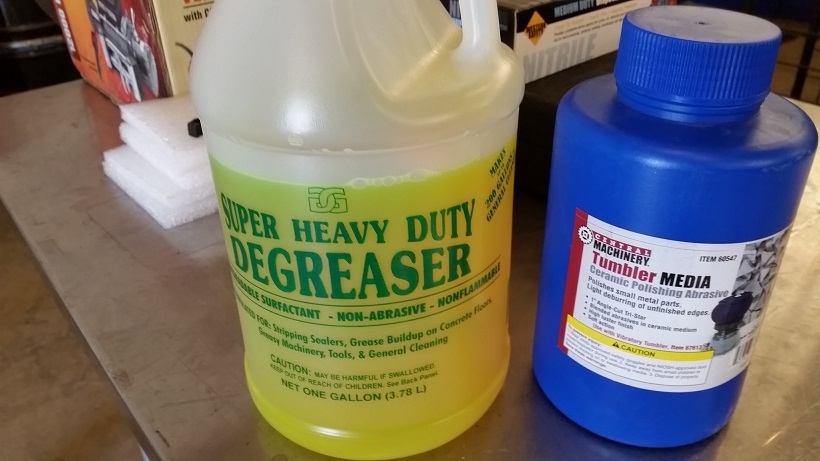 Then I picked up some new stuff for my tumbler. I got the recipe from a couple guys doing some restoration work here in PDX. Basically I was looking for a simple prep for hardware prior to going out for cad plating. Only issue with the first batch was the wing nut backing out and the slurry being flung all over the cabinets. (IMG:style_emoticons/default/mad.gif) (IMG:style_emoticons/default/mad.gif) So a word to the wise. Double nut the top before you start your batch. 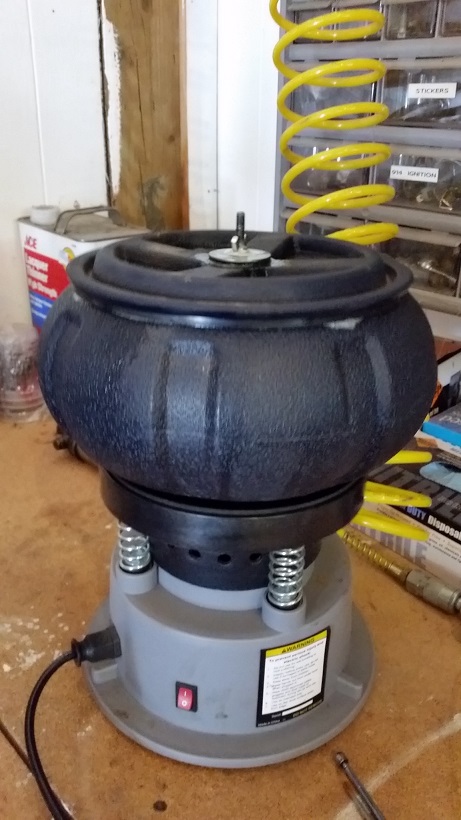 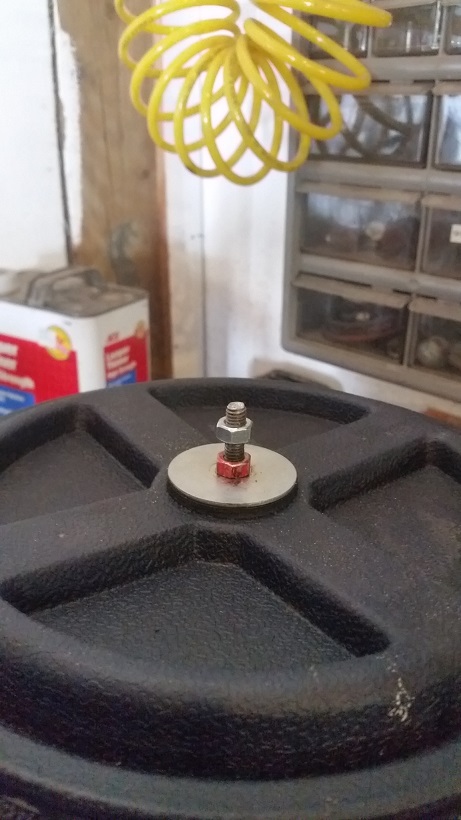 I'm going to stop at the hardware store and get a barrel nut for the bottom one. This post has been edited by cary: Aug 7 2015, 08:13 AM |
| cary |
 Aug 6 2015, 10:24 PM Aug 6 2015, 10:24 PM
Post
#483
|
|
Advanced Member     Group: Members Posts: 3,900 Joined: 26-January 04 From: Sherwood Oregon Member No.: 1,608 Region Association: Pacific Northwest 
|
This is only issue that I found after the first day of blasting.
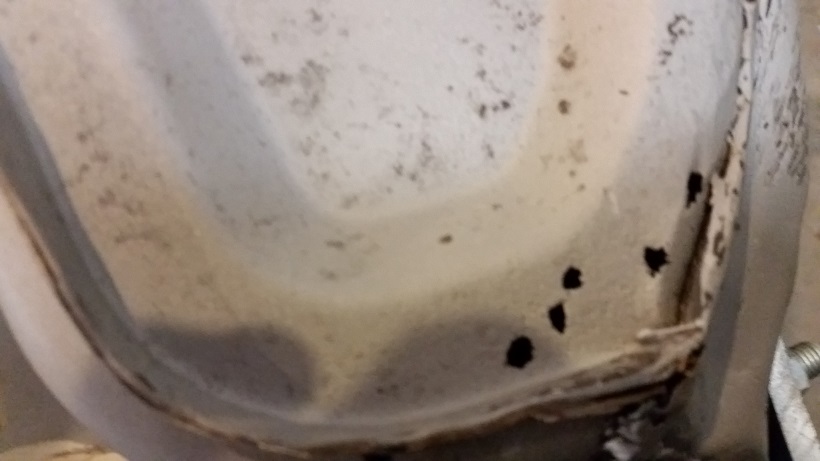 The bottom of the right head light bucket. I haven't taken a good enough look at it to determine my plan of attack. Probably just a small patch piece |
| cary |
 Aug 6 2015, 10:48 PM Aug 6 2015, 10:48 PM
Post
#484
|
|
Advanced Member     Group: Members Posts: 3,900 Joined: 26-January 04 From: Sherwood Oregon Member No.: 1,608 Region Association: Pacific Northwest 
|
Now back to the task at hand ................
Here's our load of beads from this morning. 10 bags. 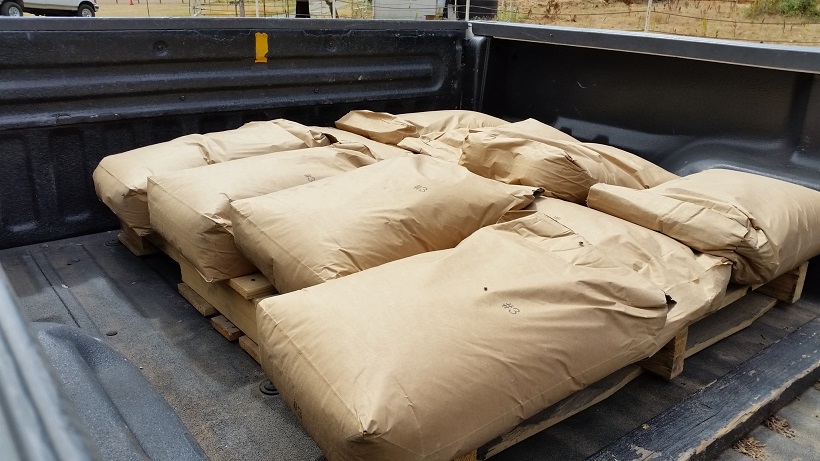 Then I get right to work. Off she comes, slick as a whistle. 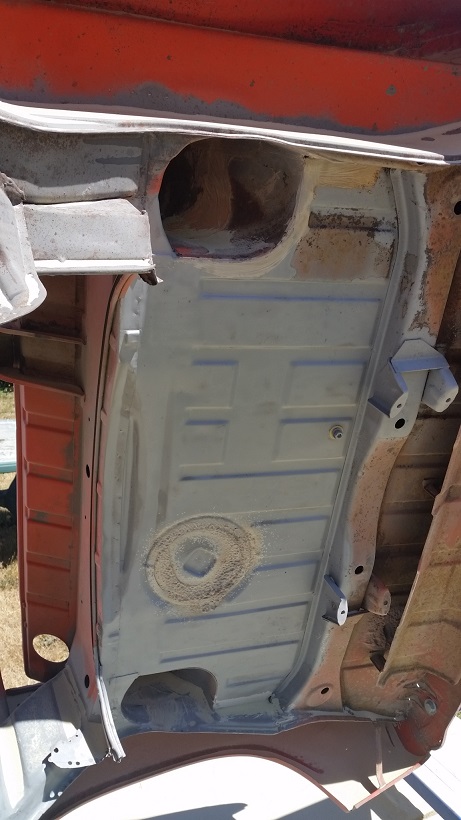 The back half of the trunk came off real easy. Then I decide to do it right, the muffler heat shield needs to come off. There's no way to get things cleaned up right with it in the way. First thing to do is locate the spot welds. 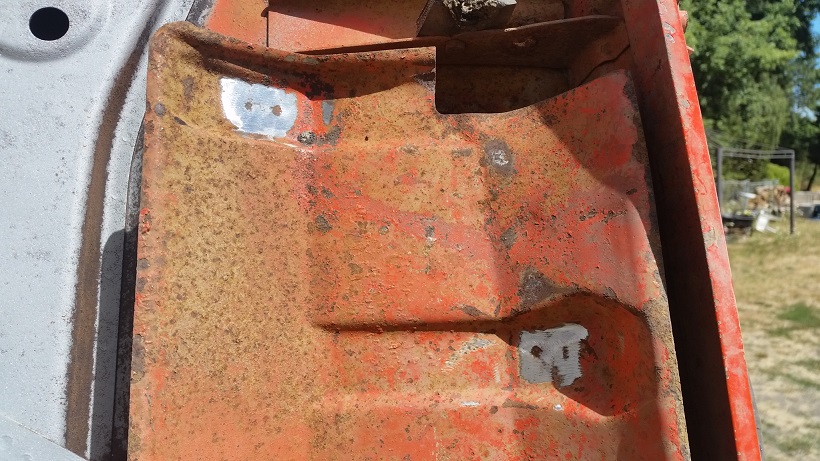 Came off pretty easy. Next time I would use 3/8" spot weld cutter. The 1/4" I usually use was too small. 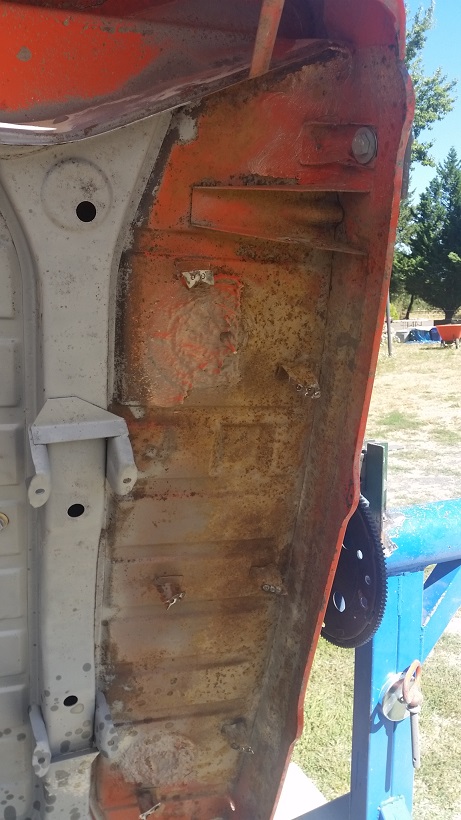 On a side note. The first 3 pot fills were done with reclaimed material. Super In Law collected it out of the pool and with a broom and dust pan. Then ran it thru a screen. Seemed to work the same. Maybe a little dustier. |
| cary |
 Aug 16 2015, 08:50 AM Aug 16 2015, 08:50 AM
Post
#485
|
|
Advanced Member     Group: Members Posts: 3,900 Joined: 26-January 04 From: Sherwood Oregon Member No.: 1,608 Region Association: Pacific Northwest 
|
Just realized that I didn't shoot a picture of under the heat shield after it was stripped. I'll shoot a couple today.
On the last trip I pulled it out and continued to work on the inside of the rear fenders. Its little harder to blast, theres no where for the blast to exit. It makes it kind of hard to see. But it continues to do a great job. I'm going to buy a replacement dead man valve, an inline water collector and a pressure gauge on the way home. The closure plate on the valve has worn out. I decided that I'll blast off the POR 15 that I applied in the trunk rather than purchase the tie in primer. I'd kind of been leaning toward just cleaning and scuffing the good paint in the trunk. But going to come off too. Here's a shot of the beginning of the POR 15 removal before it started to rain. 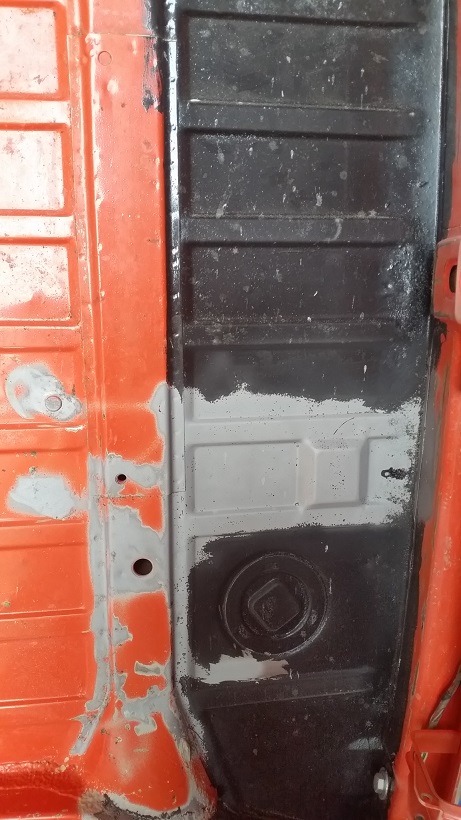 After the thunderstorm started I decided to weld in the e-brake pieces. Pretty easy to locate when I still have the donor car still sitting in the room. The front end of the guide lines up with the front of the hole in the long. The wall mount is basically centered between the end of the guide and the center support. 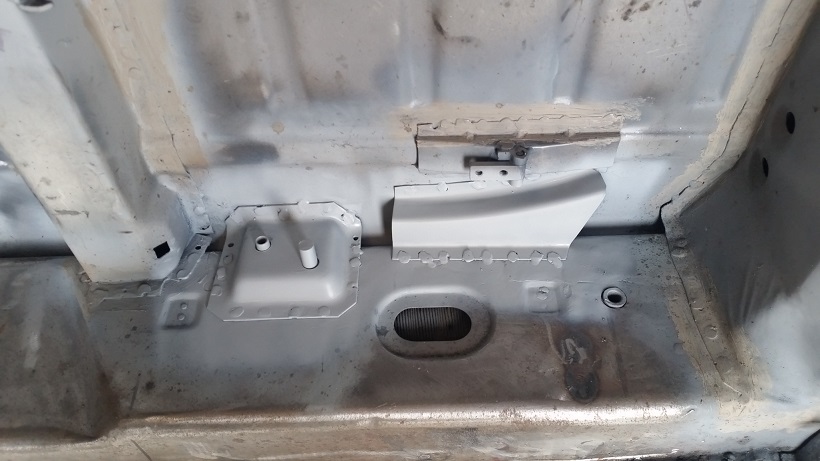 Then I grabbed the new suspension ear and began to ponder its installation. Really pretty simple. It just needs to be 3/16" out farther from the firewall than my first install. Which means it slides up the long. The problem is, that might put it in the indentation on the new upper long piece. We'll see. 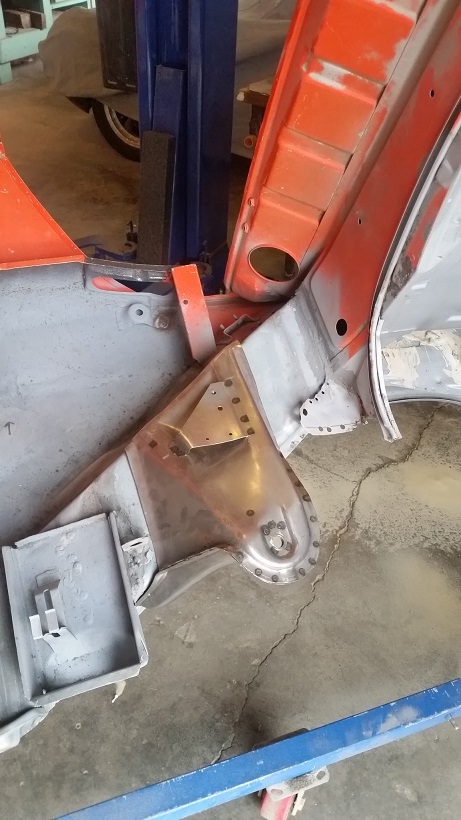 |
| worn |
 Aug 17 2015, 07:49 AM Aug 17 2015, 07:49 AM
Post
#486
|
|
Winner of the Utah Twisted Joint Award     Group: Members Posts: 3,388 Joined: 3-June 11 From: Madison, WI Member No.: 13,152 Region Association: Upper MidWest 
|
Looking good! What are the specs on your air compressor? I don't know right off the top of my head. It was working pretty hard. The first thing I'll do on Thursday is check the oil and drain the water. I did seem to slow down a couple times. So I hung up the gun and let it catch up. I will get you the numbers on Thursday night. I'm pretty sure it was largest one that Home Depot sold 10 years ago. I forgot to say that I cleaned up the front fenders too............... with the little blaster it didn't seem to heat up the flat panels. It was a good day !!! We'll go back out there on Thursday AM and get 10 bags this time. Great work as always. A warning: I got one of the glass beads under my eyelid a few years ago. Rolled in and didn't want to roll back out. Even after it was gone it felt like it was there for a few hours. So, keep covered up some. Nice weather out there this time of year, so good working conditions. Here sunny equals humid most of the time and you get rust. |
| cary |
 Aug 17 2015, 08:09 AM Aug 17 2015, 08:09 AM
Post
#487
|
|
Advanced Member     Group: Members Posts: 3,900 Joined: 26-January 04 From: Sherwood Oregon Member No.: 1,608 Region Association: Pacific Northwest 
|
I wear a complete face shield. Wraps around my big head pretty good.
My only issue is the moisture build up in the compressor running it so long. Today I'll add a filter at the blaster pot and see what I catch. Looks like I need to pony up and add a drier right after the compressor lines come thru the wall to catch the majority of it. The filter I'll use today will get mounted inline right before my primary 100ft. hose reel eventually. |
| cary |
 Aug 17 2015, 08:18 AM Aug 17 2015, 08:18 AM
Post
#488
|
|
Advanced Member     Group: Members Posts: 3,900 Joined: 26-January 04 From: Sherwood Oregon Member No.: 1,608 Region Association: Pacific Northwest 
|
Today's forecast. 91 degrees, 75% humidity. We've been about 50% most of the summer. So rust hasn't been an issue.
Time to get things covered up. I'm off all week, so I hope to make some progress this week. Now that the e-brake guide is in I might spray the bottom of the floor pan this morning. I'd like to see how this SPI epoxy preforms. Getting antsy .... |
| cary |
 Aug 17 2015, 09:37 PM Aug 17 2015, 09:37 PM
Post
#489
|
|
Advanced Member     Group: Members Posts: 3,900 Joined: 26-January 04 From: Sherwood Oregon Member No.: 1,608 Region Association: Pacific Northwest 
|
Here's the rear after the heat shield was removed and the area was blasted.
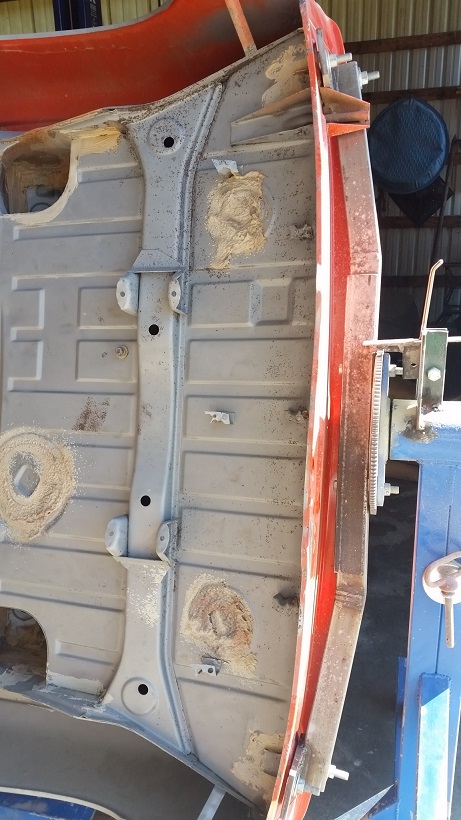 |
| cary |
 Aug 17 2015, 09:47 PM Aug 17 2015, 09:47 PM
Post
#490
|
|
Advanced Member     Group: Members Posts: 3,900 Joined: 26-January 04 From: Sherwood Oregon Member No.: 1,608 Region Association: Pacific Northwest 
|
Here's the additions to my blaster set up.
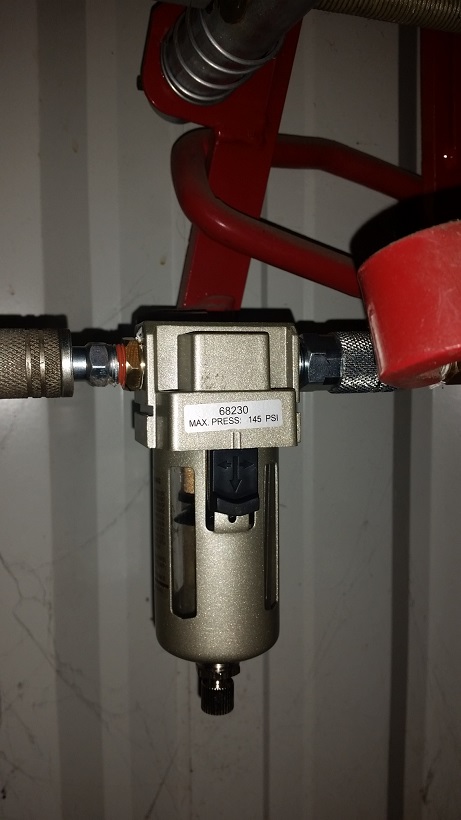 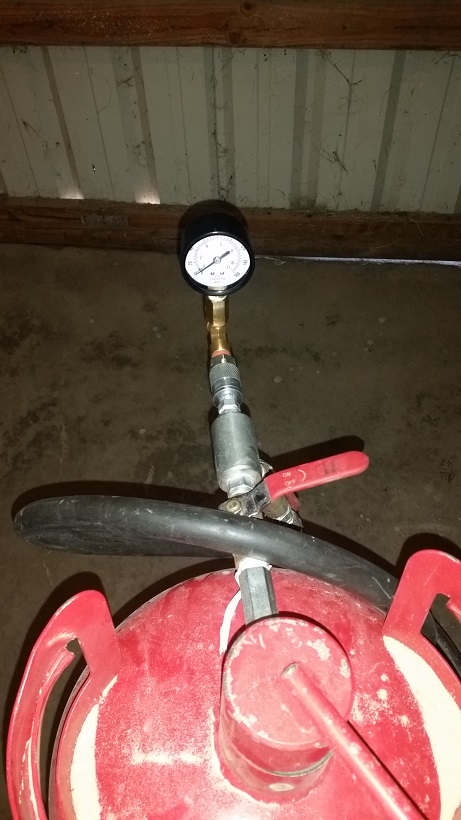 After watching the gauge. It works like a raped ape at 130 PSI. Continues to cut pretty good until it drops below 100 PSI. By then you need to pause and let the dust settle. |
| cary |
 Aug 17 2015, 09:52 PM Aug 17 2015, 09:52 PM
Post
#491
|
|
Advanced Member     Group: Members Posts: 3,900 Joined: 26-January 04 From: Sherwood Oregon Member No.: 1,608 Region Association: Pacific Northwest 
|
Here's where we started the day.
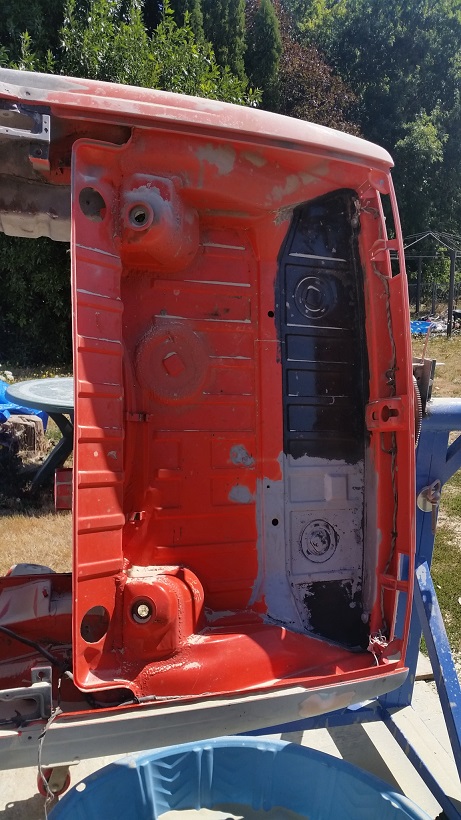 Here's where we ended. 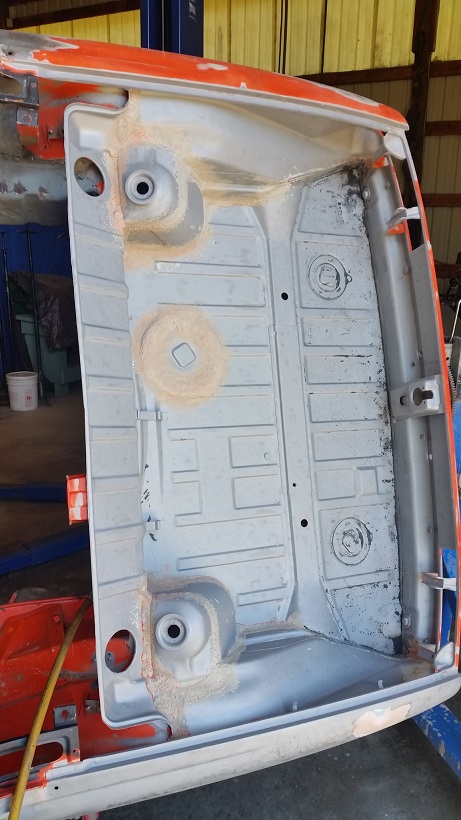 Let's just say it was hot. 90 degrees in the shade. Started the day with overalls and my welding coat. Ended shorts and a t-shirt. Didn't get to shoot any primer. (IMG:style_emoticons/default/sad.gif) Way to hot. But I rolled it back inside and wiped it down so it would be ready on the next trip. |
| cary |
 Aug 17 2015, 09:54 PM Aug 17 2015, 09:54 PM
Post
#492
|
|
Advanced Member     Group: Members Posts: 3,900 Joined: 26-January 04 From: Sherwood Oregon Member No.: 1,608 Region Association: Pacific Northwest 
|
My vacation cabana. Complete with a pool and a beach.
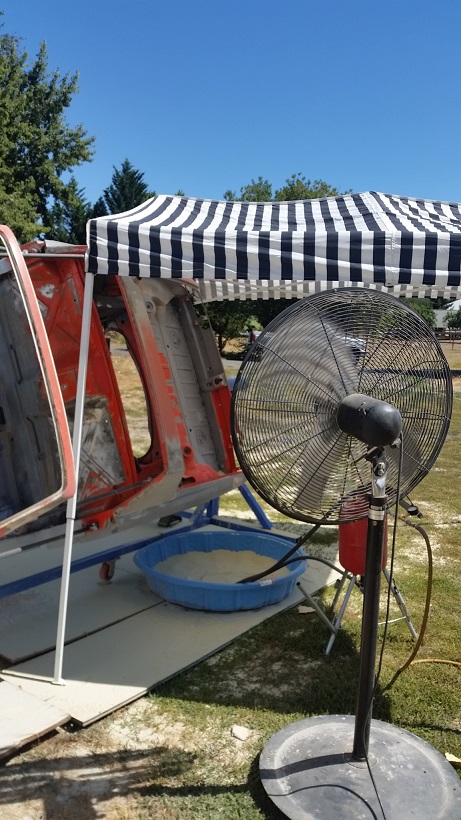 |
| cary |
 Aug 19 2015, 12:08 PM Aug 19 2015, 12:08 PM
Post
#493
|
|
Advanced Member     Group: Members Posts: 3,900 Joined: 26-January 04 From: Sherwood Oregon Member No.: 1,608 Region Association: Pacific Northwest 
|
Nice start to a hot day ..............
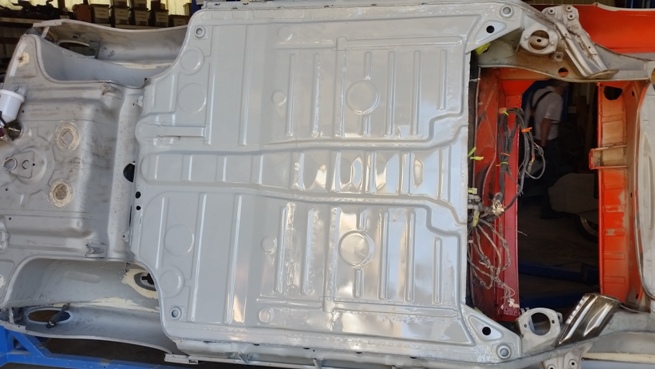 It's been a long time since I've a had a spray gun in my hand. By the time I get done primering the car I should have adjusting the gun down. Adjust air pressure for runs Adjust gun for orange peel http://www.southernpolyurethanes.com/#!...-your-gun/c1lfc |
| cary |
 Aug 20 2015, 12:01 AM Aug 20 2015, 12:01 AM
Post
#494
|
|
Advanced Member     Group: Members Posts: 3,900 Joined: 26-January 04 From: Sherwood Oregon Member No.: 1,608 Region Association: Pacific Northwest 
|
Then we went on to installing the right suspension mount for the second time. When it was all said and done. It moved out from the firewall 5/16 of an inch. It is now dead on.
From Jeff Hail's yellow pad notes : 33 1/2 outside to outside of the ear holes (IMG:style_emoticons/default/biggrin.gif) 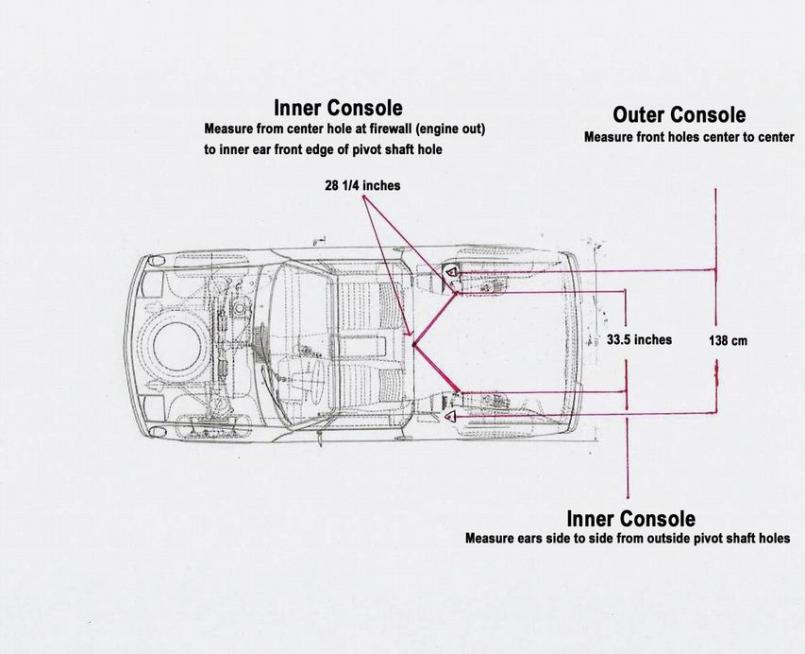 Left and right are exactly the same distance from center hole on the fire wall. 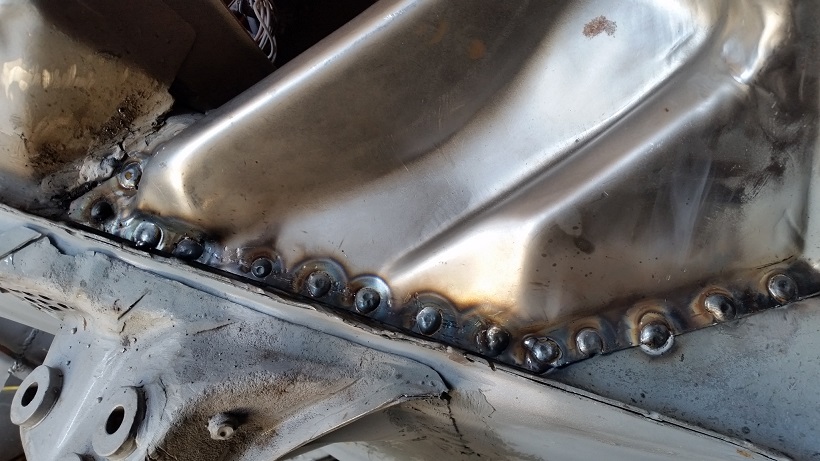 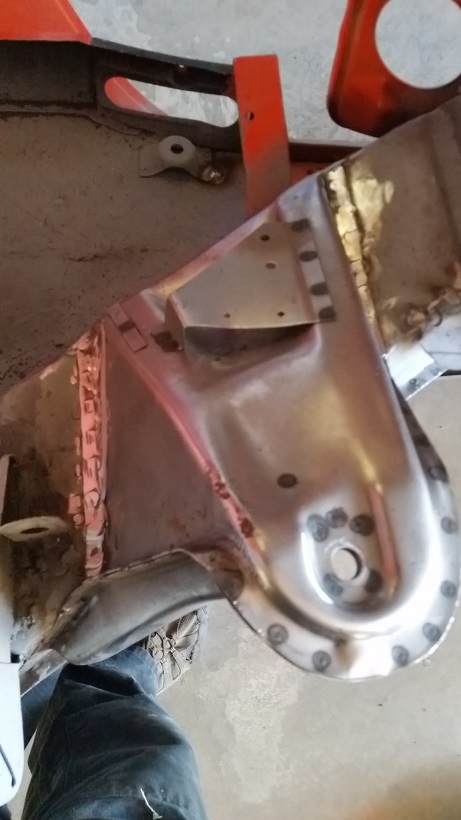 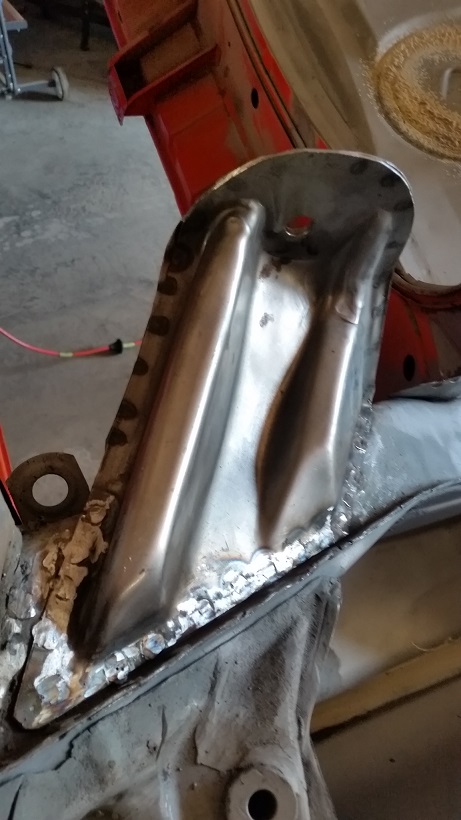 |
| ndfrigi |
 Aug 20 2015, 12:13 AM Aug 20 2015, 12:13 AM
Post
#495
|
|
Advanced Member     Group: Members Posts: 2,960 Joined: 21-August 11 From: Orange County Member No.: 13,474 Region Association: Southern California 
|
Hi Sir, Can I hijack on your build thread? I just installed my passenger rear suspension console also a few months ago on my 71 1.7 but haven't finish it yet since then.
Are you planning to install or weld back the small pieces of metal underneath? (shown on my picture which I still have to add more metal to cover those spaces). 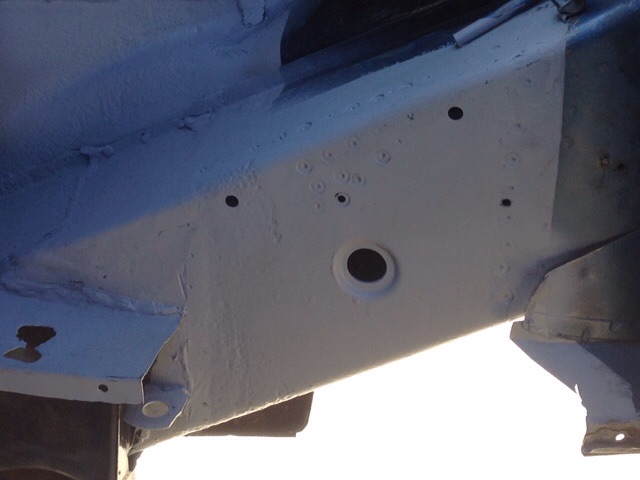 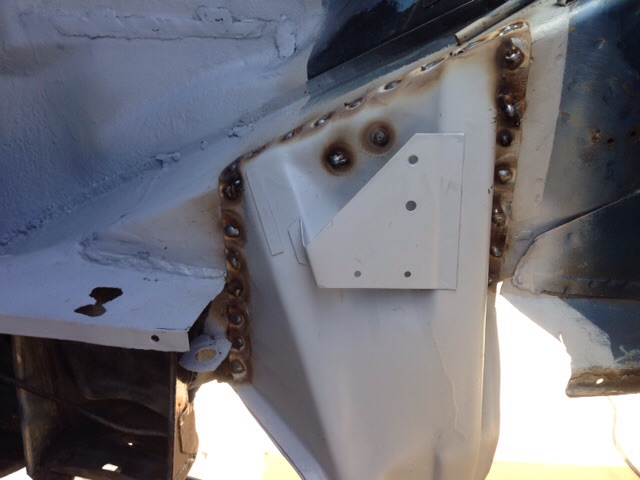 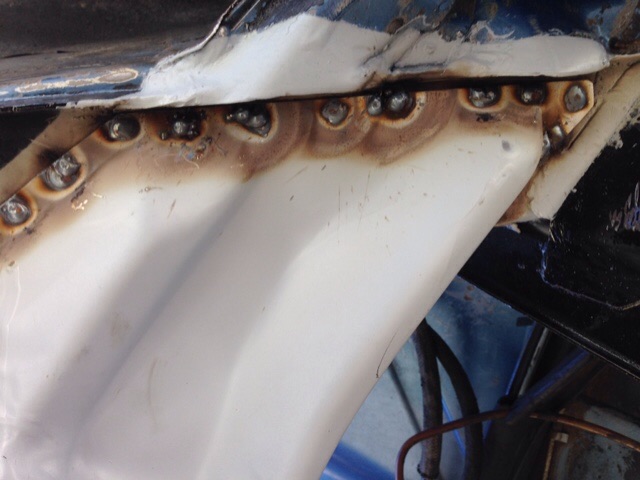 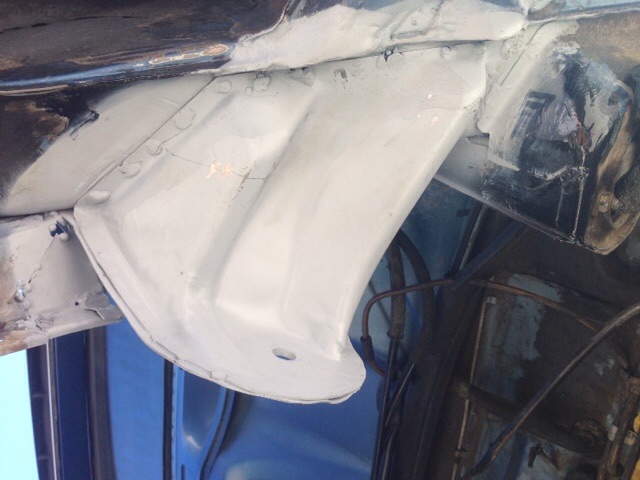 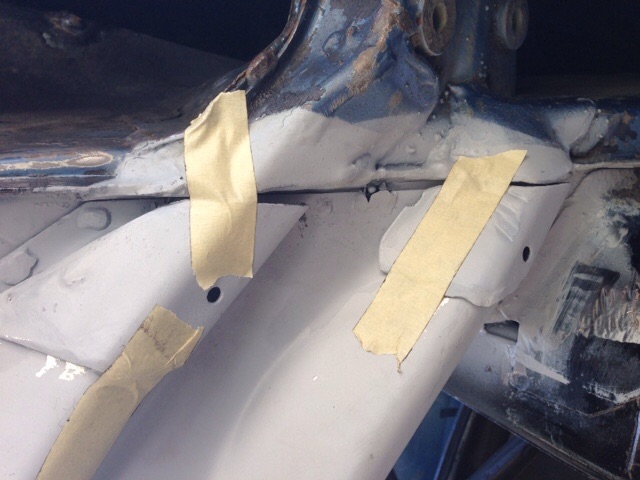 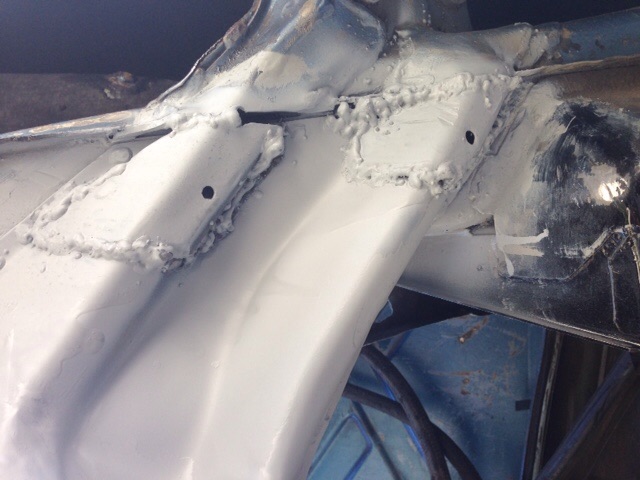 |
| cary |
 Aug 20 2015, 01:28 AM Aug 20 2015, 01:28 AM
Post
#496
|
|
Advanced Member     Group: Members Posts: 3,900 Joined: 26-January 04 From: Sherwood Oregon Member No.: 1,608 Region Association: Pacific Northwest 
|
By 3pm it was a little too hot to paint.
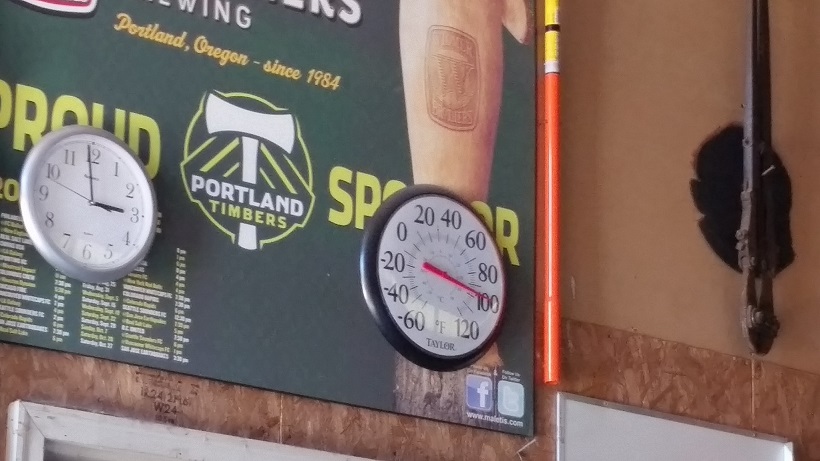 Just shy of 100 in the shade. But we're all prepped to primer both the front and rear first thing. 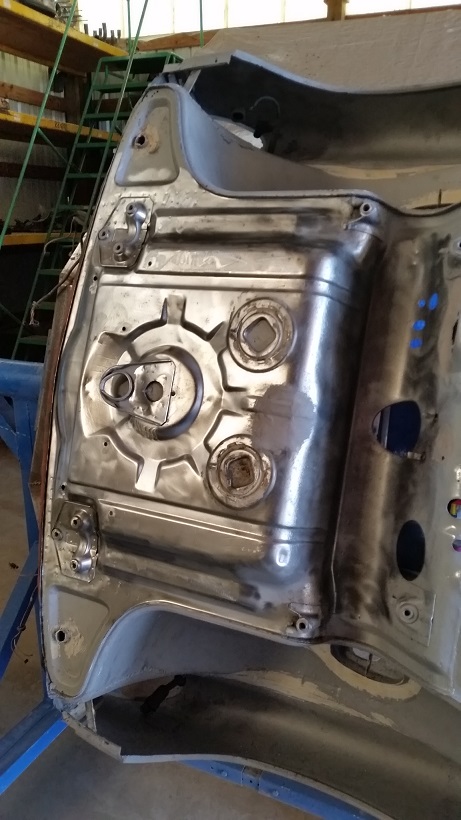 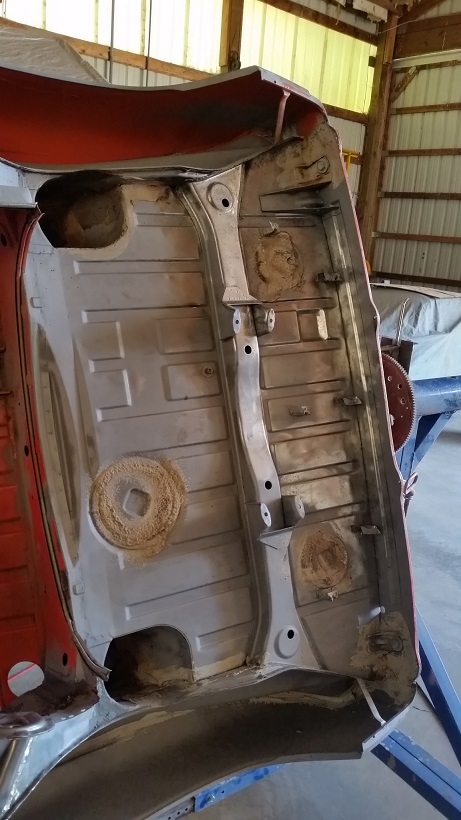 Wire cup brush took off the `flash rust. |
| cary |
 Aug 20 2015, 09:16 AM Aug 20 2015, 09:16 AM
Post
#497
|
|
Advanced Member     Group: Members Posts: 3,900 Joined: 26-January 04 From: Sherwood Oregon Member No.: 1,608 Region Association: Pacific Northwest 
|
Are you planning to install or weld back the small pieces of metal underneath? (shown on my picture which I still have to add more metal to cover those spaces). Yes you need more. It needs to tie both halves together. Here's a link to a guy who recreated the ties. Hope this helps. http://www.performanceforum.com/wesvann/91.../rd-9-1-08.html That's what we're going to work on while I'm letting the epoxy dry. |
| Spoke |
 Aug 20 2015, 10:27 AM Aug 20 2015, 10:27 AM
Post
#498
|
|
Jerry      Group: Members Posts: 7,119 Joined: 29-October 04 From: Allentown, PA Member No.: 3,031 Region Association: None 
|
The back half of the trunk came off real easy. Then I decide to do it right, the muffler heat shield needs to come off. There's no way to get things cleaned up right with it in the way. First thing to do is locate the spot welds.  Nice job on the clean up and rustoration. I had to remove the heat shield as well for my car. Decided to make it an item which I can easily remove so I added welded nuts to the hangers and can now bolt and unbolt the shield. |
| cary |
 Aug 20 2015, 12:23 PM Aug 20 2015, 12:23 PM
Post
#499
|
|
Advanced Member     Group: Members Posts: 3,900 Joined: 26-January 04 From: Sherwood Oregon Member No.: 1,608 Region Association: Pacific Northwest 
|
Good idea. I bought the tool when I lowered the seats in my 911.
|
| ndfrigi |
 Aug 20 2015, 01:16 PM Aug 20 2015, 01:16 PM
Post
#500
|
|
Advanced Member     Group: Members Posts: 2,960 Joined: 21-August 11 From: Orange County Member No.: 13,474 Region Association: Southern California 
|
Are you planning to install or weld back the small pieces of metal underneath? (shown on my picture which I still have to add more metal to cover those spaces). Yes you need more. It needs to tie both halves together. Here's a link to a guy who recreated the ties. Hope this helps. http://www.performanceforum.com/wesvann/91.../rd-9-1-08.html That's what we're going to work on while I'm letting the epoxy dry. Thanks for your response sir! And nice restoration you are doing sir, I have been watching your restoration since you started it! |
  |
2 User(s) are reading this topic (2 Guests and 0 Anonymous Users)
0 Members:

|
Lo-Fi Version | Time is now: 17th January 2025 - 04:45 PM |
Invision Power Board
v9.1.4 © 2025 IPS, Inc.


