|
|

|
Porsche, and the Porsche crest are registered trademarks of Dr. Ing. h.c. F. Porsche AG.
This site is not affiliated with Porsche in any way. Its only purpose is to provide an online forum for car enthusiasts. All other trademarks are property of their respective owners. |
|
|
  |
| FourBlades |
 Dec 27 2012, 10:29 PM Dec 27 2012, 10:29 PM
Post
#141
|
|
From Wreck to Rockin     Group: Members Posts: 2,056 Joined: 3-December 07 From: Brevard, FL Member No.: 8,414 Region Association: South East States 
|
|
| Mike Bellis |
 Dec 31 2012, 11:43 PM Dec 31 2012, 11:43 PM
Post
#142
|
|
Resident Electrician      Group: Members Posts: 8,346 Joined: 22-June 09 From: Midlothian TX Member No.: 10,496 Region Association: None 

|
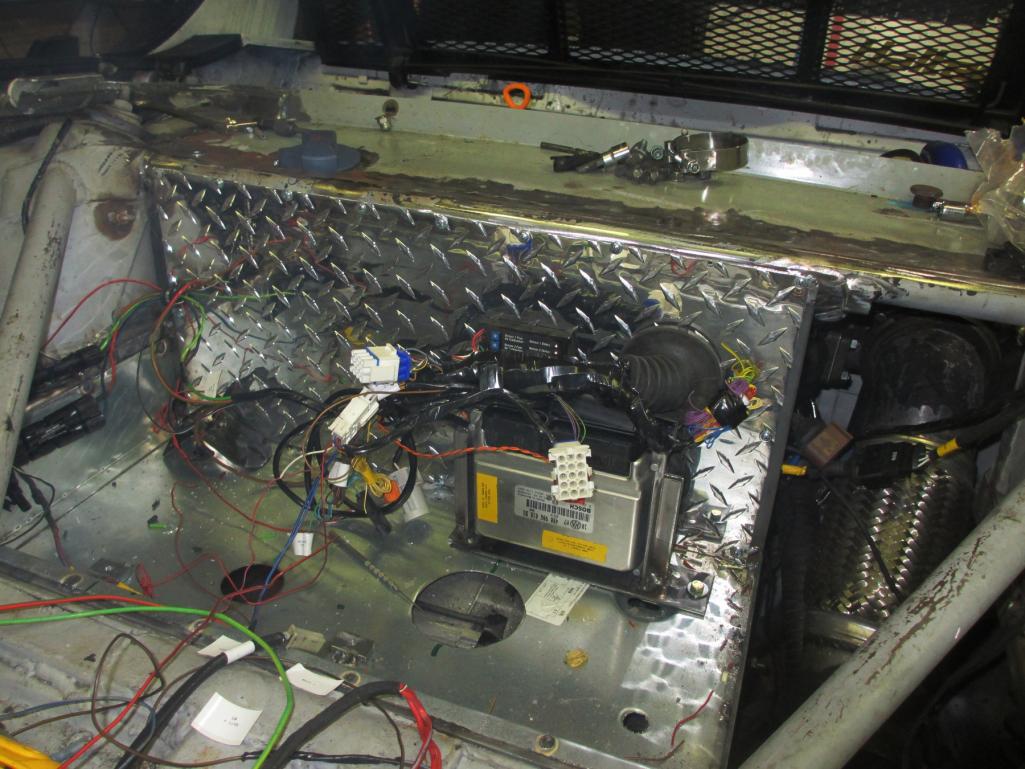
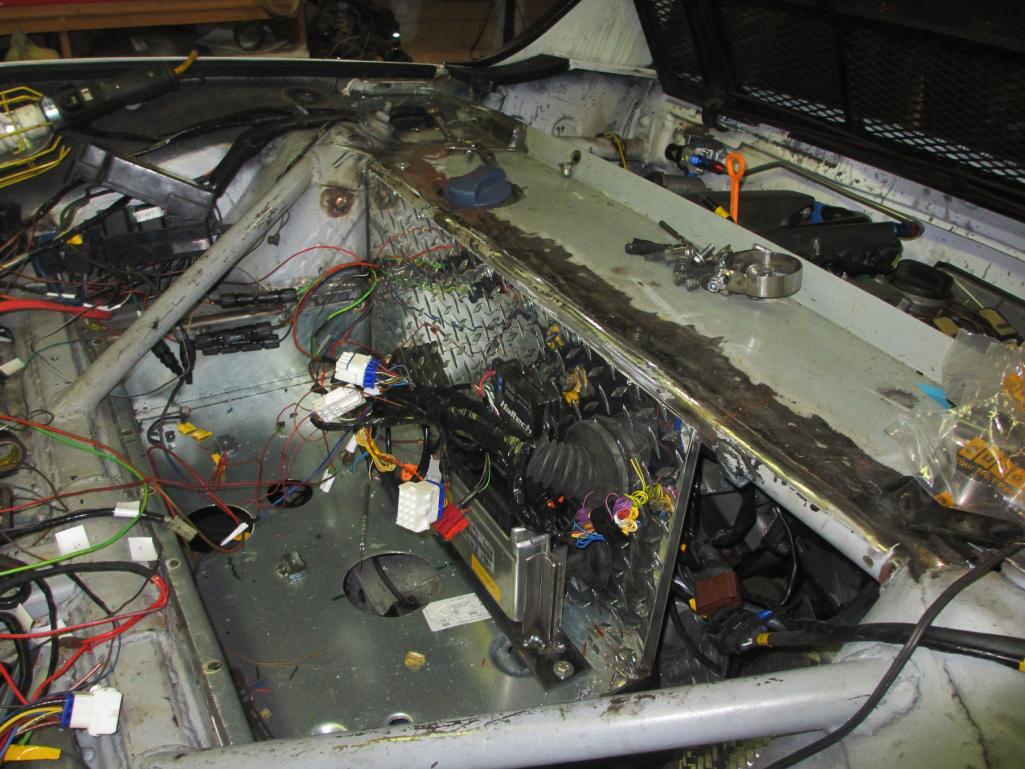
Got most of the rear area and ECU wired. I'm down to 6 or 7 wires but rand out of connectors. I can't believe how many wires I have connected.... (IMG:style_emoticons/default/blink.gif)
  |
| Andyrew |
 Jan 1 2013, 02:01 PM Jan 1 2013, 02:01 PM
Post
#143
|
|
Spooling.... Please wait           Group: Members Posts: 13,377 Joined: 20-January 03 From: Riverbank, Ca Member No.: 172 Region Association: Northern California 
|
I like the progress!!
|
| Mike Bellis |
 Jan 19 2013, 07:54 PM Jan 19 2013, 07:54 PM
Post
#144
|
|
Resident Electrician      Group: Members Posts: 8,346 Joined: 22-June 09 From: Midlothian TX Member No.: 10,496 Region Association: None 

|
Progress continues even without updates. The wiring has taken longer since I'm adding connectors and soldering connections...
Got the cluster figured out. i was going to build a custom fiberglass dash but decided to go another route. I first broke off the factory clear lens on the cluster and cut the black surround down. I had a piece of acrylic cut to the outer shape of the 914 cluster. The Passat dash is slightly narrower but slightly taller. I used an epoxy designed to bond the ABS to the acrylic. I then painted the acrylic satin black around the edge... I think it looks pretty good and I get to keep the stock 914 dash shape... (IMG:style_emoticons/default/smile.gif) 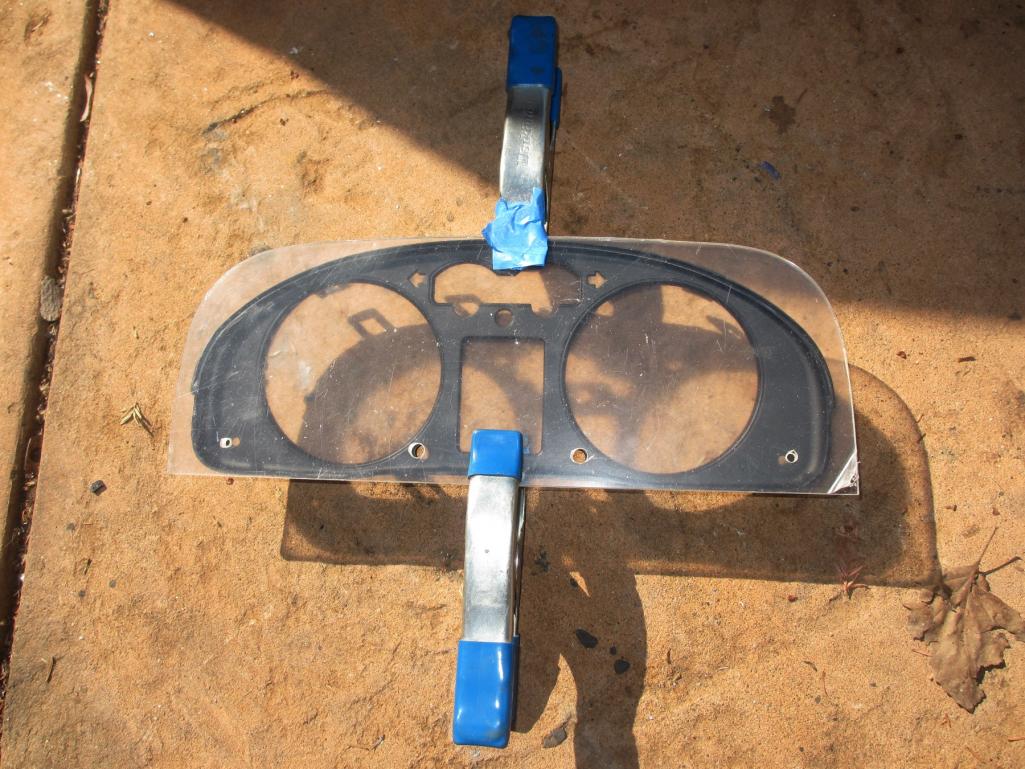 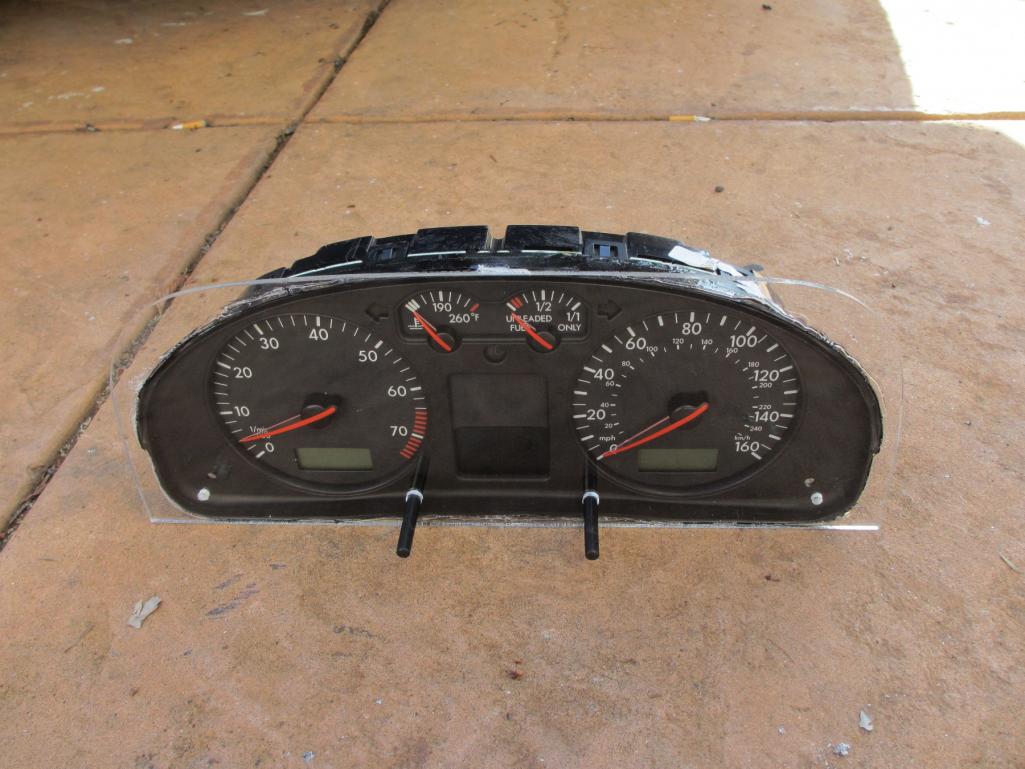 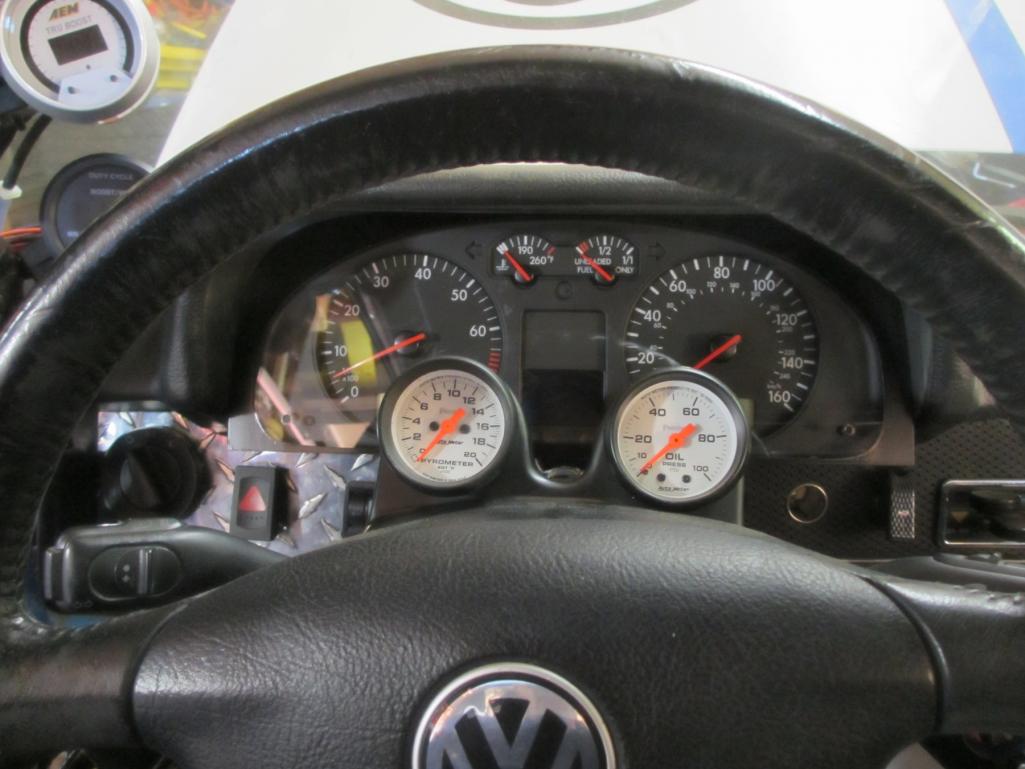 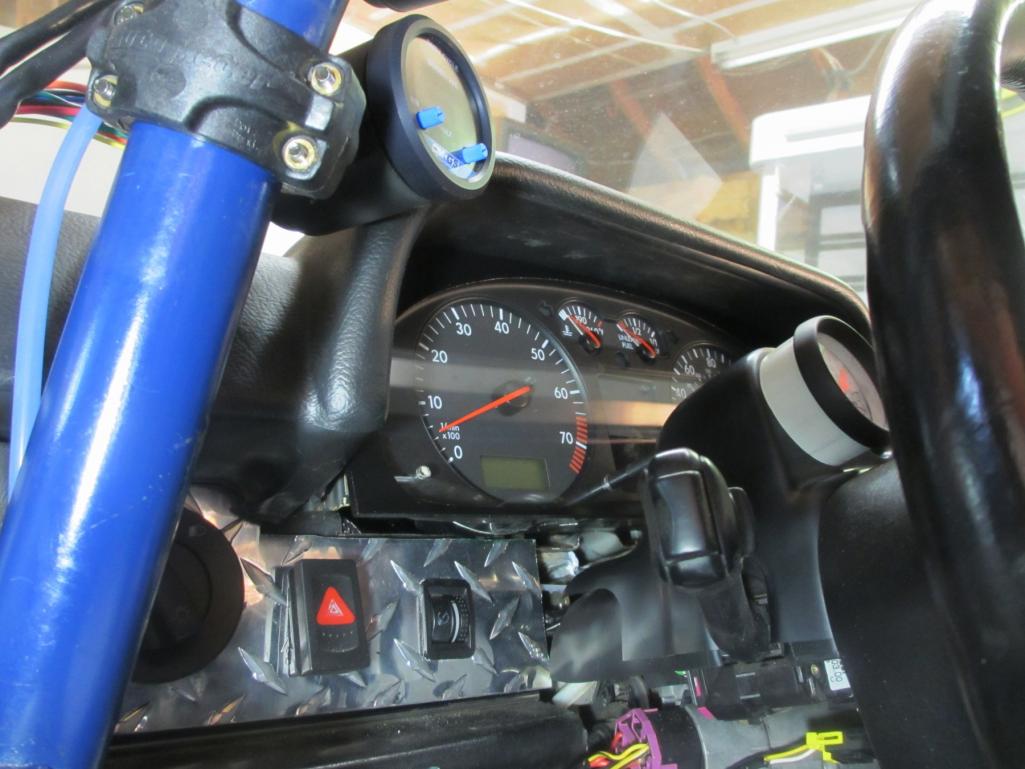 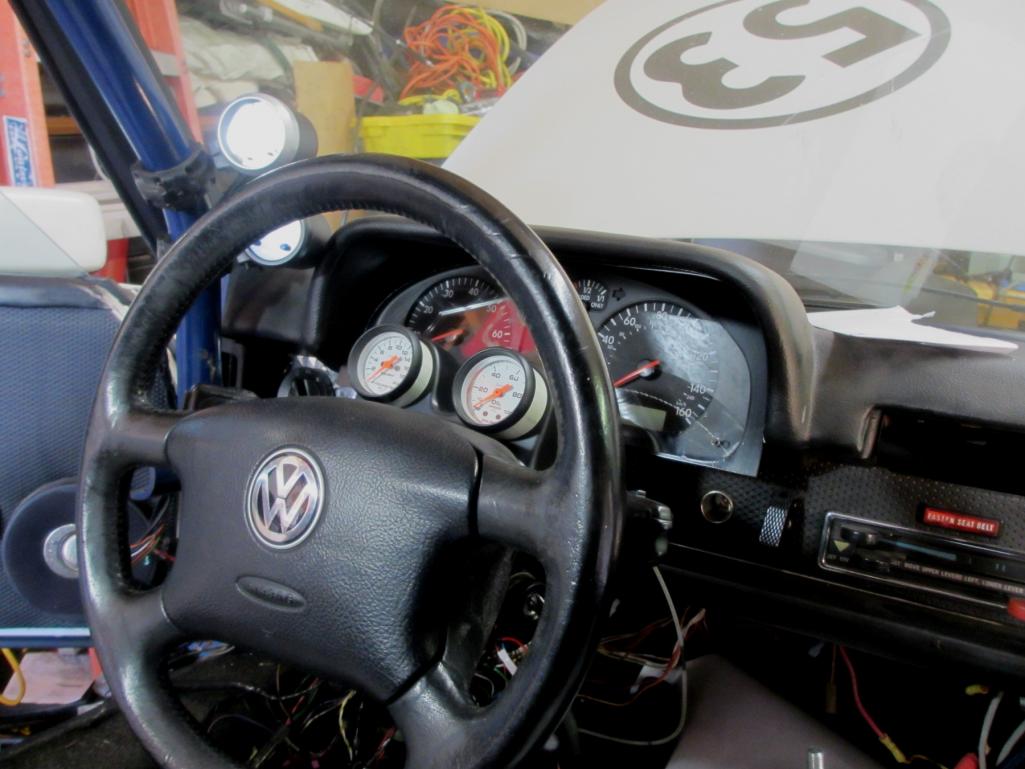 |
| JRust |
 Jan 19 2013, 08:50 PM Jan 19 2013, 08:50 PM
Post
#145
|
|
914 Guru      Group: Members Posts: 6,310 Joined: 10-January 03 From: Corvallis Oregon Member No.: 129 Region Association: Pacific Northwest 
|
Yeah Buddy (IMG:style_emoticons/default/piratenanner.gif) Lookin sweet! Going to be a trip seeing that all going in your 914. A nice updated cluster & steering wheel controls. Good to see you making progress. Can't wait to see it at WCR
|
| Andyrew |
 Jan 21 2013, 02:12 AM Jan 21 2013, 02:12 AM
Post
#146
|
|
Spooling.... Please wait           Group: Members Posts: 13,377 Joined: 20-January 03 From: Riverbank, Ca Member No.: 172 Region Association: Northern California 
|
Like the gauge cluster idea (IMG:style_emoticons/default/smile.gif)
|
| Mike Bellis |
 Feb 3 2013, 07:48 PM Feb 3 2013, 07:48 PM
Post
#147
|
|
Resident Electrician      Group: Members Posts: 8,346 Joined: 22-June 09 From: Midlothian TX Member No.: 10,496 Region Association: None 

|
I'm getting burned out on wiring... (IMG:style_emoticons/default/dry.gif)
Today I switched to steering. I had to shorted the under dash steering rod by 2.5 inches. So I cut it in half, connected everything and marked it. I then cut off the excess. I don;t want this weld to fail so I did it more like a structural weld. Note the chamfers on each section. I used an angle aluminum piece in the vice and over clamped it so the heat would not pull the rod. It was welded, ground and spun... Over and over. It is not warped or bent at all. A quick coat of satin black finished it off. I did discover the VW clock spring does 7 complete revolutions. I never looked to see what the 914 does lock to lock but I hope 7 is OK. Kind of a boring update but if it don't steer, it don't drive... 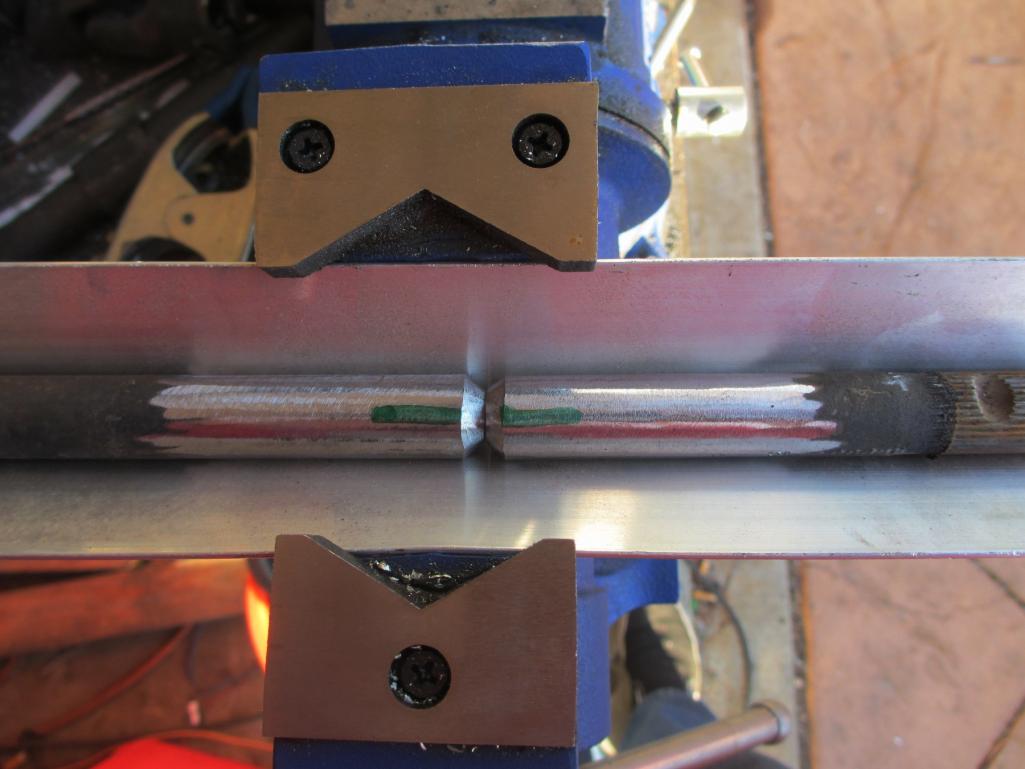 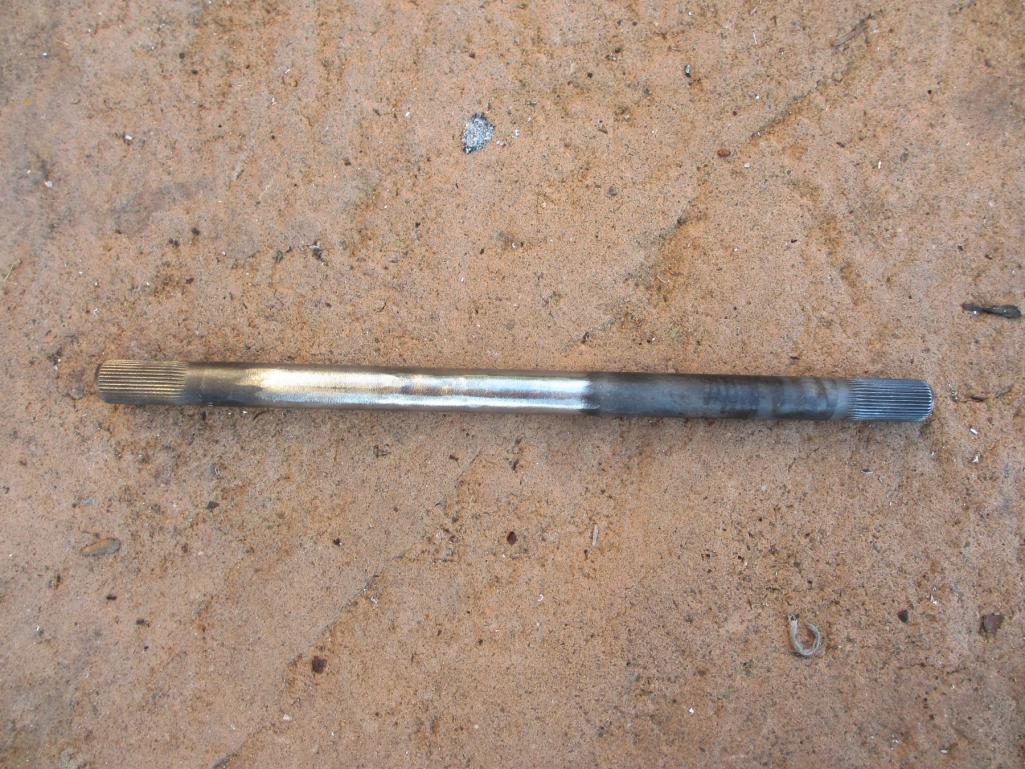 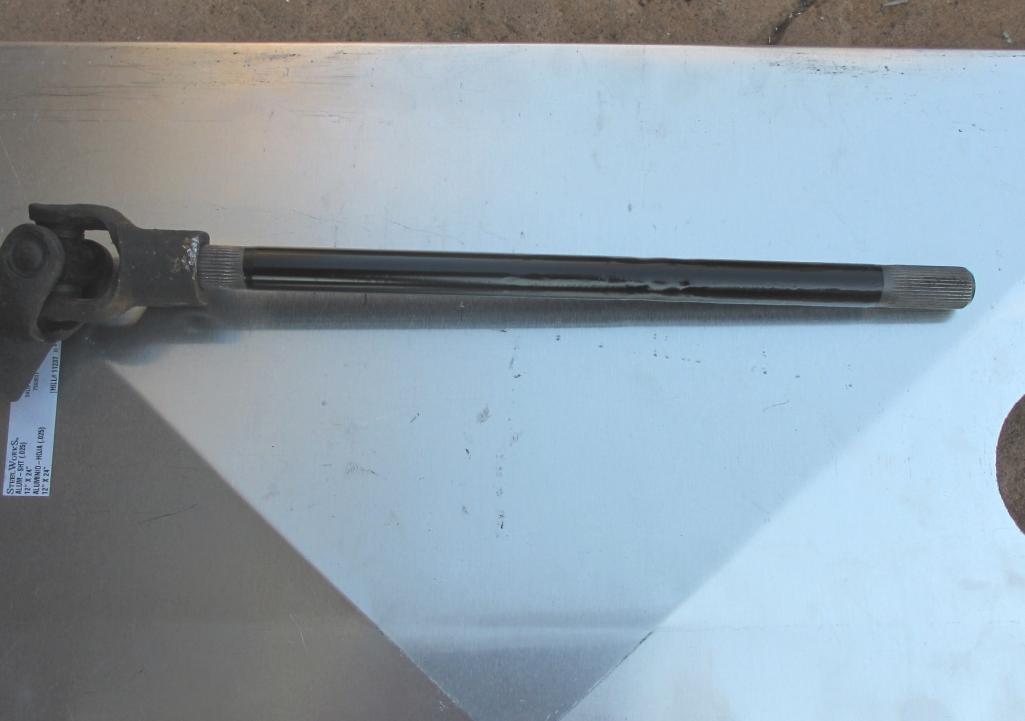 |
| Andyrew |
 Feb 4 2013, 12:36 AM Feb 4 2013, 12:36 AM
Post
#148
|
|
Spooling.... Please wait           Group: Members Posts: 13,377 Joined: 20-January 03 From: Riverbank, Ca Member No.: 172 Region Association: Northern California 
|
Looks great! Even if it was warped a hair, its just a steering rack...
Progress good! |
| Chris H. |
 Feb 4 2013, 07:41 AM Feb 4 2013, 07:41 AM
Post
#149
|
|
Senior Member     Group: Members Posts: 4,048 Joined: 2-January 03 From: Chicago 'burbs Member No.: 73 Region Association: Upper MidWest 
|
Mike...your gauge cluster....awesome man! The gauges look factory that way!
|
| jeeperjohn56 |
 Feb 4 2013, 06:01 PM Feb 4 2013, 06:01 PM
Post
#150
|
|
Member   Group: Members Posts: 479 Joined: 9-July 06 From: Antioch,Ca. Member No.: 6,407 Region Association: None |
Hey Mike, Your doing a great job keep up the great work. John (IMG:style_emoticons/default/welder.gif)
|
| Mike Bellis |
 Mar 10 2013, 07:47 PM Mar 10 2013, 07:47 PM
Post
#151
|
|
Resident Electrician      Group: Members Posts: 8,346 Joined: 22-June 09 From: Midlothian TX Member No.: 10,496 Region Association: None 

|
Well, my car
They don't look too bad from the outside... 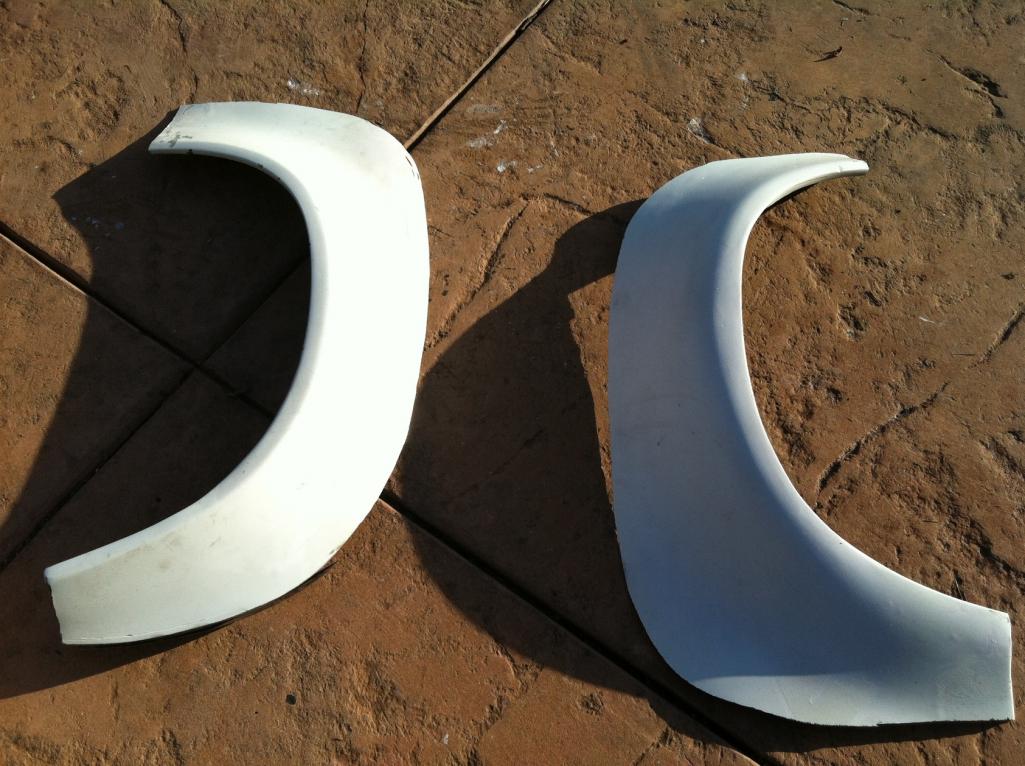 Here you can see 3 layers of sheet metal. (IMG:style_emoticons/default/barf.gif) 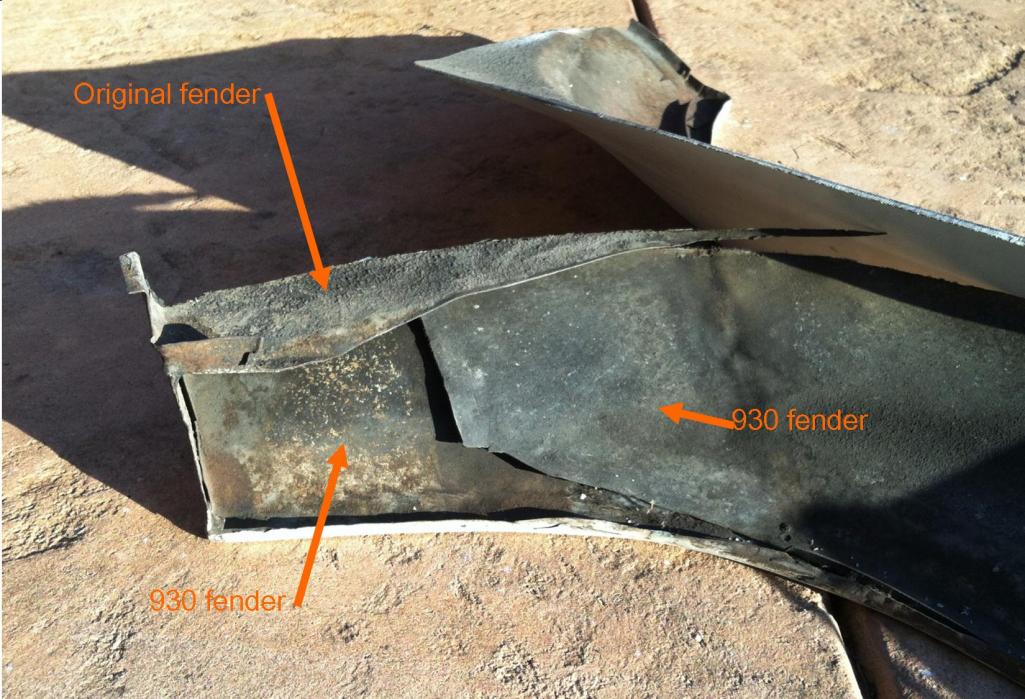 Here you can see 1/2" of bondo. (IMG:style_emoticons/default/dry.gif) White painted fender makes it look thicker. 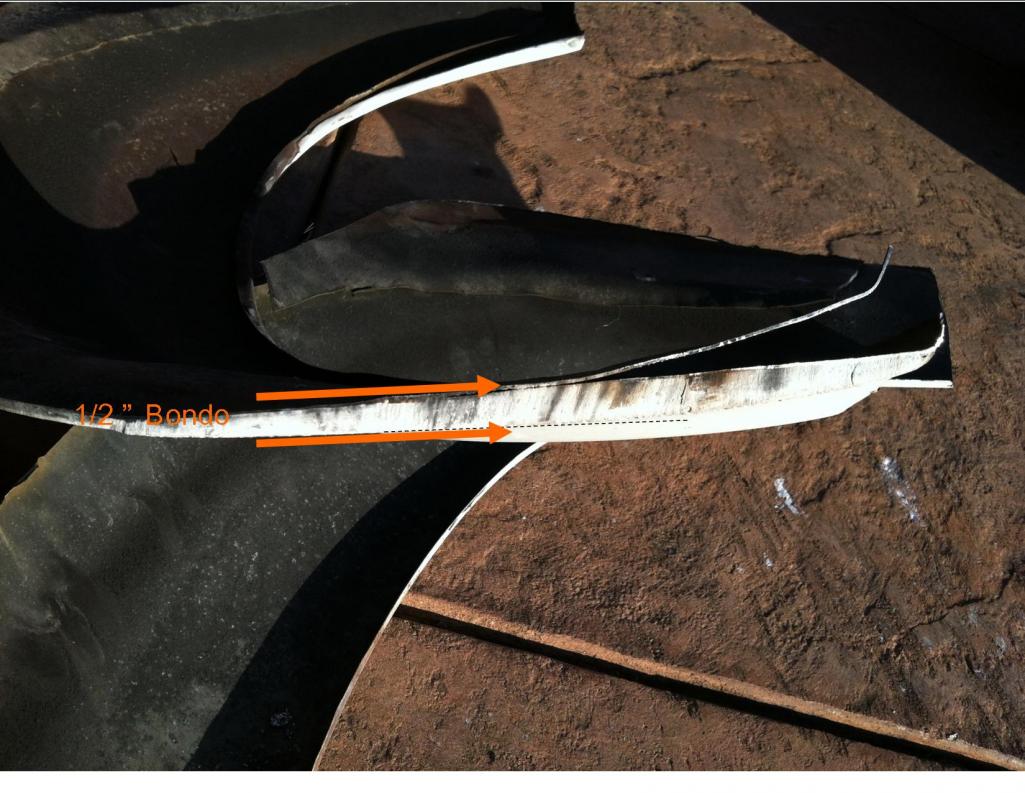 I picked up a full set from AIR and 914 LTD. I also picked up some black fender welting. right now I just have them screwed on. I have wide rivets for later down the road. I was bidding on Brad's set (including rockers), lost the bid, bought a set from AIR and then Brad sent me a second chance offer. Now I have 2 complete sets. I already had flared steel rockers but realized the length of each was not consistent. Looks like the PO installed the old flares and built the rockers to fit. All of the old flares were off set different from the opposite side; Asymmetrical. (IMG:style_emoticons/default/WTF.gif) The worst was the front right which was set back a full inch from the left. (IMG:style_emoticons/default/drunk.gif) So... I installed the new rockers first and installed the flares to meet. The jack post hole was the original alignment point. The ones I chose to install are from 914 LTD. The quality of both were good. The fit was almost the same. The 914 LTD flares were slightly thicker than the AIR's. I did notice that the gel coating on Brad's is cracking. I will deal with this someday when I paint the car. If anyone needs a set of 4 fiberglass flares PM me. I will sell them for cost. I also have some free steel flared rockers if anyone wants them. 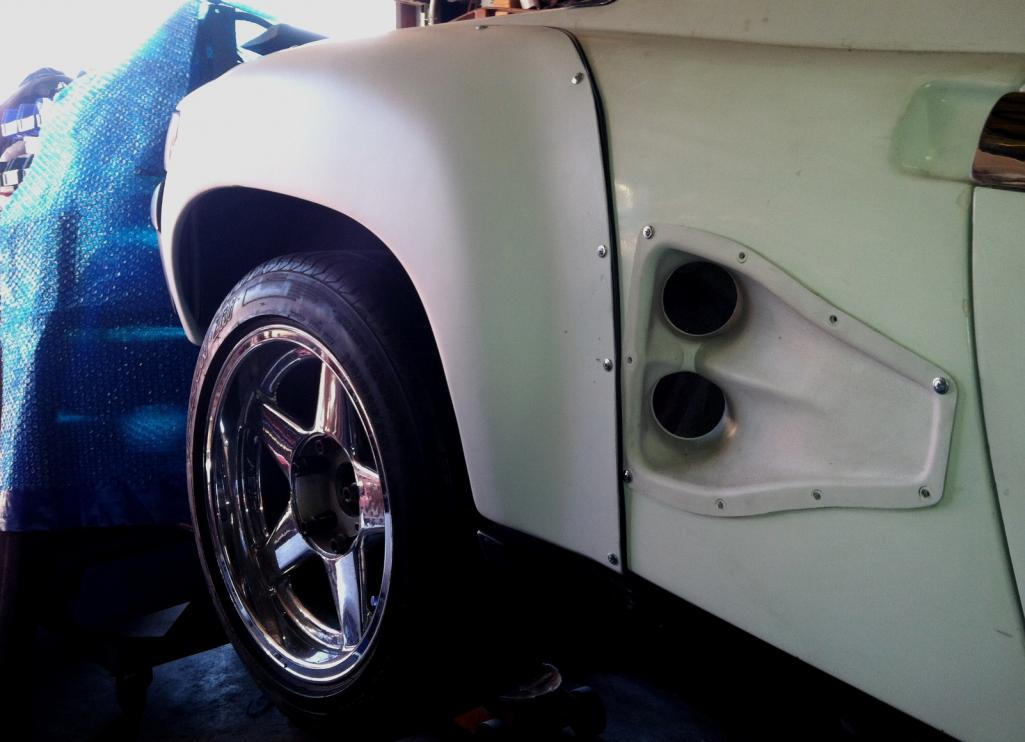 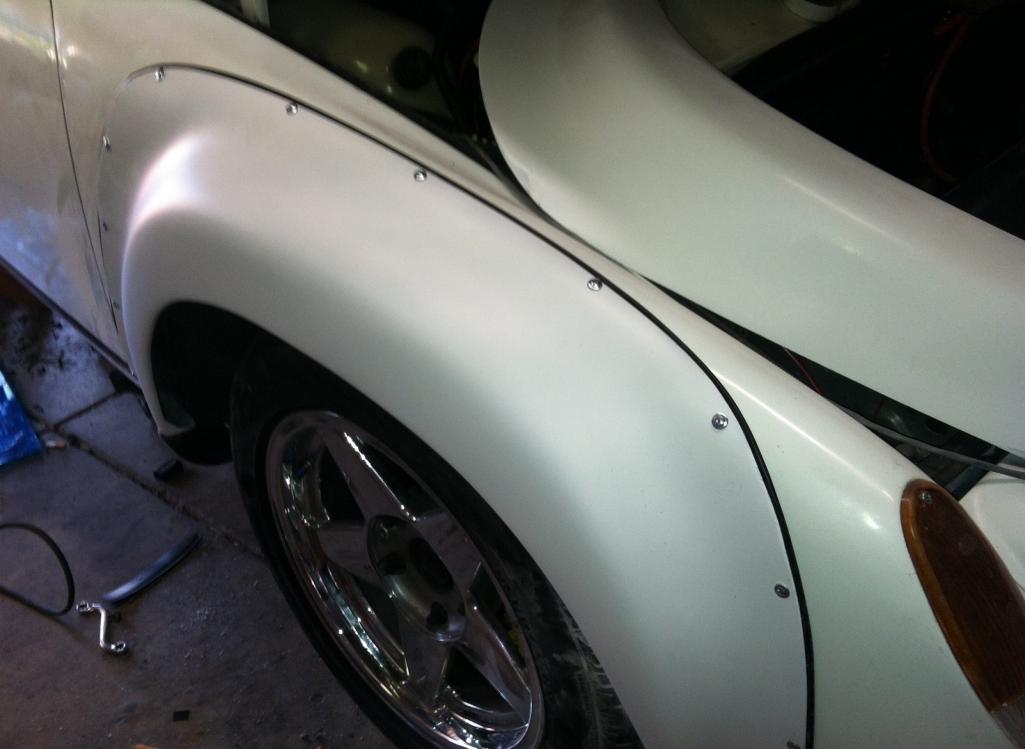 |
| Andyrew |
 Mar 12 2013, 06:07 PM Mar 12 2013, 06:07 PM
Post
#152
|
|
Spooling.... Please wait           Group: Members Posts: 13,377 Joined: 20-January 03 From: Riverbank, Ca Member No.: 172 Region Association: Northern California 
|
Looks great! Crazy work on those original flares!
|
| 76-914 |
 Mar 12 2013, 07:12 PM Mar 12 2013, 07:12 PM
Post
#153
|
|
Repeat Offender & Resident Subaru Antagonist           Group: Members Posts: 13,634 Joined: 23-January 09 From: Temecula, CA Member No.: 9,964 Region Association: Southern California 
|
That was a good idea on the dash set up, Mike.
|
| Mike Bellis |
 Mar 12 2013, 07:30 PM Mar 12 2013, 07:30 PM
Post
#154
|
|
Resident Electrician      Group: Members Posts: 8,346 Joined: 22-June 09 From: Midlothian TX Member No.: 10,496 Region Association: None 

|
That was a good idea on the dash set up, Mike. Thanks, I actually went this route because it looked easier than any other custom work. I think it turned out better than expected. The pics in the thread show it not even in final position. I just placed it there for pics. The final position looks almost factory installed. Well, if you had a 2001 914, that is... |
| 3d914 |
 Mar 12 2013, 07:32 PM Mar 12 2013, 07:32 PM
Post
#155
|
|
Senior Member    Group: Members Posts: 1,275 Joined: 24-September 03 From: Benson, AZ Member No.: 1,191 Region Association: Southwest Region |
Mike, I like your approach to the gauge panel. I was thinking something similar if I decide to use the SHO gauge panel, but using stock steering column. I'm curious about the NACA duct on the side. Is that something you added or PO? I'm looking for just that size to mount for intake air, but on the trunk. |
| Mike Bellis |
 Mar 12 2013, 07:33 PM Mar 12 2013, 07:33 PM
Post
#156
|
|
Resident Electrician      Group: Members Posts: 8,346 Joined: 22-June 09 From: Midlothian TX Member No.: 10,496 Region Association: None 

|
Looks great! Crazy work on those original flares! They look worse in person. There is 10lbs of bondo on each fender. I also found a bondo dent repair on the front right side. I cut most of it out but it will require some welding at some point. That will be in Part 4 of the build when I strip it for paint. I think I dropped 50lbs off the car with the fiberglass flares and rockers... (IMG:style_emoticons/default/smile.gif) |
| Mike Bellis |
 Mar 12 2013, 07:39 PM Mar 12 2013, 07:39 PM
Post
#157
|
|
Resident Electrician      Group: Members Posts: 8,346 Joined: 22-June 09 From: Midlothian TX Member No.: 10,496 Region Association: None 

|
Mike, I like your approach to the gauge panel. I was thinking something similar if I decide to use the SHO gauge panel, but using stock steering column. I'm curious about the NACA duct on the side. Is that something you added or PO? I'm looking for just that size to mount for intake air, but on the trunk. The NACA was an ebay purchase. This one is setup as a cold air intake for the turbo. It was plumbed into a plenum but now the inner fender is the plenum. On the other side of the car, the NACA is the intake for the intercooler's heat exchanger. I cut it down to match the contour of the exchanger... 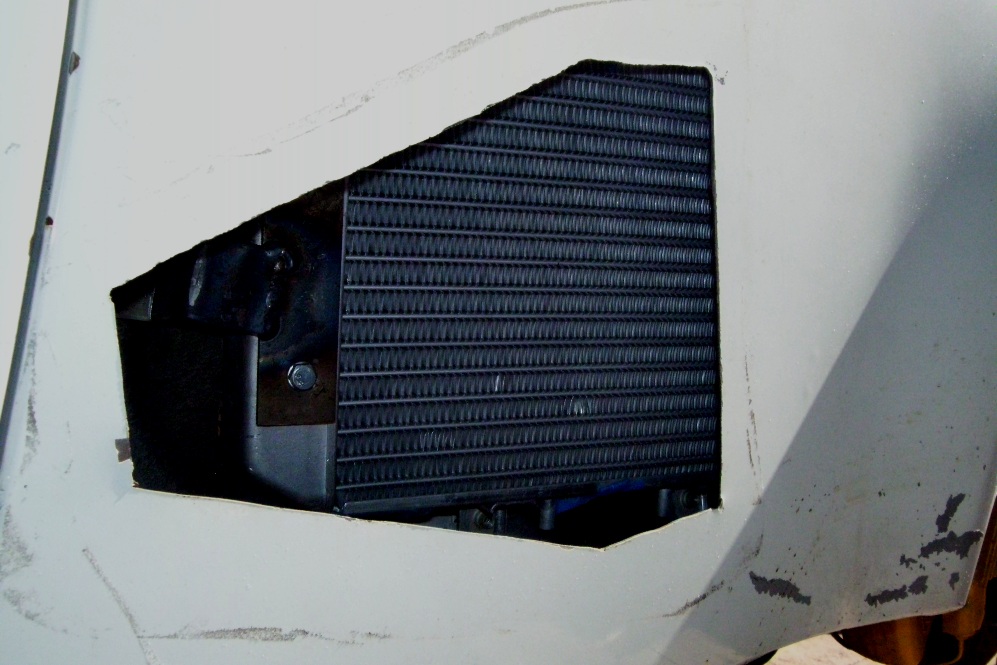 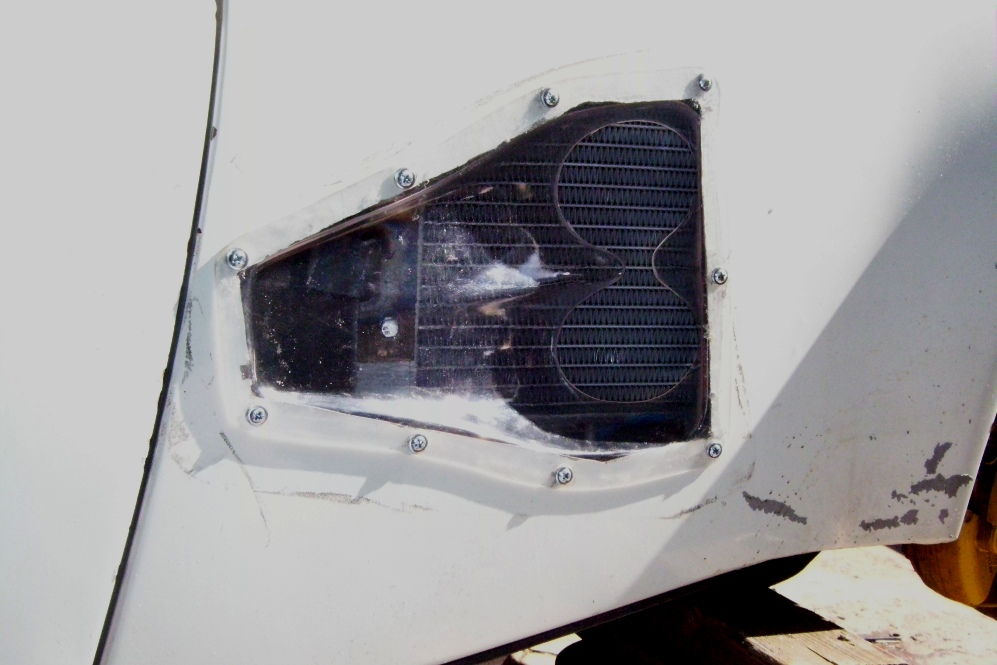 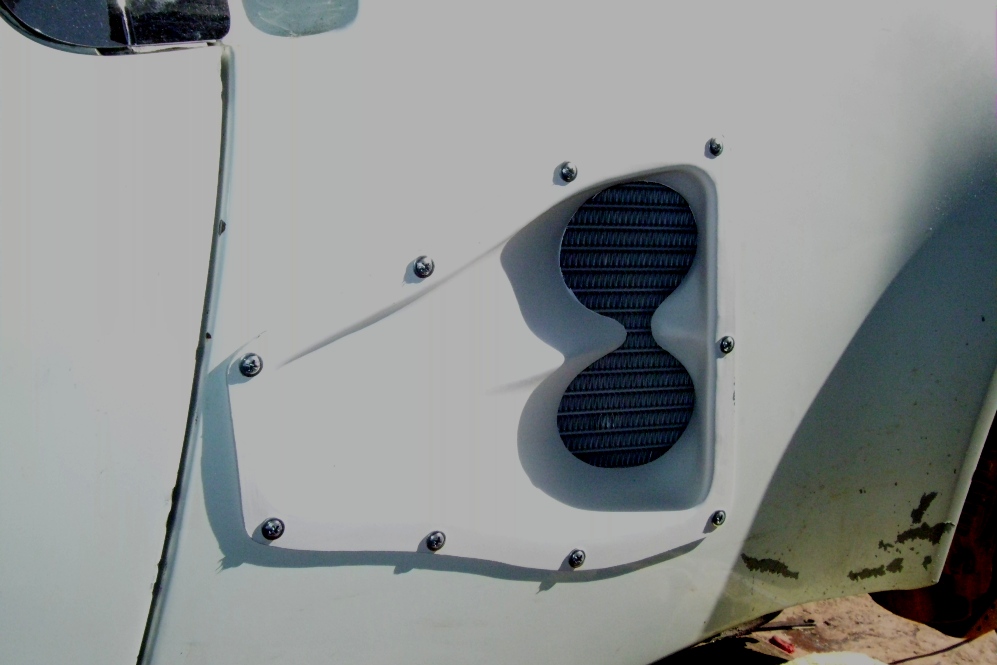 |
| Andyrew |
 Mar 13 2013, 10:29 AM Mar 13 2013, 10:29 AM
Post
#158
|
|
Spooling.... Please wait           Group: Members Posts: 13,377 Joined: 20-January 03 From: Riverbank, Ca Member No.: 172 Region Association: Northern California 
|
That should help some (IMG:style_emoticons/default/smile.gif) Not sure if thats really enough flow over the intercooler though. Something youll find out when you log your Intake Air Temps after you get the setup up and running.
|
| Mike Bellis |
 Mar 13 2013, 12:01 PM Mar 13 2013, 12:01 PM
Post
#159
|
|
Resident Electrician      Group: Members Posts: 8,346 Joined: 22-June 09 From: Midlothian TX Member No.: 10,496 Region Association: None 

|
That should help some (IMG:style_emoticons/default/smile.gif) Not sure if thats really enough flow over the intercooler though. Something youll find out when you log your Intake Air Temps after you get the setup up and running. I have a 7" fan behind there too. I measured the IAT sensor at 120F after some hard driving with the old motor. I reconfigured the IC mounting to eliminate air bubbles within so I hope to have even cooler are now. |
| Andyrew |
 Mar 13 2013, 02:12 PM Mar 13 2013, 02:12 PM
Post
#160
|
|
Spooling.... Please wait           Group: Members Posts: 13,377 Joined: 20-January 03 From: Riverbank, Ca Member No.: 172 Region Association: Northern California 
|
Is that the air to air intercooler or is it for the air to water intercooler?
|
  |
2 User(s) are reading this topic (2 Guests and 0 Anonymous Users)
0 Members:

|
Lo-Fi Version | Time is now: 26th November 2024 - 07:34 AM |
Invision Power Board
v9.1.4 © 2024 IPS, Inc.


