|
|

|
Porsche, and the Porsche crest are registered trademarks of Dr. Ing. h.c. F. Porsche AG.
This site is not affiliated with Porsche in any way. Its only purpose is to provide an online forum for car enthusiasts. All other trademarks are property of their respective owners. |
|
|
  |
| 76-914 |
 Mar 19 2016, 04:58 PM Mar 19 2016, 04:58 PM
Post
#545
|
|
Repeat Offender & Resident Subaru Antagonist           Group: Members Posts: 13,698 Joined: 23-January 09 From: Temecula, CA Member No.: 9,964 Region Association: Southern California 
|
Once that engine is out most everything else is easy; except diagnosis of course. p.s., Received the controller, Chris Nice neat little package. Good tip. Thx. (IMG:style_emoticons/default/beerchug.gif)
|
| Chris H. |
 Mar 19 2016, 08:59 PM Mar 19 2016, 08:59 PM
Post
#546
|
|
Senior Member     Group: Members Posts: 4,055 Joined: 2-January 03 From: Chicago 'burbs Member No.: 73 Region Association: Upper MidWest 
|
(IMG:style_emoticons/default/thumb3d.gif) Cool man. Very easy to install. Remember you'll probably have to adjust the thermostat a bit. I'm sure you can see the dial on the housing with temp #s. My fans came on way too early initially. Think its set at 165 from the factory which means they wont go off until the temp gets to 155...so...not until you turn the car off. (IMG:style_emoticons/default/biggrin.gif). Put the sensor right by the HOT inlet on the rad. Then a few tweaks and you'll be good. I doubt they'll come on much until you kick the AC on. Pretty sure we can stick with the rad hoses we have now after all (IMG:style_emoticons/default/beerchug.gif) .
|
| 76-914 |
 Mar 20 2016, 08:54 AM Mar 20 2016, 08:54 AM
Post
#547
|
|
Repeat Offender & Resident Subaru Antagonist           Group: Members Posts: 13,698 Joined: 23-January 09 From: Temecula, CA Member No.: 9,964 Region Association: Southern California 
|
After reading the wiring instructions I see why some people were claiming them to be "DOA". The Futsie's probably missed the part where "neg" fan connects to "pos" on the unit and wired pos to pos and neg to neg instead.
|
| Chris H. |
 Mar 20 2016, 03:46 PM Mar 20 2016, 03:46 PM
Post
#548
|
|
Senior Member     Group: Members Posts: 4,055 Joined: 2-January 03 From: Chicago 'burbs Member No.: 73 Region Association: Upper MidWest 
|
Totally stumbled on this one but it's a good lesson. Check the crank and cam angle sensors! The car ran fine so I ASSUMED they were OK.
There are two Crank Angle Sensors that are located on top of the oil pump right under the alternator next to each other. I was removing them to take the oil pump out and one of them just didn't want to budge. The outer metal sleeve had come loose and was stuck inside the hole. I tested it and found the sensor was bad so I manhandled it out. 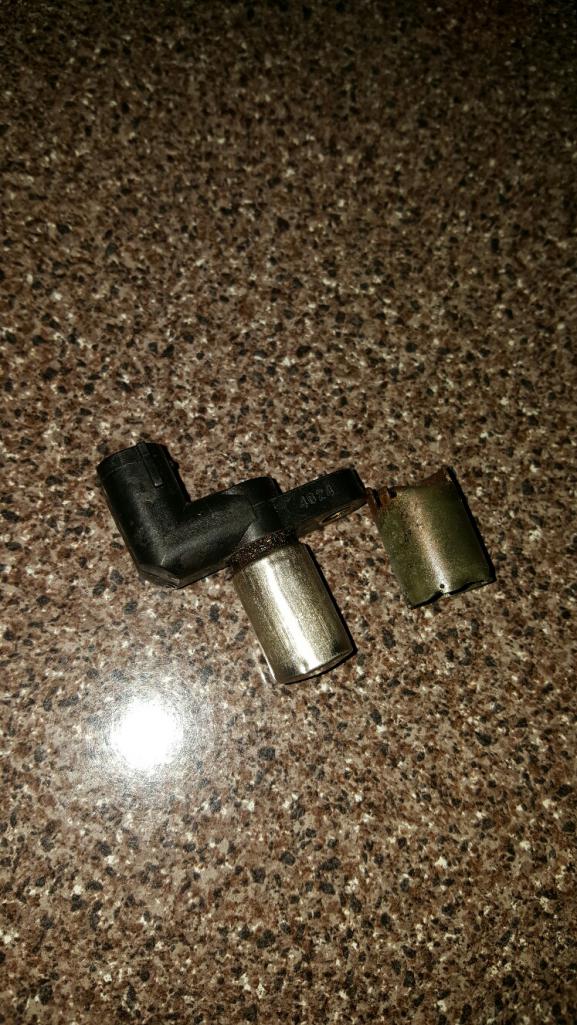 Looks like a small amount of water must have gotten between the sensor and the pump housing: 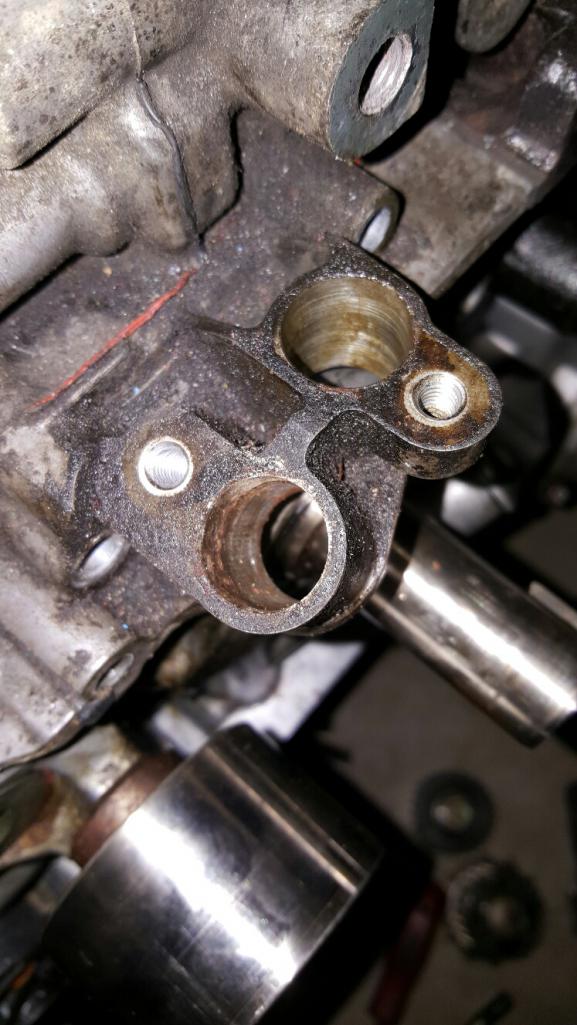 That's the one area I didn't mess with when I resealed the engine (of course). When you test these using an Ohm meter it should read ~2600. The other two are very close... 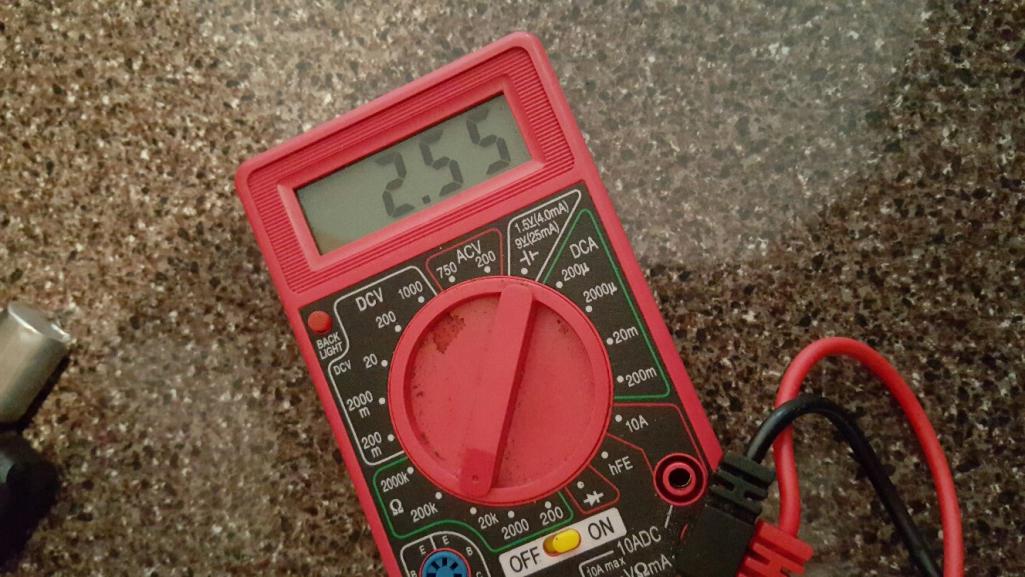 The bad one...nothing... 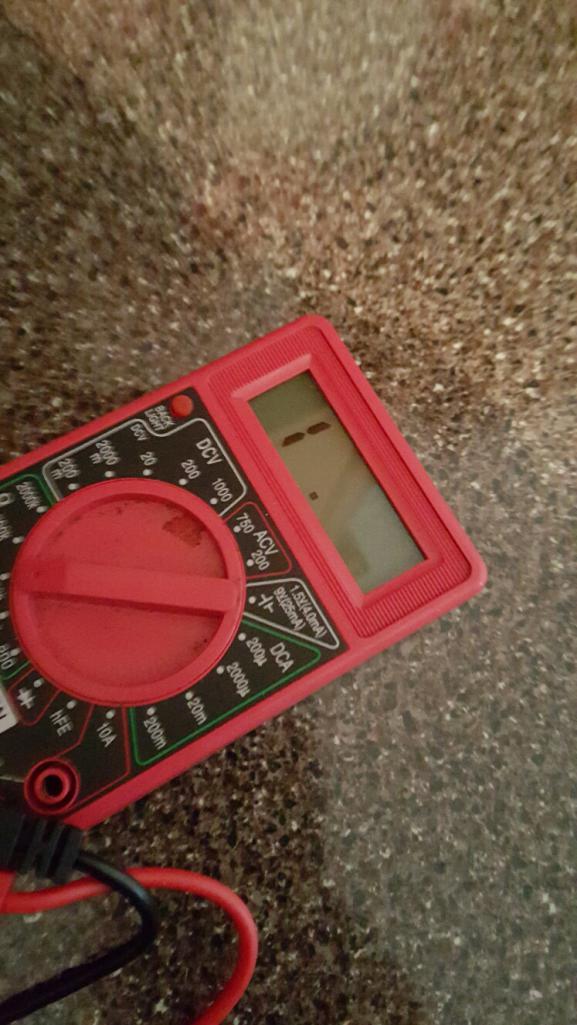 These are very simple magnetic sensors, they are technically all interchangeable. The only difference is the angle of the plug. 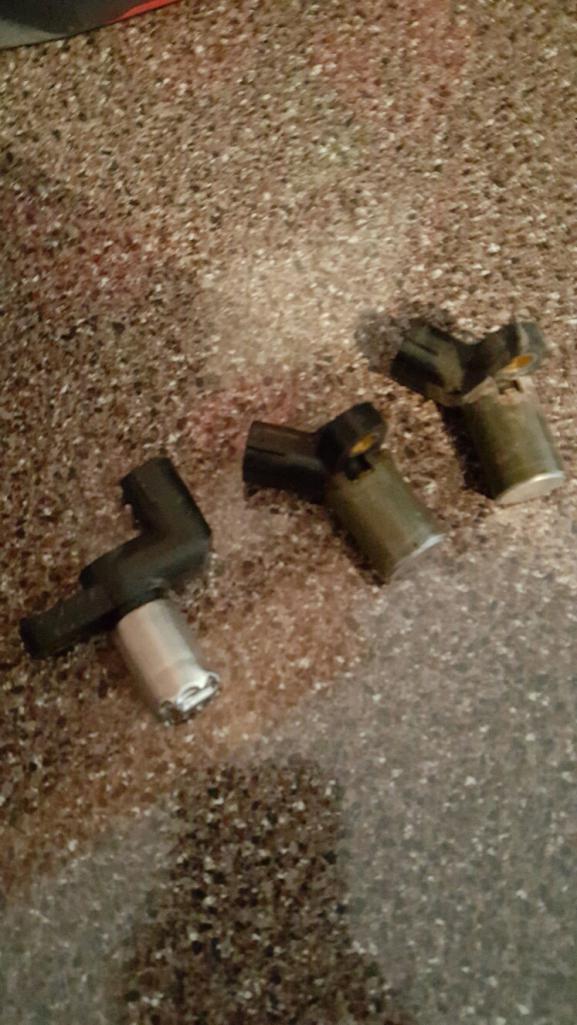 Of course the one I need is #1, and the plug end is pretty unique. Just need to do some searches to see what other Subaru sensor is close enough. You can find these for $20 -$30 each. Tempting to replace all 3. Definitely not spending ~$250 for the SVX one. |
| 914forme |
 Mar 20 2016, 05:18 PM Mar 20 2016, 05:18 PM
Post
#549
|
|
Times a wastin', get wrenchin'!     Group: Members Posts: 3,896 Joined: 24-July 04 From: Dayton, Ohio Member No.: 2,388 Region Association: None 
|
Chris I have 1 complete set, and the two on the engine, the cam sensor was trashed on my mockup engine. If you don't find one I can pull them next weekend. I am traveling this week for work, will be back in town next Friday.
|
| Chris H. |
 Mar 20 2016, 05:47 PM Mar 20 2016, 05:47 PM
Post
#550
|
|
Senior Member     Group: Members Posts: 4,055 Joined: 2-January 03 From: Chicago 'burbs Member No.: 73 Region Association: Upper MidWest 
|
Thanks so much Steve. Very nice of you. I'll definitely let you know but will try to use the Legacy ones first so you can keep those as spares. The price for a new #1 is RIDICULOUS.
|
| a914622 |
 Mar 21 2016, 09:12 PM Mar 21 2016, 09:12 PM
Post
#551
|
|
Member   Group: Members Posts: 316 Joined: 12-August 10 From: northwest Member No.: 12,048 Region Association: Pacific Northwest |
I have heard rumours the Nissan crank sensor plugs in from the top or 45 deg like the svx. I have not confirmed that but I will have a look next time I'm pocking around the wrecking yard.
|
| Chris H. |
 Mar 22 2016, 09:44 PM Mar 22 2016, 09:44 PM
Post
#552
|
|
Senior Member     Group: Members Posts: 4,055 Joined: 2-January 03 From: Chicago 'burbs Member No.: 73 Region Association: Upper MidWest 
|
Interesting. Thanks Jeff. I ordered a couple of Legacy ones for a whopping $16 each. They are the OEM replacement on Rockauto so not the el-cheapo ones.
Slight progress while we wait... Oil pump is off. Never resealed in 21 years. Seems like it might have been leaking slightly from both the seal around the pump housing and the front seal around the crank ( I think referred to as the front main seal). I got the seals I need in the Subaru reseal kit, just never used them. 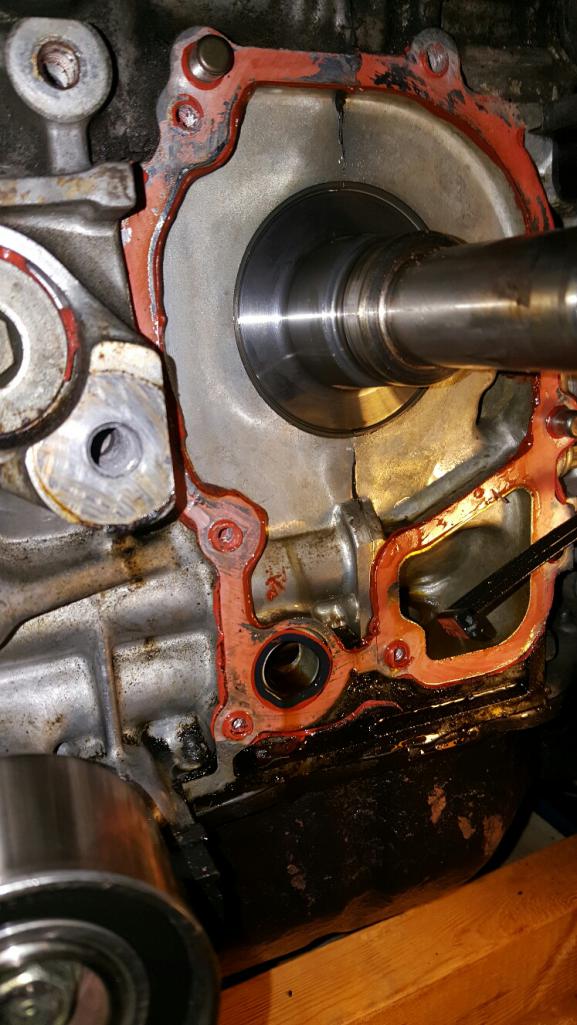 Look at the crap behind that thing. 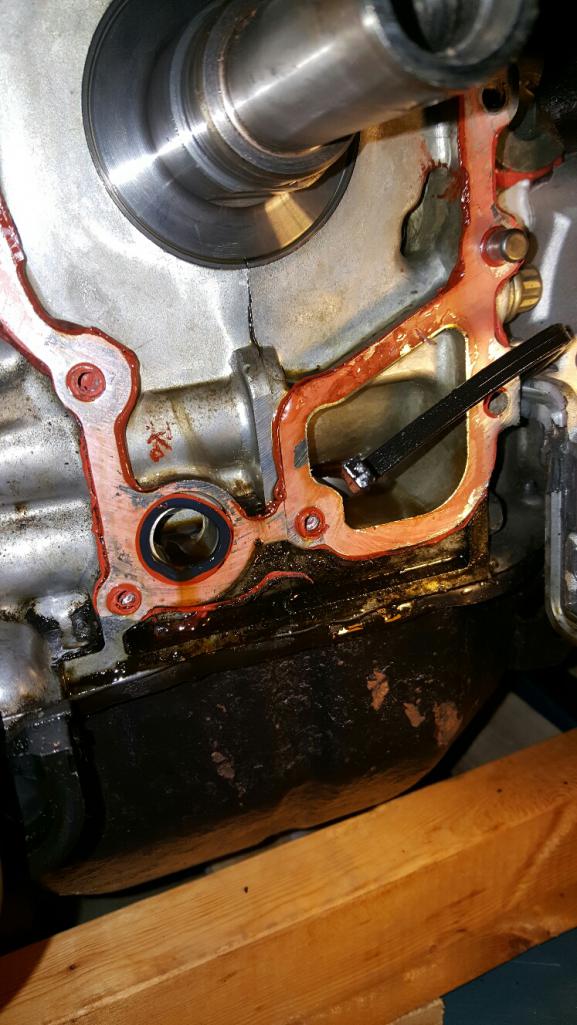 O-Ring is not very pliable. It broke later. 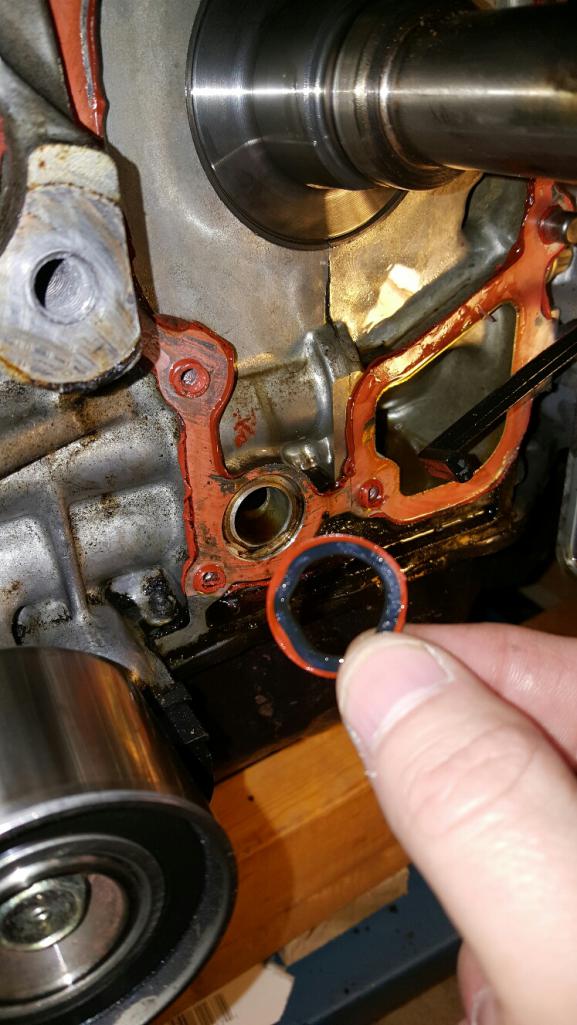 Got the RTV removed from both surfaces. RTV is the OEM way to seal the oil pump. Same with the oil pan. 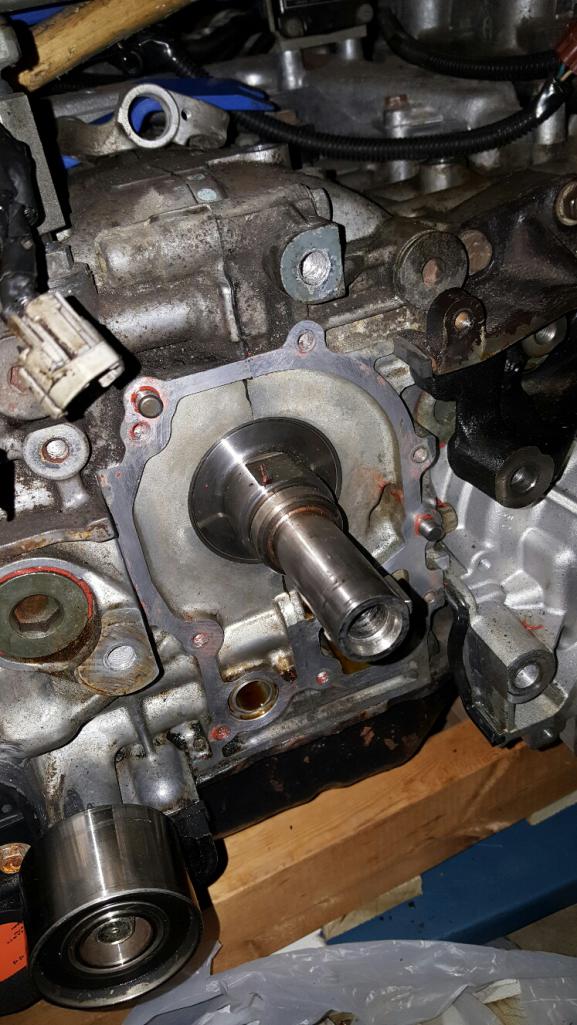 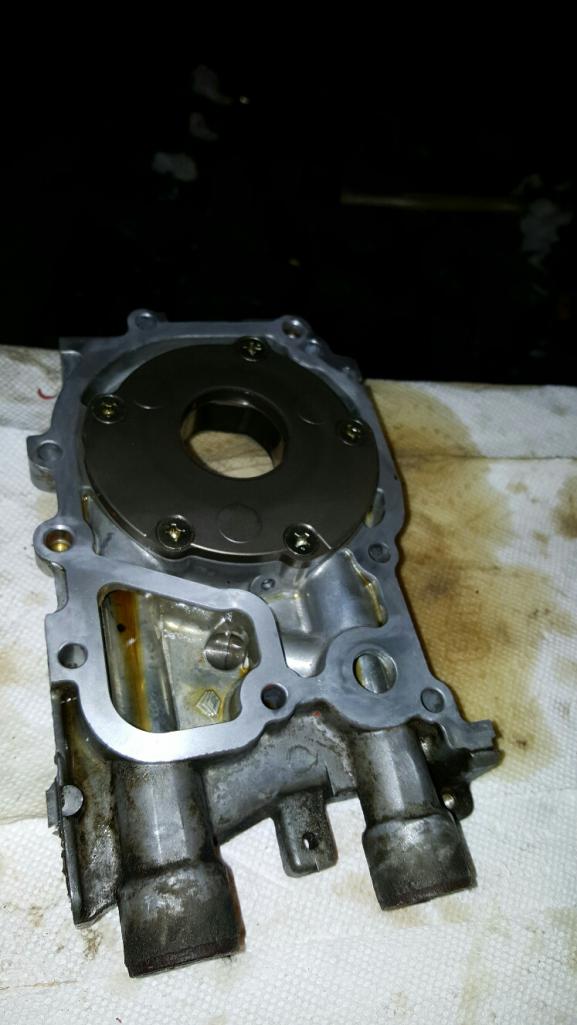 Tomorrow we clean the gunk off from on and behind the oil pump, re-seal it, get the timing belt back on. I'll detail the procedure for doing the timing belt when I reinstall it. Easiest one I've ever done (3 times now (IMG:style_emoticons/default/biggrin.gif) ). Non-interference too. It's gonna be flying down the road in no time (IMG:style_emoticons/default/beerchug.gif) . |
| motoTrooper |
 Mar 22 2016, 10:26 PM Mar 22 2016, 10:26 PM
Post
#553
|
|
Newbie  Group: Members Posts: 39 Joined: 18-March 16 From: Palo Alto Member No.: 19,774 Region Association: None |
I am working on my 3.3 vicariously through you! Great photos and description, you are saving me so much time when I actually get my donor car. Looks like that Celica radiator will fit the Scorpion too as the old one I pulled today is 31(l)x10.5(h).
I do not wish to hijack your thread but want to share pics. So shall I post a link to one of the Lancia/Fiat sites that I have build threads on? Best regards -Christopher |
| Chris H. |
 Mar 23 2016, 06:01 AM Mar 23 2016, 06:01 AM
Post
#554
|
|
Senior Member     Group: Members Posts: 4,055 Joined: 2-January 03 From: Chicago 'burbs Member No.: 73 Region Association: Upper MidWest 
|
Sure that's fine. Go for it.
|
| 76-914 |
 Mar 23 2016, 06:53 AM Mar 23 2016, 06:53 AM
Post
#555
|
|
Repeat Offender & Resident Subaru Antagonist           Group: Members Posts: 13,698 Joined: 23-January 09 From: Temecula, CA Member No.: 9,964 Region Association: Southern California 
|
Great progress Chris. So tell me, I've never used siliconed as a gasket. Is the proper technique to apply and tighten or apply, tighten some, let cure then complete the tightening. (IMG:style_emoticons/default/beerchug.gif)
|
| Andyrew |
 Mar 23 2016, 07:10 AM Mar 23 2016, 07:10 AM
Post
#556
|
|
Spooling.... Please wait           Group: Members Posts: 13,377 Joined: 20-January 03 From: Riverbank, Ca Member No.: 172 Region Association: Northern California 
|
The Audi factory manual for the oil pan says to torque the bolts to 5lbs the wait one hour and torque to 10lbs.
I did the same thing for all my other things I RTVed. Hopefully it works.... |
| Chris H. |
 Mar 23 2016, 07:12 AM Mar 23 2016, 07:12 AM
Post
#557
|
|
Senior Member     Group: Members Posts: 4,055 Joined: 2-January 03 From: Chicago 'burbs Member No.: 73 Region Association: Upper MidWest 
|
Yes that's it Kent. I'm gonna pick up some fresh RTV today since I'm out so I don't remember the exact timing but you apply the stuff, put the parts together but only tighten them a bit, then finish torquing when the stuff is almost completely set.
It'll work Andrew, believe it or not (I was skeptical). My oil pan has held up fine for 3 years. |
| ThePaintedMan |
 Mar 23 2016, 09:24 AM Mar 23 2016, 09:24 AM
Post
#558
|
|
Advanced Member     Group: Members Posts: 3,887 Joined: 6-September 11 From: St. Petersburg, FL Member No.: 13,527 Region Association: South East States 
|
That's good info guys. I was wondering what the factory procedure was with the RTV, as I had never used it on two machined surfaces before. I saw that the factory RTV was the orange stuff when I pulled my oil pump, however, I'm inclined to go with the black RTV - more oil resistant. I really like the grey/Hondabond/Yamabond, but it might be a little too thin for this application.
|
| Chris H. |
 Mar 23 2016, 09:37 AM Mar 23 2016, 09:37 AM
Post
#559
|
|
Senior Member     Group: Members Posts: 4,055 Joined: 2-January 03 From: Chicago 'burbs Member No.: 73 Region Association: Upper MidWest 
|
That's good info guys. I was wondering what the factory procedure was with the RTV, as I had never used it on two machined surfaces before. I saw that the factory RTV was the orange stuff when I pulled my oil pump, however, I'm inclined to go with the black RTV - more oil resistant. I really like the grey/Hondabond/Yamabond, but it might be a little too thin for this application. Yes I went with the black on my oil pan George. Might use it on this too. |
| Sleepin |
 Mar 23 2016, 09:44 AM Mar 23 2016, 09:44 AM
Post
#560
|
|
Advanced Member     Group: Members Posts: 3,647 Joined: 20-November 07 From: Grand Junction, Co. Member No.: 8,357 Region Association: Rocky Mountains |
|
| ThePaintedMan |
 Mar 23 2016, 09:55 AM Mar 23 2016, 09:55 AM
Post
#561
|
|
Advanced Member     Group: Members Posts: 3,887 Joined: 6-September 11 From: St. Petersburg, FL Member No.: 13,527 Region Association: South East States 
|
I do too. A great candidate for metal-metal seals, but not sure with the case halve parting lines and other irregularities in machining, it might not be a good candidate here. If the factory orange RTV lasted 20 years, I bet the black RTV will be just fine.
|
| Chris H. |
 Mar 23 2016, 10:53 AM Mar 23 2016, 10:53 AM
Post
#562
|
|
Senior Member     Group: Members Posts: 4,055 Joined: 2-January 03 From: Chicago 'burbs Member No.: 73 Region Association: Upper MidWest 
|
....If the factory orange RTV lasted 20 years.... Let's call in 19... (IMG:style_emoticons/default/lol-2.gif) ..ah just kidding I know exactly what you're saying. The oil pump was still really stuck to the motor. When I took the bolts off it didn't budge at all. Had to carefully pry it a bit. And BTW the oil pump o-ring and seal you need do come in that kit I sent the info on...the mega-every-seal-kit. |
| 76-914 |
 Mar 23 2016, 03:10 PM Mar 23 2016, 03:10 PM
Post
#563
|
|
Repeat Offender & Resident Subaru Antagonist           Group: Members Posts: 13,698 Joined: 23-January 09 From: Temecula, CA Member No.: 9,964 Region Association: Southern California 
|
If you store your tube of silicone in the fridge it will keep for 2 years or more. (IMG:style_emoticons/default/beerchug.gif)
|
| mgp4591 |
 Mar 23 2016, 03:48 PM Mar 23 2016, 03:48 PM
Post
#564
|
|
914 Guru      Group: Members Posts: 5,609 Joined: 1-August 12 From: Salt Lake City Ut Member No.: 14,748 Region Association: Intermountain Region 
|
On ALL applications involving aluminum to aluminum, i.e. oil pans, etc., we used Hondabond exclusively according to the manuals and never had a leak. With the oil pans, we'd use a bead and let it set up 15 minutes before installation - I don't think I'd use a bead on the oil pump though. A light skim of no more than 1/16th inch would probably work, maybe a tad thicker. Let it set up a bit til it's sticky/hard, them bolt it in but make sure to avoid getting too close to the inlet/outlet holes. Should work fine! Just make sure all surfaces are clean and dry with brake kleen and a dry cloth.
|
  |
1 User(s) are reading this topic (1 Guests and 0 Anonymous Users)
0 Members:

|
Lo-Fi Version | Time is now: 21st April 2025 - 05:25 AM |
Invision Power Board
v9.1.4 © 2025 IPS, Inc.


