|
|

|
Porsche, and the Porsche crest are registered trademarks of Dr. Ing. h.c. F. Porsche AG.
This site is not affiliated with Porsche in any way. Its only purpose is to provide an online forum for car enthusiasts. All other trademarks are property of their respective owners. |
|
|
  |
| Chris H. |
 Mar 23 2016, 04:02 PM Mar 23 2016, 04:02 PM
Post
#565
|
|
Senior Member     Group: Members Posts: 4,055 Joined: 2-January 03 From: Chicago 'burbs Member No.: 73 Region Association: Upper MidWest 
|
If you store your tube of silicone in the fridge it will keep for 2 years or more. (IMG:style_emoticons/default/beerchug.gif) Yeah my tube is older but that's good to know for next time. Might replace my oil pan someday. What's this Hondabond you guys speak of? Never tried it. Probably stick with RTV since that was OEM but good to know. |
| mgp4591 |
 Mar 23 2016, 04:12 PM Mar 23 2016, 04:12 PM
Post
#566
|
|
914 Guru      Group: Members Posts: 5,609 Joined: 1-August 12 From: Salt Lake City Ut Member No.: 14,748 Region Association: Intermountain Region 
|
It's specially made for bonds with aluminum. It's stickier and sets up differently than RTV, has more consistency to it also like it's got a fibrous matrix to it. I've never had it fail but it's only available at dealers or so I understand. If RTV is OE, I'd go with their brand of it.
|
| ThePaintedMan |
 Mar 23 2016, 05:07 PM Mar 23 2016, 05:07 PM
Post
#567
|
|
Advanced Member     Group: Members Posts: 3,887 Joined: 6-September 11 From: St. Petersburg, FL Member No.: 13,527 Region Association: South East States 
|
This has turned out to be one of the most informative threads ever! Thanks for the info. Chris - Permatex Grey is darn close to Hondabond/Yamabond and intended for similar uses.
|
| Chris H. |
 Mar 23 2016, 05:28 PM Mar 23 2016, 05:28 PM
Post
#568
|
|
Senior Member     Group: Members Posts: 4,055 Joined: 2-January 03 From: Chicago 'burbs Member No.: 73 Region Association: Upper MidWest 
|
This has turned out to be one of the most informative threads ever! Thanks for the info. Chris - Permatex Grey is darn close to Hondabond/Yamabond and intended for similar uses. You going with grey George? Might be a good call. Just looked at it. This? Ultra Grey Great info guys. Hey we're getting pretty excited about silicone gasketing material (IMG:style_emoticons/default/biggrin.gif) . |
| 76-914 |
 Mar 24 2016, 07:40 AM Mar 24 2016, 07:40 AM
Post
#569
|
|
Repeat Offender & Resident Subaru Antagonist           Group: Members Posts: 13,698 Joined: 23-January 09 From: Temecula, CA Member No.: 9,964 Region Association: Southern California 
|
Back to the cam sensor; What change can you expect after it is replaced? (IMG:style_emoticons/default/popcorn[1].gif) Was it performing on a sub par level with only one sensor working? (IMG:style_emoticons/default/beerchug.gif)
|
| 914forme |
 Mar 24 2016, 08:12 AM Mar 24 2016, 08:12 AM
Post
#570
|
|
Times a wastin', get wrenchin'!     Group: Members Posts: 3,896 Joined: 24-July 04 From: Dayton, Ohio Member No.: 2,388 Region Association: None 
|
This has turned out to be one of the most informative threads ever! Thanks for the info. Chris - Permatex Grey is darn close to Hondabond/Yamabond and intended for similar uses. You going with grey George? Might be a good call. Just looked at it. This? Ultra Grey Great info guys. Hey we're getting pretty excited about silicone gasketing material (IMG:style_emoticons/default/biggrin.gif) . Yes, i have only used Yamabond and Mercrusier Bellows Cement. You need to glue a piece of hose to metal, and never have a leak Bellows Cement will do just that. Do it fast, it is not designed to dillydally around with! Yamabond, is great stuff, easily sourced at your local Motorcycle dealer or on Amazon. (IMG:style_emoticons/default/confused24.gif) lots of choice in the Yamabond range I normally use 4, that being said is that if your pieces have wide gaps the 6b works wonders. One thing to note they out gas a lot, so you might want to work with some ventilation. Now that we are heading out of winter this is much less of a problem. |
| Chris H. |
 Mar 24 2016, 09:20 AM Mar 24 2016, 09:20 AM
Post
#571
|
|
Senior Member     Group: Members Posts: 4,055 Joined: 2-January 03 From: Chicago 'burbs Member No.: 73 Region Association: Upper MidWest 
|
Back to the cam sensor; What change can you expect after it is replaced? (IMG:style_emoticons/default/popcorn[1].gif) Was it performing on a sub par level with only one sensor working? (IMG:style_emoticons/default/beerchug.gif) Yes it was performing sub-par-ly. And I think when I hooked up the VSS it flushed out the problem. So thanks Kent! I hooked mine up because you did. Bet she'll be even faster when I get this fixed I THINK the symptoms were due to cam sensor #1...but...maybe not. Technically the car should not start if #1 is dead, but my hunch is that it was barely working and I broke it fully when I tried to remove it. Did some searches on the SVX sites and one person mentioned the exact symptoms I was having, which I thought were more than one problem, which were: - occasional backfiring on hard acceleration - hard starting - that whole hesitation thing I described before. Since the crank and cam sensors set the timing, this makes a lot of sense now. Hopefully this is it! I ordered a couple of sensors, they should be here in a day or two. Didn't get a chance to put the oil pump back in but did get the grey RTV last night. |
| motoTrooper |
 Apr 12 2016, 10:25 AM Apr 12 2016, 10:25 AM
Post
#572
|
|
Newbie  Group: Members Posts: 39 Joined: 18-March 16 From: Palo Alto Member No.: 19,774 Region Association: None |
Hey Chris, hope you're well and progressing on your build. Here's the link to my Lancia if you want a quick read. Good news is I do have the space for the EG33, thanks again for the measurements!
http://xwebforums.org/showthread.php?t=28514 |
| rhodyguy |
 Apr 12 2016, 11:21 AM Apr 12 2016, 11:21 AM
Post
#573
|
|
Chimp Sanctuary NW. Check it out.                Group: Members Posts: 22,237 Joined: 2-March 03 From: Orion's Bell. The BELL! Member No.: 378 Region Association: Galt's Gulch |
What? Rusty 914s aren't enough for you? That is some scary stuff going on in the interior.
|
| motoTrooper |
 Apr 12 2016, 04:21 PM Apr 12 2016, 04:21 PM
Post
#574
|
|
Newbie  Group: Members Posts: 39 Joined: 18-March 16 From: Palo Alto Member No.: 19,774 Region Association: None |
Seems to be a rite of passage for Scorpion ownership. Still I'd rather be doing this (IMG:style_emoticons/default/welder.gif) than doing this...
(IMG:style_emoticons/default/sheeplove.gif) Maybe see how I'm doing in a year and ask me if I want to change my mind. p.s. Some of these smilies are out there. End thread hijack. |
| Chris H. |
 Apr 12 2016, 05:56 PM Apr 12 2016, 05:56 PM
Post
#575
|
|
Senior Member     Group: Members Posts: 4,055 Joined: 2-January 03 From: Chicago 'burbs Member No.: 73 Region Association: Upper MidWest 
|
Looks like a 914 barn find...scary until you clean it up a bit, then not that bad once you vacuum the mouse crap out. Nice Cromodoros! That engine bay is set up for a transverse layout. What about a Lotus (Toyota V6) style setup? Could use a lot of MR2 parts most likely.
|
| mgp4591 |
 Apr 12 2016, 07:58 PM Apr 12 2016, 07:58 PM
Post
#576
|
|
914 Guru      Group: Members Posts: 5,609 Joined: 1-August 12 From: Salt Lake City Ut Member No.: 14,748 Region Association: Intermountain Region 
|
Looks like a 914 barn find...scary until you clean it up a bit, then not that bad once you vacuum the mouse crap out. Nice Cromodoros! That engine bay is set up for a transverse layout. What about a Lotus (Toyota V6) style setup? Could use a lot of MR2 parts most likely. That's what I was seeing when he first posted - a Toyota or Honda transverse setup would be the best, easiest, and most balanced setup for that chassis.... (IMG:style_emoticons/default/idea.gif) |
| 76-914 |
 Apr 13 2016, 09:06 AM Apr 13 2016, 09:06 AM
Post
#577
|
|
Repeat Offender & Resident Subaru Antagonist           Group: Members Posts: 13,698 Joined: 23-January 09 From: Temecula, CA Member No.: 9,964 Region Association: Southern California 
|
Hey Chris, any updates or pic's? (IMG:style_emoticons/default/popcorn[1].gif)
|
| Chris H. |
 Apr 13 2016, 11:08 AM Apr 13 2016, 11:08 AM
Post
#578
|
|
Senior Member     Group: Members Posts: 4,055 Joined: 2-January 03 From: Chicago 'burbs Member No.: 73 Region Association: Upper MidWest 
|
Yes sir. I got the oil pump resealed. Don't think it was really leaking as much. It was the front main seal primarily but hey...you can't leave 20 year old RTV on there when it requires removal of the timing belt to redo.
No pics of that since it's a messy job that requires both hands, but here is the diagram from the manual. 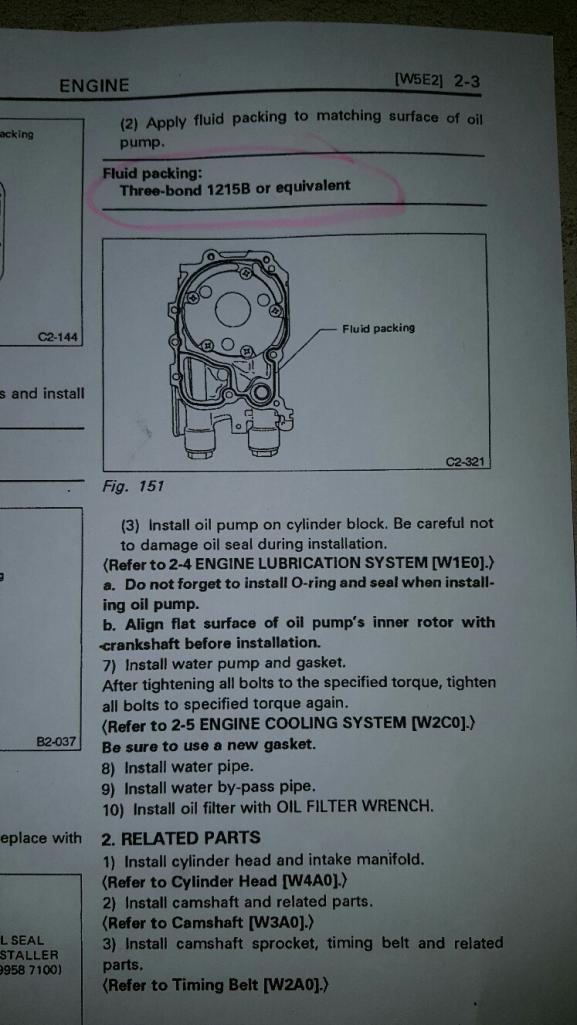 Just follow that line with the RTV and you're good. And then the timing belt reinstall. This is one of the easiest TB to reinstall...The most important thing to remember is to line up the marks before you remove it. There is an arrow on each cam sprocket. They both must be pointing UP. There is a notch on the outside edge that lines up with one on the black plastic piece behind it. 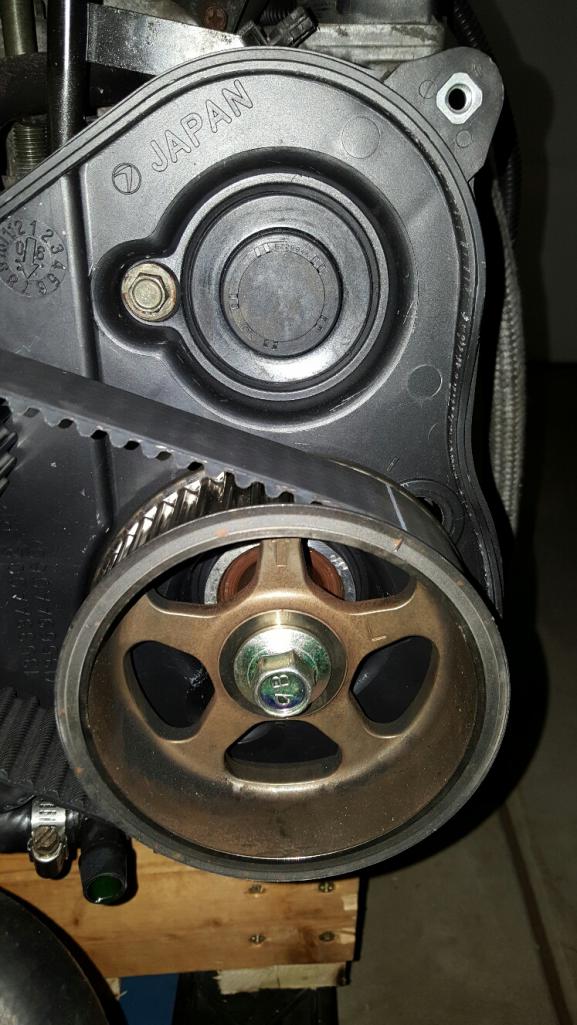 At the same time the lines on the crank sprocket and the notch above it must line up. 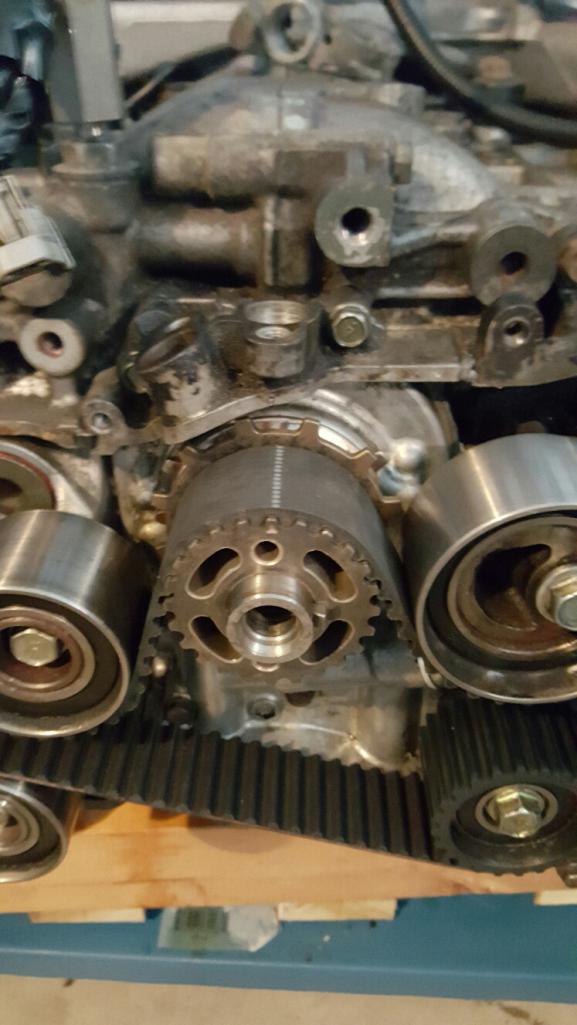 If you take it off that way it most likely won't move. For reinstalling, first take the belt tensioner off, compress the tensioner and stick a small allen key in the holes keeping the pin in the middle from moving forward. Unfortunately I had to redo mine several times last time and the back side snapped off, so I added some JB Weld to the end. 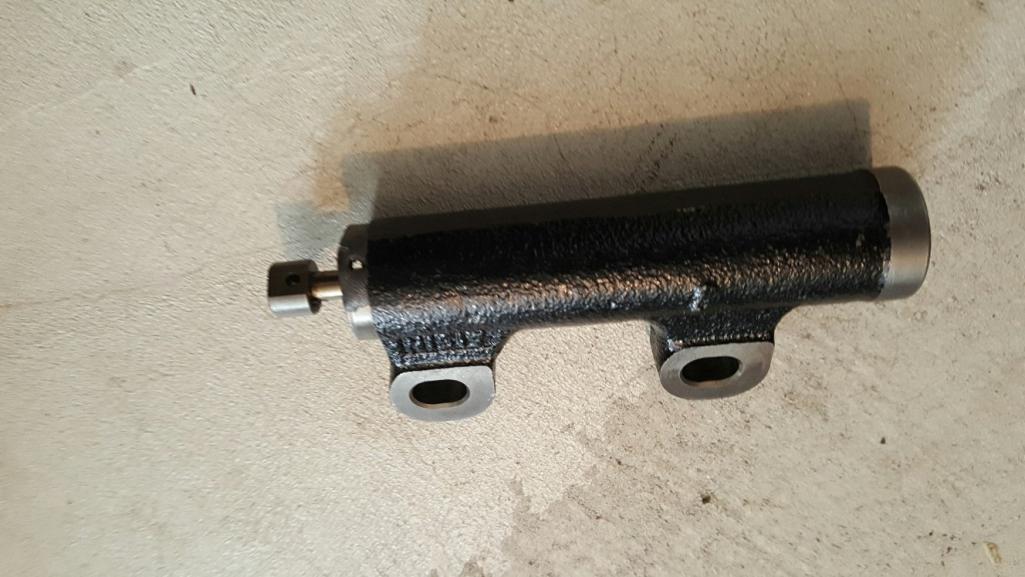 It worked just long enough to reinstall the belt then crumbled off. I could drill new holes but it seemed to hold OK with just one and the JB Weld subsitute. Go ahead and bolt the tensioner back on but don't tighten it down. Putting the belt on can be fiddly, so get a Harbor Freight $5 wood clamp and clamp the left side JUST ENOUGH to hold it in place, lining the white line up with the marks on the cam and plastic piece. 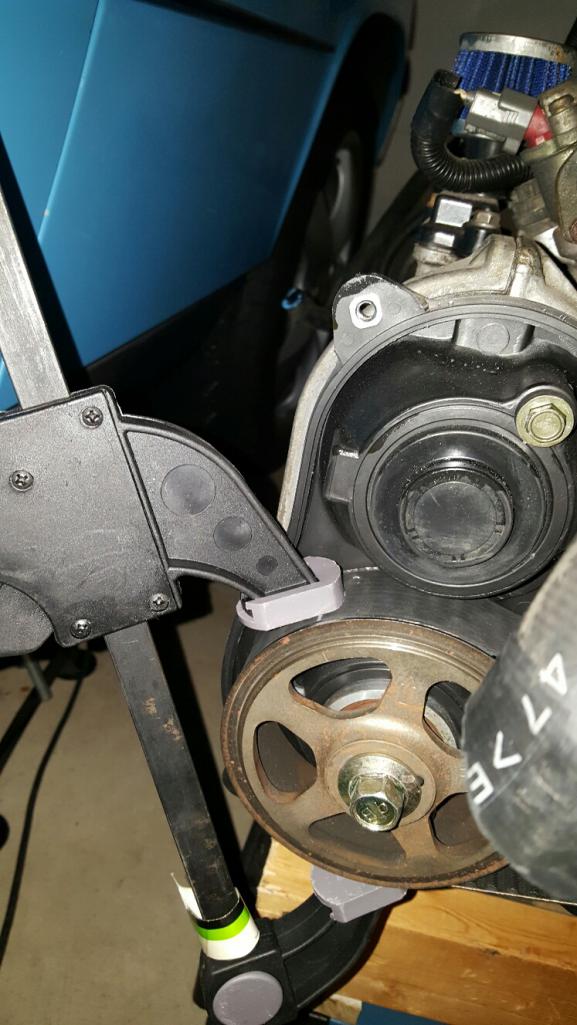 That keeps it from repeatedly flopping off, skipping notches, and keeps you from swearing a lot. You most likely won't be able to get the belt stretched over both cam sprockets, so remove one of the non-geared idlers and line up the belt. 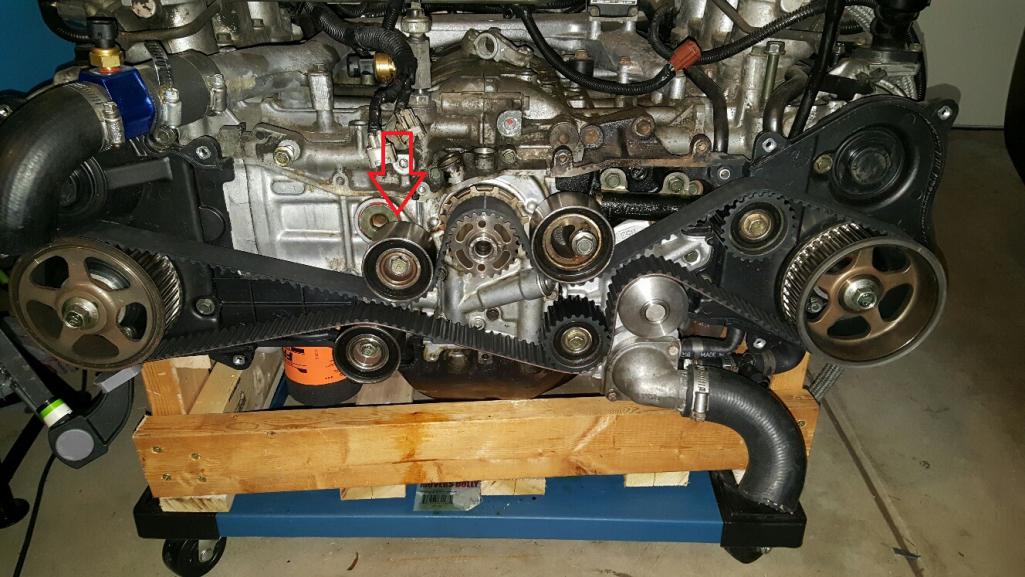 The dotted line goes on the crank sprocket marks, and there is another solid white line for the right bank. Reinstall the idler pulley, double check your work, un-clamp the left side, triple check your work, make sure the belt is on all the teeth with no skips, then push the tensioner to the left and tighten it to spec (I think 35-40 lbs). Check the belt again...do a drum roll....and pull the pin out. 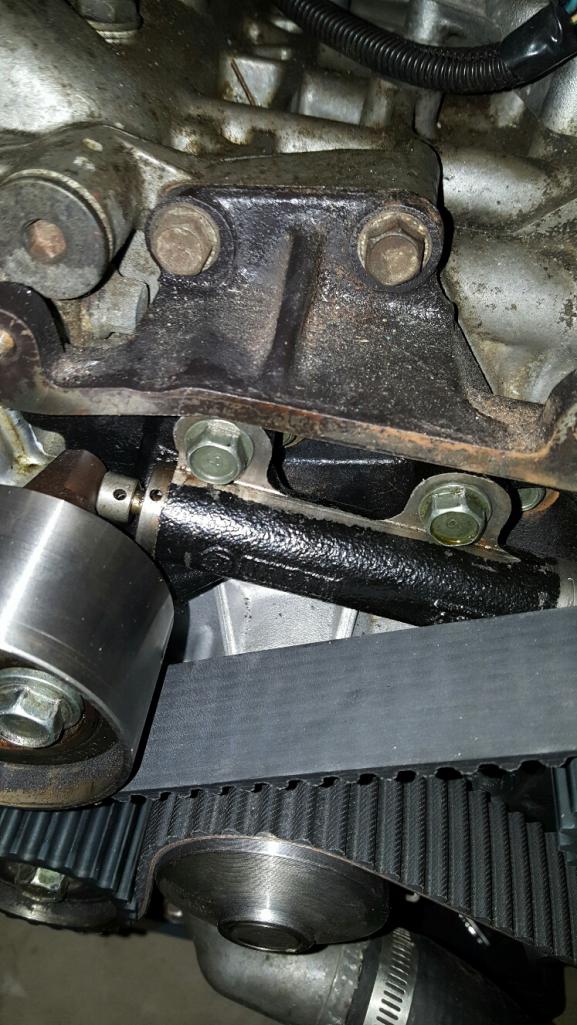 You are done. Put the covers back on. Say "Yeah". High five yourself. 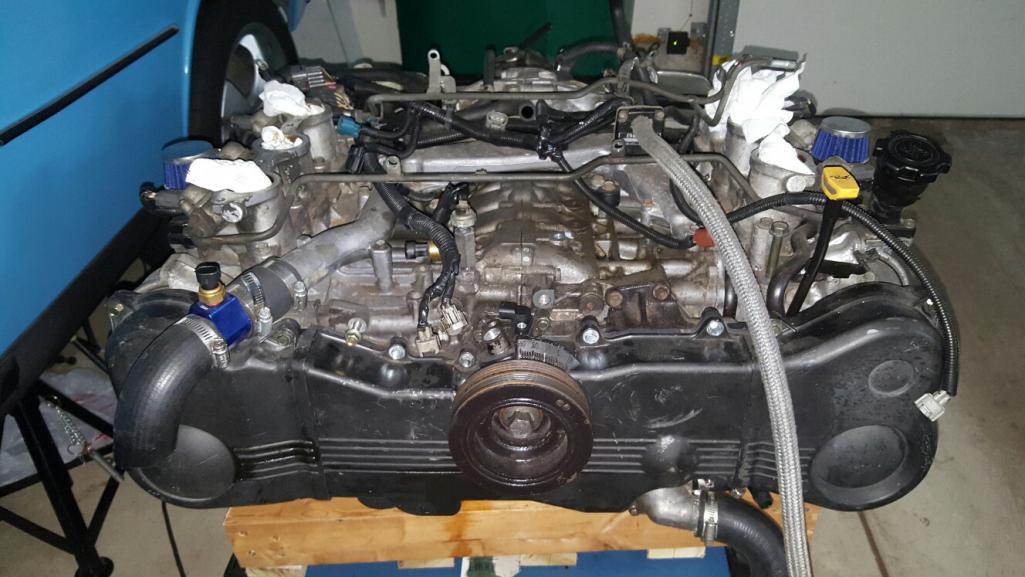 |
| Chris H. |
 Apr 13 2016, 11:56 AM Apr 13 2016, 11:56 AM
Post
#579
|
|
Senior Member     Group: Members Posts: 4,055 Joined: 2-January 03 From: Chicago 'burbs Member No.: 73 Region Association: Upper MidWest 
|
|
| 76-914 |
 Apr 13 2016, 07:11 PM Apr 13 2016, 07:11 PM
Post
#580
|
|
Repeat Offender & Resident Subaru Antagonist           Group: Members Posts: 13,698 Joined: 23-January 09 From: Temecula, CA Member No.: 9,964 Region Association: Southern California 
|
Wow, you got a lot done. Have you ever counted the number of times you've dropped the drive train. (IMG:style_emoticons/default/lol-2.gif) A 1/2 or 3/4 wire cup brush will do 98% of those areas but not the corners. Gunk engine cleaner in the corners?
|
| Andyrew |
 Apr 13 2016, 07:47 PM Apr 13 2016, 07:47 PM
Post
#581
|
|
Spooling.... Please wait           Group: Members Posts: 13,377 Joined: 20-January 03 From: Riverbank, Ca Member No.: 172 Region Association: Northern California 
|
Question for the engine cleaning gurus...is there something I can get to attach to a drill to clean the crevices of this engine? There are a lot of little pockets that need to be scrubbed out a little better. 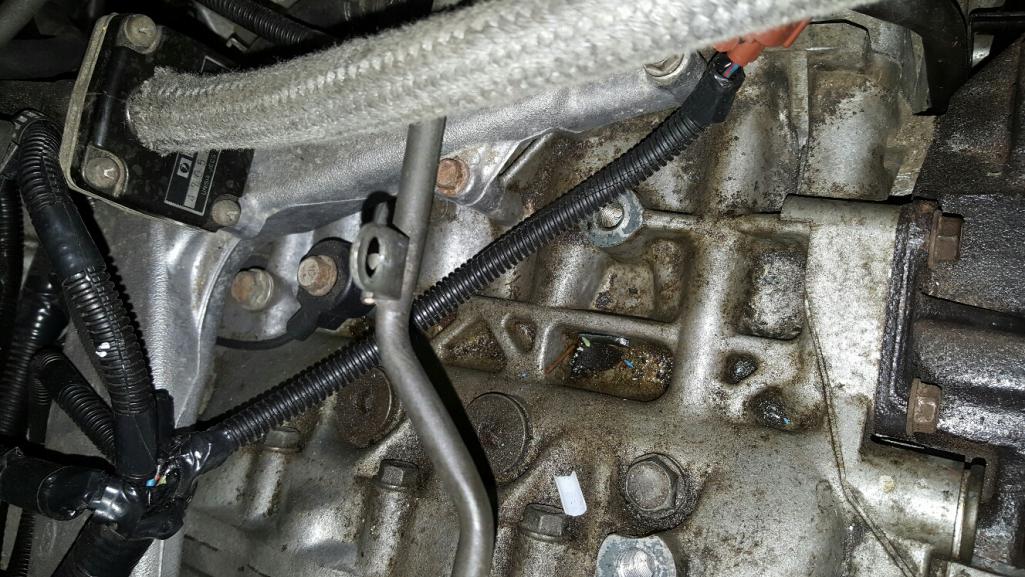 Looks worse than it is in this pic but you get the idea. I used a pressure washer for that kind of stuff. (IMG:style_emoticons/default/biggrin.gif) |
| Chris H. |
 Apr 13 2016, 09:42 PM Apr 13 2016, 09:42 PM
Post
#582
|
|
Senior Member     Group: Members Posts: 4,055 Joined: 2-January 03 From: Chicago 'burbs Member No.: 73 Region Association: Upper MidWest 
|
Yeah thanks Kent. Such small little sections. Was hoping there was some sort of scrubber pad I could mount on a drill. Looks like the old fashioned way...
Andrew...yeah the little bit of water I used last time seemed to find its way into my ^&^* crank sensor! (IMG:style_emoticons/default/biggrin.gif) . Not the cheap one of course...the one-of-a-kind $300 one. |
| 76-914 |
 Apr 14 2016, 08:08 AM Apr 14 2016, 08:08 AM
Post
#583
|
|
Repeat Offender & Resident Subaru Antagonist           Group: Members Posts: 13,698 Joined: 23-January 09 From: Temecula, CA Member No.: 9,964 Region Association: Southern California 
|
They do mount in a drill. https://www.waresdirect.com/products/commer...CFc5hfgod1JUDFA
|
| rhodyguy |
 Apr 14 2016, 08:12 AM Apr 14 2016, 08:12 AM
Post
#584
|
|
Chimp Sanctuary NW. Check it out.                Group: Members Posts: 22,237 Joined: 2-March 03 From: Orion's Bell. The BELL! Member No.: 378 Region Association: Galt's Gulch |
The ones pictured in the link are very agressive . You can find similar brushes with brass bristles.
|
  |
1 User(s) are reading this topic (1 Guests and 0 Anonymous Users)
0 Members:

|
Lo-Fi Version | Time is now: 21st April 2025 - 09:10 AM |
Invision Power Board
v9.1.4 © 2025 IPS, Inc.


