|
|

|
Porsche, and the Porsche crest are registered trademarks of Dr. Ing. h.c. F. Porsche AG.
This site is not affiliated with Porsche in any way. Its only purpose is to provide an online forum for car enthusiasts. All other trademarks are property of their respective owners. |
|
|
  |
| Andyrew |
 Apr 13 2016, 07:47 PM Apr 13 2016, 07:47 PM
Post
#581
|
|
Spooling.... Please wait           Group: Members Posts: 13,377 Joined: 20-January 03 From: Riverbank, Ca Member No.: 172 Region Association: Northern California 
|
Question for the engine cleaning gurus...is there something I can get to attach to a drill to clean the crevices of this engine? There are a lot of little pockets that need to be scrubbed out a little better. Looks worse than it is in this pic but you get the idea. I used a pressure washer for that kind of stuff. (IMG:style_emoticons/default/biggrin.gif) |
| Chris H. |
 Apr 13 2016, 09:42 PM Apr 13 2016, 09:42 PM
Post
#582
|
|
Senior Member     Group: Members Posts: 4,054 Joined: 2-January 03 From: Chicago 'burbs Member No.: 73 Region Association: Upper MidWest 
|
Yeah thanks Kent. Such small little sections. Was hoping there was some sort of scrubber pad I could mount on a drill. Looks like the old fashioned way...
Andrew...yeah the little bit of water I used last time seemed to find its way into my ^&^* crank sensor! (IMG:style_emoticons/default/biggrin.gif) . Not the cheap one of course...the one-of-a-kind $300 one. |
| 76-914 |
 Apr 14 2016, 08:08 AM Apr 14 2016, 08:08 AM
Post
#583
|
|
Repeat Offender & Resident Subaru Antagonist           Group: Members Posts: 13,698 Joined: 23-January 09 From: Temecula, CA Member No.: 9,964 Region Association: Southern California 
|
They do mount in a drill. https://www.waresdirect.com/products/commer...CFc5hfgod1JUDFA
|
| rhodyguy |
 Apr 14 2016, 08:12 AM Apr 14 2016, 08:12 AM
Post
#584
|
|
Chimp Sanctuary NW. Check it out.                Group: Members Posts: 22,237 Joined: 2-March 03 From: Orion's Bell. The BELL! Member No.: 378 Region Association: Galt's Gulch |
The ones pictured in the link are very agressive . You can find similar brushes with brass bristles.
|
| 76-914 |
 Apr 14 2016, 08:54 AM Apr 14 2016, 08:54 AM
Post
#585
|
|
Repeat Offender & Resident Subaru Antagonist           Group: Members Posts: 13,698 Joined: 23-January 09 From: Temecula, CA Member No.: 9,964 Region Association: Southern California 
|
It shouldn't be (IMG:style_emoticons/default/confused24.gif) ?? It's SS and not the "wire rope" style. I would caution that you keep the rpm below 1500 rpm. They will shoot out little wire darts if run too fast. Just don't use a Steel brush on aluminum.
|
| motoTrooper |
 Apr 14 2016, 10:12 AM Apr 14 2016, 10:12 AM
Post
#586
|
|
Newbie  Group: Members Posts: 39 Joined: 18-March 16 From: Palo Alto Member No.: 19,774 Region Association: None |
Maybe a dremel with a small wire brush attachment? You can sleeve it with a bit of shrinkwrap to keep the wire under better control and use low rpms.
|
| mepstein |
 Apr 14 2016, 10:21 AM Apr 14 2016, 10:21 AM
Post
#587
|
|
914-6 GT in waiting                Group: Members Posts: 19,843 Joined: 19-September 09 From: Landenberg, PA/Wilmington, DE Member No.: 10,825 Region Association: MidAtlantic Region 
|
Brake clean and a brush. The brake clean does most of the work.
|
| Chris H. |
 Apr 15 2016, 07:47 AM Apr 15 2016, 07:47 AM
Post
#588
|
|
Senior Member     Group: Members Posts: 4,054 Joined: 2-January 03 From: Chicago 'burbs Member No.: 73 Region Association: Upper MidWest 
|
Thanks guys. I was thinking of a 3m green scotch brite pad material in a bullet-ish shape that could be used with a drill linke one of those rim cleaner/buffers but I guess soft metal brushes and cleaner will have to do.
Feel free to invent that green pad thing and I'll test it (IMG:style_emoticons/default/biggrin.gif) . |
| mgp4591 |
 Apr 15 2016, 01:57 PM Apr 15 2016, 01:57 PM
Post
#589
|
|
914 Guru      Group: Members Posts: 5,608 Joined: 1-August 12 From: Salt Lake City Ut Member No.: 14,748 Region Association: Intermountain Region 
|
Brake clean and a brush. The brake clean does most of the work. (IMG:style_emoticons/default/agree.gif) Brake cleaner is amazingly versatile and does a helluva job. With the supplied spray head tube, it reaches everywhere and dissolves everything. A soft brush or sponge should take care of everything else that you can't take off by scraping or brushing. Take off all the thick stuff first, then use the spray for everything else. It works! |
| Chris H. |
 May 19 2016, 08:39 PM May 19 2016, 08:39 PM
Post
#590
|
|
Senior Member     Group: Members Posts: 4,054 Joined: 2-January 03 From: Chicago 'burbs Member No.: 73 Region Association: Upper MidWest 
|
I'm back at it. Kent didn't even have to (IMG:style_emoticons/default/poke.gif) me this time! My kid graduated from high school last weekend so my schedule is getting much more open.
Cracked into my goodies from Bob's...there's gotta be 10 coils in that pile along with the rest of the stuff. The smell of old gas is dominating the air for now...but I'm working on that. Just a small amount in the fuel rails is all it takes. That stuff was sitting at his house for a while. 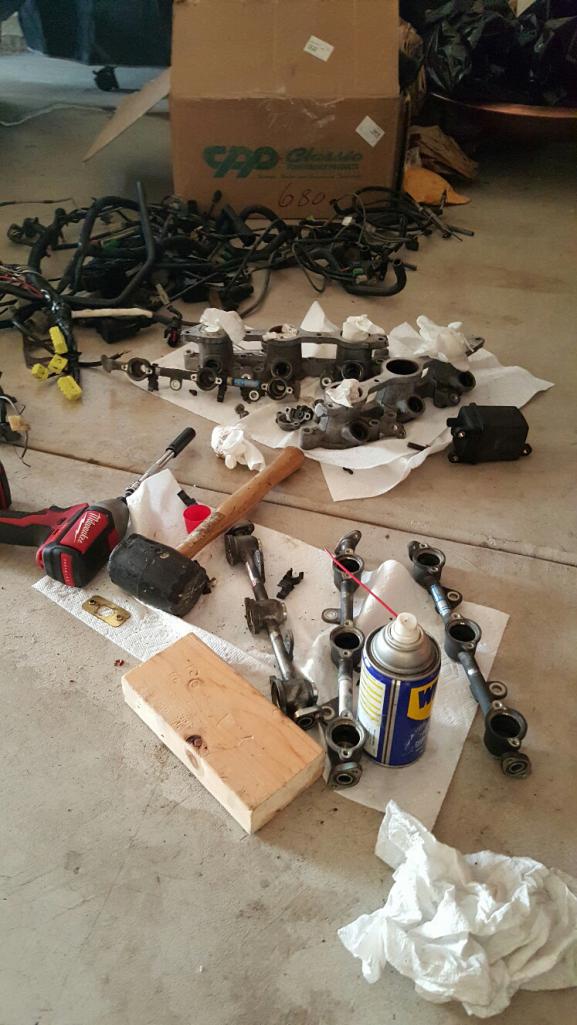 2 sets of injectors! 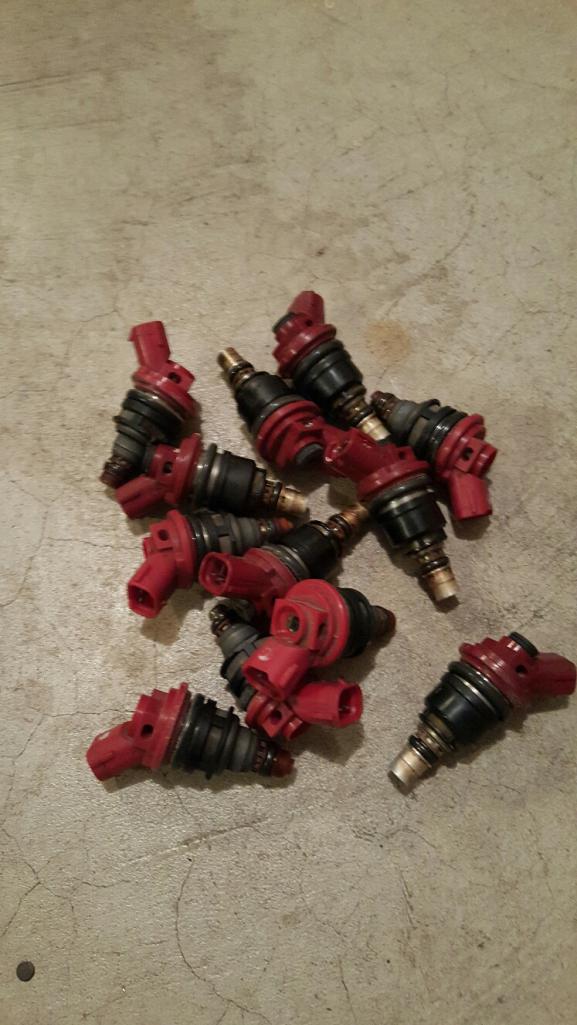 Here's a riddle for you...the larger, more substantial (temporarily smellier) injectors came from Bob's car. The all plastic smaller wimpy ones came from mine. 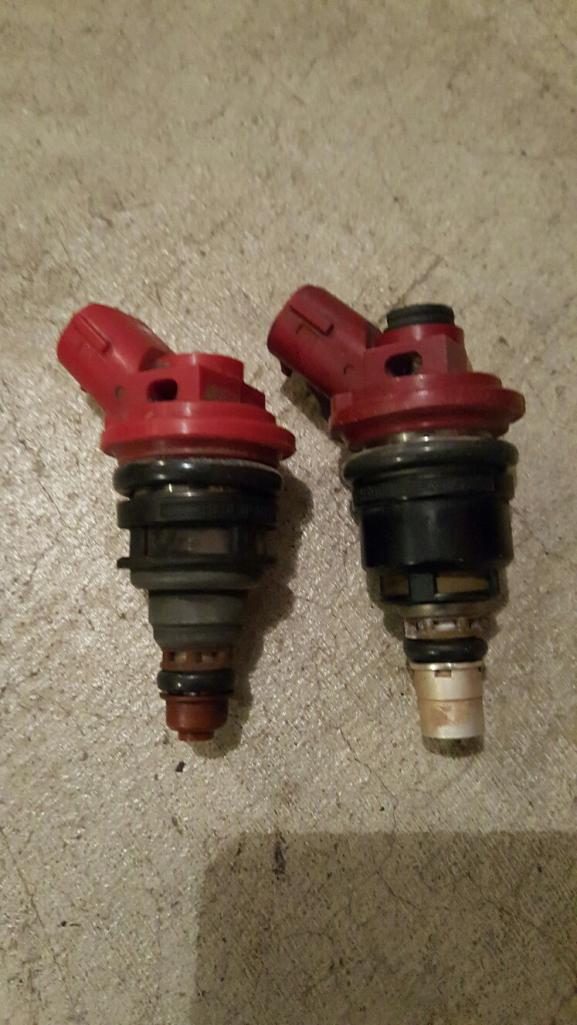 My car ran fine with the smaller ones. I'm thinking I'll use the ones from Bob's car though. They have a larger metal tip and when I search the OEM part number (16611AA310) the pic looks like the bigger ones. Don't know for sure if the later cars used the more plastic-y ones or if these were replacements. Anyone hate the idea or am I good? I'll send the injectors to Mr Injector for a cleaning and re-sealing. BTW the plastic ones' pintle caps (plastic piece at the end) were VERY brittle. 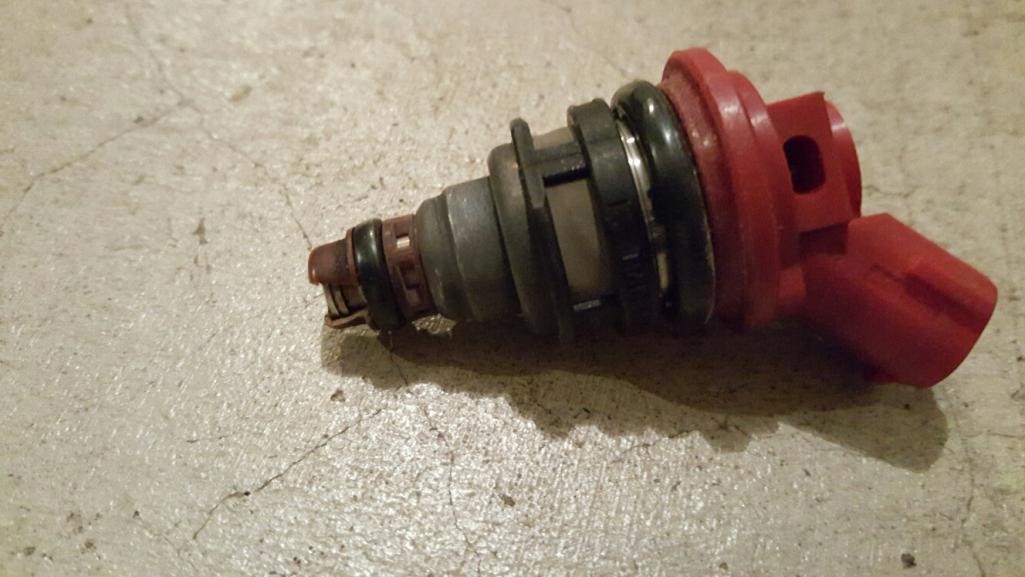 Three of them just crumbled off when I touched them. Mr Injector replaces those as part of the service. I might get both sets serviced, we'll see. Next up I'm cleaning up the engine and intake parts, getting ready to flip the intake. Back to the garage and I'll update later. |
| Chris H. |
 May 19 2016, 09:52 PM May 19 2016, 09:52 PM
Post
#591
|
|
Senior Member     Group: Members Posts: 4,054 Joined: 2-January 03 From: Chicago 'burbs Member No.: 73 Region Association: Upper MidWest 
|
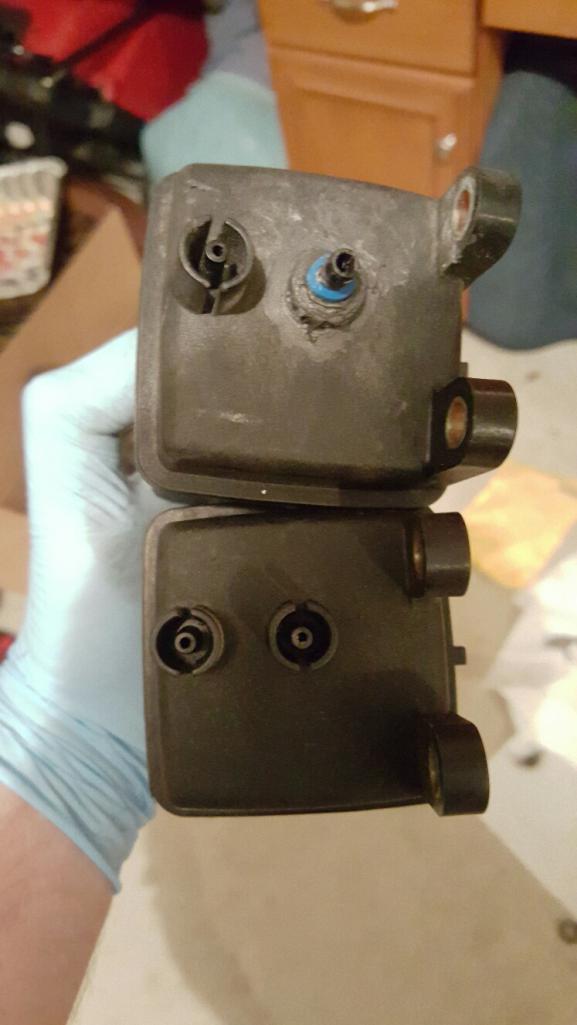
This is the vacuum canister that is attached to the underside of the intake. I had to JB Weld one of the tubes on mine. Now I can swap it!
 Here's a good example of Bob's skill level. You have to make a blockoff plate if you eliminate the EGR system. Mine is a piece of scrap metal. Bob of course pinched and perfectly welded the end of the original piece right down the center. Think I'll use his (IMG:style_emoticons/default/biggrin.gif) . 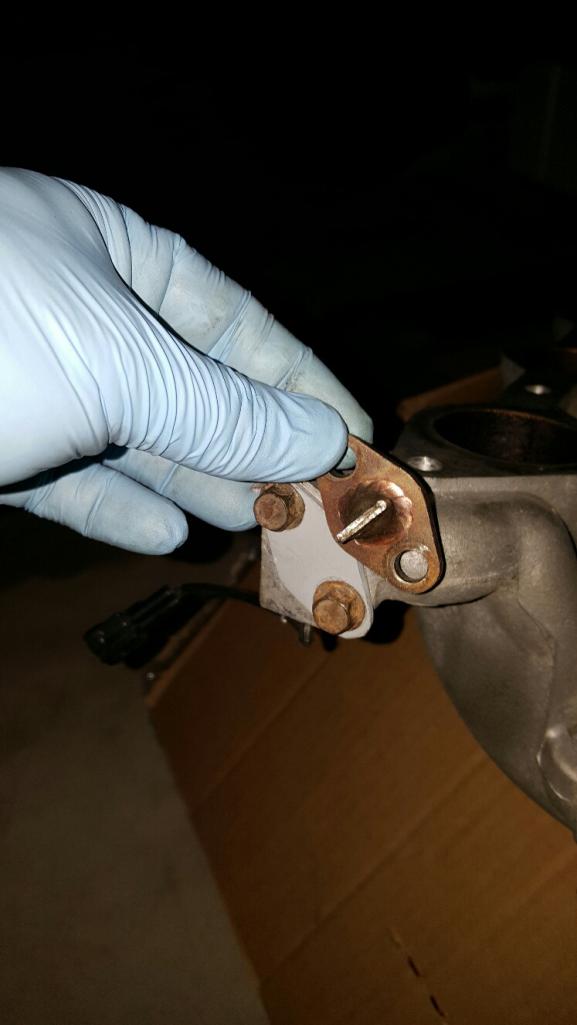 Air tight seal 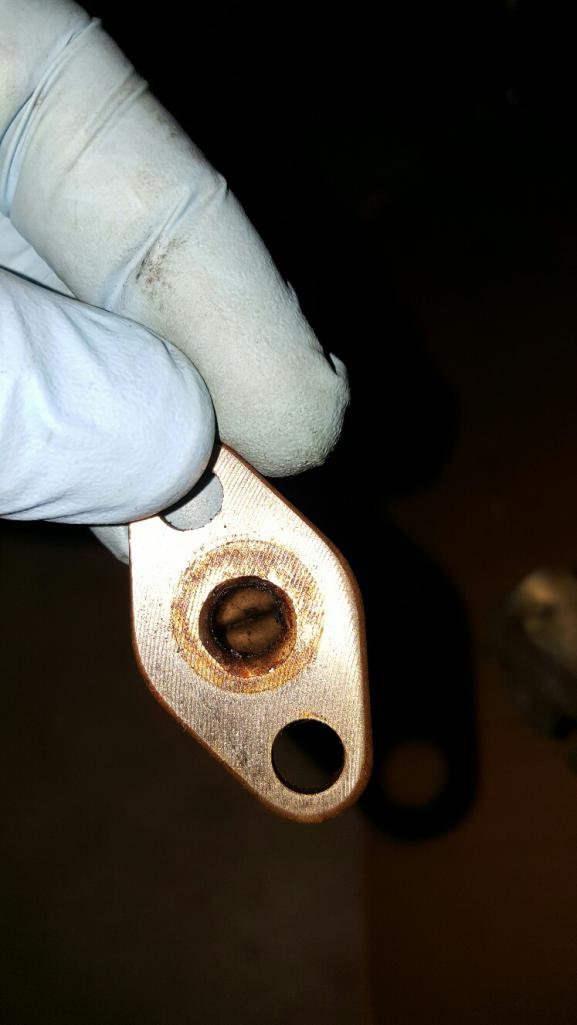 Next (when my dremel recharges) I'll be fixing a small problem that's a real PITA for me. This little nipple helps regulate the fuel tank pressure in the SVX. Not needed for the 914. 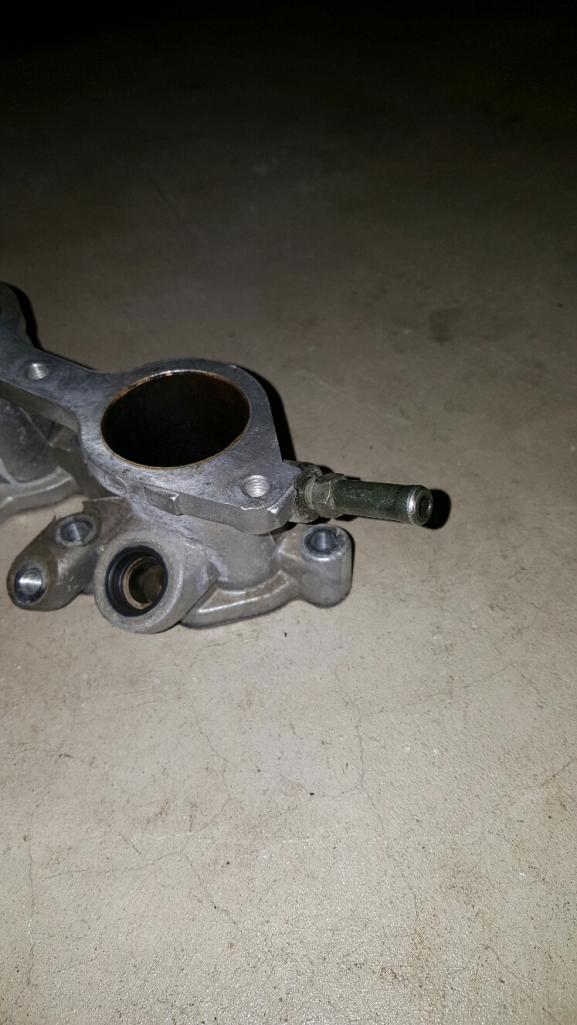 I left this on there in phase 1 and it really got in the way of things at the back. I'm planning to cut the nip off right past the nut and fill it with JBWeld. I have an extra one if anything happens but it should be fine. |
| Chris H. |
 May 20 2016, 07:45 AM May 20 2016, 07:45 AM
Post
#592
|
|
Senior Member     Group: Members Posts: 4,054 Joined: 2-January 03 From: Chicago 'burbs Member No.: 73 Region Association: Upper MidWest 
|
And now it's just a bolt (IMG:style_emoticons/default/biggrin.gif) .
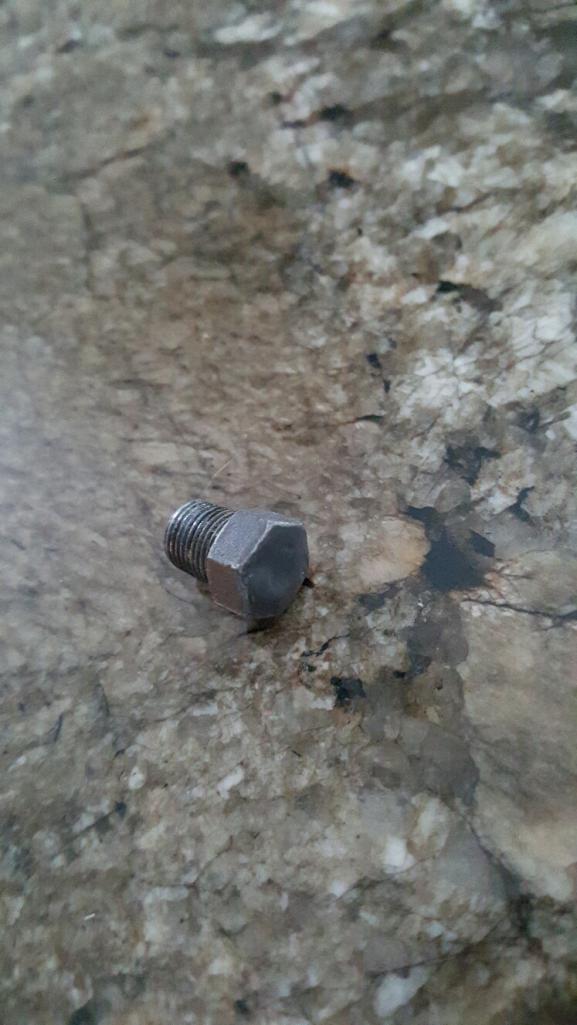 I tried looking for a bolt to fit into the hole but it's tapered and it's a strange size (I think M10x1.0). Since there can be NO leakage I didn't want to risk using something that might fail. I'll wait a week and this sucker will be solid. |
| ThePaintedMan |
 May 20 2016, 07:50 AM May 20 2016, 07:50 AM
Post
#593
|
|
Advanced Member     Group: Members Posts: 3,887 Joined: 6-September 11 From: St. Petersburg, FL Member No.: 13,527 Region Association: South East States 
|
Cool stuff Chris! Did you remove the injectors from the rails, or did Bob do that before you got them? I have not been successful at getting mine out and I'm really worried about breaking them.
|
| 76-914 |
 May 20 2016, 08:11 AM May 20 2016, 08:11 AM
Post
#594
|
|
Repeat Offender & Resident Subaru Antagonist           Group: Members Posts: 13,698 Joined: 23-January 09 From: Temecula, CA Member No.: 9,964 Region Association: Southern California 
|
I'm back at it. Kent didn't even have to (IMG:style_emoticons/default/poke.gif) me this time! My kid graduated from high school last weekend so my schedule is getting much more open. You cut it close. (IMG:style_emoticons/default/lol-2.gif) Glad to see your back on it. You need to start planning your first trip to an event in your car, now. Our trip to AZ was a good shake out run and I'm in the process of tweaking little things. Re-doing the exhaust for the 4th time. (IMG:style_emoticons/default/headbang.gif) I'll post after I have it nailed. Keep the pics coming. |
| Chris H. |
 May 20 2016, 08:48 AM May 20 2016, 08:48 AM
Post
#595
|
|
Senior Member     Group: Members Posts: 4,054 Joined: 2-January 03 From: Chicago 'burbs Member No.: 73 Region Association: Upper MidWest 
|
Cool stuff Chris! Did you remove the injectors from the rails, or did Bob do that before you got them? I have not been successful at getting mine out and I'm really worried about breaking them. I removed them and honestly they were a bitch to get out. They're in there so tight that I didn't know if they were keyed with a notch or not. They are not keyed, and technically rotate "freely". I sprayed a small amount of WD40 into crack between the injector and the rail underneath and that got them a little loose. The technical procedure is: - rotate injector 90 degrees so that the top is over either lip where the cover screws in - use a VERY WIDE screwdriver to pry the injector up (1/2") - if that doesn't work find a fairly soft surface, set the rail on it evenly and gently tap the rail a bit with a small rubber mallet. Here's a set of directions I found. Injector Removal Hey George what do your injectors look like? Bob's or mine? |
| ThePaintedMan |
 May 20 2016, 09:14 AM May 20 2016, 09:14 AM
Post
#596
|
|
Advanced Member     Group: Members Posts: 3,887 Joined: 6-September 11 From: St. Petersburg, FL Member No.: 13,527 Region Association: South East States 
|
Yeah, I tried the service procedure with no luck. Was super worried about breaking something. I'm thinking of building a little jig to grab them at the top, tighten a screw and pull them out, sort of like a mini 2-jaw puller. Since I haven't gotten them out, I don't know for sure, but they have the pintle caps on the bottom, so I think they're the smaller version.
|
| Chris H. |
 May 20 2016, 09:49 AM May 20 2016, 09:49 AM
Post
#597
|
|
Senior Member     Group: Members Posts: 4,054 Joined: 2-January 03 From: Chicago 'burbs Member No.: 73 Region Association: Upper MidWest 
|
Pintle cap should = smaller one. weird that Bob's are so much bigger!
|
| Chris H. |
 May 20 2016, 10:54 AM May 20 2016, 10:54 AM
Post
#598
|
|
Senior Member     Group: Members Posts: 4,054 Joined: 2-January 03 From: Chicago 'burbs Member No.: 73 Region Association: Upper MidWest 
|
Yeah so I'll just (IMG:style_emoticons/default/dead horse.gif) OK George (IMG:style_emoticons/default/biggrin.gif) ? So on Rockauto all of the injectors pictured for the SVX are Bob's style. I think either is fine but most likely ours have been replaced with cheaper ones. So that means unless one or more of his are bad we'll have some extras of the pintle cap variety. Good news for you !
|
| 914forme |
 May 20 2016, 11:02 PM May 20 2016, 11:02 PM
Post
#599
|
|
Times a wastin', get wrenchin'!     Group: Members Posts: 3,896 Joined: 24-July 04 From: Dayton, Ohio Member No.: 2,388 Region Association: None 
|
Keep it up or else I might beat you back on the road (IMG:style_emoticons/default/blink.gif) (IMG:style_emoticons/default/screwy.gif)
Don't worry that was the optimistic project manager in my head, he tends to over estimate the rate of work and severely underestimate the amount of time it will take. I have a bunch of parts I should send your way also, as I don't need them anymore. I just ordered up my new EFI system. It is an SDS, a little primitive compared to the MegaSquirt Pro or III. I finally decided to (IMG:style_emoticons/default/ar15.gif) as I have liked the design for a long time, and they do lots of EG33 work in aircraft. Yeah I don't have launch control, flat throttle shifting and a million other options. But If I wanted all that stuff, I would buy a new car. The 914 needs to have a certain basic raw feel to it, make it to nice and it becomes a Cayman! |
| Chris H. |
 May 30 2016, 09:46 AM May 30 2016, 09:46 AM
Post
#600
|
|
Senior Member     Group: Members Posts: 4,054 Joined: 2-January 03 From: Chicago 'burbs Member No.: 73 Region Association: Upper MidWest 
|
You just might beat me Steve. You're a welding madman.
Got a bunch of small stuff done which I will update, but working on flipping the intake now. Question for George (The Painted Man)... So when I put the intake in place backwards the ^*&^*ing (gosh darned) diaphragm for the induction control valve hits the coolant pipe. This keeps me from bolting the manifold down by about 1/2 inch or so on the left (passenger) side. 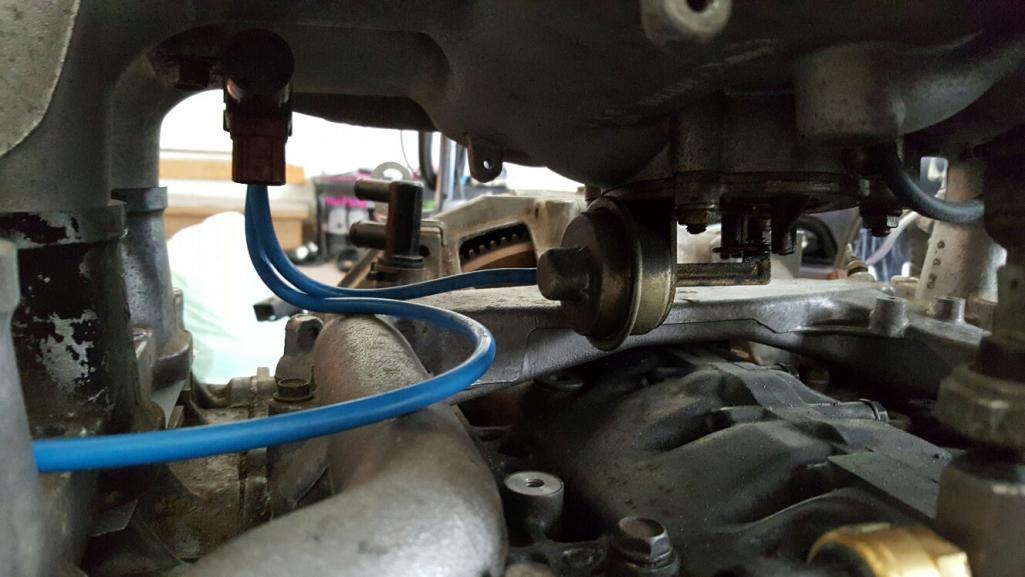 Just BARELY off! 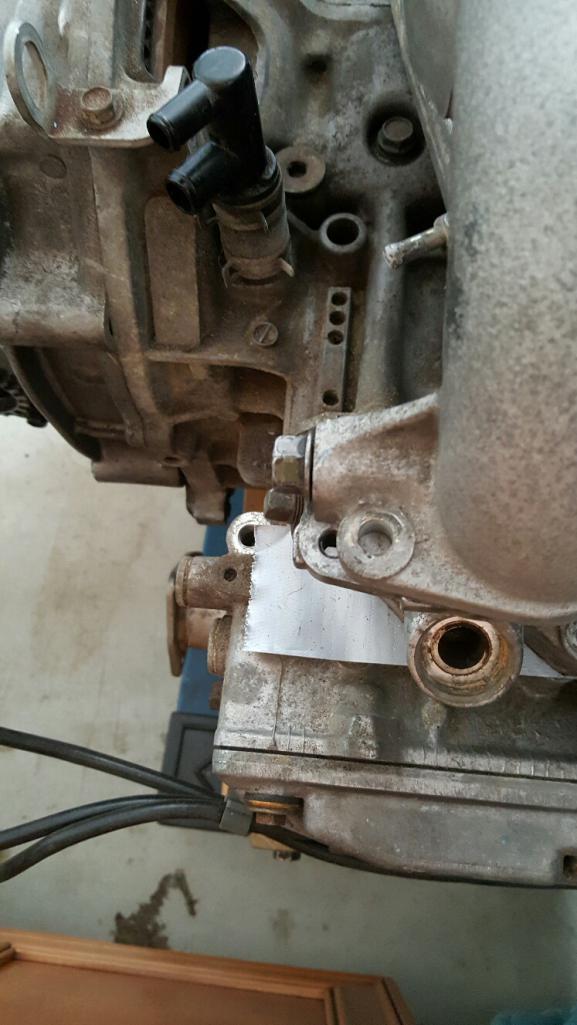 But it seems like even with a spacer it'd hit a little. 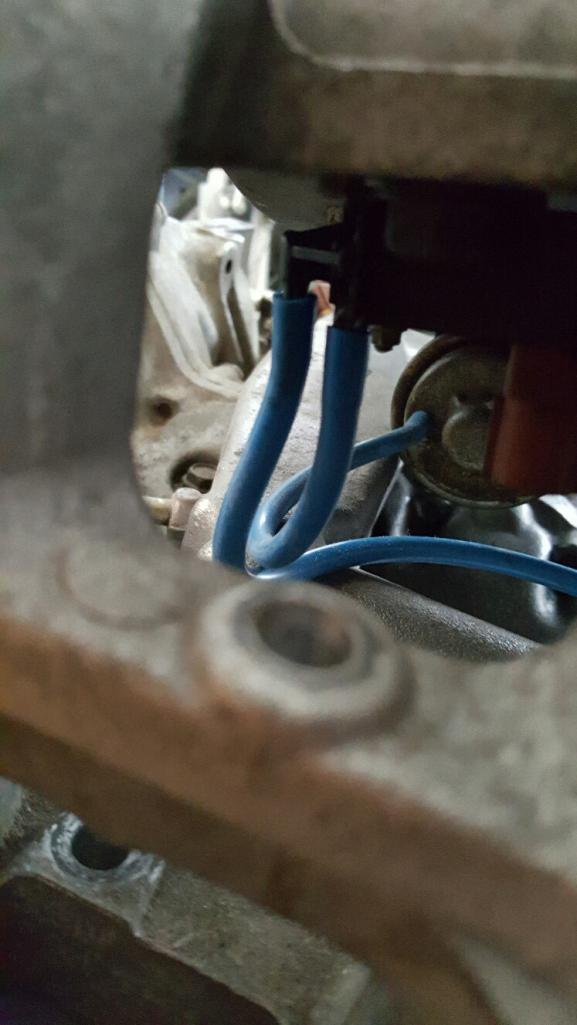 It's also pretty amazing how HIGH the intake is flipped around. WOW! 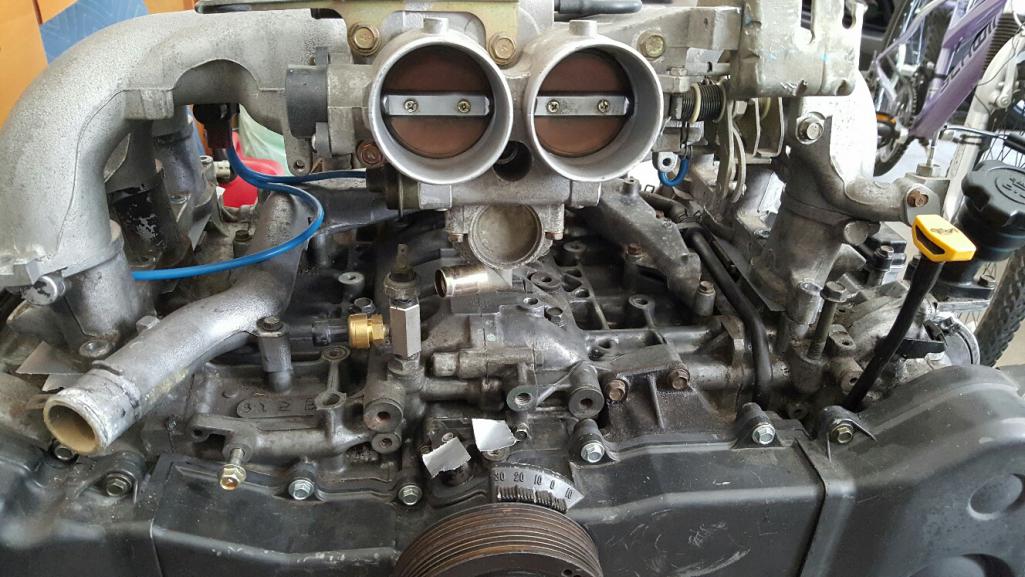 Well, If I would have looked at George's thread for 5 seconds I would have gotten the answers. Looks like he addressed this in his flip. Be back soon! |
  |
1 User(s) are reading this topic (1 Guests and 0 Anonymous Users)
0 Members:

|
Lo-Fi Version | Time is now: 20th April 2025 - 05:40 AM |
Invision Power Board
v9.1.4 © 2025 IPS, Inc.


