|
|

|
Porsche, and the Porsche crest are registered trademarks of Dr. Ing. h.c. F. Porsche AG.
This site is not affiliated with Porsche in any way. Its only purpose is to provide an online forum for car enthusiasts. All other trademarks are property of their respective owners. |
|
|
  |
| Chris H. |
 Jan 28 2013, 08:00 AM Jan 28 2013, 08:00 AM
Post
#61
|
|
Senior Member     Group: Members Posts: 4,054 Joined: 2-January 03 From: Chicago 'burbs Member No.: 73 Region Association: Upper MidWest 
|
Is it this one?
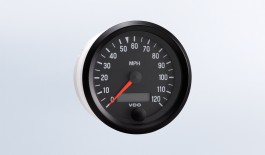 Certainly a good option. Fits right in the slot... says it has "auto-calibration" so that must make it compatible with multiple senders. I might be heading back to the SpeedHut setup....a little pricey but all the gauges I want. |
| DBCooper |
 Jan 28 2013, 09:13 AM Jan 28 2013, 09:13 AM
Post
#62
|
|
14's in the 13's with ATTITUDE     Group: Members Posts: 3,079 Joined: 25-August 04 From: Dazed and Confused Member No.: 2,618 Region Association: Northern California |
Yup, that's it. Found a photo:
(IMG:http://www.914world.com/bbs2/uploads_offsite/i379.photobucket.com-2618-1359386016.1.jpg) Fully programmable so you can change tire height and correct the speedo. The tach is also VDO, with a programmable shift light (that LED just above the VDO logo). The shift light looks small but it's pretty bright, without looking like a drag racer. And it goes up to 9K, appropriate for a Subaru engine that spins higher than a T4. It was about $100 from e-bay new in the box. The fonts and style are the same so it leaves the dash looking "in the style of" the original, but with modern instruments. The tach and speedo needles have absolutely no bounce, are perfectly steady. They work well and are simple to install. Important to note that I use an aftermarket EMS, so no need to retain any Subaru compatibility for ECU function. They're great, the only real problem is lighting at night, they're all a little different. I still haven't changed the bulbs in all so they match. That photo makes the needle colors look different, which is odd, but in real life I can't tell the difference. . |
| 904svo |
 Jan 28 2013, 11:07 AM Jan 28 2013, 11:07 AM
Post
#63
|
|
904SVO    Group: Members Posts: 1,124 Joined: 17-November 05 From: Woodstock,Georgia Member No.: 5,146 |
It's answer like these that take the scare out of doing a transplant!!
|
| Chris H. |
 Mar 21 2013, 08:52 PM Mar 21 2013, 08:52 PM
Post
#64
|
|
Senior Member     Group: Members Posts: 4,054 Joined: 2-January 03 From: Chicago 'burbs Member No.: 73 Region Association: Upper MidWest 
|
Wow, it's been a long time since update! Sorry about that.
Spent the last several weeks doing cleanup and re-seal of the engine, timing belt, getting rid of various SVX parts, collecting parts, and just finished converting the 2006 WRX trans to 2wd and installing the stub axles. Not very exciting visually but I'll throw a few pics up anyway. The engine was extremely dirty and grimy. The oil that eventually leaked out of the seals turned to tar over time and it took several days to get it all off. Before: 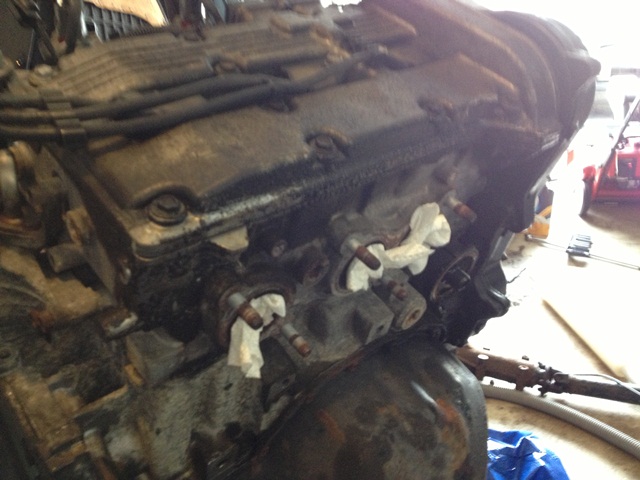 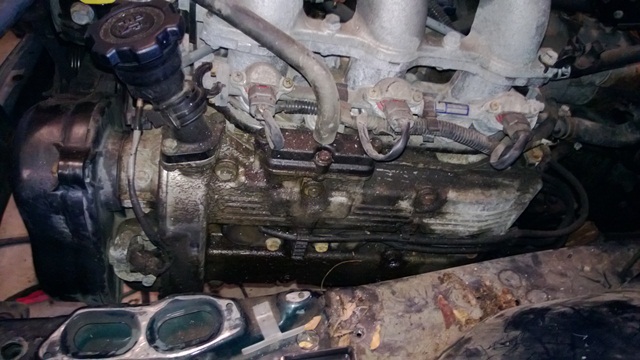 After: 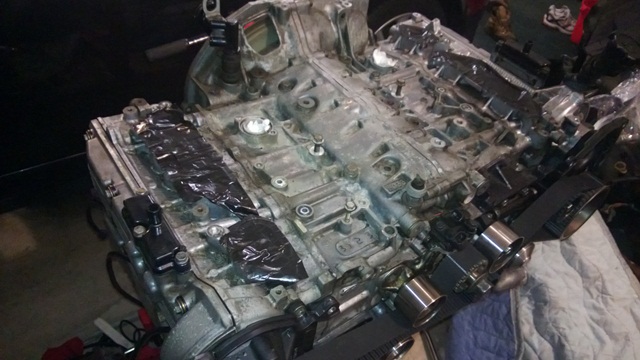 High pressure car wash would have been great, but unfortunately I don’t know these engines well enough to know what to spray and what not to so it was the old slow method of smear and wipe. Tried several different products including brake cleaner, Goo Gone, Simple Green, but the best results came from Goop. A big tub can be had for about $8 at Harbor Freight. 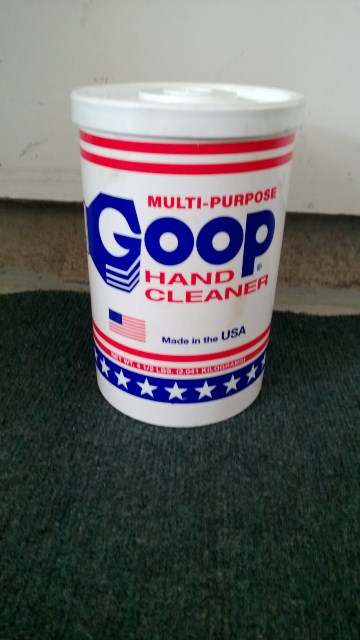 Put it on, it turns from white to clear, wipe/rinse it with warm water. Repeat, repeat. Bought the full engine reseal kit from Subaruparts.com. 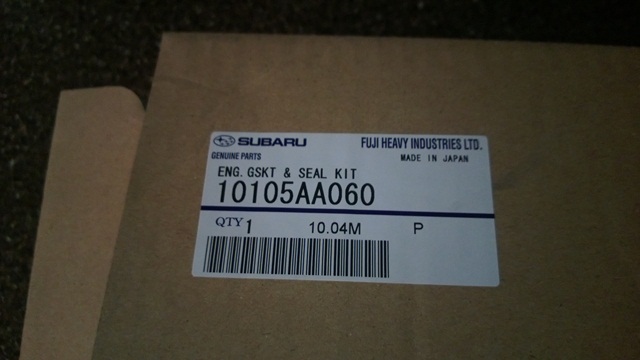 It has some seals you won’t need but pricing the stuff piece by piece it’s still a good deal. Not doing the head gaskets at this point but have them for later. It’s amazing how unfamiliar the seals look. 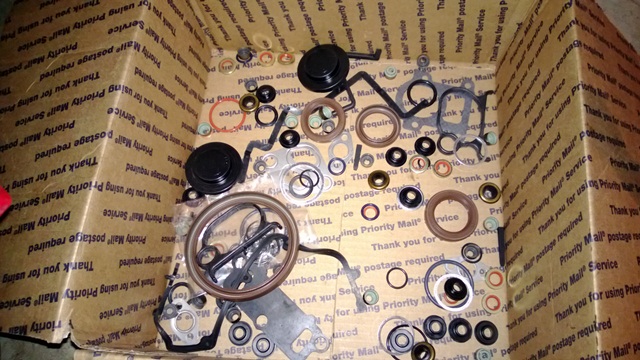 If these were 914 seals it would be easier to tell what the heck they all are. Just compare the old ones with the new ones. Should be an exact fit. |
| Chris H. |
 Mar 21 2013, 09:00 PM Mar 21 2013, 09:00 PM
Post
#65
|
|
Senior Member     Group: Members Posts: 4,054 Joined: 2-January 03 From: Chicago 'burbs Member No.: 73 Region Association: Upper MidWest 
|
Never done a timing belt before so I wasted a lot of time re-doing it because I thought it was incorrect. Lined up the marks perfectly…cranked the engine one revolution…and the dang belt marks never realigned with the marks on the engine. Apparently they don't have to. The marks are for the initial alignment, so as long as the arrows on the engine line up with the ones on the belt wheels it’s all good. Hope that saves someone a couple hours. And if you screw it up, no worries. The EG33 is a non-interference engine. Didn’t expect that but it’s true. The car won’t run, but you won’t bang the valves against the piston tops.
Left side: 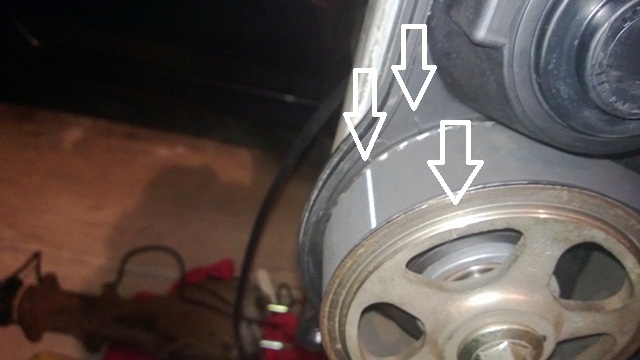 Center: 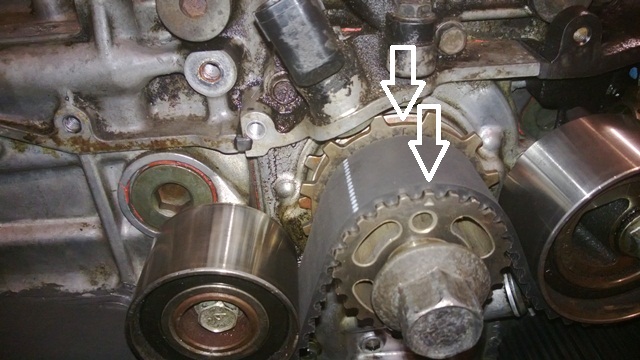 Right Side: 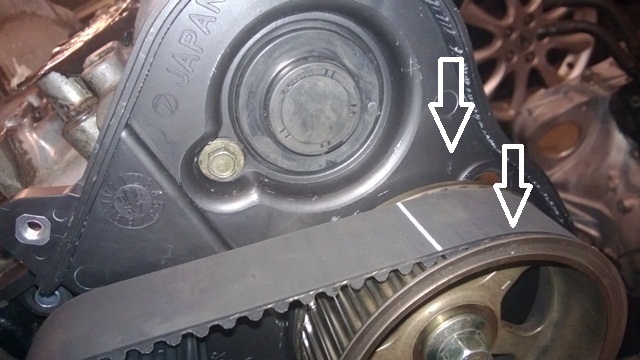 Note how after one revolution the arrows on the wheel line up with the ones on the engine but the timing belt marks do not. |
| Chris H. |
 Mar 21 2013, 09:24 PM Mar 21 2013, 09:24 PM
Post
#66
|
|
Senior Member     Group: Members Posts: 4,054 Joined: 2-January 03 From: Chicago 'burbs Member No.: 73 Region Association: Upper MidWest 
|
Don’t have any pics of this, but I did try flipping the intake…I’m not confident enough in my skills to do it this time. Too many variables if it doesn’t start once I get it done. When I flipped both the FI runner section and the top section there was interference with the AC unit. Found a company called Outlaw Engineering who will do a ¼” phenolic spacer for the SVX, but even with that it would still interfere. When I flipped just the top piece the fuel lines underneath didn’t cooperate. It can be done though, maybe version 2.0.
So on to the trans…mine is 2006 WRX unit, so it is a “turbo” trans (2.5T). Bought Ian’s kit to lock the diff and change to the older stub axle style. Ian is assembling a very concise set of photos to explain the process so I won’t outline all the steps since his will be better. First, the when you take off the center diff, which is the tail section of the trans it’s not immediately obvious what to do next. Just pull out this stuff: 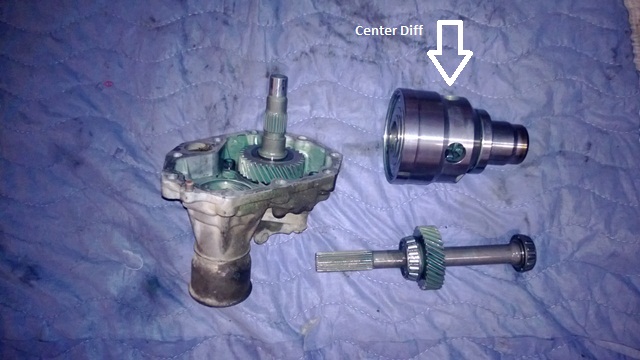 The center diff is worth between $150 and $300 depending on the year and how many people need it at the time you want to sell it. Here's the diff lock installed: 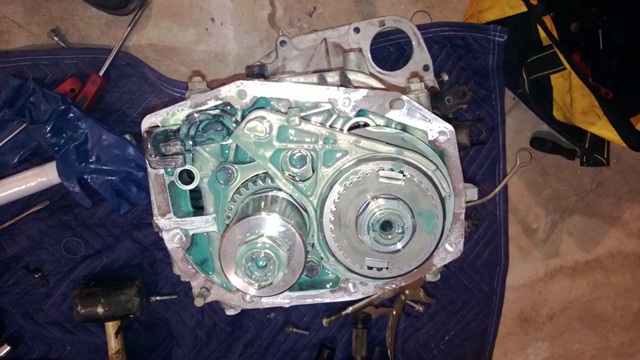 To get the nut off for the diff lock you need to take the next section of trans cover off. You'll probably need a new gasket or some gasket maker. Mine tore into several pieces. It's made of a paper-ish material. New stubs in...ready to go. 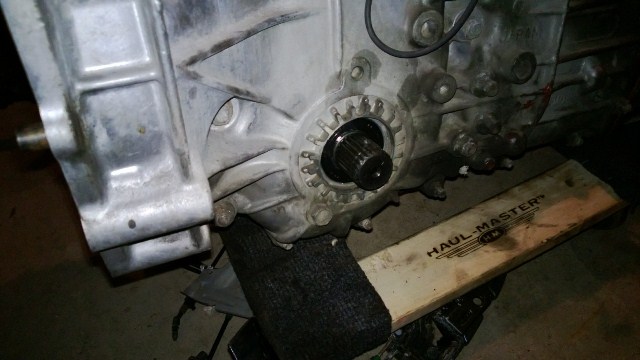 Tail end...the stock bolts are way too long for the cover. Shorter ones are provided in the kit. 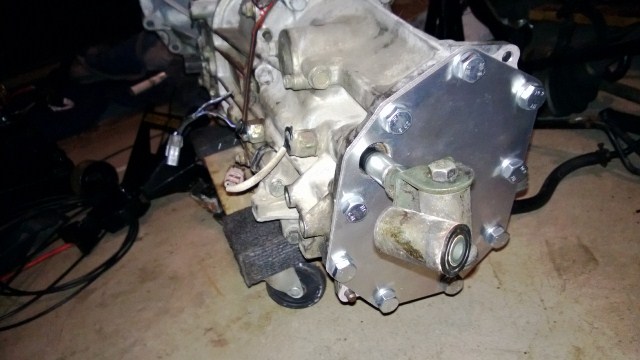 Some "gotchas": 1. If you are installing stub axles be very careful with the axle seals. I bent one by slightly tapping it with a wrench. They should sit flush with the axle holes. I also pushed one in a bit too far but was able to get it out. This is "way too far" in: 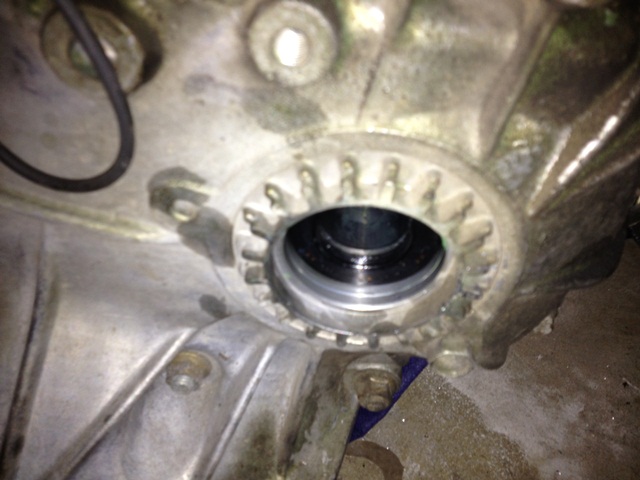 Not quite German quality engineering we're dealing with so things don't all fit with a crisp snap like we are used to. 2. When you remove the middle section of the trans cover to get at the differential nut the gear selector shaft will just fall out onto the floor which is alarming. Don't worry, you did not break it. |
| Chris H. |
 Mar 21 2013, 09:43 PM Mar 21 2013, 09:43 PM
Post
#67
|
|
Senior Member     Group: Members Posts: 4,054 Joined: 2-January 03 From: Chicago 'burbs Member No.: 73 Region Association: Upper MidWest 
|
Also bought a very inexpensive 2006 Impreza gauge cluster from e-bay. Thought I could take it apart and not feel bad if I break it for $36. I'd like to see if I can separate the cluster into three separate gauges similar to the stock 914 look....not sure if it's possible but we'll see. I'm torn between this and using an electronic Porsche VDO speedo.
Front: 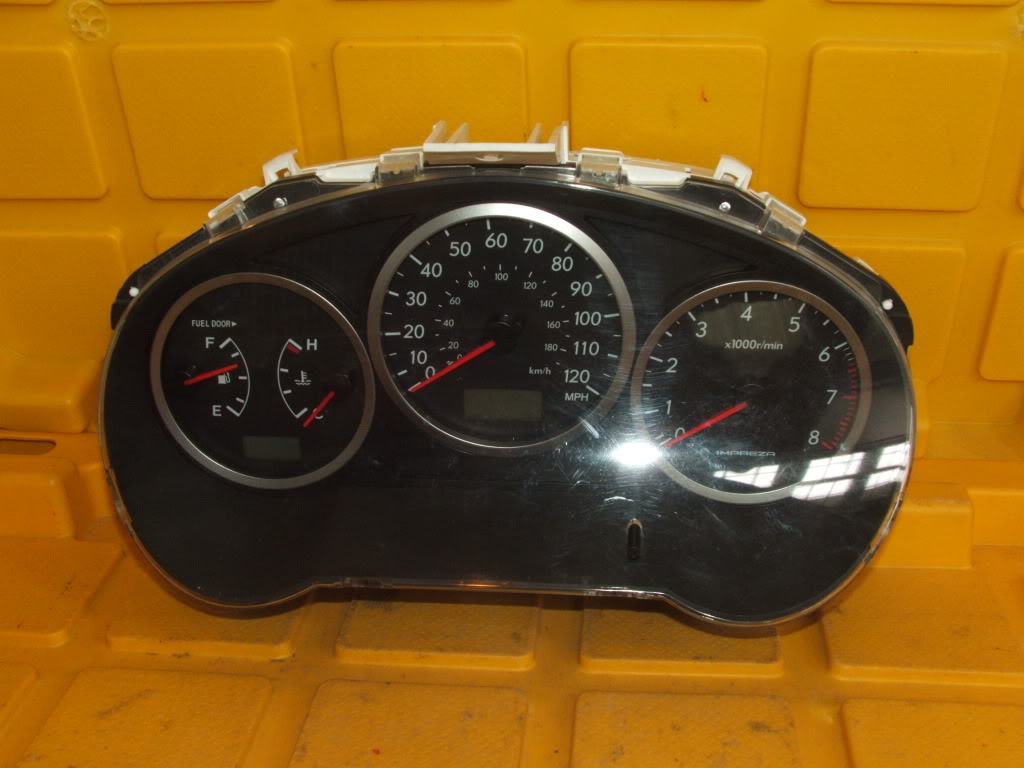 Back: 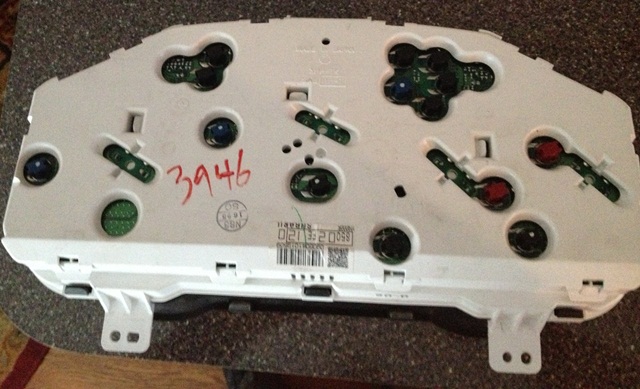 Since the gauge is from a 2006 as is the trans the speedo should work. The tach will need an adapter like this one: Tach Adapt Temp will be directionally correct and I plan to use an Impreza fuel pump per BIGKAT's recommendation. |
| Chris H. |
 Mar 21 2013, 09:50 PM Mar 21 2013, 09:50 PM
Post
#68
|
|
Senior Member     Group: Members Posts: 4,054 Joined: 2-January 03 From: Chicago 'burbs Member No.: 73 Region Association: Upper MidWest 
|
Next step is the engine wiring. I hear that's A LOT OF FUN.
Here are a few links that were helpful so far: H6 swap thread Bremar 2WD conversion directions SVX Engine PDF SVX Engine Reseal Thread Questions and comments are welcome as always. |
| a914622 |
 Mar 21 2013, 10:10 PM Mar 21 2013, 10:10 PM
Post
#69
|
|
Member   Group: Members Posts: 316 Joined: 12-August 10 From: northwest Member No.: 12,048 Region Association: Pacific Northwest |
Sweet. I just started on a second harness cut down. If you run into problems I could send some pics your way. I found a good deal on a hole swap set up. (Maybe turbo ver 2.0)
You will want to change most of those seals in that box pic. The top manifold can be flipped but it is a PITAss. It took 2 days to figure relocations of needed stuff and removal of the exahust gas regurgitater system. I would stay stock if you can, But done forget the vacuum lines. They will be hard and brittle. Keep up the good work. (IMG:style_emoticons/default/beer3.gif) |
| Chris H. |
 Mar 22 2013, 07:03 AM Mar 22 2013, 07:03 AM
Post
#70
|
|
Senior Member     Group: Members Posts: 4,054 Joined: 2-January 03 From: Chicago 'burbs Member No.: 73 Region Association: Upper MidWest 
|
Thanks jcl. Yes most of those seals are on the engine. I have a list of them all if anyone needs it.
JCL when you removed the EGR stuff did you just block off the connection at the intake? Was planning to do that but just making sure I'm not overlooking anything. Pic: 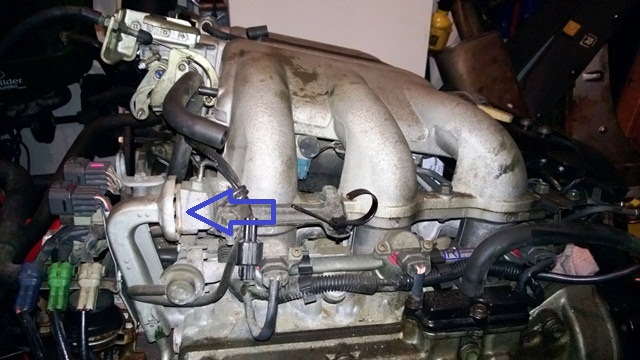 |
| a914622 |
 Mar 22 2013, 08:35 AM Mar 22 2013, 08:35 AM
Post
#71
|
|
Member   Group: Members Posts: 316 Joined: 12-August 10 From: northwest Member No.: 12,048 Region Association: Pacific Northwest |
Yep. I plan on making long tube headers. A lot of the vanagon guys yake it off.
|
| Chris H. |
 Mar 22 2013, 09:04 AM Mar 22 2013, 09:04 AM
Post
#72
|
|
Senior Member     Group: Members Posts: 4,054 Joined: 2-January 03 From: Chicago 'burbs Member No.: 73 Region Association: Upper MidWest 
|
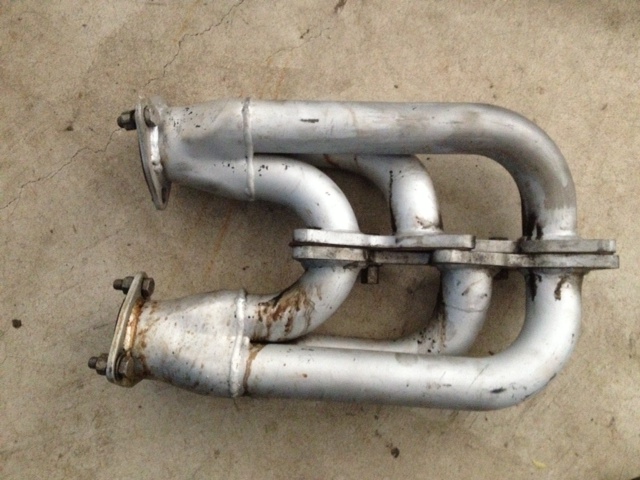
Nice. Picked these up from Bob (BIGKAT) along with a custom built exhaust. One less thing to mess up for me!
 |
| a914622 |
 Mar 23 2013, 07:33 AM Mar 23 2013, 07:33 AM
Post
#73
|
|
Member   Group: Members Posts: 316 Joined: 12-August 10 From: northwest Member No.: 12,048 Region Association: Pacific Northwest |
sweet. And it looks like they dont have the "gas regurgitator" bung.
Hey and its way off topic but the Goop is also great for cleaning Granite counter tops if they havent been sealed. Goop keeps from drying and cracking the granite. I didnt even think about using it to clean engines. I have always used Jacobs paint stripper and a power washer. All right back to building... |
| Chris H. |
 Mar 24 2013, 02:56 PM Mar 24 2013, 02:56 PM
Post
#74
|
|
Senior Member     Group: Members Posts: 4,054 Joined: 2-January 03 From: Chicago 'burbs Member No.: 73 Region Association: Upper MidWest 
|
sweet. And it looks like they dont have the "gas regurgitator" bung. Hey and its way off topic but the Goop is also great for cleaning Granite counter tops if they havent been sealed. Goop keeps from drying and cracking the granite. I didnt even think about using it to clean engines. I have always used Jacobs paint stripper and a power washer. All right back to building... No bung. That thing is impossible to get off of the stock header....it's baked on. By the way I found a really good resource for the vacuum line info. Spellis it out very well in terms of what is needed, diagrams, etc. Vacuum Lines Hope it helps someone.... |
| Chris H. |
 Mar 28 2013, 08:58 PM Mar 28 2013, 08:58 PM
Post
#75
|
|
Senior Member     Group: Members Posts: 4,054 Joined: 2-January 03 From: Chicago 'burbs Member No.: 73 Region Association: Upper MidWest 
|
Time to start reinstalling the accessories onto the engine. The AC/alternator bracket had a lot of surface rust so I had to clean it up a bit:
Before: 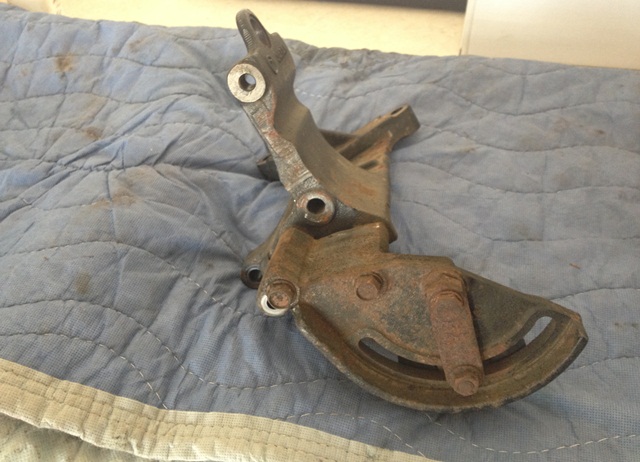 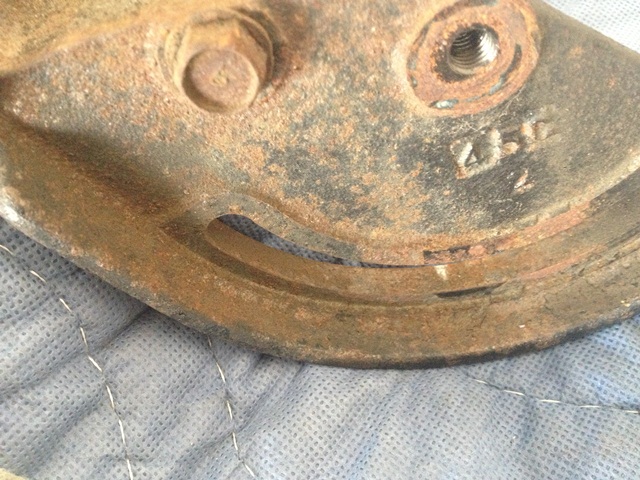 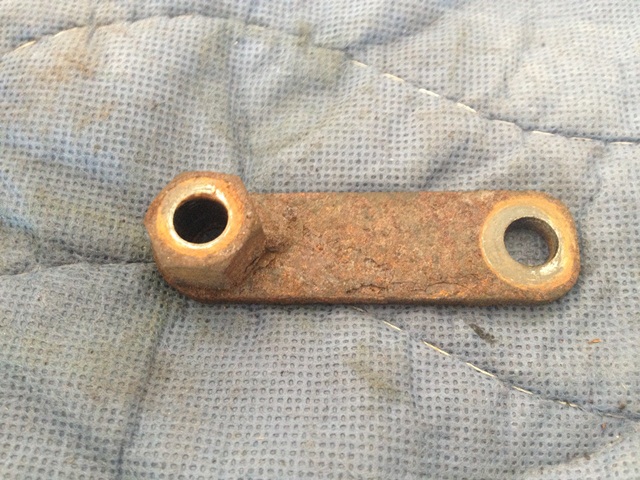 Ground off the chunky rust: 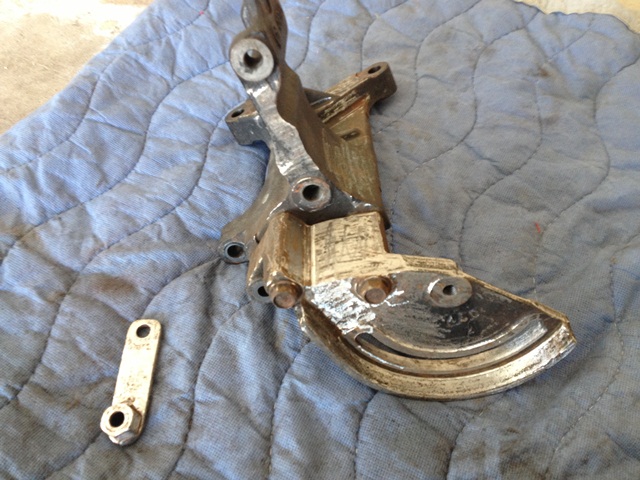 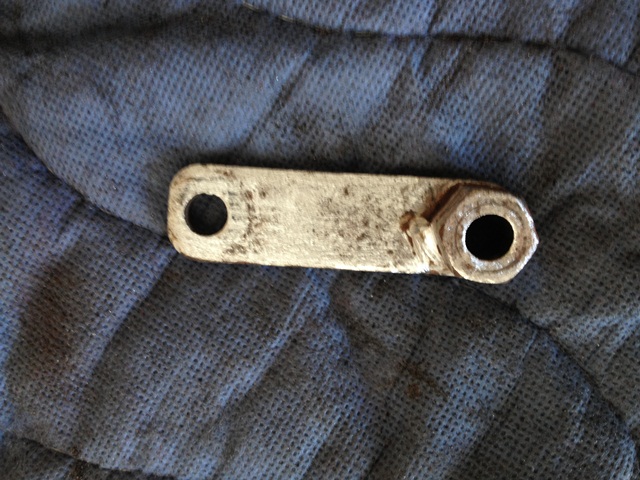 Painted with high temp paint: 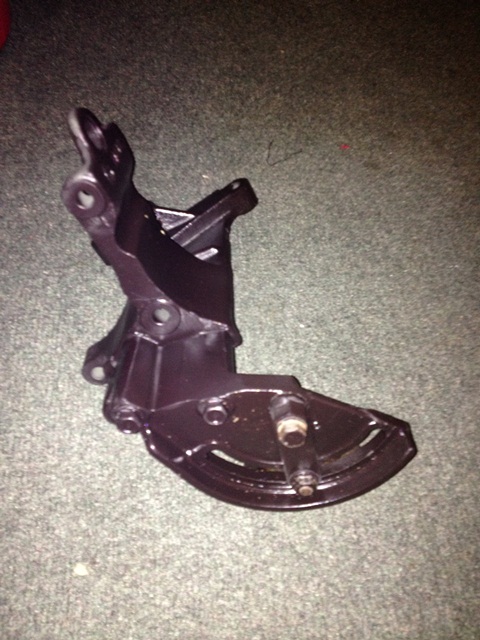 |
| Chris H. |
 Mar 28 2013, 09:04 PM Mar 28 2013, 09:04 PM
Post
#76
|
|
Senior Member     Group: Members Posts: 4,054 Joined: 2-January 03 From: Chicago 'burbs Member No.: 73 Region Association: Upper MidWest 
|
I heard the knock sensors were one of the keys to a smooth running Subie engine. On the subaru-svx site the experts say if there are ANY cracks at all replace them. Just checked mine and both are cracked. You can find them cheap, just ordered two for $12.99 ea on e-bay. Free shipping.
Badly cracked: 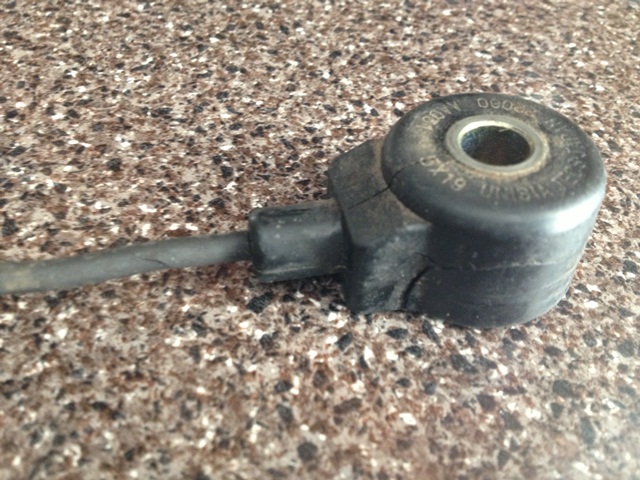 One crack: 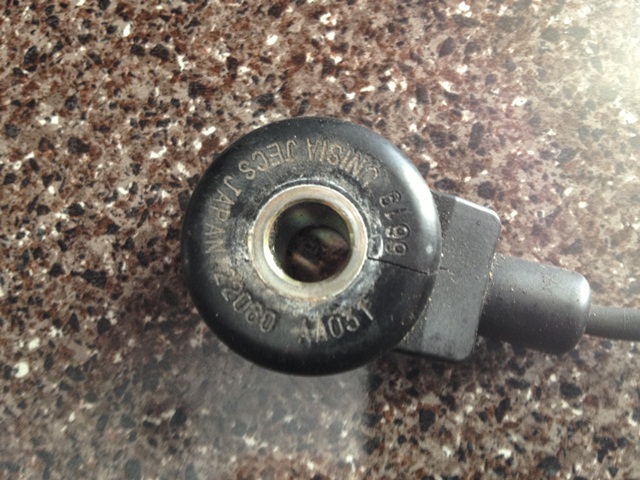 Link to the e-bay site: Sensors |
| 76-914 |
 Mar 28 2013, 09:09 PM Mar 28 2013, 09:09 PM
Post
#77
|
|
Repeat Offender & Resident Subaru Antagonist           Group: Members Posts: 13,698 Joined: 23-January 09 From: Temecula, CA Member No.: 9,964 Region Association: Southern California 
|
|
| Chris H. |
 Mar 28 2013, 09:31 PM Mar 28 2013, 09:31 PM
Post
#78
|
|
Senior Member     Group: Members Posts: 4,054 Joined: 2-January 03 From: Chicago 'burbs Member No.: 73 Region Association: Upper MidWest 
|
He special ordered them from somewhere...I THINK Outfront Motorsports but could be wrong on that.
Here's a link to something similar... Outfront He did make the exhaust system that mounts to it. It's jammed in the corner of my garage or I would post some pics. There are some in his blog if anyone wants to check it out. |
| Chris H. |
 Apr 2 2013, 09:25 AM Apr 2 2013, 09:25 AM
Post
#79
|
|
Senior Member     Group: Members Posts: 4,054 Joined: 2-January 03 From: Chicago 'burbs Member No.: 73 Region Association: Upper MidWest 
|
Tackled the engine wiring harnesses....
Because there was a gathering of nesting materials under the intake the wiring needed to be checked pretty closely. Mice love to chew through 914 wires as we know, but it looks like Subie wires don't taste quite as good. Before: 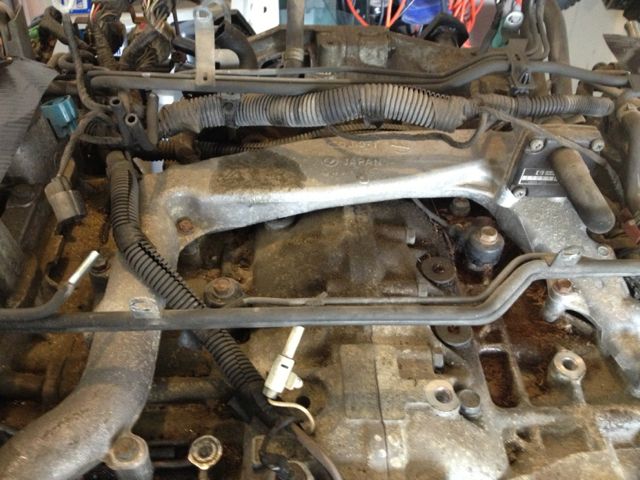 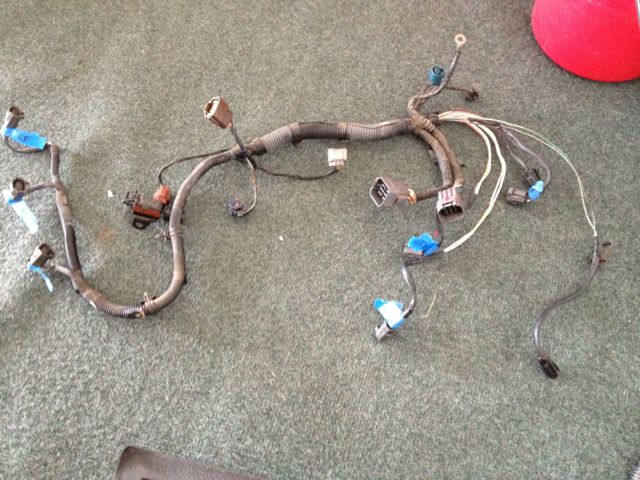 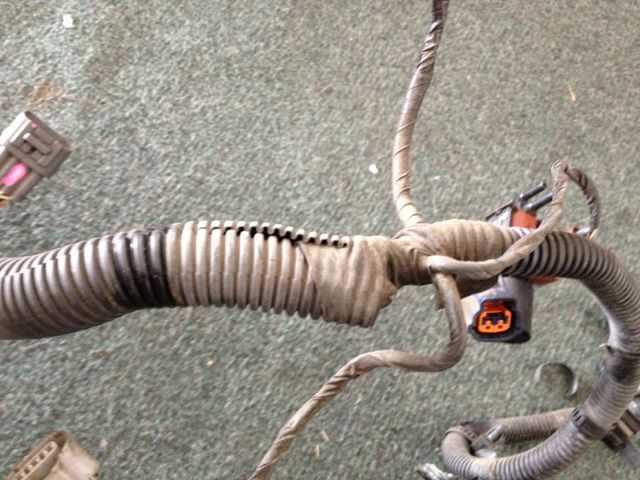 Nothing was chewed, but there were some nicked wires, which likely explained the blinky lights on the dash. It was raining when I bought the car and every time I started it a different set of warning lights lit up. The engine ran great so I figured it was a wiring issue... 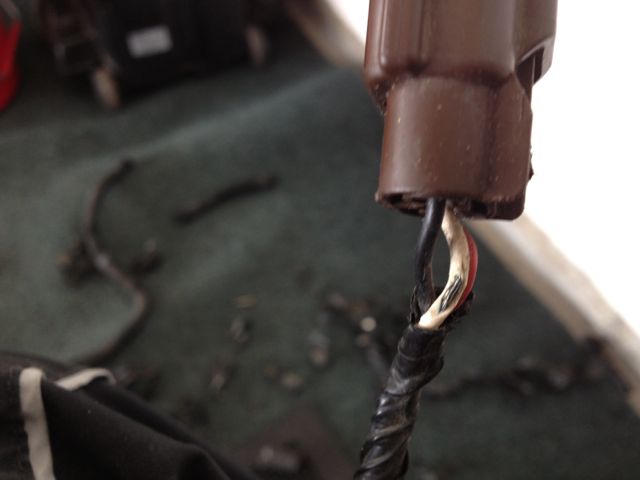 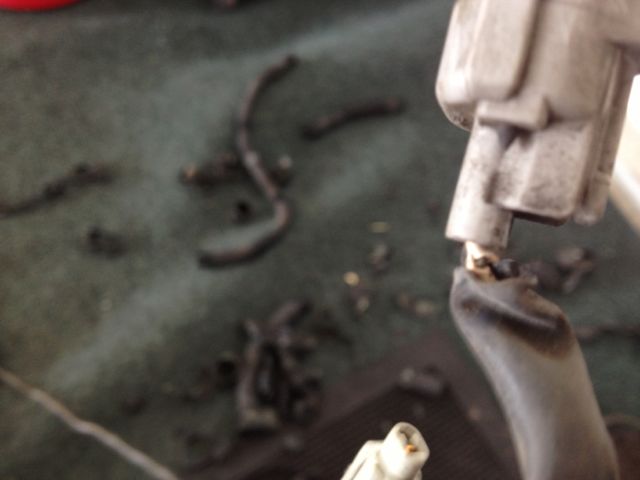 A little liquid tape..then regular electrical tape 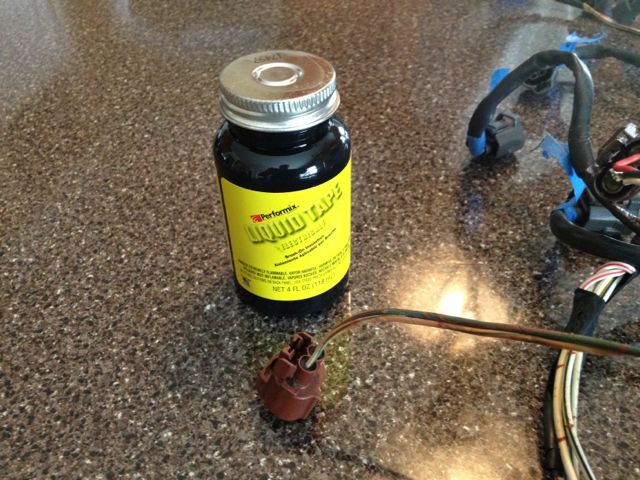 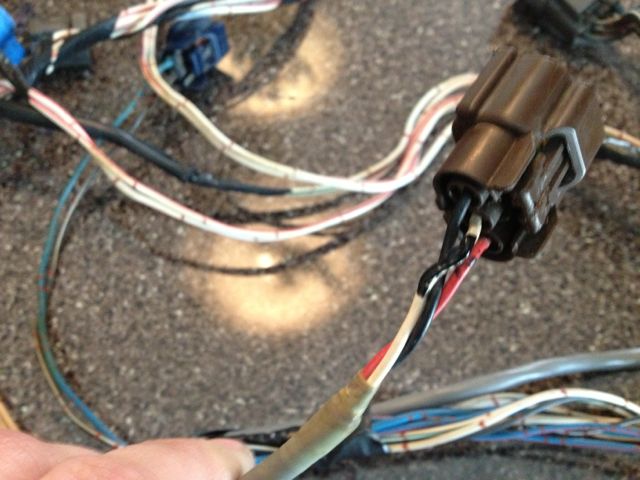 And the end result: 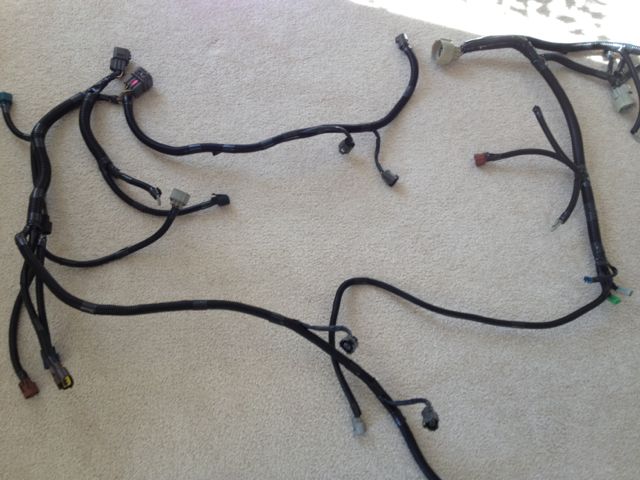 The OEM covering was plastic tubing that can be found at Harbor Freight. It held up surprisingly well so that's what I replaced it with. The wiring underneath was very healthy and pliable. Of course I covered every last one even though it was not necessary... (IMG:style_emoticons/default/biggrin.gif) Next up are the vacuum hoses, reinstall intake, alternator, etc. Then the main wiring harness. I want to test fire the engine before I put it in the car so that it will be easy to troubleshoot if there is something not connected right, etc. |
| wingnut86 |
 May 4 2013, 08:49 PM May 4 2013, 08:49 PM
Post
#80
|
|
...boola la boo boola boo...    Group: Members Posts: 1,053 Joined: 22-April 10 From: South Carolina Member No.: 11,645 Region Association: South East States |
Subd:-)
|
  |
1 User(s) are reading this topic (1 Guests and 0 Anonymous Users)
0 Members:

|
Lo-Fi Version | Time is now: 19th April 2025 - 02:49 PM |
Invision Power Board
v9.1.4 © 2025 IPS, Inc.


