|
|
|
Porsche, and the Porsche crest are registered trademarks of Dr. Ing. h.c. F. Porsche AG.
This site is not affiliated with Porsche in any way. Its only purpose is to provide an online forum for car enthusiasts. All other trademarks are property of their respective owners. |
|
|

  |

| peteyd |
 May 14 2013, 12:11 PM May 14 2013, 12:11 PM
Post
#21
|
|
Senior Member  Group: Members Posts: 715 Joined: 27-March 08 From: Elora, Ontario, Canada Member No.: 8,858 Region Association: Canada |
|
   |

 
|
| Luke M |
May 15 2013, 09:18 AM
Post
#22
|
|
Senior Member Group: Members Posts: 1,381 Joined: 8-February 05 From: WNY Member No.: 3,574 Region Association: North East States |
Hi Pete,
We ( being my brother & I ) received all of the new metal to do the repairs on our cars. It was a fast order to receive even with all the tins. I must say a job well done at your end. I have a question on the stiffener kit install. Can they be installed w/o having to cut off a portion of the rear lower fenders ? I plan on doing the install within the next month. Thanks for adding the videos. TIA. |
|
|
|
| moparrob |
May 15 2013, 09:28 AM
Post
#23
|
|
Senior Member Group: Members Posts: 646 Joined: 27-April 10 From: Los Angeles Member No.: 11,663 Region Association: None |
Subscribed. (IMG:style_emoticons/default/popcorn[1].gif)
|
|
|
|
| Jon H. |
May 15 2013, 07:26 PM
Post
#24
|
|
Member Group: Members Posts: 237 Joined: 1-July 11 From: Ottawa, Canada Member No.: 13,264 Region Association: Canada |
QUOTE(bandjoey @ May 3 2013, 04:56 PM)  At the end it needs to move to the Restoration thread area. Is this Rotisserie simply a roll the entire cage over on its side and upside down or is there something I can't see? Waiting on the next edition! How 'bout showing us the presses in action - how you make the parts? and yes to complete bodies! Here's how the front trunk is done. Front trunk Jon |
|
|
|
| cary |
May 15 2013, 08:07 PM
Post
#25
|
|
Advanced Member Group: Members Posts: 3,900 Joined: 26-January 04 From: Sherwood Oregon Member No.: 1,608 Region Association: Pacific Northwest |
Man, Pete your fast .................. LOL.
Nice work ................ |
|
|
|
| r_towle |
May 15 2013, 09:32 PM
Post
#26
|
|
Custom Member Group: Members Posts: 24,599 Joined: 9-January 03 From: Taxachusetts Member No.: 124 Region Association: North East States |
Well done.
Might want to put the frame stiffener overlay on your website....I can't find it. D your guys make the piece up front on the long that goes over the long and under the front fender? Rich |
|
|
|
| peteyd |
May 16 2013, 06:16 AM
Post
#27
|
|
Senior Member Group: Members Posts: 715 Joined: 27-March 08 From: Elora, Ontario, Canada Member No.: 8,858 Region Association: Canada |
QUOTE(r_towle @ May 15 2013, 07:32 PM) Well done. Might want to put the frame stiffener overlay on your website....I can't find it. D your guys make the piece up front on the long that goes over the long and under the front fender? Rich Here is the part on the web http://www.restoration-design.com/mm5/merc...duct_Code=P346R If you are referring to the lower box shape piece that is part of the hinge post, we dont make a replacement piece for there yet. The boxy shape piece that is part of the stiffener up front we make and that fits right over the original. |
|
|
|
| peteyd |
May 16 2013, 06:21 AM
Post
#28
|
|
Senior Member Group: Members Posts: 715 Joined: 27-March 08 From: Elora, Ontario, Canada Member No.: 8,858 Region Association: Canada |
QUOTE(Luke M @ May 15 2013, 07:18 AM) Hi Pete, We ( being my brother & I ) received all of the new metal to do the repairs on our cars. It was a fast order to receive even with all the tins. I must say a job well done at your end. I have a question on the stiffener kit install. Can they be installed w/o having to cut off a portion of the rear lower fenders ? I plan on doing the install within the next month. Thanks for adding the videos. TIA. I cut off the lower fenders on my personal car as well. It would be tight in there if you didnt cut some away. It would be much easier for sure to cut away the lower fender, but you should try anyways. It wouldnt hurt to make the attempt. |
|
|
|
| Chris H. |
May 16 2013, 02:26 PM
Post
#29
|
|
Senior Member Group: Members Posts: 4,032 Joined: 2-January 03 From: Chicago 'burbs Member No.: 73 Region Association: Upper MidWest |
Sorry for the ignorance but are the frame stiffeners an alternative to the "Engman kit" or would you do both? It depends on the application I'm sure.
|
|
|
|
| peteyd |
May 17 2013, 06:30 AM
Post
#30
|
|
Senior Member Group: Members Posts: 715 Joined: 27-March 08 From: Elora, Ontario, Canada Member No.: 8,858 Region Association: Canada |
QUOTE(Chris H. @ May 16 2013, 12:26 PM) Sorry for the ignorance but are the frame stiffeners an alternative to the "Engman kit" or would you do both? It depends on the application I'm sure. I'd say that it would be an alternative. Having both would probably be overkill. |
|
|
|
| peteyd |
Aug 12 2013, 01:27 PM
Post
#31
|
|
Senior Member Group: Members Posts: 715 Joined: 27-March 08 From: Elora, Ontario, Canada Member No.: 8,858 Region Association: Canada |
We just completed replacing the front and rear floor pans as well as the seat mount reinforcement pieces and the peddle cluster bracket.
I will have another installation video up shortly, but here are a few photos of the process. Here is the prep work before drilling out the spot welds. 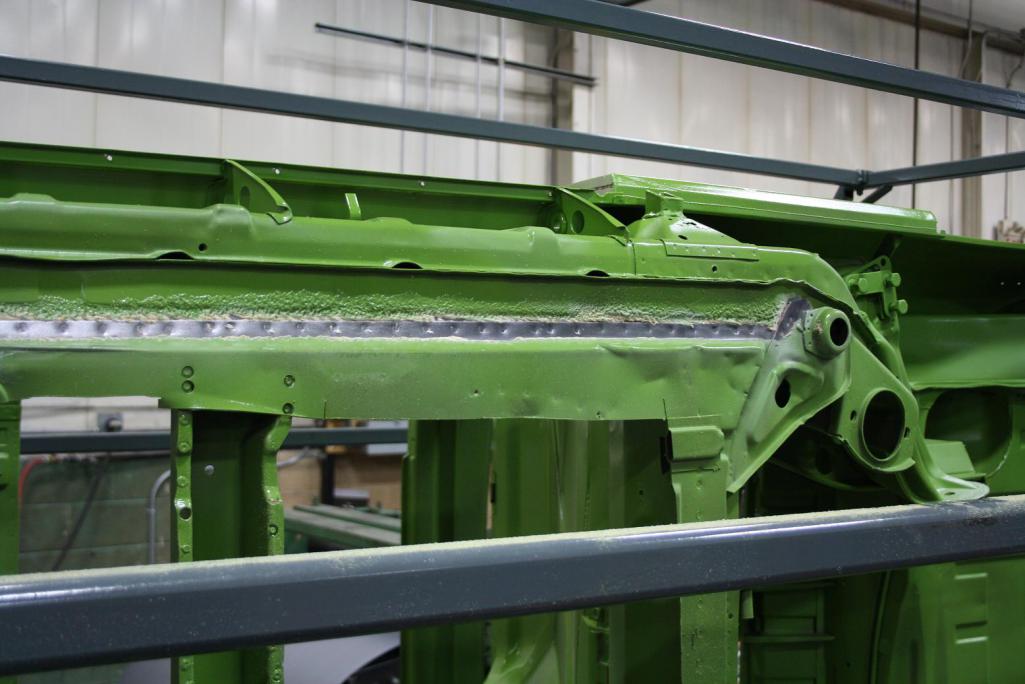 After the spot welds are drilled we have to chisel off the edges of the pan. 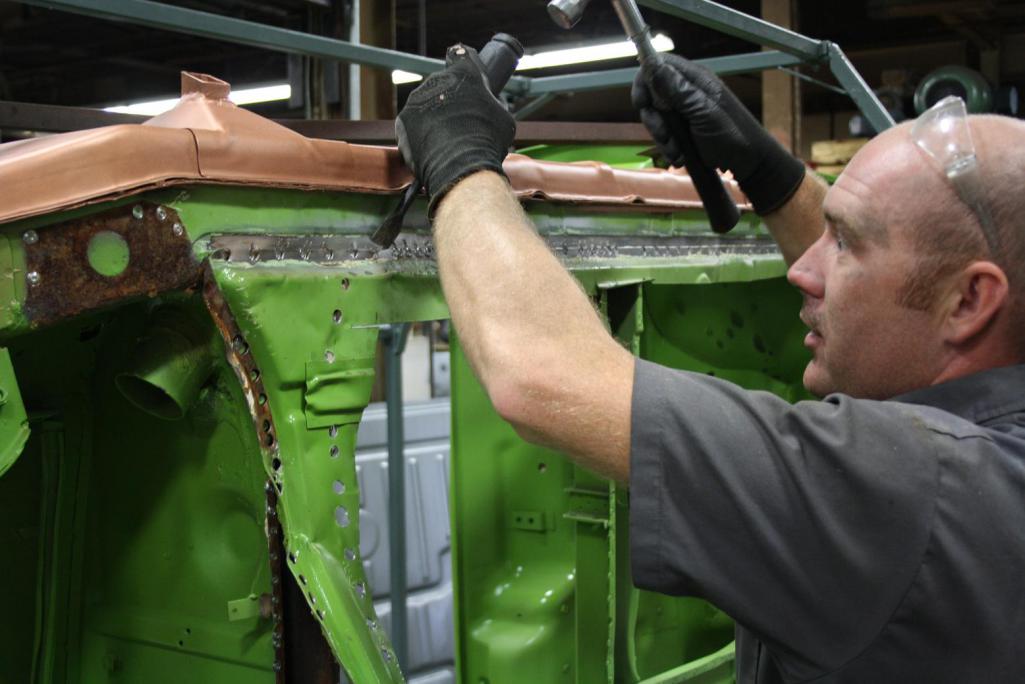 You can see all the rust that is hiding between the pans, so when someone tells you their car is "100% rust free" you know thats BS. 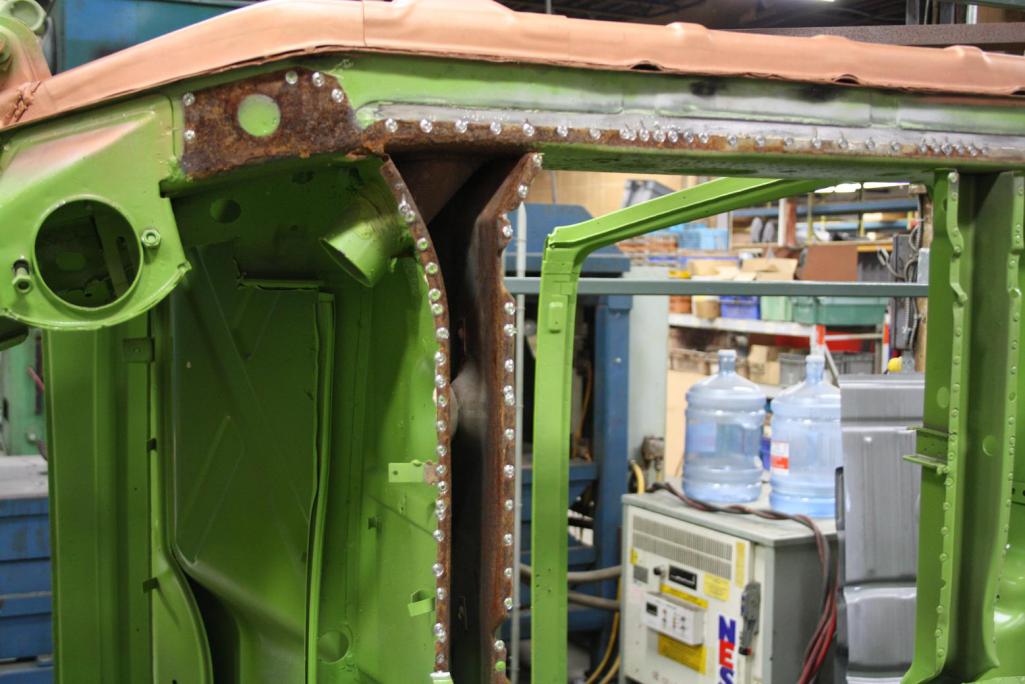 Test fitting the front pan. 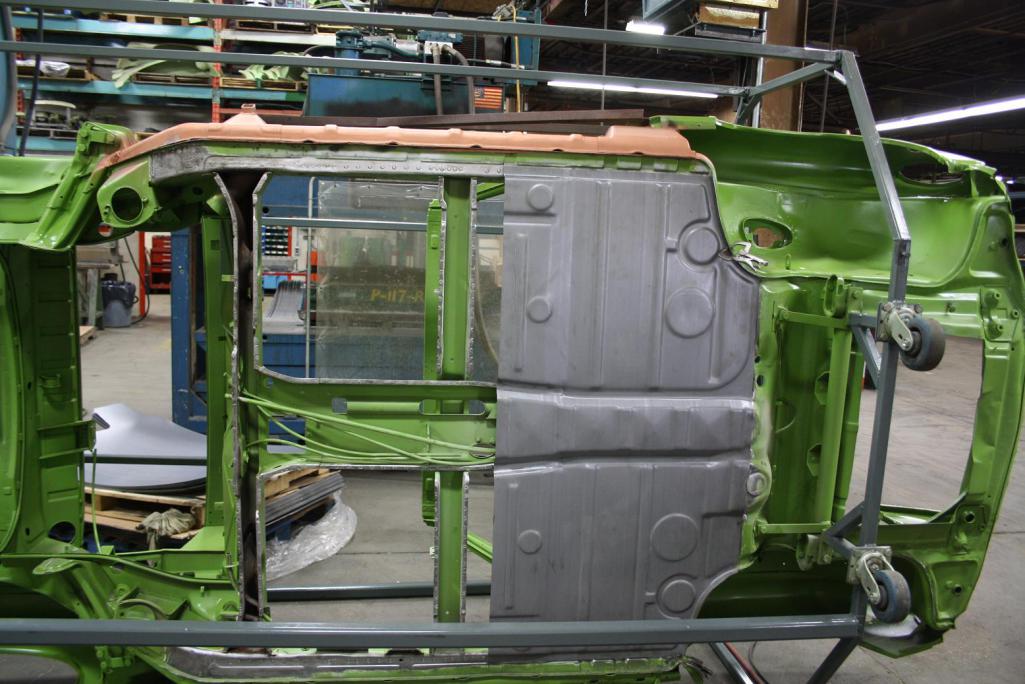 Holes punched in the pans for rosette welds 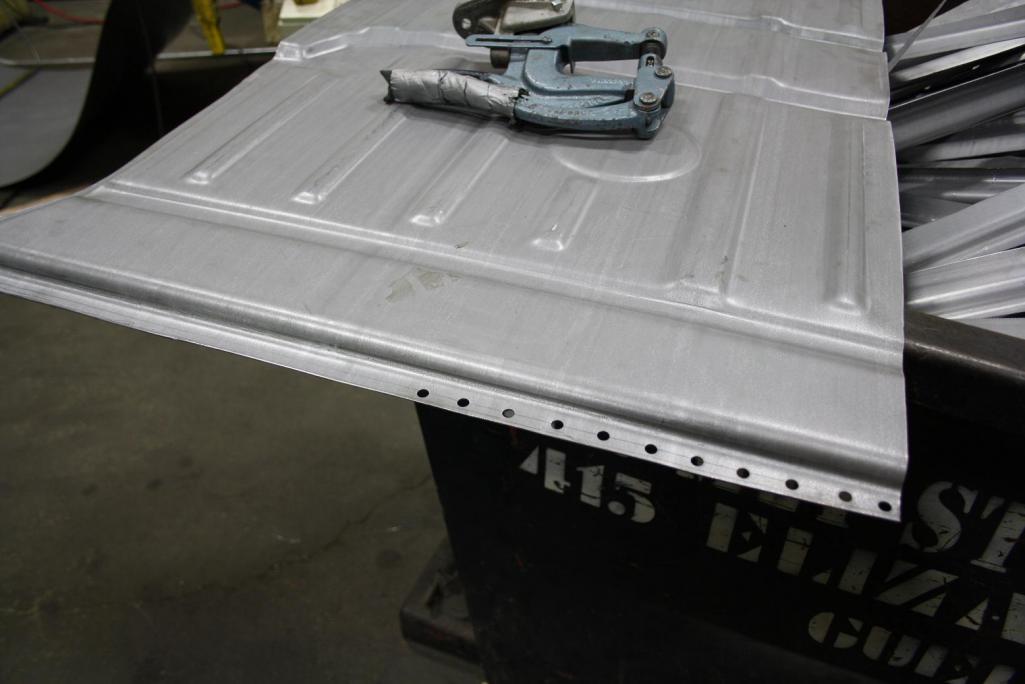 Boths pans and jack points being test fit with butt weld clamps in the middle. The seat mount reinforcements have been spot welded in and the peddle cluster bracket was located with the peddle cluster. The holes were drilled then the bracket was spot welded in also. 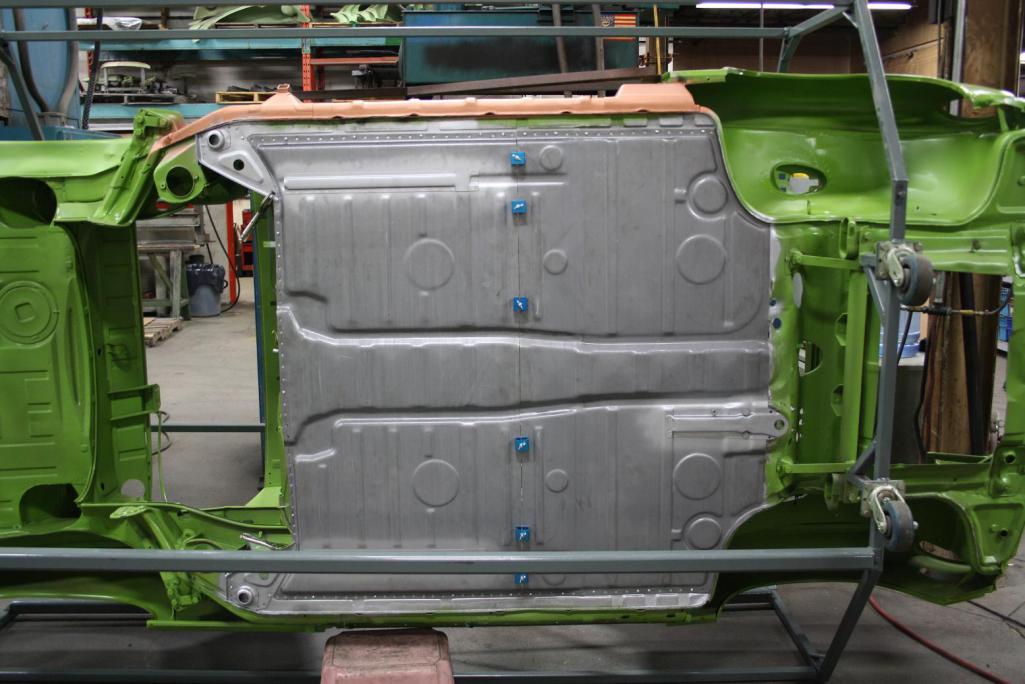 Heres the finished product. 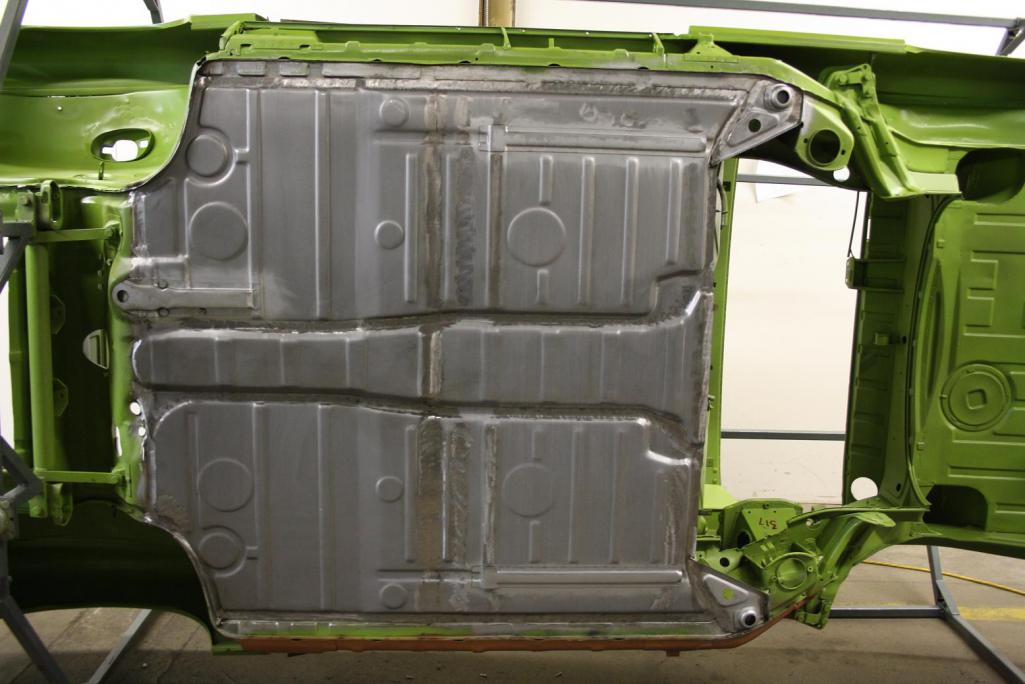 |
|
|
|
| peteyd |
Aug 13 2013, 08:24 AM
Post
#32
|
|
Senior Member Group: Members Posts: 715 Joined: 27-March 08 From: Elora, Ontario, Canada Member No.: 8,858 Region Association: Canada |
|
|
|
|
| peteyd |
Aug 28 2013, 08:09 AM
Post
#33
|
|
Senior Member Group: Members Posts: 715 Joined: 27-March 08 From: Elora, Ontario, Canada Member No.: 8,858 Region Association: Canada |
We have updated the YouTube channel with another video of a rear trunk installation.
We also have made the rear trunk reinforcement that lays over the transaxle cross member mount. This new part is P335A check it out and enjoy! https://www.youtube.com/watch?v=GBmJkP8I_rI |
|
|
|
| solex |
Aug 28 2013, 09:35 AM
Post
#34
|
|
Senior Member Group: Members Posts: 789 Joined: 12-January 05 From: Long Island, NY Member No.: 3,439 Region Association: North East States |
This is great, i really need to do something about my floor next. Thank you
|
|
|
|
| peteyd |
Sep 20 2013, 08:19 AM
Post
#35
|
|
Senior Member Group: Members Posts: 715 Joined: 27-March 08 From: Elora, Ontario, Canada Member No.: 8,858 Region Association: Canada |
We put together another video for your viewing pleasure.
Adam demonstrates the installation of the seat hinge risers and the hinges. If your interested in the cooling gel used in the video, it is a wurth product. Spray it on a nearby location and that area will not heat up. There are some youtube videos demonstrating it in use. Pretty amazing stuff actually. wurth welding spray https://www.youtube.com/watch?v=PWgt8AaqnUI |
|
|
|
| Sleepin |
Sep 20 2013, 09:45 AM
Post
#36
|
|
Advanced Member Group: Members Posts: 3,647 Joined: 20-November 07 From: Grand Junction, Co. Member No.: 8,357 Region Association: Rocky Mountains |
I agree with most on here that this came along just in time! I am doing a passenger side floorpan replacement very shortly!
To fix this mess: (IMG:http://www.914world.com/bbs2/uploads_offsite/i171.photobucket.com-8357-1379692068.1.jpg) Does Restoration design make anything for the cowl/fender seam? My passenger side is also in bad shape. |
|
|
|
| peteyd |
Sep 20 2013, 10:17 AM
Post
#37
|
|
Senior Member Group: Members Posts: 715 Joined: 27-March 08 From: Elora, Ontario, Canada Member No.: 8,858 Region Association: Canada |
Currently we dont have any repair piece for that seam. If you have rust in there, it probably goes deeper.
You might want to get a piece from a donor car. Make sure you get all the rust or else you will see rust coming to the surface again in a couple years. |
|
|
|
| worn |
Sep 20 2013, 12:47 PM
Post
#38
|
|
can't remember Group: Members Posts: 3,198 Joined: 3-June 11 From: Madison, WI Member No.: 13,152 Region Association: Upper MidWest |
QUOTE(peteyd @ Sep 20 2013, 08:17 AM) Currently we dont have any repair piece for that seam. If you have rust in there, it probably goes deeper. You might want to get a piece from a donor car. Make sure you get all the rust or else you will see rust coming to the surface again in a couple years. I am curious why you had the car painted at the outset, since obviously it will need to be at least partially painted at the end again. Was it for contrast in the videos? |
|
|
|
| peteyd |
Sep 20 2013, 01:26 PM
Post
#39
|
|
Senior Member Group: Members Posts: 715 Joined: 27-March 08 From: Elora, Ontario, Canada Member No.: 8,858 Region Association: Canada |
QUOTE(worn @ Sep 20 2013, 10:47 AM) I am curious why you had the car painted at the outset, since obviously it will need to be at least partially painted at the end again. Was it for contrast in the videos? We painted the car green so it would stand out at shows and swap meets. It also works well for contrast as you said. Yes it will need to be painted again in the end, but this is more of a demonstration car and will most likely remain a bare shell for quite some time. |
|
|
|
| peteyd |
Feb 27 2014, 08:39 AM
Post
#40
|
|
Senior Member Group: Members Posts: 715 Joined: 27-March 08 From: Elora, Ontario, Canada Member No.: 8,858 Region Association: Canada |
We have shot a few more videos of the green 914, but I wanted to put this video up first.
A day in the Life of Restoration Design. https://www.youtube.com/watch?v=C6CEx0UB8FM |
|
|
|
|
2 User(s) are reading this topic (2 Guests and 0 Anonymous Users)
0 Members:

|
Lo-Fi Version | Time is now: 30th June 2024 - 04:06 AM |
Invision Power Board
v9.1.4 © 2024 IPS, Inc.