|
|

|
Porsche, and the Porsche crest are registered trademarks of Dr. Ing. h.c. F. Porsche AG.
This site is not affiliated with Porsche in any way. Its only purpose is to provide an online forum for car enthusiasts. All other trademarks are property of their respective owners. |
|
|
  |
| Steve_R |
 Jun 23 2013, 11:32 PM Jun 23 2013, 11:32 PM
Post
#1
|
|
Member   Group: Members Posts: 68 Joined: 8-August 12 From: San Diego, CA Member No.: 14,777 Region Association: None |
Hi, I would like to introduce myself and share my project. I’m Steve, I live in San Diego and I picked up this 1973 1.7 914 about a year ago. It was in great shape with no rust and had been sitting in a garage for the past 13 years. My plan is to restore it to its original condition. At this point I think the car is about 50% done.
The car had door guards riveted to the sides and I had them welded up. One of the first things I did when I got the car was to build a dolly to be able to work on the suspension and make it easy to move it around the garage. It’s made from 4 X 4s and plywood and it took about 4 hours to build. If you don’t have a wood saw Home Depot will cut the 4 X 4s and plywood to the correct length. There are lag screws on top of the vertical posts that stick up ½” that fit into the 4 jack points cups under the car. This keeps the car from falling off. Also, I removed the engine before I put the car on it. To get it up there I used some cement blocks, 4 jack stands and 2 scissor jacks. Over the past year I’ve learned a lot from reading your posts and now I would like to give back some of the knowledge I’ve learned. Attached image(s) 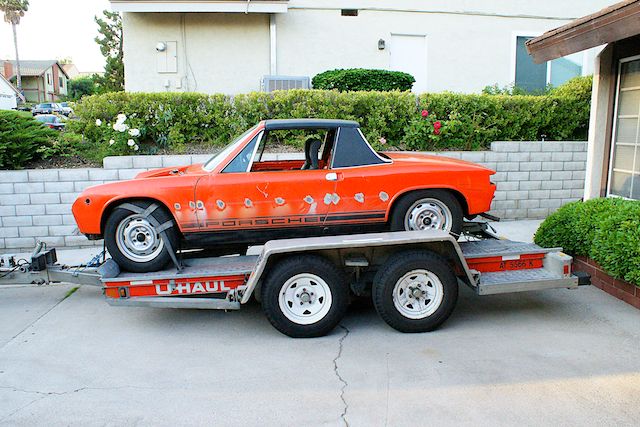 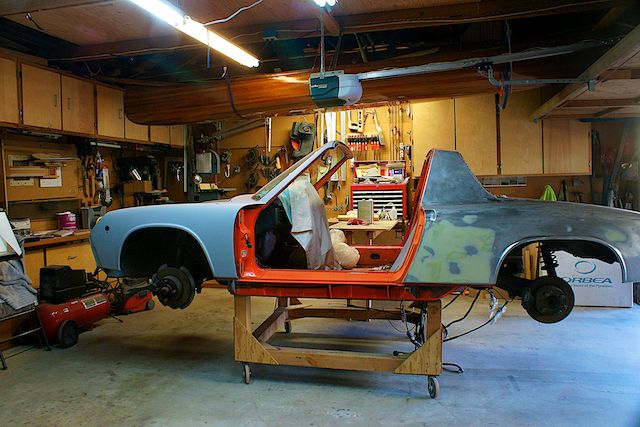 Attached File(s)  Dolly.pdf ( 97.5k )
Number of downloads: 289
 |
| JawjaPorsche |
 Jun 24 2013, 05:32 AM Jun 24 2013, 05:32 AM
Post
#2
|
|
Advanced Member     Group: Members Posts: 3,463 Joined: 23-July 11 From: Clayton, Georgia Member No.: 13,351 Region Association: South East States |
Good luck with your project. Looks like you have a good teener to work on. (IMG:style_emoticons/default/beerchug.gif)
I like your dolly height. Would save my back from bending over. Same year, engine, and color as mine! |
| Steve_R |
 Aug 15 2013, 10:01 PM Aug 15 2013, 10:01 PM
Post
#3
|
|
Member   Group: Members Posts: 68 Joined: 8-August 12 From: San Diego, CA Member No.: 14,777 Region Association: None |
I finally finished the paint job. Here in California we have some of the strictest VOC laws in the country. I was originally planning on using PPG paint, but when I went to my local paint jobber (Tri City Paint) I found out that they would only sell me zero or low VOC paint. So, I decided on Valspar low VOC base and clear. Valspar also makes a direct to metal primer (DTM2004) that eliminates the need for an epoxy base primer and 2K sealer.
My goal was to do a show car type finish so I did a lot of extra steps. I used the 3M Trizact 3000 and 5000 sanding pads, on a DA sander, and the 3M Perfect It buffing compounds with the 3 different pads. I did this in my driveway using a Harbor Freight ($11.00) spray gun for the primer and a DeVilbiss Finish Line ($150.00) HVLP gun for the base and clear. BTW the color is Bahia Red L-30E 1. Remove old paint to bare metal with 80 grit using Porter Cable DA sander. 2. Apply Evercoat Rage Gold filler to fill dents. 3. Sand filler with 80 grit on a long board sanding block. 4. Prime using Valspar DTM2004. Mix 4:1:1 with LVBM100 reducer and DTMA activator. 3 heavy coats. 5. Block sand using 220 dry Durra Gold sand paper roll on a long sanding board. 6. Fill small dents using Evercoat Metal Glaze and Blending Putty. 7. Block sand using 220 dry on a long sanding block. 8. Repeat to step 4 as needed. 9. Prime using Valspar DTM2004. Mix 4:1:2 (more reducer) 10. Sand with 800 wet using a firm rubber pad. 11. Spray 3 coats of base coat color (Bahia Red L-30E) using Valspar LVB100. Mix 1:1 with TCP Kustom Shop medium zero VOC XR-70 reducer. Use 1.3mm gun tip. No activator. Let flash between coats, about 15 min. 12. Spray 3 coats of clear Valspar LVCC300. Mix 4:1 with LVAA activator. Use 1.5mm gun tip. Let dry in between coats so there is no “stringing”. About 30-40 min. 13. Let dry for 48 hours. 14. Wet sand by hand with 1500. 15. Wet sand by hand with 2000. 16. Wet sand with 3000 using 3M Trizact pads on a DA sander. Hand sand all edges and corners with Trizact pad. 17. Wet sand with 5000 using 3M Trizact pads on a DA sander. Hand sand all edges and corners with Trizact pad. 18. Buff with 3M Perfect It system using white, black and blue foam pads and corresponding compounds. Hand polish edges and corners with each compound. 19. Let dry for 2 months and wax. 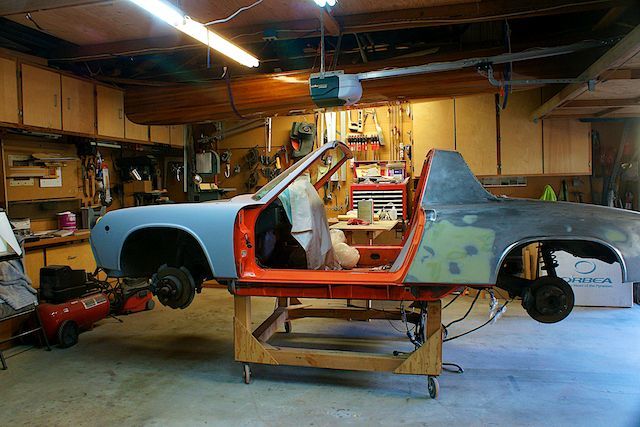 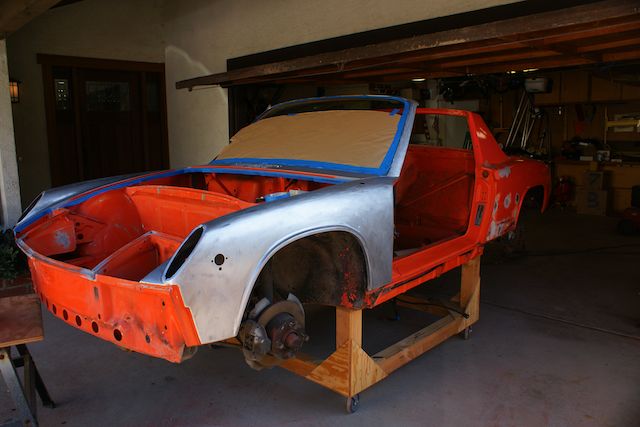 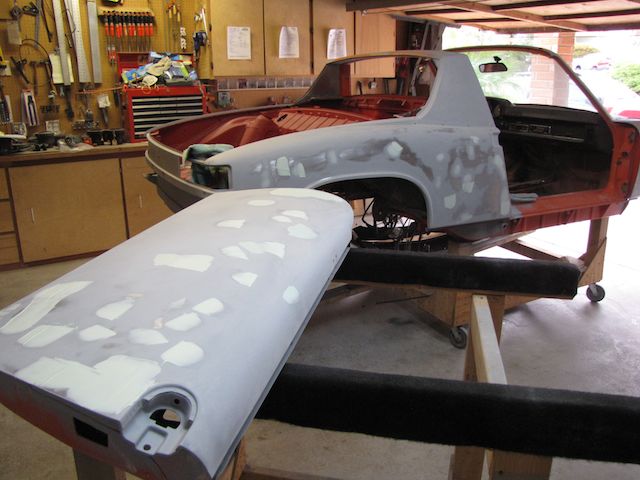 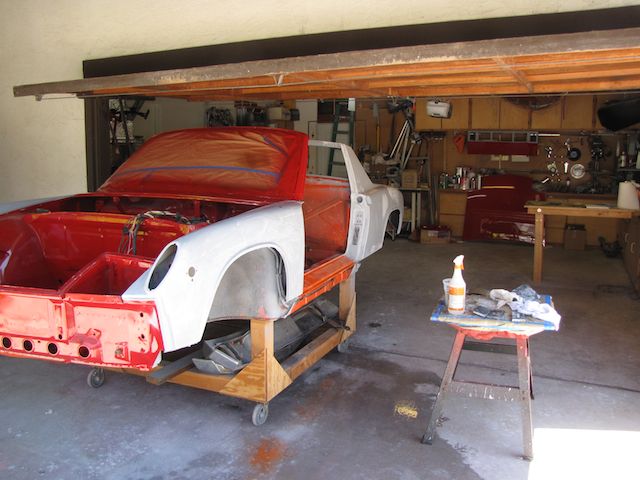 [attachmentid=404 [attachmentid=404565] 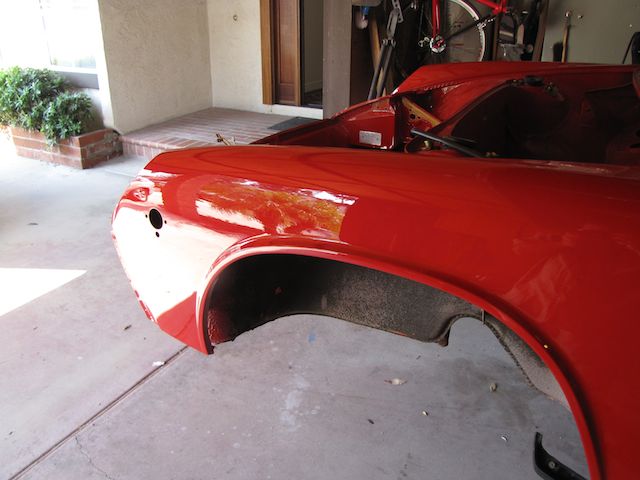 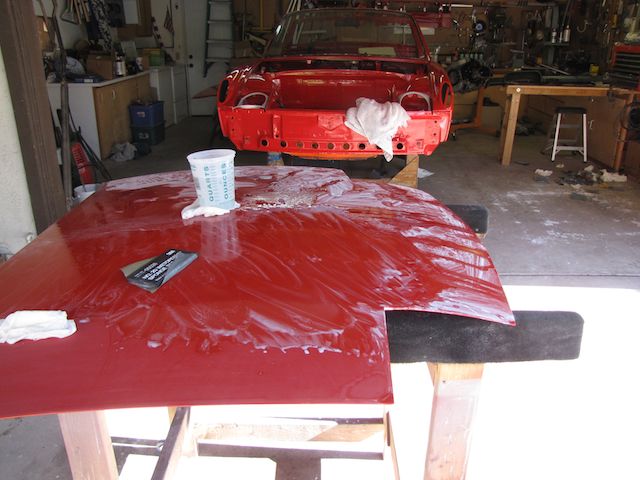 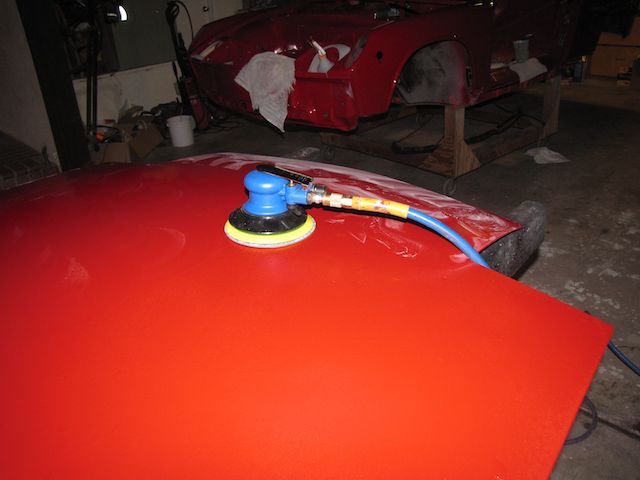 [attachmentid [attachmentid=404569] Attached image(s) 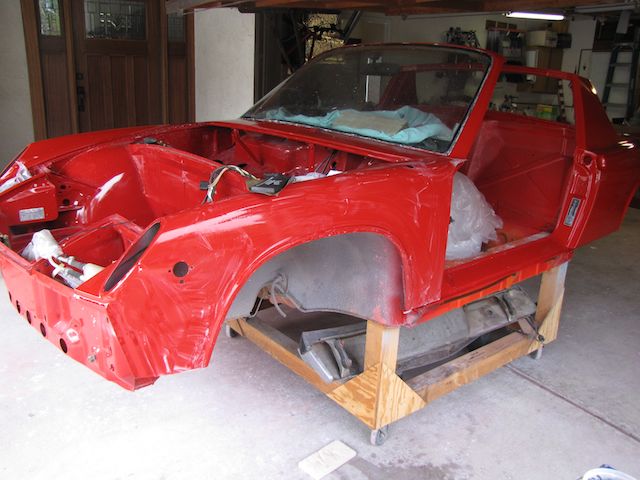 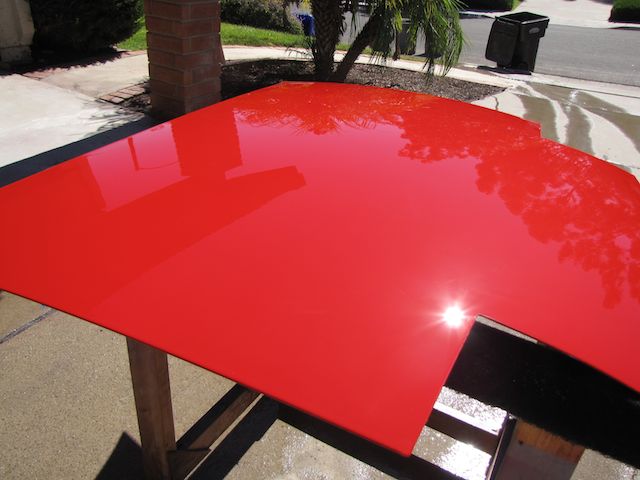
|
| zambezi |
 Aug 16 2013, 09:54 PM Aug 16 2013, 09:54 PM
Post
#4
|
|
Senior Member    Group: Members Posts: 711 Joined: 14-April 08 From: Lafayette, LA Member No.: 8,920 Region Association: South East States |
Great job. I hope my home paint job comes out that nice.
|
| Cairo94507 |
 Aug 17 2013, 07:55 AM Aug 17 2013, 07:55 AM
Post
#5
|
|
Michael           Group: Members Posts: 10,149 Joined: 1-November 08 From: Auburn, CA Member No.: 9,712 Region Association: Northern California 
|
That looks terrific! I hope you post more pictures soon. (IMG:style_emoticons/default/smilie_pokal.gif)
|
| rick 918-S |
 Aug 18 2013, 05:19 AM Aug 18 2013, 05:19 AM
Post
#6
|
|
Hey nice rack! -Celette                Group: Members Posts: 20,838 Joined: 30-December 02 From: Now in Superior WI Member No.: 43 Region Association: Northstar Region 

|
Nice work (IMG:style_emoticons/default/welcome.png)
|
| jimkelly |
 Aug 18 2013, 05:41 AM Aug 18 2013, 05:41 AM
Post
#7
|
|
Delaware USA     Group: Members Posts: 4,969 Joined: 5-August 04 From: Delaware, USA Member No.: 2,460 Region Association: MidAtlantic Region |
thanks for the details and product list.
looks nice and shiney (IMG:style_emoticons/default/drooley.gif) |
| bulitt |
 Aug 18 2013, 06:34 AM Aug 18 2013, 06:34 AM
Post
#8
|
|
Achtzylinder     Group: Members Posts: 4,188 Joined: 2-October 11 Member No.: 13,632 Region Association: South East States |
Wow! Love the canoe!
|
| FourBlades |
 Aug 18 2013, 07:18 AM Aug 18 2013, 07:18 AM
Post
#9
|
|
From Wreck to Rockin     Group: Members Posts: 2,056 Joined: 3-December 07 From: Brevard, FL Member No.: 8,414 Region Association: South East States 
|
What happened to welding in 30 rust repair panels? (IMG:style_emoticons/default/confused24.gif) This can't be a teener restoration without that. (IMG:style_emoticons/default/biggrin.gif) Lets see more pictures, looks great so far. (IMG:style_emoticons/default/piratenanner.gif) John |
| watsonrx13 |
 Aug 18 2013, 07:51 AM Aug 18 2013, 07:51 AM
Post
#10
|
|
Advanced Member     Group: Members Posts: 2,735 Joined: 18-February 03 From: Plant City, FL Member No.: 312 Region Association: South East States |
Excellent work. Can you show some pics of the paint booth set up?
--- Rob |
| Steve_R |
 Aug 18 2013, 09:11 AM Aug 18 2013, 09:11 AM
Post
#11
|
|
Member   Group: Members Posts: 68 Joined: 8-August 12 From: San Diego, CA Member No.: 14,777 Region Association: None |
Rob,
I didn't use a paint booth. I painted it in the drive way in the morning when there wasn't any wind. Also I hosed down the driveway to keep the dust down. On the whole car I got two small flies in the paint that I was able to pick out with tweezers. I think the two stage base coat/clear coat paint makes it easier to paint without a paint booth. You can easily fix problems (bugs, runs) in the base coat. Since you sand and buff the clear coat, it's easy to fix problems. |
| CptTripps |
 Mar 3 2014, 07:25 PM Mar 3 2014, 07:25 PM
Post
#12
|
|
:: Punch and Pie ::     Group: Members Posts: 3,584 Joined: 26-December 04 From: Mentor, OH Member No.: 3,342 Region Association: Upper MidWest |
I was planning on getting one of these to do the paintwork that I'll be doing at home. I have the car on a rotisserie, so I can set this up outside and just wheel the car to/from the garage for the primer and paint stages.
http://www.harborfreight.com/10-ft-x-17-ft...ml#.UxUq6vRdWR8 Thinking about adding 2 box fans to one side for exhaust and 3-4 filters on the other side to let fresh air in. |
| ndfrigi |
 Mar 3 2014, 07:45 PM Mar 3 2014, 07:45 PM
Post
#13
|
|
Advanced Member     Group: Members Posts: 2,960 Joined: 21-August 11 From: Orange County Member No.: 13,474 Region Association: Southern California 
|
Hi Steve,
Can you share a picture(s) of your car now. Thank you! |
| cconcepcion |
 Mar 3 2014, 07:49 PM Mar 3 2014, 07:49 PM
Post
#14
|
|
Member   Group: Members Posts: 51 Joined: 5-January 06 From: Peoria,Az Member No.: 5,370 |
+1 on the canoe! on a side note….you must have a uber floor jack huh?
Nice paintwork! |
| Steve_R |
 Mar 4 2014, 12:09 AM Mar 4 2014, 12:09 AM
Post
#15
|
|
Member   Group: Members Posts: 68 Joined: 8-August 12 From: San Diego, CA Member No.: 14,777 Region Association: None |
So, here's an update. Since my last post i've finished the engine rebuild, sand blasted the suspension parts and had them powder coated, rebuilt the brake calipers and installed the suspension. I found that most of the cost in powder coating is in sand blasting the parts. Since I did the sand blasting myself I was able to get the entire suspension power coated for $350.00.
Attached image(s) 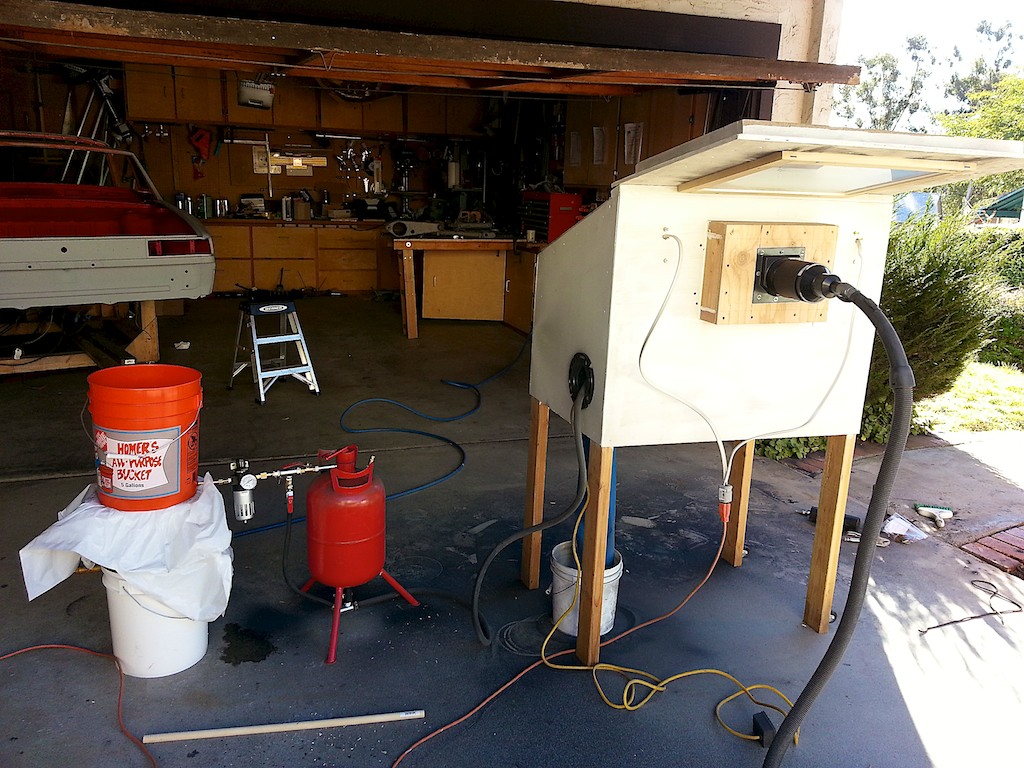 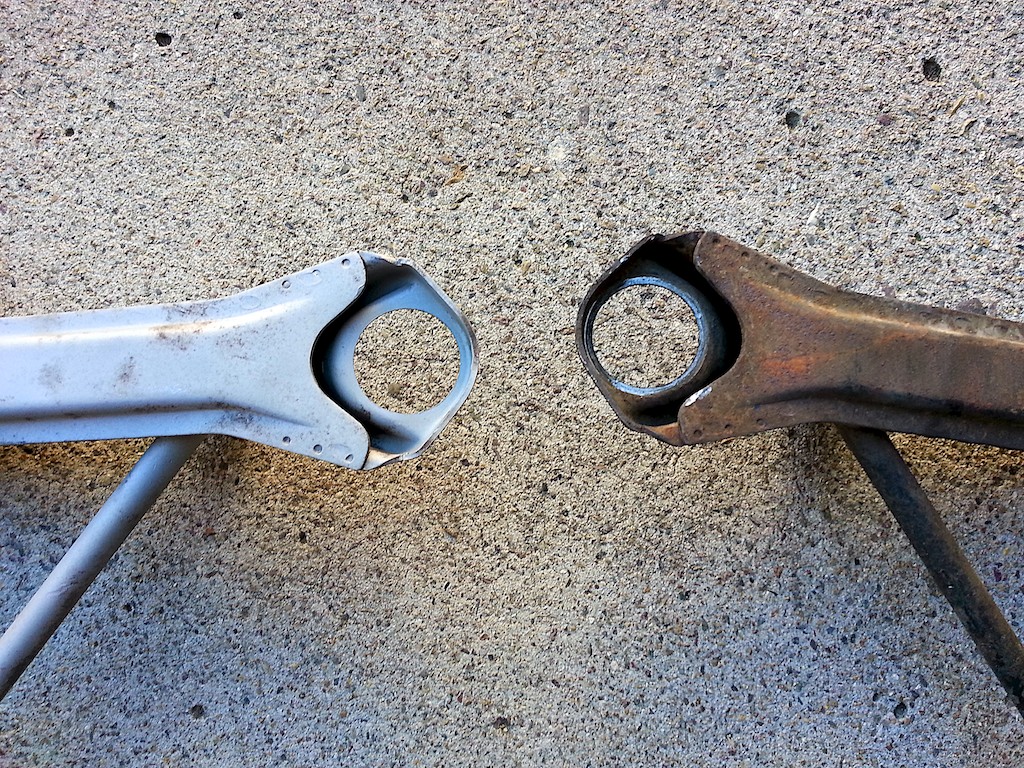 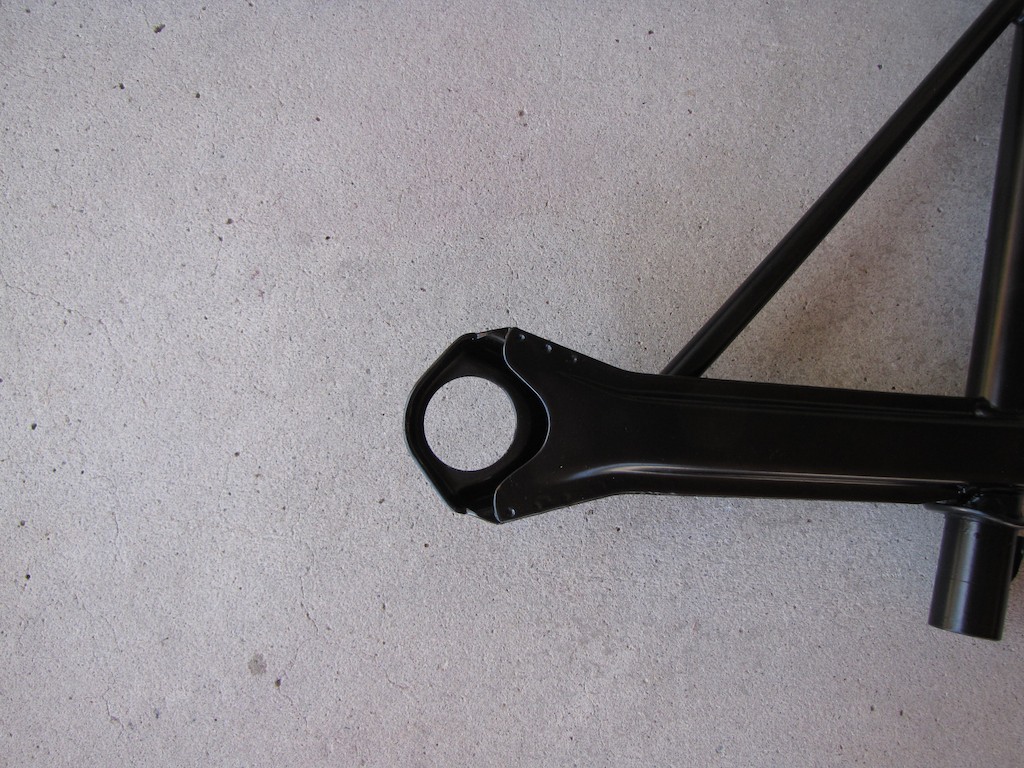 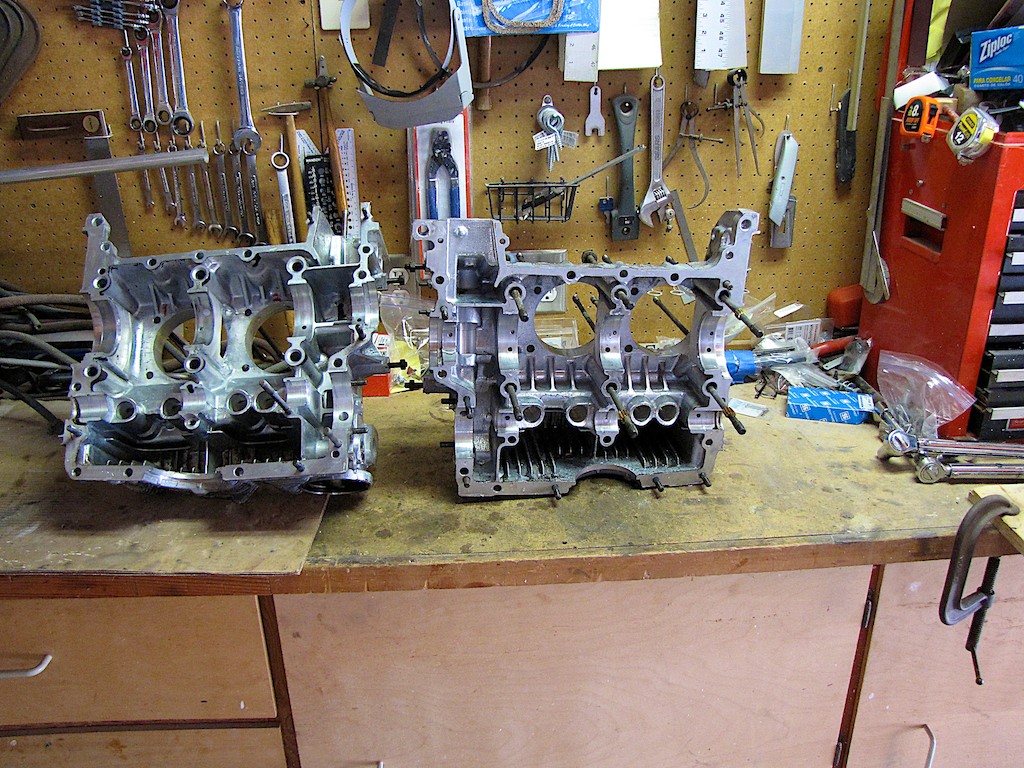 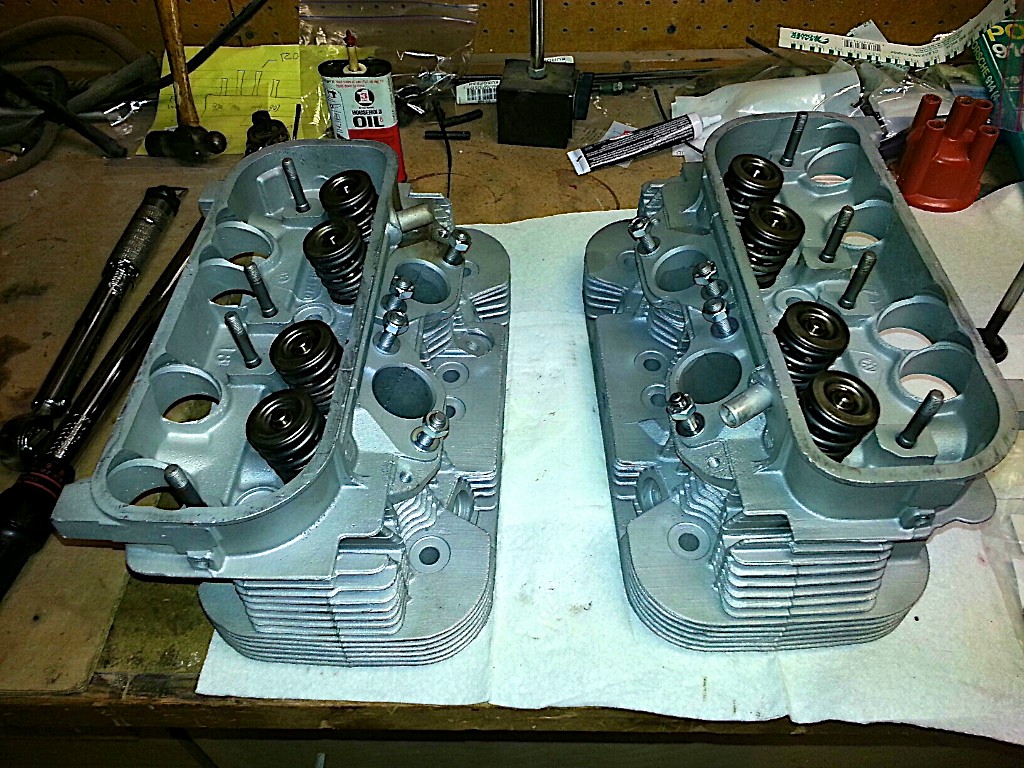 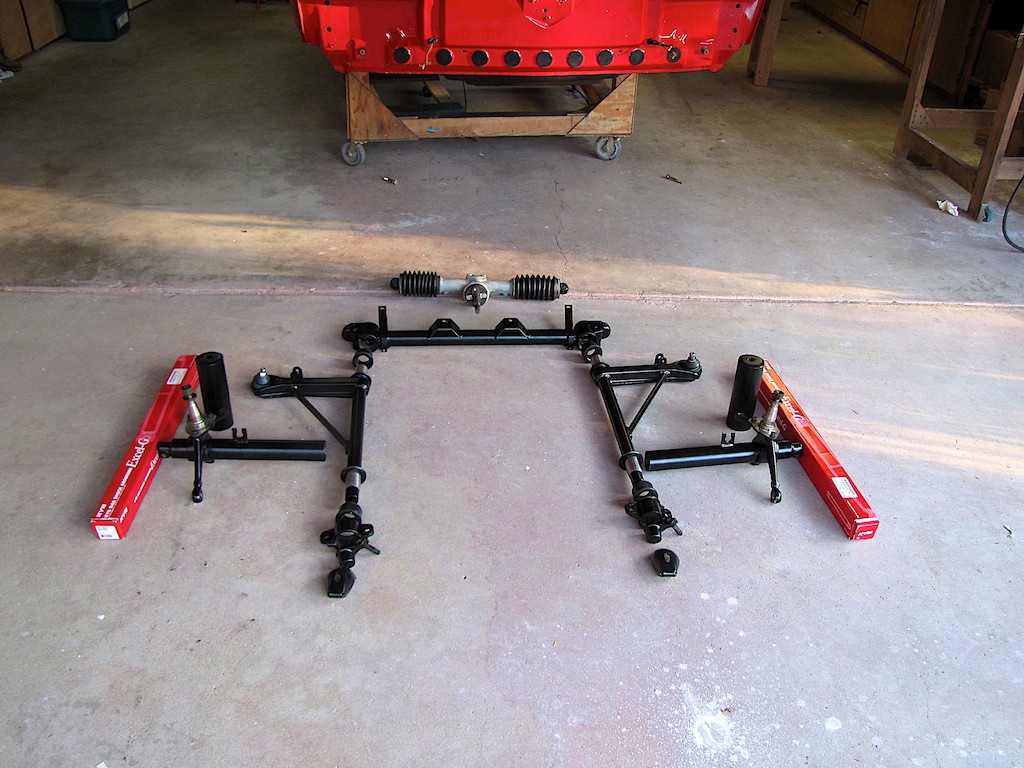 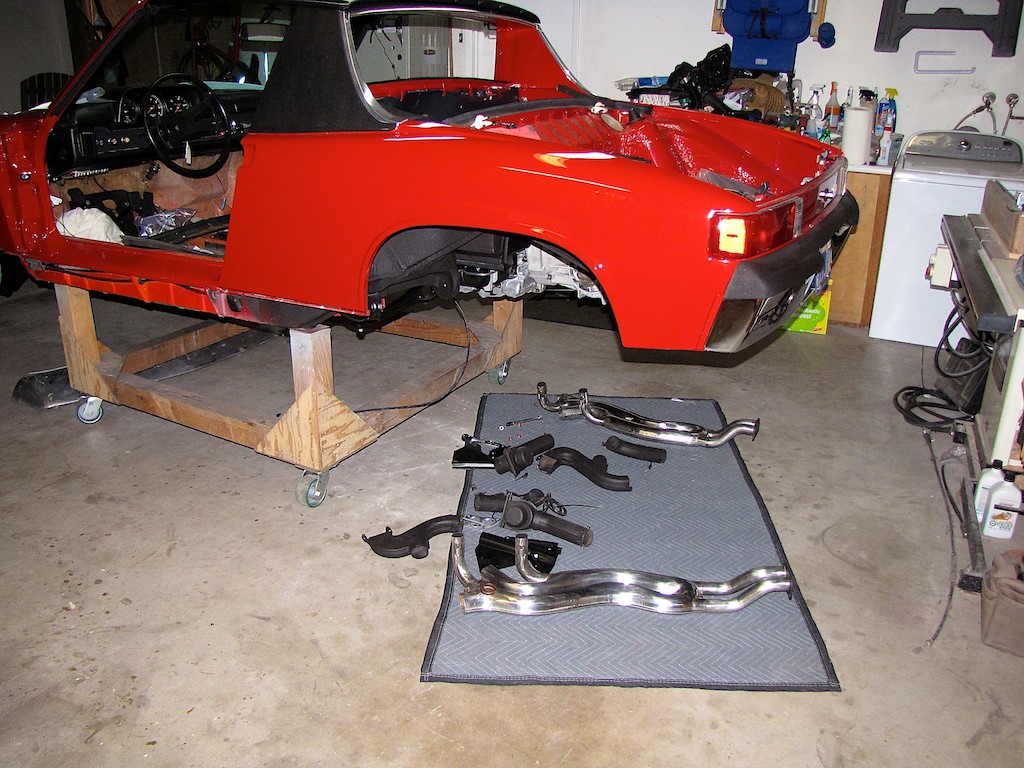 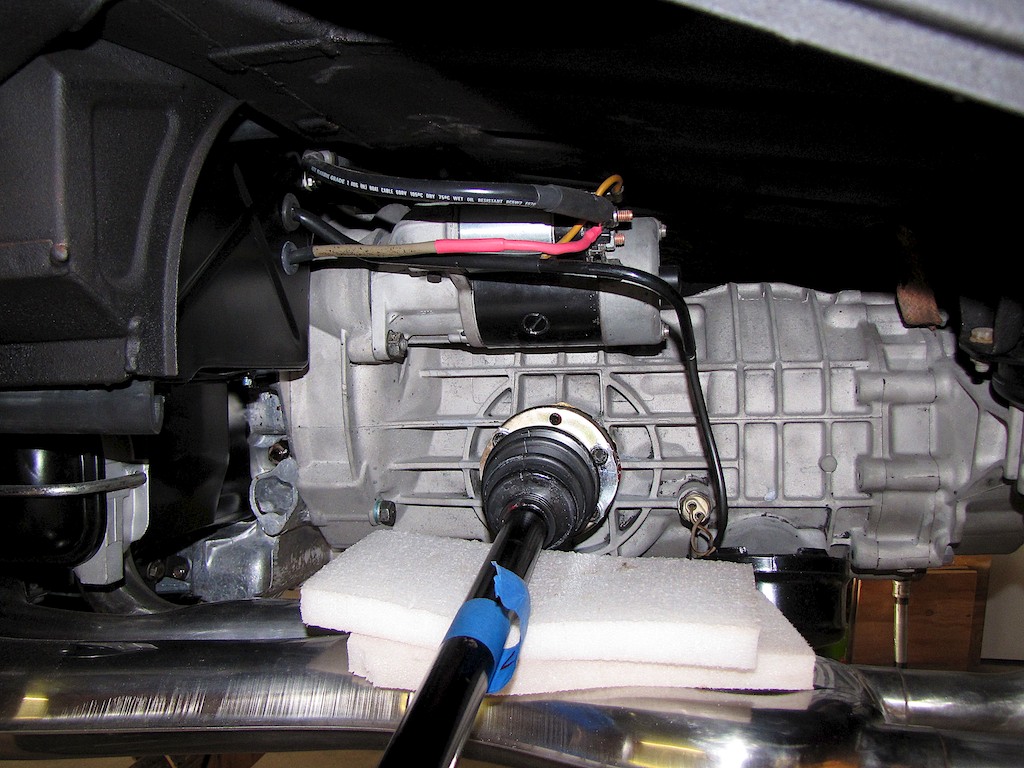 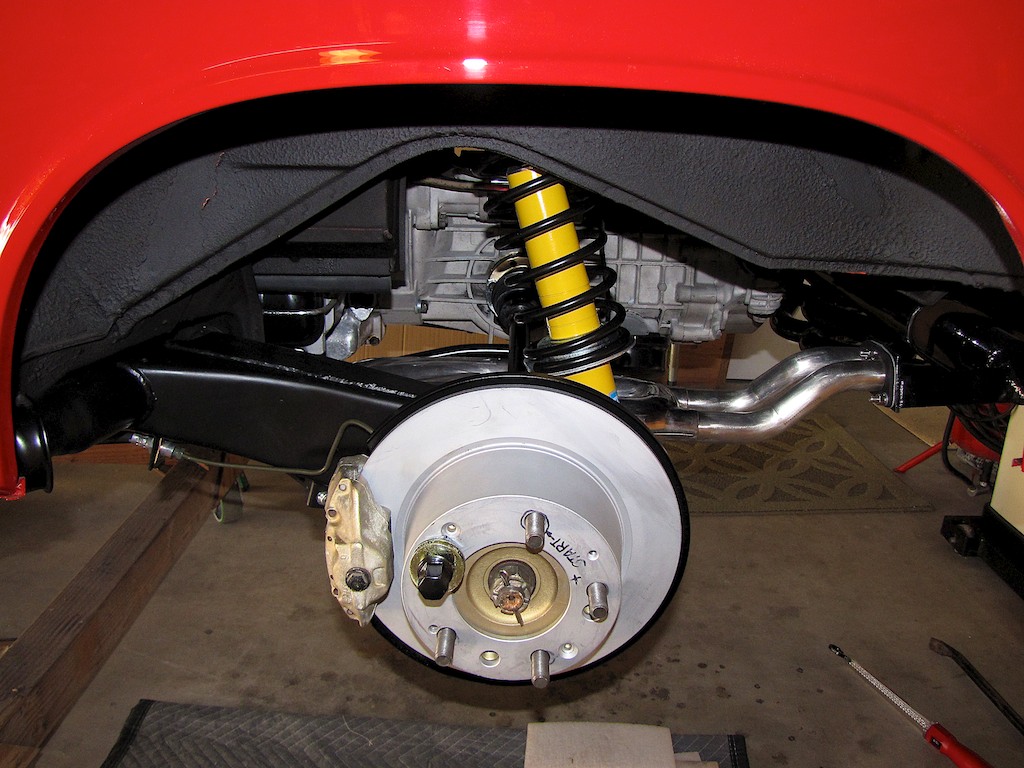 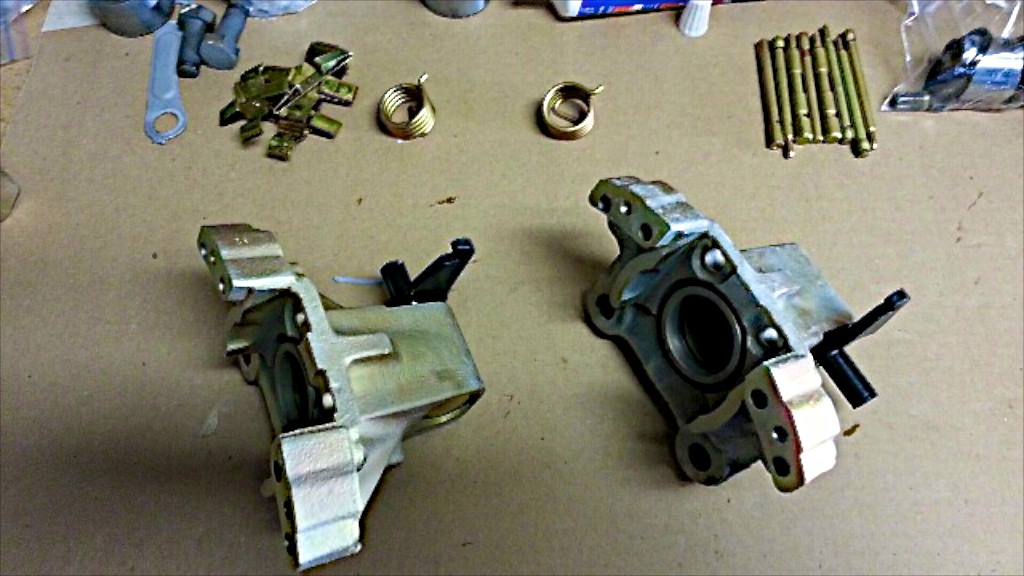 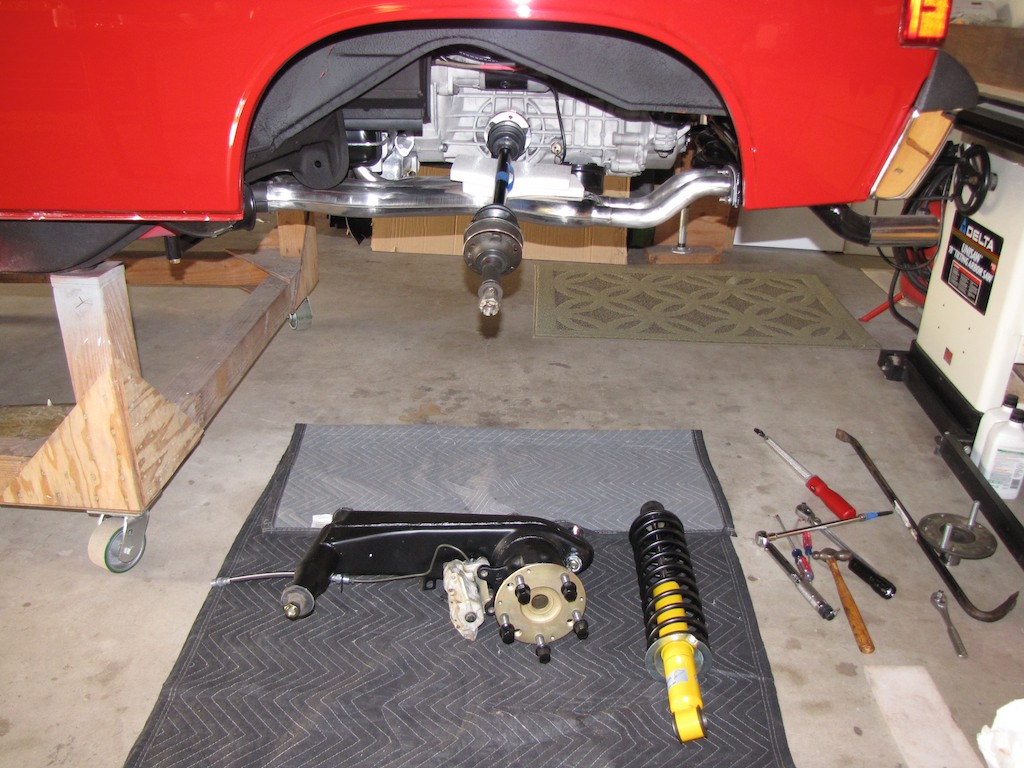 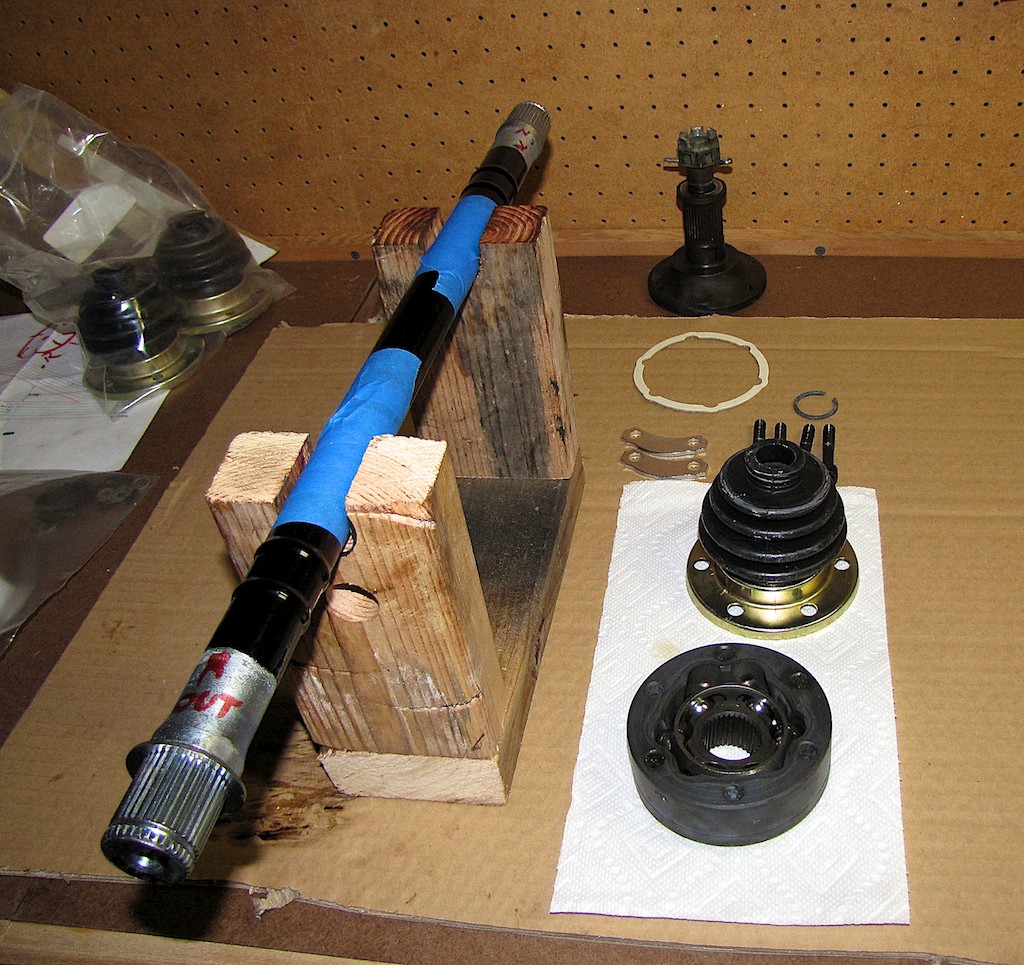 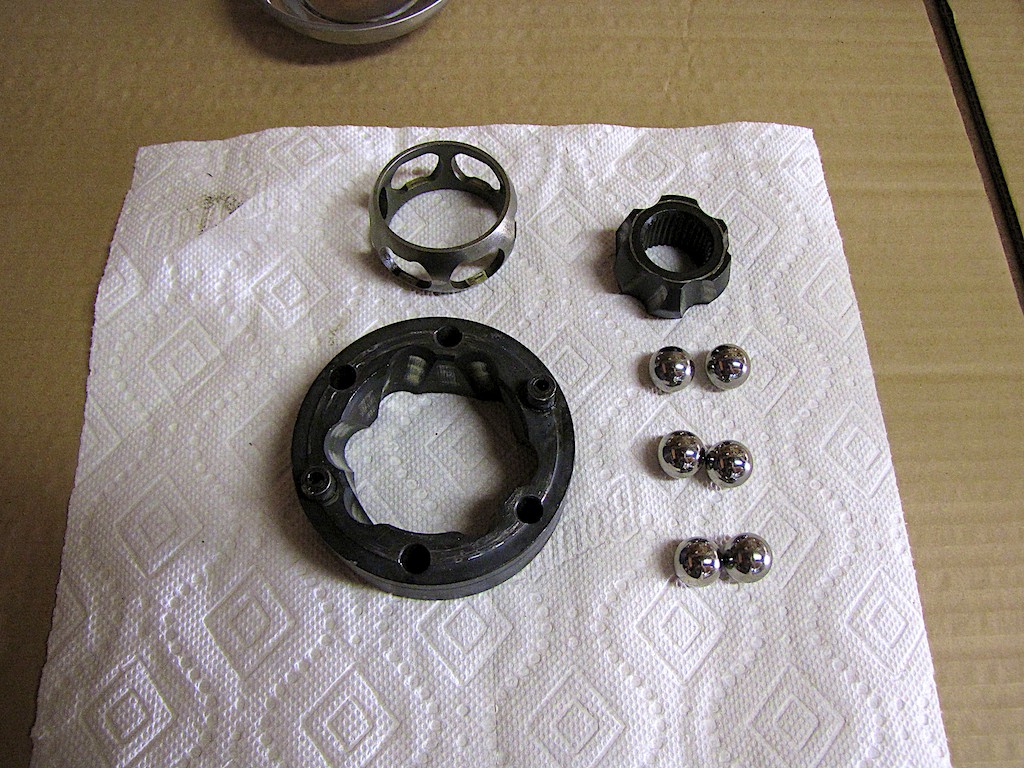 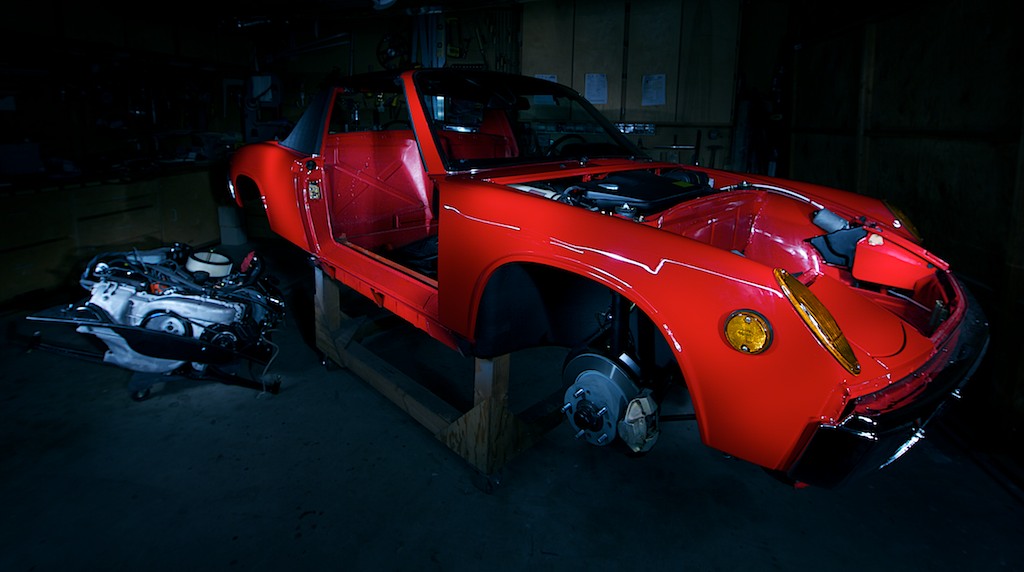
|
| ndfrigi |
 Mar 4 2014, 12:19 AM Mar 4 2014, 12:19 AM
Post
#16
|
|
Advanced Member     Group: Members Posts: 2,960 Joined: 21-August 11 From: Orange County Member No.: 13,474 Region Association: Southern California 
|
Wow beautiful! Thanks for sharing the update!
|
| Steve_R |
 Mar 4 2014, 08:13 AM Mar 4 2014, 08:13 AM
Post
#17
|
|
Member   Group: Members Posts: 68 Joined: 8-August 12 From: San Diego, CA Member No.: 14,777 Region Association: None |
More pics
Attached image(s) 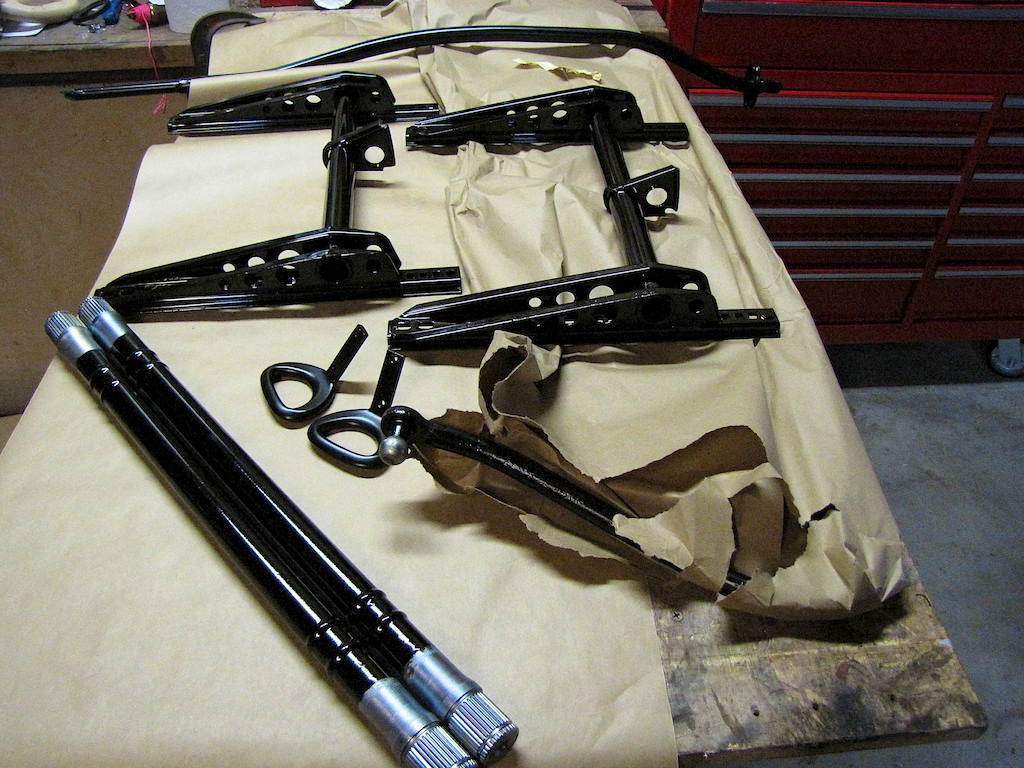 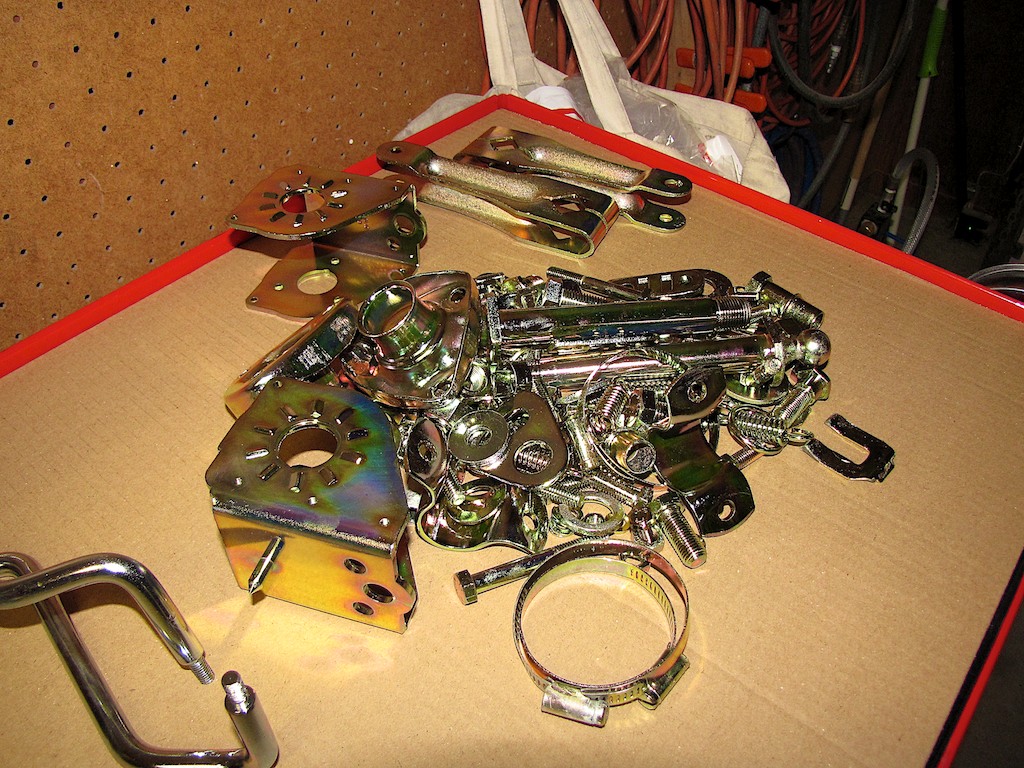 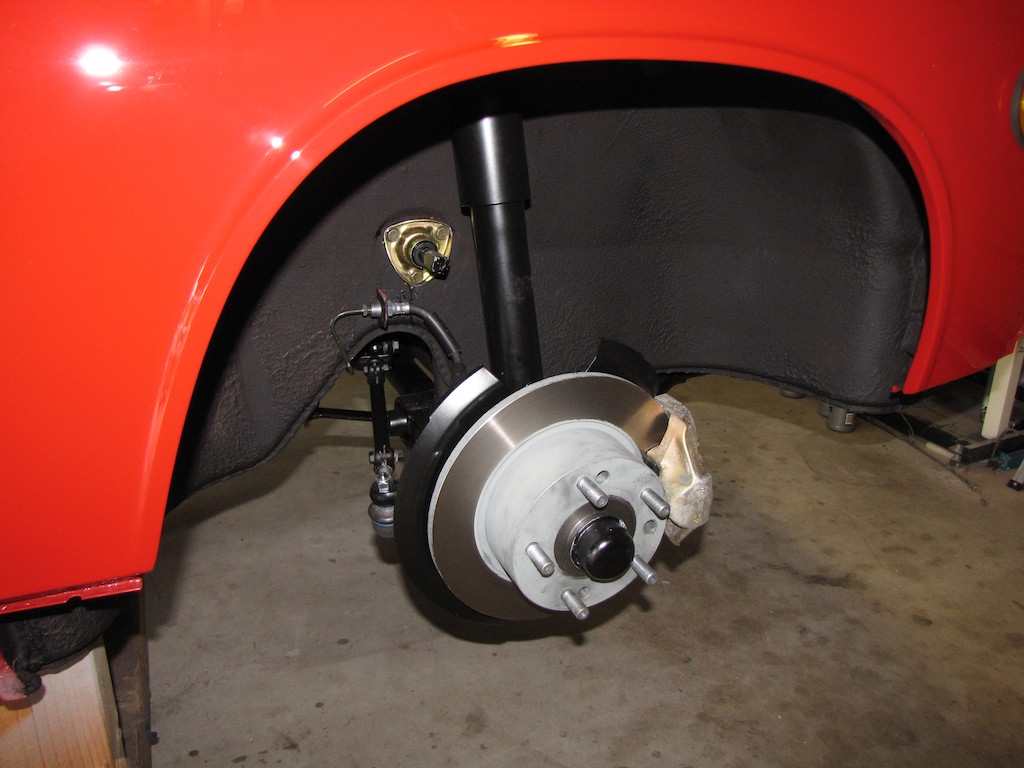
|
| ThePaintedMan |
 Mar 4 2014, 08:29 AM Mar 4 2014, 08:29 AM
Post
#18
|
|
Advanced Member     Group: Members Posts: 3,886 Joined: 6-September 11 From: St. Petersburg, FL Member No.: 13,527 Region Association: South East States 
|
WOW. Really impressive work Steve. Nice to see someone spending time and energy renewing even a lowly 1.7. You'll enjoy the heck out of it when it's done. (IMG:style_emoticons/default/beerchug.gif)
|
| Steve_R |
 Mar 4 2014, 08:17 PM Mar 4 2014, 08:17 PM
Post
#19
|
|
Member   Group: Members Posts: 68 Joined: 8-August 12 From: San Diego, CA Member No.: 14,777 Region Association: None |
Applied undercoating and relocated the fuel pump and filter to under the gas tank.
The pump I used is a NAPA Bosch N69133 and the filter is a NAPA 3482. For the fuel lines I used 3/8 & 5/16 steel lines from NAPA. I cut them to length and flared the ends for the fittings. I did buy stainless lines to connect to the engine. Attached image(s) 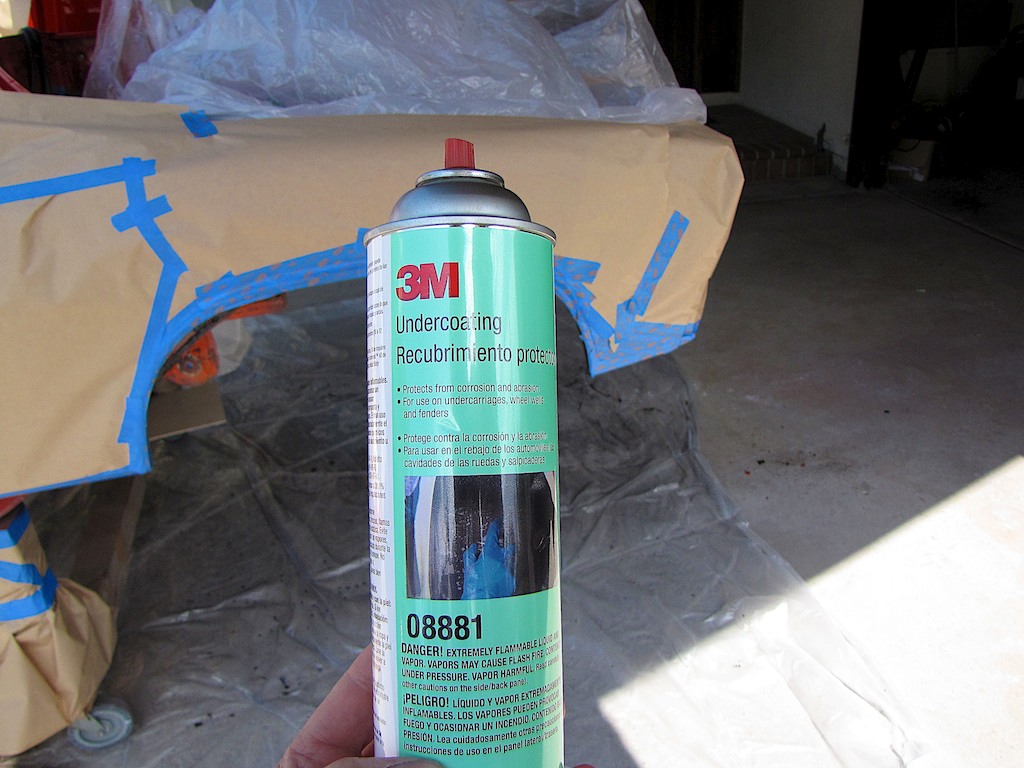 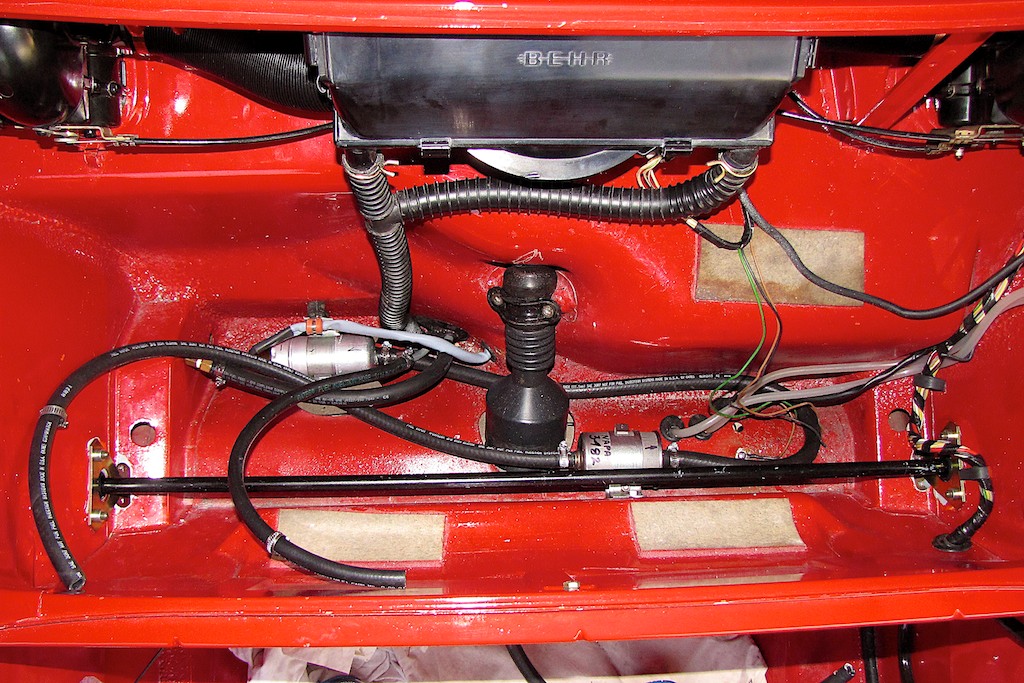 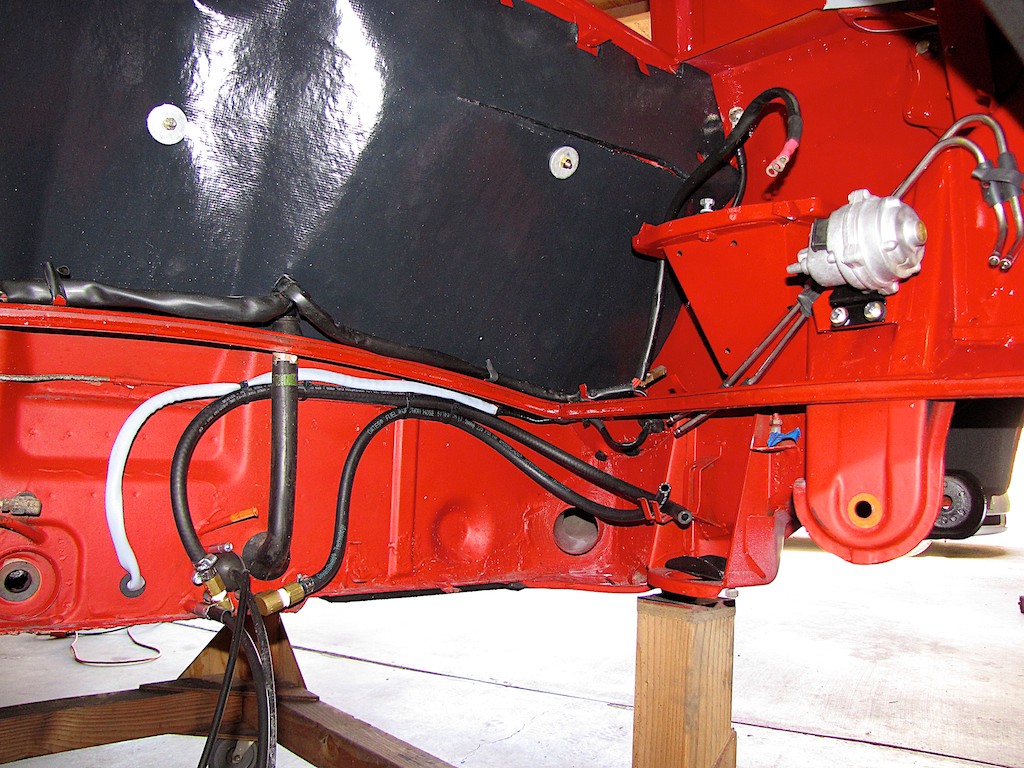 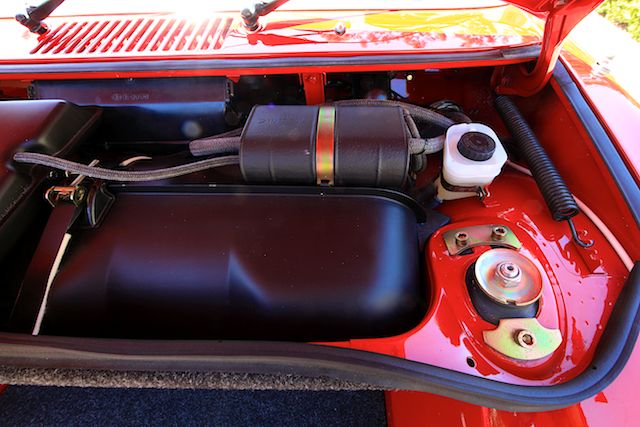
|
| wndsnd |
 Mar 4 2014, 08:41 PM Mar 4 2014, 08:41 PM
Post
#20
|
|
You wanted a horse, but got a goat. Nobody wants a goat....     Group: Members Posts: 2,861 Joined: 12-February 12 From: North Shore, MA Member No.: 14,124 Region Association: North East States  |
WOW. Really impressive work Steve. Nice to see someone spending time and energy renewing even a lowly 1.7. You'll enjoy the heck out of it when it's done. (IMG:style_emoticons/default/beerchug.gif) Lowly 1.7? (IMG:style_emoticons/default/mad.gif) (IMG:style_emoticons/default/blink.gif) And I thought I liked you George. (IMG:style_emoticons/default/spank.gif) (IMG:style_emoticons/default/poke.gif) (IMG:style_emoticons/default/biggrin.gif) |
  |
1 User(s) are reading this topic (1 Guests and 0 Anonymous Users)
0 Members:

|
Lo-Fi Version | Time is now: 8th January 2025 - 12:27 AM |
Invision Power Board
v9.1.4 © 2025 IPS, Inc.


