|
|

|
Porsche, and the Porsche crest are registered trademarks of Dr. Ing. h.c. F. Porsche AG.
This site is not affiliated with Porsche in any way. Its only purpose is to provide an online forum for car enthusiasts. All other trademarks are property of their respective owners. |
|
|
  |
| 914forme |
 Mar 26 2018, 07:26 PM Mar 26 2018, 07:26 PM
Post
#1081
|
|
Times a wastin', get wrenchin'!     Group: Members Posts: 3,896 Joined: 24-July 04 From: Dayton, Ohio Member No.: 2,388 Region Association: None 
|
Nice progress Scott.
|
| mepstein |
 Mar 26 2018, 08:37 PM Mar 26 2018, 08:37 PM
Post
#1082
|
|
914-6 GT in waiting                Group: Members Posts: 19,691 Joined: 19-September 09 From: Landenberg, PA/Wilmington, DE Member No.: 10,825 Region Association: MidAtlantic Region 
|
Sorry I couldn't help you with the replacement piece. Mine was toast. Car looks much healthier with the metal back in place. (IMG:style_emoticons/default/beerchug.gif)
|
| Amenson |
 Mar 27 2018, 07:38 PM Mar 27 2018, 07:38 PM
Post
#1083
|
|
That's opposite lock!!    Group: Members Posts: 645 Joined: 27-May 05 From: Dublin, OH Member No.: 4,154 Region Association: None 
|
With the center console in place and the throttle cable tube relocated to the driver side I was able to mock up the throttle cable.
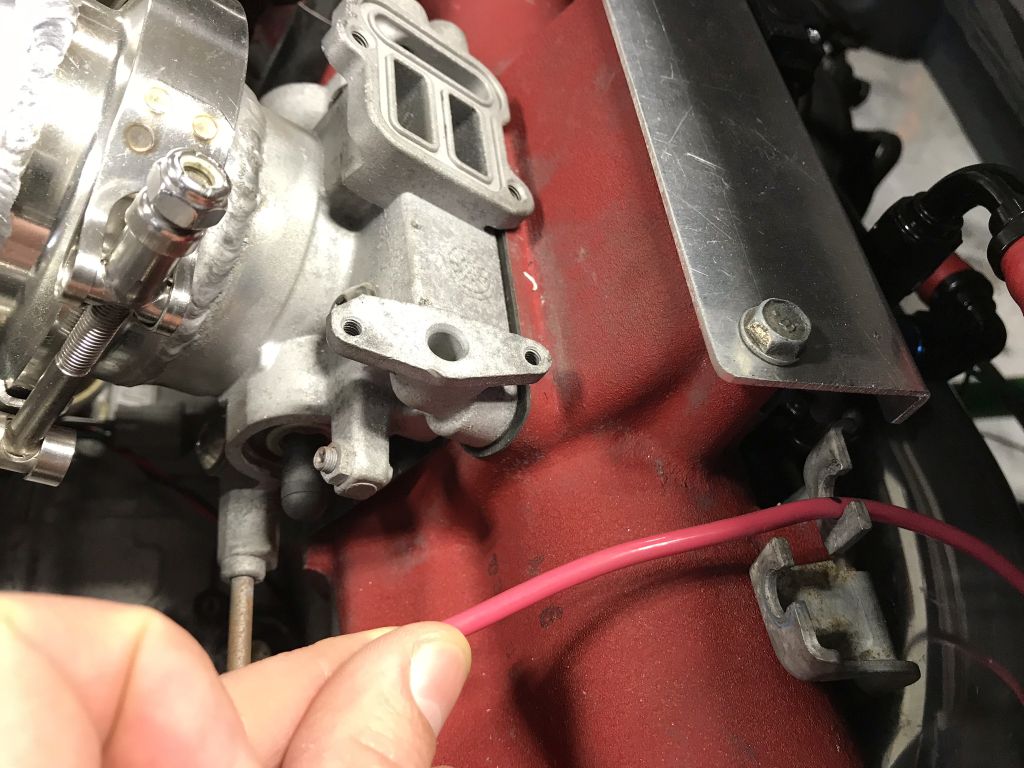 Bad picture, you can sort of see the red wire in place of the throttle cable. 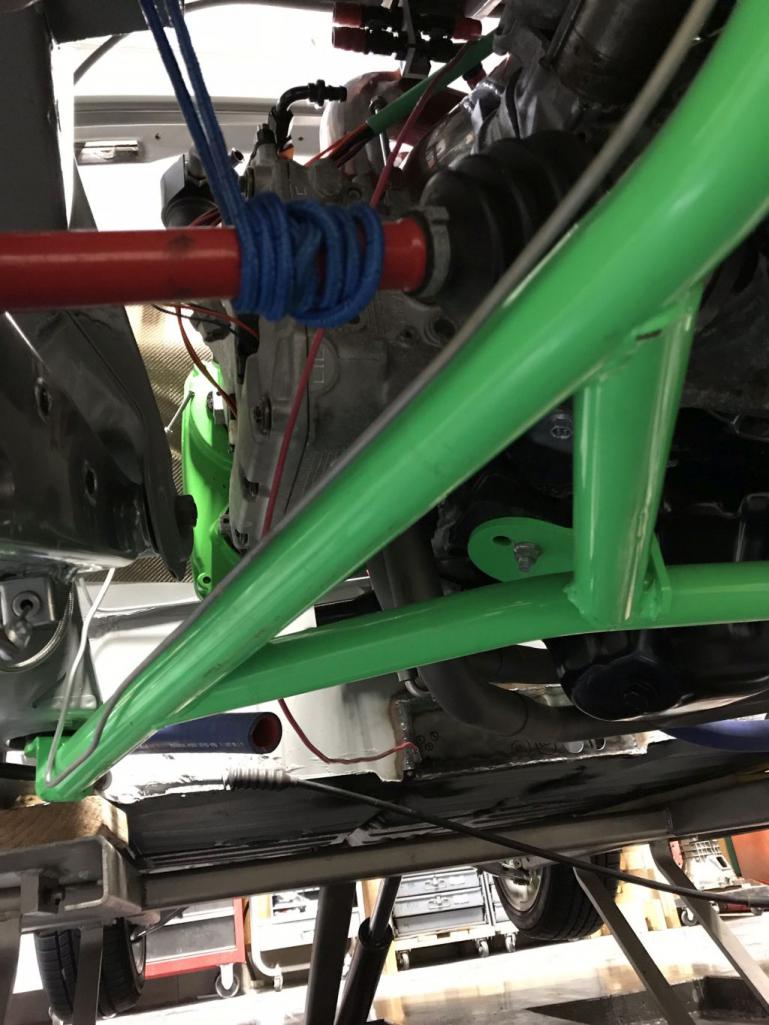 The length from the tip of the throttle tube to the stock Suby cable mount is 140cm. Throttle tube is stock length. Manifold side is all stock Suby. Tom, is this enough info to specify the cable to 914 Rubber? |
| theer |
 Mar 28 2018, 06:56 AM Mar 28 2018, 06:56 AM
Post
#1084
|
|
Senior Member    Group: Members Posts: 686 Joined: 31-July 15 From: Dover, MA Member No.: 19,014 Region Association: North East States 
|
Thanks, Scott. That should do it.
Tom |
| Amenson |
 Mar 29 2018, 06:01 PM Mar 29 2018, 06:01 PM
Post
#1085
|
|
That's opposite lock!!    Group: Members Posts: 645 Joined: 27-May 05 From: Dublin, OH Member No.: 4,154 Region Association: None 
|
How do you eat an elephant?
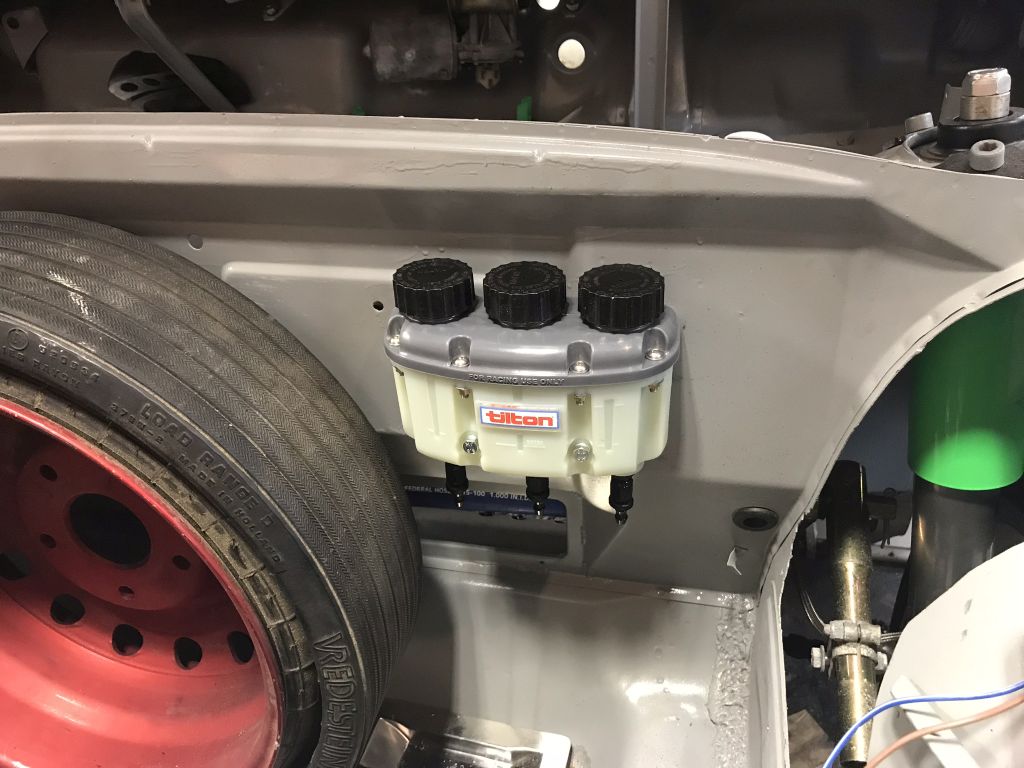 |
| 914forme |
 Mar 29 2018, 06:39 PM Mar 29 2018, 06:39 PM
Post
#1086
|
|
Times a wastin', get wrenchin'!     Group: Members Posts: 3,896 Joined: 24-July 04 From: Dayton, Ohio Member No.: 2,388 Region Association: None 
|
With a proper three chamber Tilton fluid reservoir. But you are correct one piece at a time.
I was busy cleaning hubs tonight, one piece at a time (IMG:style_emoticons/default/chowtime.gif) |
| Amenson |
 Mar 30 2018, 09:12 PM Mar 30 2018, 09:12 PM
Post
#1087
|
|
That's opposite lock!!    Group: Members Posts: 645 Joined: 27-May 05 From: Dublin, OH Member No.: 4,154 Region Association: None 
|
Had they day off and took the opportunity to finish the welding on the tunnel replacement.
Bad things happen when you try to push through dirty tungsten. It is amazing how a little contamination pop can ruin the arc. Proper thing to do is to stop and resharpen. this is what happens when you don't. Arc gets wide, takes more amps to melt the filler, more contamination on the tungsten, then blop... 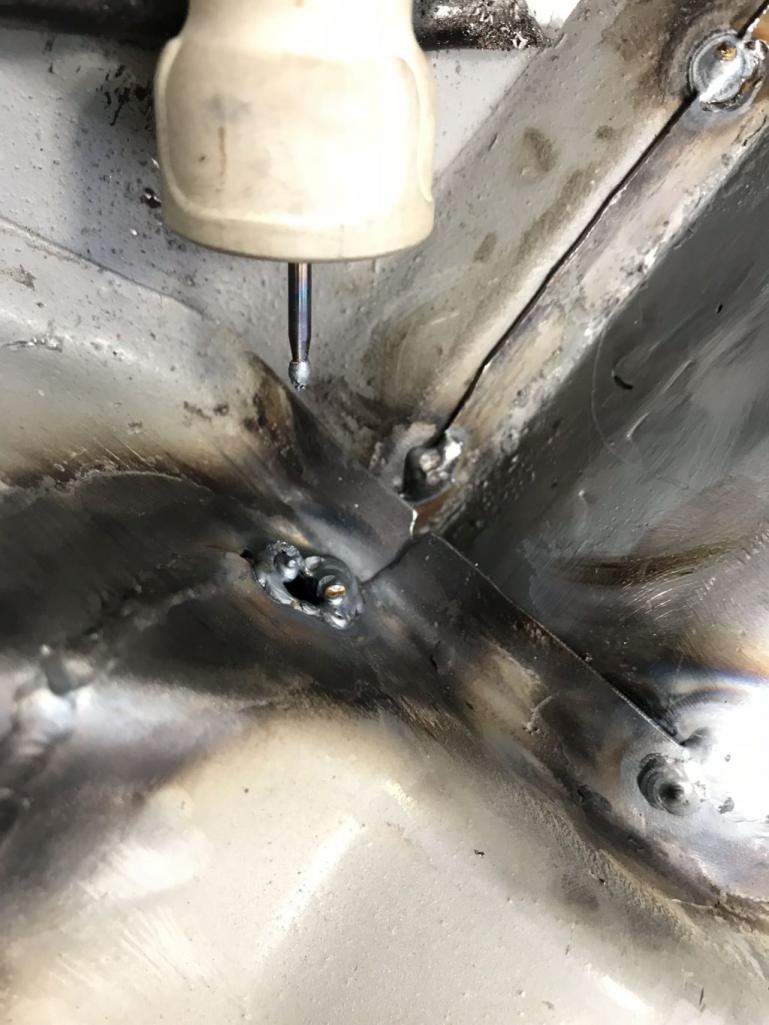 Took a bid of grinding but pretty happy with the recovery. 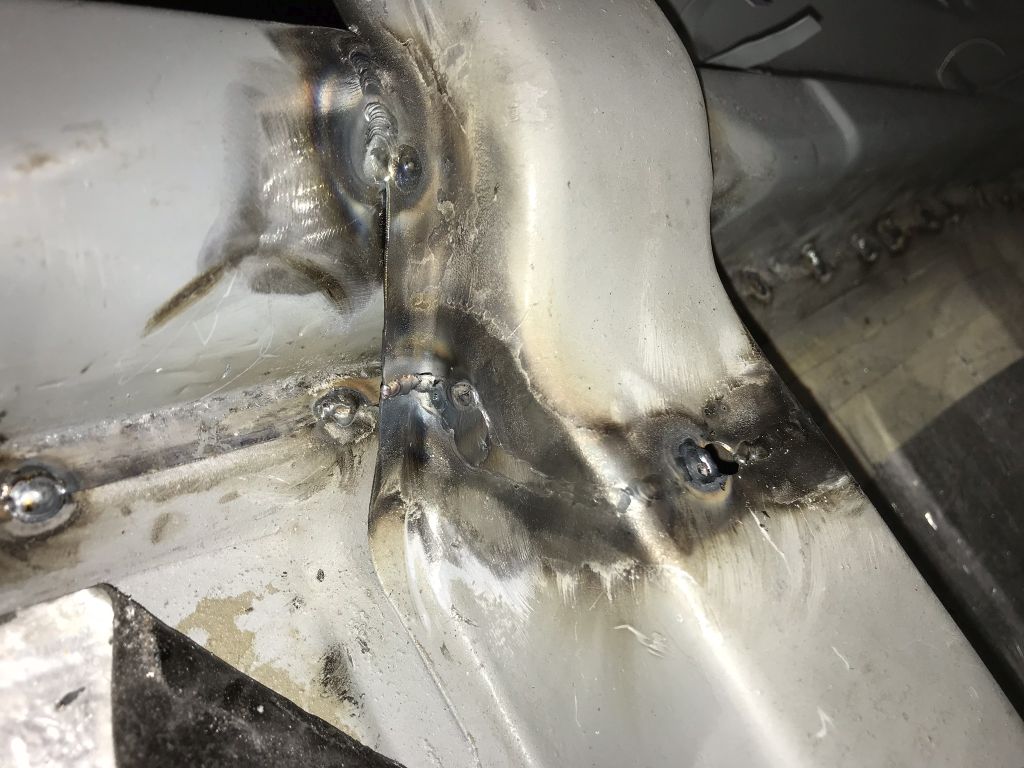 Welding finished. This thing is stiff. 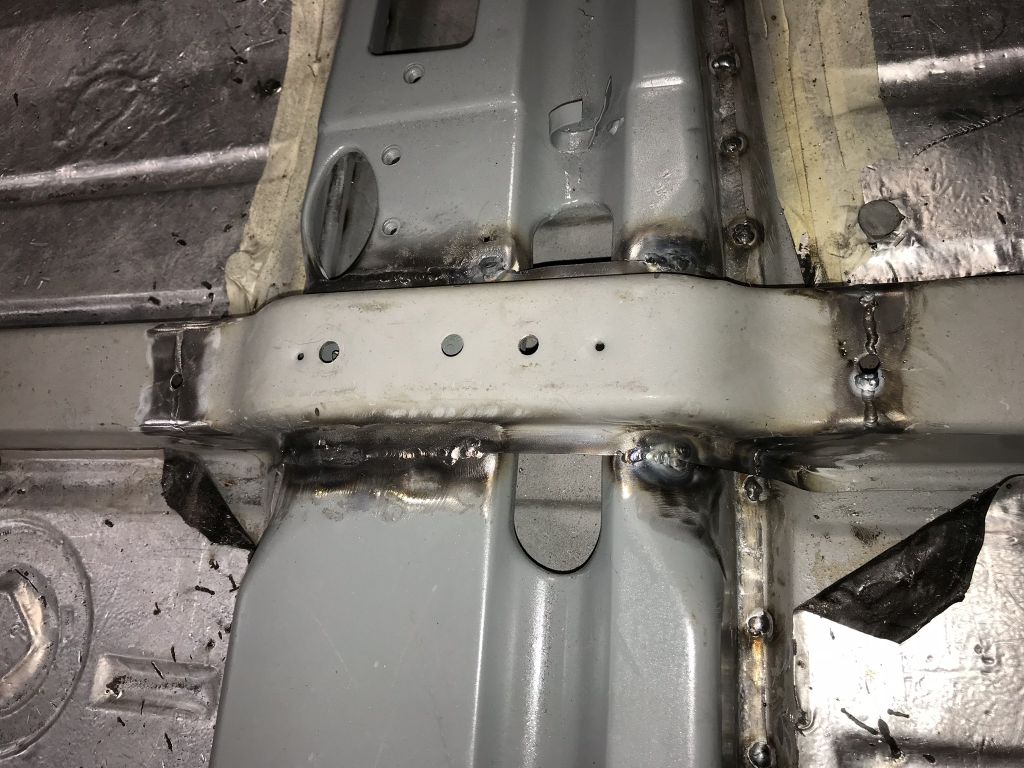 Tomorrow the squirt gun welds get ground. |
| Amenson |
 Apr 1 2018, 06:16 PM Apr 1 2018, 06:16 PM
Post
#1088
|
|
That's opposite lock!!    Group: Members Posts: 645 Joined: 27-May 05 From: Dublin, OH Member No.: 4,154 Region Association: None 
|
And Done. Now you can cover it with carpet.
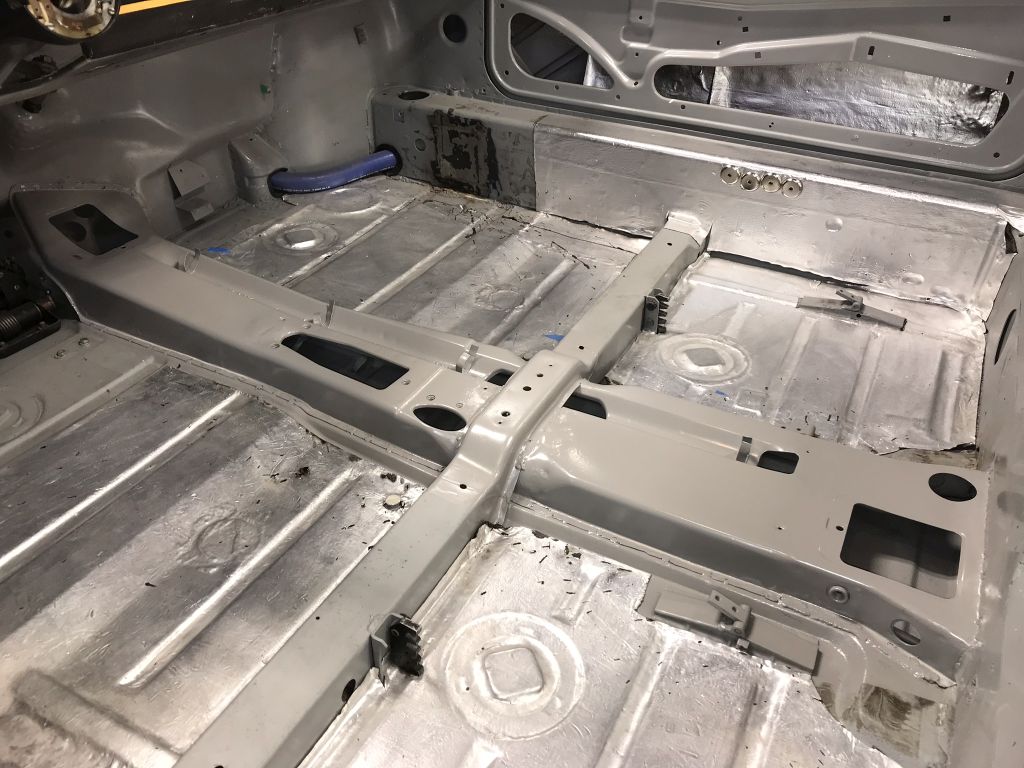 Also fixed the missing steering rack clamp stud. 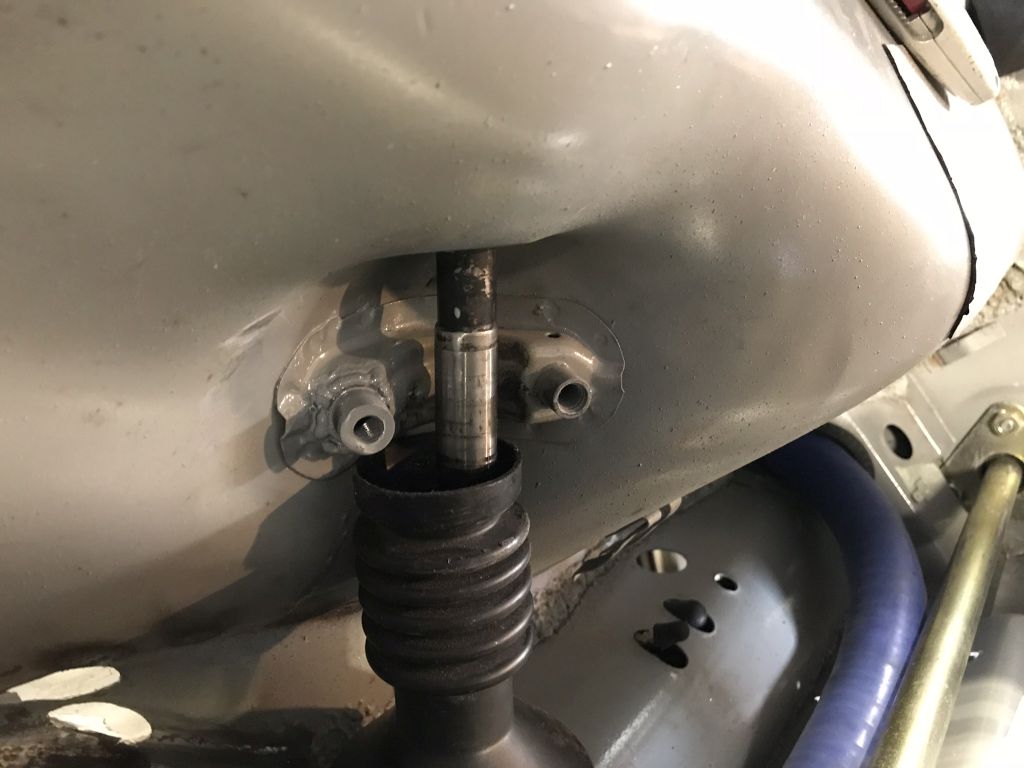 Yet another repair that will never be noticed. 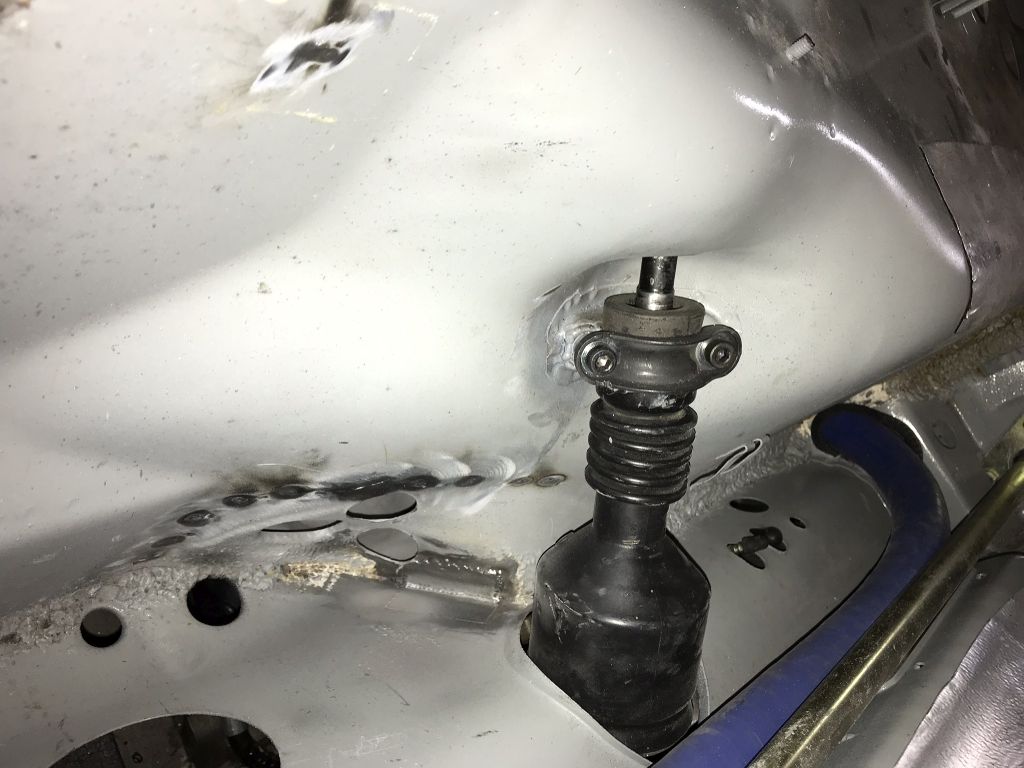 Time to get back to some fun stuff. |
| Amenson |
 Apr 3 2018, 07:59 PM Apr 3 2018, 07:59 PM
Post
#1089
|
|
That's opposite lock!!    Group: Members Posts: 645 Joined: 27-May 05 From: Dublin, OH Member No.: 4,154 Region Association: None 
|
Moving on to final assembly.
Good place to start is the hydraulic clutch master cylinder. After pressing out the studs I realized that the flat for the stud head is too small for the bolt. 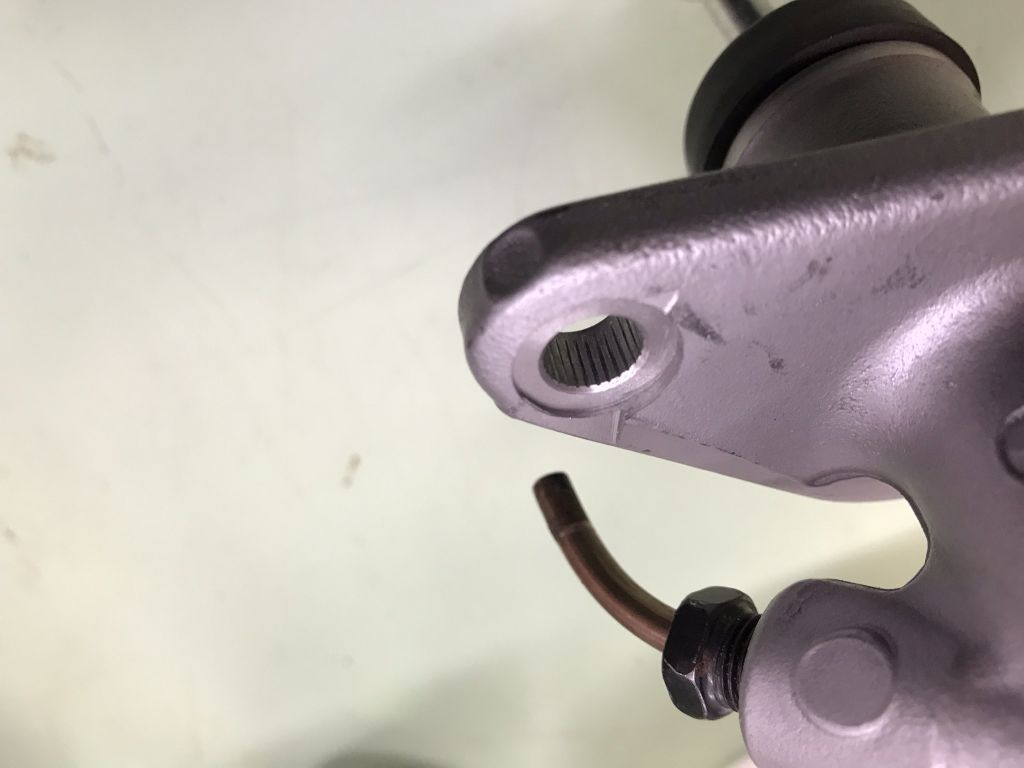 I thought about trying to grind it flat but it would never be really flat and if someday down the line it needed to be replaced it could not be replaced w/o modification. So I machined some step washers. 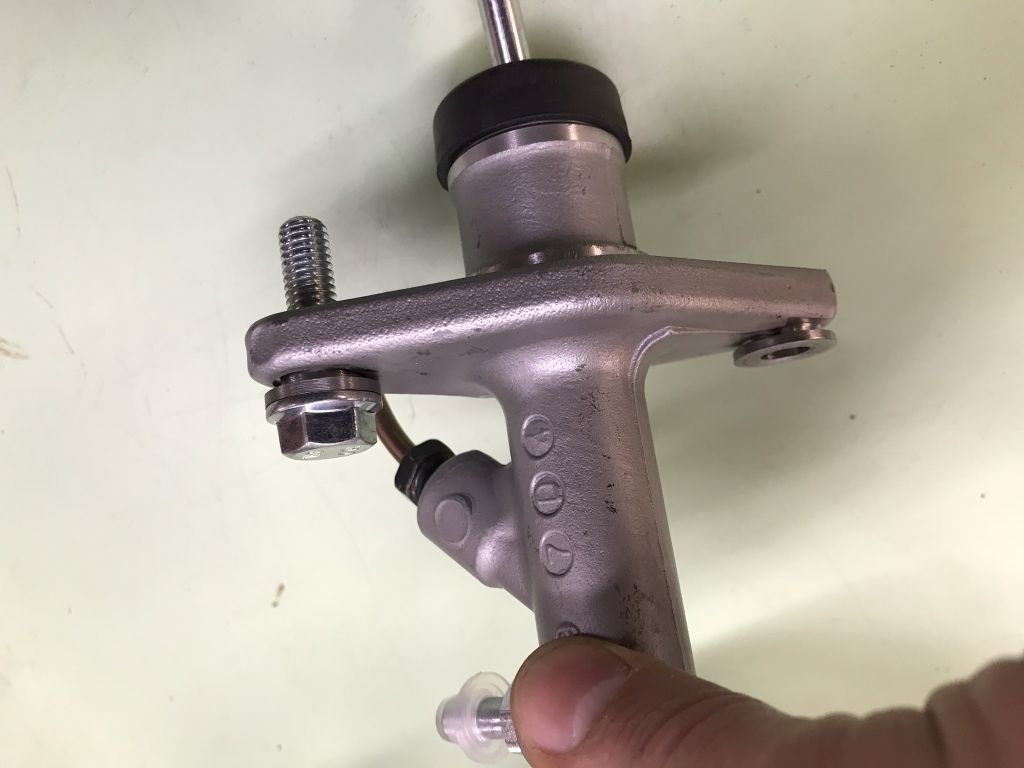 Check that off the list. 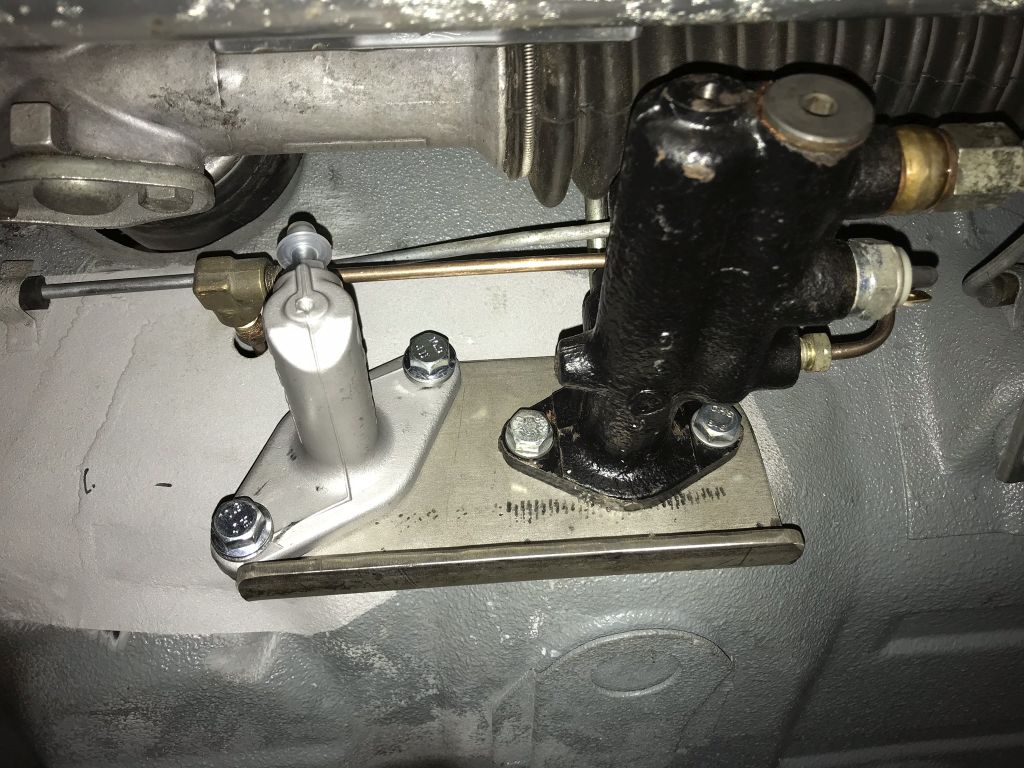 |
| CptTripps |
 Apr 11 2018, 11:26 AM Apr 11 2018, 11:26 AM
Post
#1090
|
|
:: Punch and Pie ::     Group: Members Posts: 3,584 Joined: 26-December 04 From: Mentor, OH Member No.: 3,342 Region Association: Upper MidWest |
I've been watching from the sidelines for several months now, shedding the occasional tear for how awesome this build is, and that it's in such good hands. This is truly going to be the baddest-ass 914 on the road.
I talked to Tom last night, and got him some of the info on the map in the ECU. Scott: If you download the Hydra software, you'll be able to pull the map off of it. I uploaded the custom map to the ECU already. Here are some specifics about it. I told the guy that wrote the map for me the engine specs, turbo specs, and that I was using an air-to-water intercooler. The also knew that it was only driving two wheels. As he told me, the map that he wrote was "close" but would need refinement to operate at peak performance. Once I got it running, he was going to VPN into the computer attached to it, and then make the final adjustments. I forget the guy I talked to, that wrote the map, but the company was Element Tuning. (I don't have access to the email account that I'd conversed with him through, or I'd let you know.) The laptop that Tom has, has the installation file for the software on it. He should be able to get that to you. I have no clue where to download it anymore. (a quick Google search wasn't much help either.) I DO believe I'd emailed you the pin-out for the ECU a long time ago. I can dig that up again if you need it. Hope that helps guys. I can't wait to see this thing on the road! |
| CptTripps |
 Apr 11 2018, 11:34 AM Apr 11 2018, 11:34 AM
Post
#1091
|
|
:: Punch and Pie ::     Group: Members Posts: 3,584 Joined: 26-December 04 From: Mentor, OH Member No.: 3,342 Region Association: Upper MidWest |
Update: Found the link to download the software: http://nemesisems.com/software/
|
| Amenson |
 Apr 11 2018, 01:47 PM Apr 11 2018, 01:47 PM
Post
#1092
|
|
That's opposite lock!!    Group: Members Posts: 645 Joined: 27-May 05 From: Dublin, OH Member No.: 4,154 Region Association: None 
|
I've been watching from the sidelines for several months now, shedding the occasional tear for how awesome this build is, and that it's in such good hands. This is truly going to be the baddest-ass 914 on the road. I talked to Tom last night, and got him some of the info on the map in the ECU. Scott: If you download the Hydra software, you'll be able to pull the map off of it. I uploaded the custom map to the ECU already. Here are some specifics about it. I told the guy that wrote the map for me the engine specs, turbo specs, and that I was using an air-to-water intercooler. The also knew that it was only driving two wheels. As he told me, the map that he wrote was "close" but would need refinement to operate at peak performance. Once I got it running, he was going to VPN into the computer attached to it, and then make the final adjustments. I forget the guy I talked to, that wrote the map, but the company was Element Tuning. (I don't have access to the email account that I'd conversed with him through, or I'd let you know.) The laptop that Tom has, has the installation file for the software on it. He should be able to get that to you. I have no clue where to download it anymore. (a quick Google search wasn't much help either.) I DO believe I'd emailed you the pin-out for the ECU a long time ago. I can dig that up again if you need it. Hope that helps guys. I can't wait to see this thing on the road! Hi Doug, great to hear from you. I wasn't sure how you were handling someone else taking over the project. Glad that it is only occasional tears. I am not sure I would be so composed given similar circumstances. (IMG:style_emoticons/default/hissyfit.gif) I have been playing with the SW for quite a while. It has very good info on the wiring interface that I have been using to confirm your pin out sheet. I also wanted to get comfortable with sensor checking/scaling/debugging. Regarding the MAP, I have not powered up the ECU so I can not download the data from it. I assumed that the MAP was on the laptop that went with the car so I had Tom send it. The MAP he sent had notes describing a completely different setup with a boost target of 41psi! He is going to send the other MAPs. I am sure we can find the one that matches with what is in the ecu, otherwise I will just start it with what is in there. |
| mepstein |
 Apr 11 2018, 01:57 PM Apr 11 2018, 01:57 PM
Post
#1093
|
|
914-6 GT in waiting                Group: Members Posts: 19,691 Joined: 19-September 09 From: Landenberg, PA/Wilmington, DE Member No.: 10,825 Region Association: MidAtlantic Region 
|
I have to think that Scott helped to save this build. While Doug did a lot of heavy lifting, there are still a ton of details that could have been a make it or break it result. I hate it when projects get pushed in a corner.
|
| theer |
 Apr 11 2018, 02:23 PM Apr 11 2018, 02:23 PM
Post
#1094
|
|
Senior Member    Group: Members Posts: 686 Joined: 31-July 15 From: Dover, MA Member No.: 19,014 Region Association: North East States 
|
You are right about that, Mark.
If Scott hadn't agreed to help, I wouldn't have been able to do the deal. (IMG:style_emoticons/default/beerchug.gif) |
| Amenson |
 Apr 22 2018, 09:02 PM Apr 22 2018, 09:02 PM
Post
#1095
|
|
That's opposite lock!!    Group: Members Posts: 645 Joined: 27-May 05 From: Dublin, OH Member No.: 4,154 Region Association: None 
|
Fun with sheetmetal. The last major bit of fabrication on the project is to make the shroud for the radiator intake. I had mentally budgeted a day in the garage to get it done...ya, that didn't quite work out. When I made the Radiator mount I had a general idea of what I wanted to do. When it came down to actually doing it I didn't like my first idea. After several cardboard templates and much pondering I ended up reworking the radiator mount a bit to add mounting flanges. More CAD and then 2 tries per side in aluminum I think that it is almost something I am happy with.
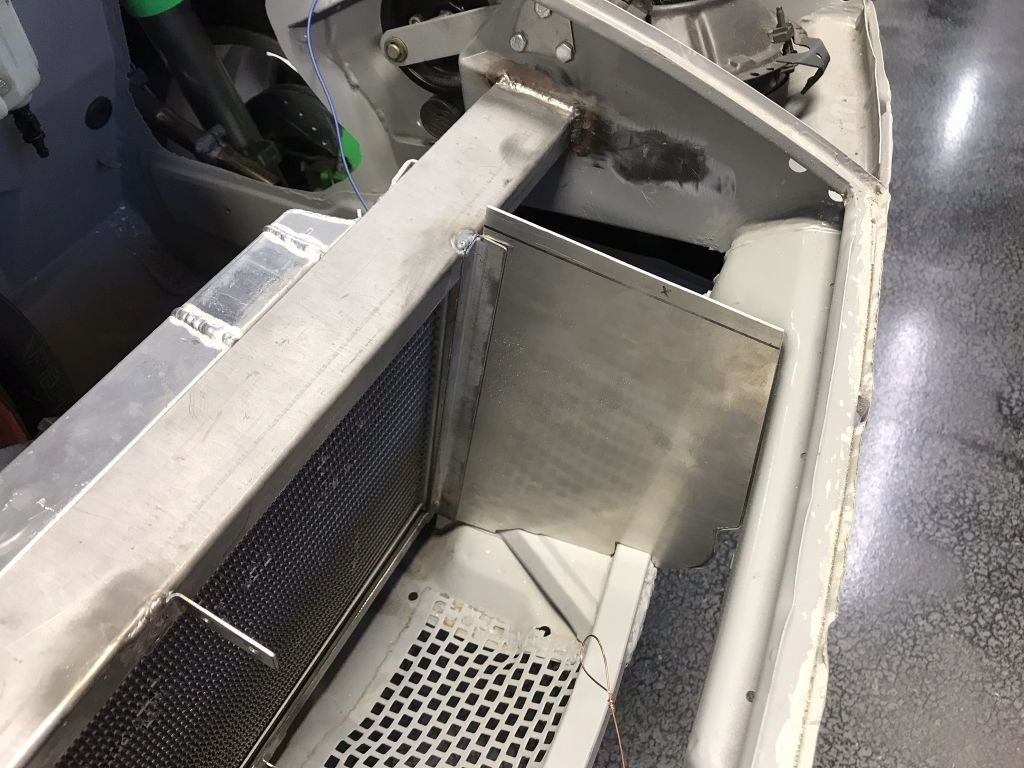 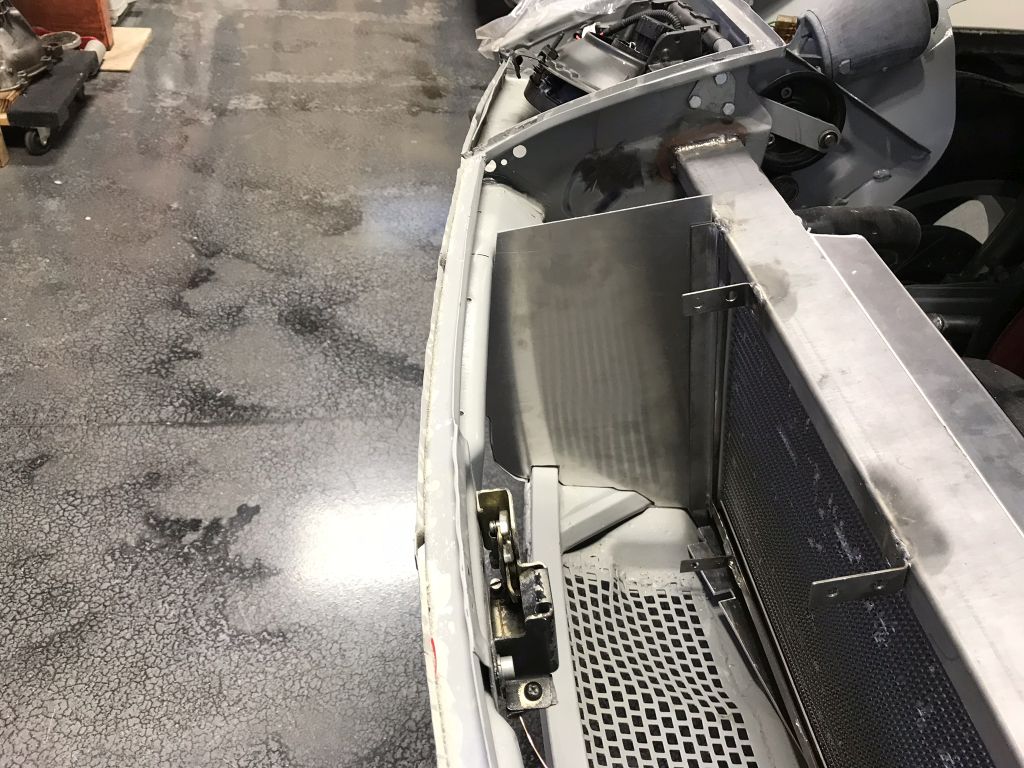 The tops of the side pieces will be bent in to make a flange to mount the top piece to. The top piece will need to be bent to sit flat on the front lip. May have to get out the bead roller and try out the tipping dies. I am sure this will only take a few ruined pieces to get right! The shape over the radiator is not final. 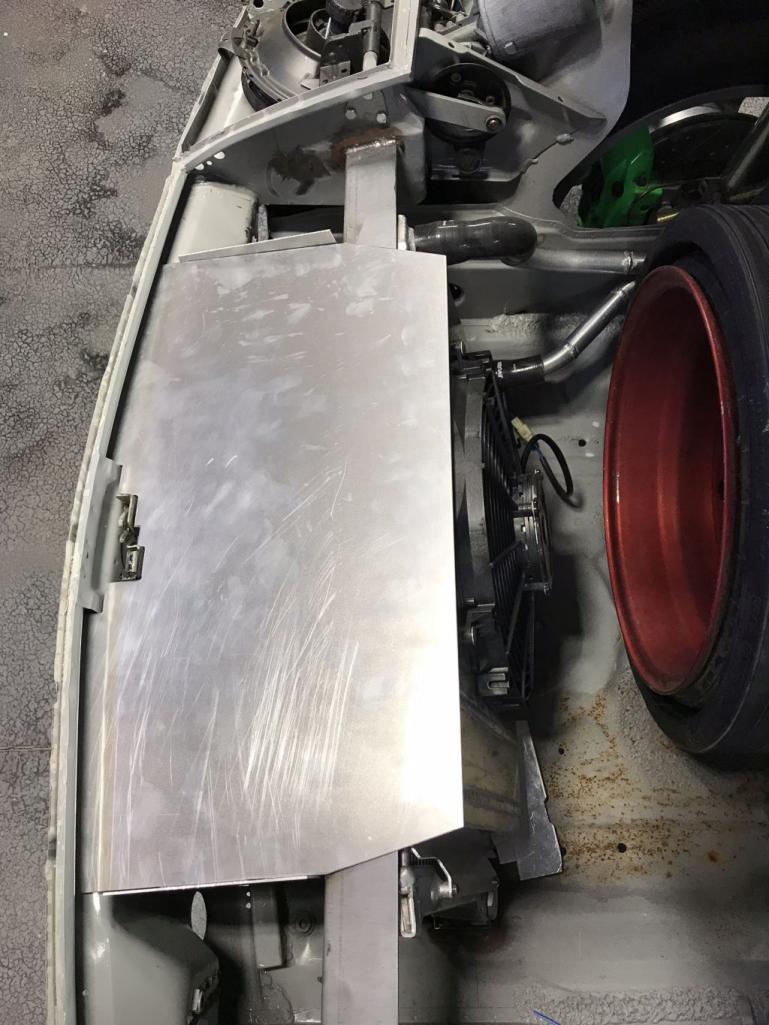 CAD (IMG:style_emoticons/default/lol-2.gif) 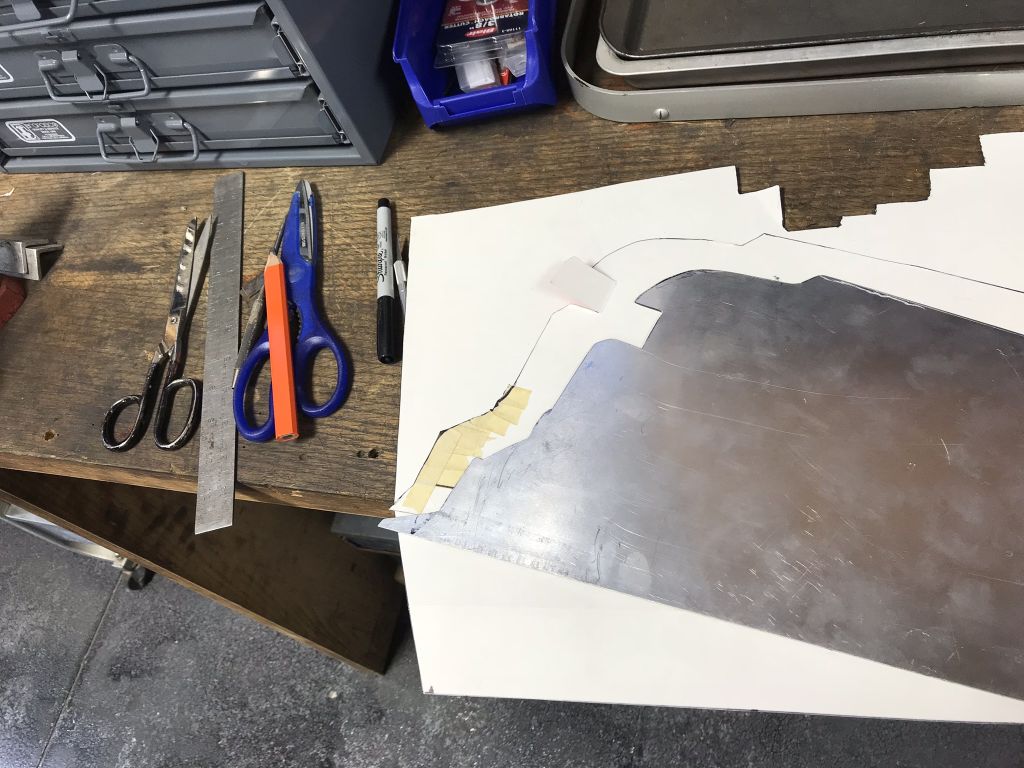 The clevis for the clutch MC arrived and is a really nice piece. Unfortunately the pin is larger than the bushings in the pivot. The slot is also quite a bit wider than the pivot. I am guessing that most people just pop out the bushing and run it. Effective but not something that I could do and sleep at night. I'll enlarge the hole and make a pair of step bushings. |
| Amenson |
 Apr 24 2018, 08:59 PM Apr 24 2018, 08:59 PM
Post
#1096
|
|
That's opposite lock!!    Group: Members Posts: 645 Joined: 27-May 05 From: Dublin, OH Member No.: 4,154 Region Association: None 
|
I dug into the clutch linkage tonight. I was pleasantly surprised that the shaft came out without removing the entire pedal assembly (IMG:style_emoticons/default/cheer.gif)
I was a bit harsh on the bushing in my last post. When installed it is just undersized. Once out is is right at 8mm. Pin in the clevis is 7.90mm. A shave with a 8mm reamer when installed and it would be perfect. The side to side gap is definitely excessive so I will still make a pair of step bushings. 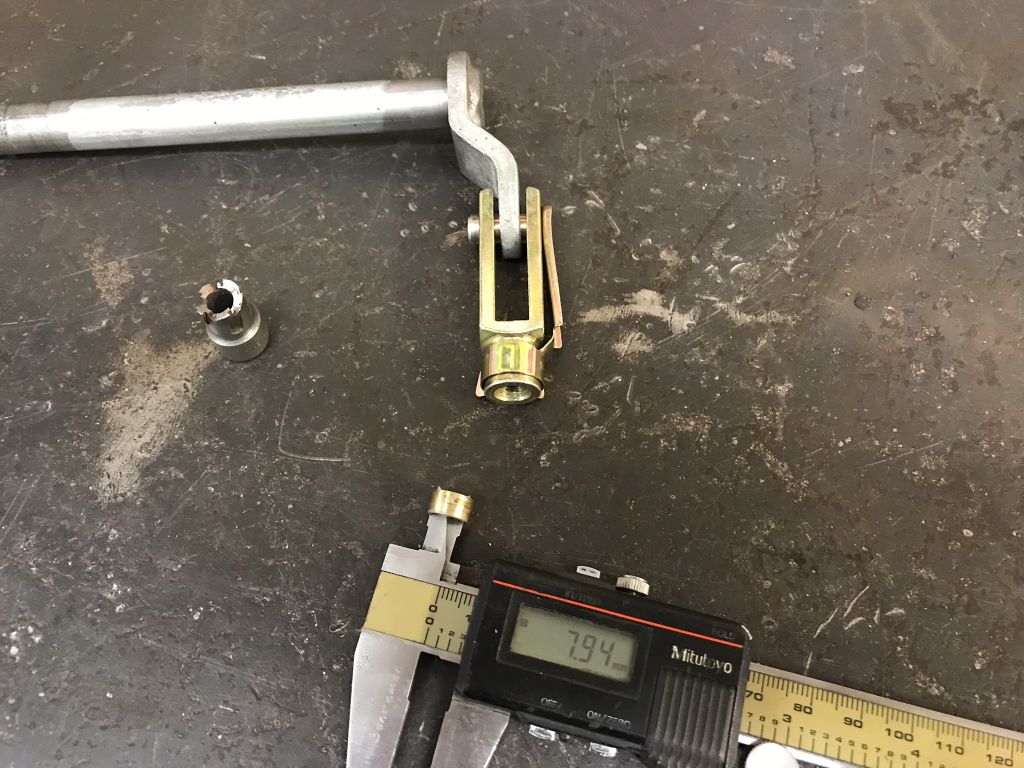 |
| dakotaewing |
 Apr 25 2018, 01:46 PM Apr 25 2018, 01:46 PM
Post
#1097
|
|
Senior Member    Group: Members Posts: 1,163 Joined: 8-July 03 From: DeSoto, Tx Member No.: 897 Region Association: Southwest Region 
|
Those cuts for the radiator sheet metal look really clean and smooth..
What are you using to make the cuts, and what guage is the metal? I'm asking because I have to to the same thing for my project - (IMG:style_emoticons/default/dry.gif) I'm assuming that's aluminum? |
| Amenson |
 Apr 30 2018, 08:39 PM Apr 30 2018, 08:39 PM
Post
#1098
|
|
That's opposite lock!!    Group: Members Posts: 645 Joined: 27-May 05 From: Dublin, OH Member No.: 4,154 Region Association: None 
|
Those cuts for the radiator sheet metal look really clean and smooth.. What are you using to make the cuts, and what guage is the metal? I'm asking because I have to to the same thing for my project - (IMG:style_emoticons/default/dry.gif) I'm assuming that's aluminum? It is aluminum. Thickness: 1.5mm As for the cuts, I start with the longest straight edge on the shear cut edge of the sheet metal. Instant straight! Other edges are cut on the band saw, tidied up on the belt sander and final tweaking with a file. Just take your time....lots of it! And don't be afraid to start over. Good luck. |
| Amenson |
 Jul 6 2018, 08:48 PM Jul 6 2018, 08:48 PM
Post
#1099
|
|
That's opposite lock!!    Group: Members Posts: 645 Joined: 27-May 05 From: Dublin, OH Member No.: 4,154 Region Association: None 
|
The Porsti Power Tour thrash is over, time to get back to Grey. I spent a good part of the weekend and the 4th cleaning and organizing the garage back to a workable state. Now Grey is back on the operating table.
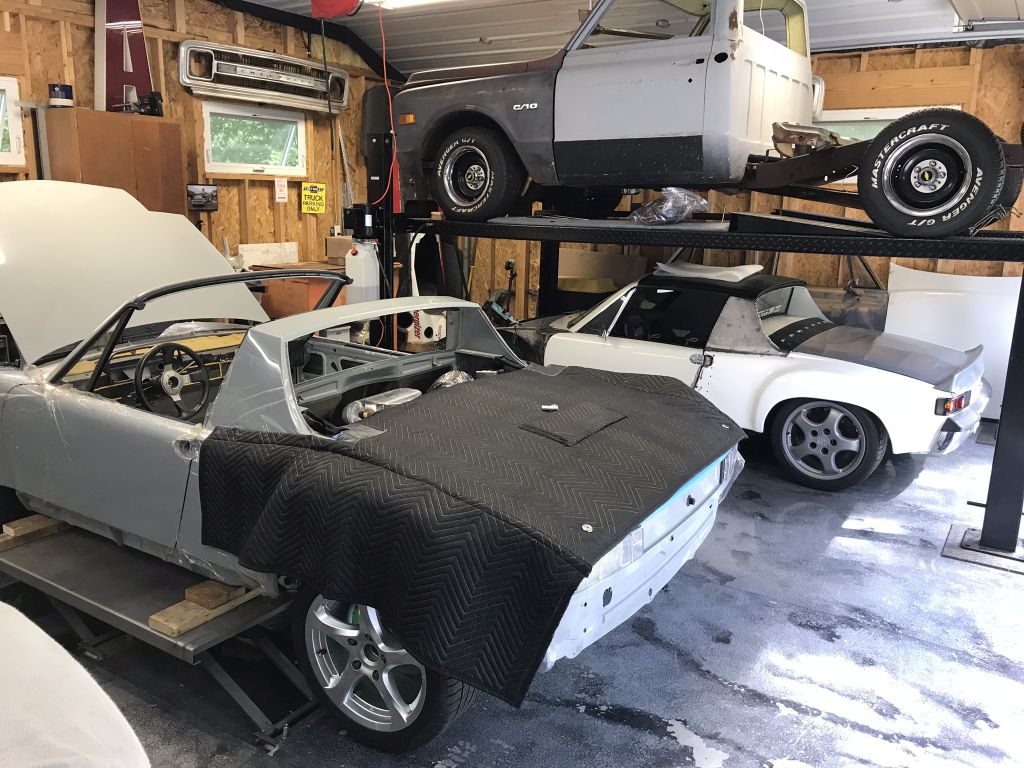 Pushing it around reminded me how much rubbing is happening. Driver side is rubbing on the inside, passenger on the outside. Need to get a base alignment done to see if they will fit perfectly in the limited space or if some trimming and precision spacing will be necessary. |
| effutuo101 |
 Jul 7 2018, 12:27 AM Jul 7 2018, 12:27 AM
Post
#1100
|
|
Advanced Member     Group: Members Posts: 2,735 Joined: 10-April 05 From: Lemon Grove Member No.: 3,914 Region Association: Southern California |
Just wow! Keep up the good work!
I am still waiting on Dyno. Went a different way, so now I have to source some mirrors. Then seat belts and touch up on paint. |
  |
9 User(s) are reading this topic (9 Guests and 0 Anonymous Users)
0 Members:

|
Lo-Fi Version | Time is now: 9th January 2025 - 10:54 PM |
Invision Power Board
v9.1.4 © 2025 IPS, Inc.


