|
|
|
Porsche, and the Porsche crest are registered trademarks of Dr. Ing. h.c. F. Porsche AG.
This site is not affiliated with Porsche in any way. Its only purpose is to provide an online forum for car enthusiasts. All other trademarks are property of their respective owners. |
|
|

  |

| CptTripps |
 Mar 7 2014, 03:13 AM Mar 7 2014, 03:13 AM
Post
#361
|
|
:: Punch and Pie ::  Group: Members Posts: 3,584 Joined: 26-December 04 From: Mentor, OH Member No.: 3,342 Region Association: Upper MidWest |
Worked for 2hrs on the engine wiring harness tonight. Ugh...this is a lot of work!
I've got it all mapped out now though. Only 2-3 that I need clarity on. I'll be spending lots of time searching for replacement plugs too. Other than thT and a few bits/pieces, the motor is pretty much built. In other news, I talked to the sandblaster late in the day. There was a problem with the etching primer I'd given him, so they had to use a different brand. I'm not too worried about it. What they had was just a different version of the SW paint id given them. I'll have it back Sat morn now instead of Fri night. Attached thumbnail(s) 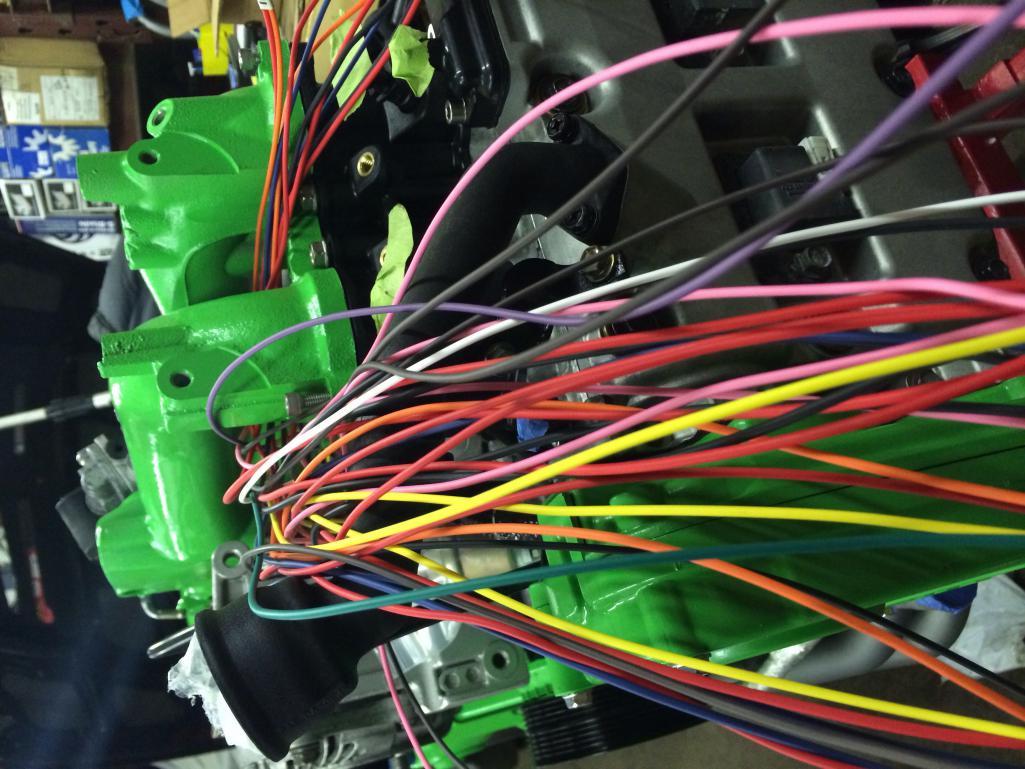 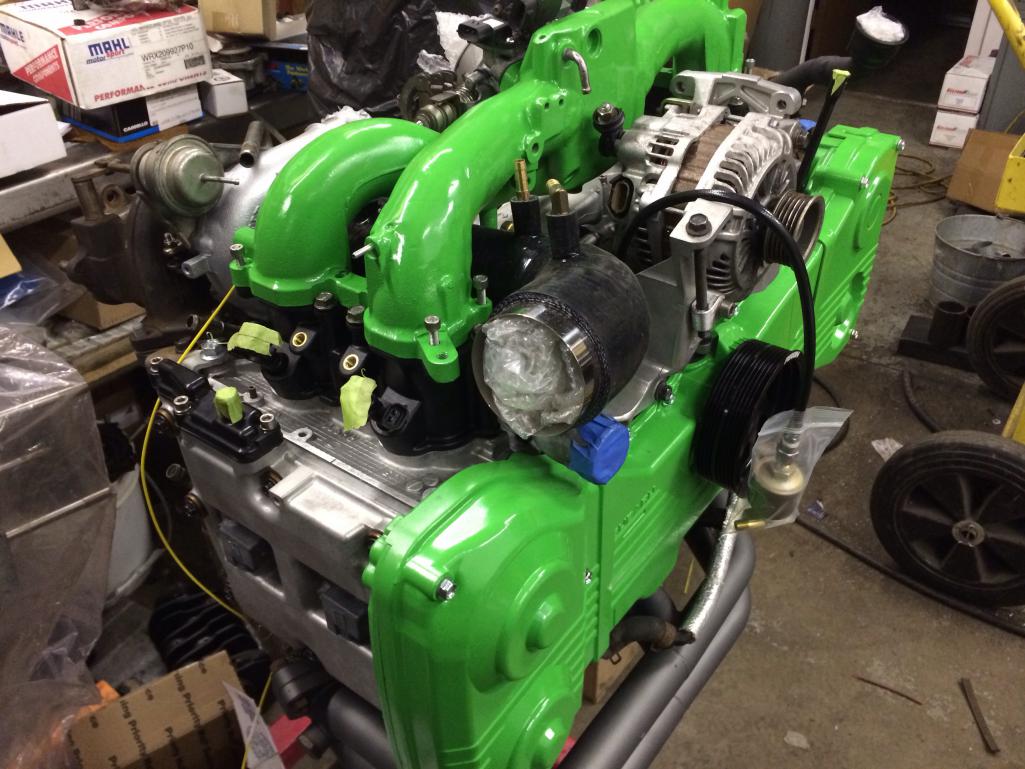
|
   |

 
|
| tdgray |
Mar 7 2014, 09:07 AM
Post
#362
|
|
Thank God Nemo is not here to see this Group: Members Posts: 9,705 Joined: 5-August 03 From: Akron, OH Member No.: 984 Region Association: None |
Doug... just make sure you tell the body shop that is painting it that you used etch primer otherwise they may put the wrong top coat on it and well.... bad things happen.
Ask me how I know (IMG:style_emoticons/default/sad2.gif) |
|
|
|
| CptTripps |
Mar 7 2014, 09:52 AM
Post
#363
|
|
:: Punch and Pie :: Group: Members Posts: 3,584 Joined: 26-December 04 From: Mentor, OH Member No.: 3,342 Region Association: Upper MidWest |
Todd: I'll be doing the bodywork. PLEASE tell me what you mean? I was planning on doing all the filler on top of the etch primer, and then 2K primer over that before I apply the color. I may have someone else do the final top-coat and clear again, but if things go well, I may do it myself this time. (I feel more confident about painting this time around.)
|
|
|
|
| tdgray |
Mar 7 2014, 02:15 PM
Post
#364
|
|
Thank God Nemo is not here to see this Group: Members Posts: 9,705 Joined: 5-August 03 From: Akron, OH Member No.: 984 Region Association: None |
2K (Urethane) primer should not go over etch primer. It has the ability to stick to bare metal and should not be used over etch primer.
I etched the TR6 and the body shop put urethane over it and it all melted together... when they went to block it down it just wiped away. They had to strip and re-primer. Nice big bill for me (IMG:style_emoticons/default/dry.gif) I should have used what I usually use which is "z-chrome" from Claussen but I was doing it in batches and did not want to hassle with it... serves me right I guess. Rick can chime in with a more specific reason why the etch and urethane do not mix... I only know what my buddy told me. |
|
|
|
| CptTripps |
Mar 7 2014, 02:19 PM
Post
#365
|
|
:: Punch and Pie :: Group: Members Posts: 3,584 Joined: 26-December 04 From: Mentor, OH Member No.: 3,342 Region Association: Upper MidWest |
We used a 2k etch primer that was specifically compatible with the 2k high build primer that I bought too. I SHOULD be ok in that department. I'll absolutely check though. Great tip.
|
|
|
|
| tdgray |
Mar 7 2014, 02:48 PM
Post
#366
|
|
Thank God Nemo is not here to see this Group: Members Posts: 9,705 Joined: 5-August 03 From: Akron, OH Member No.: 984 Region Association: None |
QUOTE(CptTripps @ Mar 7 2014, 03:19 PM)  We used a 2k etch primer that was specifically compatible with the 2k high build primer that I bought too. I SHOULD be ok in that department. I'll absolutely check though. Great tip. You should be good then... I did not (apparently). I think I used acid etch... dumb ass move I know. |
|
|
|
| 76-914 |
Mar 7 2014, 03:28 PM
Post
#367
|
|
Repeat Offender & Resident Subaru Antagonist Group: Members Posts: 13,653 Joined: 23-January 09 From: Temecula, CA Member No.: 9,964 Region Association: Southern California |
Doug, just run it by your paint supplier. Those guys usually sell just 1 or 2 brands so you may have to check a few places.
|
|
|
|
| CptTripps |
Mar 7 2014, 04:20 PM
Post
#368
|
|
:: Punch and Pie :: Group: Members Posts: 3,584 Joined: 26-December 04 From: Mentor, OH Member No.: 3,342 Region Association: Upper MidWest |
Picking up the car tonight. Looks good...but I've got some work to do for sure!
Tomorrow morning I'll get to grinding and welding. Gotta map out all the spots of interest first. Attached thumbnail(s) 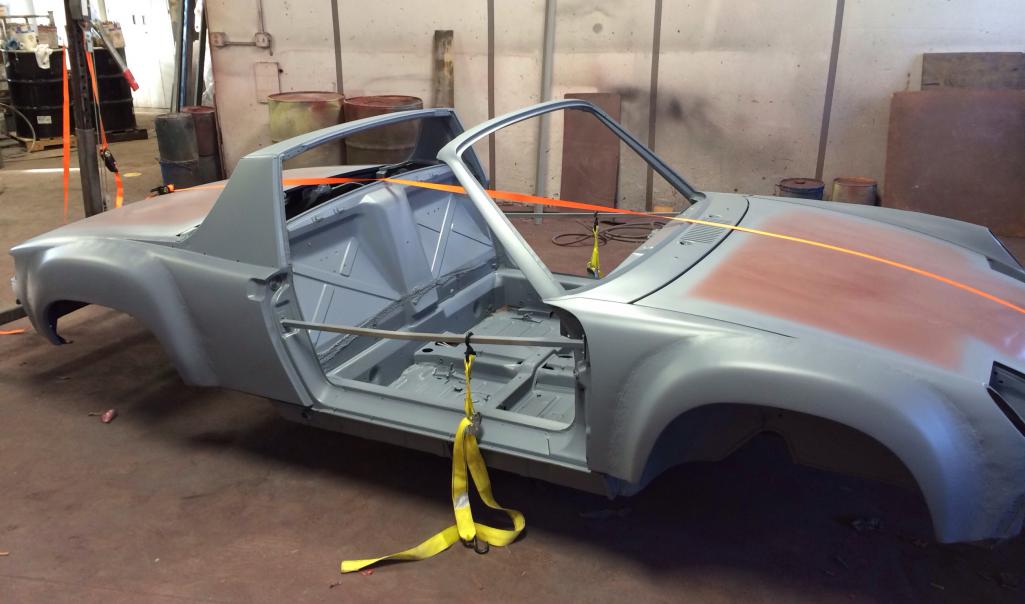  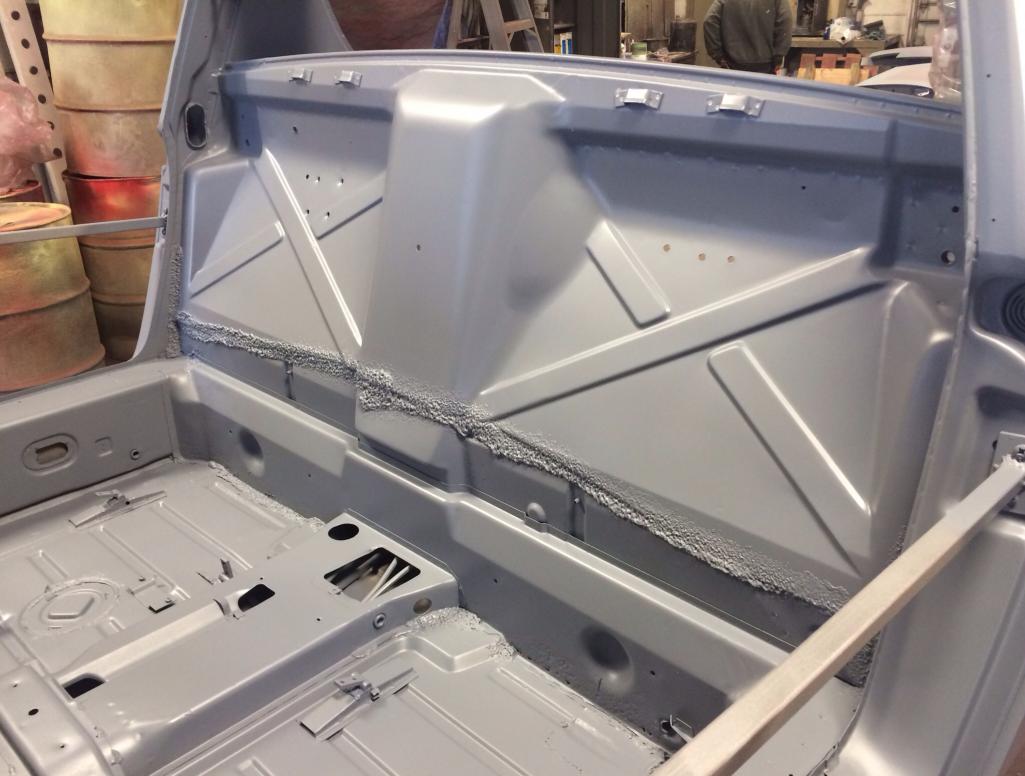
|
|
|
|
| CptTripps |
Mar 8 2014, 10:58 AM
Post
#369
|
|
:: Punch and Pie :: Group: Members Posts: 3,584 Joined: 26-December 04 From: Mentor, OH Member No.: 3,342 Region Association: Upper MidWest |
Spent all morning in the garage, getting ready to fix the areas of the floor pan that needed attention. Nothing bad at all. After I got everything fitted, I took them out and sandblasted the replacement metal and primed them.
I also grabbed Garrett to give me a hand with marking all the holes on the Engman kit. He's only 7 but turning out to be a BIG help with tasks like that. Going to work on the engine shelf and look inside the long after I get back from taking the boys to the dentist. I'm determined to lick this before sundown tomorrow so I can get back on track. Attached thumbnail(s) 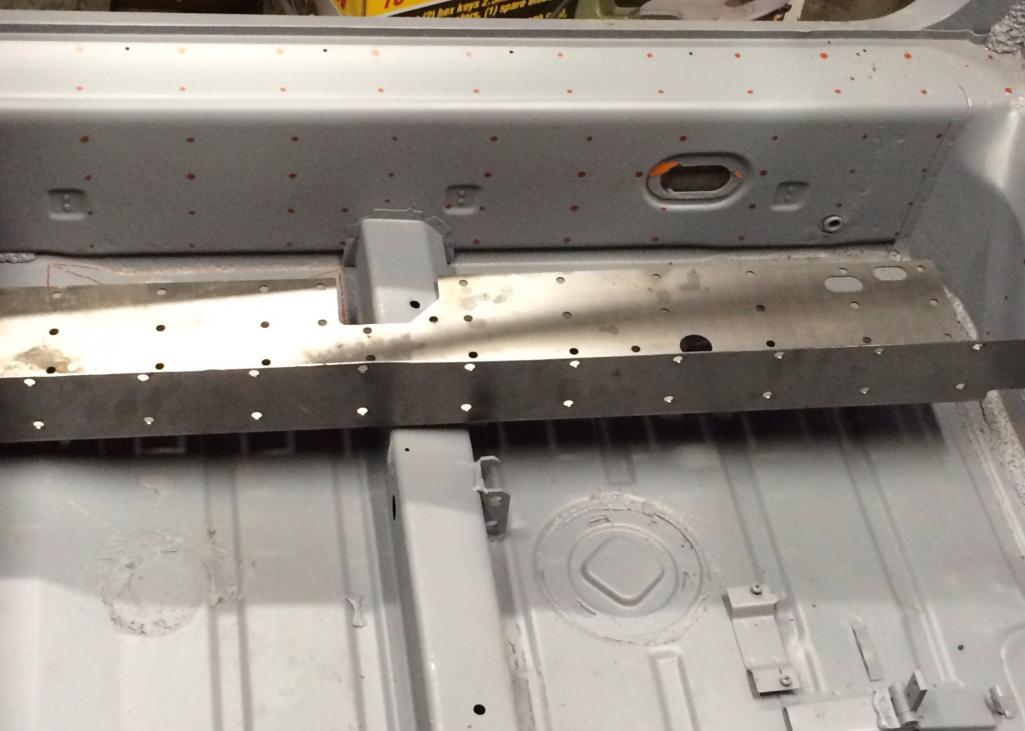 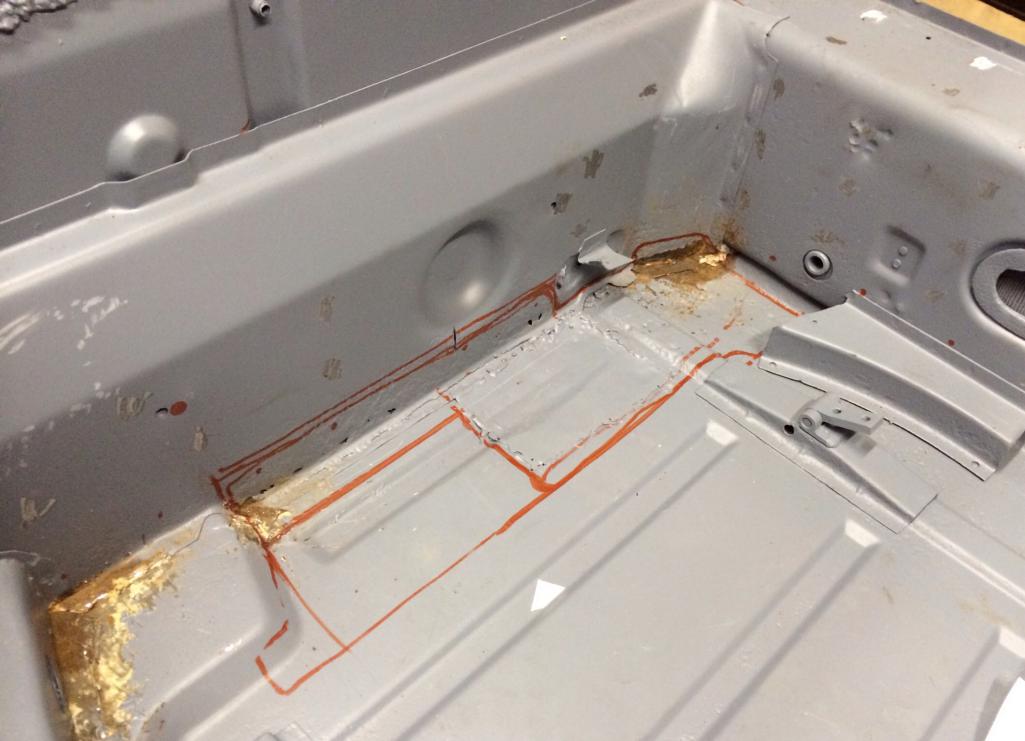 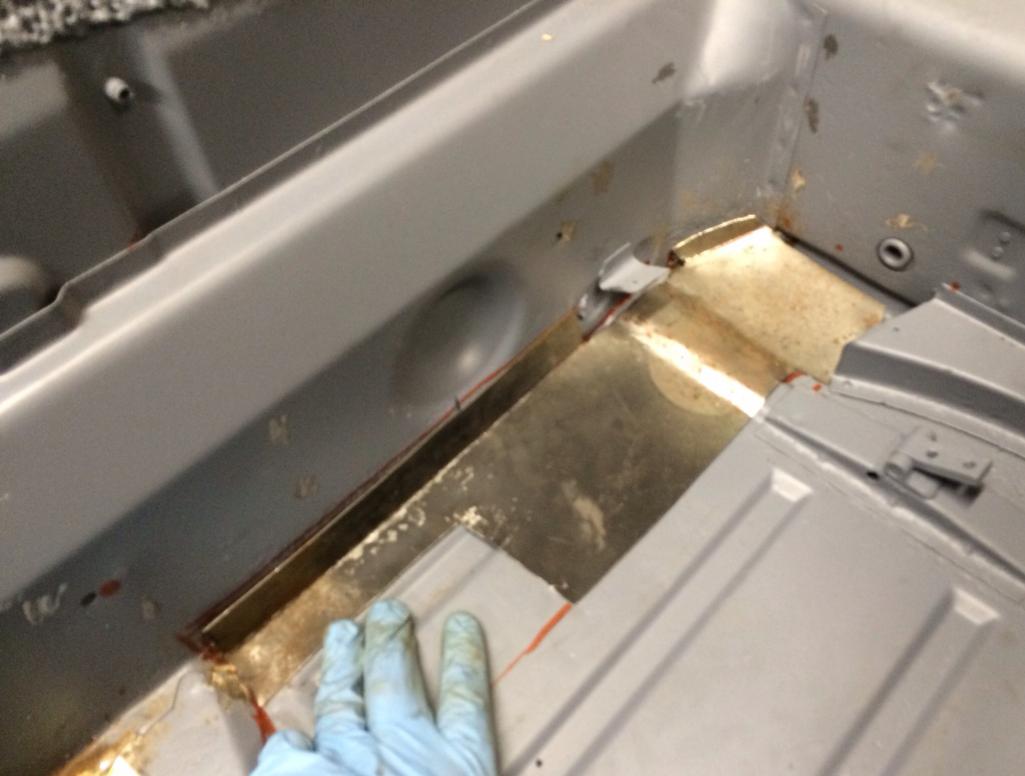 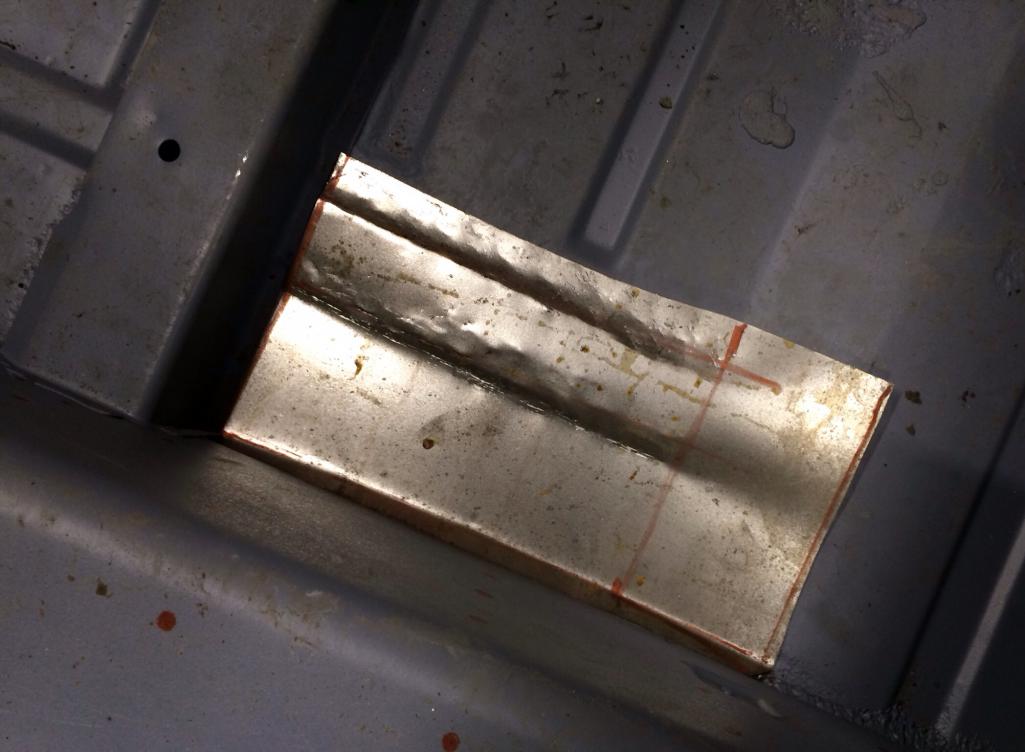 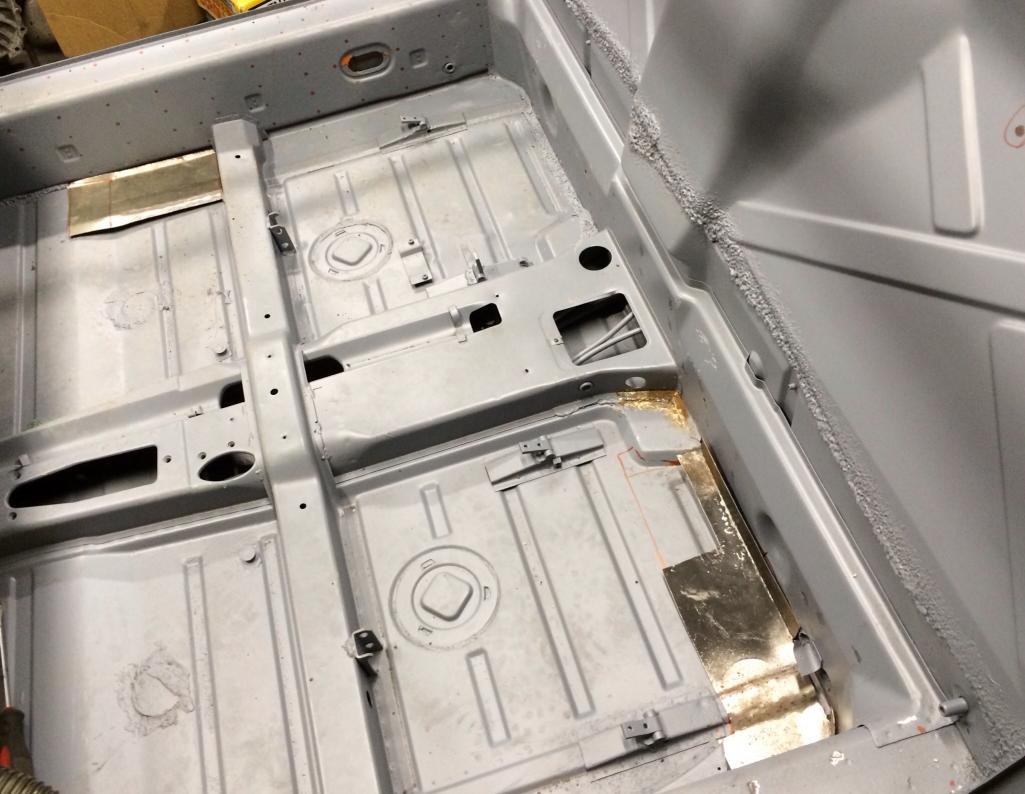
|
|
|
|
| 76-914 |
Mar 8 2014, 11:56 AM
Post
#370
|
|
Repeat Offender & Resident Subaru Antagonist Group: Members Posts: 13,653 Joined: 23-January 09 From: Temecula, CA Member No.: 9,964 Region Association: Southern California |
It won't be a biggie but that flange on the L rear patch will hold off that Engman piece a tad. It welds up flush but I don't think .030" offset will matter squat.
|
|
|
|
| CptTripps |
Mar 9 2014, 05:50 PM
Post
#371
|
|
:: Punch and Pie :: Group: Members Posts: 3,584 Joined: 26-December 04 From: Mentor, OH Member No.: 3,342 Region Association: Upper MidWest |
Spent the weekend:
patching the floors... 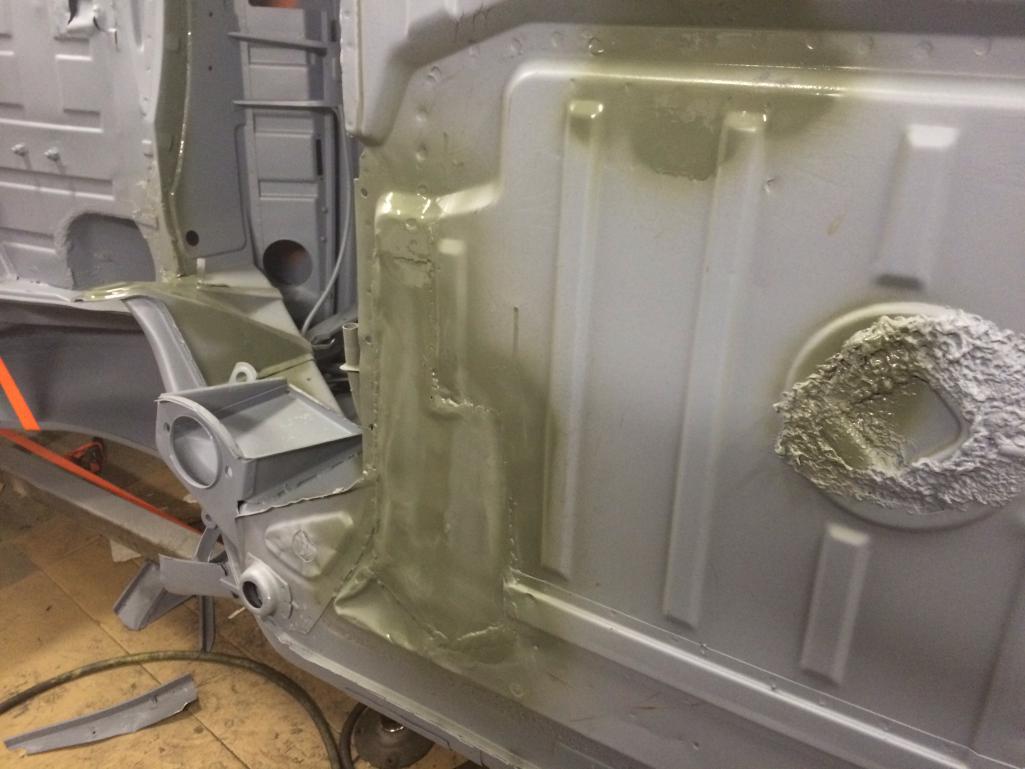 removing the shelf... 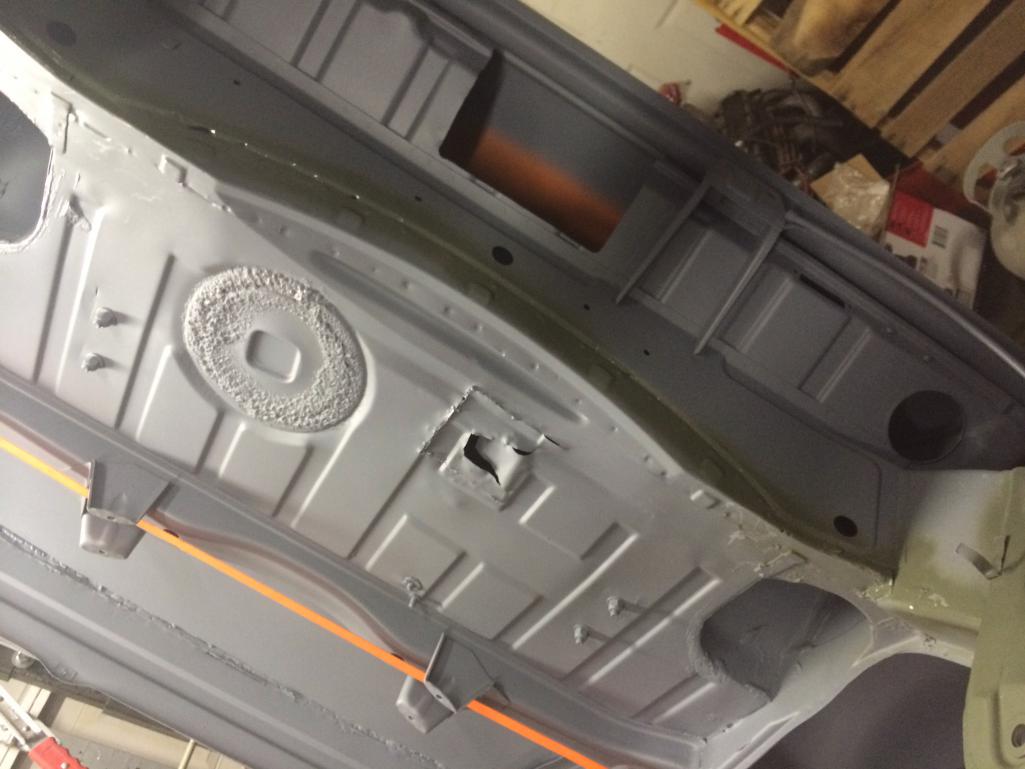 ...and fixing the hell-hole. (There's another thread on it, but here's the end-result.) 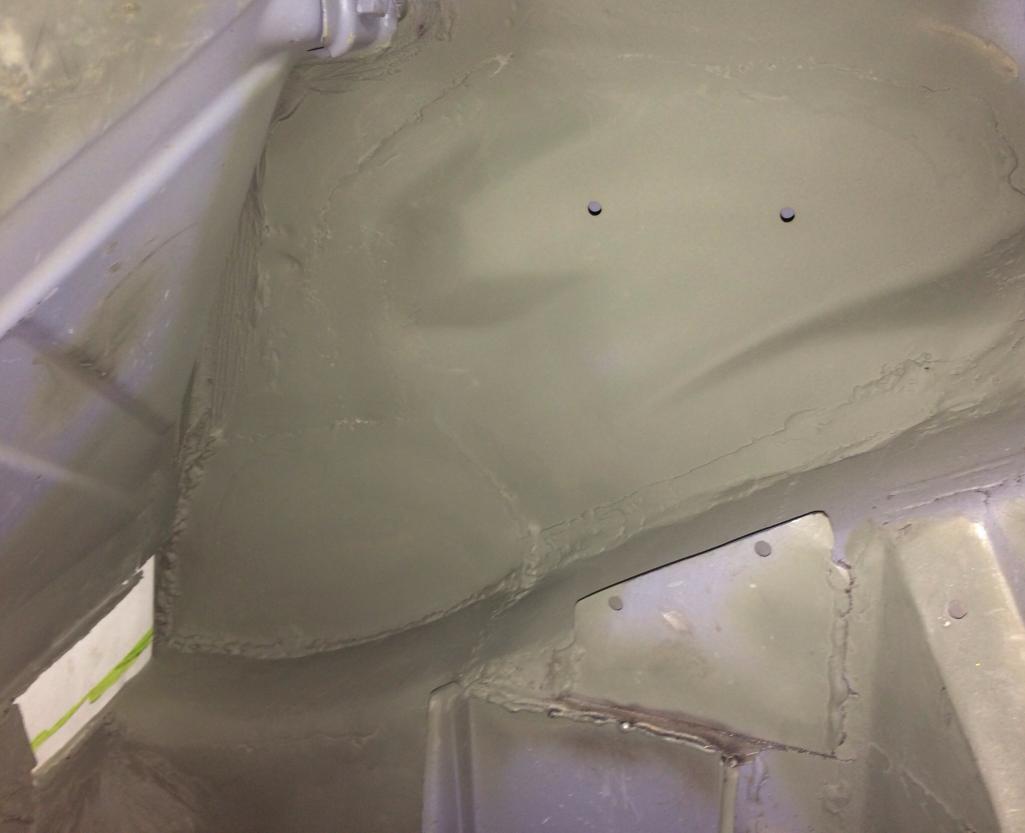 |
|
|
|
| CptTripps |
Mar 9 2014, 06:01 PM
Post
#372
|
|
:: Punch and Pie :: Group: Members Posts: 3,584 Joined: 26-December 04 From: Mentor, OH Member No.: 3,342 Region Association: Upper MidWest |
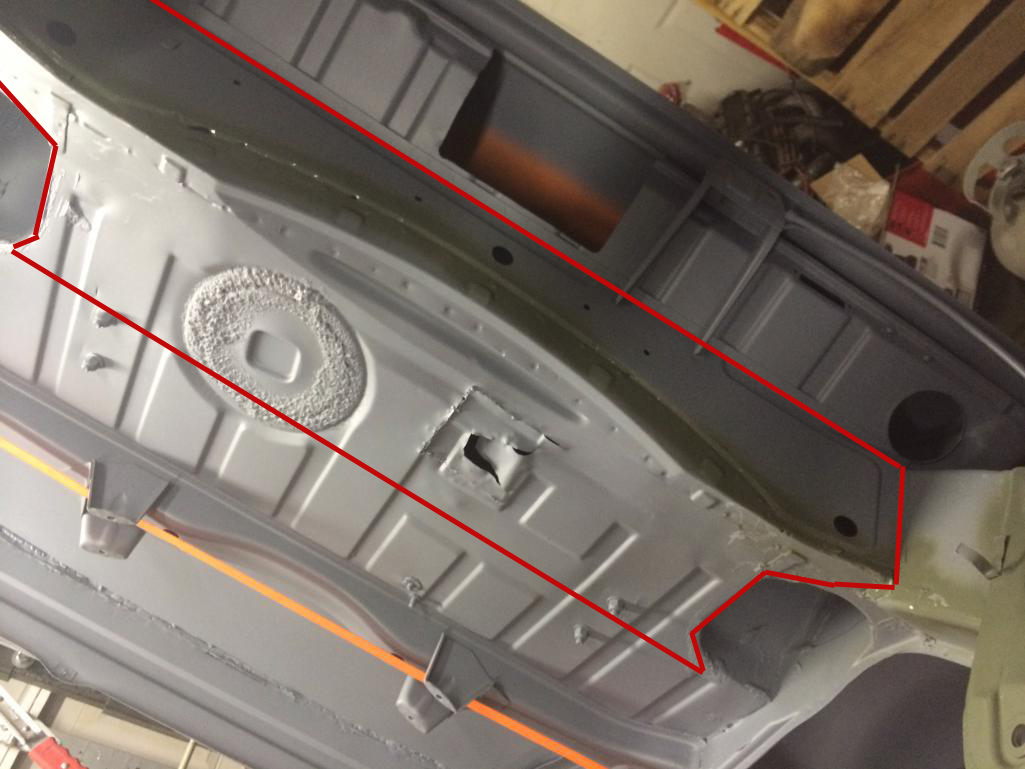
This is the section that I was planning on cutting out next week to box in preparation for the Subie trans. I've got a piece of 2" steel tube that I would put between the two shock towers. Any other ideas? Is this enough room?
 |
|
|
|
| Chris H. |
Mar 9 2014, 08:26 PM
Post
#373
|
|
Senior Member Group: Members Posts: 4,053 Joined: 2-January 03 From: Chicago 'burbs Member No.: 73 Region Association: Upper MidWest |
Does your engine setup require you to cut all that out? All I had to do was cut a small hole for the starter in the trunk floor and another 3x3 square in the back for the intake manifold.
|
|
|
|
| JRust |
Mar 9 2014, 09:12 PM
Post
#374
|
|
914 Guru Group: Members Posts: 6,313 Joined: 10-January 03 From: Corvallis Oregon Member No.: 129 Region Association: Pacific Northwest |
Here are a couple pics of mine
Attached thumbnail(s) 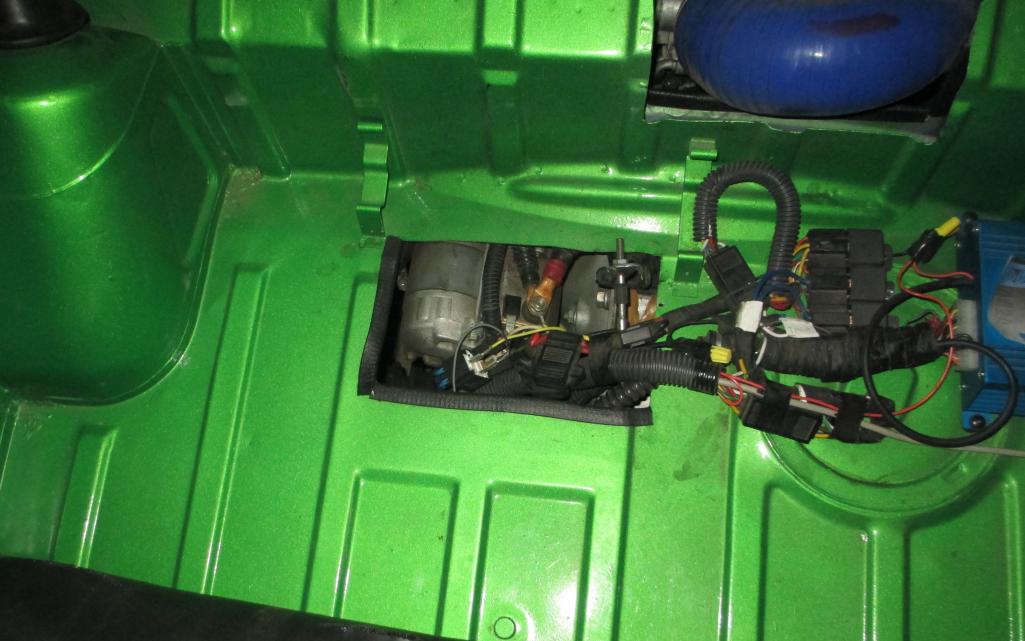 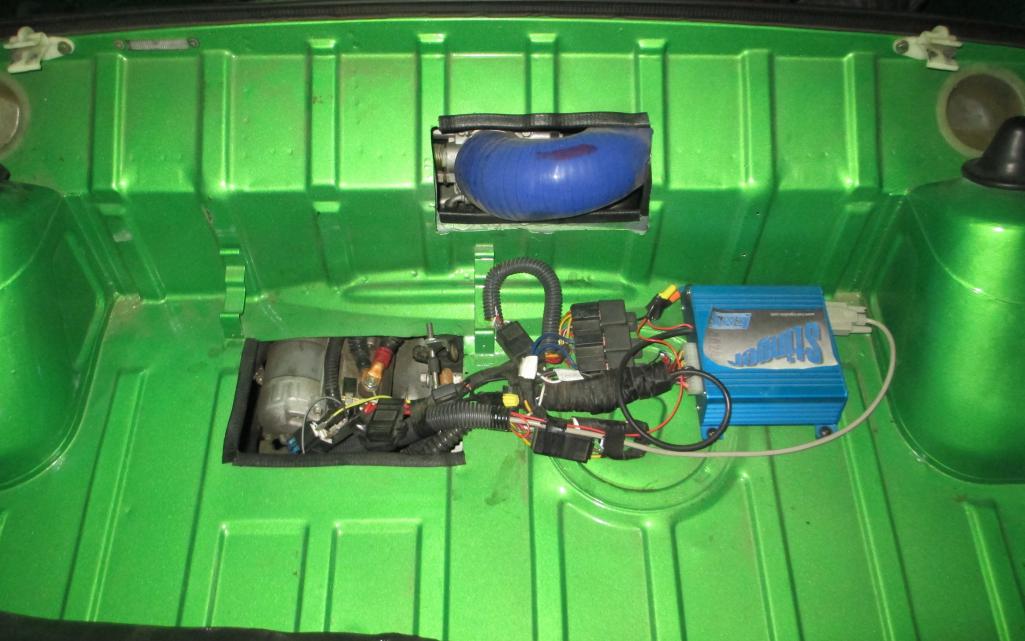
|
|
|
|
| JRust |
Mar 9 2014, 09:13 PM
Post
#375
|
|
914 Guru Group: Members Posts: 6,313 Joined: 10-January 03 From: Corvallis Oregon Member No.: 129 Region Association: Pacific Northwest |
One more. Sorry I can't resize on my mac worth a (IMG:style_emoticons/default/stromberg.gif)
You really don't need to cut out that whole area. The starter only comes through little bit. So just an access hole should be fine Attached thumbnail(s) 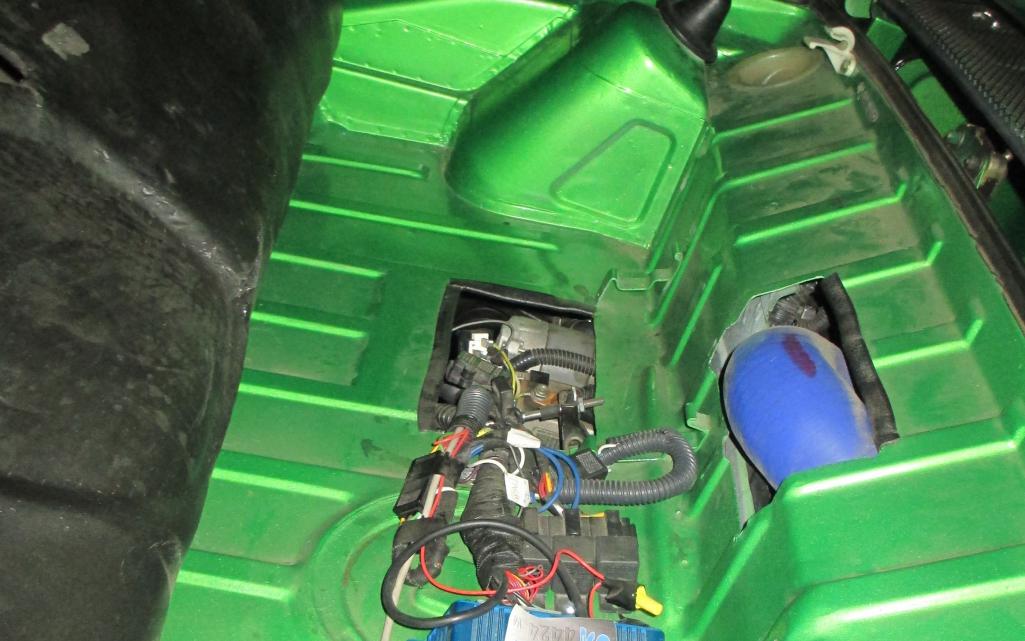
|
|
|
|
| CptTripps |
Mar 10 2014, 05:38 AM
Post
#376
|
|
:: Punch and Pie :: Group: Members Posts: 3,584 Joined: 26-December 04 From: Mentor, OH Member No.: 3,342 Region Association: Upper MidWest |
I've got an intercooler that needs some additional piping, and was planning on mounting the ECU on it.
I don't see a cutout for the turbo. Did you move it? |
|
|
|
| CptTripps |
Mar 10 2014, 05:57 AM
Post
#377
|
|
:: Punch and Pie :: Group: Members Posts: 3,584 Joined: 26-December 04 From: Mentor, OH Member No.: 3,342 Region Association: Upper MidWest |
I love what McMark did with this one. Wish I had the spare parts to make it work.
Attached image(s) 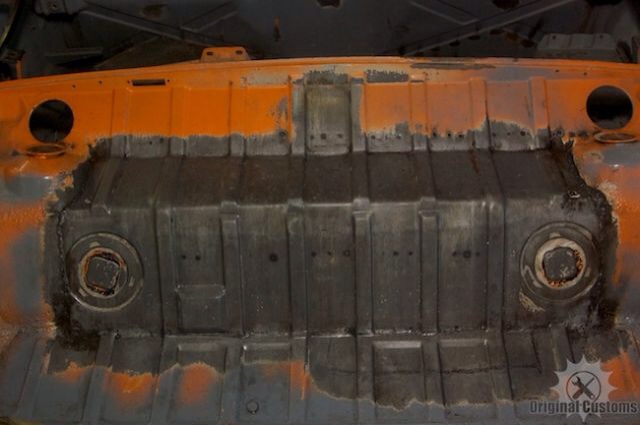
|
|
|
|
| Chris H. |
Mar 10 2014, 06:24 AM
Post
#378
|
|
Senior Member Group: Members Posts: 4,053 Joined: 2-January 03 From: Chicago 'burbs Member No.: 73 Region Association: Upper MidWest |
OK I figured it was something if you were cutting a hole that big. I don't think Jamie's is turbo'd (yet).
That extended piece does look nice and stockish with the matching ribbed panels. I'm sure someone has a piece of trunk floor they could cut out for you... |
|
|
|
| DBCooper |
Mar 10 2014, 07:16 AM
Post
#379
|
|
14's in the 13's with ATTITUDE Group: Members Posts: 3,079 Joined: 25-August 04 From: Dazed and Confused Member No.: 2,618 Region Association: Northern California |
Excellent, that's what I've been trying to describe to people but I didn't know someone had already done it, that there was a photo. That's perfect, and if I were doing it again is the way I'd do it.
I think you'll find that how much you need to cut out, and where, depends on where the cradle, or whatever other engine mount you're using, locates the engine. That's the most important factor, then the engine's plumbing, tubing, whether the manifold was flipped, etc, etc. For my first cradle with the 901 transmission we kept the engine pretty much at the same position as the T4 engine, then when we did the Subaru transaxle we we moved the transmission forward an inch or inch and a half, because we could and because that gave the engine more space for the flipped manifold and the intercooler tubing. So I think how much you're going to need to do depends on what configuration you're putting in. But that big cutout that McMark did (damn, he's a smart guy) should cover pretty much any combination. |
|
|
|
| CptTripps |
Mar 10 2014, 07:32 AM
Post
#380
|
|
:: Punch and Pie :: Group: Members Posts: 3,584 Joined: 26-December 04 From: Mentor, OH Member No.: 3,342 Region Association: Upper MidWest |
QUOTE(DBCooper @ Mar 10 2014, 09:16 AM) But that big cutout that McMark did (damn, he's a smart guy) should cover pretty much any combination. That's kinda what I needed to hear. My engine and trans won't 'meet' the car until after the bodywork is done, so I need to guess at the maximum space and hope that it works out. I have a complete rear trunk panel, but I need to use it because what I have in there now is a piece of flat sheet metal from the PO. |
|
|
|
|
4 User(s) are reading this topic (4 Guests and 0 Anonymous Users)
0 Members:

|
Lo-Fi Version | Time is now: 11th January 2025 - 07:08 AM |
Invision Power Board
v9.1.4 © 2025 IPS, Inc.