|
|
|
Porsche, and the Porsche crest are registered trademarks of Dr. Ing. h.c. F. Porsche AG.
This site is not affiliated with Porsche in any way. Its only purpose is to provide an online forum for car enthusiasts. All other trademarks are property of their respective owners. |
|
|

  |

| 76-914 |
 Mar 10 2014, 08:37 AM Mar 10 2014, 08:37 AM
Post
#381
|
|
Repeat Offender & Resident Subaru Antagonist  Group: Members Posts: 13,653 Joined: 23-January 09 From: Temecula, CA Member No.: 9,964 Region Association: Southern California |
Kiss the imposed April deadline good bye! You have a lot of work and it just keeps piling up. (IMG:style_emoticons/default/dry.gif)
|
   |

 
|
| CptTripps |
Mar 10 2014, 08:46 AM
Post
#382
|
|
:: Punch and Pie :: Group: Members Posts: 3,584 Joined: 26-December 04 From: Mentor, OH Member No.: 3,342 Region Association: Upper MidWest |
QUOTE(76-914 @ Mar 10 2014, 10:37 AM)  Kiss the imposed April deadline good bye! You have a lot of work and it just keeps piling up. Ye of little faith! I'm determined to drive it to Hershey. Honestly, it's all going to start coming together from here. I have just about all the major fabrication done. If I can get the trunk floorpan and cut-out done tonight, I'll be ready to start the rest of the bodywork. |
|
|
|
| CptTripps |
Mar 10 2014, 09:54 AM
Post
#383
|
|
:: Punch and Pie :: Group: Members Posts: 3,584 Joined: 26-December 04 From: Mentor, OH Member No.: 3,342 Region Association: Upper MidWest |
Stopped by Cleveland Ohio Powder Coating to see what everything looks like this morning. They were just getting ready to put everything in the oven to pre-bake. I dropped off:
Front Struts Front A-Arms Front Mounting Pieces Front Support Beam Rear Trailing Arms Brake Shields 911 E-Brake Shields and Mounts Other pieces/parts A bunch of it will be "Powder Chrome" and the other parts will be neon green. I'll have everything back later today! Attached thumbnail(s) 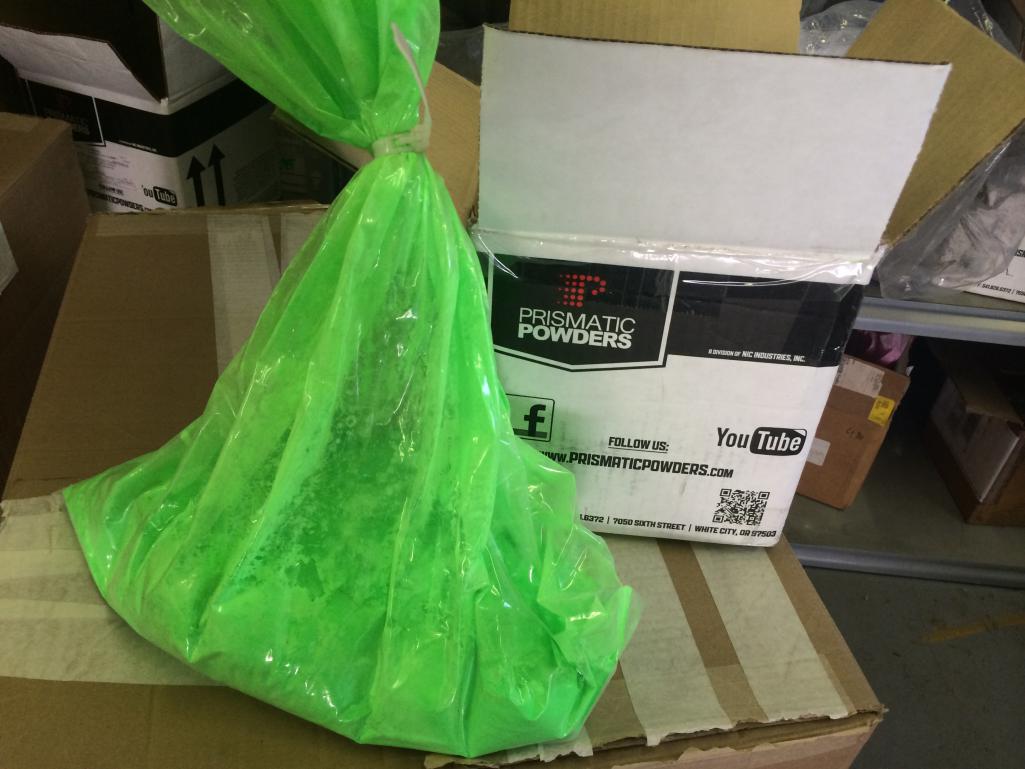 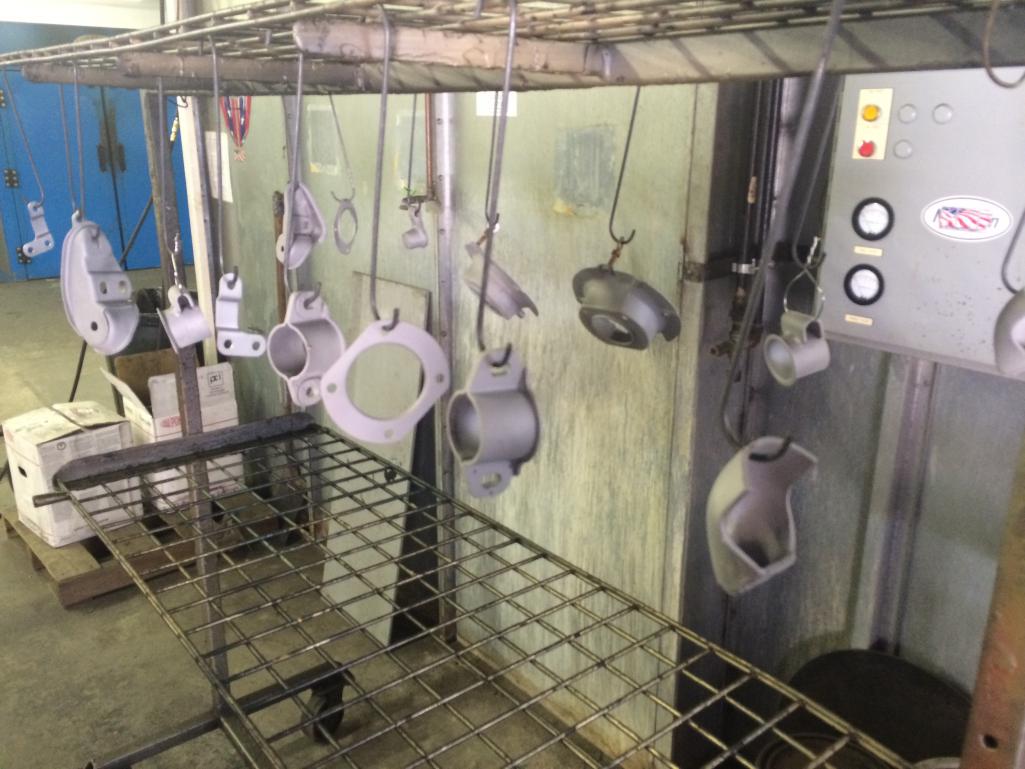
|
|
|
|
| JRust |
Mar 10 2014, 10:08 AM
Post
#384
|
|
914 Guru Group: Members Posts: 6,313 Joined: 10-January 03 From: Corvallis Oregon Member No.: 129 Region Association: Pacific Northwest |
QUOTE(Chris H. @ Mar 10 2014, 05:24 AM) OK I figured it was something if you were cutting a hole that big. I don't think Jamie's is turbo'd (yet). That extended piece does look nice and stockish with the matching ribbed panels. I'm sure someone has a piece of trunk floor they could cut out for you... Yeah mine is just a normally aspirated 2.5. Although the motor was built a little & dyno'd at 160 to the rear wheels. It pulls great & runs awesome. Not sure I will ever go for the turbo setup. An suby 6 would be more likely. For now I am just trying to keep from screwing anything up. I want to enjoy a driving 914 for once (IMG:style_emoticons/default/evilgrin.gif) |
|
|
|
| effutuo101 |
Mar 10 2014, 12:18 PM
Post
#385
|
|
Advanced Member Group: Members Posts: 2,735 Joined: 10-April 05 From: Lemon Grove Member No.: 3,914 Region Association: Southern California |
QUOTE(CptTripps @ Mar 10 2014, 08:54 AM) Stopped by Cleveland Ohio Powder Coating to see what everything looks like this morning. They were just getting ready to put everything in the oven to pre-bake. I dropped off: Front Struts Front A-Arms Front Mounting Pieces Front Support Beam Rear Trailing Arms Brake Shields 911 E-Brake Shields and Mounts Other pieces/parts A bunch of it will be "Powder Chrome" and the other parts will be neon green. I'll have everything back later today! Cool! get er done! |
|
|
|
| CptTripps |
Mar 10 2014, 04:41 PM
Post
#386
|
|
:: Punch and Pie :: Group: Members Posts: 3,584 Joined: 26-December 04 From: Mentor, OH Member No.: 3,342 Region Association: Upper MidWest |
My powder-coater rules. (IMG:style_emoticons/default/biggrin.gif)
Attached thumbnail(s) 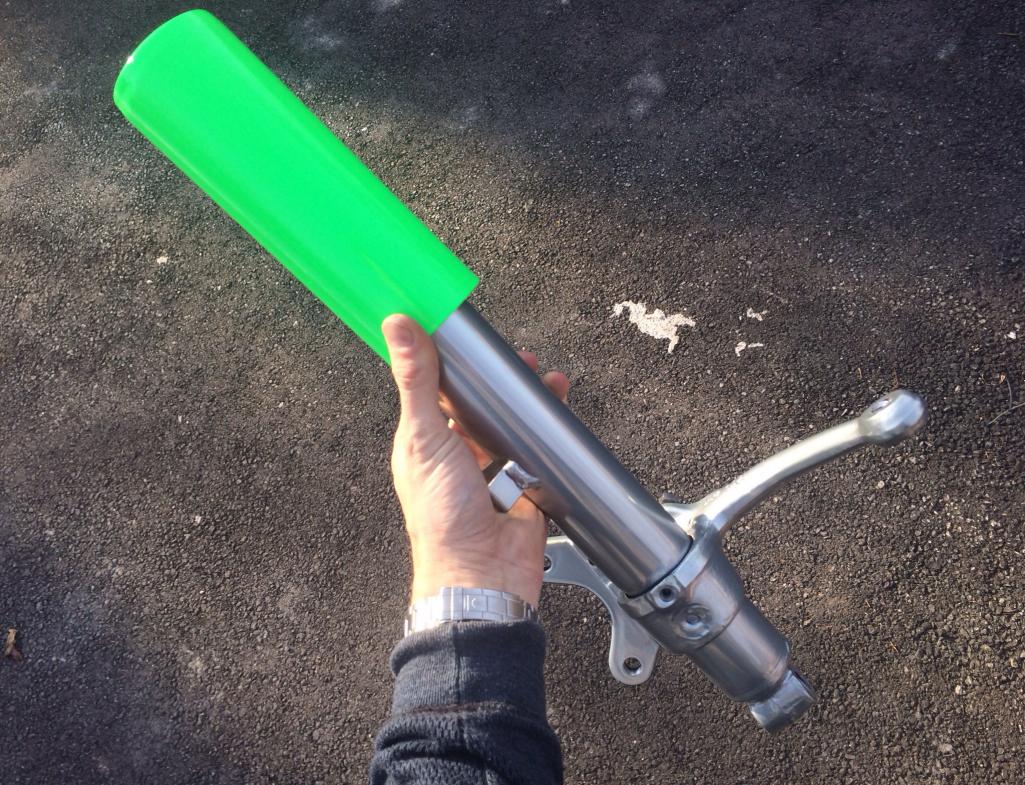 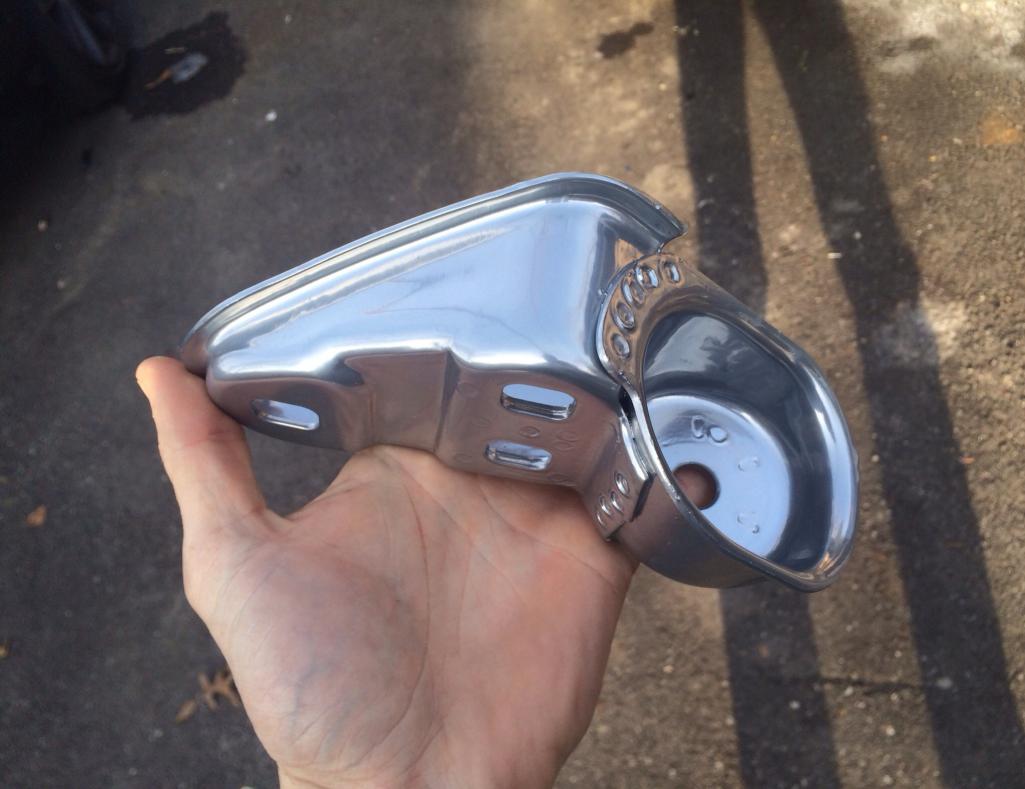  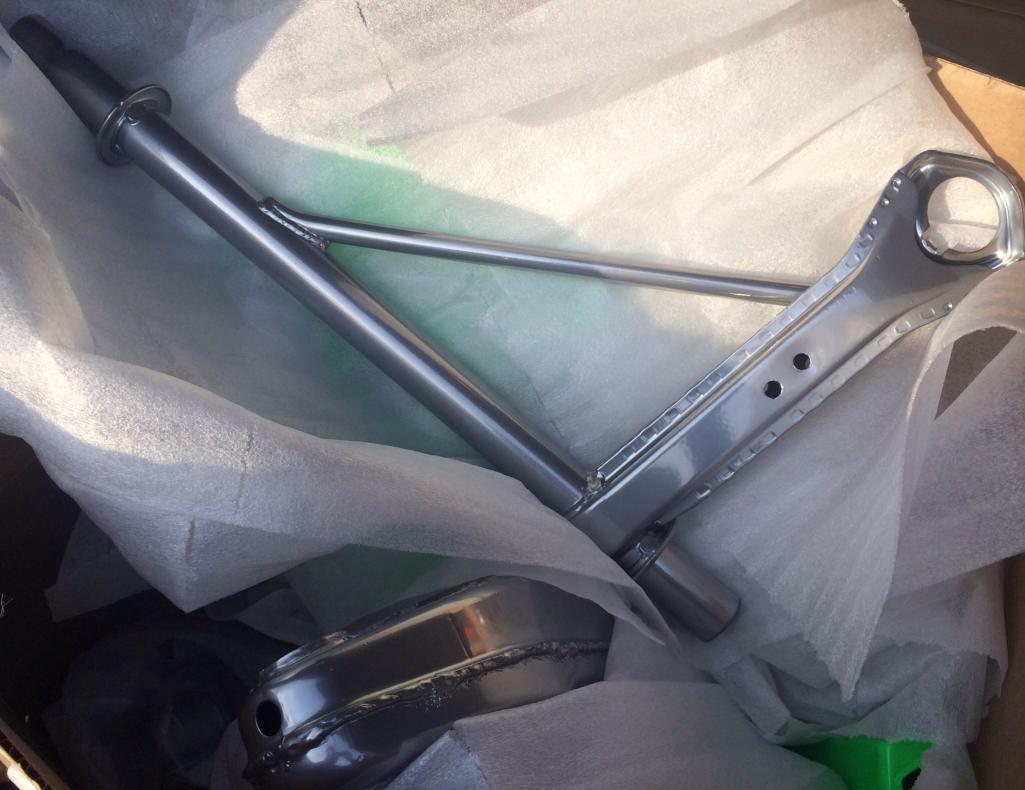
|
|
|
|
| ruby914 |
Mar 10 2014, 05:12 PM
Post
#387
|
|
Senior Member Group: Members Posts: 720 Joined: 26-April 09 From: Hawthorne, Ca Member No.: 10,305 Region Association: None |
WOW, Nice (IMG:style_emoticons/default/smile.gif)
Looks Photoshopped. |
|
|
|
| CptTripps |
Mar 10 2014, 08:33 PM
Post
#388
|
|
:: Punch and Pie :: Group: Members Posts: 3,584 Joined: 26-December 04 From: Mentor, OH Member No.: 3,342 Region Association: Upper MidWest |
It's bright. That's for sure!
|
|
|
|
| mgp4591 |
Mar 10 2014, 09:09 PM
Post
#389
|
|
914 Guru Group: Members Posts: 5,527 Joined: 1-August 12 From: Salt Lake City Ut Member No.: 14,748 Region Association: Intermountain Region |
Bright AND protected for awhile! Great job at any price! (IMG:style_emoticons/default/aktion035.gif)
|
|
|
|
| effutuo101 |
Mar 10 2014, 09:11 PM
Post
#390
|
|
Advanced Member Group: Members Posts: 2,735 Joined: 10-April 05 From: Lemon Grove Member No.: 3,914 Region Association: Southern California |
I love the colors!
also, when I did my /4 suspension, I did it the same "chrome" it came out really nice! |
|
|
|
| CptTripps |
Mar 11 2014, 07:22 AM
Post
#391
|
|
:: Punch and Pie :: Group: Members Posts: 3,584 Joined: 26-December 04 From: Mentor, OH Member No.: 3,342 Region Association: Upper MidWest |
Got busy with a few projects last night.
First, I finished up the hell-hole repair. I ran out of 18awg steel, so I picked up a few more sheets yesterday. The piece went in easy and after some fitment, I feel confident that I have it all buttoned up well. My welds aint as pretty as I'd like just yet, but they are getting a lot better! 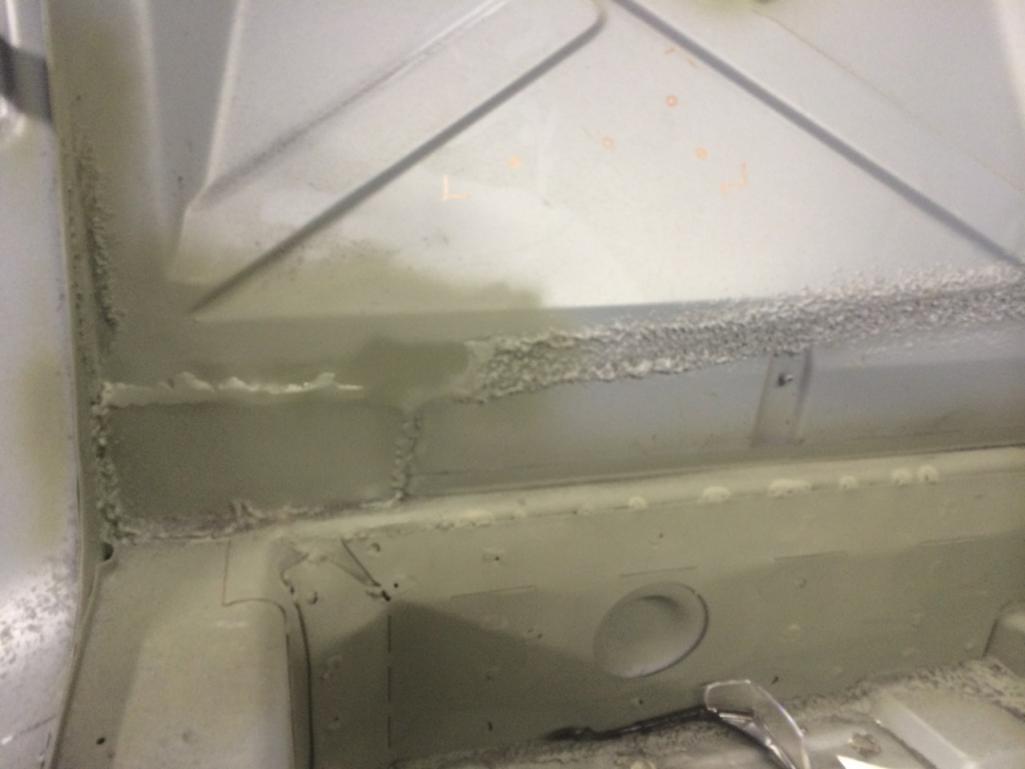 Next, I played with the seats a little bit. For whatever reason, this part of the build still has me flustered. I just don't know what I want to do. On one hand, I have these bad-ass Carbon-Fiber seats I picked up for a song. They need recovered so if I want them in the car, I need to decide pretty quickly what I want to do. BUT...if I use them, I'm going to need to move the e-brake handle and use the Boxster handle I bought. That'll take some fabrication, and I'm not sure I'd ever really trust it if I needed to. 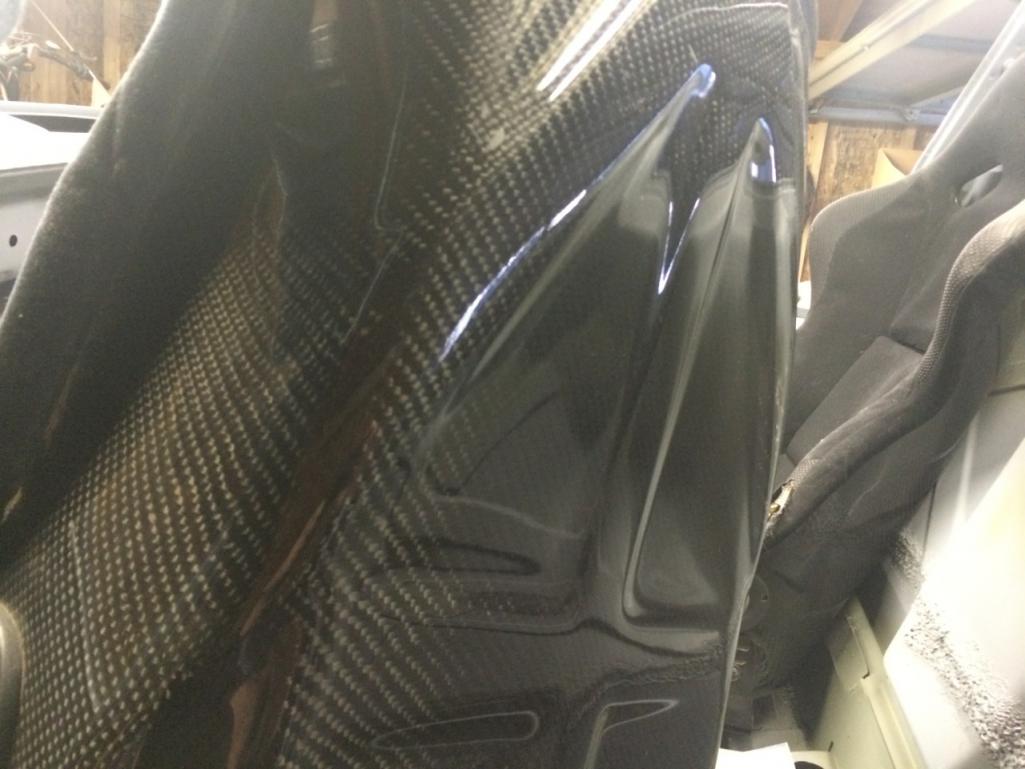 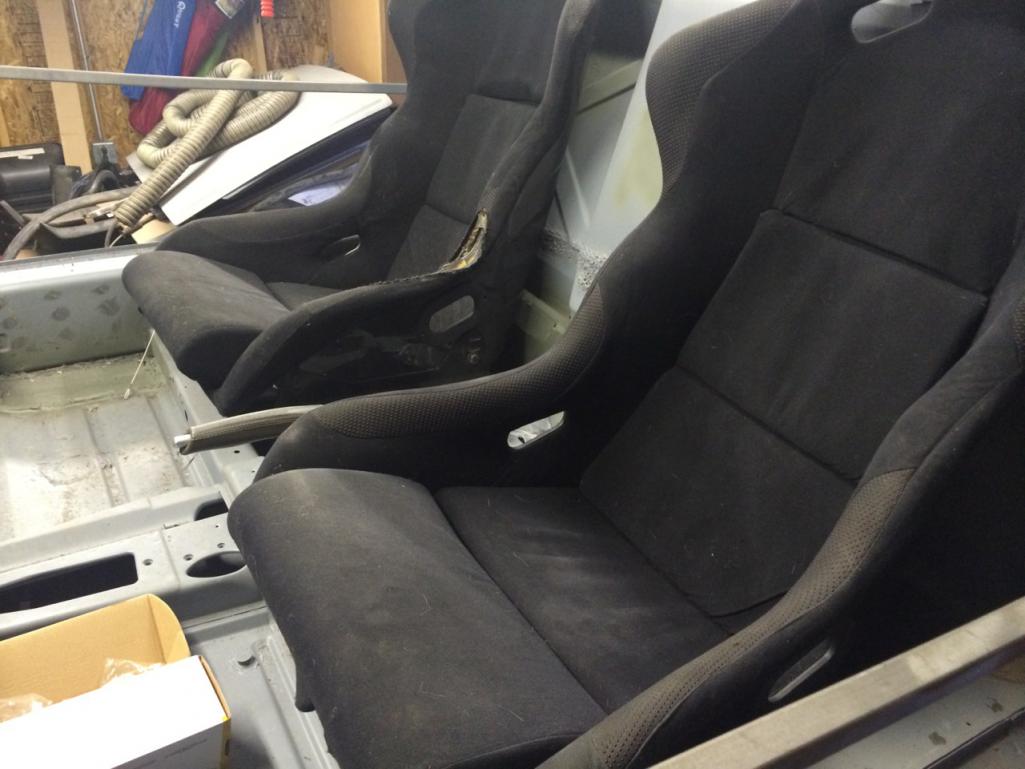 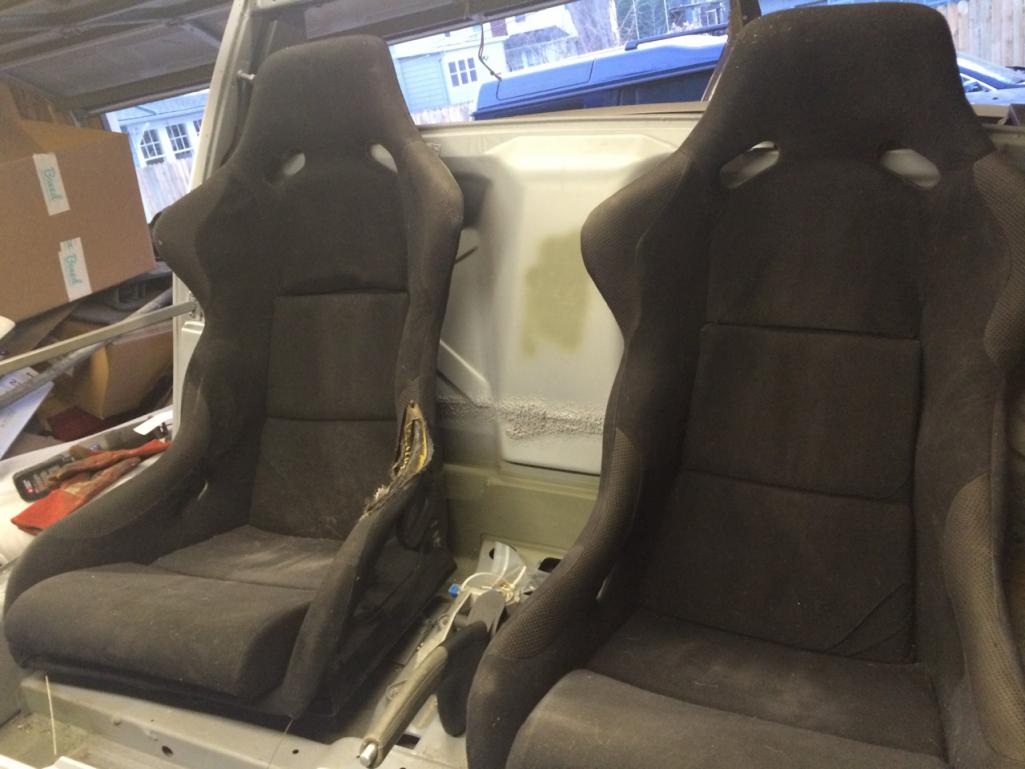 I'll ponder that later...time to get started on more welding before I move on to the trunk project. I have this GT kit, and after I got this piece in place, I realized that I didn't have the instructions, and couldn't figure out where 2 of the other pieces went. So...I got these installed and left it at that until I can research placement, and if some of the other pieces are really necessary. 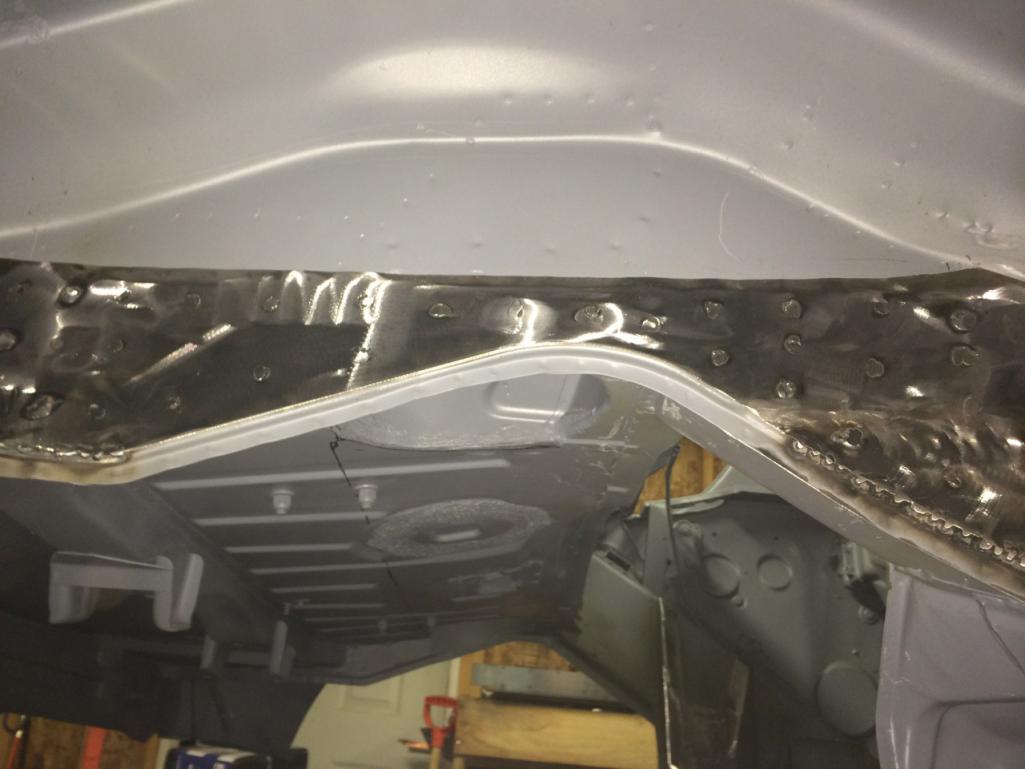 |
|
|
|
| 914forme |
Mar 13 2014, 05:42 AM
Post
#392
|
|
Times a wastin', get wrenchin'! Group: Members Posts: 3,896 Joined: 24-July 04 From: Dayton, Ohio Member No.: 2,388 Region Association: None |
GT kits where made for the -6 cars, so the two pieces you have most like run up the inner logs towards the inner suspension console. They are covered by that much needed -4 engine mount on each side. You could cut them out, weld in the plates, and then put them back in as you need them for the Coldwater cradle.
|
|
|
|
| CptTripps |
Mar 13 2014, 06:41 AM
Post
#393
|
|
:: Punch and Pie :: Group: Members Posts: 3,584 Joined: 26-December 04 From: Mentor, OH Member No.: 3,342 Region Association: Upper MidWest |
QUOTE(914forme @ Mar 13 2014, 07:42 AM) GT kits where made for the -6 cars, so the two pieces you have most like run up the inner logs towards the inner suspension console. They are covered by that much needed -4 engine mount on each side. You could cut them out, weld in the plates, and then put them back in as you need them for the Coldwater cradle. That's exactly what I figured out. I'm wondering if that particular part is really needed though. Also, I don't want to take something off, and then realize after it's too late, that I put them back incorrectly. In the end, I may just add the pieces I know I need, and then seam weld the parts that are normally just tacked up. That should give me the added strength that I need, without adding additional weight. In other news... I mocked up the dashboard yesterday so I know what the pieces of aluminum I need to have water-jetted for the dash. I had to make a few things smaller...others a bit bigger, and some of the holes that I made are just downright WAY too small. 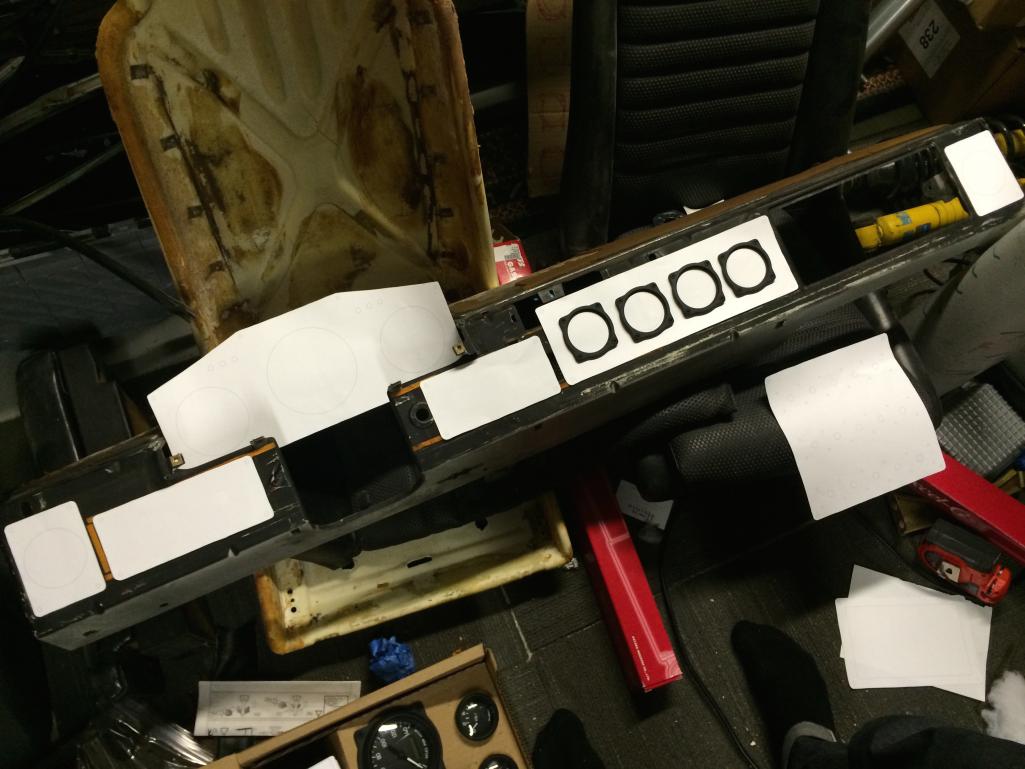 Also found a place local to me that had a bunch of Porsche rims and assorted other goodies. These Corbeau seats look to be a much better fit than the Carbon Fiber seats I bought last week. I can trade him mine for these, and have something closer to what I'm looking for without having to move the e-brake handle. 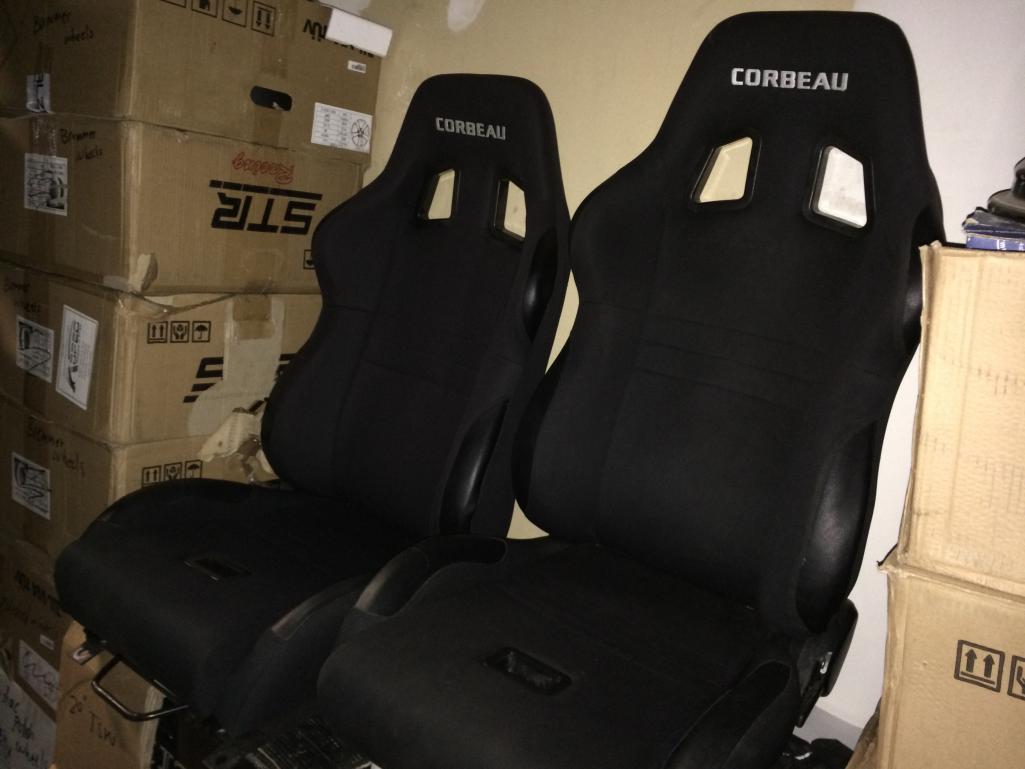 Still hunting for a body guy that can take this from me on Saturday and work on it next week while I'm out of town. My hope is to have it back in a week and be ready for final blocking and paint. |
|
|
|
| CptTripps |
Mar 14 2014, 10:03 PM
Post
#394
|
|
:: Punch and Pie :: Group: Members Posts: 3,584 Joined: 26-December 04 From: Mentor, OH Member No.: 3,342 Region Association: Upper MidWest |
This is Dan. My new body guy.
I have to get on a plane to LIT tomorrow, then ATL on Monday, the. SFO on Tues. So I needed some backup. He tells me he can get the body filled/blocked/everything by next Sunday. If he makes the FOLLOWING Sunday, I'll be happy. Already sent me some progress pics. I'll post those in the AM. Attached thumbnail(s) 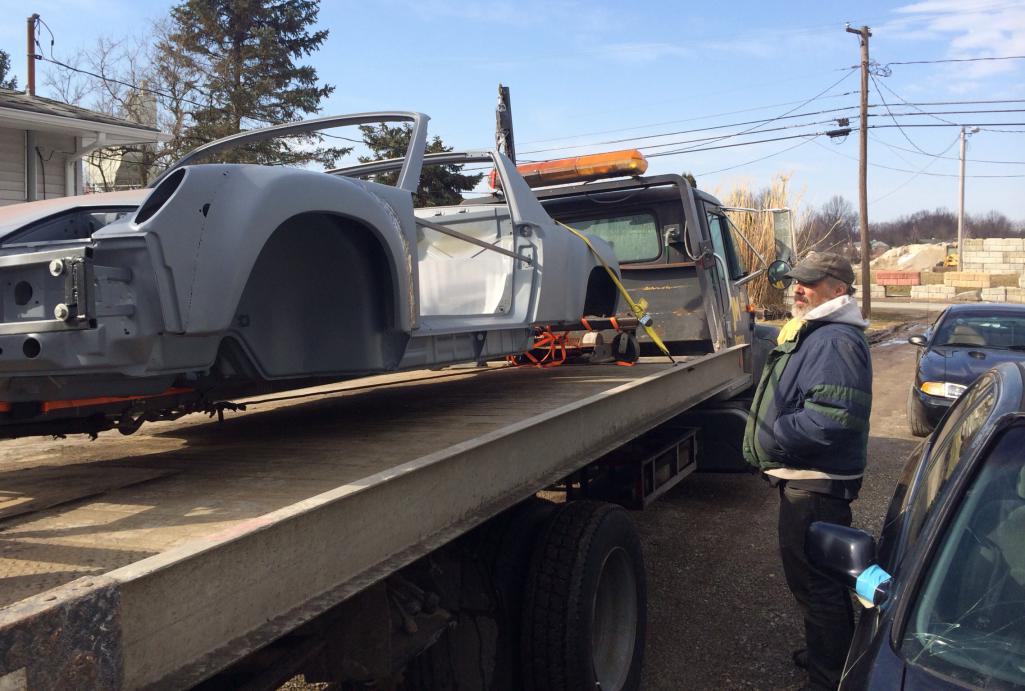 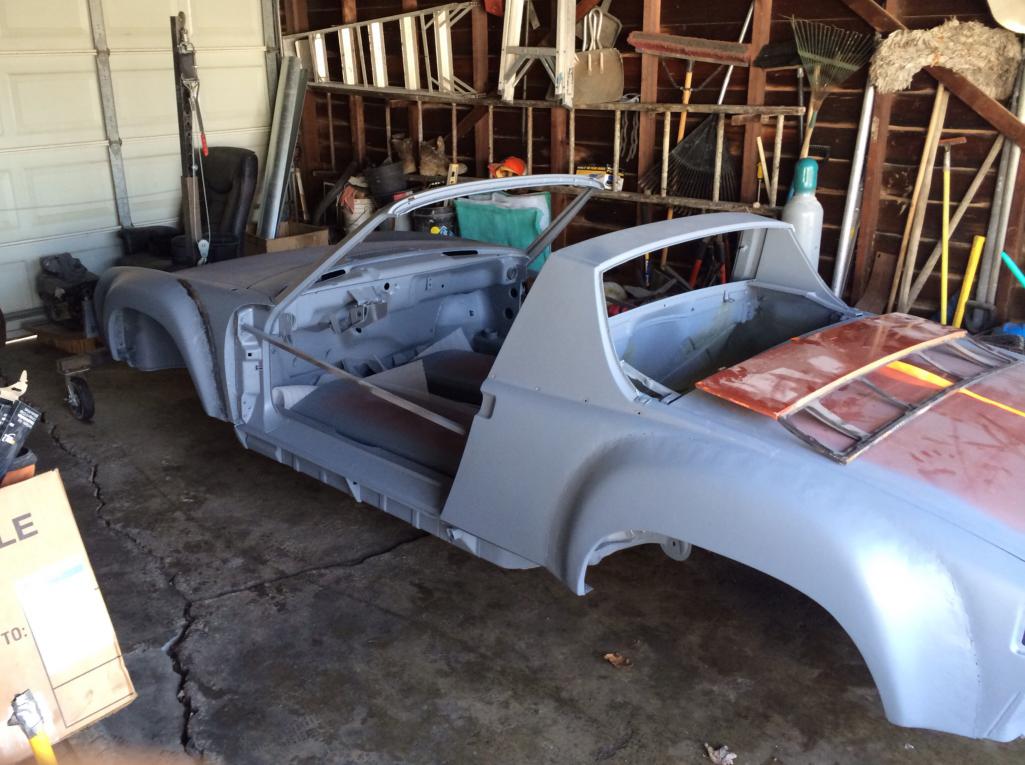
|
|
|
|
| 914forme |
Mar 15 2014, 11:11 AM
Post
#395
|
|
Times a wastin', get wrenchin'! Group: Members Posts: 3,896 Joined: 24-July 04 From: Dayton, Ohio Member No.: 2,388 Region Association: None |
What was the decision on the rear trunk. I have McMarks rear trunk Evernoted for my Project as it is the cleanest factory looking one I have seen.
I got my cradle from Ian, have the mockup motor almost ready to go in and see what and where I need to clearance. Your making great progress keep it up. |
|
|
|
| CptTripps |
Mar 15 2014, 12:39 PM
Post
#396
|
|
:: Punch and Pie :: Group: Members Posts: 3,584 Joined: 26-December 04 From: Mentor, OH Member No.: 3,342 Region Association: Upper MidWest |
Thanks Stephen. I "punted" until next week when I get the body back. I think I'm going to end up dong something similar, but without the "ribs" that McMark has. Honestly, I'm going so far off the reservation with the rest of the build, it doesn't make sense to put a ton of work into making it look stock.
Dan has been doing a great job on the flares. He got all the "waves" out of one of them about an hour after I dropped it off. He also fixed the welds that the other guy ground too much off of. He sent me a question last night about how to match the flares with the existing sheet metal down by the rockers. I know I've seen a few threads on it, so I'll keep digging. I dropped the fiberglass rockers off at his garage this AM on my way to the airport. I'll let him have fun with that! Here's one of the pics he sent me last night. Already I can see a big improvement. I'm not sure what the other guy was doing with the pick-end of the metal hammer. Trying to shrink it up? Who knows. This guy is much better. Attached thumbnail(s) 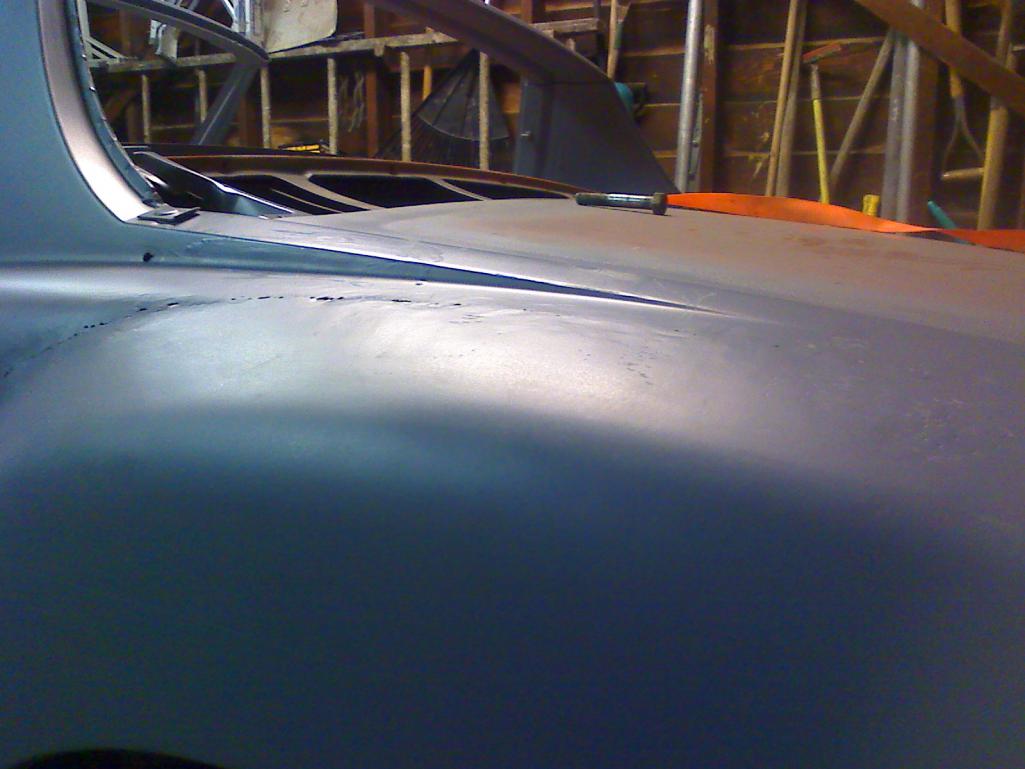
|
|
|
|
| CptTripps |
Mar 16 2014, 08:10 AM
Post
#397
|
|
:: Punch and Pie :: Group: Members Posts: 3,584 Joined: 26-December 04 From: Mentor, OH Member No.: 3,342 Region Association: Upper MidWest |
So I got an update late last night from my new body gut Dan.
He isn't happy with how far he got yesterday, but I sure am! He ground out and braised any of the thin spots that were over ground. Then modified the bottom of the flares so they match up with the body panels now. Also welded all the little holes I wanted buttoned up. So far, I like what I see. Here are a few of the 20 pics he sent me last night. Attached thumbnail(s) 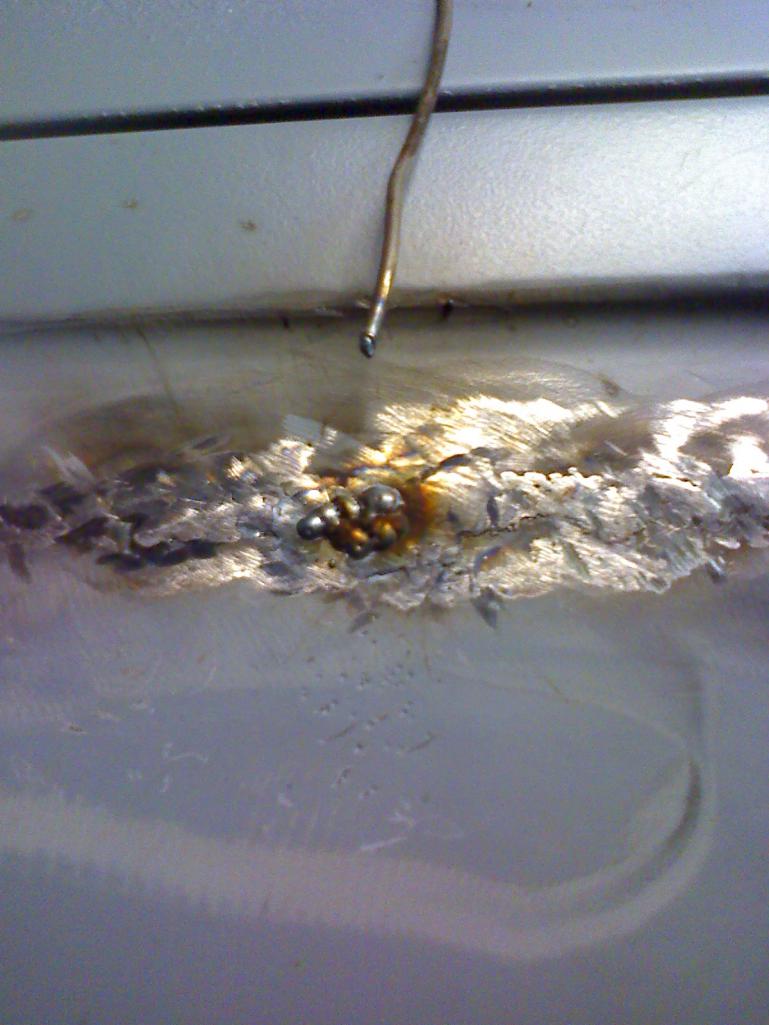 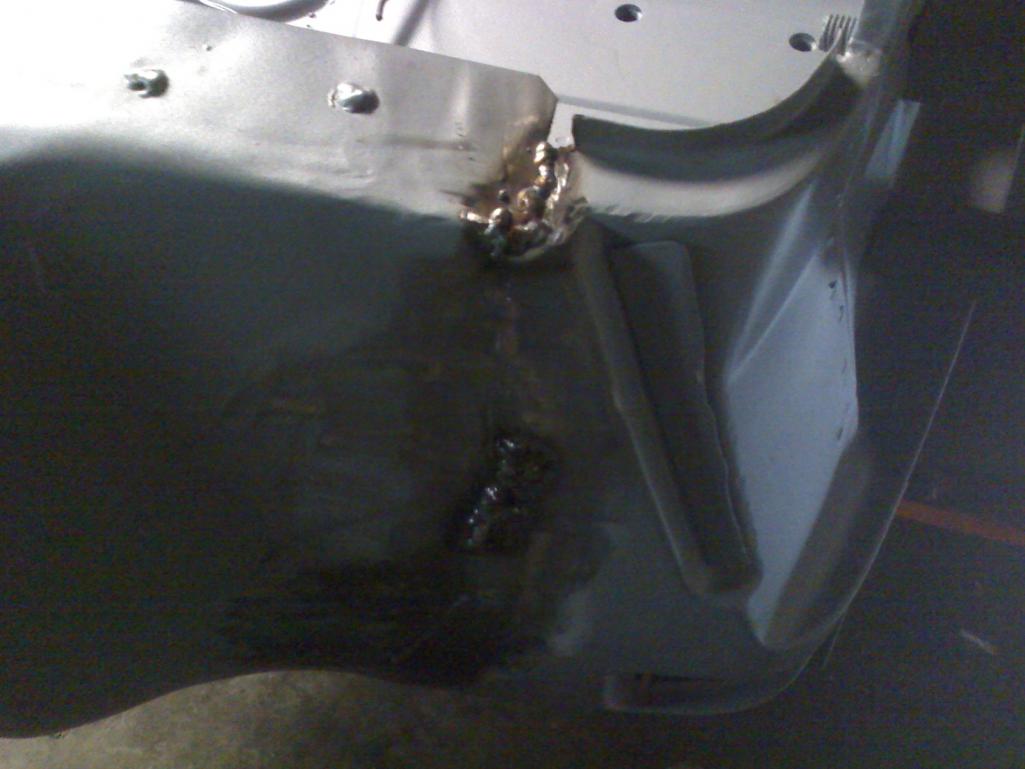 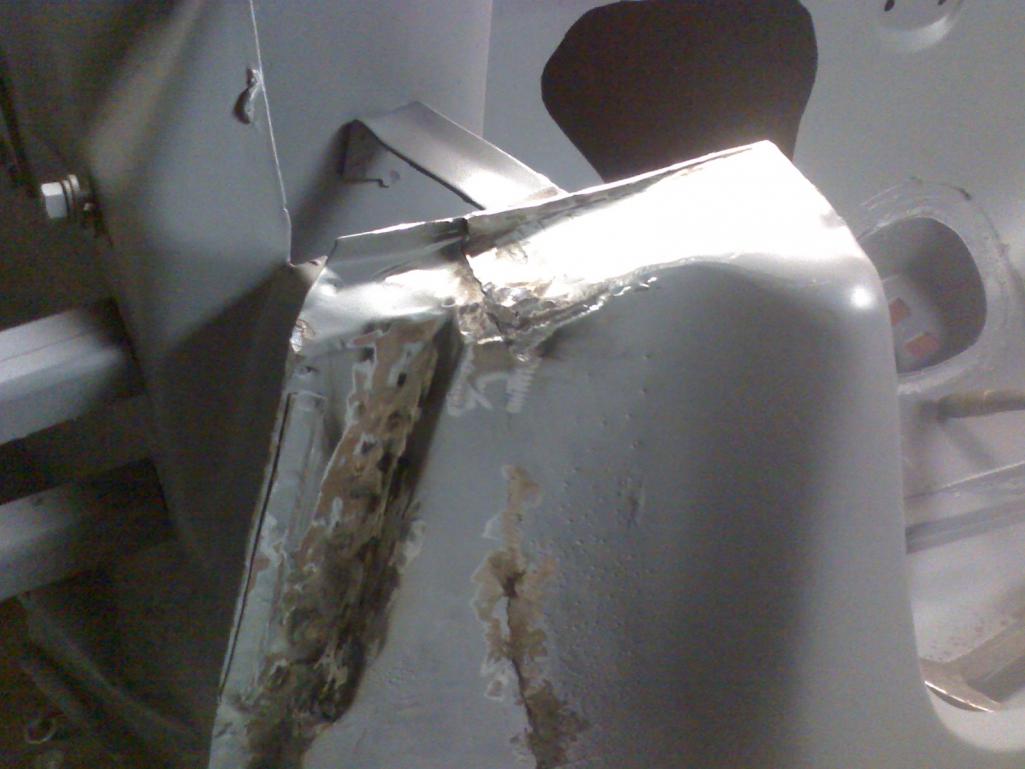 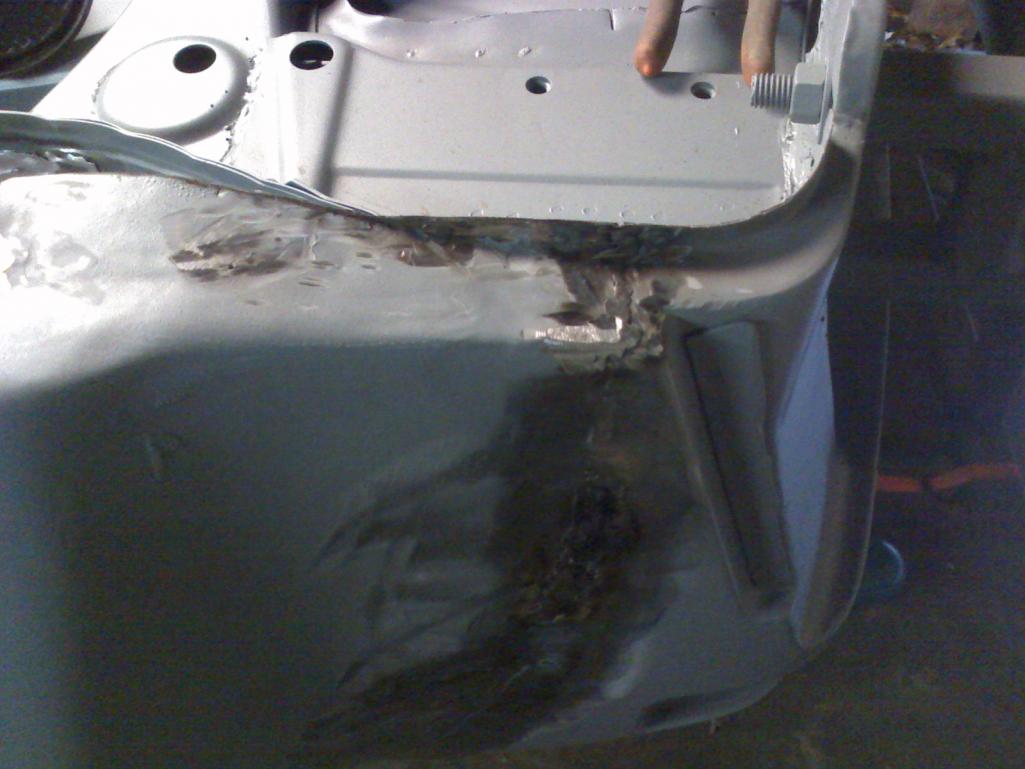
|
|
|
|
| CptTripps |
Mar 17 2014, 09:02 AM
Post
#398
|
|
:: Punch and Pie :: Group: Members Posts: 3,584 Joined: 26-December 04 From: Mentor, OH Member No.: 3,342 Region Association: Upper MidWest |
More pics from my body guy, while I'm out of town.
VERY glad I didn't try to tackle this on my own. He welded everything up, blocked it out, then re-sprayed it with more epoxy primer. He's starting on the bondo (Using Rage Gold) work today. He'll have it blocked out and in 2K high-build by the time I get home on Thursday. He'll do a few more coat before it lands in my garage next Sunday. From there, I've got to do the trunk work, then I'll paint the bottom and interior so I can get started on re-assembly of all of that before it hits the paint-booth for the exterior work on April 3rd. (IMG:style_emoticons/default/driving.gif) in no time... 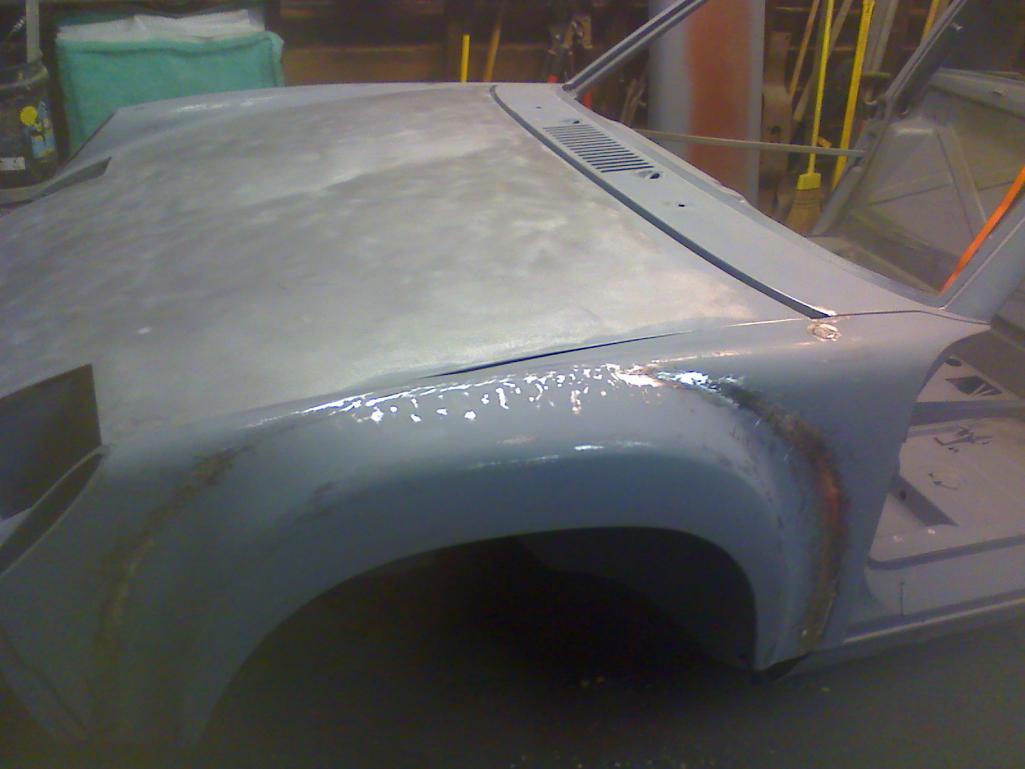 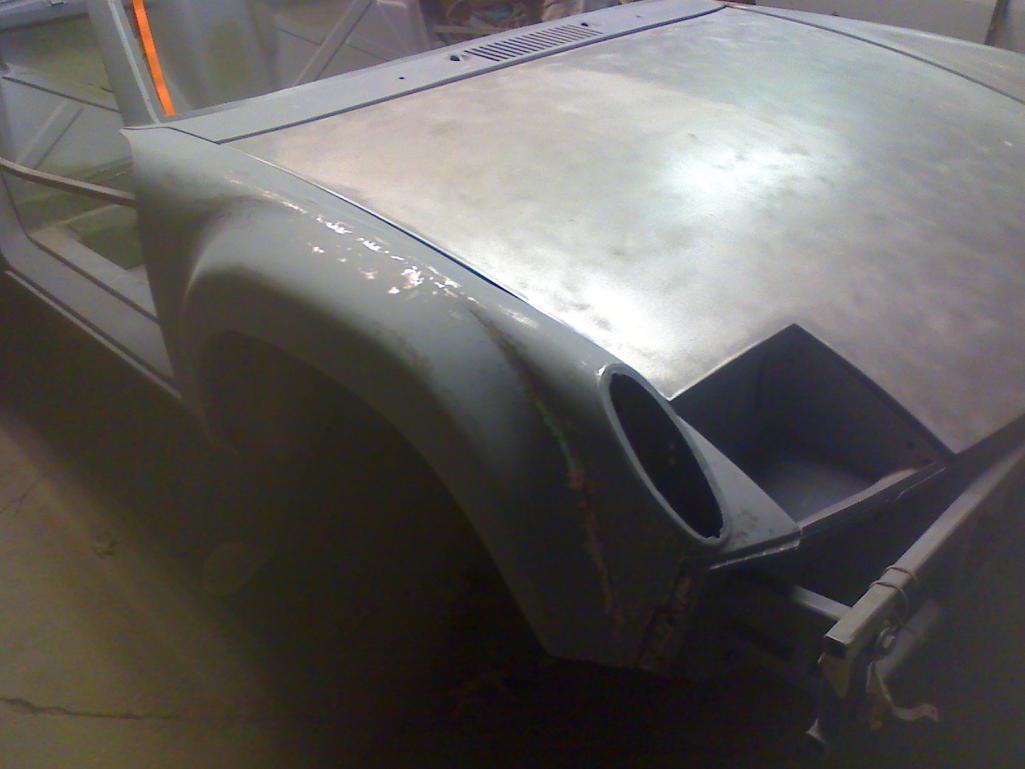 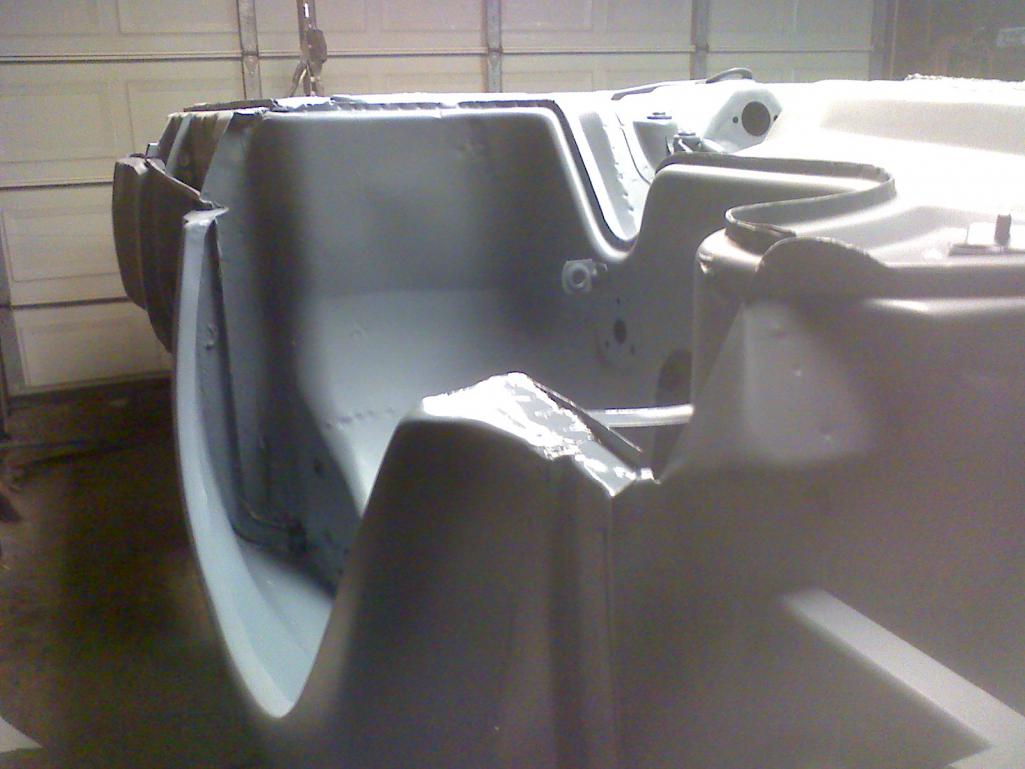 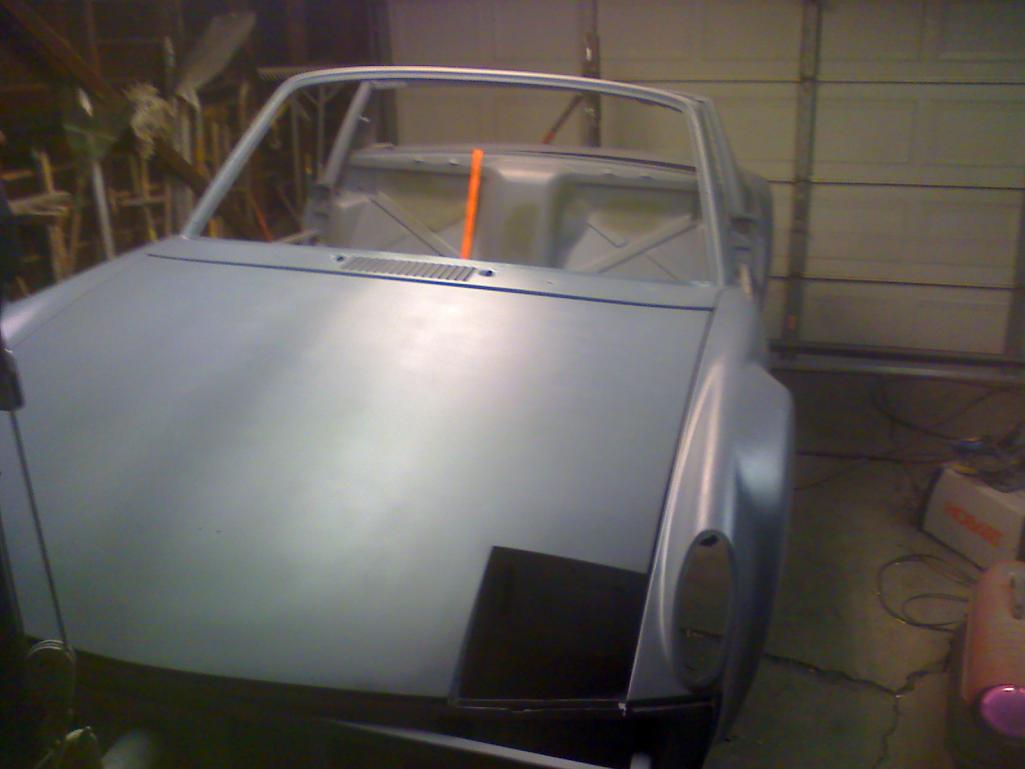 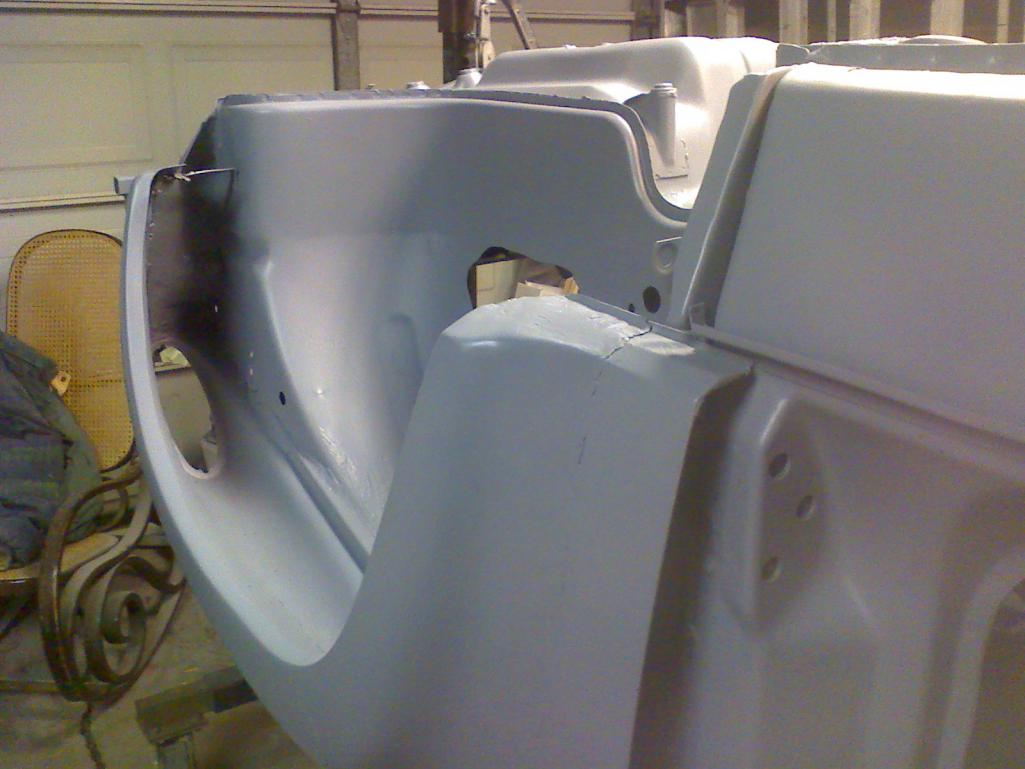 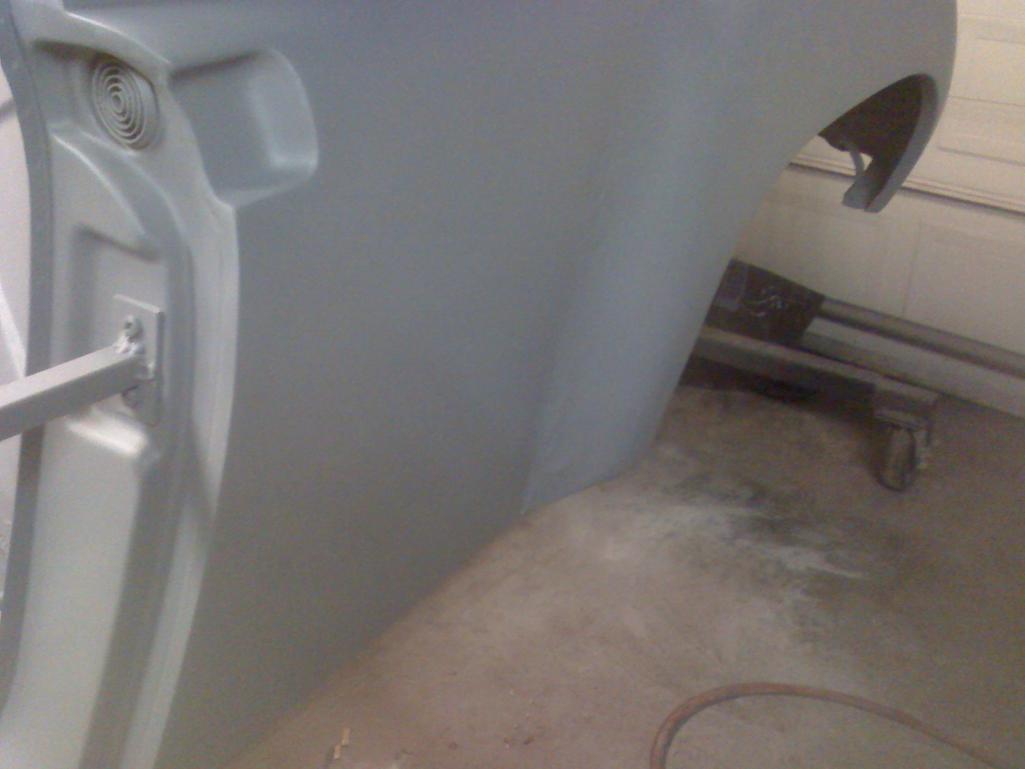 |
|
|
|
| McMark |
Mar 17 2014, 05:36 PM
Post
#399
|
|
914 Freak! Group: Retired Admin Posts: 20,179 Joined: 13-March 03 From: Grand Rapids, MI Member No.: 419 Region Association: None |
Whoops! Shoulda had them mask off this section depending on what bearing/bushing replacements you're using. The PC thickness will come into play on most setups. Also, you'll likely have the grind the PC off the ID to fit the ball joint into the arm.
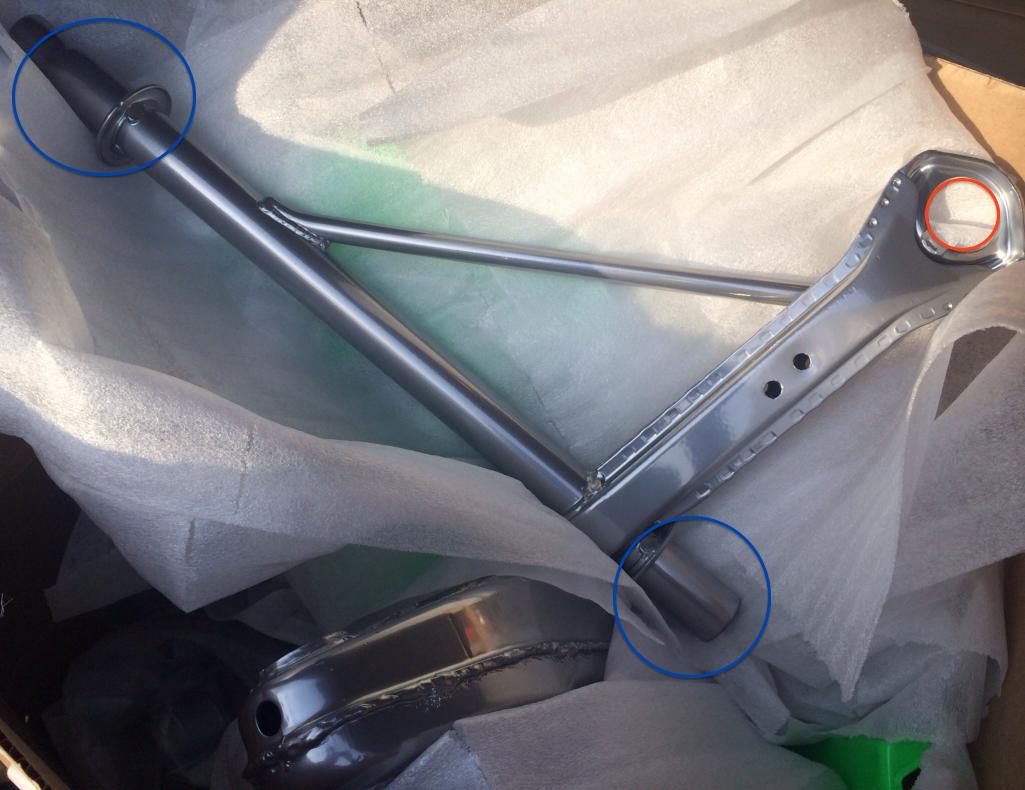 But I really like the chrome and green. (IMG:style_emoticons/default/cool_shades.gif) Glad you like the trunk restructuring we did. The top of the new section is the vertical wall from the trunk, cut and flipped. This kept the ribbing and gave us the smooth rounded transition. The other piece is a section of rear trunk pan from a donor car. I opted to leave the 'portholes' for a little more authenticity. (IMG:style_emoticons/default/wink.gif) 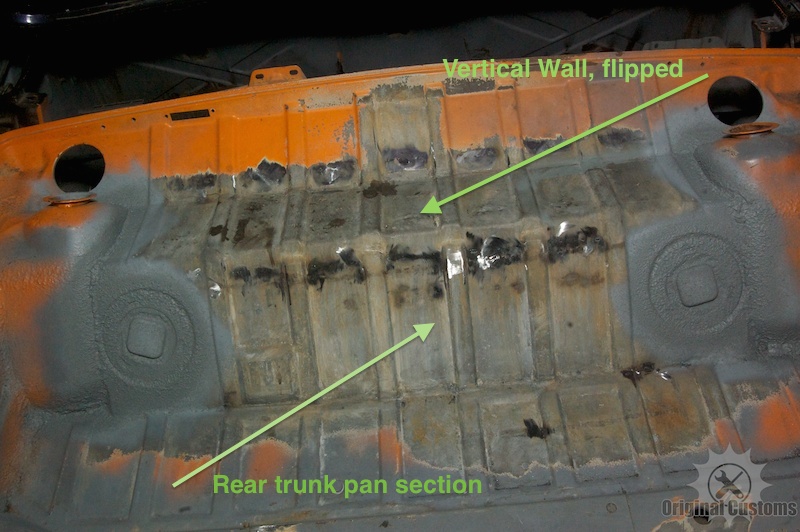 There is also a very important reinforcement section on the bottom of the new piece. The stock cars have a double wall, boxed section between the shock towers. Without replicating that box section or otherwise reinforcing the shock towers, you may experience flex or worse, tearing metal. 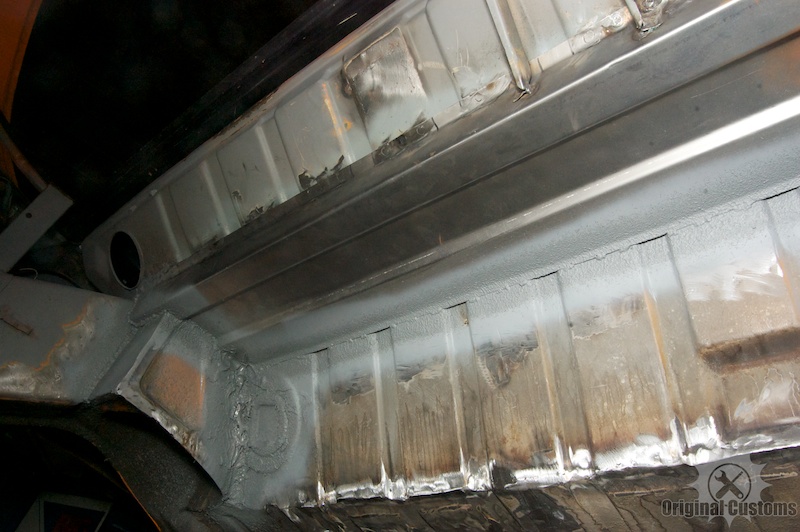 |
|
|
|
| CptTripps |
Mar 17 2014, 06:17 PM
Post
#400
|
|
:: Punch and Pie :: Group: Members Posts: 3,584 Joined: 26-December 04 From: Mentor, OH Member No.: 3,342 Region Association: Upper MidWest |
Wow Mark...I completely forgot to have them mask the arms. They did it on the trailing arms and the struts.
The trunk work is going to be interesting. There are 2-3 different ways that I can go about it, but I'm going to have to wait and see what I come up with when I have the sawzall in my hand. Maybe I can get some advice on Wednesday when I drop by Mark? |
|
|
|
|
2 User(s) are reading this topic (2 Guests and 0 Anonymous Users)
0 Members:

|
Lo-Fi Version | Time is now: 11th January 2025 - 07:04 AM |
Invision Power Board
v9.1.4 © 2025 IPS, Inc.