|
|
|
Porsche, and the Porsche crest are registered trademarks of Dr. Ing. h.c. F. Porsche AG.
This site is not affiliated with Porsche in any way. Its only purpose is to provide an online forum for car enthusiasts. All other trademarks are property of their respective owners. |
|
|

  |

| CptTripps |
 Mar 23 2014, 06:11 PM Mar 23 2014, 06:11 PM
Post
#421
|
|
:: Punch and Pie ::  Group: Members Posts: 3,584 Joined: 26-December 04 From: Mentor, OH Member No.: 3,342 Region Association: Upper MidWest |
Spent the day doing all the little things I won't have time to, or want to do later.
Yanked the bearings and blasted the front hubs, blasted and painted the targa latches, blasted and re-sprayed about 20 little nick-knacks and cleaned the windshield wiper assembly. Also bought a parts vibrator today after seeing McMarks's last week. Holy shit is this thing useful. Attached thumbnail(s) 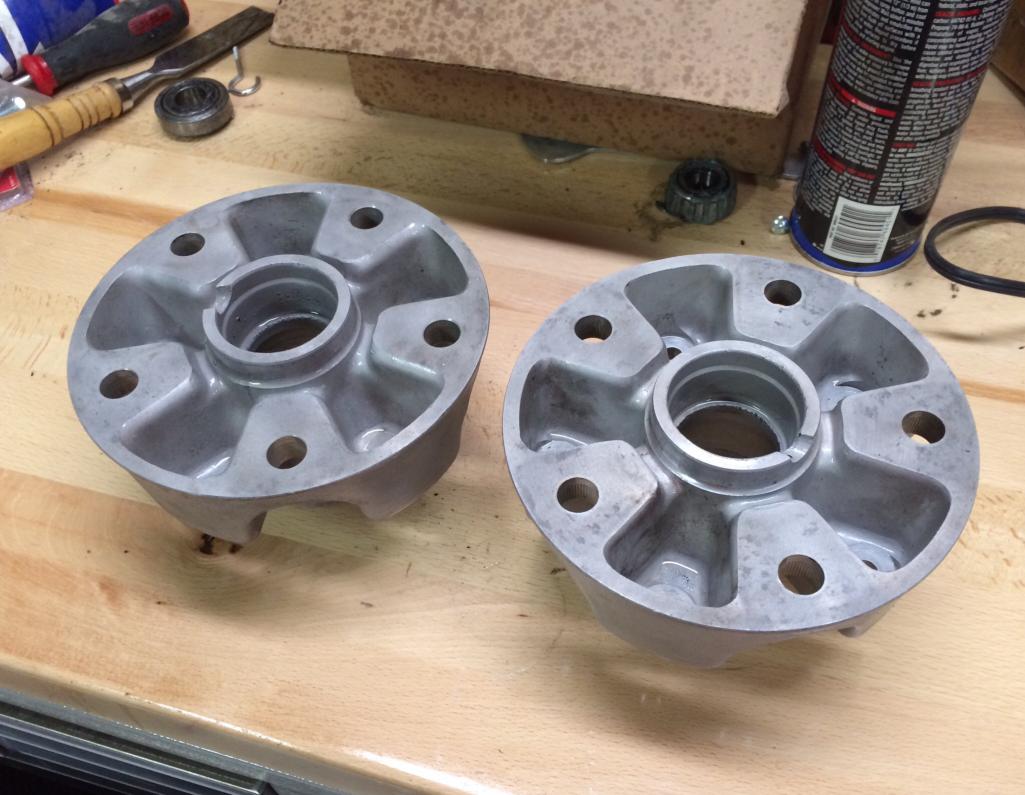 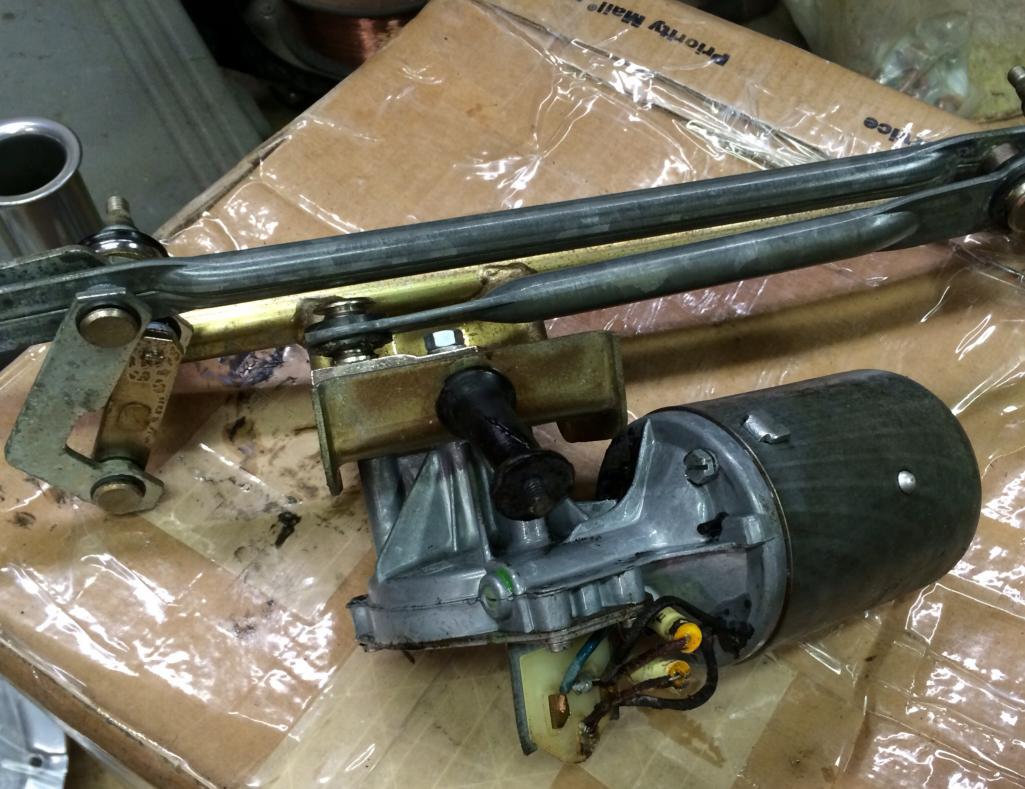 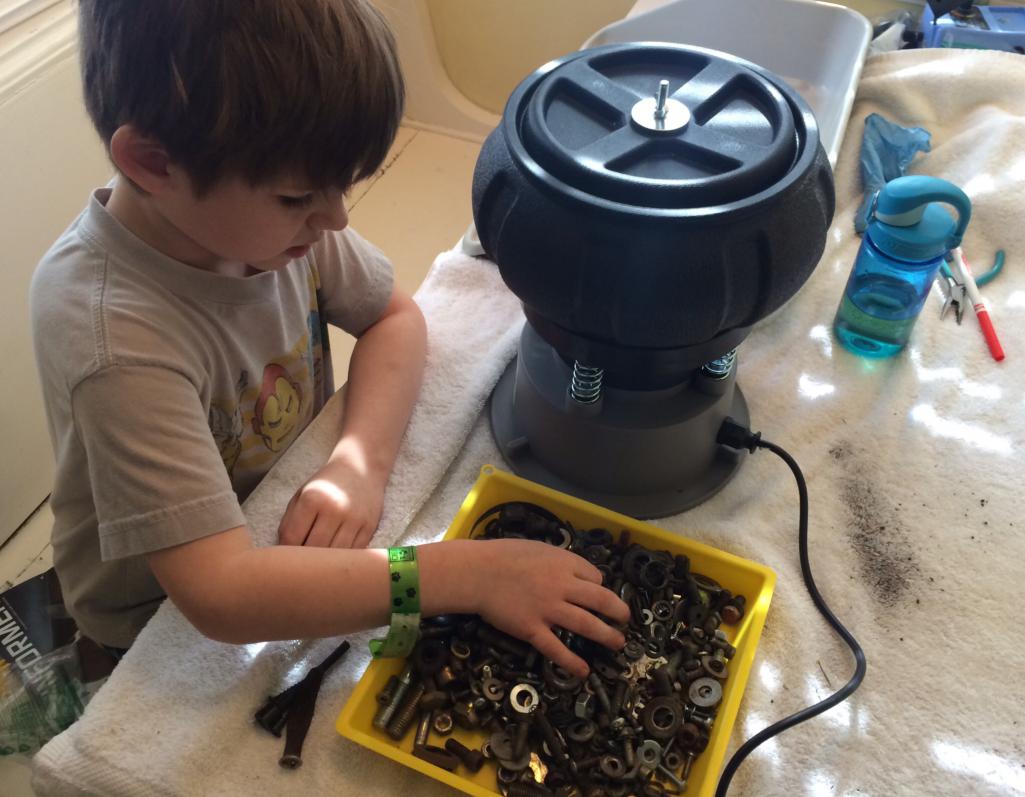 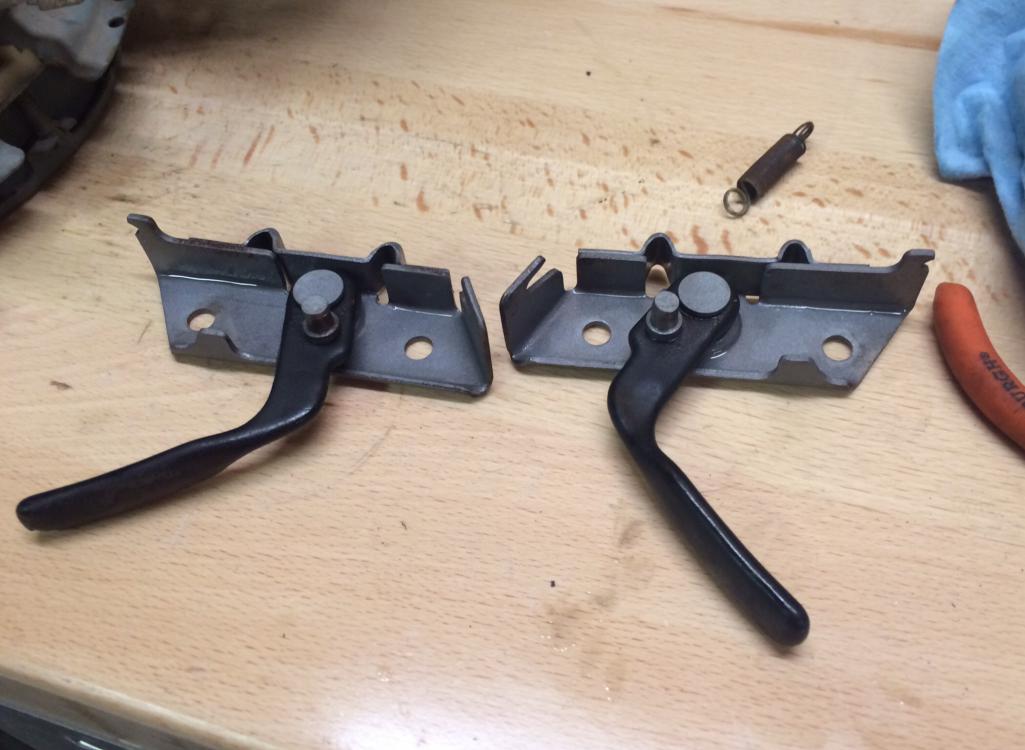
|
   |

 
|
| CptTripps |
Mar 23 2014, 06:35 PM
Post
#422
|
|
:: Punch and Pie :: Group: Members Posts: 3,584 Joined: 26-December 04 From: Mentor, OH Member No.: 3,342 Region Association: Upper MidWest |
Here's what an hour in the vibrating parts cleaner thingy can do to a tired greasy box of bolts.
Attached thumbnail(s) 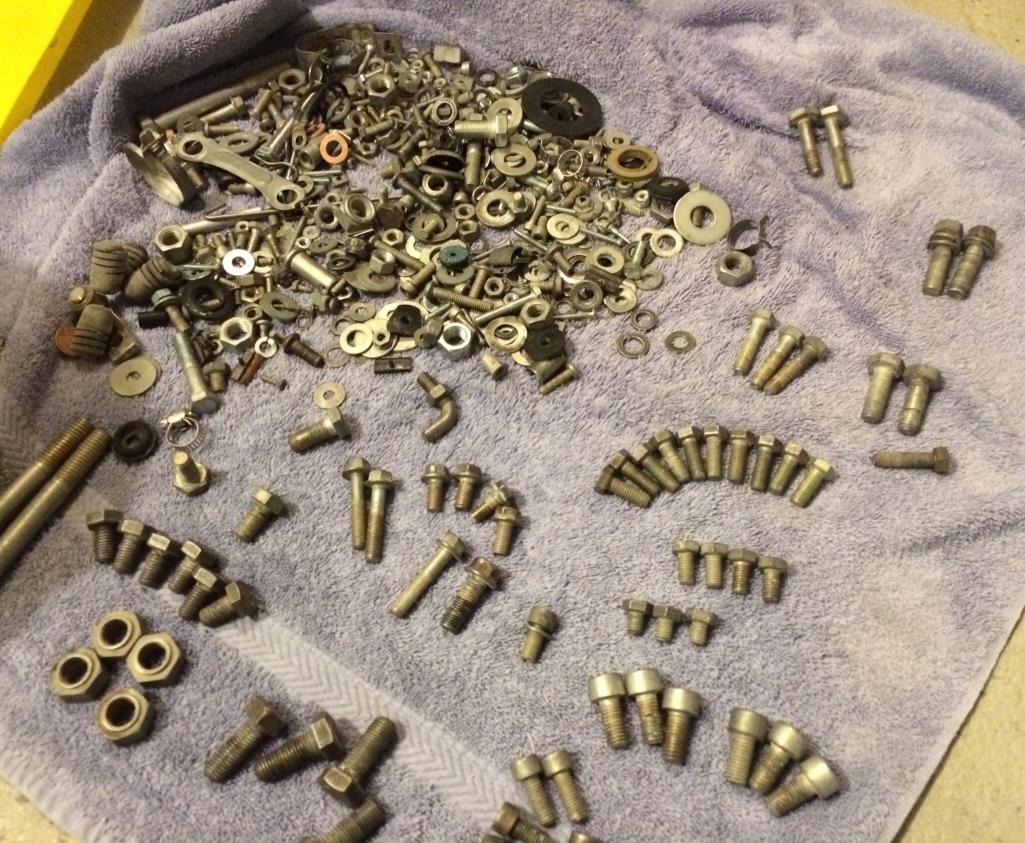
|
|
|
|
| McMark |
Mar 23 2014, 07:26 PM
Post
#423
|
|
914 Freak! Group: Retired Admin Posts: 20,179 Joined: 13-March 03 From: Grand Rapids, MI Member No.: 419 Region Association: None |
|
|
|
|
| bulitt |
Mar 23 2014, 07:47 PM
Post
#424
|
|
Achtzylinder Group: Members Posts: 4,188 Joined: 2-October 11 Member No.: 13,632 Region Association: South East States |
QUOTE(CptTripps @ Mar 23 2014, 08:35 PM)  Here's what an hour in the vibrating parts cleaner thingy can do to a tired greasy box of bolts. What medium are you using in the vibrator? Liquid dish soap also? I have one just haven't used it yet. |
|
|
|
| CptTripps |
Mar 23 2014, 08:46 PM
Post
#425
|
|
:: Punch and Pie :: Group: Members Posts: 3,584 Joined: 26-December 04 From: Mentor, OH Member No.: 3,342 Region Association: Upper MidWest |
The green glass pyramids, with some SuperClean and water.
I did a run with just water, and a dry run too. The mix I mentioned above worked the best. I ran it for about an hour each time. And boy...if you thought stepping on a Lego in there feet was rough...this is WAY worse. You have no idea. |
|
|
|
| CptTripps |
Mar 24 2014, 05:49 AM
Post
#426
|
|
:: Punch and Pie :: Group: Members Posts: 3,584 Joined: 26-December 04 From: Mentor, OH Member No.: 3,342 Region Association: Upper MidWest |
Engine bay mod is done. Used 1.5" tube across the shock towers, then boxed it in place. I'm going to use the flat panel to mount a plate for the ECU and the wiring block. (I REALLY hope I gave myself enough room for the turbo and starter to clear.
Attached thumbnail(s)   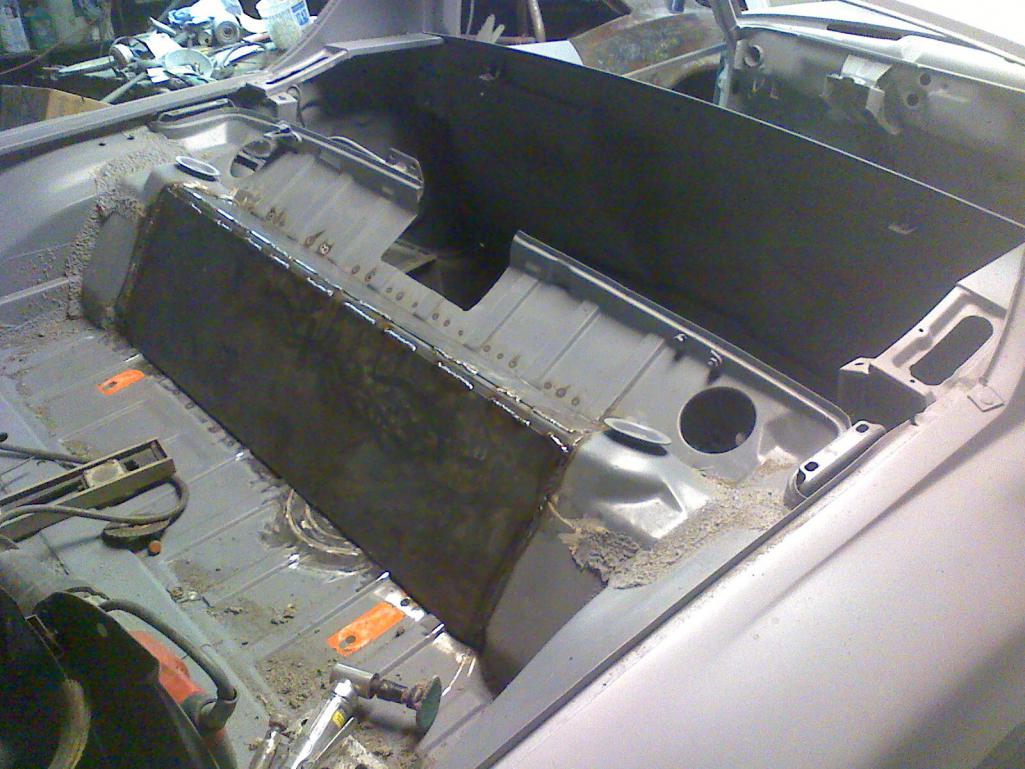 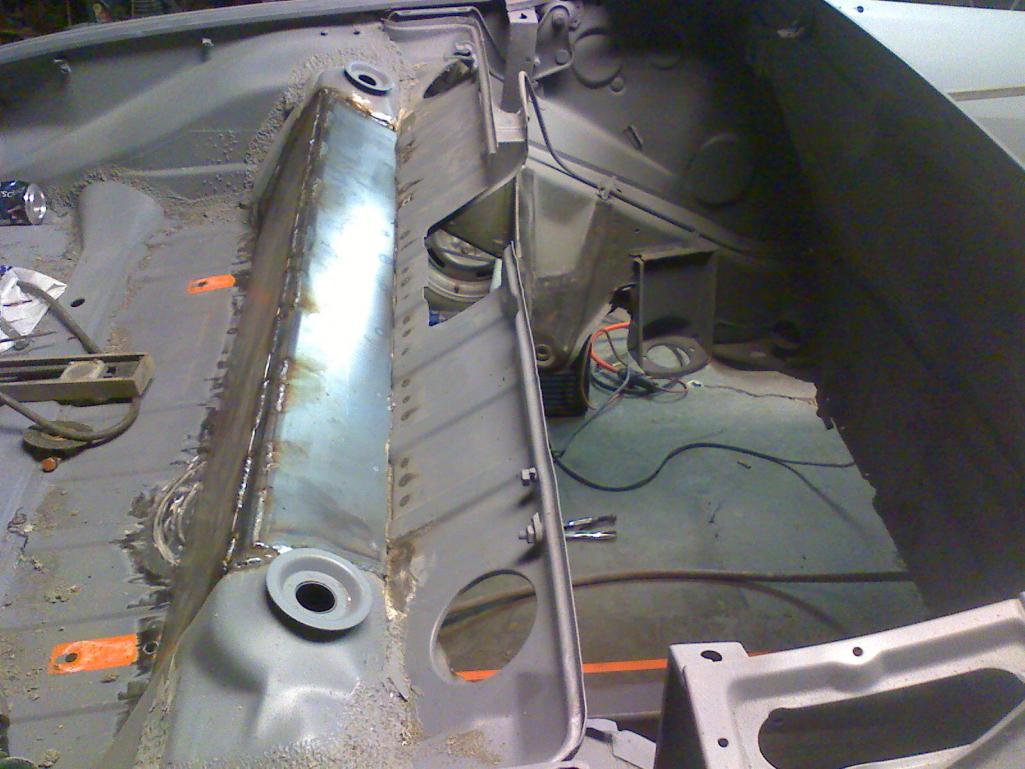
|
|
|
|
| OU8AVW |
Mar 24 2014, 01:21 PM
Post
#427
|
|
Yacht Rigger Group: Members Posts: 1,803 Joined: 1-October 08 From: Granbury, TX Member No.: 9,601 Region Association: Southwest Region |
That's a cool way to box your trunk. The tube gives good strength and a nice round edge. Let's hope the motor fits (IMG:style_emoticons/default/biggrin.gif)
|
|
|
|
| CptTripps |
Mar 24 2014, 01:47 PM
Post
#428
|
|
:: Punch and Pie :: Group: Members Posts: 3,584 Joined: 26-December 04 From: Mentor, OH Member No.: 3,342 Region Association: Upper MidWest |
Thanks.
Yeah, I THINK I'll be OK. I used dbcooper's pic as a template for how far out I needed to go...then added a few inches. I'm going to use the flat panel for the ECU and Wiring. I left myself about 6' extra from every lead so I'd be OK in the "worst-case-scenerio" of ECU wiring. I should also have quite a bit more support between the rear towers. The inside and bottom edges are also 1" square tubing between the points. The inside triangle was also braced and welded up. I'm going over to measure tonight and will set up the board so I can just screw it on and add the wiring as needed. I'm going for a very clean install. Like I used to do with car stereo installs back in the 90s. Attached thumbnail(s) 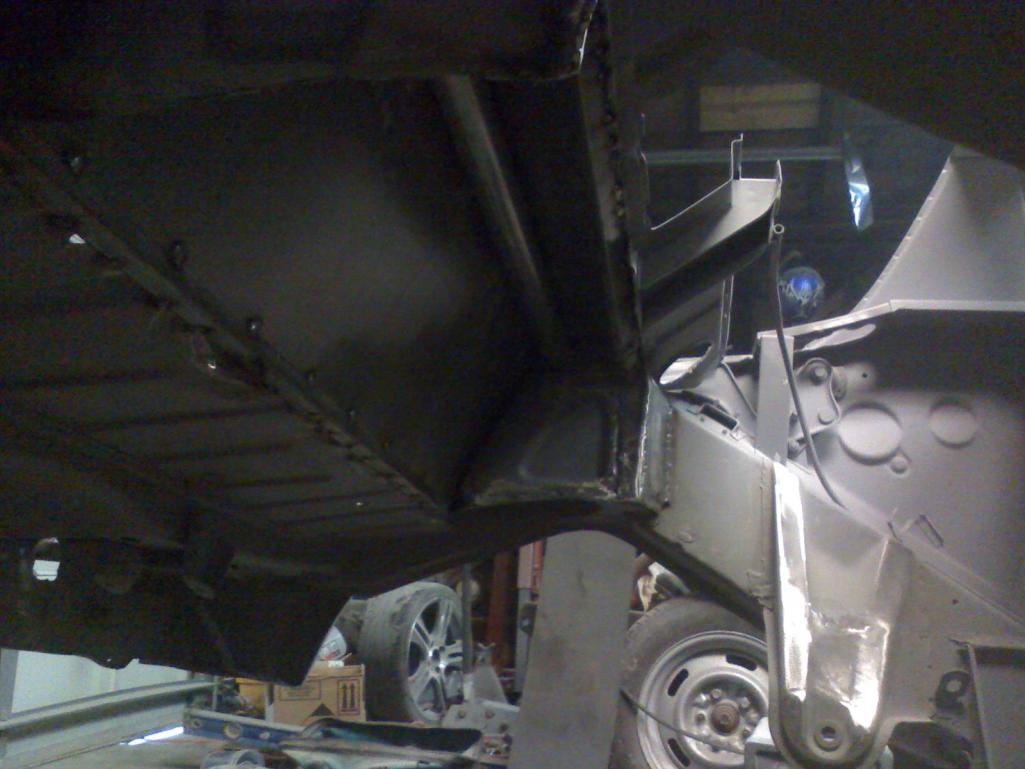  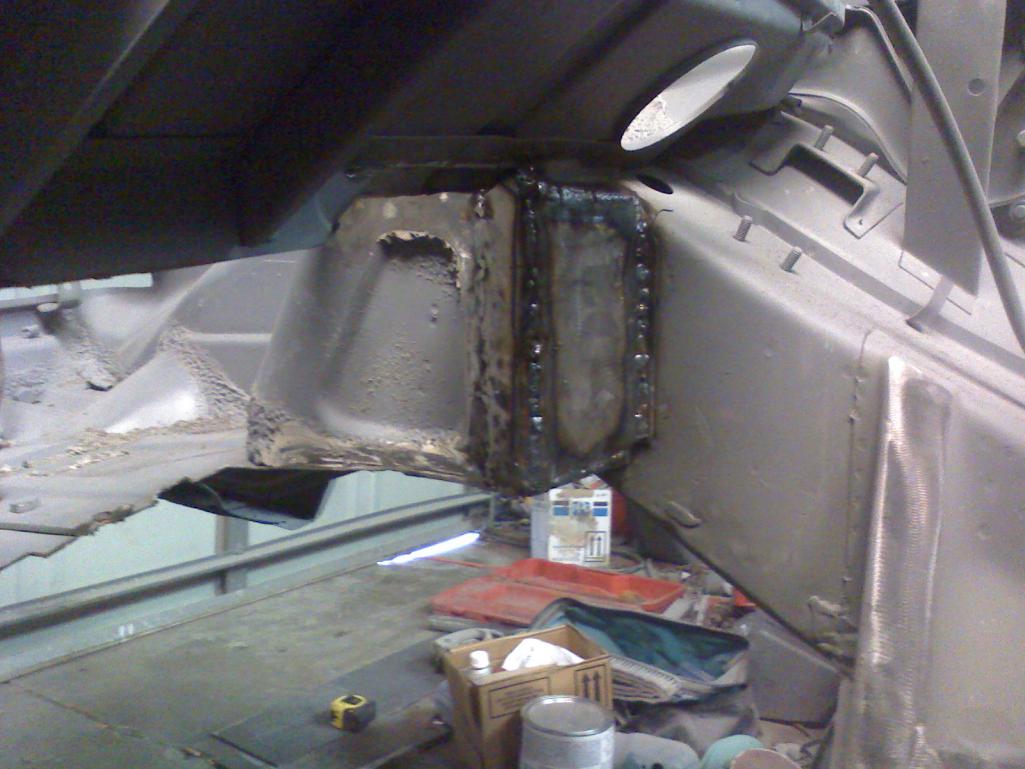 Attached image(s) 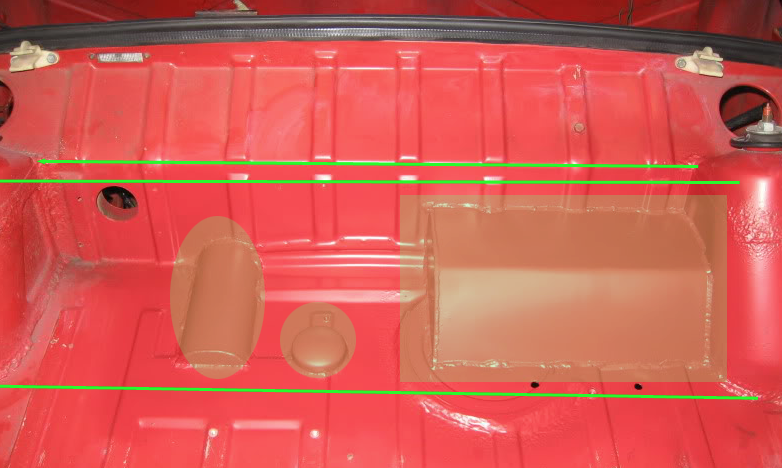
|
|
|
|
| CptTripps |
Mar 25 2014, 07:51 AM
Post
#429
|
|
:: Punch and Pie :: Group: Members Posts: 3,584 Joined: 26-December 04 From: Mentor, OH Member No.: 3,342 Region Association: Upper MidWest |
Stopped by the car last night to check the progress in the trunk.
He'd ground down all the welds in the "box" and removed the rear section of the pan. This is going to be covered by interior vinly later, so I just need it to be ground down "enough" so I can do my thing there later. Since this is a 1975 car, and had the bumpers converted, the piece I bought needed modified to make way for the bumper bolts. Not a big deal, but put a kink in the progress. I'm going to take some stuff over later for painting, but wanted to post these so people could see. Also finished the install of the Engman kit. The car was pushed out by an extra 1/8", and by the time the kit was complete, the measurements between the windshield and targa bar are perfect. The inside of the box will get packed with seam sealer after epoxy and before primer and paint, so don't fret too much about that. This also shows a better look at the inside braces. He's also going to replace that section of metal where the distributor for the SB350 was. Attached thumbnail(s) 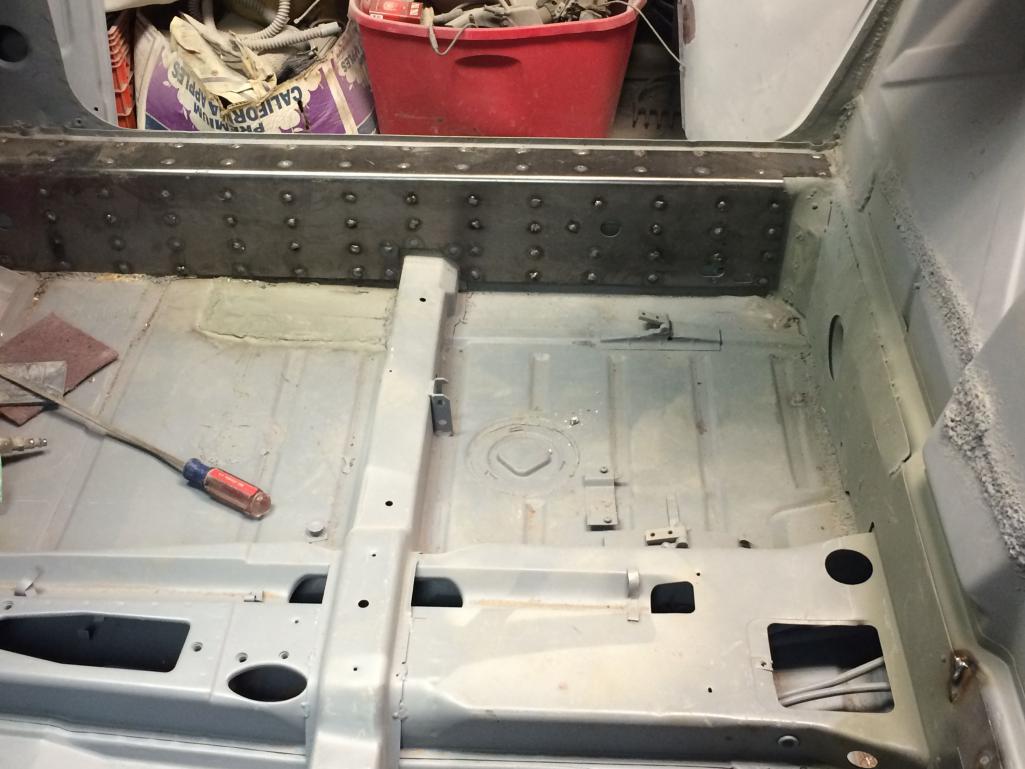 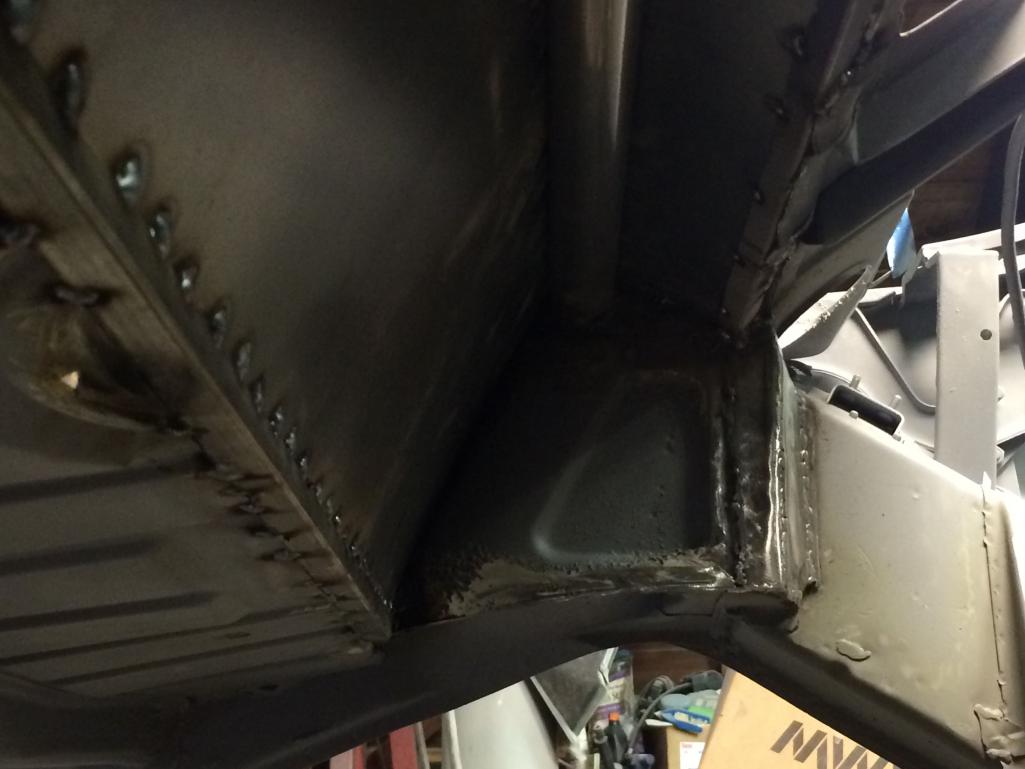 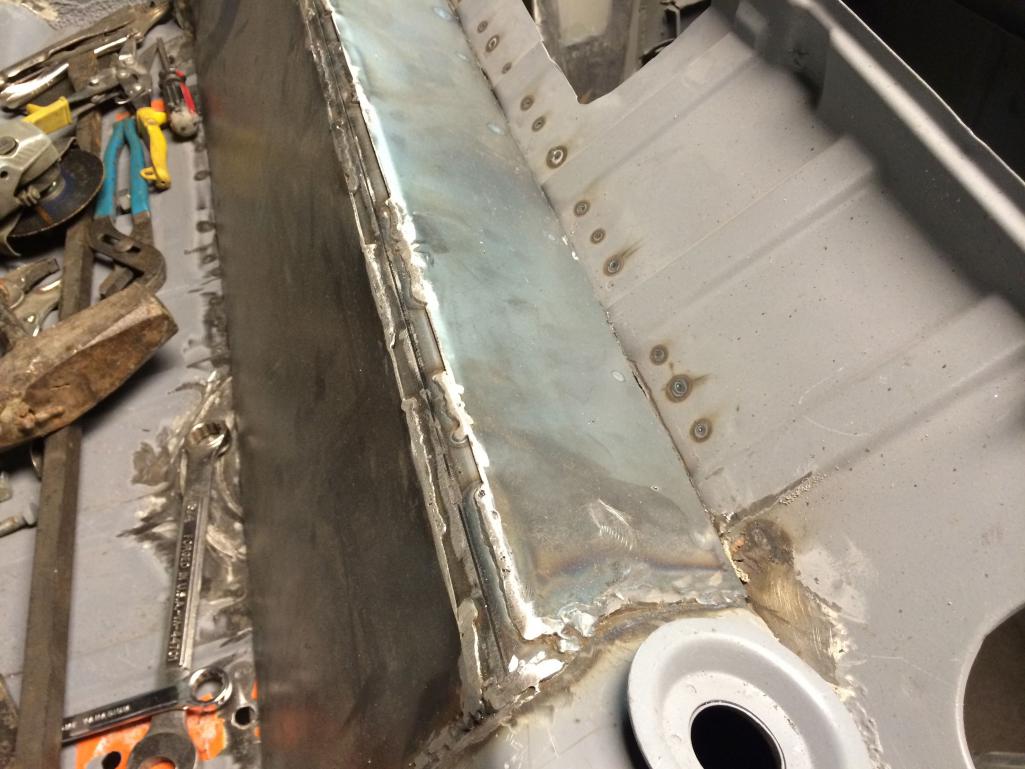 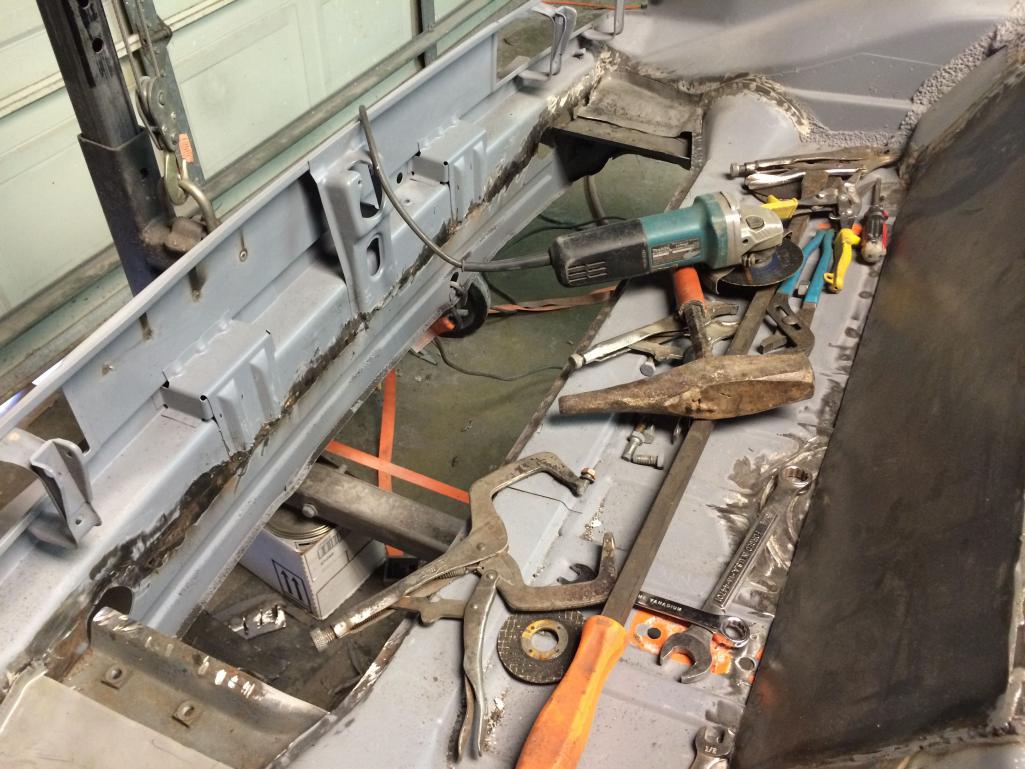 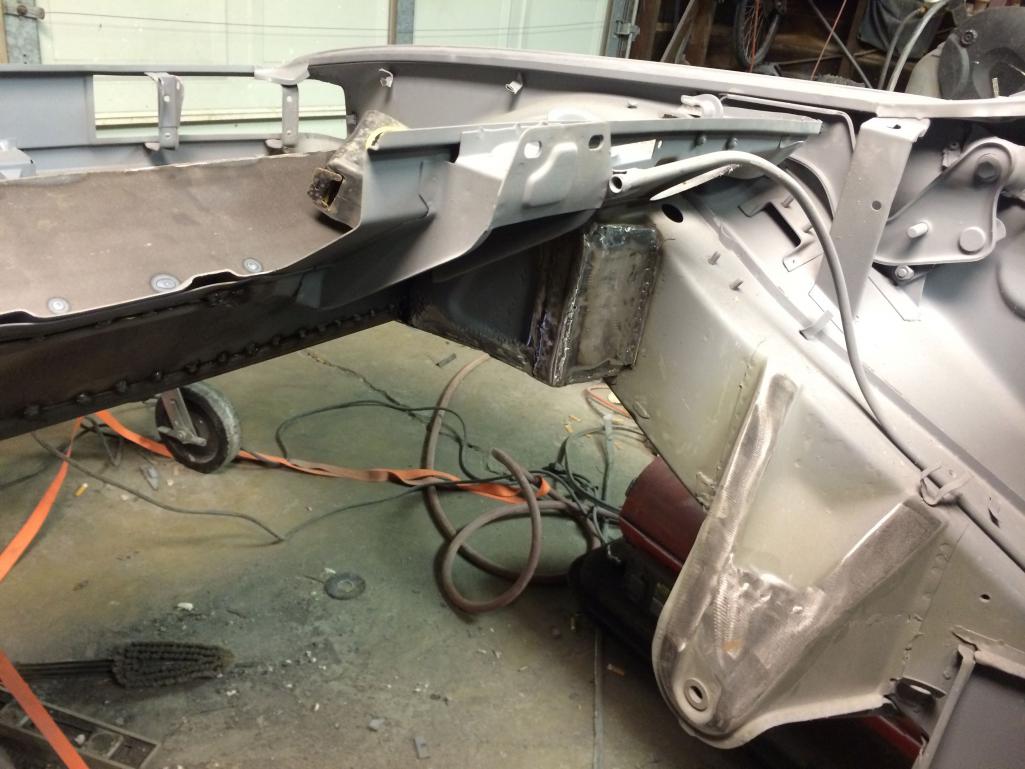
|
|
|
|
| CptTripps |
Mar 25 2014, 02:00 PM
Post
#430
|
|
:: Punch and Pie :: Group: Members Posts: 3,584 Joined: 26-December 04 From: Mentor, OH Member No.: 3,342 Region Association: Upper MidWest |
Because I'm going to need to go pretty fast on my wiring harness once the car gets here, I figured I'd do some advanced work on what will be needed. Holy shit are the instructions bad. The only thing worse, was the PDF that the company sent me. I'm not even joking...this is an example of what they looked like.
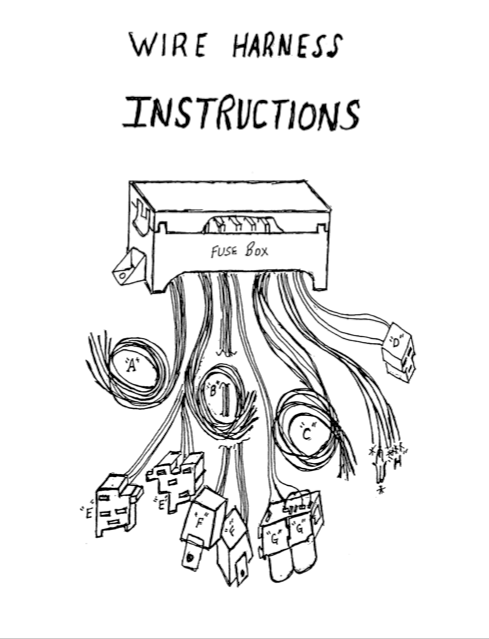 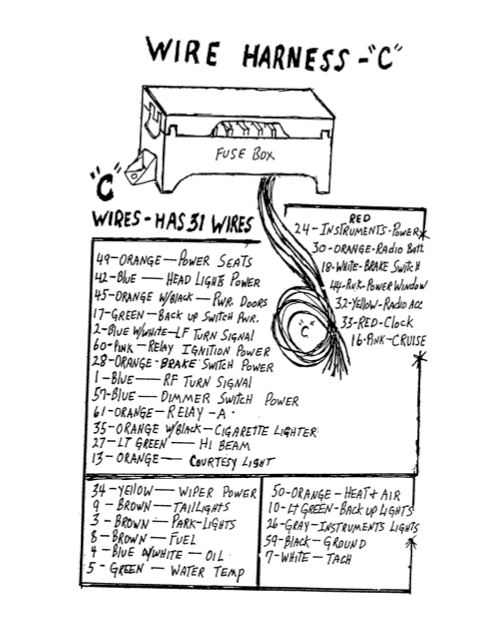 SO....I started hunting a little more. Lucky for me, someone else had the same issue and came up with a set of REAL instructions. 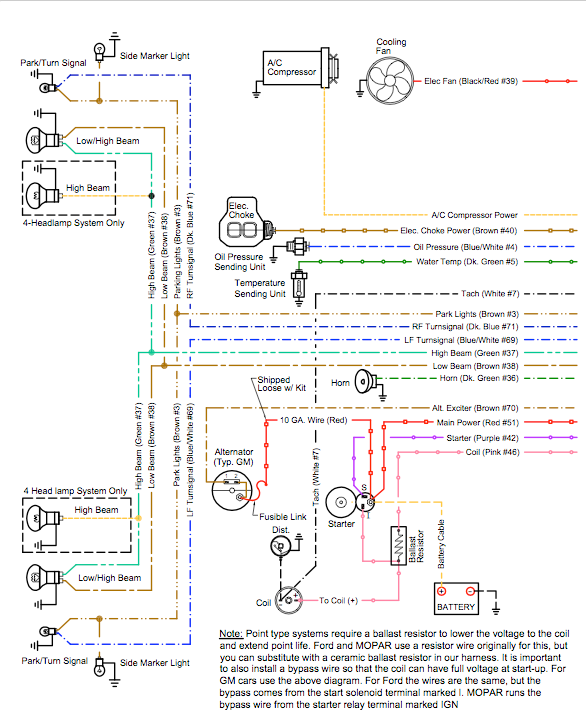 In case anyone else is looking...here's a link to the good ones. http://www.goindesign.com/w4r/EZ2Wire-Manual.pdf I guess EZ2Wire buys them from the same place and spent a few hours putting together proper instructions. Boy, am I ever grateful! Tonight is going to be a lot of pre-assembly. I have the brake calipers to get ready, so I'll be putting all the pistons together and trying to locate the banjo fittings so I can get the lines made up when I have them in the car. I ordered about $100 worth of $2 pieces/parts from Pelican today. That'll all be here on Friday. The car lands in my garage on Saturday morning...ready or not! (Oh, I'll be ready...) |
|
|
|
| CptTripps |
Mar 25 2014, 02:18 PM
Post
#431
|
|
:: Punch and Pie :: Group: Members Posts: 3,584 Joined: 26-December 04 From: Mentor, OH Member No.: 3,342 Region Association: Upper MidWest |
::: guess I forgot to add the pics :::
|
|
|
|
| 914forme |
Mar 25 2014, 06:25 PM
Post
#432
|
|
Times a wastin', get wrenchin'! Group: Members Posts: 3,896 Joined: 24-July 04 From: Dayton, Ohio Member No.: 2,388 Region Association: None |
Thanks for the link, as I have the same harness. The drawings are just like the How to Keep Your Volkswagen Alive
 |
|
|
|
| CptTripps |
Mar 25 2014, 09:53 PM
Post
#433
|
|
:: Punch and Pie :: Group: Members Posts: 3,584 Joined: 26-December 04 From: Mentor, OH Member No.: 3,342 Region Association: Upper MidWest |
Spent the evening working on more little things.
Replaced the bearings in the front hubs. Re-built the pedal cluster...again. Painted a bunch of random pieces. Re-stenciled the "Porsche" on the calipers. Dan is CRUSHING the body work. I'll be stopping by tomorrow to check it out, but he was prepping for paint when I stopped by earlier in the day. It's really starting to feel like everything is coming together. Attached thumbnail(s) 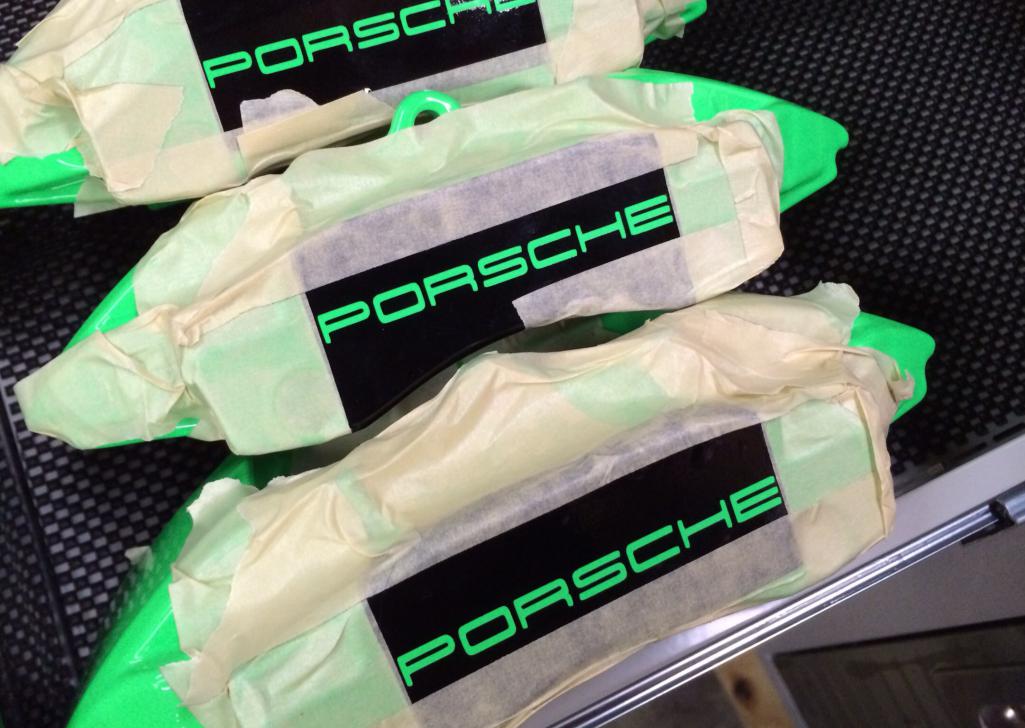 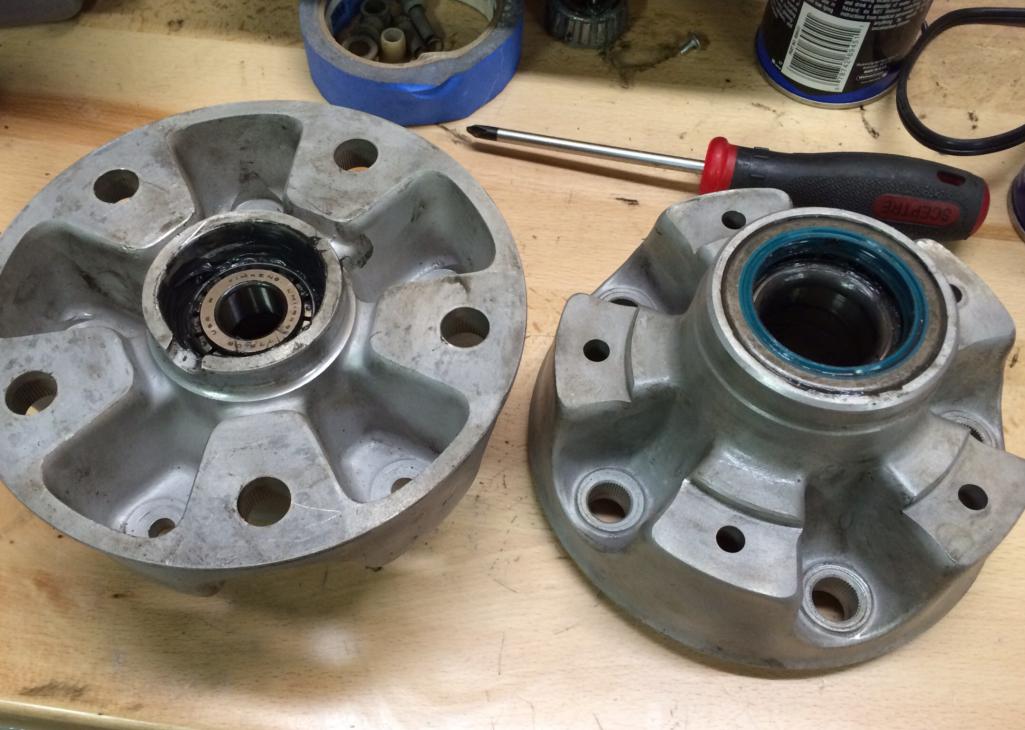 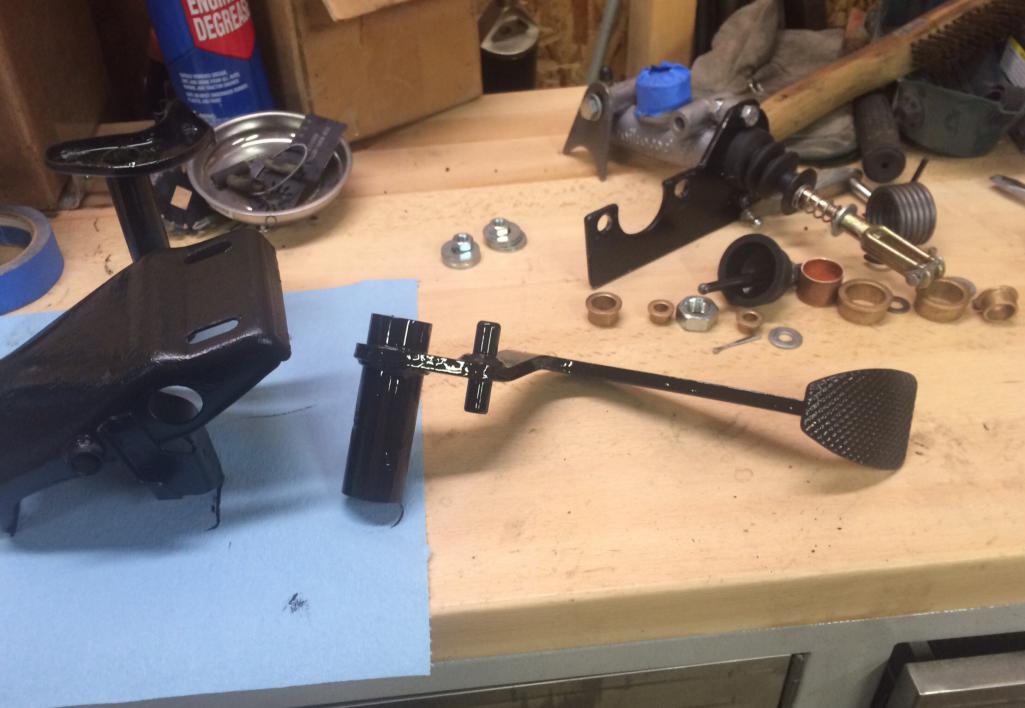
|
|
|
|
| Zaney |
Mar 25 2014, 09:53 PM
Post
#434
|
|
Deuchland en der Haus Group: Members Posts: 461 Joined: 1-March 04 From: Engine 11 Redmond, WA Member No.: 1,738 Region Association: Pacific Northwest |
QUOTE(914forme @ Mar 25 2014, 05:25 PM) Thanks for the link, as I have the same harness. The drawings are just like the How to Keep Your Volkswagen Alive Love that book! Kept me from going crazy many times! Can't say the same about Suby wiring harnesses though. (IMG:style_emoticons/default/drunk.gif) Took mine apart maaaaaaany times to get it right! Car looks great!! You have learned from all the other Suby conversions to do it right the first time! Cheers! (IMG:style_emoticons/default/beerchug.gif) Z |
|
|
|
| CptTripps |
Mar 26 2014, 05:54 AM
Post
#435
|
|
:: Punch and Pie :: Group: Members Posts: 3,584 Joined: 26-December 04 From: Mentor, OH Member No.: 3,342 Region Association: Upper MidWest |
Here are the pics I got last night from Dan. Yesterday he got the rear trunk-pan welded in, fabricated a piece for the dizzy, epoxy primed all the trunks and engine bay again, seam-sealed the areas that needed it, and ten put a coat of paint on the trunks/interior/engine bay/underside.
Today hell get a coat on the car and then start blocking and sanding for another coat and then do it again until the body is ready to come home on Sat. He's working faster than I am! Attached thumbnail(s) 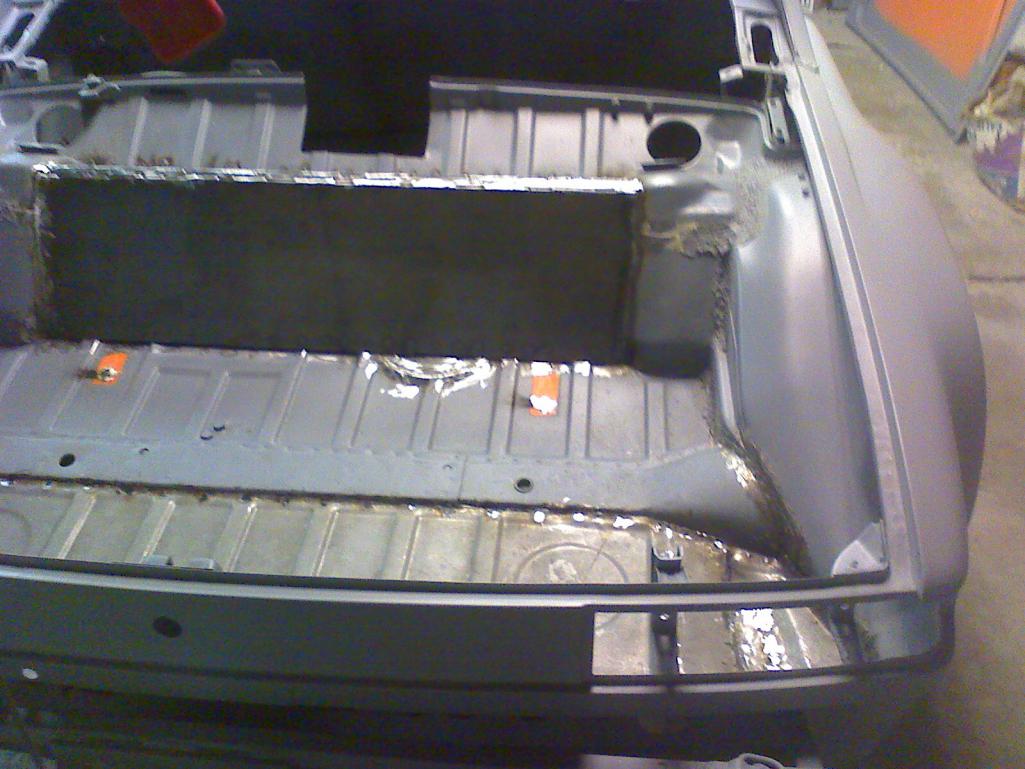 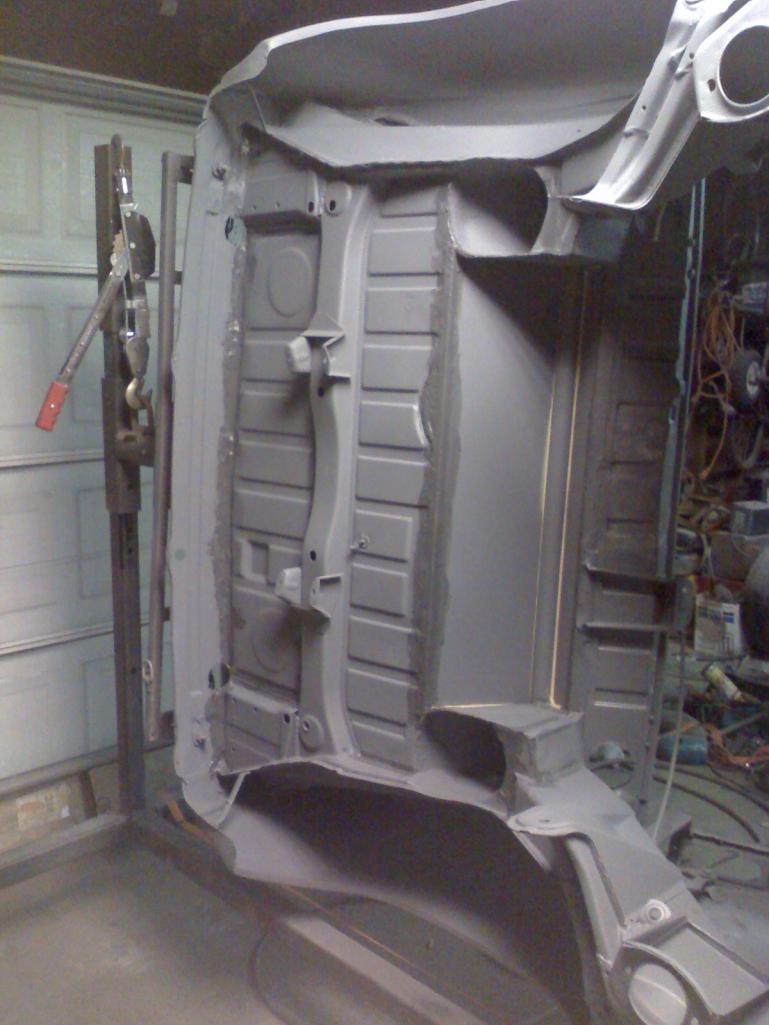  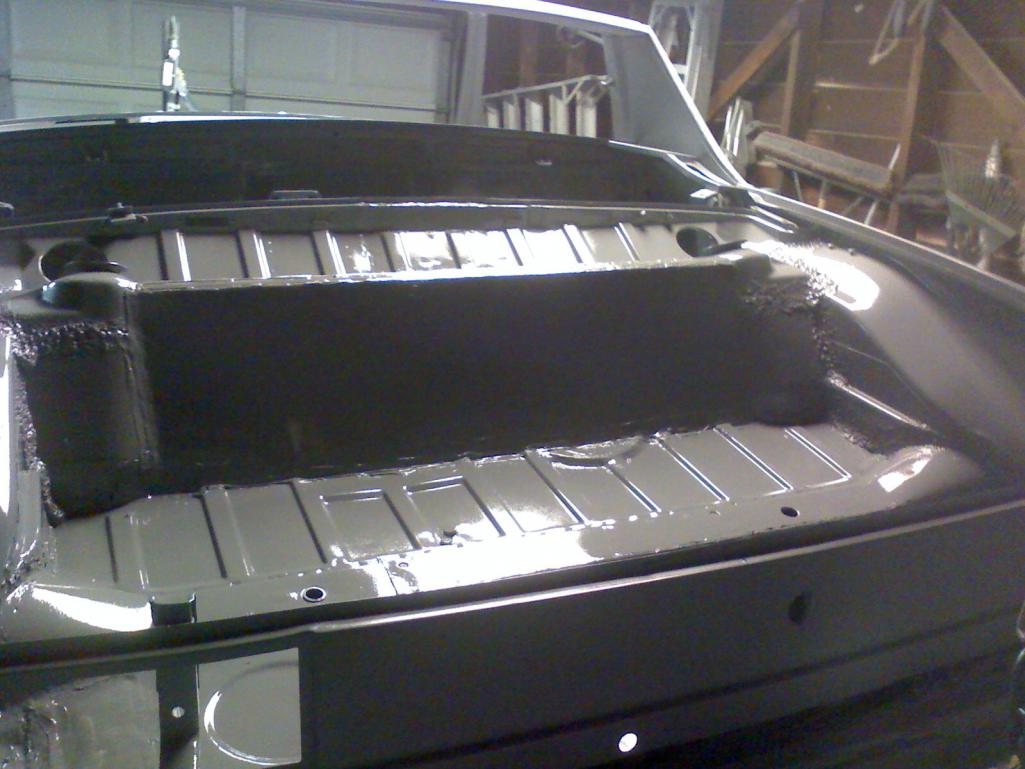 
|
|
|
|
| RazorbackFan78 |
Mar 26 2014, 08:58 AM
Post
#436
|
|
3 different layers of paint helps protect if from rust Group: Members Posts: 136 Joined: 29-March 13 From: Bentonville, AR Member No.: 15,709 Region Association: South East States |
|
|
|
|
| tdgray |
Mar 26 2014, 12:10 PM
Post
#437
|
|
Thank God Nemo is not here to see this Group: Members Posts: 9,705 Joined: 5-August 03 From: Akron, OH Member No.: 984 Region Association: None |
Good progress.... keep his number... I need to get it from you at some point.
|
|
|
|
| CptTripps |
Mar 26 2014, 01:08 PM
Post
#438
|
|
:: Punch and Pie :: Group: Members Posts: 3,584 Joined: 26-December 04 From: Mentor, OH Member No.: 3,342 Region Association: Upper MidWest |
Just sent all my aluminium pieces off to be water-jetted this week. There's a local guy that's doing it for me. $160 for a 4X4 sheet of 1/8" 6061 Aluminium...and the jetting is included. :woot: I should have them on Monday!
It'll be a lot easier to build my console out and have all the switches in-line of I can do it this way. The ONLY thing I'm thinking about is a gated shifter. I may go back later for that one. I can have it cut out of plexi for $25 so I'm not wasting metal to do it. Attached image(s) 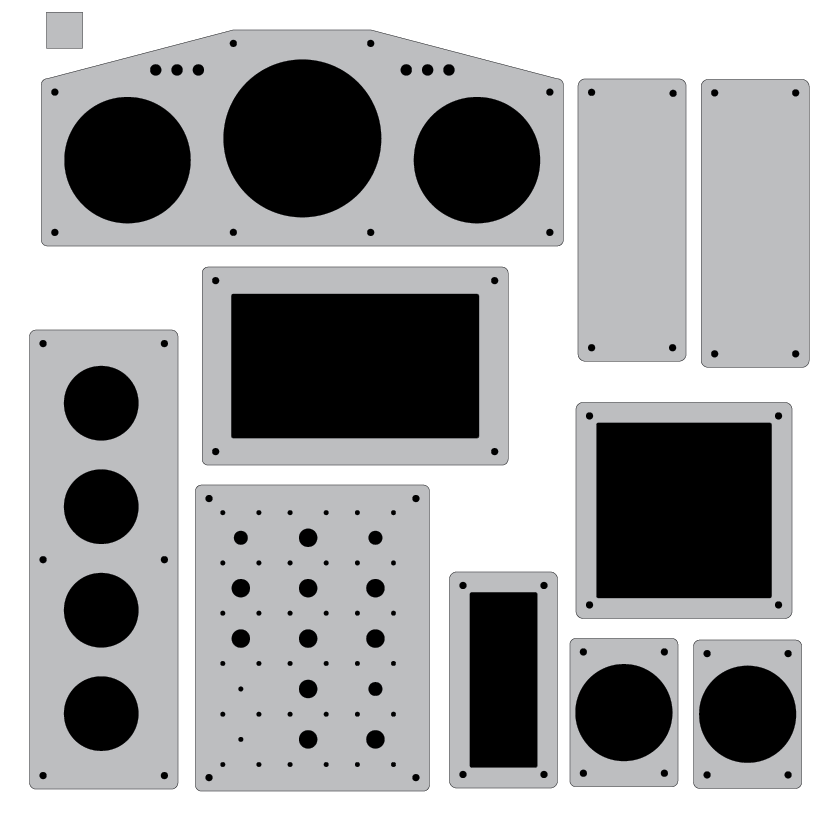 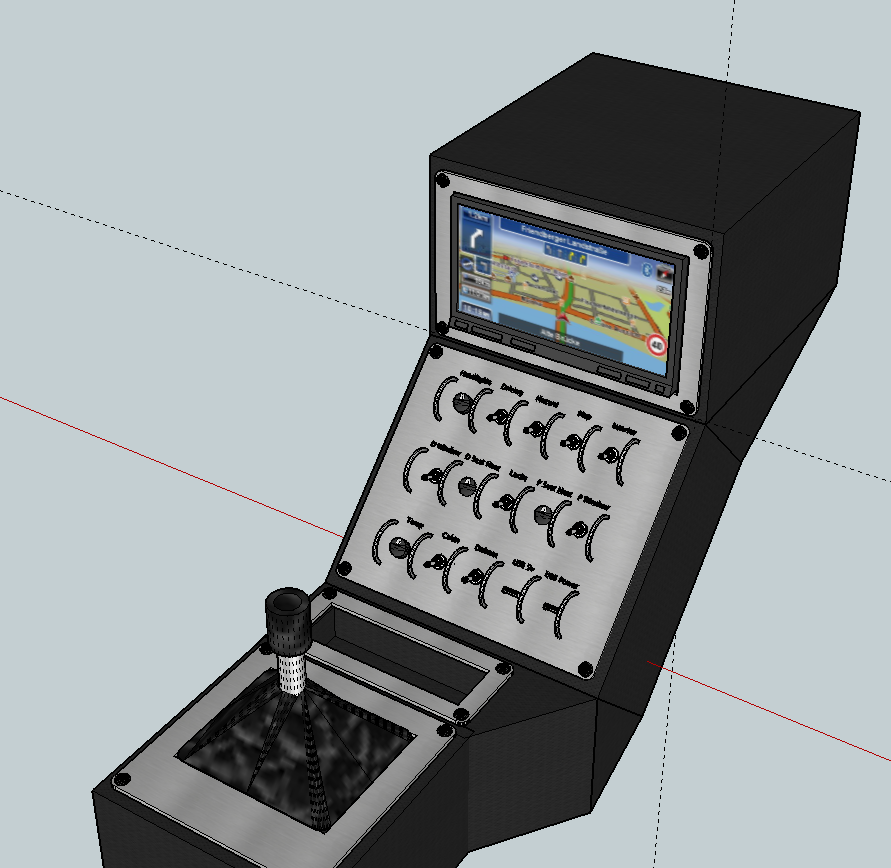
|
|
|
|
| CptTripps |
Mar 26 2014, 09:49 PM
Post
#439
|
|
:: Punch and Pie :: Group: Members Posts: 3,584 Joined: 26-December 04 From: Mentor, OH Member No.: 3,342 Region Association: Upper MidWest |
QUOTE(76-914 @ Mar 4 2014, 01:24 AM) Your pedal assembly is ready for shipping tomorrow. I'll pm you tomorrow. I made some rubber stop pads. Ugly but effective. Note the washer orientation, don't mix washers. The one on the accelerator shaft is unique in size. Do not omit any washers or interference is possible. I can't thank you enough for this post! I took it all apart and forgot to take a pic first. Looking much better now! Attached thumbnail(s) 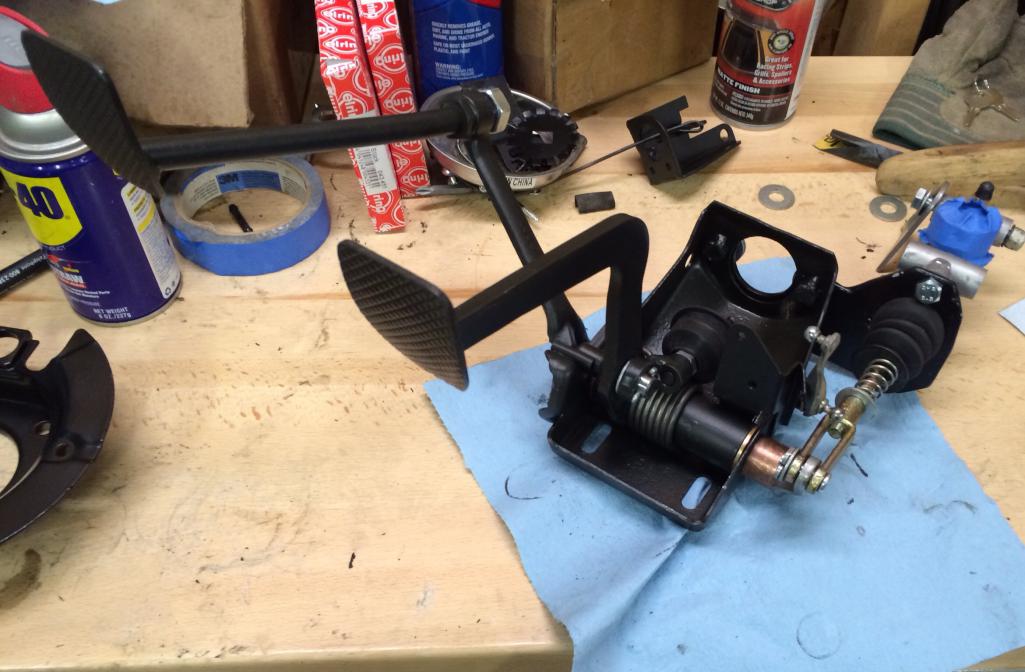
|
|
|
|
| CptTripps |
Mar 27 2014, 12:00 AM
Post
#440
|
|
:: Punch and Pie :: Group: Members Posts: 3,584 Joined: 26-December 04 From: Mentor, OH Member No.: 3,342 Region Association: Upper MidWest |
I got a lot accomplished tonight.
Assembled one of the front struts tonight, just to see how it would all go together. I have some grinding to do! The powder on the area the caliper mounts is thick, so I don't have the right clearance. It sure looks good though!   Then I got to work on the trailing arms. Ground down all the extra metal with a grinding flap-wheel thingy, then welded the tabs on. From there, it was pretty easy.   Then I pressed the old bolts out of the spacers, so they're ready to be milled down (if needed) or just put over the other bolts I have now. (100mm) 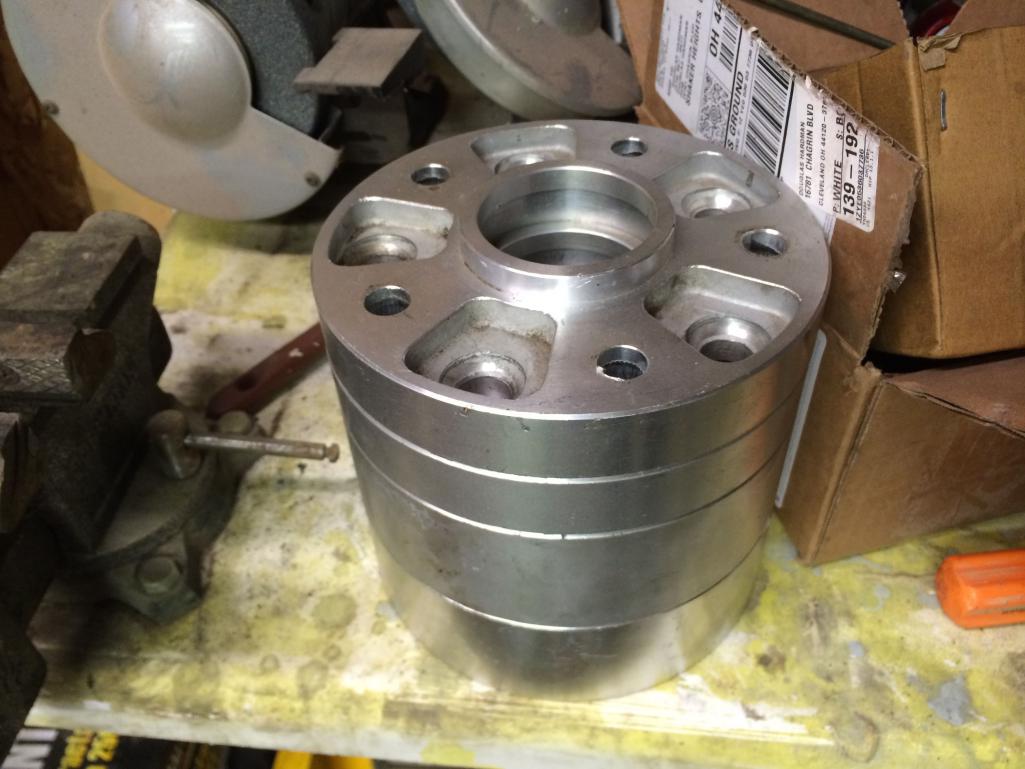 All the while, Dan is hard at work on the body. I'll head over in the morning and take a look. He had the insides/bottom painted yesterday. He was going to get a few coats on the body this evening so I should be able to see it coming together when I get there. Ok...I'm pooped. Time for bed! |
|
|
|
|
2 User(s) are reading this topic (2 Guests and 0 Anonymous Users)
0 Members:

|
Lo-Fi Version | Time is now: 11th January 2025 - 09:38 AM |
Invision Power Board
v9.1.4 © 2025 IPS, Inc.