|
|
|
Porsche, and the Porsche crest are registered trademarks of Dr. Ing. h.c. F. Porsche AG.
This site is not affiliated with Porsche in any way. Its only purpose is to provide an online forum for car enthusiasts. All other trademarks are property of their respective owners. |
|
|

  |

| CptTripps |
 Apr 11 2014, 07:30 AM Apr 11 2014, 07:30 AM
Post
#501
|
|
:: Punch and Pie ::  Group: Members Posts: 3,584 Joined: 26-December 04 From: Mentor, OH Member No.: 3,342 Region Association: Upper MidWest |
I plan on having the brakes done by midnight, and if I can get the wiring and ECU mounted that'd be a great day.
|
   |

 
|
| tdgray |
Apr 11 2014, 08:05 AM
Post
#502
|
|
Thank God Nemo is not here to see this Group: Members Posts: 9,705 Joined: 5-August 03 From: Akron, OH Member No.: 984 Region Association: None |
QUOTE(rick 918-S @ Apr 11 2014, 01:16 AM)  QUOTE(CptTripps @ Apr 10 2014, 12:10 PM) No updates for a few days, as I've been in Vegas at a conference. I'm hitting it hard this week so I can drive it this weekend. Gotta make it happen! Anybody want to come to Cleveland this weekend to help? I was actually supposed to be in Cleveland delivering the 911 but I got a stay of execution until June 1st. Nice progress! Yeah let us know Rick... would be great to grab a beer and BS... If I can ever free myself from work (IMG:style_emoticons/default/dry.gif) |
|
|
|
| CptTripps |
Apr 11 2014, 08:23 AM
Post
#503
|
|
:: Punch and Pie :: Group: Members Posts: 3,584 Joined: 26-December 04 From: Mentor, OH Member No.: 3,342 Region Association: Upper MidWest |
Seats are done. :-)
Attached thumbnail(s) 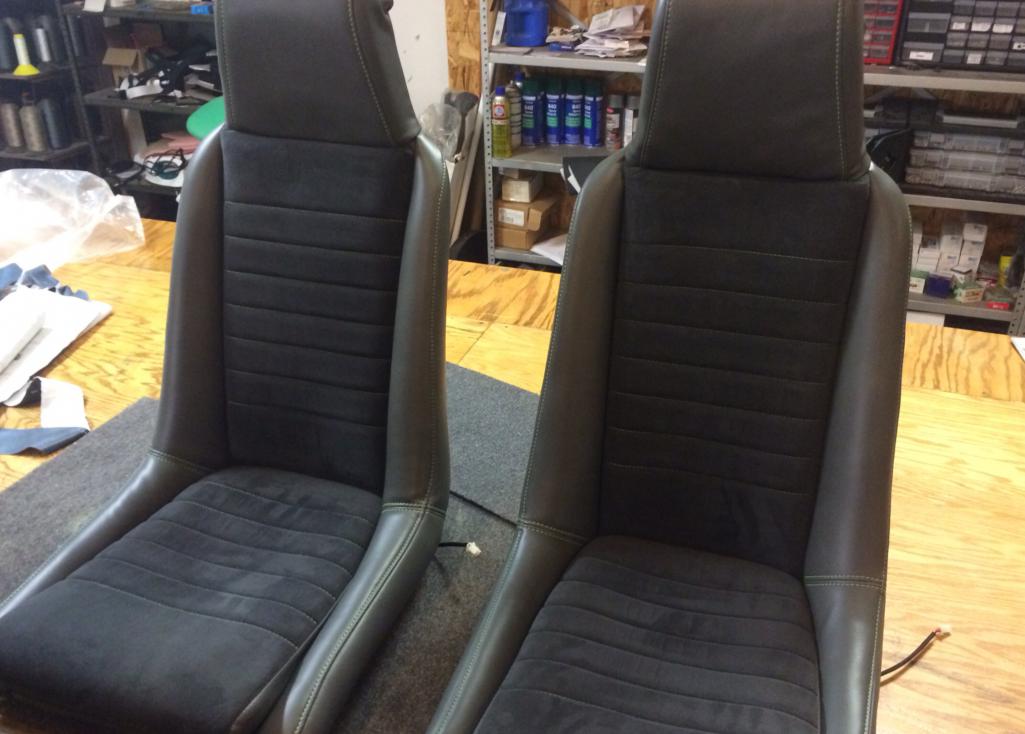 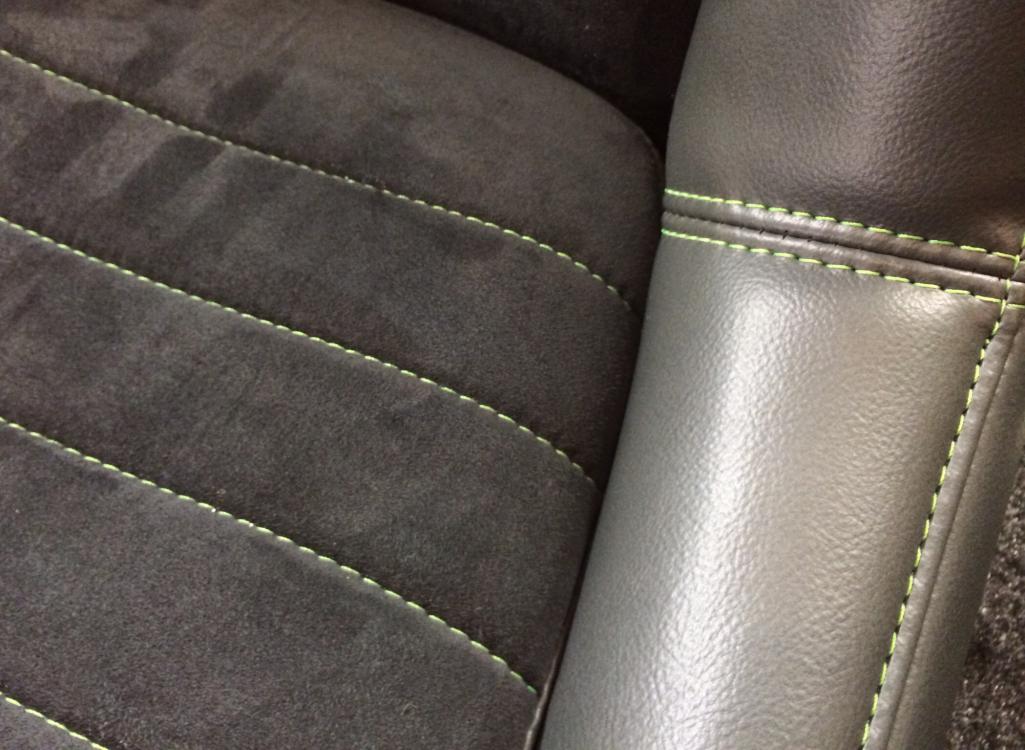
|
|
|
|
| rhodyguy |
Apr 11 2014, 10:14 AM
Post
#504
|
|
Chimp Sanctuary NW. Check it out. Group: Members Posts: 22,205 Joined: 2-March 03 From: Orion's Bell. The BELL! Member No.: 378 Region Association: Galt's Gulch |
awesome, fast build.
|
|
|
|
| Qarl |
Apr 11 2014, 01:10 PM
Post
#505
|
|
Shriveled member Group: Benefactors Posts: 5,233 Joined: 8-February 03 From: Florida Member No.: 271 Region Association: None |
Love the green stitching. Nice touch!
|
|
|
|
| dan_the _body_guy |
Apr 11 2014, 08:45 PM
Post
#506
|
|
Newbie Group: Members Posts: 28 Joined: 1-April 14 From: cleveland ohio Member No.: 17,185 Region Association: None |
get back to work! when youre finished putting the scratches and greasy paw prints on it from assembly let me know so i can give it a final buff and glaze before anybody sees it
|
|
|
|
| CptTripps |
Apr 12 2014, 08:19 AM
Post
#507
|
|
:: Punch and Pie :: Group: Members Posts: 3,584 Joined: 26-December 04 From: Mentor, OH Member No.: 3,342 Region Association: Upper MidWest |
I went in to the office yesterday to grab something and ended up smack-dab in the middle of an emergency that the team was working on, so I didn't get back home until about 9p. No worrys...I've been in Vegas all week, and still working on "west cost time"
Worked till 2:30am on wiring....and I 'm up to go finish the job. This harness is SO easy to use. I'm going to go back through and mark all the wires I used, and where to use them so others can do this too. Even the good instructions are a little tough to understand. Garrett is helping with wiring today, and I HOPE to get the cooling system plumbed at some point too. Gotta figure out the size hose I need, then I'm headed to McMaster Carr to pick up that and a few other do-dads. Attached thumbnail(s) 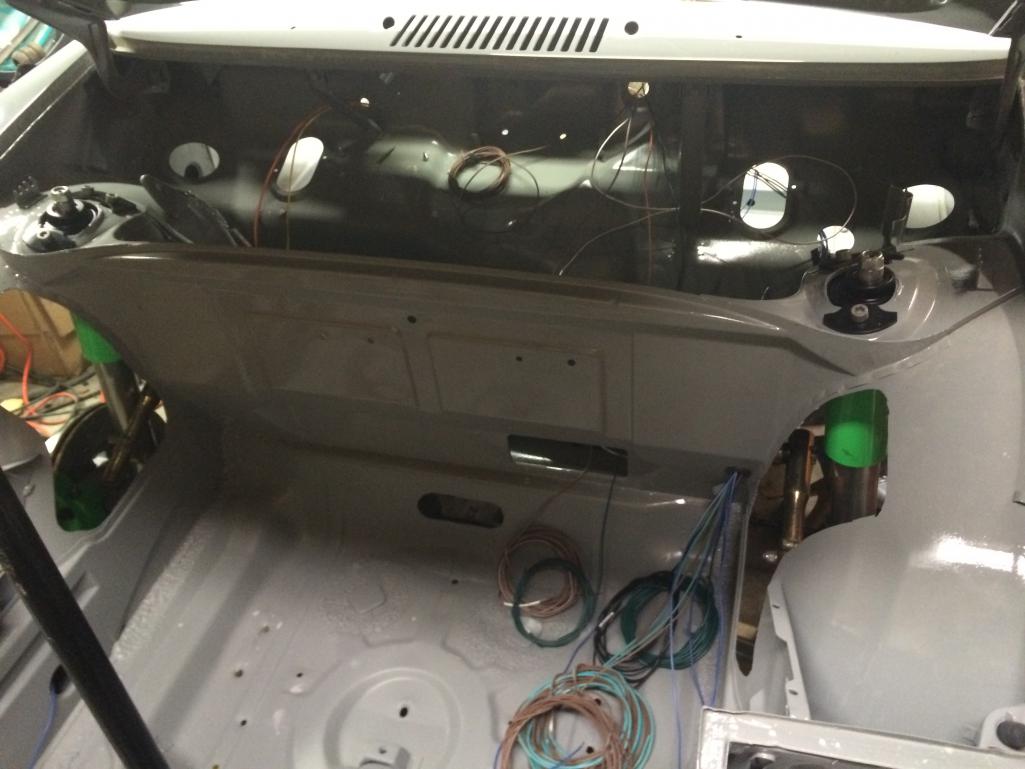 
|
|
|
|
| PanelBilly |
Apr 12 2014, 08:27 AM
Post
#508
|
|
914 Guru Group: Members Posts: 5,866 Joined: 23-July 06 From: Kent, Wa Member No.: 6,488 Region Association: Pacific Northwest |
Go speed racer, go!
|
|
|
|
| 76-914 |
Apr 12 2014, 09:10 AM
Post
#509
|
|
Repeat Offender & Resident Subaru Antagonist Group: Members Posts: 13,653 Joined: 23-January 09 From: Temecula, CA Member No.: 9,964 Region Association: Southern California |
I might have missed this part, but did you reinforce those wheel well cut outs? Looking good. I can't wait to see the total $$ build cost
|
|
|
|
| Spoke |
Apr 12 2014, 09:13 AM
Post
#510
|
|
Jerry Group: Members Posts: 7,113 Joined: 29-October 04 From: Allentown, PA Member No.: 3,031 Region Association: None |
Amazing progress!
The only way I could do this much work this fast is to have started 5 years ago, stored all the pics, and release them in sequential days. Awesome! BTW, how will you cover the openings in the center channel? This is the way the manufacturer should have made it so things are accessible. Attached image(s) 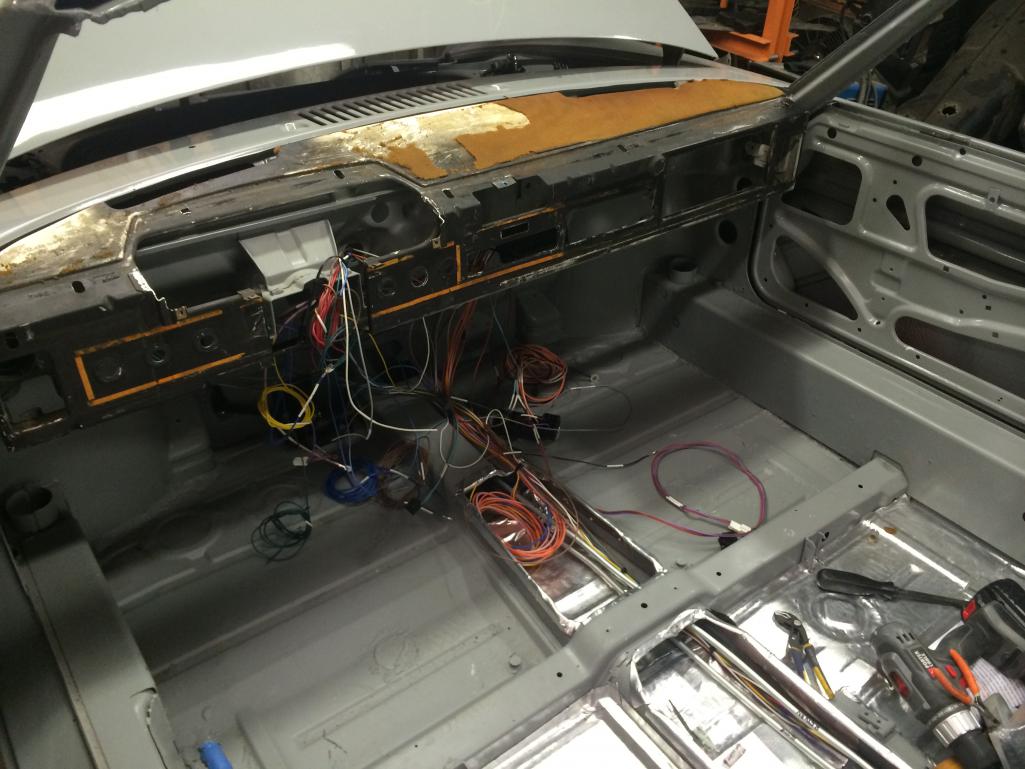
|
|
|
|
| CptTripps |
Apr 12 2014, 04:27 PM
Post
#511
|
|
:: Punch and Pie :: Group: Members Posts: 3,584 Joined: 26-December 04 From: Mentor, OH Member No.: 3,342 Region Association: Upper MidWest |
Spent all morning working on the radiator and finishing up the wiring. Also stripped the paint off the rear tail lights and got them re-painted too. I'm going with black on them because the LEDs are bright enough.
Oh...I also got the motor/trans in the car. Clearances are perfect. Plenty of room. I'll be able to get the CVs in shortly and then will work on how in the hell I'm going to get water back there. Hmmmmmm.... Attached thumbnail(s) 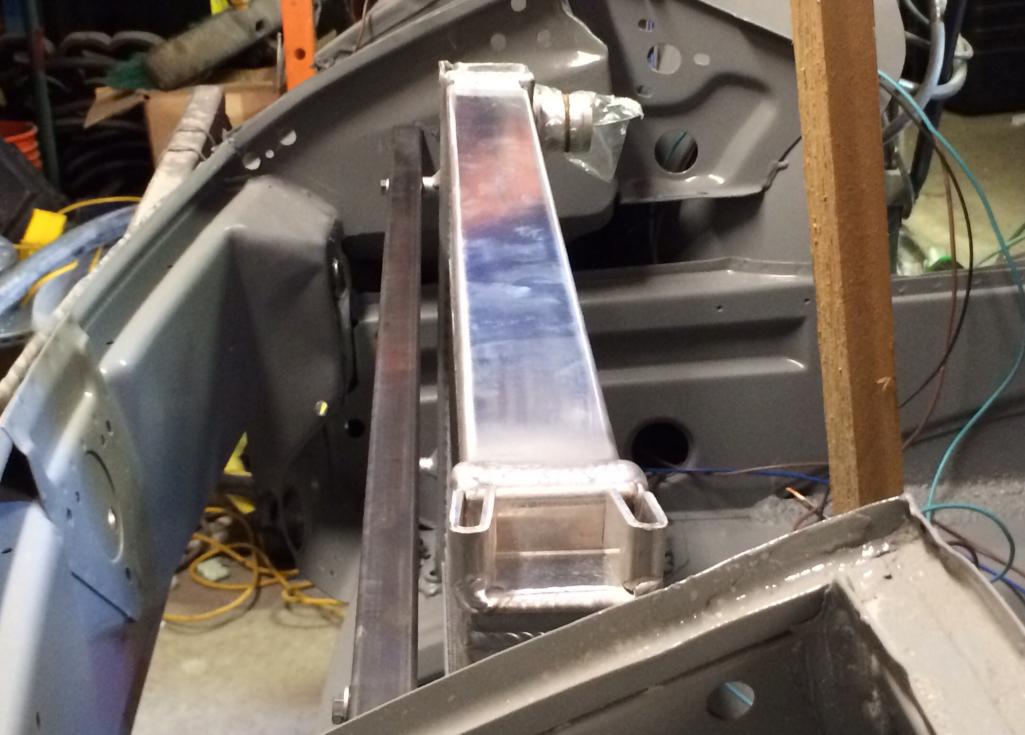 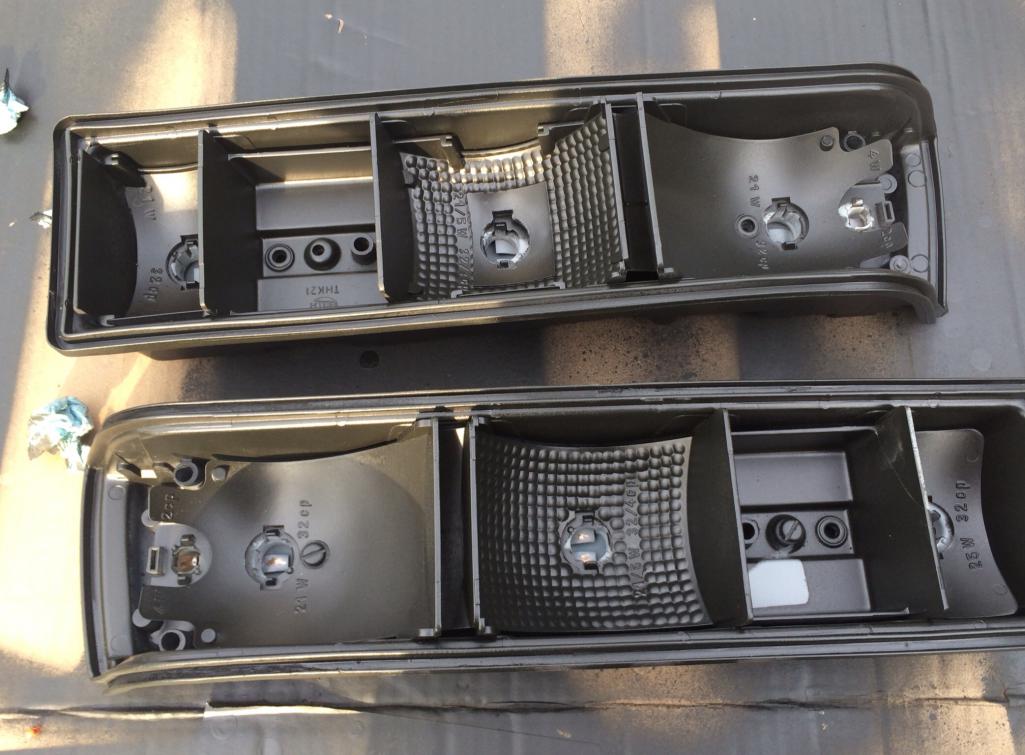 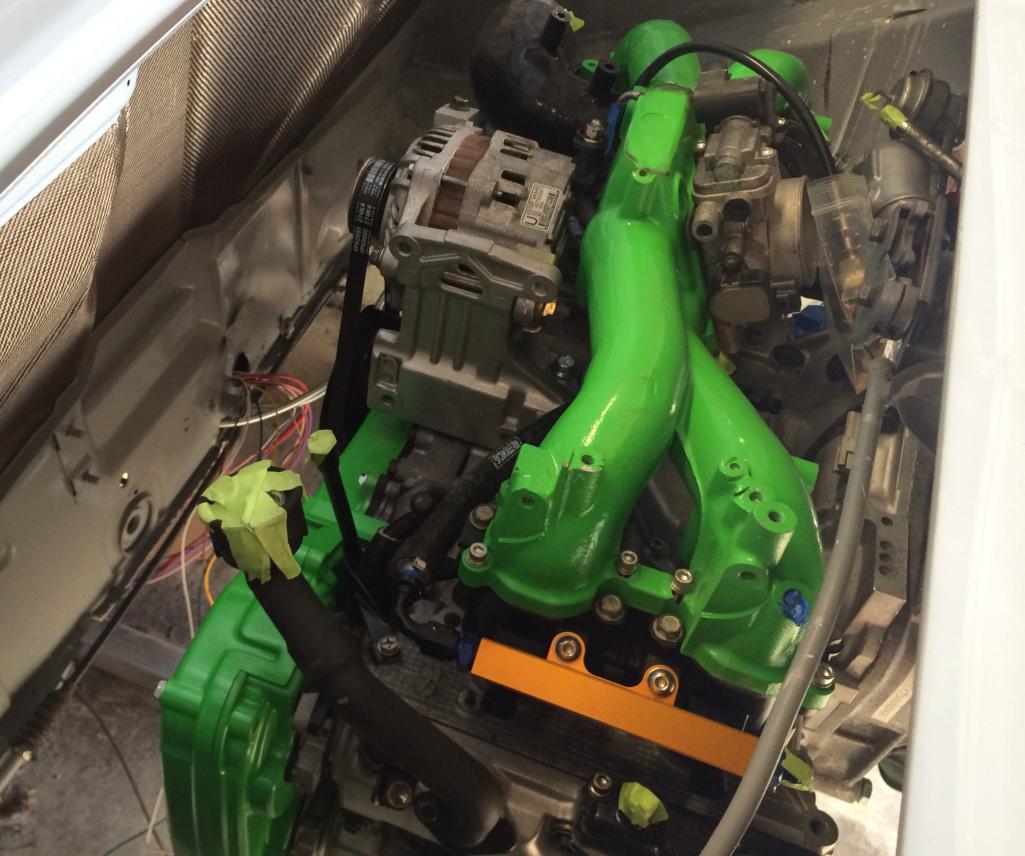
|
|
|
|
| 914forme |
Apr 12 2014, 05:37 PM
Post
#512
|
|
Times a wastin', get wrenchin'! Group: Members Posts: 3,896 Joined: 24-July 04 From: Dayton, Ohio Member No.: 2,388 Region Association: None |
Doug, I have some concerns about your radiator mount. Most of the time they are mounted into a channel at the bottom, padded, and a set of brackets at the top that clamp them in place. The bungs you used are normally for the fan assemblies to be mounted to. At least thats what my rock crawler friends. They say that using the bungs will cause the vibrations from the car to rapidly flex at that point causing them to crack, and leak. Thats what I have been told. Now rock crawlers might see more forces being applied to their rads than we would. But I noticed that my stock rads all use isolated pin mounts at the bottom, and isolated pin mounts at the top.
|
|
|
|
| CptTripps |
Apr 12 2014, 07:13 PM
Post
#513
|
|
:: Punch and Pie :: Group: Members Posts: 3,584 Joined: 26-December 04 From: Mentor, OH Member No.: 3,342 Region Association: Upper MidWest |
QUOTE(914forme @ Apr 12 2014, 07:37 PM) Doug, I have some concerns about your radiator mount. Most of the time they are mounted into a channel at the bottom, padded, and a set of brackets at the top that clamp them in place. The bungs you used are normally for the fan assemblies to be mounted to. At least thats what my rock crawler friends. They say that using the bungs will cause the vibrations from the car to rapidly flex at that point causing them to crack, and leak. Thats what I have been told. Now rock crawlers might see more forces being applied to their rads than we would. But I noticed that my stock rads all use isolated pin mounts at the bottom, and isolated pin mounts at the top. Good tip! Nothing is concrete yet, as I haven't welded the top piece in. The bottom bar IS for the isolation posts, and that's how I have them in place. I'll re-work that later or tomorrow when I go to Summit Racing to pick up some more (smaller) hose. I've been working on lights for the last few hours. Got the backs done, and all purdy. Need to order the plastic nuts so the lenses attach right. I'm really stuck on my rear hubs. They're (I think) wider than the 914 bearings, so I may need to re-do them before I can drive. Tightened all the way, there seems to be play on the hub. I'm at a loss. Attached thumbnail(s) 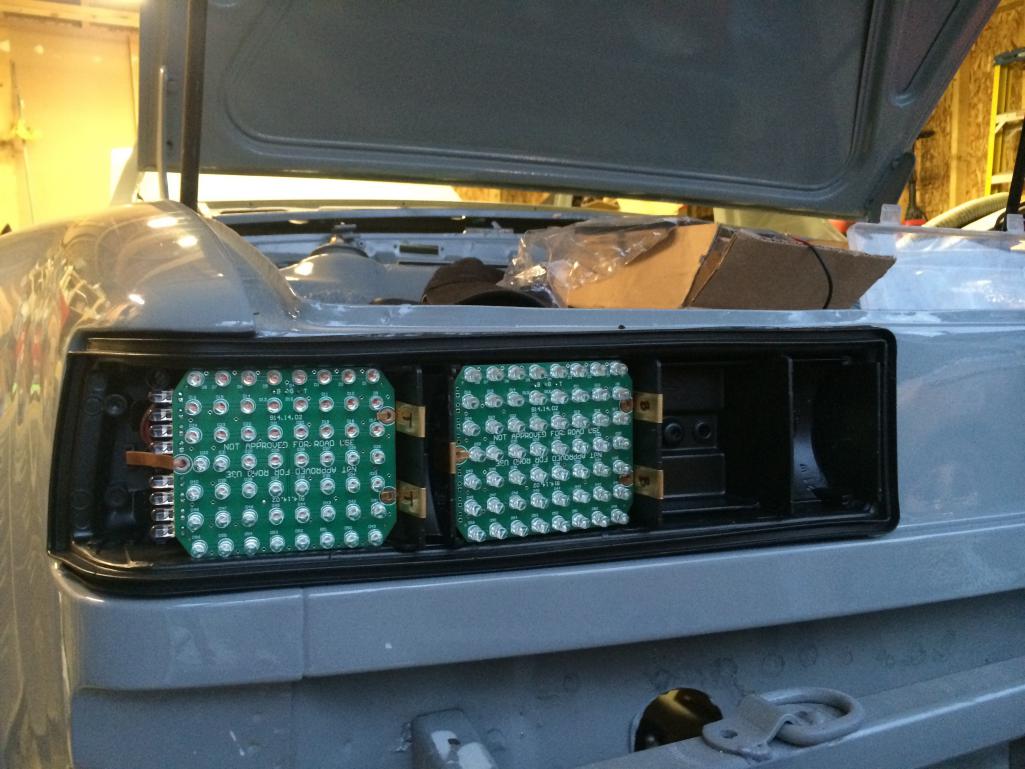 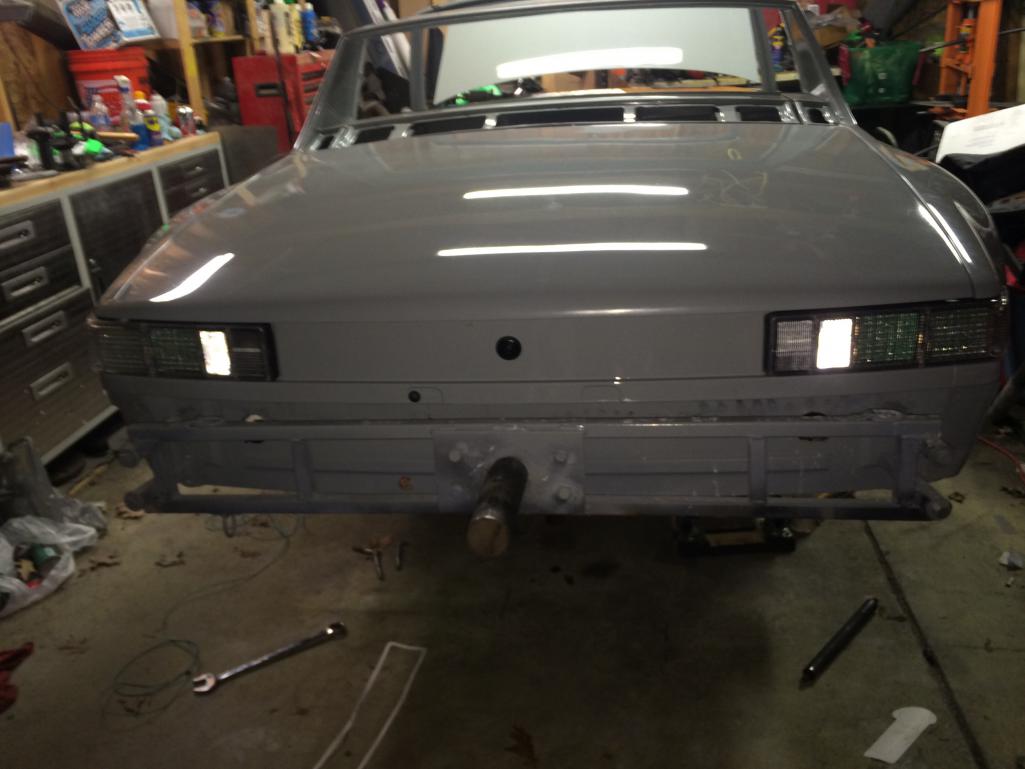
|
|
|
|
| CptTripps |
Apr 12 2014, 10:38 PM
Post
#514
|
|
:: Punch and Pie :: Group: Members Posts: 3,584 Joined: 26-December 04 From: Mentor, OH Member No.: 3,342 Region Association: Upper MidWest |
Ok. I'm calling it a night.
Got the dash mocked up. Plates show up Monday. Got the engine all wired up, and the wires routed to the trunk wall for mounting. I'll hook up the ECU tomorrow and get that tidied up. The distribution block layout might change a few times...actually, I know it needs to. Engine bay is starting to really come together. A few more doodads to add before I take it to the engine builder so I can get the inter cooler plumbed and ready to roll. It's getting there... Attached thumbnail(s) 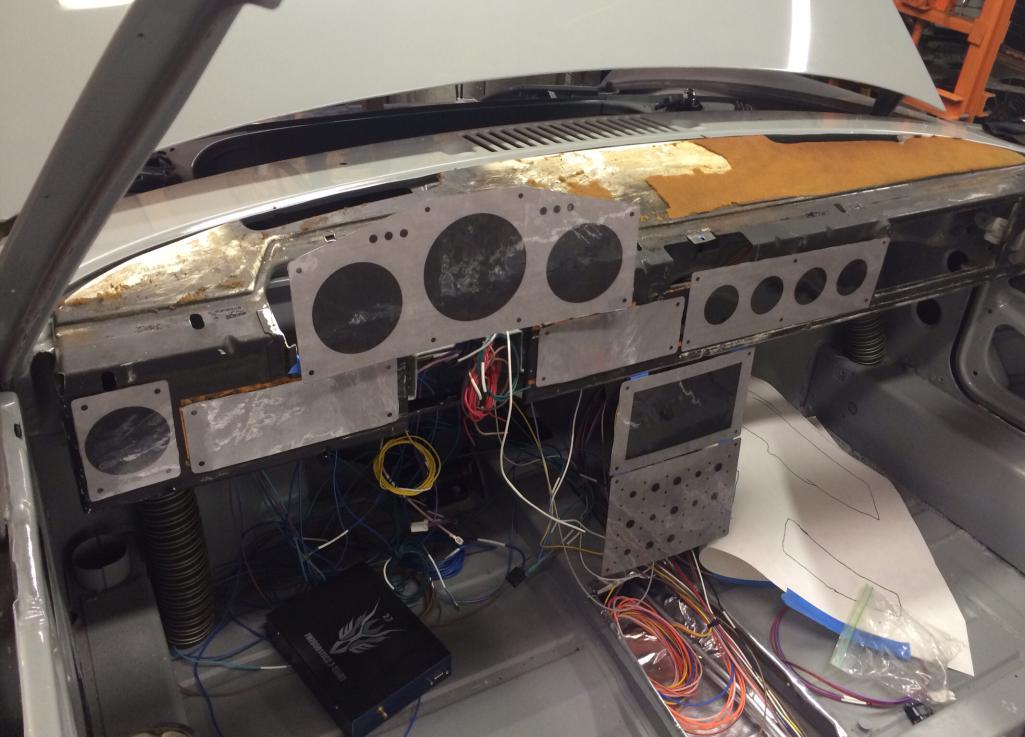 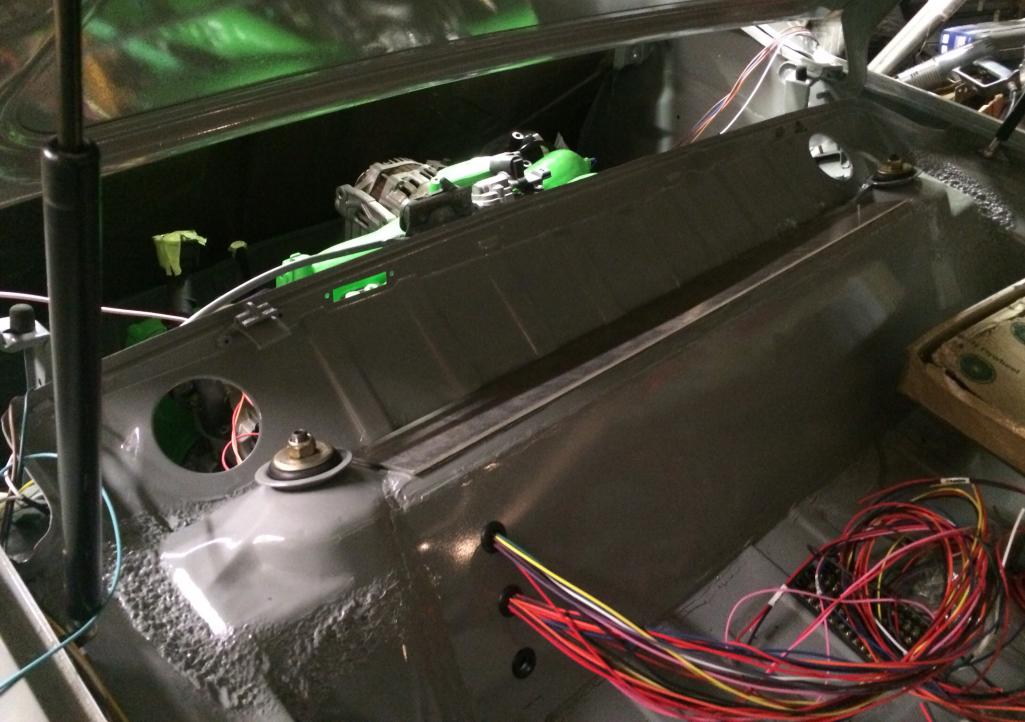 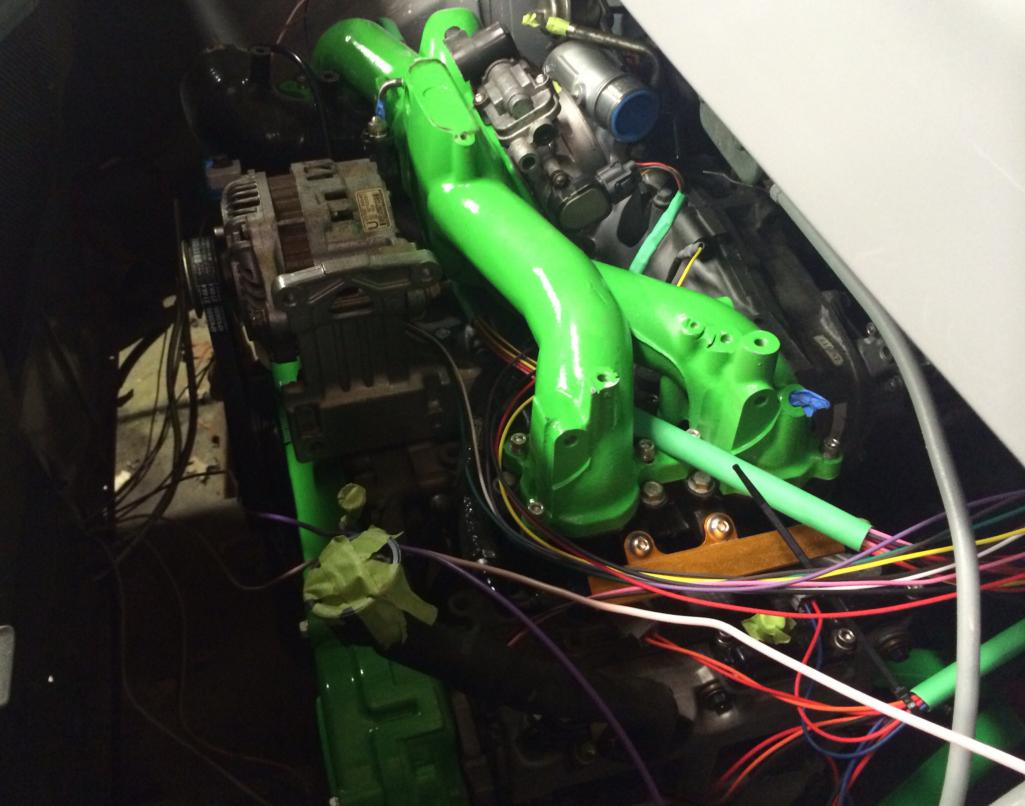
|
|
|
|
| dan_the _body_guy |
Apr 12 2014, 10:49 PM
Post
#515
|
|
Newbie Group: Members Posts: 28 Joined: 1-April 14 From: cleveland ohio Member No.: 17,185 Region Association: None |
very nice! its starting to look like a car again, get with me after you get it running ill finish buffing before hershey trip
|
|
|
|
| 914forme |
Apr 13 2014, 07:55 AM
Post
#516
|
|
Times a wastin', get wrenchin'! Group: Members Posts: 3,896 Joined: 24-July 04 From: Dayton, Ohio Member No.: 2,388 Region Association: None |
Doug, let me know what other odds and end 914 pieces you need, I am sure I have them hoarded just for your build. (IMG:style_emoticons/default/beerchug.gif)
I PM'd you about the lens nuts. |
|
|
|
| CptTripps |
Apr 13 2014, 12:47 PM
Post
#517
|
|
:: Punch and Pie :: Group: Members Posts: 3,584 Joined: 26-December 04 From: Mentor, OH Member No.: 3,342 Region Association: Upper MidWest |
Thanks Stephen!
Spent all morning getting the cable shifter installed and hooked up. Now I'm on the the radiator hose. I welded a 3/4" square tube brace to the tunnel. Not that it needs more bracing, but the height was perfect for what I'm building as a center console. I also added a little shrink-wrap to the nut that connects to the shifter linkage. This fattened it up perfectly. The only modification I made to Ian's piece was to make the hole in the Aluminium arm a little bigger so it matches the hole on the clevis fitting. We're in business now. VERY tight shifting pattern! Attached thumbnail(s) 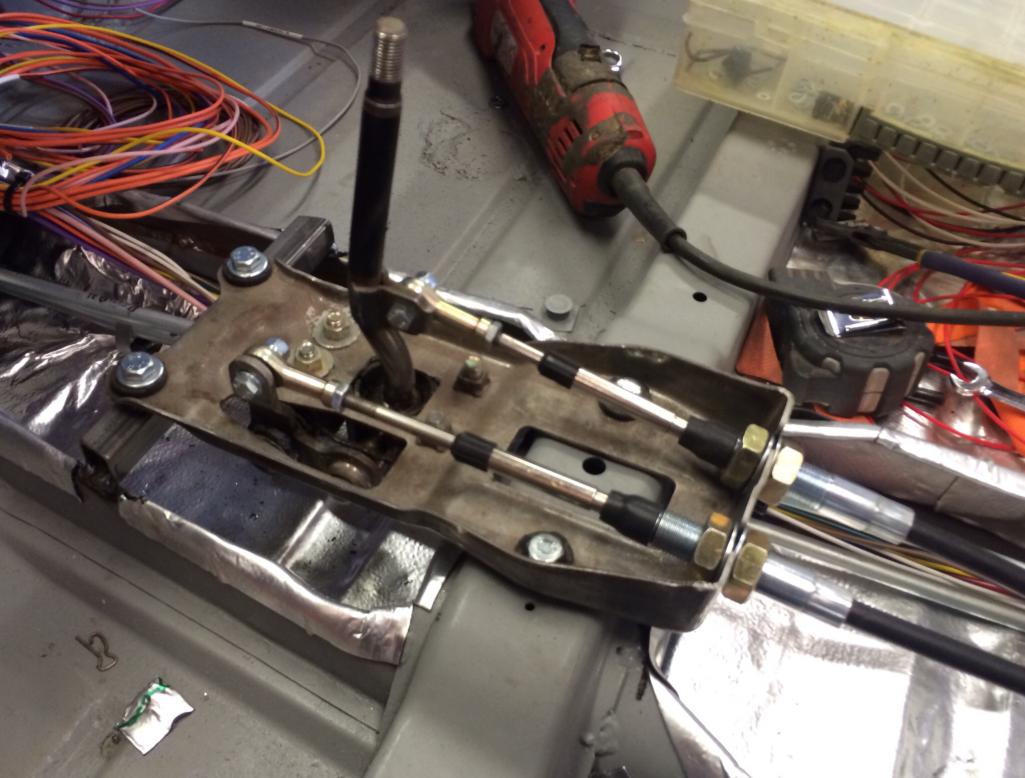 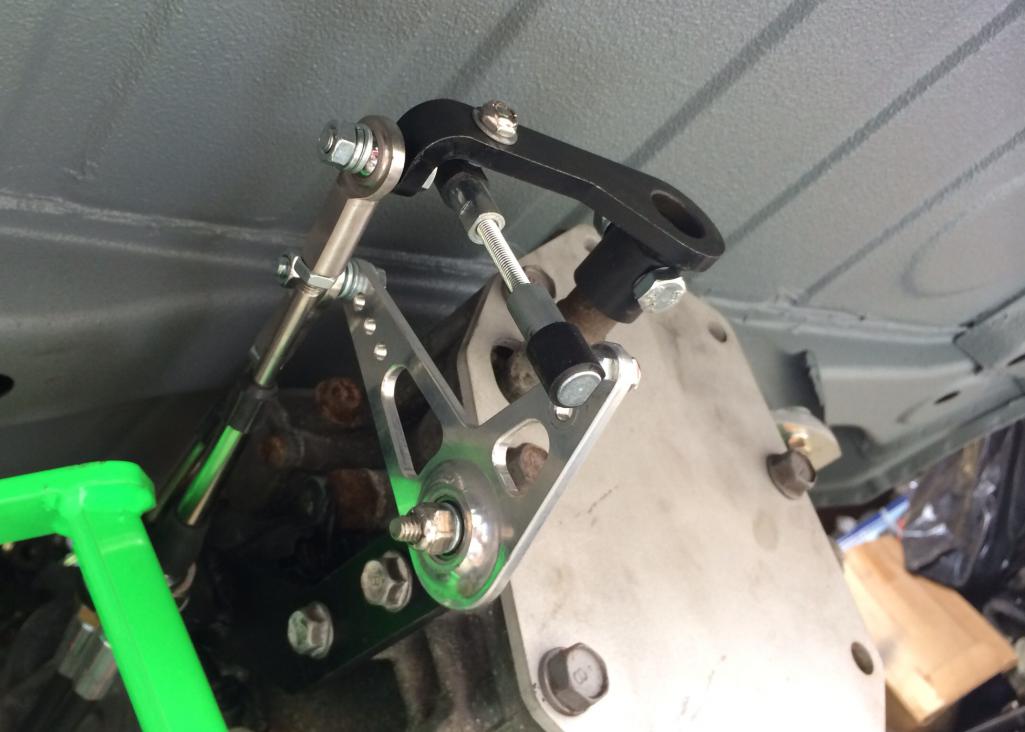 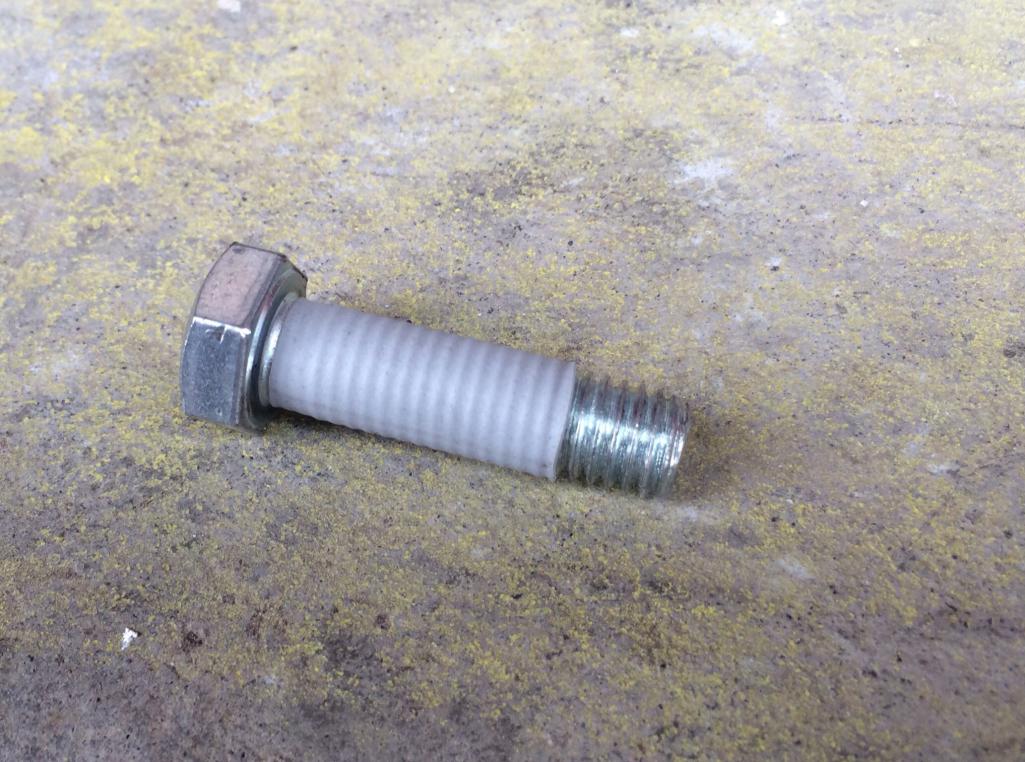
|
|
|
|
| CptTripps |
Apr 13 2014, 01:46 PM
Post
#518
|
|
:: Punch and Pie :: Group: Members Posts: 3,584 Joined: 26-December 04 From: Mentor, OH Member No.: 3,342 Region Association: Upper MidWest |
Just decided that I'm going to take the radiator hoses up the tunnel. I have a lot of Lava Mat left for the entire tunnel, and it'll be a lot cleaner than going through the longs or under the car.
I can take a 4" square piece of Lava Mat, stick it to my finger, and hold it 3" over the top of an open flame with almost no heat on my finger. I think it'll work real well. |
|
|
|
| McMark |
Apr 13 2014, 04:57 PM
Post
#519
|
|
914 Freak! Group: Retired Admin Posts: 20,179 Joined: 13-March 03 From: Grand Rapids, MI Member No.: 419 Region Association: None |
Paint your PCBs black. (IMG:style_emoticons/default/tongue.gif)
|
|
|
|
| CptTripps |
Apr 13 2014, 07:06 PM
Post
#520
|
|
:: Punch and Pie :: Group: Members Posts: 3,584 Joined: 26-December 04 From: Mentor, OH Member No.: 3,342 Region Association: Upper MidWest |
QUOTE(McMark @ Apr 13 2014, 06:57 PM) Not a bad idea! I'll add that to the "after I get driving" list of weekend projects. I got the clutch master re-mounted tonight and started on the radiator hose. I have a lot of little things to do with the electrical so I'll do those inside tonight. Just finished tagging all the wires out of the ECU to make that easier to identify while hooking up. Attached thumbnail(s) 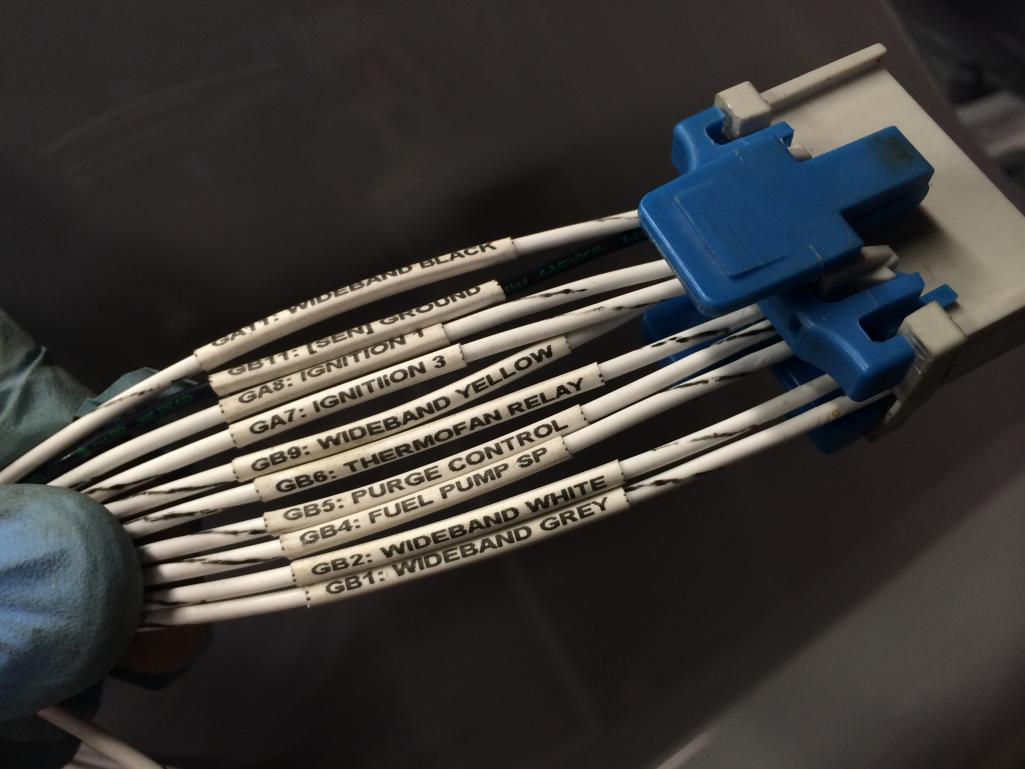
|
|
|
|
|
3 User(s) are reading this topic (3 Guests and 0 Anonymous Users)
0 Members:

|
Lo-Fi Version | Time is now: 11th January 2025 - 03:01 PM |
Invision Power Board
v9.1.4 © 2025 IPS, Inc.