|
|
|
Porsche, and the Porsche crest are registered trademarks of Dr. Ing. h.c. F. Porsche AG.
This site is not affiliated with Porsche in any way. Its only purpose is to provide an online forum for car enthusiasts. All other trademarks are property of their respective owners. |
|
|

  |

| 914forme |
 May 1 2014, 07:49 AM May 1 2014, 07:49 AM
Post
#581
|
|
Times a wastin', get wrenchin'!  Group: Members Posts: 3,896 Joined: 24-July 04 From: Dayton, Ohio Member No.: 2,388 Region Association: None |
QUOTE(Moneypit @ Apr 30 2014, 12:52 PM)  I'll just leave this F4 Phantom ejection seat handle here, because you could totally mod this into an e-brake lever... F4 Ejection Handle Or you could get a pair of full Ejection Seats for like $2200 a pop. Really complete the look! (IMG:style_emoticons/default/w00t.gif) Oh yeah this brings up a old topic on this thread. Flight stick control handle for your gear shift Thats really a decent deal for a metal control stick grip with buttons. They have a few others also. |
   |

 
|
| Moneypit |
May 1 2014, 07:58 AM
Post
#582
|
|
Member Group: Members Posts: 195 Joined: 4-January 06 From: Georgetown, TX Member No.: 5,360 Region Association: Southwest Region |
QUOTE(CptTripps @ May 1 2014, 08:29 AM) I actually looked at aircraft seats. Everything I could find was way too wide, or way too tall. They'd be awesome for racing though. Real high bolsters. The interior is important, but right now I need to concentrate on all the little crap that needs to get done. Wiring. Radiators. Intercooler. Those are the top priorities. Pffff.... Look at you trying to be all practical. "It'd be too tall!" - Sounds like you need a Carrera GT style double bubble targa roof (IMG:style_emoticons/default/idea.gif) Have you already done your seats? If not there might be a way to re-cover them, build up side bolsters, maybe using some exposed strip aluminum to give that ejector seat look. You could probably score some fabrics that mimic the colors with more OD green and black, but in suede or something more comfortable. You could also paint your seat adjuster handle either red or black/yellow. I think you should fly me up there so I can consult on the interior while you deal with trivial things like wiring and intercoolers. (IMG:style_emoticons/default/rolleyes.gif) |
|
|
|
| CptTripps |
May 1 2014, 02:46 PM
Post
#583
|
|
:: Punch and Pie :: Group: Members Posts: 3,584 Joined: 26-December 04 From: Mentor, OH Member No.: 3,342 Region Association: Upper MidWest |
Ha. Yeah, look back a few pages. The seats are re-covered...and awesome. I'm hoping the Alcantara keeps me stuck in the middle.
|
|
|
|
| Moneypit |
May 1 2014, 02:55 PM
Post
#584
|
|
Member Group: Members Posts: 195 Joined: 4-January 06 From: Georgetown, TX Member No.: 5,360 Region Association: Southwest Region |
QUOTE(CptTripps @ May 1 2014, 03:46 PM) Ha. Yeah, look back a few pages. The seats are re-covered...and awesome. I'm hoping the Alcantara keeps me stuck in the middle. Forgot about that! So many pages, I got lost at one point. They look great, before the 2.0 died my mom had started to redo our seats, using some faux-alcantara style stuff and some kind of heavy duty blak "sport" fabric, can't figure out how to describe it. At the time the idea was an inexpensive way to fix them up, since she's been sewing for a long time. Did some home contract work once sewing sound deadening material for helicopters or something! I'm still trying to convince my mom to let go of the reins of the 914, all this time it's been in her name, and hers alone. She keeps bringing that point up every time I start talking about nefarious plans... |
|
|
|
| CptTripps |
May 3 2014, 12:34 PM
Post
#585
|
|
:: Punch and Pie :: Group: Members Posts: 3,584 Joined: 26-December 04 From: Mentor, OH Member No.: 3,342 Region Association: Upper MidWest |
Ok. Lots to talk about.
I need to add more pics later... I got the pedal clister and masters installed. Them moved to wiring. Since I didn't have the connection to the wheel any more, I soldered leads on the I can connect up to the harness I have. Should be all set, as I've toned everything out. Finished adding dynamat to the entire interior and doors. Dead as dirt now. Going to be great. Painted a the trim, and drilled out the holes for the LED holders I have. There will be 5 lights in the targa bar trim that should keep people off my ass. Attached thumbnail(s) 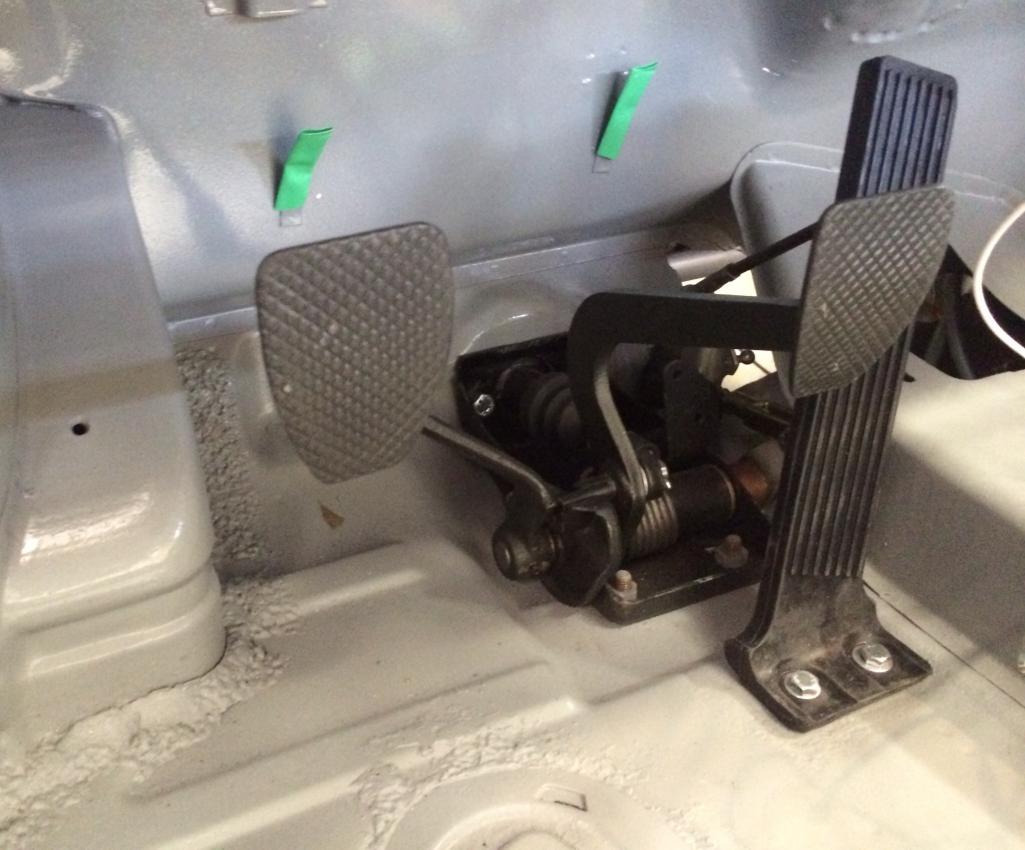 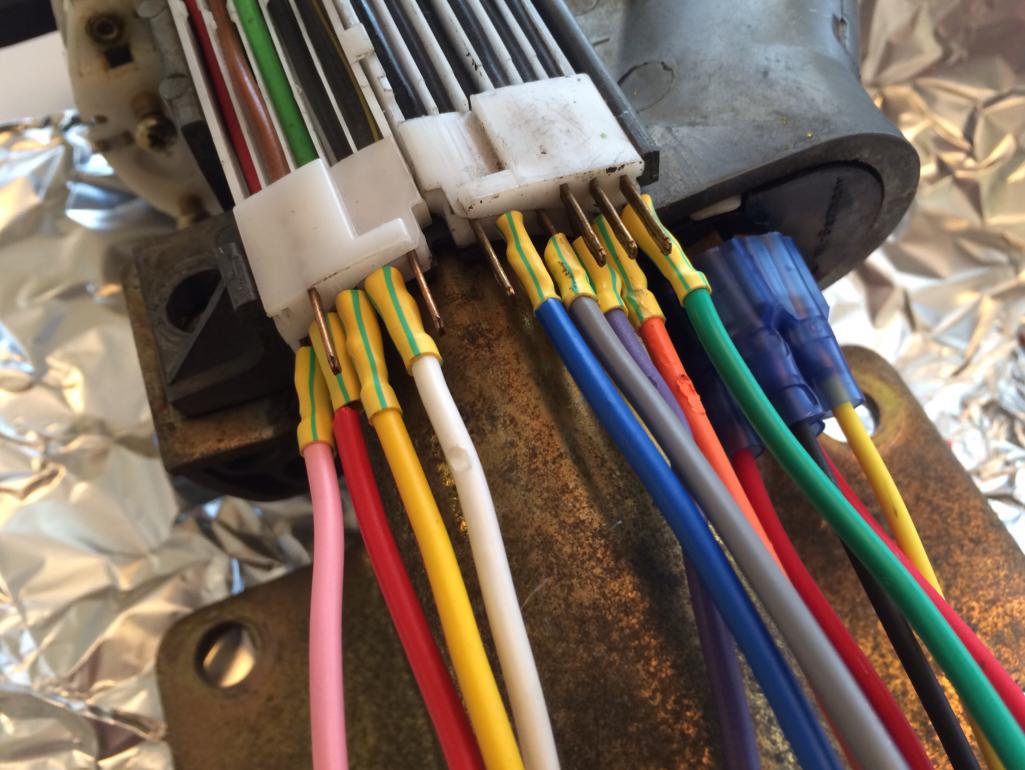 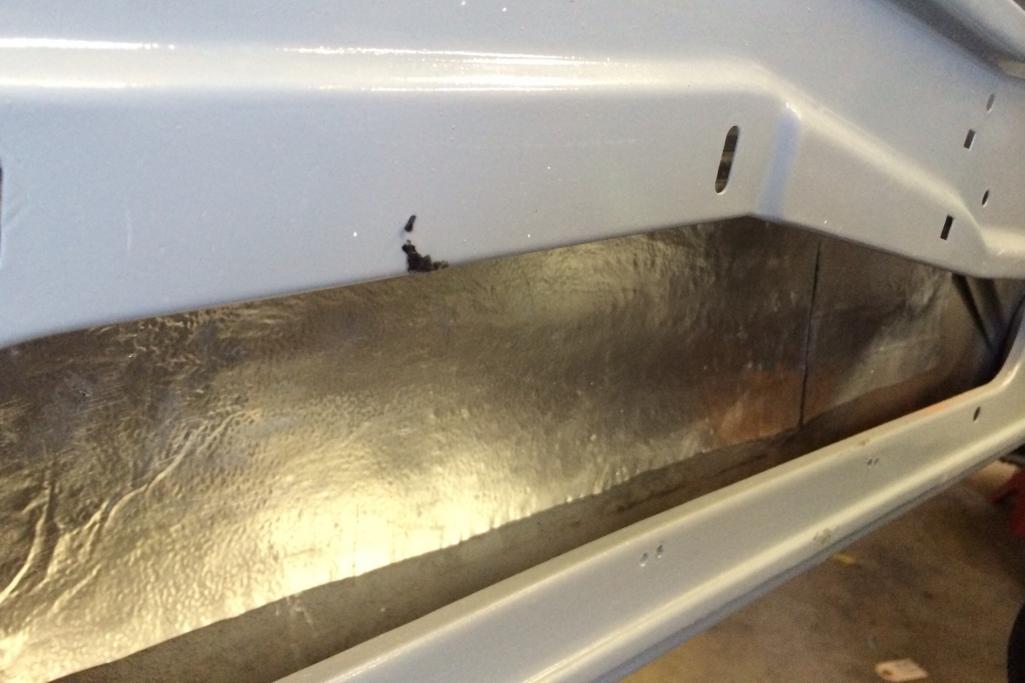
|
|
|
|
| CptTripps |
May 3 2014, 03:05 PM
Post
#586
|
|
:: Punch and Pie :: Group: Members Posts: 3,584 Joined: 26-December 04 From: Mentor, OH Member No.: 3,342 Region Association: Upper MidWest |
Got goodies from Eric today. :-)
Attached thumbnail(s) 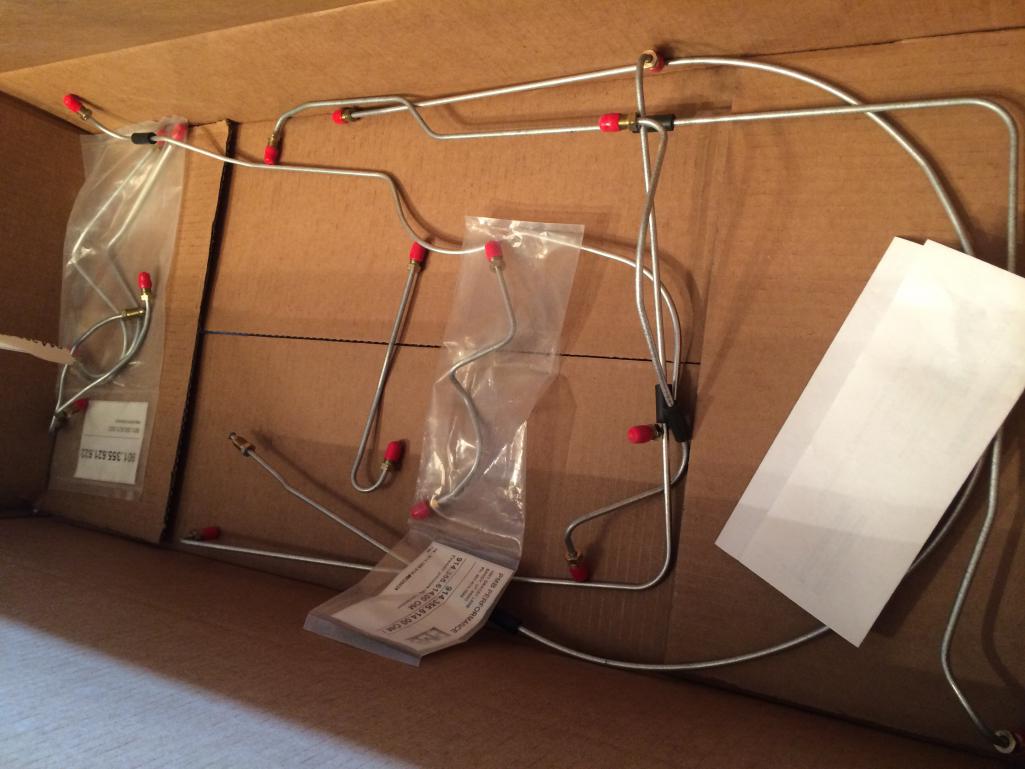
|
|
|
|
| Maltese Falcon |
May 4 2014, 01:33 AM
Post
#587
|
|
Advanced Member Group: Members Posts: 4,910 Joined: 14-September 04 From: Mulholland SoCal Member No.: 2,755 Region Association: None |
QUOTE(CptTripps @ Apr 30 2014, 06:49 PM) 90%: totally agree! That's what it feels like too. I've had a lot of personal stuff to deal with this week, but I'm going to start hitting it hard tomorrow. That ejector handle is awesome. That's how I already have my e-brake and seat movers painted up. Love the green theme running with your build. I have taken a liking to the Porsche acid green for details in the livery on our current v8 build. Your aircraft theme is well executed + unique. I have an airframe id plate that I salvaged from one of these F4s that was downed in combat. I might stick this in the race car somewhere (IMG:style_emoticons/default/biggrin.gif) Awsome build on your 914 ! Marty 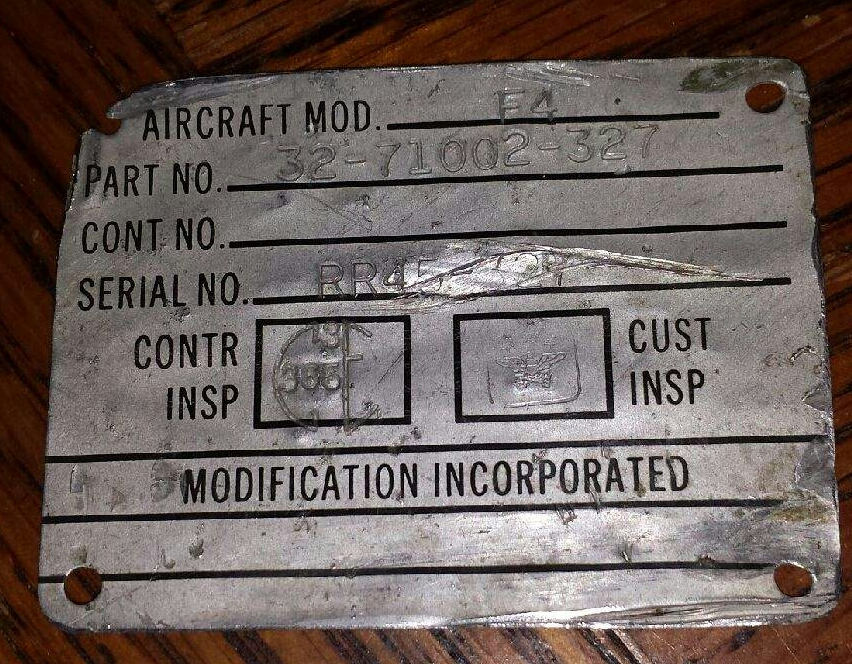 |
|
|
|
| CptTripps |
May 5 2014, 04:14 AM
Post
#588
|
|
:: Punch and Pie :: Group: Members Posts: 3,584 Joined: 26-December 04 From: Mentor, OH Member No.: 3,342 Region Association: Upper MidWest |
Took a day off to be with my family, and then hit the garage yesterday.
Realized that for the 2nd time, I'd built the proportioning valve wrong. So...back apart again. I'm getting good at this! The trick is to replace 2 bolts first with real long ones, then back it out that way. Installation is the reverse. No muss no fuss. 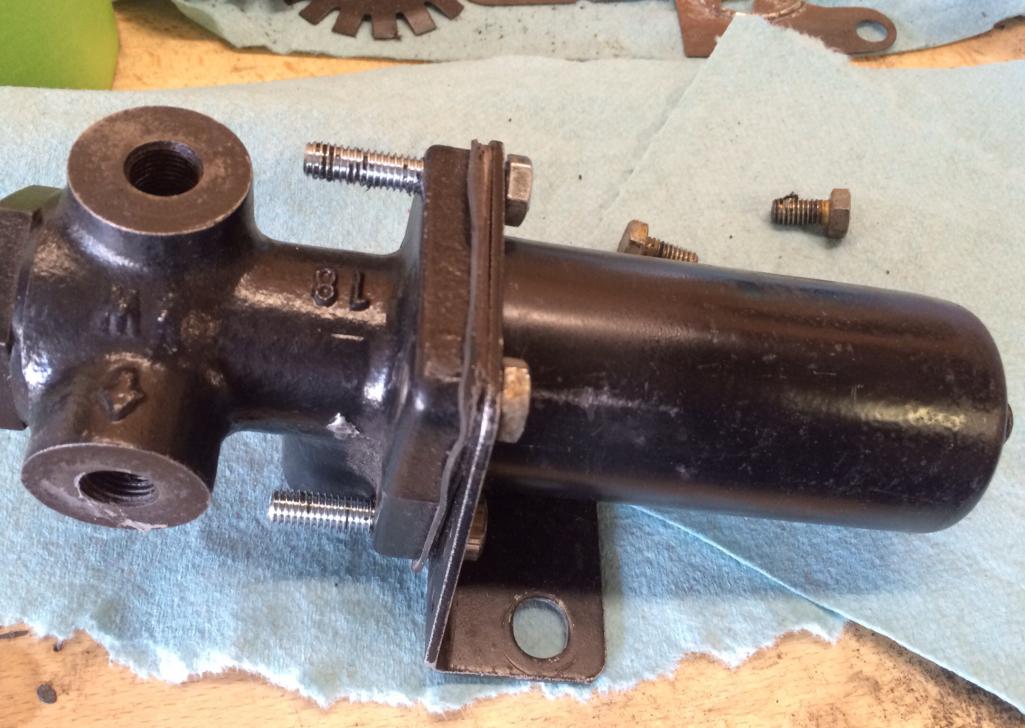 Then I started on door seals and working towards getting the windows back in. The new triangle seals from 914rubber.com are really pretty awesome. Took lots of stretching and prodding but I'm locked in place now. 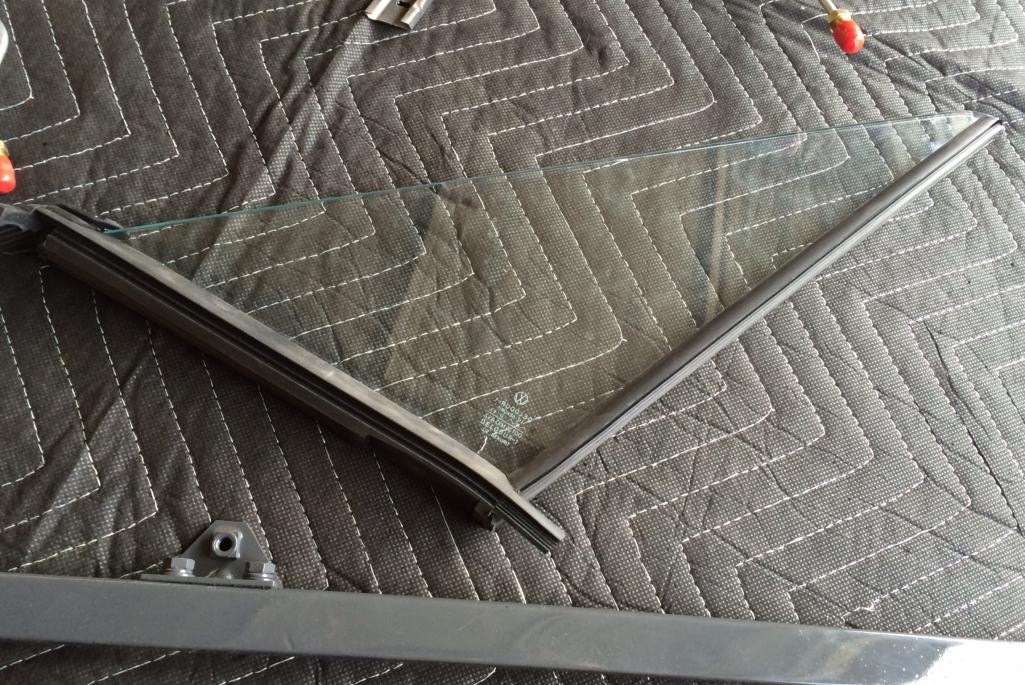 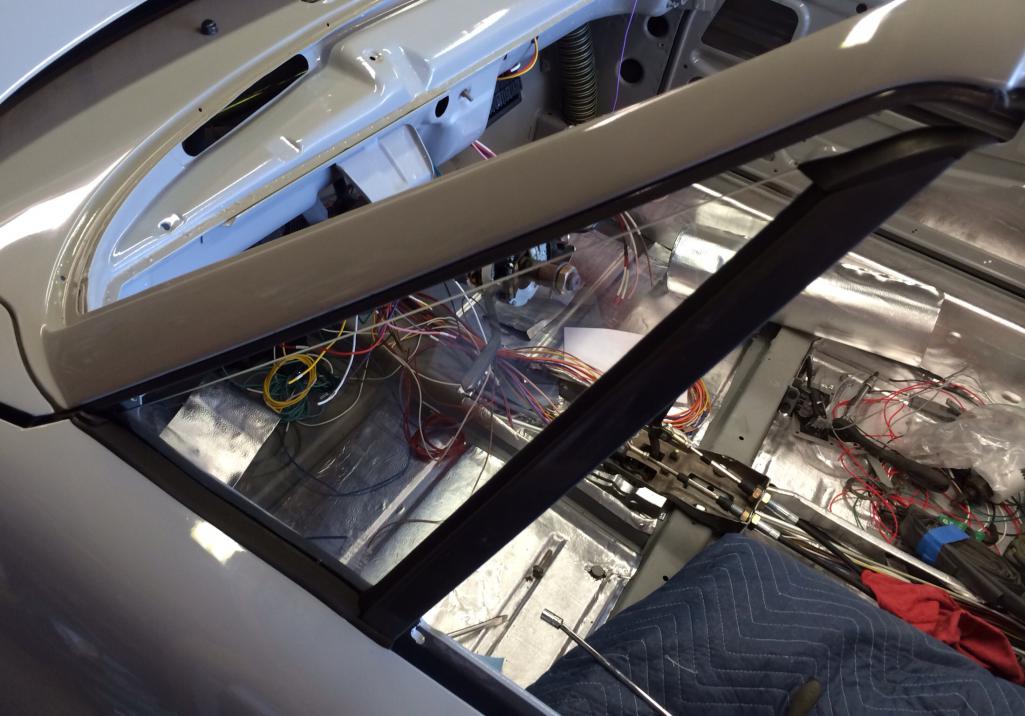 One thing I'm stuck on is the vertical targa seal. 1: Is this installed correctly. 2: should I cut the rest off? 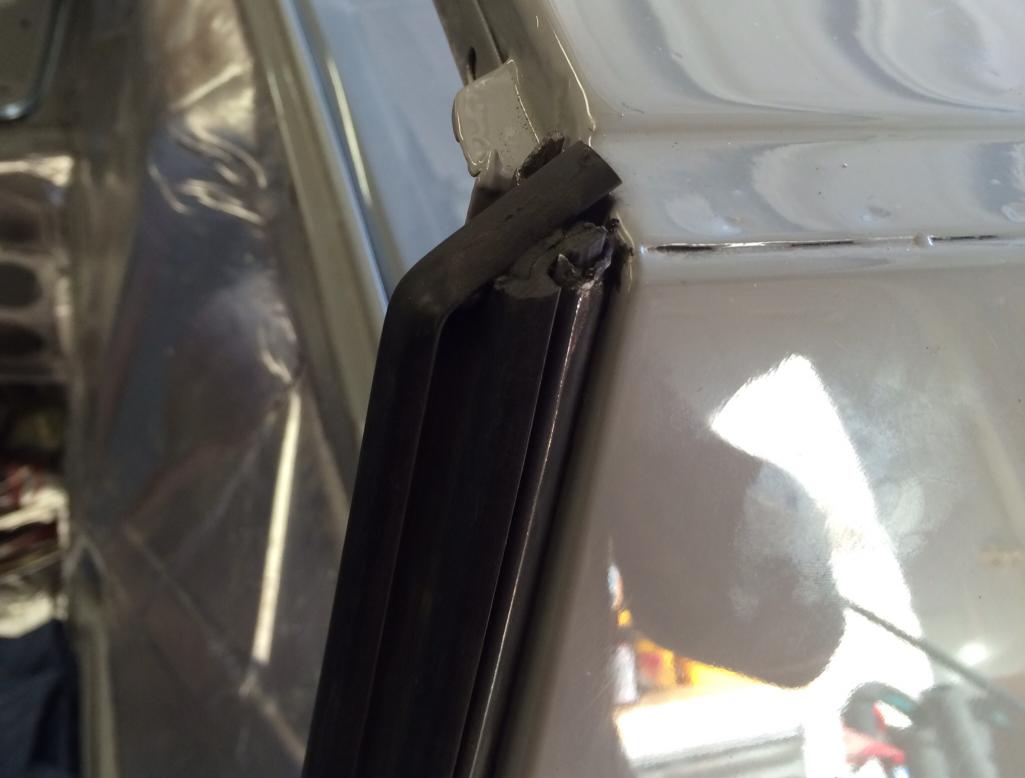 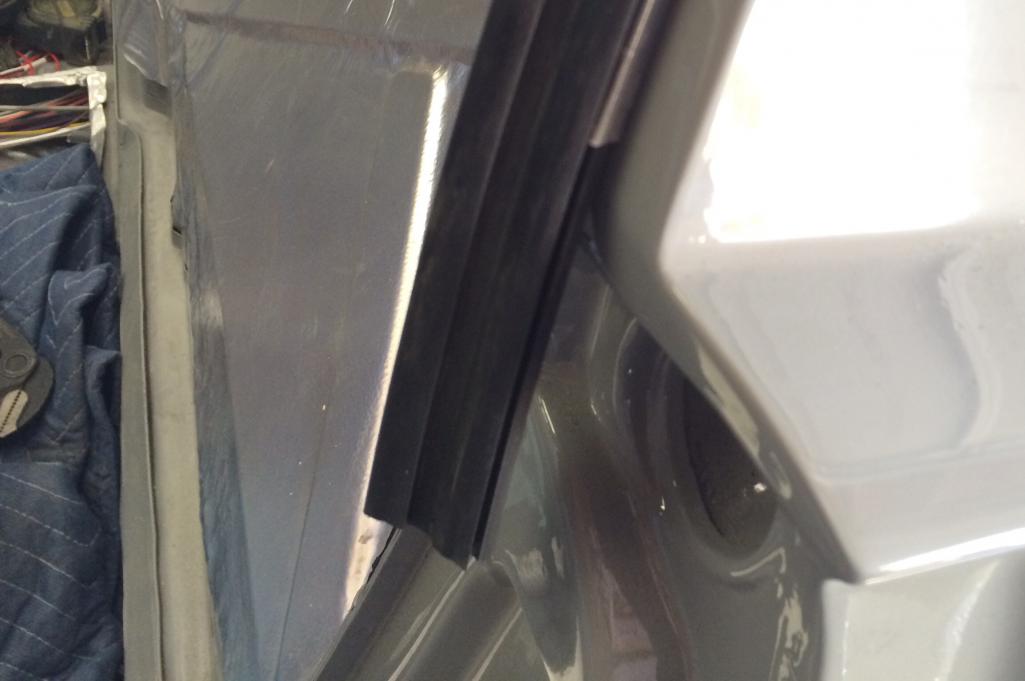 I got the rear brakes all set, and am missing a fitting that'll let me complete the front. Need to call Eric on that today. Today I'm going to finish the radiator and get that started. I can start the thing without an intercooler...but not without water. |
|
|
|
| Maltese Falcon |
May 5 2014, 10:18 AM
Post
#589
|
|
Advanced Member Group: Members Posts: 4,910 Joined: 14-September 04 From: Mulholland SoCal Member No.: 2,755 Region Association: None |
The end of the vertical seal at the top (your picture) is incorrect.
Porsche Panorama had an article on this , and I do remember that the instructions were to carefully trim an angle to match the angle where there Targa top window seal meets it. In essence: both edges may require a careful trim ( at their meeting point) and would look like a 45° joint. Since the top clamps down with pressure, allow enough extra material to ensure air+water tight sealing and should help eliminate Targa top rattles as well. Marty |
|
|
|
| CptTripps |
May 5 2014, 10:33 AM
Post
#590
|
|
:: Punch and Pie :: Group: Members Posts: 3,584 Joined: 26-December 04 From: Mentor, OH Member No.: 3,342 Region Association: Upper MidWest |
So I need to push it down further than I have it now? If there's a "finished" end like that, I'm assuming that it would go on top so water wouldn't leak down inside of it and become trapped.
|
|
|
|
| McMark |
May 5 2014, 10:51 AM
Post
#591
|
|
914 Freak! Group: Retired Admin Posts: 20,179 Joined: 13-March 03 From: Grand Rapids, MI Member No.: 419 Region Association: None |
Get the top on and inspect how the two seal interact before you cut anything.
|
|
|
|
| Maltese Falcon |
May 5 2014, 11:50 AM
Post
#592
|
|
Advanced Member Group: Members Posts: 4,910 Joined: 14-September 04 From: Mulholland SoCal Member No.: 2,755 Region Association: None |
QUOTE(CptTripps @ May 5 2014, 09:33 AM) So I need to push it down further than I have it now? If there's a "finished" end like that, I'm assuming that it would go on top so water wouldn't leak down inside of it and become trapped. Some of the rubber Targa seals I've installed come with a slight squared off edge. This is a candidate for trimming. I like a snug fit. With age the fit gets loose, causing top rattling. This also starts to chaffe the soft aluminum Targa top edge trim. YES always premount + check before cutting ! Marty |
|
|
|
| CptTripps |
May 5 2014, 08:22 PM
Post
#593
|
|
:: Punch and Pie :: Group: Members Posts: 3,584 Joined: 26-December 04 From: Mentor, OH Member No.: 3,342 Region Association: Upper MidWest |
Yeah...I need to get the top on sooner or later. Now I just need to find it. :-)
|
|
|
|
| scotty b |
May 5 2014, 08:31 PM
Post
#594
|
|
rust free you say ? Group: Members Posts: 16,375 Joined: 7-January 05 From: richmond, Va. Member No.: 3,419 Region Association: None |
QUOTE(McMark @ May 5 2014, 08:51 AM) Get the top on and inspect how the two seal interact before you cut anything. This |
|
|
|
| CptTripps |
May 6 2014, 07:45 AM
Post
#595
|
|
:: Punch and Pie :: Group: Members Posts: 3,584 Joined: 26-December 04 From: Mentor, OH Member No.: 3,342 Region Association: Upper MidWest |
I'll be back in the garage later today and the first thing I'll be doing is checking the top out. I want to get the seals done so I'll have one less thing to worry about at the end of the build. The body work is all done now, so the seals are just one more thing I can do now to feel like I'm making progress.
My hope is to have the seals in, and the doors full of windows and electronics by the end of the day. |
|
|
|
| CptTripps |
May 6 2014, 03:39 PM
Post
#596
|
|
:: Punch and Pie :: Group: Members Posts: 3,584 Joined: 26-December 04 From: Mentor, OH Member No.: 3,342 Region Association: Upper MidWest |
So I didn't touch the doors today. I focused on the exhaust and radiator. Can't start the car without either of those!
The exhaust wasn't all that hard after I started in on it. I needed to cut the Crucial down-pipe to make it a little shorter, and bent out to move away from the engine cradle. After welding those up, I ground it all down and welded it to the exhaust. But I didn't end up doing that great of a job. I'm askew just a little bit. No biggie, I'll just rotate it later and re-weld the pipe. Attached thumbnail(s) 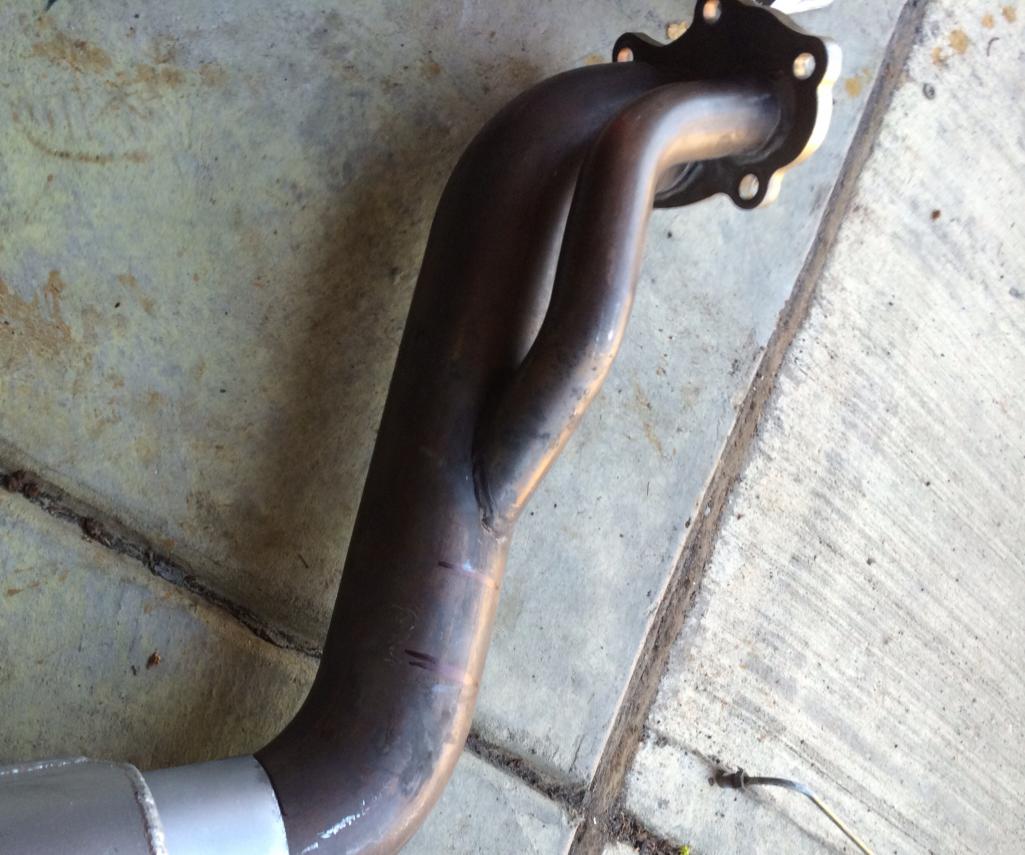 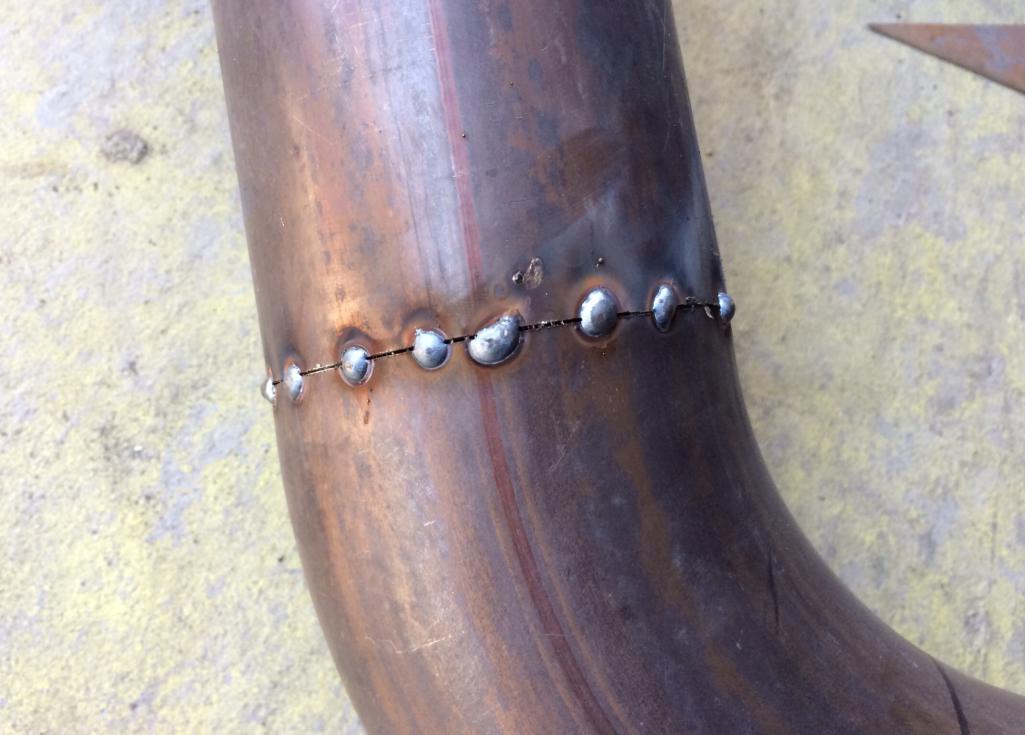 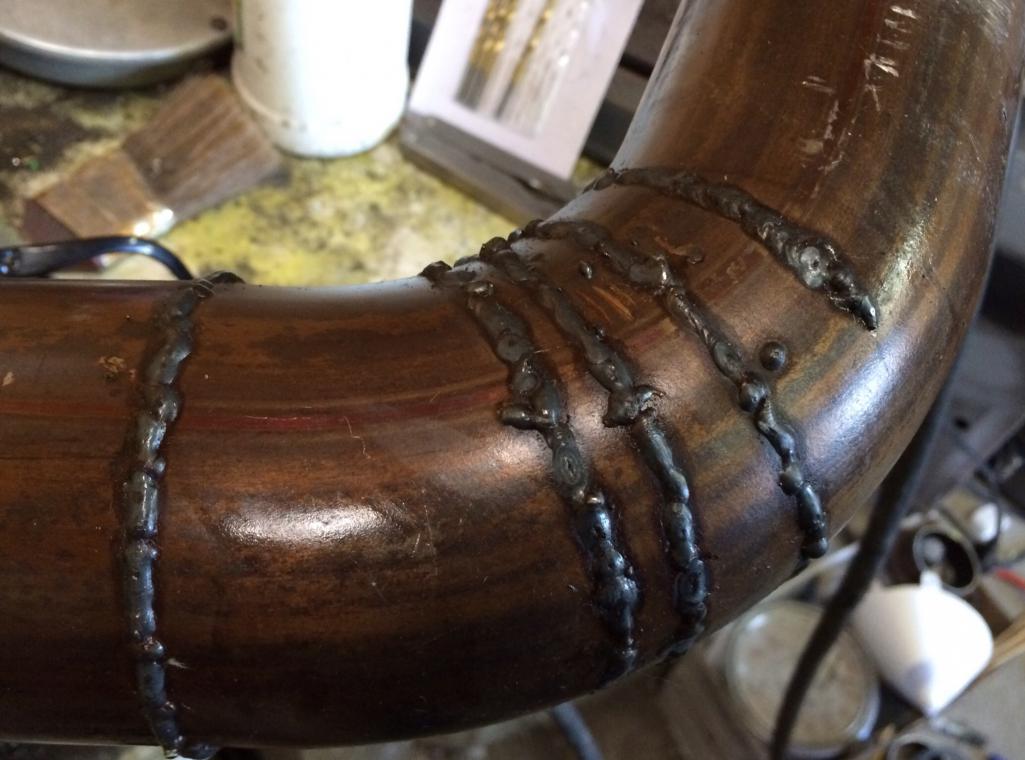 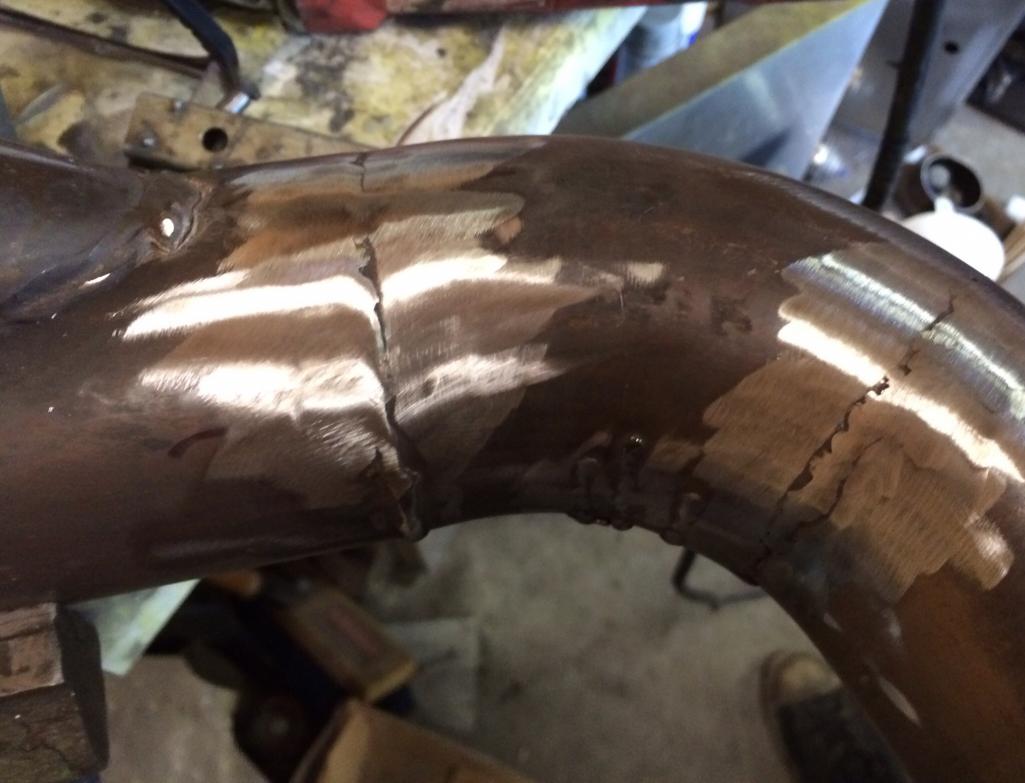 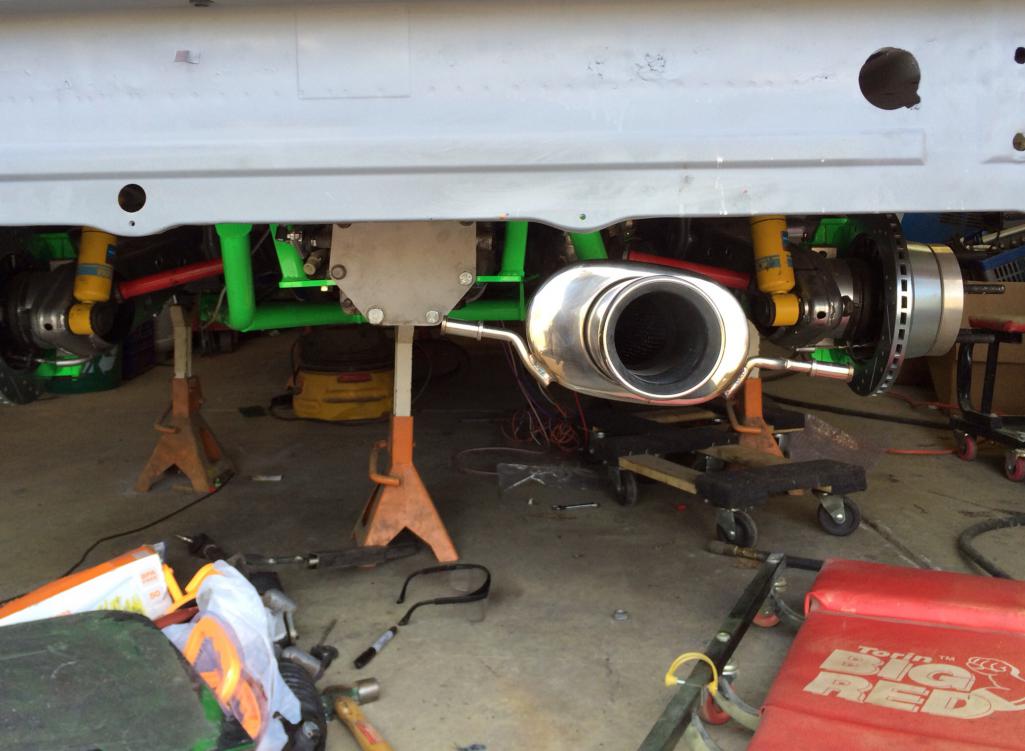
|
|
|
|
| CptTripps |
May 6 2014, 03:42 PM
Post
#597
|
|
:: Punch and Pie :: Group: Members Posts: 3,584 Joined: 26-December 04 From: Mentor, OH Member No.: 3,342 Region Association: Upper MidWest |
With the radiator, I changed the size of the holes, and made way for rubber grommets. After welding it into place, I feel good about the fit. The grommets give me enough "wiggle" so it's not solid on the chassis. I'll make up a shroud later after I get the tubing run.
Attached thumbnail(s) 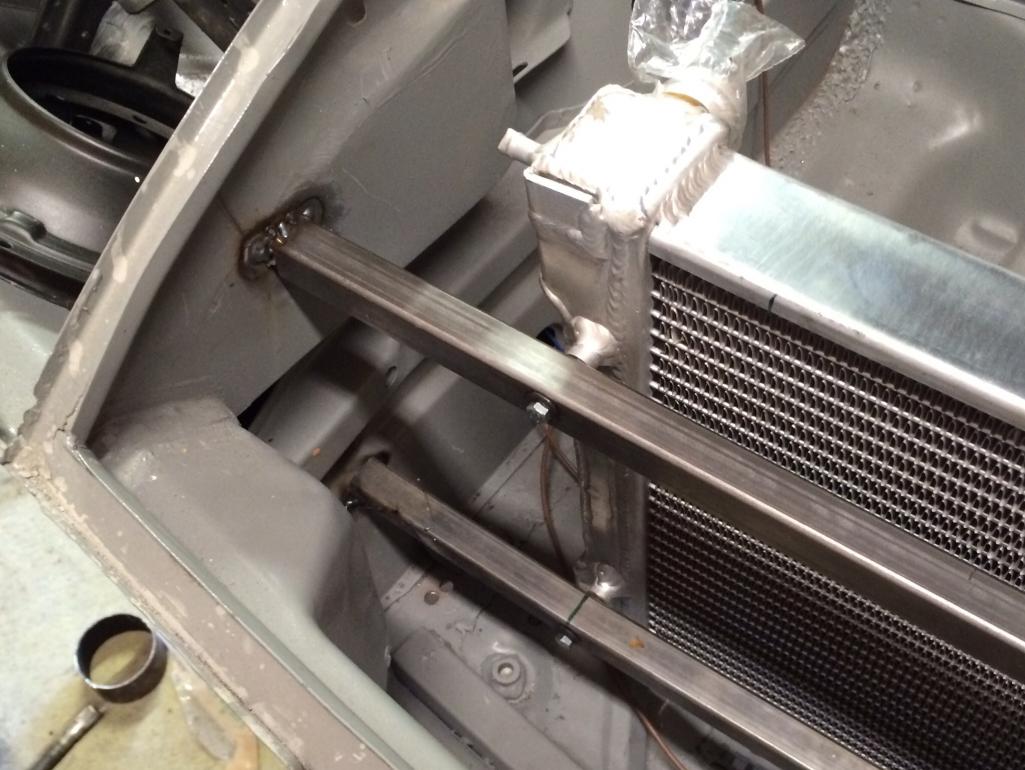 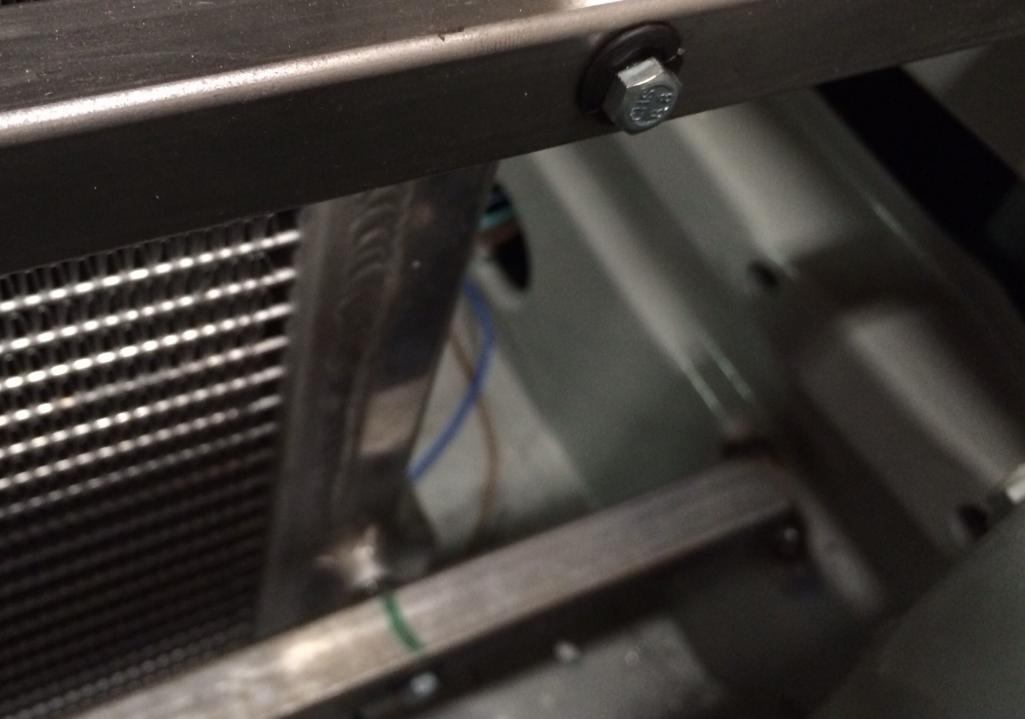
|
|
|
|
| 76-914 |
May 6 2014, 08:12 PM
Post
#598
|
|
Repeat Offender & Resident Subaru Antagonist Group: Members Posts: 13,653 Joined: 23-January 09 From: Temecula, CA Member No.: 9,964 Region Association: Southern California |
Those grommets might come back to bite ya, Doug.
|
|
|
|
| CptTripps |
May 7 2014, 04:55 AM
Post
#599
|
|
:: Punch and Pie :: Group: Members Posts: 3,584 Joined: 26-December 04 From: Mentor, OH Member No.: 3,342 Region Association: Upper MidWest |
What would be a better idea?
|
|
|
|
| bulitt |
May 7 2014, 05:25 AM
Post
#600
|
|
Achtzylinder Group: Members Posts: 4,188 Joined: 2-October 11 Member No.: 13,632 Region Association: South East States |
Here is a very clean Install, and the frame makes attaching the shroud easy.
From a post by joefri187 The radiator is floating, not bolted directly to the frame as I've heard that bolting directly to the frame can cause the radiator to crack as there is a lot of expansion when hot... It sits on rubber mounts on the bottom and bolted on through rubber grommets along the top edge. And yes, it works great and everything stays cool!!! (IMG:http://www.914world.com/bbs2/uploads/post-5047-1308688733.jpg) (IMG:http://www.914world.com/bbs2/uploads/post-5047-1308688076.jpg) (IMG:http://www.914world.com/bbs2/uploads/post-5047-1308688442_thumb.jpg) (IMG:http://www.914world.com/bbs2/uploads/post-5047-1308685753_thumb.jpg) |
|
|
|
|
1 User(s) are reading this topic (1 Guests and 0 Anonymous Users)
0 Members:

|
Lo-Fi Version | Time is now: 11th January 2025 - 01:45 PM |
Invision Power Board
v9.1.4 © 2025 IPS, Inc.