|
|
|
Porsche, and the Porsche crest are registered trademarks of Dr. Ing. h.c. F. Porsche AG.
This site is not affiliated with Porsche in any way. Its only purpose is to provide an online forum for car enthusiasts. All other trademarks are property of their respective owners. |
|
|

  |

| 76-914 |
 May 7 2014, 08:13 AM May 7 2014, 08:13 AM
Post
#601
|
|
Repeat Offender & Resident Subaru Antagonist  Group: Members Posts: 13,653 Joined: 23-January 09 From: Temecula, CA Member No.: 9,964 Region Association: Southern California |
QUOTE(CptTripps @ May 7 2014, 03:55 AM)  What would be a better idea? Something a lot thicker with some "give" or sponge-nous to it. How much is that set up going to weigh once it is filled w/ water? Depending upon the wall thickness and type/hardness (T rating) of aluminum that the radiator has would dictate my next step. Vertical loading/support would be better but that's not what you have. Could you post up several of pic's of your radiator set up and that area in general. It might be possible to leave what you have but to intro some vertical support as well. |
   |

 
|
| ruby914 |
May 7 2014, 09:49 AM
Post
#602
|
|
Senior Member Group: Members Posts: 720 Joined: 26-April 09 From: Hawthorne, Ca Member No.: 10,305 Region Association: None |
I think Kent has a good point. It is nice to have your radiator floating.
Check Summit, http://www.summitracing.com/search/part-ty...unting-brackets or just Google; Radiator mounts images for ideas. |
 |
|
| CptTripps |
May 7 2014, 04:03 PM
Post
#603
|
|
:: Punch and Pie :: Group: Members Posts: 3,584 Joined: 26-December 04 From: Mentor, OH Member No.: 3,342 Region Association: Upper MidWest |
Alright. I think I see how I can modify what I have already welded in place, to accommodate a truly floating radiator setup.
Started wiring the motor to the Hydra today. After that it's the rest of the wiring. Hope to finish wiring tomorrow at some point! |
|
|
|
| MMW |
May 7 2014, 04:20 PM
Post
#604
|
|
Member Group: Members Posts: 152 Joined: 6-October 13 From: Northern NJ Member No.: 16,477 Region Association: North East States |
I would fab a U shaped bracket lined with rubber that rad would sit in. This would support the weight & then the top brackets would only be holding it from moving front to back. Top brackets can also be U shaped/rubber lined over the top of the rad & then bolted into your top bar.
|
|
|
|
| CptTripps |
May 8 2014, 08:47 AM
Post
#605
|
|
:: Punch and Pie :: Group: Members Posts: 3,584 Joined: 26-December 04 From: Mentor, OH Member No.: 3,342 Region Association: Upper MidWest |
Yeah. On further investigation, I'm going to re-work that setup after I get it running. Today I'm concentrating on wiring and the intercooler. Those two pieces need to get done, and I'll order some parts for the radiator doin can tackle that later.
I've got the entire interior dynamat-ed and just picked up the banjo bolt I needed to finish the brakes. I forgot (somehow) that Stoddard is about 10min from my house, so I can pick up parts from them for the "Porsche" pieces of the car a lot faster than I realized. |
|
|
|
| mgp4591 |
May 8 2014, 09:32 AM
Post
#606
|
|
914 Guru Group: Members Posts: 5,527 Joined: 1-August 12 From: Salt Lake City Ut Member No.: 14,748 Region Association: Intermountain Region |
Besides the rubber U cradles (most cars have at least those) you can pick up radiator bolts that are really just rubber pieces with threaded shanks coming out either end. One bolts into the radiator, the other into your support bracket. That way it really does float and absorb all that nasty vibration and the U cradle simply is a soft place for it to sit. Check at Honda, Toyota and Nissan dealers- not really sure if yer local Auto Zone would have those... I just think so many of us are in awe of your progress that we'd cry if you had a coolant meltdown! (IMG:style_emoticons/default/shades.gif)
|
|
|
|
| CptTripps |
May 8 2014, 09:18 PM
Post
#607
|
|
:: Punch and Pie :: Group: Members Posts: 3,584 Joined: 26-December 04 From: Mentor, OH Member No.: 3,342 Region Association: Upper MidWest |
Finished all the brake lines today, but haven't bleed anything yet. Still have the gas tank in/out so much to work out the radiator hoses. Which I finally did today.
Bent down one of the ribs in the gas tank, and cut a few openings. Now I'm in business. I need to put a valve in to relieve air, but I'll make it work. Took this just before I finished it. Radiator: Plumbed! Attached thumbnail(s) 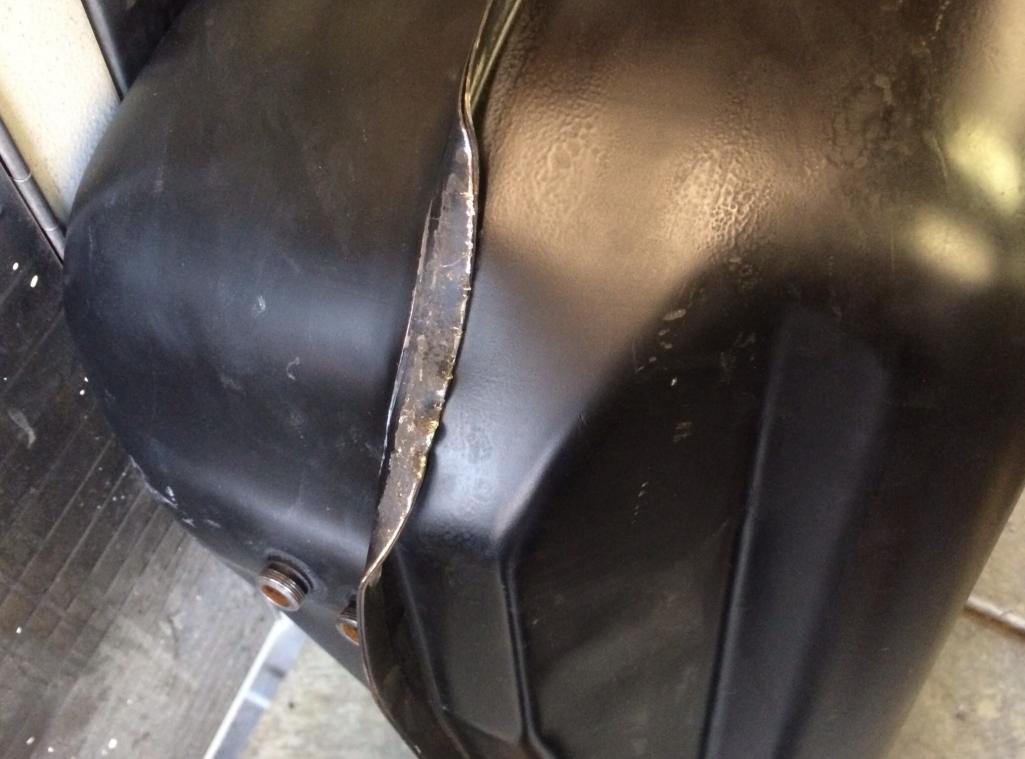 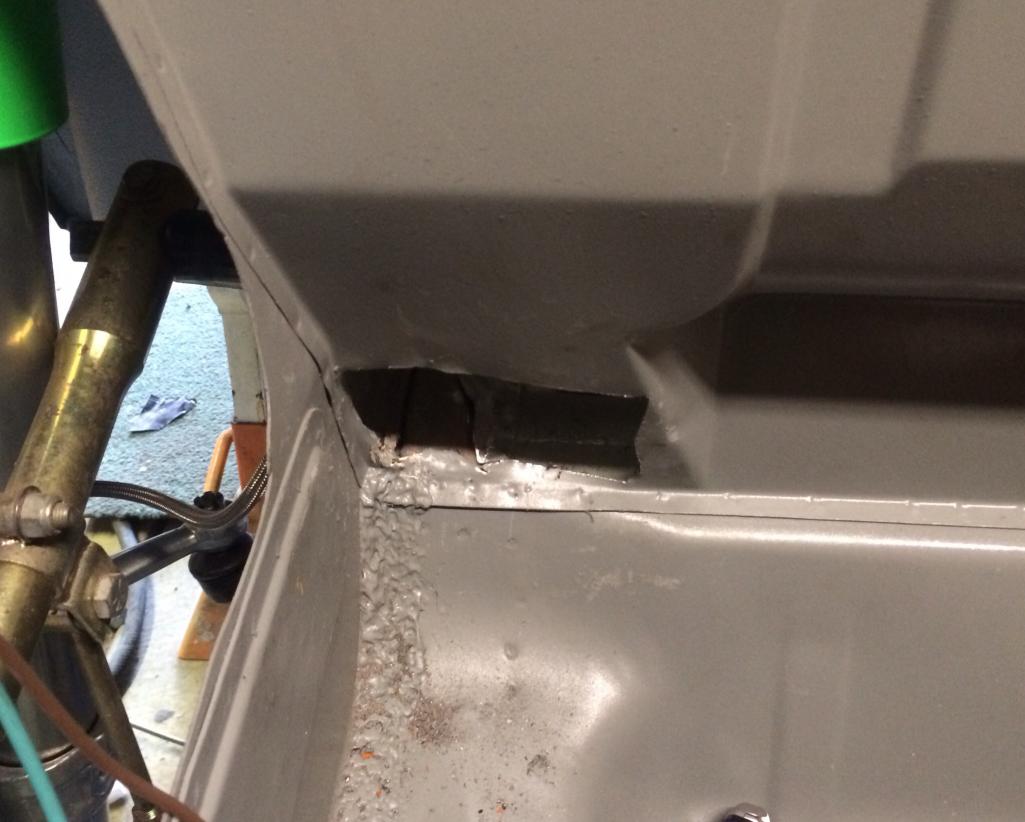 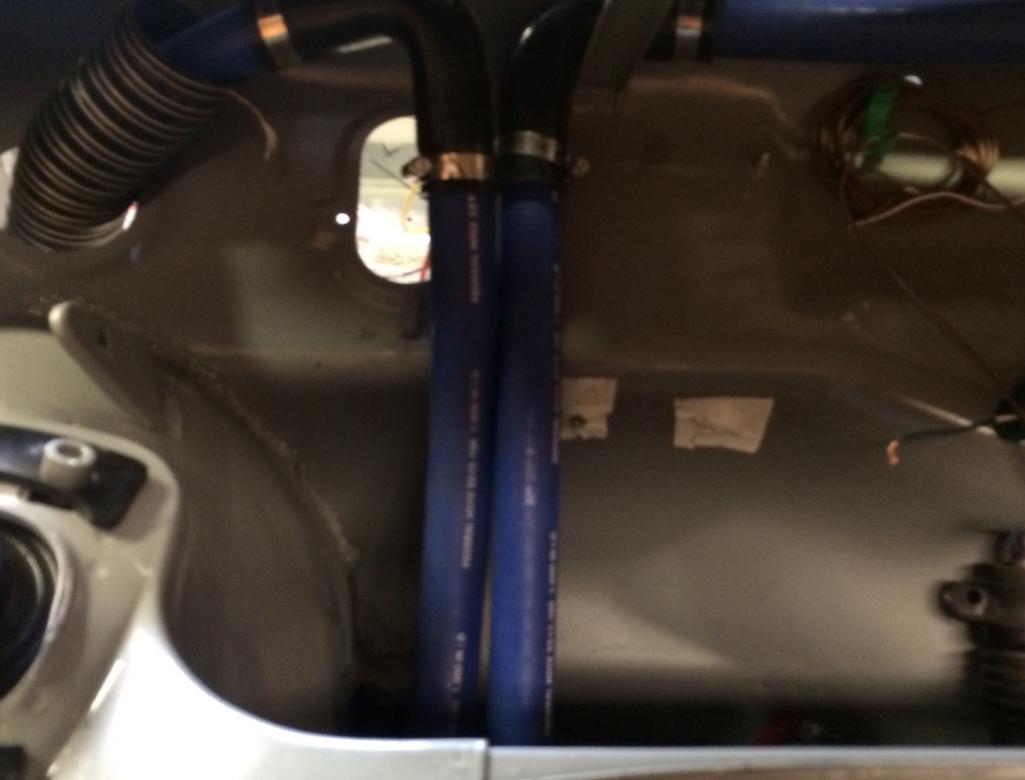 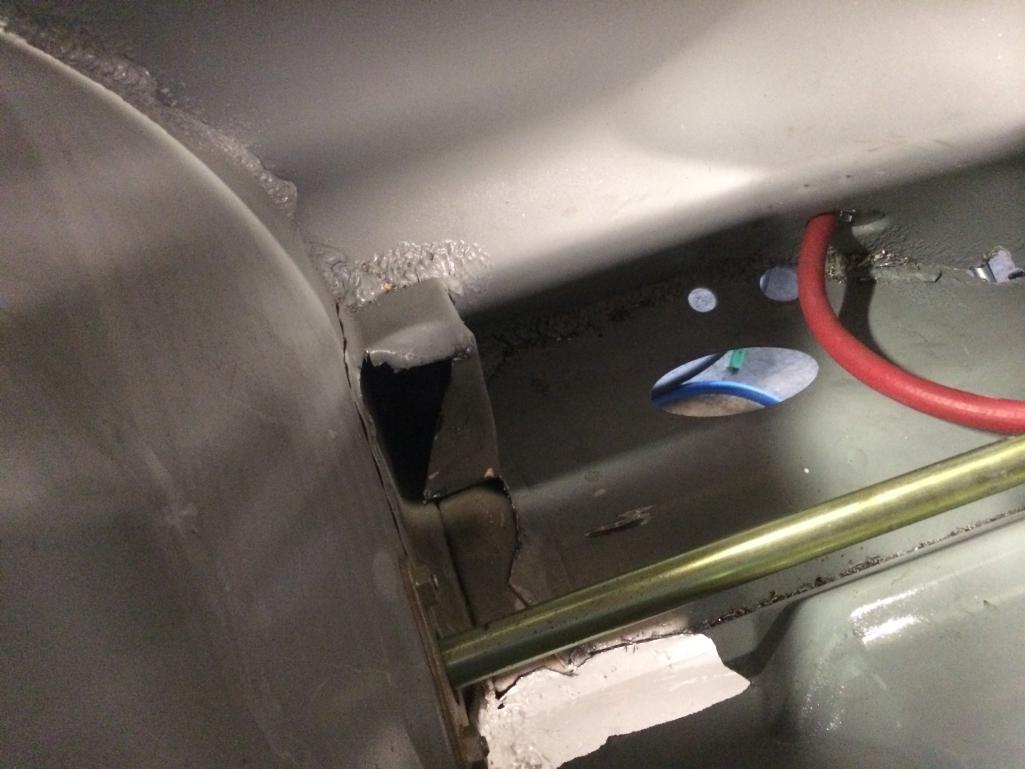
|
|
|
|
| CptTripps |
May 8 2014, 09:20 PM
Post
#608
|
|
:: Punch and Pie :: Group: Members Posts: 3,584 Joined: 26-December 04 From: Mentor, OH Member No.: 3,342 Region Association: Upper MidWest |
Forgot one...
Attached thumbnail(s) 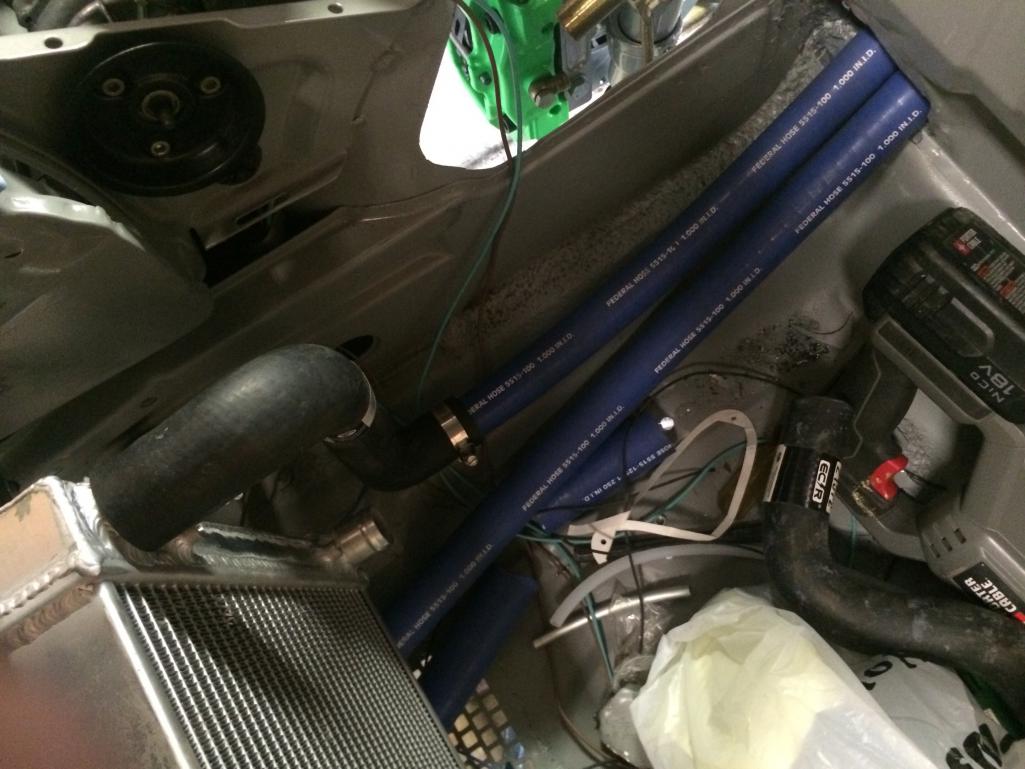
|
|
|
|
| 914forme |
May 9 2014, 08:48 AM
Post
#609
|
|
Times a wastin', get wrenchin'! Group: Members Posts: 3,896 Joined: 24-July 04 From: Dayton, Ohio Member No.: 2,388 Region Association: None |
I hope your hose mating holds up. I would not trust it in my car. You can find transitions and put some humps on them, or get the from places like Jags that Run Then use a quality clamp and not the worm gear clamps. They will cut into the hose and cause failures down the road.
You can bead transitions if you find them locally using a beading tool, or build one out a vice grip and muffler clamps. You can slap solder, braze, Mig or Tig a bead onto material if need be. I have used all the above methods with success. In a bind depending on the tubing size you can also cut threads into the OD. And you can use epoxy to build your hump. Though I don't like the last one nearly as well. Also, please put some protection around your hoses where ever they go through bulkheads, they will wear really fast in those areas. I am sure you have thought about that and the picture just don't show it. Just trying to get you to (IMG:style_emoticons/default/driving.gif) and keep you (IMG:style_emoticons/default/driving.gif) Keep up the great work Doug |
|
|
|
| CptTripps |
May 9 2014, 09:48 AM
Post
#610
|
|
:: Punch and Pie :: Group: Members Posts: 3,584 Joined: 26-December 04 From: Mentor, OH Member No.: 3,342 Region Association: Upper MidWest |
I have better threaded transitions on order already. That's why I left all the hose a little long. It'll be easy to add them, and I need to keep moving.
I put a bunch of seam sealer in the opening so I'm not rubbing against metal. Again, I'll add more later after everything is together and I know where the "run spots" are. Mocking everything into its final position right now is key. I'm kinda stuck on the fuel pump. Originally I was going to use the stock in/out of the tank and mount the fuel pump externally. Now I'm looking at cutting the tank and using the Subaru one. One of the outputs on my Walbro pump is too shallow to mount anything to. Back to the drawing board there I guess. |
|
|
|
| rhodyguy |
May 9 2014, 02:33 PM
Post
#611
|
|
Chimp Sanctuary NW. Check it out. Group: Members Posts: 22,204 Joined: 2-March 03 From: Orion's Bell. The BELL! Member No.: 378 Region Association: Galt's Gulch |
the beading that runs along the sides of a engine lid might dress out the hole and protect the coolant hoses.
|
|
|
|
| CptTripps |
May 10 2014, 10:31 PM
Post
#612
|
|
:: Punch and Pie :: Group: Members Posts: 3,584 Joined: 26-December 04 From: Mentor, OH Member No.: 3,342 Region Association: Upper MidWest |
For a new in-line fuel pump and re-did the lines to the tank. I also finally got the last piece to my master cylendar for the clutch.
The issue I have now is the clutch slave isn't moving. I've blead the line...but it won't budge. Just still feels like there is no resistance. Fluid squirts out when I'm bleeding it. But it doesn't move at all. I'm stumped. |
|
|
|
| Mike Bellis |
May 10 2014, 10:42 PM
Post
#613
|
|
Resident Electrician Group: Members Posts: 8,347 Joined: 22-June 09 From: Midlothian TX Member No.: 10,496 Region Association: None |
Did you bench bleed your new master? Could still have a bubble inside.
|
|
|
|
| mgp4591 |
May 10 2014, 11:34 PM
Post
#614
|
|
914 Guru Group: Members Posts: 5,527 Joined: 1-August 12 From: Salt Lake City Ut Member No.: 14,748 Region Association: Intermountain Region |
The slaves I've dealt with will bleed fluid all day long but they need actual pumping to get them to activate. You've probably done that- I'm just throwing in my 2 cents...
|
|
|
|
| Mike Bellis |
May 10 2014, 11:44 PM
Post
#615
|
|
Resident Electrician Group: Members Posts: 8,347 Joined: 22-June 09 From: Midlothian TX Member No.: 10,496 Region Association: None |
If you push the master, the slave should move the same relative amount. If not, there is air in the system. Hydraulic fluid does not compress easy like air.
|
|
|
|
| 76-914 |
May 11 2014, 07:13 AM
Post
#616
|
|
Repeat Offender & Resident Subaru Antagonist Group: Members Posts: 13,653 Joined: 23-January 09 From: Temecula, CA Member No.: 9,964 Region Association: Southern California |
QUOTE(Mike Bellis @ May 10 2014, 10:44 PM) If you push the master, the slave should move the same relative amount. If not, there is air in the system. Hydraulic fluid does not compress easy like air. (IMG:style_emoticons/default/agree.gif) Mikes right. Damned few liquids will compress. You have to bench bleed it firstus, Festus! (IMG:style_emoticons/default/biggrin.gif) |
|
|
|
| CptTripps |
May 11 2014, 12:25 PM
Post
#617
|
|
:: Punch and Pie :: Group: Members Posts: 3,584 Joined: 26-December 04 From: Mentor, OH Member No.: 3,342 Region Association: Upper MidWest |
Gawd. Ok. I'll dig into it tonight. Such a pita.
I've put 8oz through the slave and still not engaging. I'm starting to think it may be the master. |
|
|
|
| Mike Bellis |
May 11 2014, 12:33 PM
Post
#618
|
|
Resident Electrician Group: Members Posts: 8,347 Joined: 22-June 09 From: Midlothian TX Member No.: 10,496 Region Association: None |
The bubble is in the master. That's why you bench bleed. Then you take the drippy messy thing to the car and try to install it without spilling brake fluid everywhere.
BTW, I'm running a Howe 5/8" master with my stock VW slave. Not sure what size the VW slave is but it bolts right onto the Cayman 6 speed. Works great! |
|
|
|
| 76-914 |
May 11 2014, 01:19 PM
Post
#619
|
|
Repeat Offender & Resident Subaru Antagonist Group: Members Posts: 13,653 Joined: 23-January 09 From: Temecula, CA Member No.: 9,964 Region Association: Southern California |
Search "bench bleeding clutch master cylinder". There are several videos that are quicker than explaining with my limited vocabulary. It takes some force to push in the plunger but it will go. Or, bench bleed it in place and have someone pump the pedal for you. (IMG:style_emoticons/default/beerchug.gif)
|
|
|
|
| CptTripps |
May 12 2014, 04:03 AM
Post
#620
|
|
:: Punch and Pie :: Group: Members Posts: 3,584 Joined: 26-December 04 From: Mentor, OH Member No.: 3,342 Region Association: Upper MidWest |
Bench Bleeding: Got it! That seems like the issue I'm having. I imagine it has something to do with the master being at an angle down there. I'd tried to do it with my "Power Bleeder" but the result was the cap blowing off the master and a puddle of fluid on the garage floor.
Ugh... |
|
|
|
|
3 User(s) are reading this topic (3 Guests and 0 Anonymous Users)
0 Members:

|
Lo-Fi Version | Time is now: 11th January 2025 - 10:49 AM |
Invision Power Board
v9.1.4 © 2025 IPS, Inc.