|
|

|
Porsche, and the Porsche crest are registered trademarks of Dr. Ing. h.c. F. Porsche AG.
This site is not affiliated with Porsche in any way. Its only purpose is to provide an online forum for car enthusiasts. All other trademarks are property of their respective owners. |
|
|
  |
| trojanhorsepower |
 Oct 1 2015, 07:49 PM Oct 1 2015, 07:49 PM
Post
#101
|
|
Senior Member    Group: Members Posts: 867 Joined: 21-September 03 From: Marion, NC Member No.: 1,179 Region Association: None |
|
| 914forme |
 Oct 1 2015, 08:32 PM Oct 1 2015, 08:32 PM
Post
#102
|
|
Times a wastin', get wrenchin'!     Group: Members Posts: 3,896 Joined: 24-July 04 From: Dayton, Ohio Member No.: 2,388 Region Association: None 
|
Just read thru the entire post, that is some great work, and dedication. Makes some of my patches look like I did them in kindergarten.
|
| Olympic 914 |
 Oct 2 2015, 10:38 AM Oct 2 2015, 10:38 AM
Post
#103
|
   Group: Members Posts: 1,727 Joined: 7-July 11 From: Pittsburgh PA Member No.: 13,287 Region Association: North East States 
|
Also got the little seat adjuster bracket that welds to the cross member. Slowly moving forward, very slowly. I used the seat mount to locate the hinge parts that weld to the floor. After I broke one off trying to loosen it up. Looks good. wish I could weld like that... |
| trojanhorsepower |
 Oct 2 2015, 11:22 AM Oct 2 2015, 11:22 AM
Post
#104
|
|
Senior Member    Group: Members Posts: 867 Joined: 21-September 03 From: Marion, NC Member No.: 1,179 Region Association: None |
Thanks Guys,
It is a learning experence and I could not have gotten here with out Doug's help. |
| trojanhorsepower |
 Oct 4 2015, 09:19 AM Oct 4 2015, 09:19 AM
Post
#105
|
|
Senior Member    Group: Members Posts: 867 Joined: 21-September 03 From: Marion, NC Member No.: 1,179 Region Association: None |
Worked on prepping the rear quarter to test fit with door.
Attached image(s) 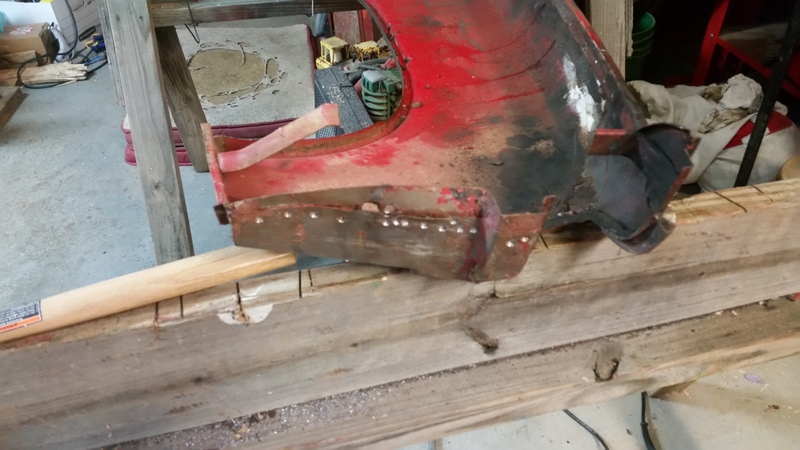 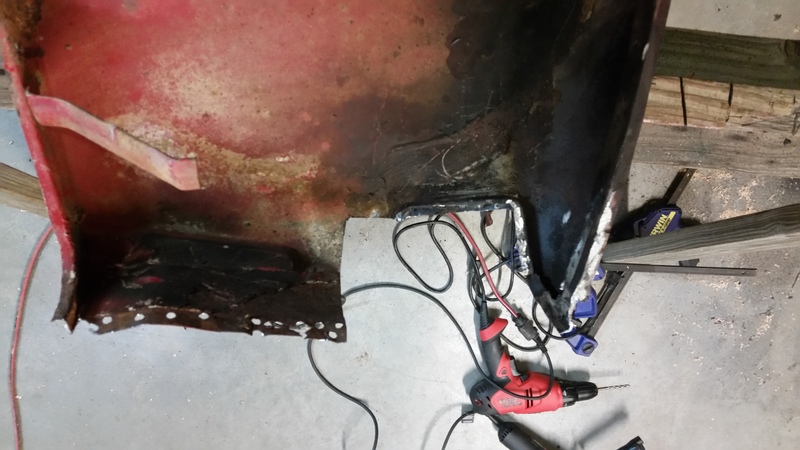 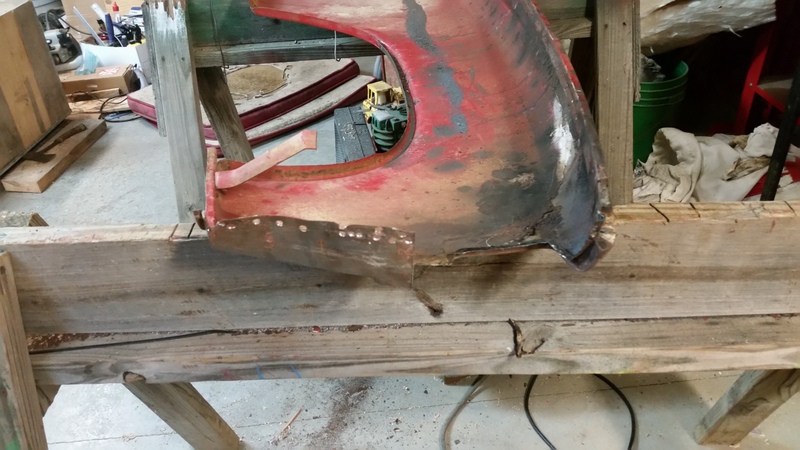 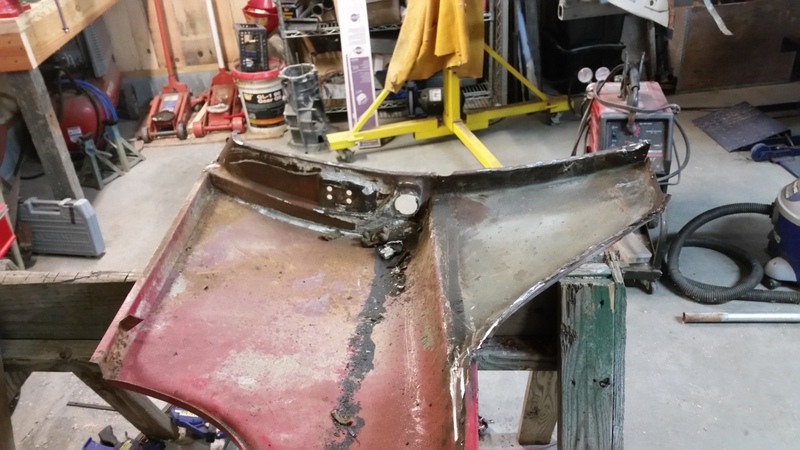
|
| trojanhorsepower |
 Oct 4 2015, 09:24 AM Oct 4 2015, 09:24 AM
Post
#106
|
|
Senior Member    Group: Members Posts: 867 Joined: 21-September 03 From: Marion, NC Member No.: 1,179 Region Association: None |
Got it all ready and test fit.
Wah wah (IMG:style_emoticons/default/hissyfit.gif) This is not good. The measurements seem OK, so maybe some fiddling and I can make it work. If not I will be the first competitor out. So far staring at it has not helped...... Attached image(s) 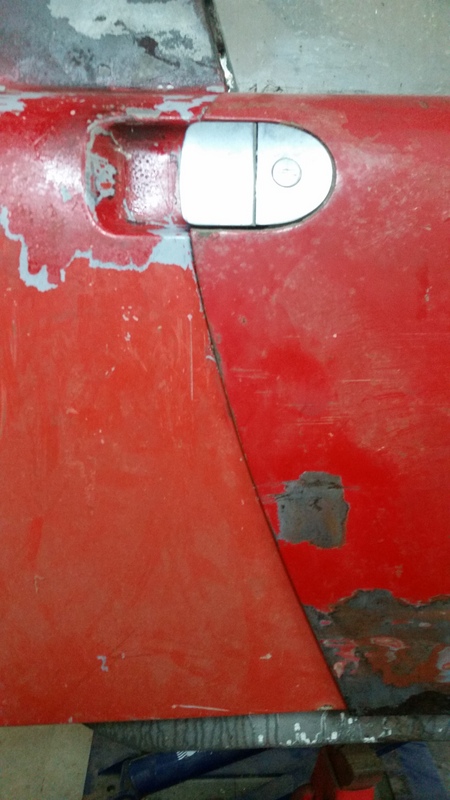
|
| trojanhorsepower |
 Oct 4 2015, 06:27 PM Oct 4 2015, 06:27 PM
Post
#107
|
|
Senior Member    Group: Members Posts: 867 Joined: 21-September 03 From: Marion, NC Member No.: 1,179 Region Association: None |
It's weird, but I put the old quarter on and it fit OK, not perfect, but the door will close. I wonder if this means that the new quarter can be made to fit?
|
| JoeDees |
 Oct 5 2015, 07:50 AM Oct 5 2015, 07:50 AM
Post
#108
|
|
Senior Member    Group: Members Posts: 515 Joined: 10-November 14 From: Northern Kentucky Member No.: 18,106 Region Association: None |
For some reason it is reminding me of the time I helped replace the doglegs on a VW bus. We absolutely couldn't get the door to fit right. Double check your prepwork where it sits and make sure the quarter is sitting flush. Is it warped from removal maybe?
I definitely don't think you're done. I'm betting and hoping it's something fairly simple. |
| trojanhorsepower |
 Oct 5 2015, 07:38 PM Oct 5 2015, 07:38 PM
Post
#109
|
|
Senior Member    Group: Members Posts: 867 Joined: 21-September 03 From: Marion, NC Member No.: 1,179 Region Association: None |
Well, I figured I should press on while I think about this fender issue. I have been picking away at the small spots that remain. Got most of the spots on the front end worked fixed, but will have to add after pics tomorrow.
Attached image(s) 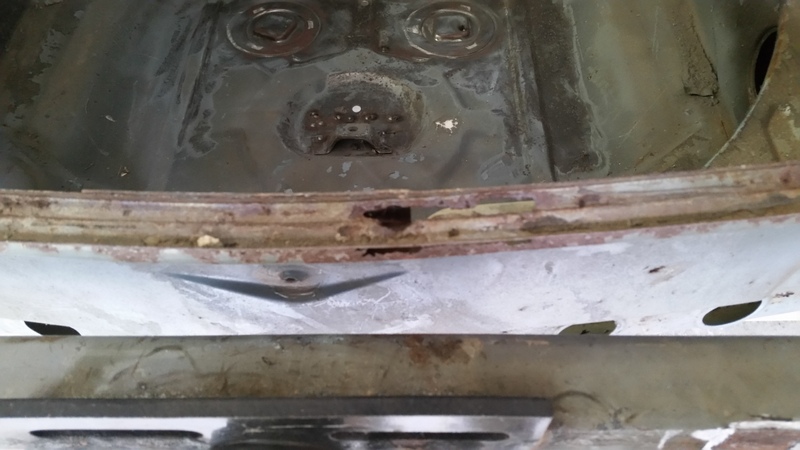 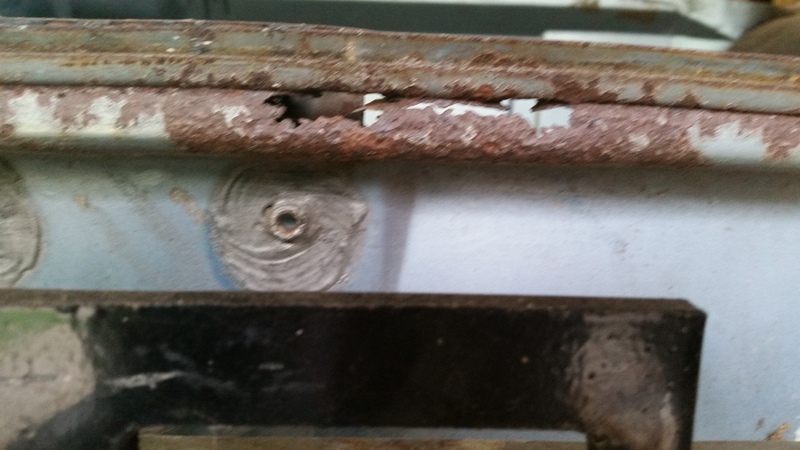 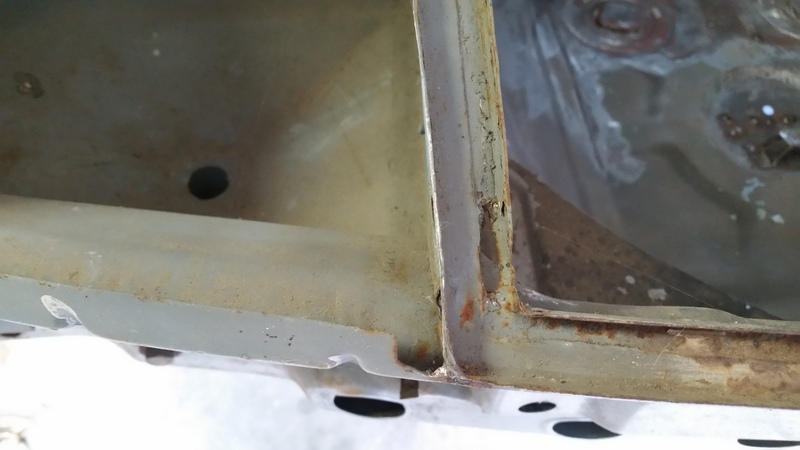 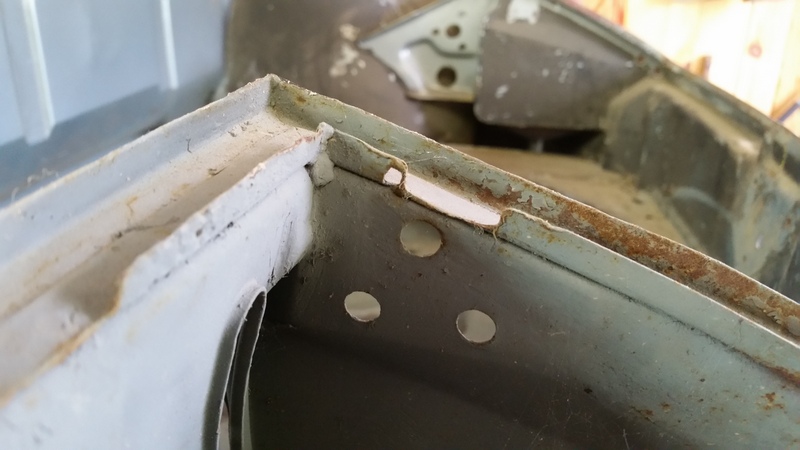 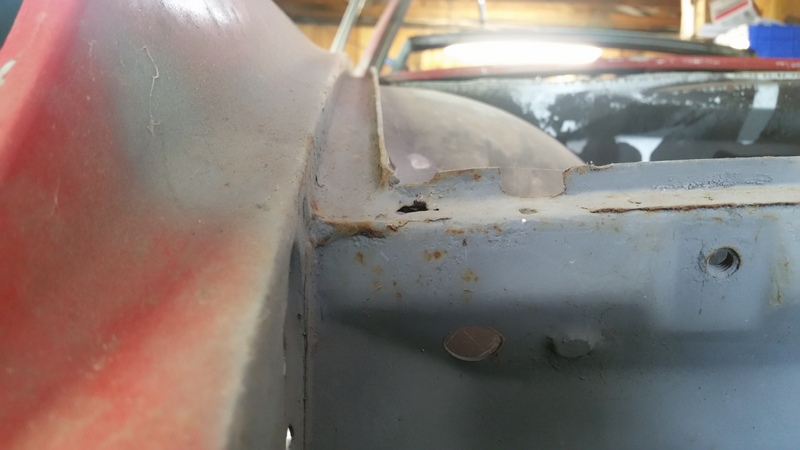 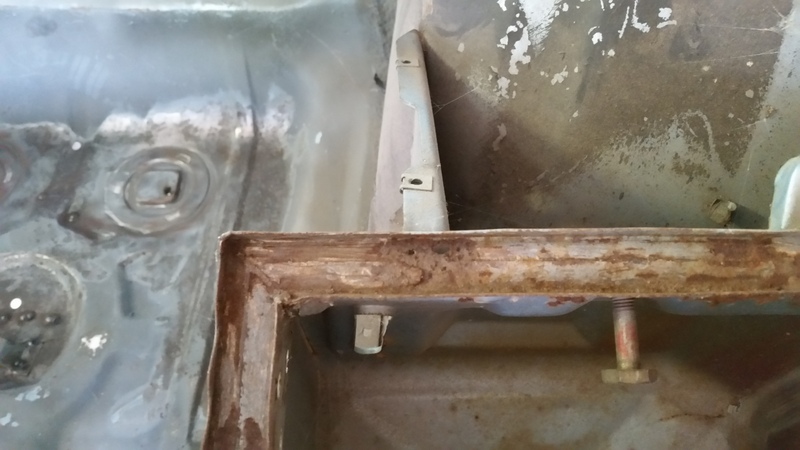 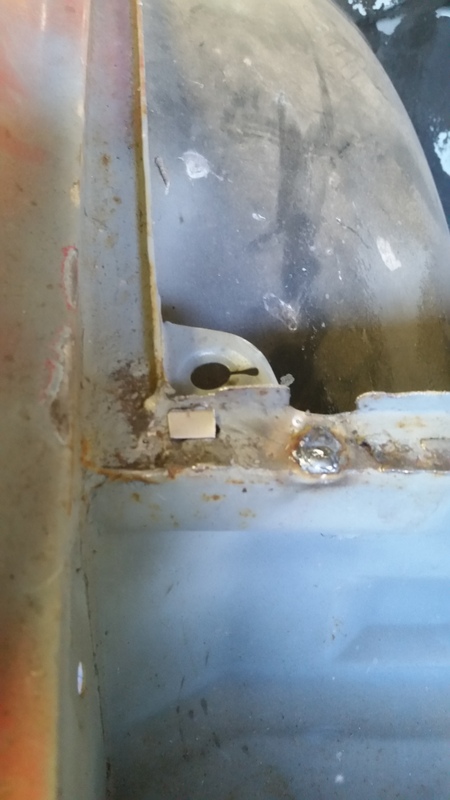
|
| cary |
 Oct 6 2015, 06:43 AM Oct 6 2015, 06:43 AM
Post
#110
|
|
Advanced Member     Group: Members Posts: 3,900 Joined: 26-January 04 From: Sherwood Oregon Member No.: 1,608 Region Association: Pacific Northwest 
|
Subscribe
|
| trojanhorsepower |
 Oct 6 2015, 07:05 PM Oct 6 2015, 07:05 PM
Post
#111
|
|
Senior Member    Group: Members Posts: 867 Joined: 21-September 03 From: Marion, NC Member No.: 1,179 Region Association: None |
More pics of the weather stripping repairs.
Still some more work to do, but it was not as bad as I though it would be. Attached image(s) 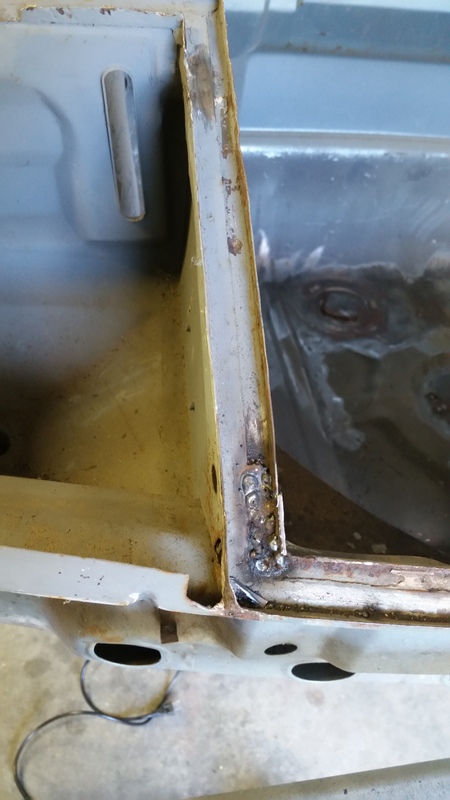 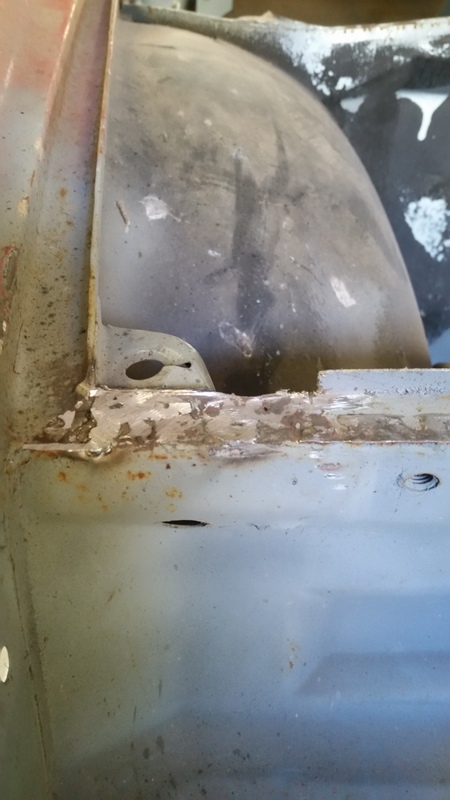 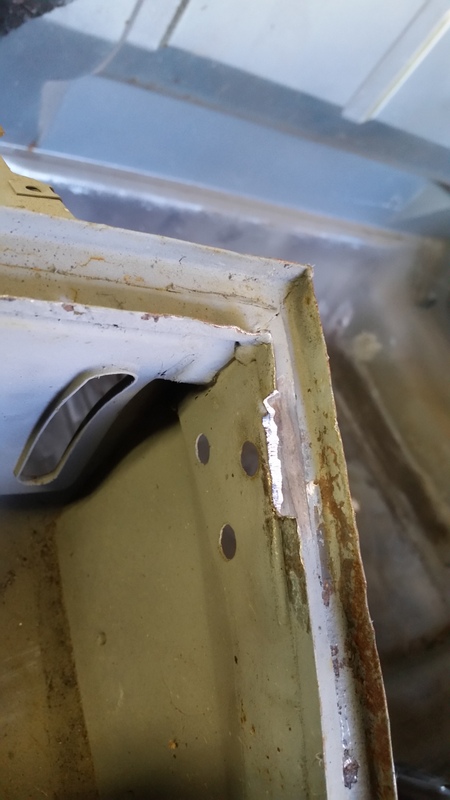 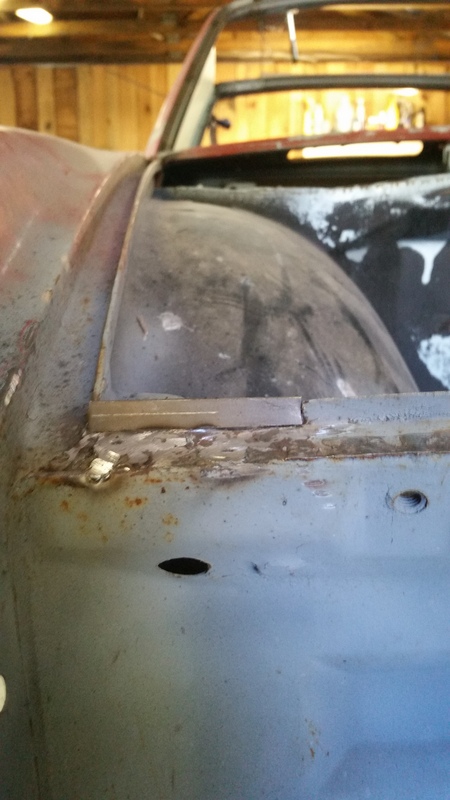 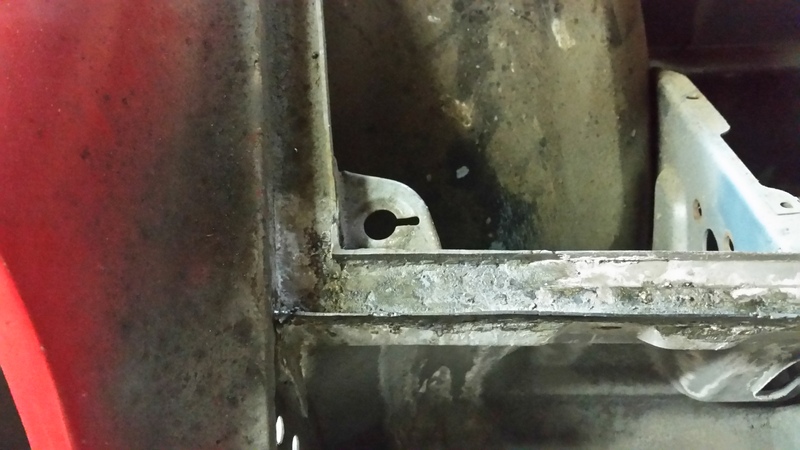 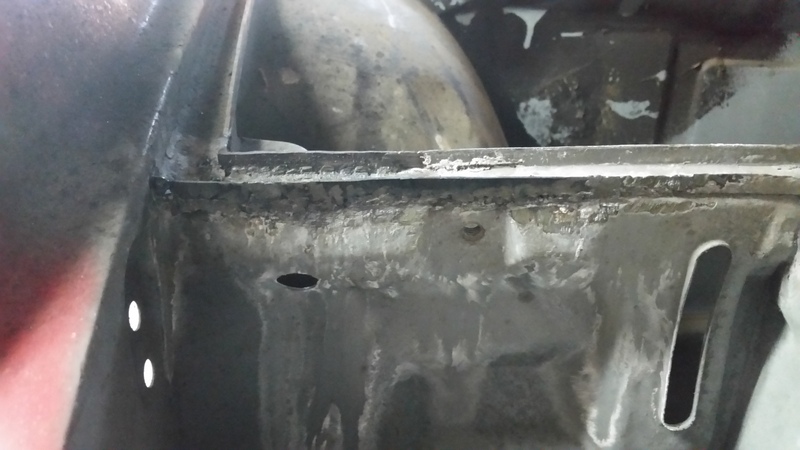 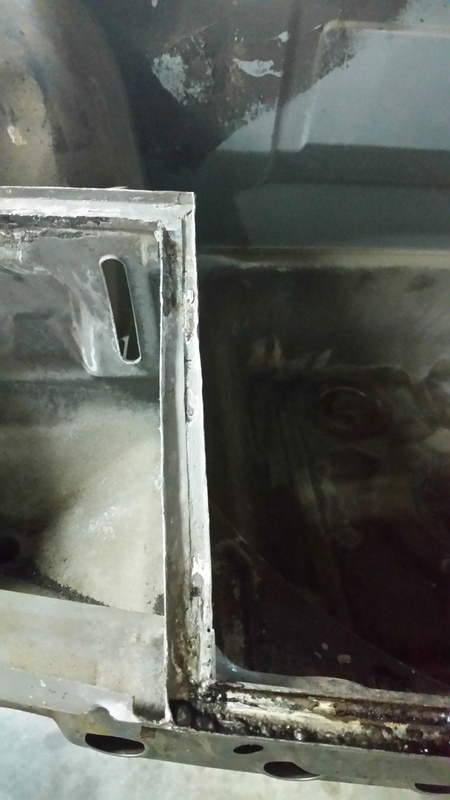 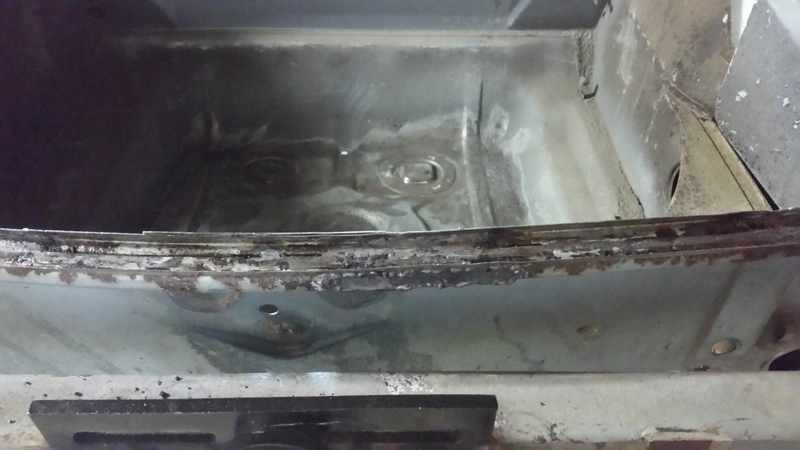
|
| trojanhorsepower |
 Oct 10 2015, 07:27 PM Oct 10 2015, 07:27 PM
Post
#112
|
|
Senior Member    Group: Members Posts: 867 Joined: 21-September 03 From: Marion, NC Member No.: 1,179 Region Association: None |
Got some more done today, but no pics. I will add some soon.
I have (I think) finished the patching on the front end. I fiddled with the replacement fender and found that it was hanging a little on the fresh air vent in the door jam. I trimmed a little more and got it to fit, so I am going ahead with the build. I may end up shaving the door a little, but at this point I am confident that I can make one of the fenders work. So, on to the back end. All I have done here is scour out the seam sealer from around the plug. I also found more rust! (IMG:style_emoticons/default/piratenanner.gif) (IMG:style_emoticons/default/mad.gif) Oh well it looks manageable. |
| trojanhorsepower |
 Oct 12 2015, 07:53 PM Oct 12 2015, 07:53 PM
Post
#113
|
|
Senior Member    Group: Members Posts: 867 Joined: 21-September 03 From: Marion, NC Member No.: 1,179 Region Association: None |
Took some time this weekend to pull out some more seam sealer.
Attached image(s) 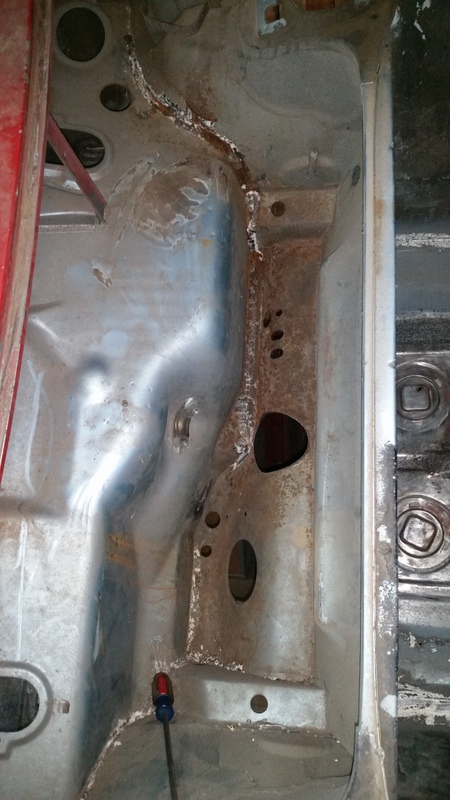
|
| trojanhorsepower |
 Oct 12 2015, 07:55 PM Oct 12 2015, 07:55 PM
Post
#114
|
|
Senior Member    Group: Members Posts: 867 Joined: 21-September 03 From: Marion, NC Member No.: 1,179 Region Association: None |
Started on the rear trunk pan.
Attached image(s) 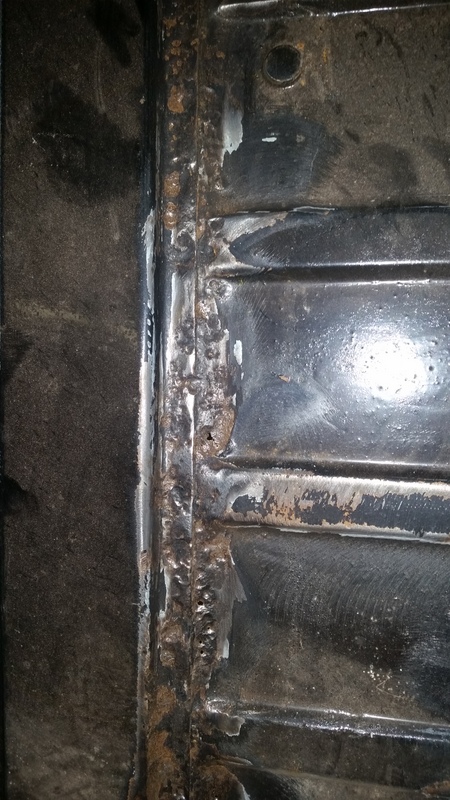 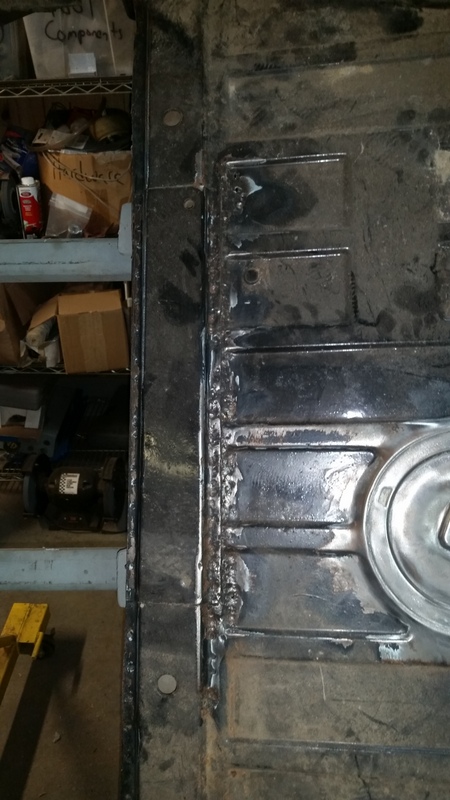 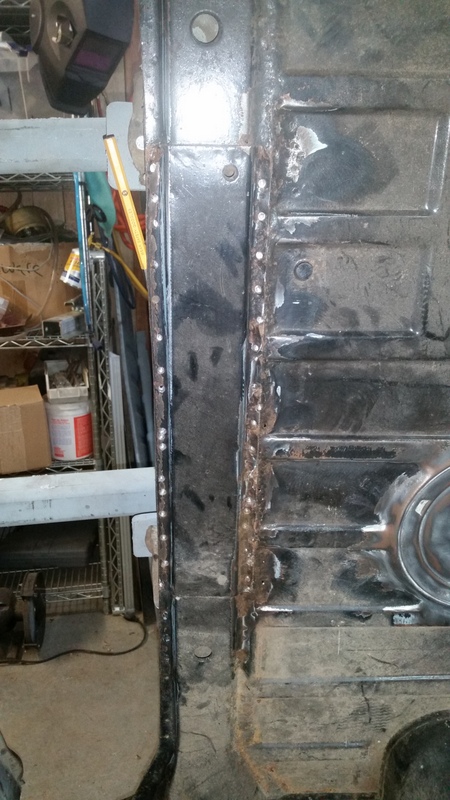 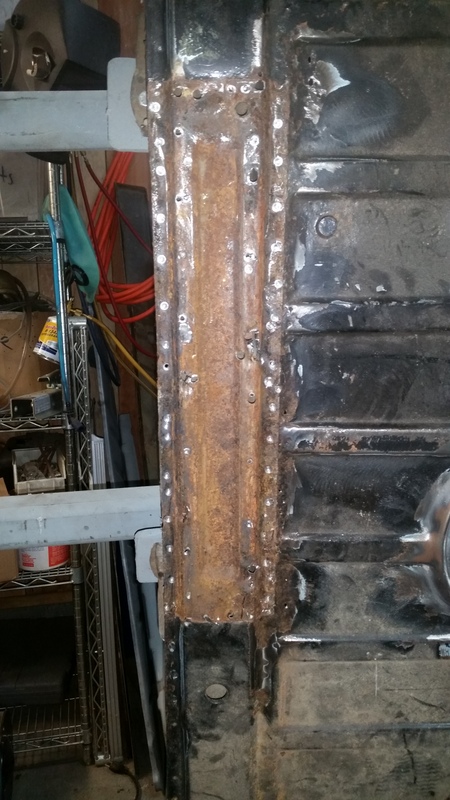
|
| trojanhorsepower |
 Oct 12 2015, 08:03 PM Oct 12 2015, 08:03 PM
Post
#115
|
|
Senior Member    Group: Members Posts: 867 Joined: 21-September 03 From: Marion, NC Member No.: 1,179 Region Association: None |
So my patch panel does not have the threaded hole seen in the last picture at about 12:05. What is this for?
|
| Chris H. |
 Oct 12 2015, 11:05 PM Oct 12 2015, 11:05 PM
Post
#116
|
|
Senior Member     Group: Members Posts: 4,054 Joined: 2-January 03 From: Chicago 'burbs Member No.: 73 Region Association: Upper MidWest 
|
Spare tire tie down? There is a threaded hole in the rear trunk that allows you to mount the spare tire.
|
| trojanhorsepower |
 Oct 29 2015, 07:15 PM Oct 29 2015, 07:15 PM
Post
#117
|
|
Senior Member    Group: Members Posts: 867 Joined: 21-September 03 From: Marion, NC Member No.: 1,179 Region Association: None |
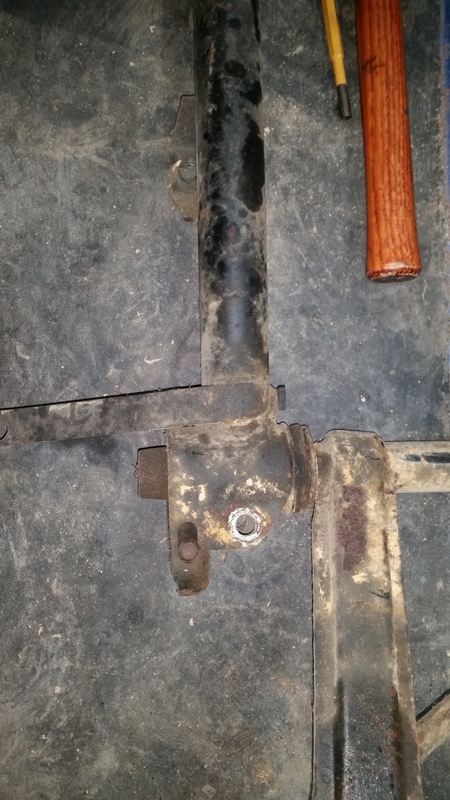
How does this joint come apart?
 |
| 914forme |
 Oct 30 2015, 12:28 PM Oct 30 2015, 12:28 PM
Post
#118
|
|
Times a wastin', get wrenchin'!     Group: Members Posts: 3,896 Joined: 24-July 04 From: Dayton, Ohio Member No.: 2,388 Region Association: None 
|
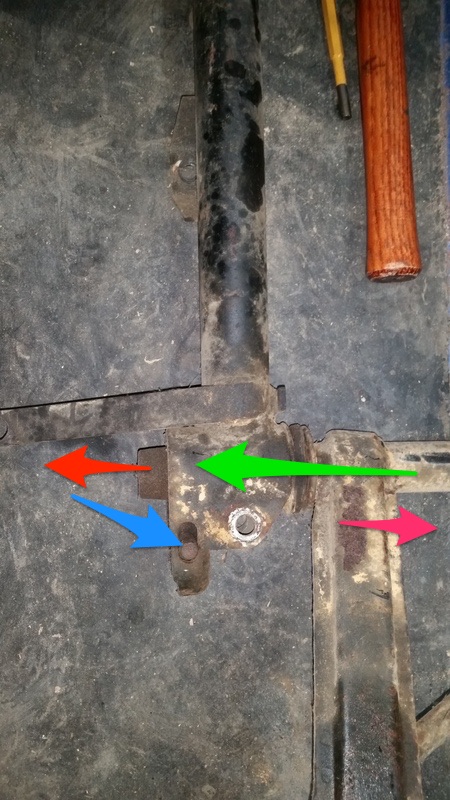 Remove this screw (Blue Arrow) Pull Cap off (Red Arrow) Pull Swap bar out (Green Arrow) {Optional Step in Reality, I do it to check them} Pull Arm (Pinkish Purplish arrow) Hope that helps |
| trojanhorsepower |
 Oct 30 2015, 06:53 PM Oct 30 2015, 06:53 PM
Post
#119
|
|
Senior Member    Group: Members Posts: 867 Joined: 21-September 03 From: Marion, NC Member No.: 1,179 Region Association: None |
Thanks Stephen,
I would not have guessed that was all that holds it together. What about the cap on the other end of the a arm? Does it just slide off as well? |
| cary |
 Oct 30 2015, 10:01 PM Oct 30 2015, 10:01 PM
Post
#120
|
|
Advanced Member     Group: Members Posts: 3,900 Joined: 26-January 04 From: Sherwood Oregon Member No.: 1,608 Region Association: Pacific Northwest 
|
More pics of the weather stripping repairs.
Still some more work to do, but it was not as bad as I though it would be. Some where I read you finish those repairs with JB Weld. I used it on my white car. Makes a nice smooth channel to install the new seal in. |
  |
1 User(s) are reading this topic (1 Guests and 0 Anonymous Users)
0 Members:

|
Lo-Fi Version | Time is now: 3rd April 2025 - 07:05 PM |
Invision Power Board
v9.1.4 © 2025 IPS, Inc.


