|
|
|
Porsche, and the Porsche crest are registered trademarks of Dr. Ing. h.c. F. Porsche AG.
This site is not affiliated with Porsche in any way. Its only purpose is to provide an online forum for car enthusiasts. All other trademarks are property of their respective owners. |
|
|

  |

| Rotary'14 |
 Jan 31 2014, 09:41 PM Jan 31 2014, 09:41 PM
Post
#21
|
|
Senior Member  Group: Members Posts: 753 Joined: 24-April 05 From: Los Angeles Member No.: 3,977 |
QUOTE(Jake Raby @ Jan 31 2014, 07:24 PM)  QUOTE Who wrote it? Some asshole. You said it,,,, (IMG:style_emoticons/default/poke.gif) (IMG:style_emoticons/default/poke.gif) (IMG:style_emoticons/default/biggrin.gif) but really, thanks for sharing your knowledge. |
   |

 
|
| Jake Raby |
Jan 31 2014, 09:50 PM
Post
#22
|
|
Engine Surgeon Group: Members Posts: 9,398 Joined: 31-August 03 From: Lost Member No.: 1,095 Region Association: South East States |
QUOTE thanks for sharing your knowledge. Sure. Its a lot easier now that we're back to only developing and building engines :-) |
|
|
|
| OU8AVW |
Feb 1 2014, 08:18 PM
Post
#23
|
|
Yacht Rigger Group: Members Posts: 1,804 Joined: 1-October 08 From: Granbury, TX Member No.: 9,601 Region Association: Southwest Region |
QUOTE(worn @ Jan 31 2014, 06:20 AM) QUOTE(OU8AVW @ Jan 31 2014, 04:26 AM) Thanks guys. If you don't like something in the write up, if you don't like Jake Raby, please post your comments somewhere else. This is a valve train thread..... Anyone have an adjustable pushrod I can use? I can manage everything else. If you are replacing them it is easy to make one out of the old one. The aluminum is ver thick, easily tapped. I use 1/4 by 20 because it is very common around my shop. The nuts are lock nuts. I can handle this, no problem. |
|
|
|
| OU8AVW |
Aug 12 2014, 09:45 AM
Post
#24
|
|
Yacht Rigger Group: Members Posts: 1,804 Joined: 1-October 08 From: Granbury, TX Member No.: 9,601 Region Association: Southwest Region |
Ok, I got started on this process. After reading Jake's instructions many times and gathering the tools needed I'm ready. I'll be following up with more accurate numbers as I hone in on the ideal set up, for now I'm just going though the process a few times to familiarize myself with how it all works.
Here is my dial gauge set up. I attached the mount to the adjacent lifter stud. I have updated the suds to 10mm. 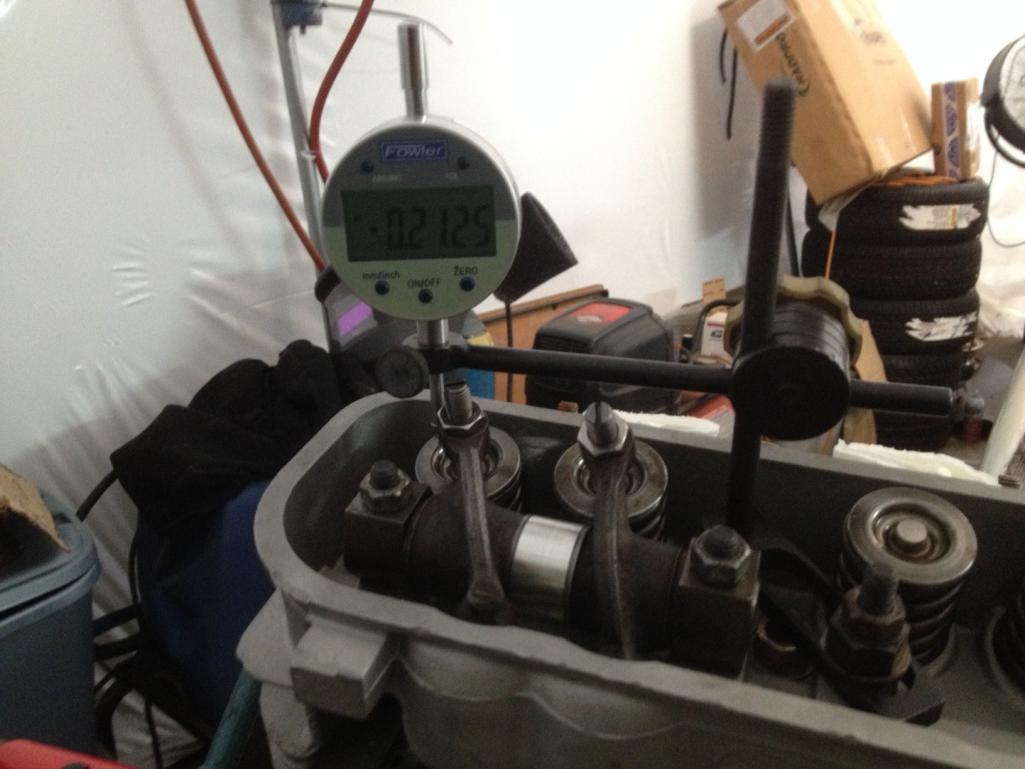 I fabricated an adjustable pushrod out of an old pushrod. I'll be using chrome alloy rods from Raby. 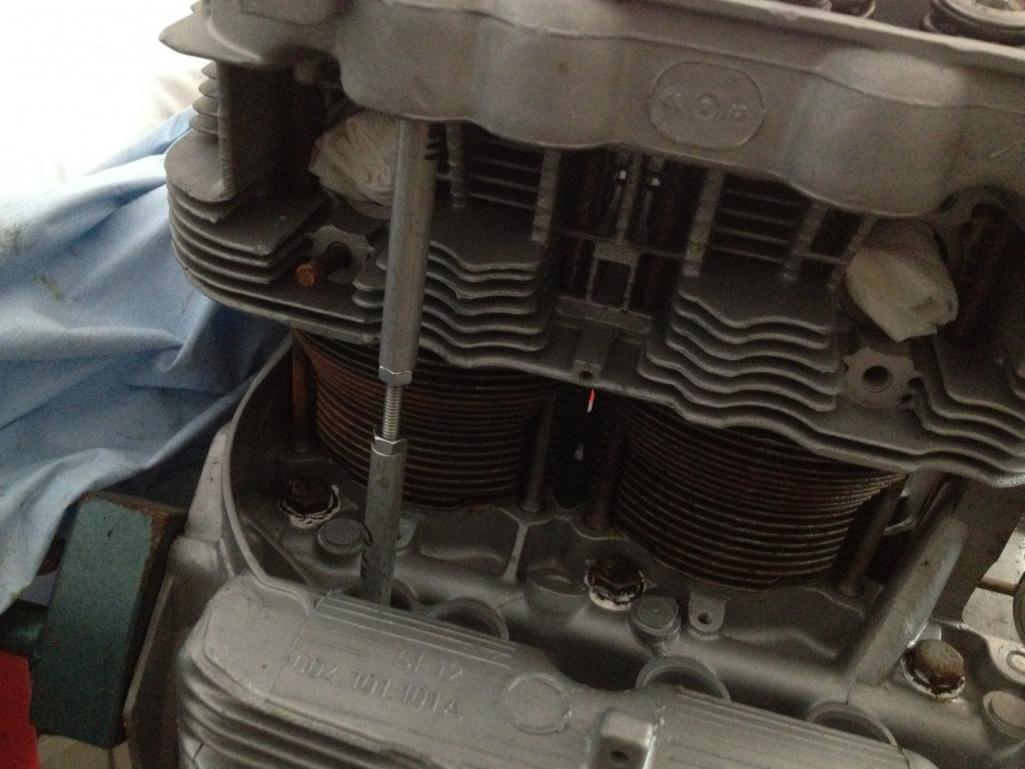 |
|
|
|
| OU8AVW |
Aug 12 2014, 09:49 AM
Post
#25
|
|
Yacht Rigger Group: Members Posts: 1,804 Joined: 1-October 08 From: Granbury, TX Member No.: 9,601 Region Association: Southwest Region |
My cam spec is .426" of lift for all lobes. My first attempt, using Jake's recommended initial settings was 4.28. Great!
But the alignment of the adjuster/valve was not perfect at 1/2 lift 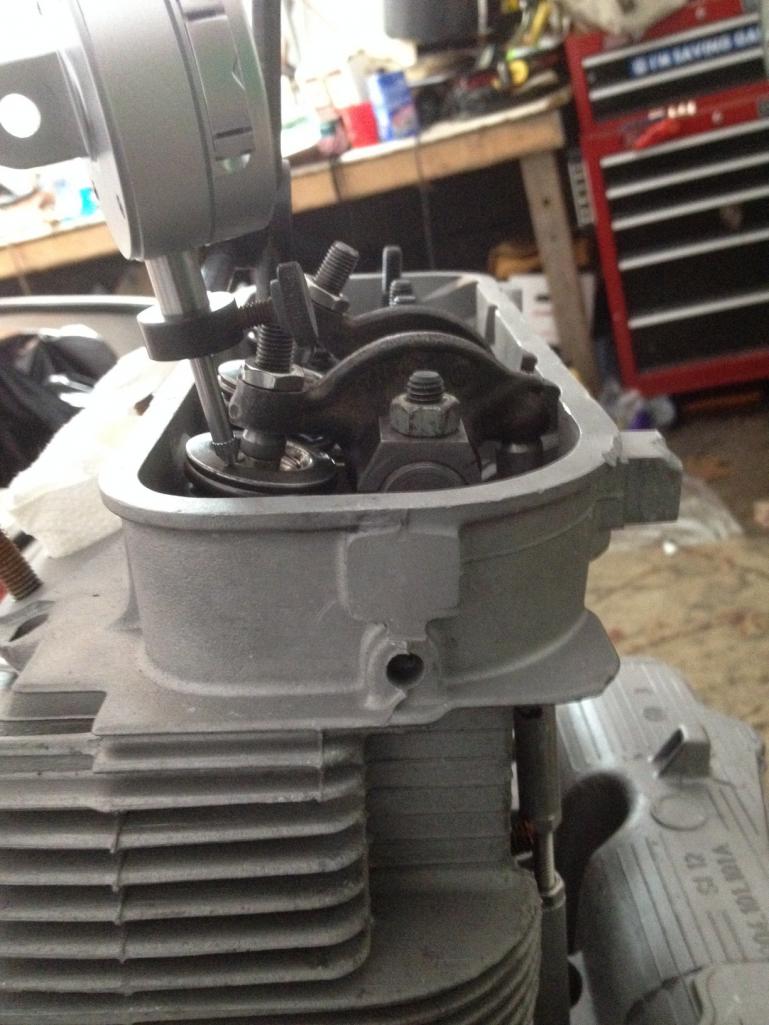 I lengthened the PR about .009". Now my lift was .412, still within the 5% of spec and the angle was much better... 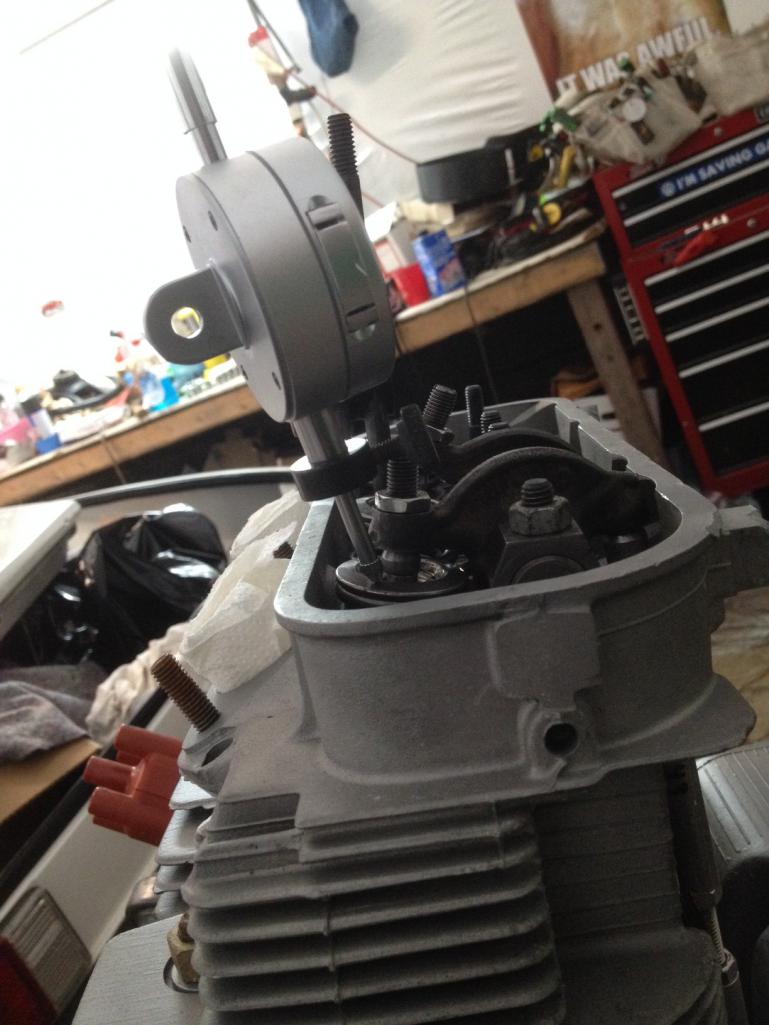 Still not perfect. |
|
|
|
| OU8AVW |
Aug 12 2014, 10:06 AM
Post
#26
|
|
Yacht Rigger Group: Members Posts: 1,804 Joined: 1-October 08 From: Granbury, TX Member No.: 9,601 Region Association: Southwest Region |
One issue I'm having that makes me nervous, my adjusters are almost all the way in leaving very little adjustment to compensate for future valve stretch.
Any advise? I imagine that I could shim the rockers but the instructions say the Raby cams work best without shims? |
|
|
|
| Cap'n Krusty |
Aug 12 2014, 10:14 AM
Post
#27
|
|
Cap'n Krusty Group: Members Posts: 10,794 Joined: 24-June 04 From: Santa Maria, CA Member No.: 2,246 Region Association: Central California |
Looking at your last picture, it's pretty evident that you failed to follow one of Jake's first instructions, one that's also mentioned in an early post in this thread. Your dial indicator probe is NOT parallel with the axis of the valve. In fact, it's at a pretty steep angle. You need a longer tip on the dial indicator, and it needs to be positioned over the retainer so the shaft lines up with the center line of the valve stem. Readings at an angle, which is probably not repeatable, aren't gonna be as accurate as they need to be, and the tip is apt to deflect, making it even worse.
Now for the Krustiness you've all been waiting for! Making the rocker assembly mounting studs 10mm is NOT an "update". It's just making them bigger, as Porsche (and VW) never introduced this change in later engines ............... The Cap'n |
|
|
|
| Olympic 914 |
Aug 12 2014, 10:56 AM
Post
#28
|
|
Group: Members Posts: 1,771 Joined: 7-July 11 From: Pittsburgh PA Member No.: 13,287 Region Association: North East States |
QUOTE(OU8AVW @ Aug 12 2014, 12:06 PM) One issue I'm having that makes me nervous, my adjusters are almost all the way in leaving very little adjustment to compensate for future valve stretch. Any advise? I imagine that I could shim the rockers but the instructions say the Raby cams work best without shims? I ran into the same issue. I am using a 9590 cam I believe its pretty similar to the 9550 you have. I ended up using .030 shims IIRC. I also took a little more off the rockers. The pushrods were a real headache for me and I never did get them cut perfect. So I used pushrods from Smith Bros. they will cut them to whatever length you need and they are right on. http://www.914world.com/bbs2/index.php?sho...=234274&hl= |
|
|
|
| OU8AVW |
Aug 12 2014, 10:59 AM
Post
#29
|
|
Yacht Rigger Group: Members Posts: 1,804 Joined: 1-October 08 From: Granbury, TX Member No.: 9,601 Region Association: Southwest Region |
QUOTE(Cap'n Krusty @ Aug 12 2014, 09:14 AM) Looking at your last picture, it's pretty evident that you failed to follow one of Jake's first instructions, one that's also mentioned in an early post in this thread. Your dial indicator probe is NOT parallel with the axis of the valve. In fact, it's at a pretty steep angle. You need a longer tip on the dial indicator, and it needs to be positioned over the retainer so the shaft lines up with the center line of the valve stem. Readings at an angle, which is probably not repeatable, aren't gonna be as accurate as they need to be, and the tip is apt to deflect, making it even worse. Now for the Krustiness you've all been waiting for! Making the rocker assembly mounting studs 10mm is NOT an "update". It's just making them bigger, as Porsche (and VW) never introduced this change in later engines ............... The Cap'n Another astute observation CK. I have corrected the angle of the gauge. Thank you for the correction of semantics, however useless that information is, it is still entertaining. (IMG:style_emoticons/default/poke.gif) What do you think about the lack of adjustment? I did machine the rockers for more clearance but it's still tight. |
|
|
|
| stugray |
Aug 12 2014, 12:31 PM
Post
#30
|
|
Advanced Member Group: Members Posts: 3,825 Joined: 17-September 09 From: Longmont, CO Member No.: 10,819 Region Association: None |
QUOTE(OU8AVW @ Aug 12 2014, 10:59 AM) What do you think about the lack of adjustment? I did machine the rockers for more clearance but it's still tight. I was able to get the geometry correct without shims, but it was too close as you see. I ended up shimming the rockers by ~.040, but my cam was a little more aggressive than yours. ANd one mistake I made: I did not thread the new studs in far enough the first time and one of my rocker bases was sitting up on the boss of the stud and threw off my measurements. Make sure the rocker bases are firmly against the head. |
|
|
|
| Cap'n Krusty |
Aug 12 2014, 01:21 PM
Post
#31
|
|
Cap'n Krusty Group: Members Posts: 10,794 Joined: 24-June 04 From: Santa Maria, CA Member No.: 2,246 Region Association: Central California |
QUOTE(OU8AVW @ Aug 12 2014, 09:59 AM) QUOTE(Cap'n Krusty @ Aug 12 2014, 09:14 AM) Looking at your last picture, it's pretty evident that you failed to follow one of Jake's first instructions, one that's also mentioned in an early post in this thread. Your dial indicator probe is NOT parallel with the axis of the valve. In fact, it's at a pretty steep angle. You need a longer tip on the dial indicator, and it needs to be positioned over the retainer so the shaft lines up with the center line of the valve stem. Readings at an angle, which is probably not repeatable, aren't gonna be as accurate as they need to be, and the tip is apt to deflect, making it even worse. Now for the Krustiness you've all been waiting for! Making the rocker assembly mounting studs 10mm is NOT an "update". It's just making them bigger, as Porsche (and VW) never introduced this change in later engines ............... The Cap'n Another astute observation CK. I have corrected the angle of the gauge. Thank you for the correction of semantics, however useless that information is, it is still entertaining. (IMG:style_emoticons/default/poke.gif) What do you think about the lack of adjustment? I did machine the rockers for more clearance but it's still tight. I like the idea of plenty of adjustment. You start out too close and it could end up being a nightmare down the road. I agree with the others who have suggested shimming the rocker stands. A few thousandths should be OK, but too much shimming can allow the rockers to hit the valve covers. The Cap'n |
|
|
|
| Jake Raby |
Aug 12 2014, 01:48 PM
Post
#32
|
|
Engine Surgeon Group: Members Posts: 9,398 Joined: 31-August 03 From: Lost Member No.: 1,095 Region Association: South East States |
QUOTE Now for the Krustiness you've all been waiting for! Making the rocker assembly mounting studs 10mm is NOT an "update". It's just making them bigger, as Porsche (and VW) never introduced this change in later engines ............... After you pick up a pair of rockers off the floor of the dyno room because the stock set up failed, you'll wonder why the hell the factory didn't pull their heads out of their asses and make them 8mm like everything else on the engine. Maybe that failure won't cost you 10K bucks, but maybe it will. |
|
|
|
| OU8AVW |
Aug 13 2014, 07:50 AM
Post
#33
|
|
Yacht Rigger Group: Members Posts: 1,804 Joined: 1-October 08 From: Granbury, TX Member No.: 9,601 Region Association: Southwest Region |
When I read shim I think washer. Should I be looking for a more machine spec shim than a standard washer?
Like this? http://www.mcmaster.com/#standard-shims/=t9fwn7 |
|
|
|
| Java2570 |
Aug 13 2014, 08:01 AM
Post
#34
|
|
Senior Member Group: Members Posts: 649 Joined: 7-May 11 From: Fishers, IN Member No.: 13,035 Region Association: Upper MidWest |
They look like this:
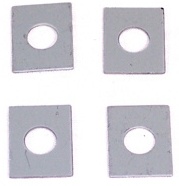 Should be able to get them at most vendors that sell engine parts....EMW, Type 4 Store, etc. |
|
|
|
| crash914 |
Aug 13 2014, 10:52 AM
Post
#35
|
|
its a mystery to me Group: Members Posts: 1,830 Joined: 17-March 03 From: Marriottsville, MD Member No.: 434 Region Association: MidAtlantic Region |
I did not realize you are local...I have shims....pm me or give me a call, I am near Ellicott city...I had an adjustable pushrod also...oh well....at least you have the dial indicator...
What is the thickness of the rocker arm at the adjuster? I took a pretty hefty amount of mine... |
|
|
|
| OU8AVW |
Aug 13 2014, 04:09 PM
Post
#36
|
|
Yacht Rigger Group: Members Posts: 1,804 Joined: 1-October 08 From: Granbury, TX Member No.: 9,601 Region Association: Southwest Region |
QUOTE(crash914 @ Aug 13 2014, 09:52 AM) I did not realize you are local...I have shims....pm me or give me a call, I am near Ellicott city...I had an adjustable pushrod also...oh well....at least you have the dial indicator... What is the thickness of the rocker arm at the adjuster? I took a pretty hefty amount of mine... I'll get back to you late next week. Off on some travel tomorrow.... |
|
|
|
| OU8AVW |
Dec 19 2014, 06:10 PM
Post
#37
|
|
Yacht Rigger Group: Members Posts: 1,804 Joined: 1-October 08 From: Granbury, TX Member No.: 9,601 Region Association: Southwest Region |
I realized i forgot to post the final numbers on this thread.
I dialed in my angle of attack per Krustie's advice and got down to sorting the geometry. I did use a set of shims. I also had to cut the adjusters to clear the valve covers. Final lift was .001" off. Well within the +/- 5% 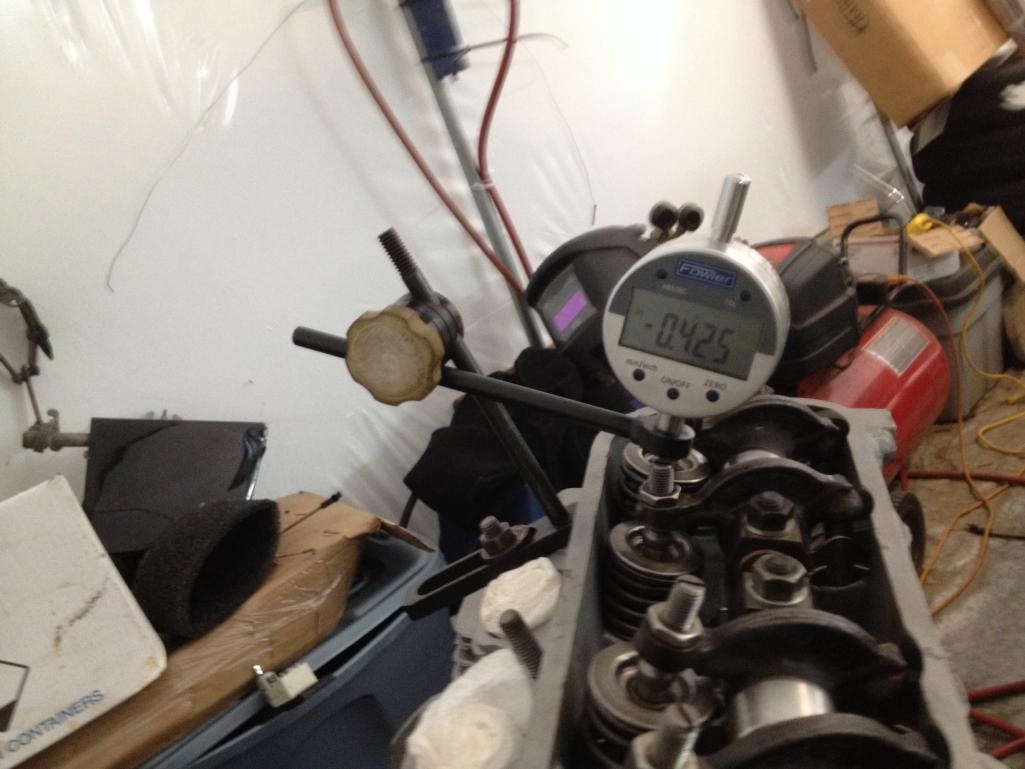 |
|
|
|
| stugray |
Dec 19 2014, 07:21 PM
Post
#38
|
|
Advanced Member Group: Members Posts: 3,825 Joined: 17-September 09 From: Longmont, CO Member No.: 10,819 Region Association: None |
Did you by chance measure the cam lobes before you put it in?
And what were your exact numbers for both intake & exhaust? I ask because I want to gather some data on what rocker ratio other people see. |
|
|
|
| OU8AVW |
Dec 19 2014, 08:04 PM
Post
#39
|
|
Yacht Rigger Group: Members Posts: 1,804 Joined: 1-October 08 From: Granbury, TX Member No.: 9,601 Region Association: Southwest Region |
I did not measure the cam, but if you want the specs I can send you an image of the sheet. Exaust and intake were identical.
|
|
|
|
| Charles Freeborn |
Jul 20 2020, 09:39 PM
Post
#40
|
|
Member Group: Members Posts: 321 Joined: 21-May 14 From: United States Member No.: 17,377 Region Association: Pacific Northwest |
QUOTE(Jake Raby @ Jan 31 2014, 08:24 PM) QUOTE Who wrote it? Some asshole. Reviving this thread. Many thanks Jake for the solid info here. So, here's my question - I've got 10mm adjusting screws. I'd love to switch out to Porsche style swivel feet. I've found some older threads and a reference to a german shop that makes them (I've emailed in my best high school german... ) but would be very interested in other opinions / options. Quick rundown on my rig: Originally 1.7, now a 2.0. Race only Heads welded and ported with 48/38 valves. Webcam 86B cam Euro pistons IDF 44's (ported manifolds to match heads) headers A bunch of other racer balancing and lightening specs. Engine was built by AJRS I've replaced the pushrods with fresh chrome moly's and am going through the set up now to confirm geometry. TIA for additional input. -C |
|
|
|
|
1 User(s) are reading this topic (1 Guests and 0 Anonymous Users)
0 Members:

|
Lo-Fi Version | Time is now: 2nd April 2026 - 05:14 AM |
Invision Power Board
v9.1.4 © 2026 IPS, Inc.