|
|

|
Porsche, and the Porsche crest are registered trademarks of Dr. Ing. h.c. F. Porsche AG.
This site is not affiliated with Porsche in any way. Its only purpose is to provide an online forum for car enthusiasts. All other trademarks are property of their respective owners. |
|
|
  |
| Mark Henry |
 Mar 5 2014, 12:13 AM Mar 5 2014, 12:13 AM
Post
#161
|
|
that's what I do!                Group: Members Posts: 20,065 Joined: 27-December 02 From: Port Hope, Ontario Member No.: 26 Region Association: Canada |
Now you have to drill the hole to size, you use the drill bit included in the kit with just a hand tap handle. the Aluminium is soft so this goes easy.
I use a guide to keep the drill bit square with the port. You can buy this guide for $40..but you know...I'm cheap...so I made this one myself. (IMG:style_emoticons/default/rolleyes.gif) (IMG:style_emoticons/default/shades.gif) Attached image(s) 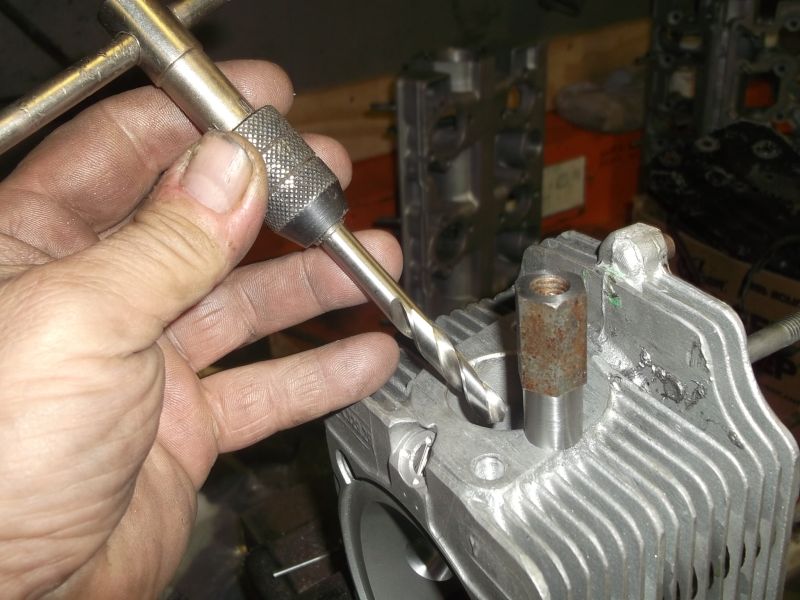 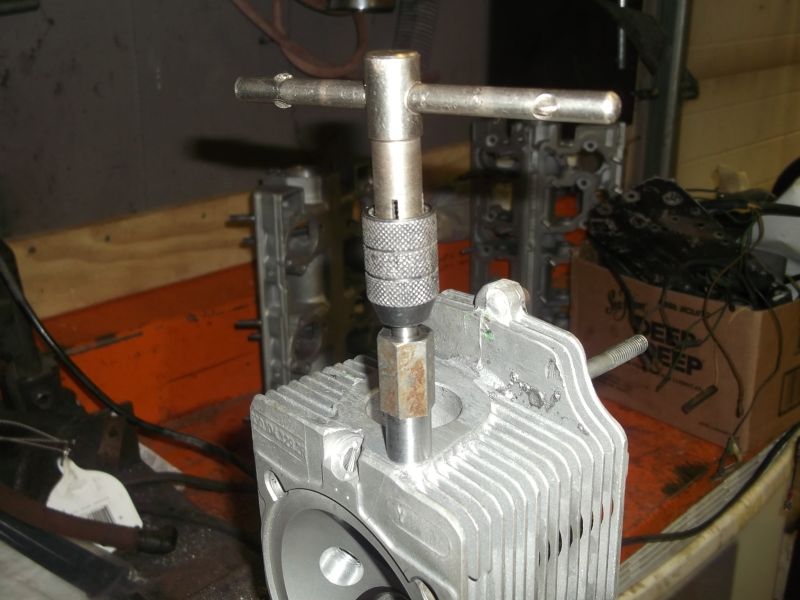 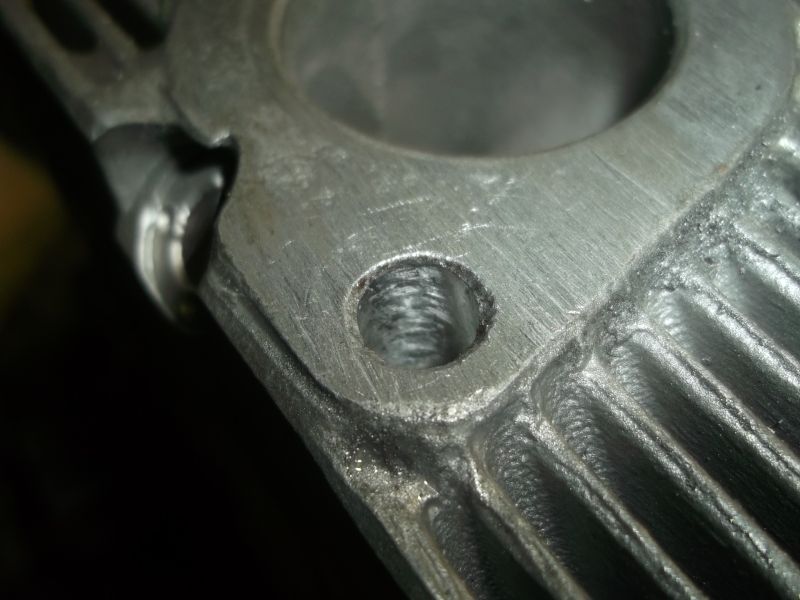
|
| Mark Henry |
 Mar 5 2014, 12:17 AM Mar 5 2014, 12:17 AM
Post
#162
|
|
that's what I do!                Group: Members Posts: 20,065 Joined: 27-December 02 From: Port Hope, Ontario Member No.: 26 Region Association: Canada |
Then you use this tool to cut a countersunk relief for the head of the timesert. Again important that you bottom this tool out so that the relief cut is deep enough
Attached image(s) 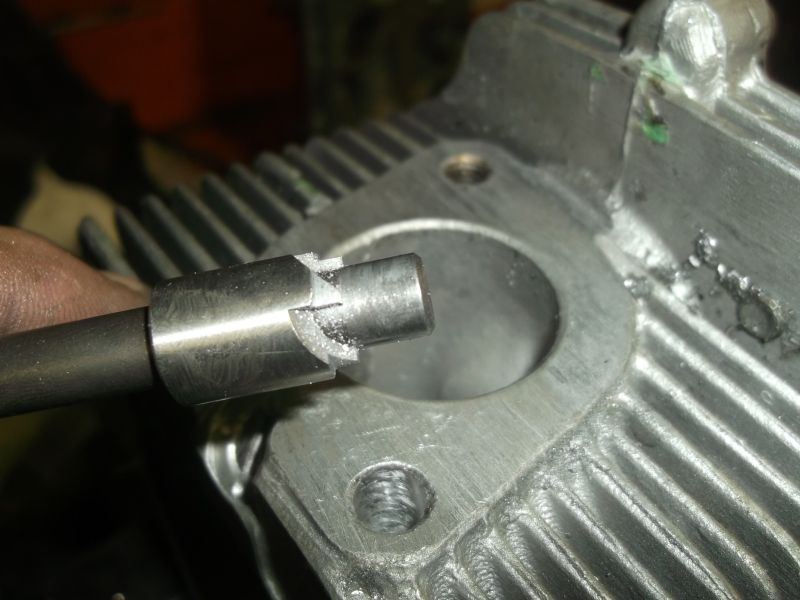 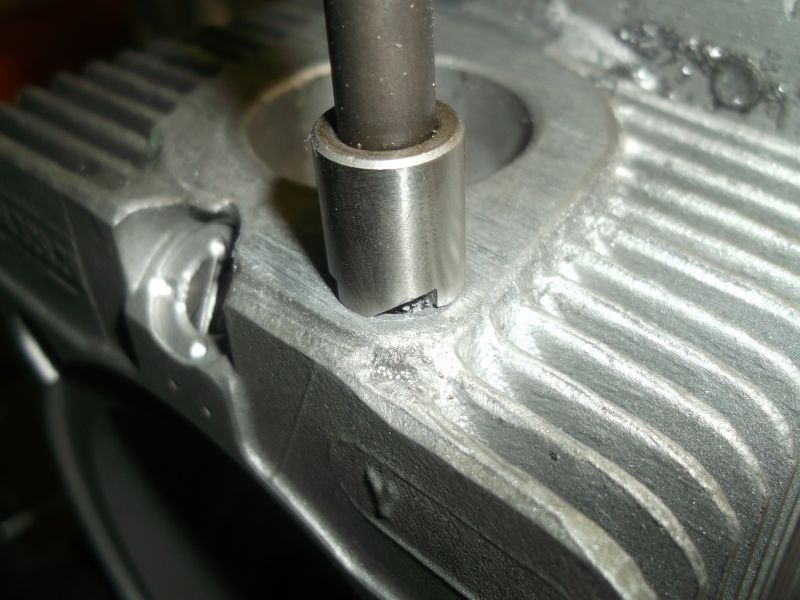 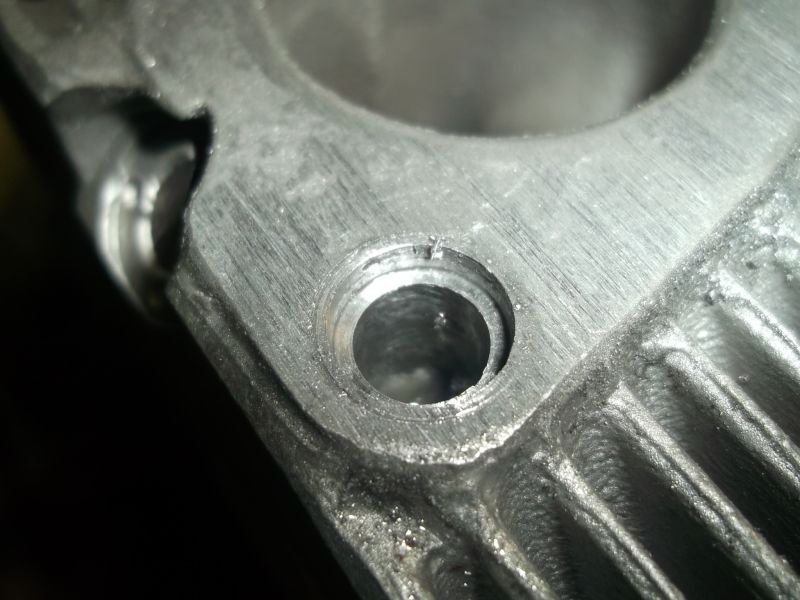
|
| Mark Henry |
 Mar 5 2014, 12:20 AM Mar 5 2014, 12:20 AM
Post
#163
|
|
that's what I do!                Group: Members Posts: 20,065 Joined: 27-December 02 From: Port Hope, Ontario Member No.: 26 Region Association: Canada |
Then you tap the hole, try to keep the tap as square as possible.
The finished hole ready for the insert. Attached image(s) 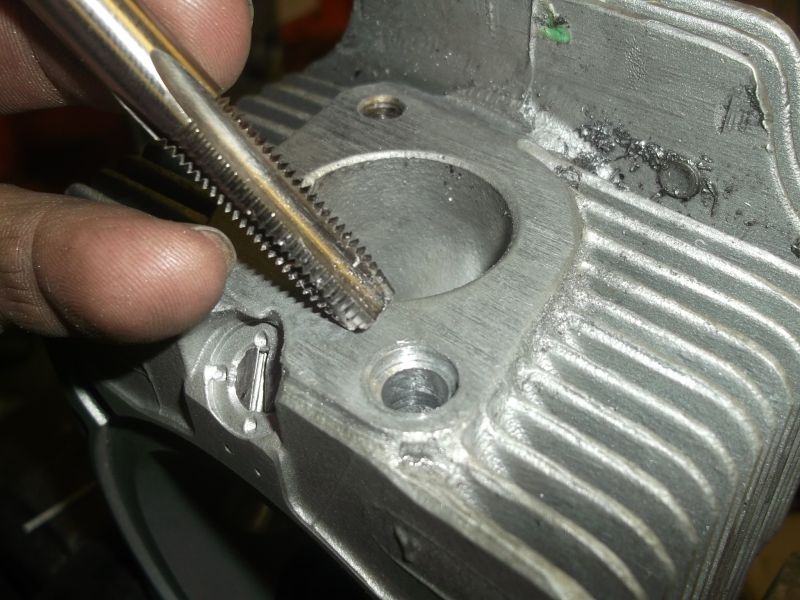 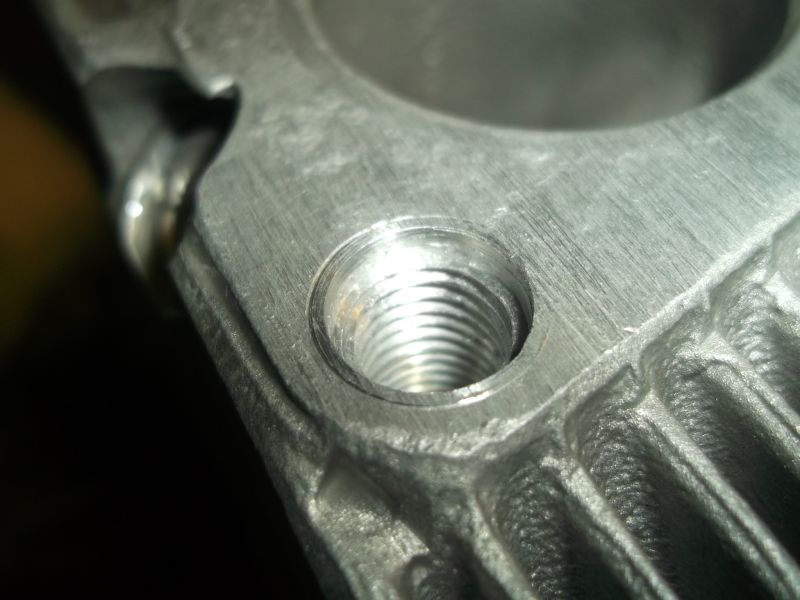
|
| Mark Henry |
 Mar 5 2014, 12:22 AM Mar 5 2014, 12:22 AM
Post
#164
|
|
that's what I do!                Group: Members Posts: 20,065 Joined: 27-December 02 From: Port Hope, Ontario Member No.: 26 Region Association: Canada |
Thread the oiled insert in as far as you can by hand.
Attached image(s) 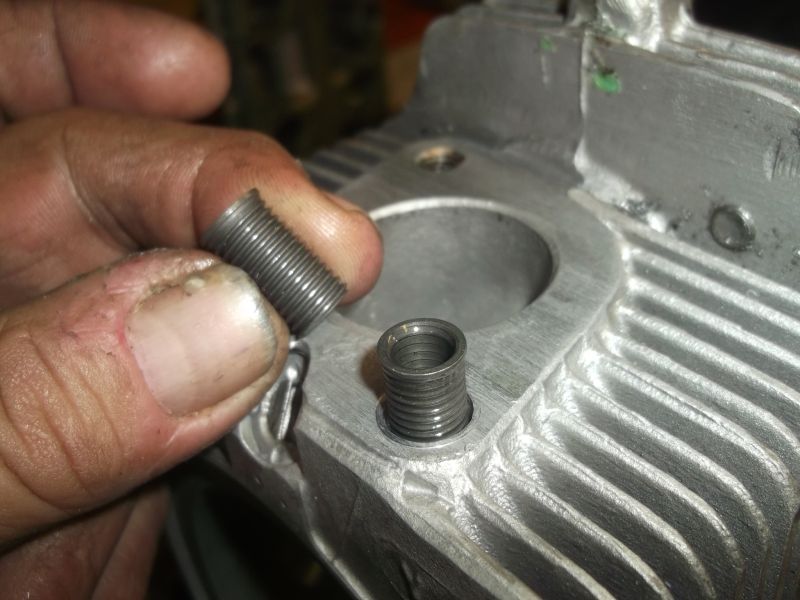
|
| Mark Henry |
 Mar 5 2014, 12:26 AM Mar 5 2014, 12:26 AM
Post
#165
|
|
that's what I do!                Group: Members Posts: 20,065 Joined: 27-December 02 From: Port Hope, Ontario Member No.: 26 Region Association: Canada |
Then use the driver to drive in the insert.
Really important that the driver is well oiled. This is because the driver expands the insert as it drives it home. Attached image(s) 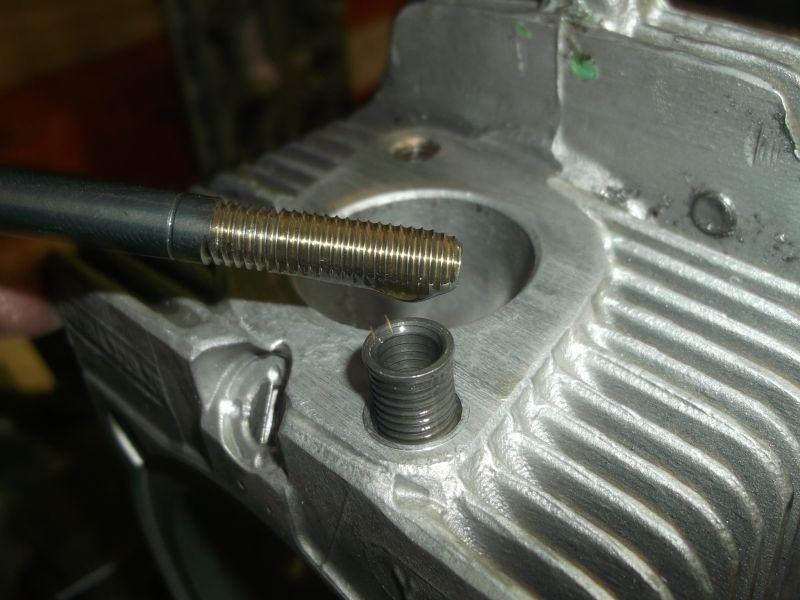 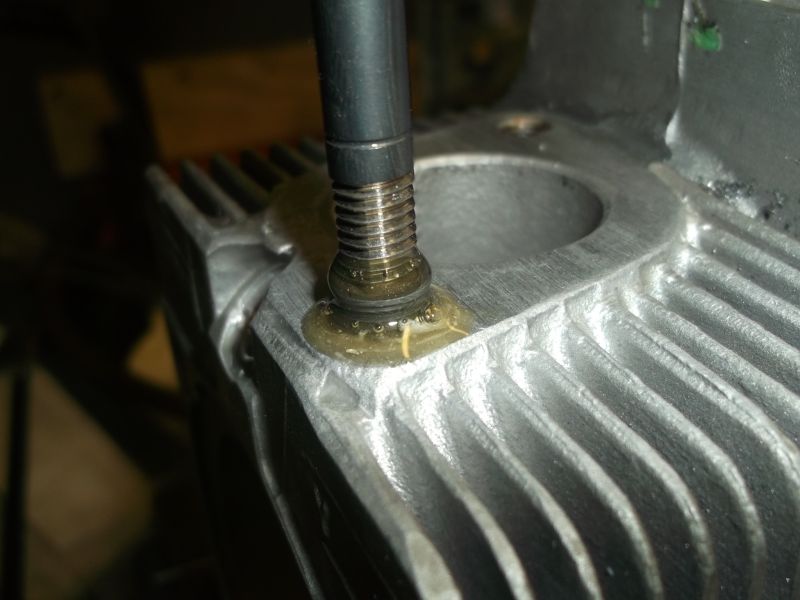 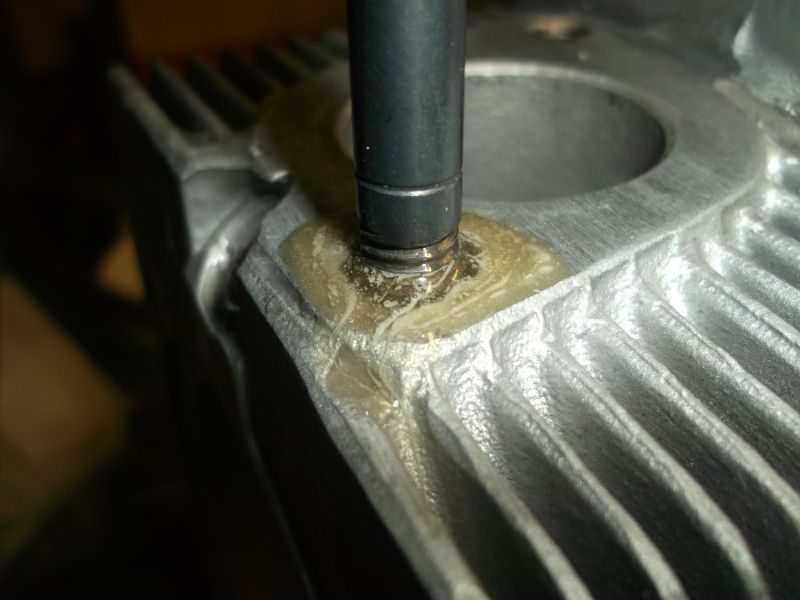
|
| Mark Henry |
 Mar 5 2014, 12:30 AM Mar 5 2014, 12:30 AM
Post
#166
|
|
that's what I do!                Group: Members Posts: 20,065 Joined: 27-December 02 From: Port Hope, Ontario Member No.: 26 Region Association: Canada |
The finished repair, better than new. The other hole the threads are fine so I'll leave it alone.
That's one exhaust port, I have a few more of these to do tomorrow. Attached image(s) 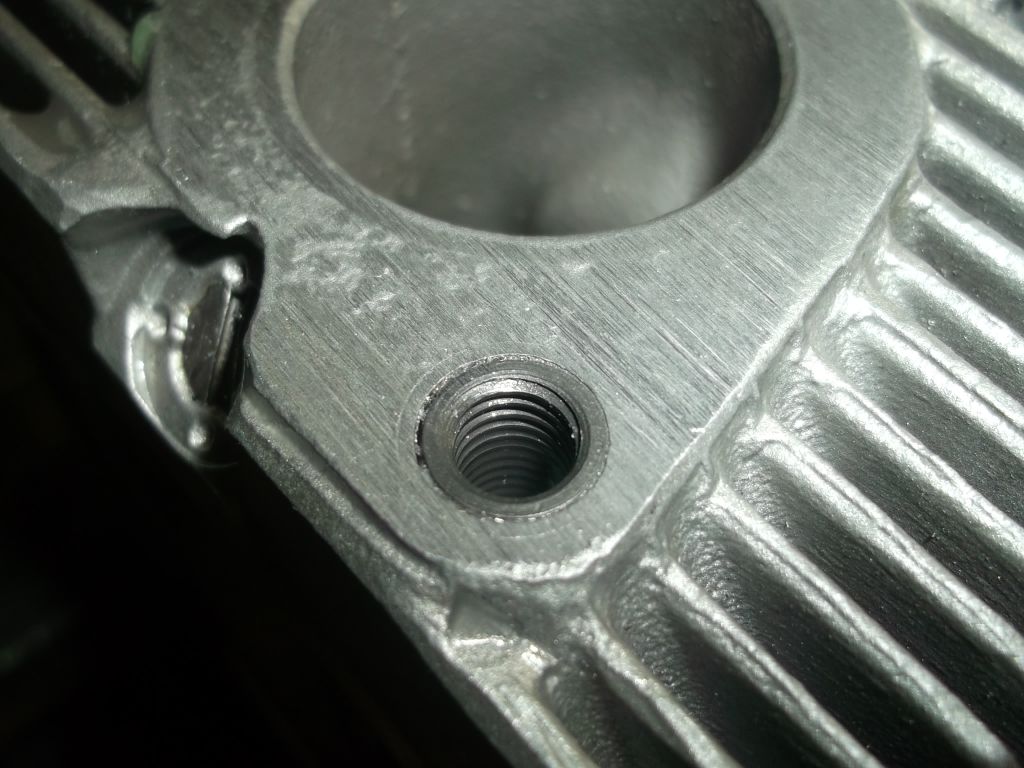 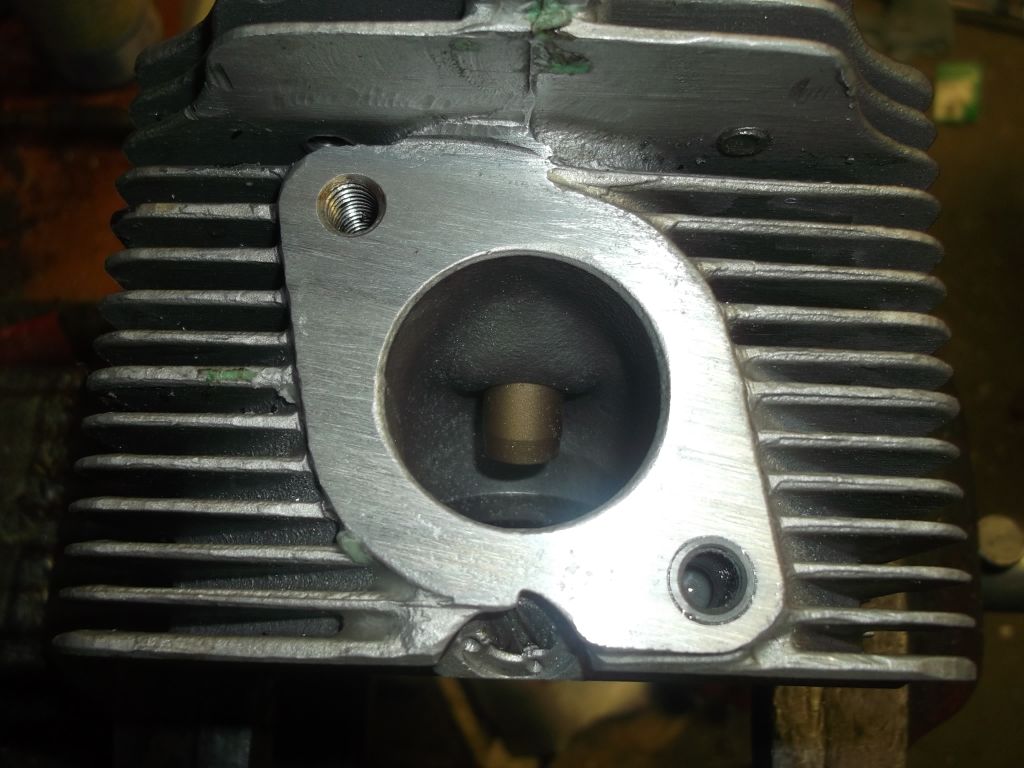
|
| CptTripps |
 Mar 5 2014, 03:54 AM Mar 5 2014, 03:54 AM
Post
#167
|
|
:: Punch and Pie ::     Group: Members Posts: 3,585 Joined: 26-December 04 From: Tuscaloosa, AL and Akron, OH Member No.: 3,342 Region Association: Upper MidWest |
Great work!
My dad and I had to do about 10 of those on my first car. (1985 Saab 900 Turbo) I got REAL good at those after the 3rd or 4th one. |
| Mark Henry |
 Mar 6 2014, 08:44 AM Mar 6 2014, 08:44 AM
Post
#168
|
|
that's what I do!                Group: Members Posts: 20,065 Joined: 27-December 02 From: Port Hope, Ontario Member No.: 26 Region Association: Canada |
DING!
Balancing shop phoned! (IMG:style_emoticons/default/piratenanner.gif) Road trip! (IMG:style_emoticons/default/driving.gif) |
| wobbletop |
 Mar 6 2014, 10:32 AM Mar 6 2014, 10:32 AM
Post
#169
|
|
Member   Group: Members Posts: 382 Joined: 8-December 06 From: Ontario, Canada Member No.: 7,335 Region Association: Canada |
I used a Timesert to fix a bolt that pulled the threads out of the block in my Subaru. Worked very well. Fairly easy to do and should prevent the steel-aluminum issue in the future (at least for that bolt).
/thread hi-jack |
| mrbubblehead |
 Mar 6 2014, 08:05 PM Mar 6 2014, 08:05 PM
Post
#170
|
|
Twodollardoug    Group: Members Posts: 1,155 Joined: 17-December 10 From: calimesa ca. Member No.: 12,492 Region Association: Southern California |
i really like timeserts. i have most of the popular metric size kits. i dont know how i got along with out them.
|
| r_towle |
 Mar 6 2014, 08:10 PM Mar 6 2014, 08:10 PM
Post
#171
|
|
Custom Member                Group: Members Posts: 24,705 Joined: 9-January 03 From: Taxachusetts Member No.: 124 Region Association: North East States 
|
Did you buy that tap handle?
|
| Jeffs9146 |
 Mar 6 2014, 08:14 PM Mar 6 2014, 08:14 PM
Post
#172
|
|
Ski Bum     Group: Members Posts: 4,062 Joined: 10-January 03 From: Discovery Bay, Ca Member No.: 128 |
Did you buy that tap handle? Old School! My dad left me a bunch of those when he died! Attached thumbnail(s) 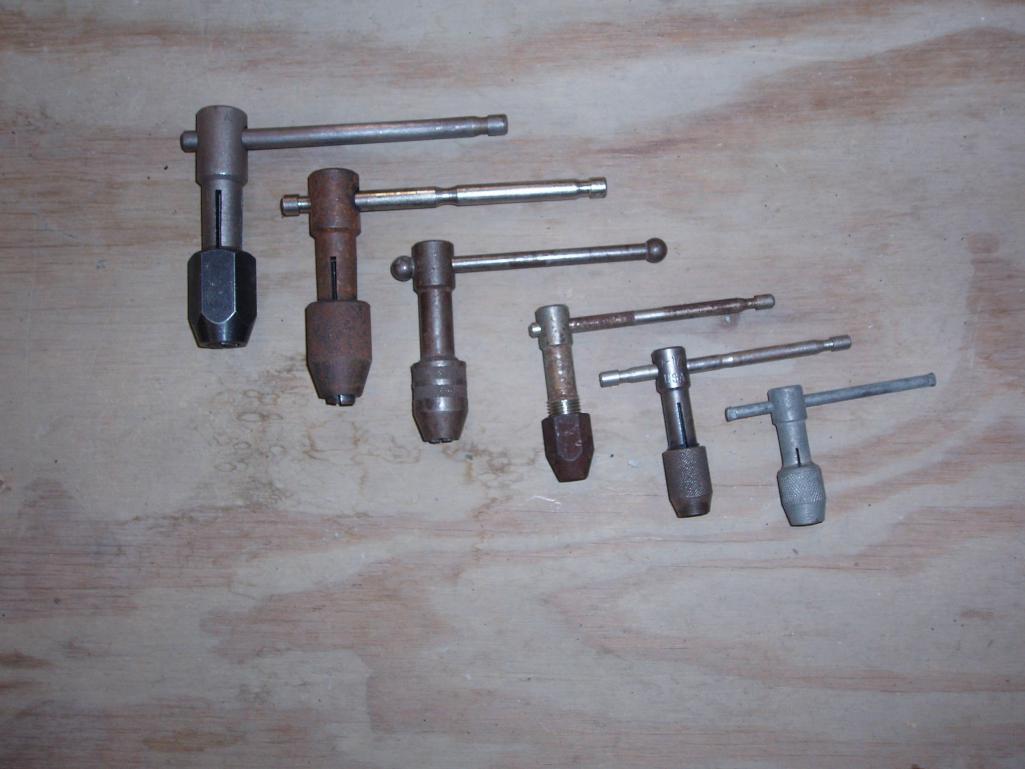
|
| Mark Henry |
 Mar 6 2014, 08:41 PM Mar 6 2014, 08:41 PM
Post
#173
|
|
that's what I do!                Group: Members Posts: 20,065 Joined: 27-December 02 From: Port Hope, Ontario Member No.: 26 Region Association: Canada |
|
| r_towle |
 Mar 6 2014, 08:54 PM Mar 6 2014, 08:54 PM
Post
#174
|
|
Custom Member                Group: Members Posts: 24,705 Joined: 9-January 03 From: Taxachusetts Member No.: 124 Region Association: North East States 
|
My son made me mine..... (IMG:style_emoticons/default/aktion035.gif)
|
| Mark Henry |
 Mar 6 2014, 08:57 PM Mar 6 2014, 08:57 PM
Post
#175
|
|
that's what I do!                Group: Members Posts: 20,065 Joined: 27-December 02 From: Port Hope, Ontario Member No.: 26 Region Association: Canada |
I do make a lot of my own tools, but I didn't make that one. (IMG:style_emoticons/default/smile.gif)
You should see the tool I'm making right now...oh wait... if you follow this thread you will be seeing it soon (IMG:style_emoticons/default/biggrin.gif) |
| Mark Henry |
 Mar 11 2014, 07:20 AM Mar 11 2014, 07:20 AM
Post
#176
|
|
that's what I do!                Group: Members Posts: 20,065 Joined: 27-December 02 From: Port Hope, Ontario Member No.: 26 Region Association: Canada |
I had to Time-Sert a few of my exhaust studs now for another stud repair, this time the case. The one bell-housing mounting stud hole had a very sketchy helicoil repair. They didn't even drill the stud right out, plus it was only helicoiled in about a half inch. This would possibly be "OK" as a dirty repair, but I have to hang this half out on the engine stand for the build....not cool. (IMG:style_emoticons/default/unsure.gif)
So I didn't want to buy another timesert kit, a regular Time-Sert wouldn't work anyways because it's been helicoiled, it would need a Big-Sert. But I do have lots of 10mm VW case savers. These ones have an odd coarse standard outer thread and I didn't have a tap, so I got one from China, $10 delivered to my door. This doesn't show the 3/4 hour spent yanking the helicoil, drilling out the rest of the old stud and tapping for the case saver but you get the idea.... Note the homemade insert driver. (IMG:style_emoticons/default/smile.gif) I think this is a good solution and I'm confident hanging my build from it. (IMG:style_emoticons/default/shades.gif) Attached image(s) 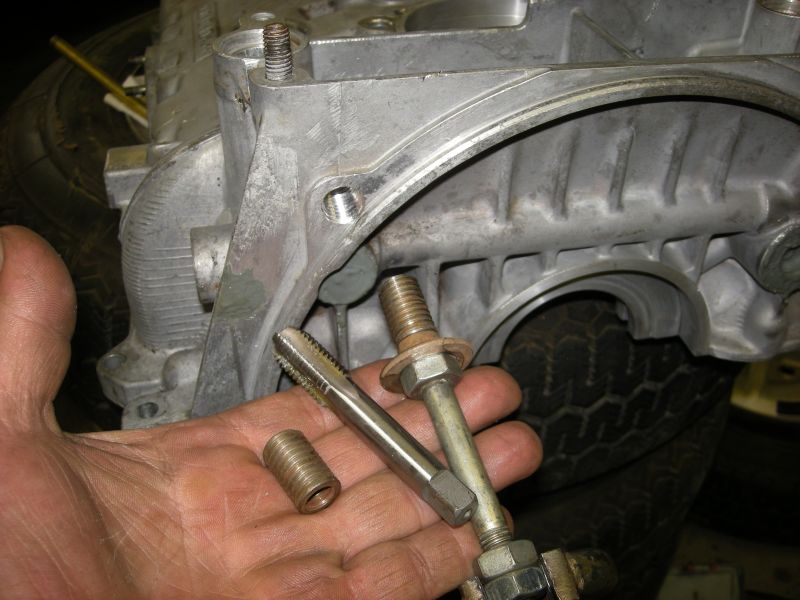 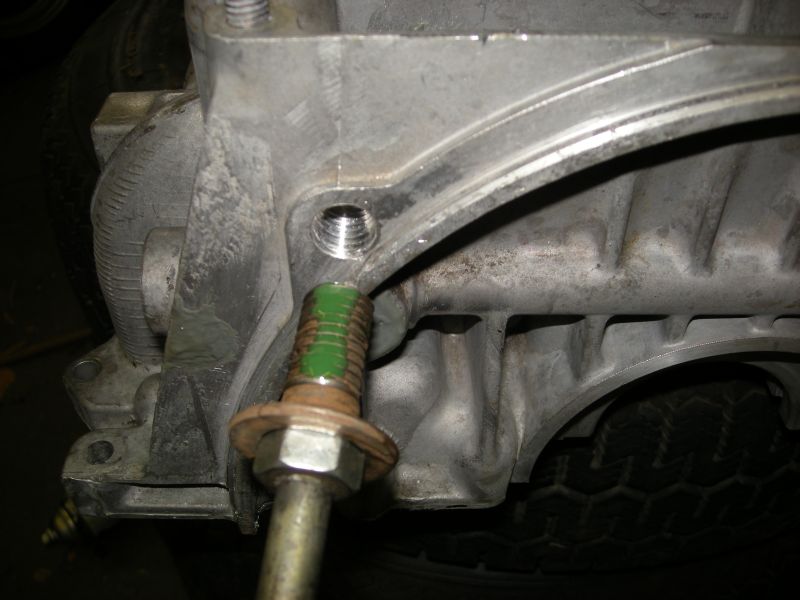 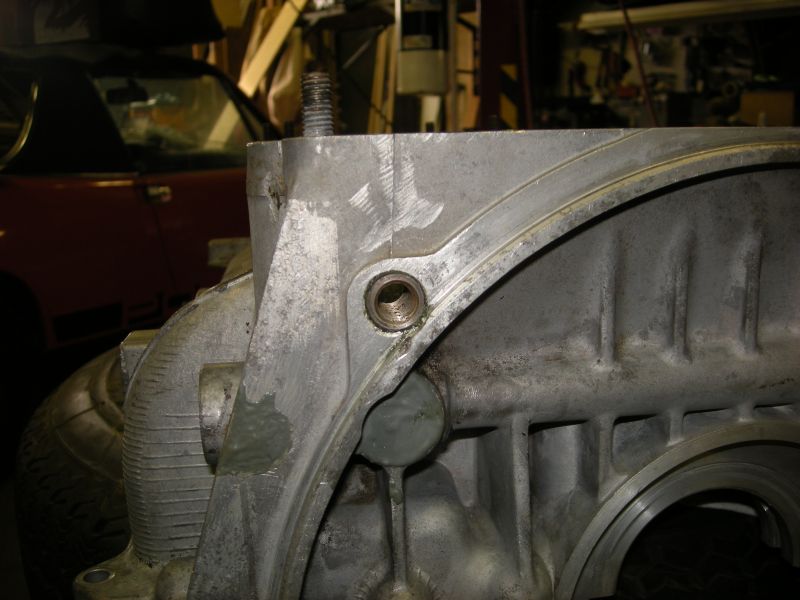
|
| Mark Henry |
 Mar 11 2014, 09:18 AM Mar 11 2014, 09:18 AM
Post
#177
|
|
that's what I do!                Group: Members Posts: 20,065 Joined: 27-December 02 From: Port Hope, Ontario Member No.: 26 Region Association: Canada |
Next job, a few of my piston oil squirters weren't up to snuff. Most of the time these are stuck shut and a bit of Seafoam or MEK will free them up. These were odd in that they wouldn't close.
The little freaking things cost $40 each. I read some how to's and they dremal the peens, then drill and tap the squirter. Seemed like a waste of time. A drill bit (A 1/4" is the same OD as the squirter) took off the peens then a bit smaller bit to open up the squirter. A couple came right out with the bit, one I jammed in a coarse screw and yanked out with a slide hammer. They all came out real easy. Attached image(s) 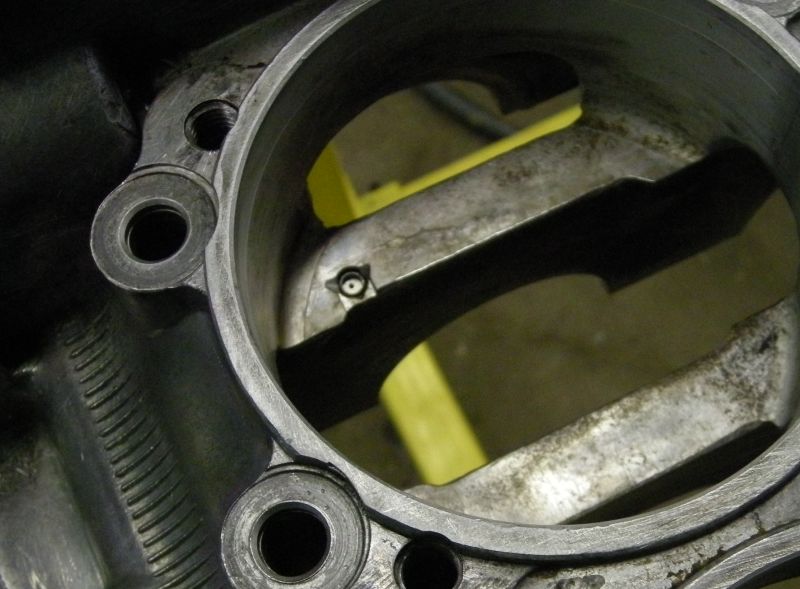 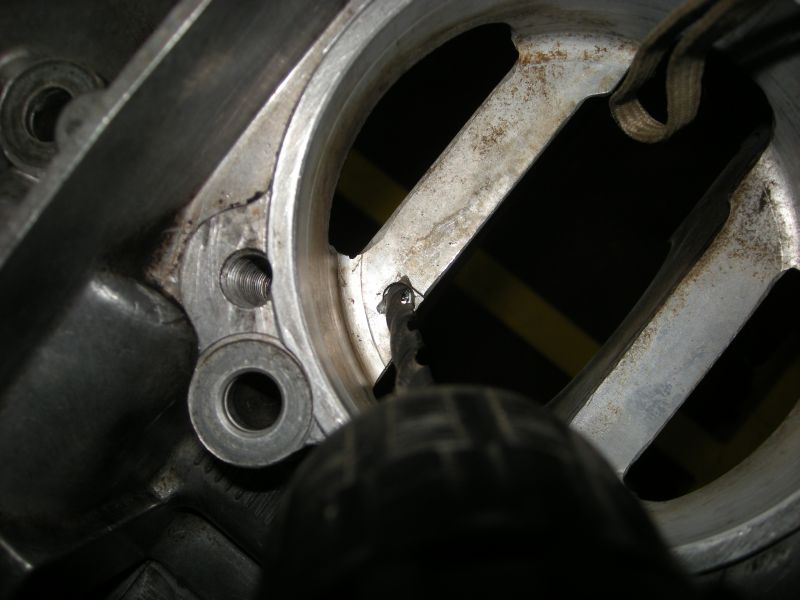 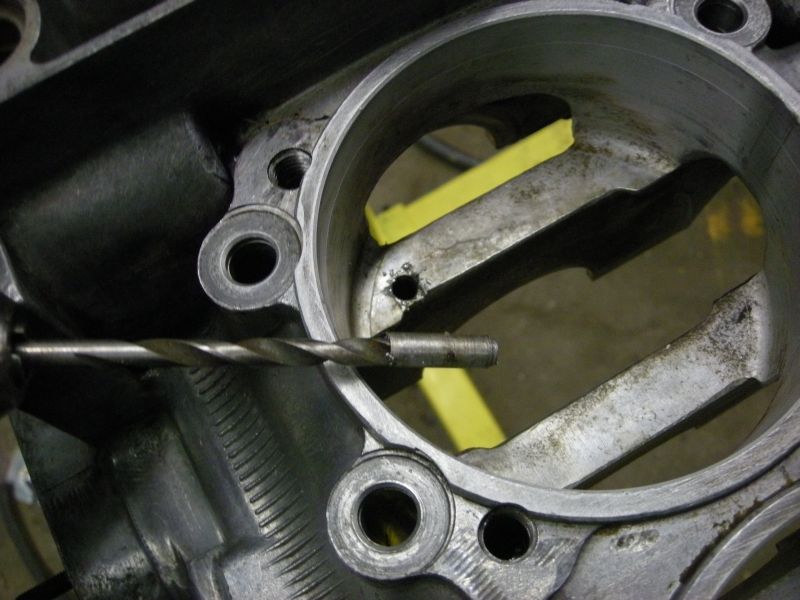 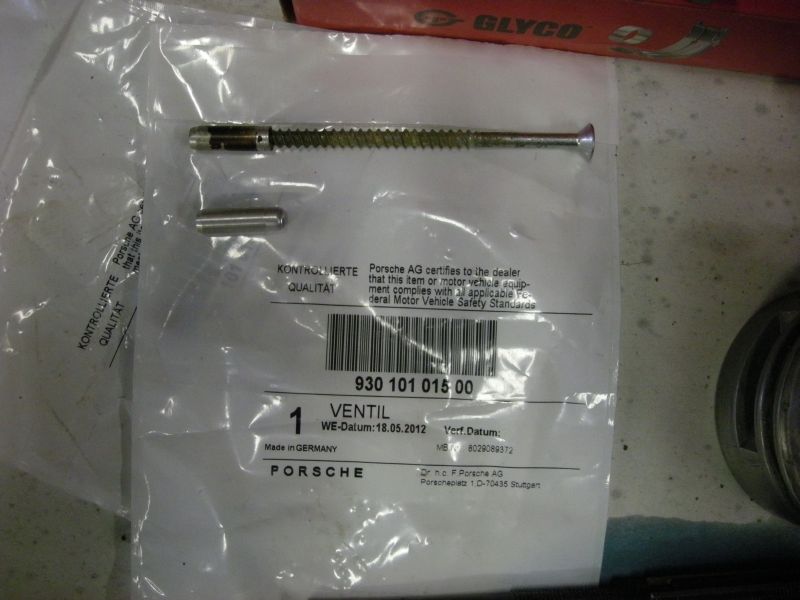
|
| bulitt |
 Mar 11 2014, 10:05 AM Mar 11 2014, 10:05 AM
Post
#178
|
|
Achtzylinder     Group: Members Posts: 4,189 Joined: 2-October 11 Member No.: 13,632 Region Association: South East States |
Dr Evil time serted a speedo angle drive hold down at the clinic. I'm sold!
|
| Mark Henry |
 Mar 11 2014, 10:57 AM Mar 11 2014, 10:57 AM
Post
#179
|
|
that's what I do!                Group: Members Posts: 20,065 Joined: 27-December 02 From: Port Hope, Ontario Member No.: 26 Region Association: Canada |
This is the busness end of the squirter, it's just a ball bearing on a spring.
Attached image(s) 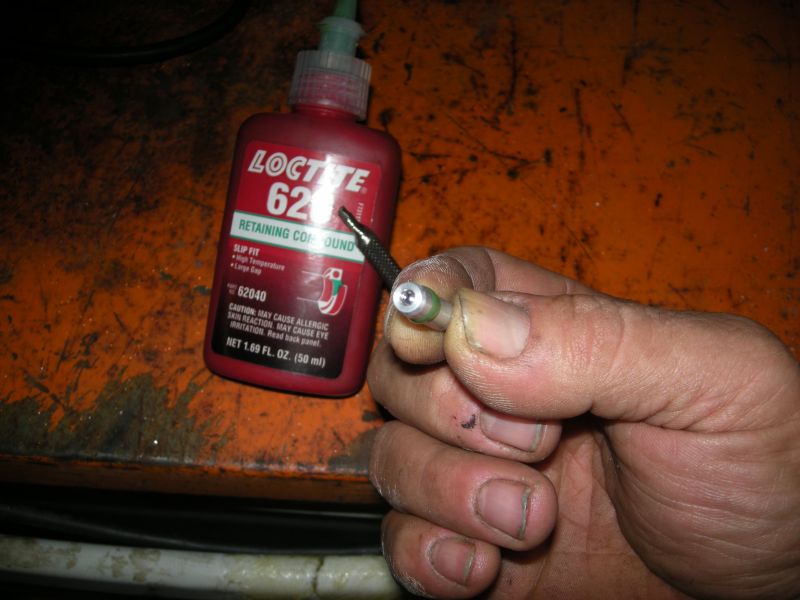
|
| Mark Henry |
 Mar 11 2014, 11:03 AM Mar 11 2014, 11:03 AM
Post
#180
|
|
that's what I do!                Group: Members Posts: 20,065 Joined: 27-December 02 From: Port Hope, Ontario Member No.: 26 Region Association: Canada |
If you have the old peening removed correctly the new squirter will just pop in. I used a bit of Loctite on the OD of the squirter only, you don't want to go crazy here because loctite in the squirter would likely be bad.
Then you have to peen the squirter in, I picked 3 new spots. Another homemade tool. (IMG:style_emoticons/default/smile.gif) We need a bench grinder smiliey And there you have it, relatively an easy job. Attached image(s) 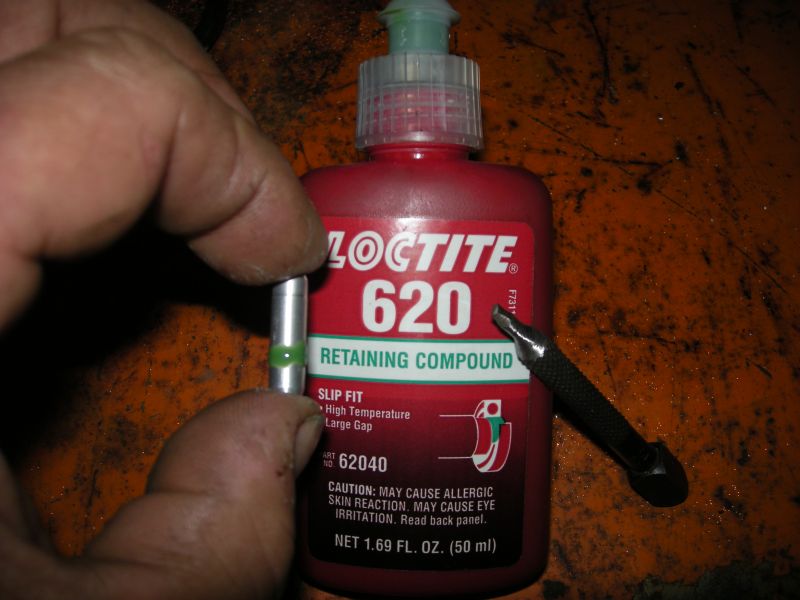 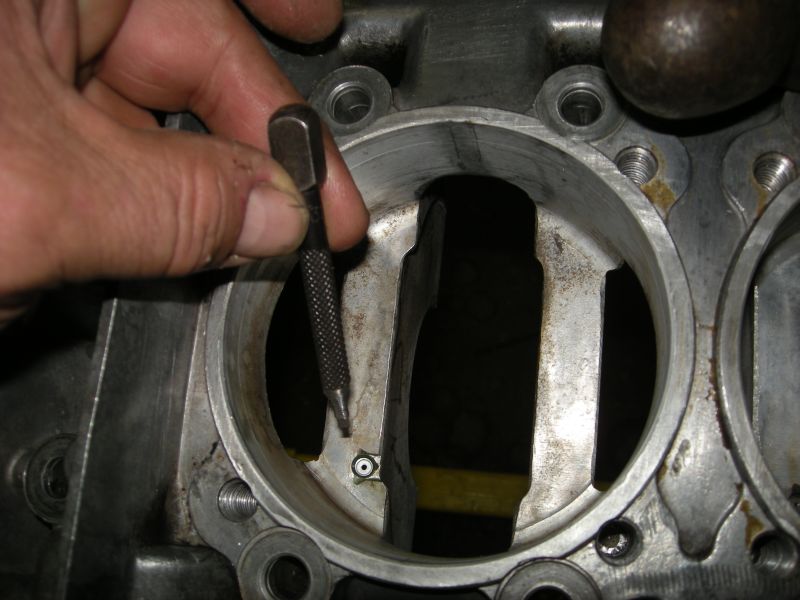 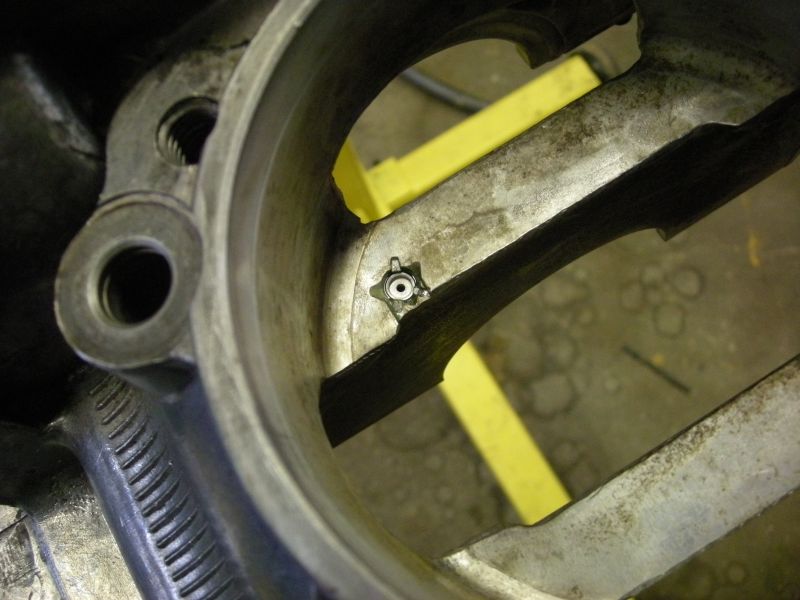
|
  |
1 User(s) are reading this topic (1 Guests and 0 Anonymous Users)
0 Members:

|
Lo-Fi Version | Time is now: 20th April 2025 - 12:45 AM |
Invision Power Board
v9.1.4 © 2025 IPS, Inc.


