|
|
|
Porsche, and the Porsche crest are registered trademarks of Dr. Ing. h.c. F. Porsche AG.
This site is not affiliated with Porsche in any way. Its only purpose is to provide an online forum for car enthusiasts. All other trademarks are property of their respective owners. |
|
|

  |

| Sfreeman615 |
 Jun 24 2014, 07:58 PM Jun 24 2014, 07:58 PM
Post
#81
|
|
Member  Group: Members Posts: 146 Joined: 23-February 14 From: Nashville,TN Member No.: 17,033 Region Association: South East States |
QUOTE(malcolm2 @ Jun 24 2014, 08:24 PM)  Hey, good to see some pictures. I just asked Mike the other day about you. Car is looking good and clean. Thanks man! I got slammed with work for about a month and wasn't able to do much, but I went the other day and bought a mig welder and a plasma cutter and we are back in business! Hope to have the new floor pans and the patches on a couple other areas welded by the end of the week, then its on to body work! It's going on the rotisserie in the morning, I'll be able to do some fast work once that happens. Eric Gardner at Restoration Media blasting has been awesome. He has basically given me free reign in his shop to work and he's helping a ton! I'm ready for our reassemble day and get this thing on the road, hopefully complete by Okteenerfest!!! |
   |

 
|
| Sfreeman615 |
Jun 26 2014, 09:01 PM
Post
#82
|
|
Member Group: Members Posts: 146 Joined: 23-February 14 From: Nashville,TN Member No.: 17,033 Region Association: South East States |
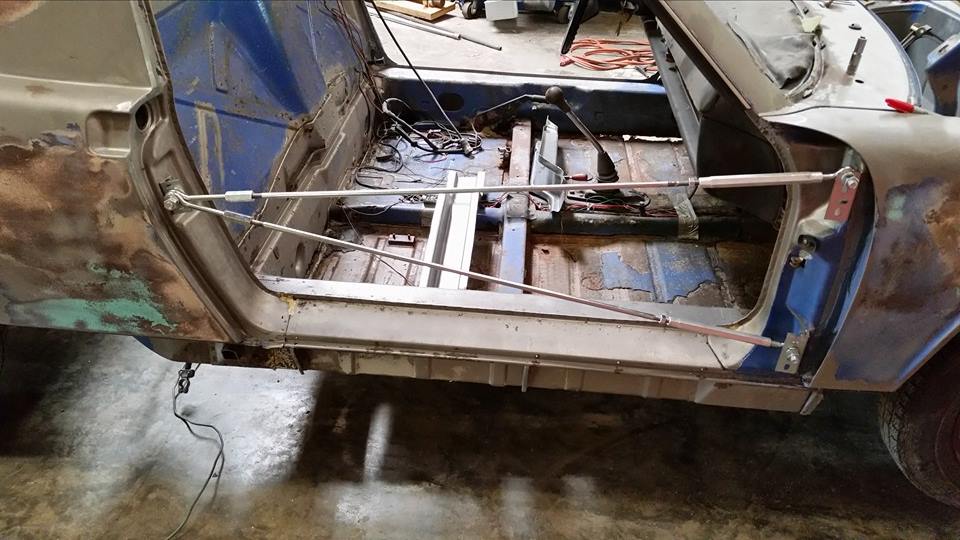
Fabricated the braces to keep everything straight and correct while on the rotisserie! Thinking of making several sets of these if anyone is interested! I wasn't gonna pay what some of the vendors were charging for these. They screw right in the existing door latch holes with the custom brackets we made! Very efficient and strong, also adjustable!
 |
|
|
|
| zambezi |
Jun 26 2014, 11:49 PM
Post
#83
|
|
Senior Member Group: Members Posts: 711 Joined: 14-April 08 From: Lafayette, LA Member No.: 8,920 Region Association: South East States |
Looks good, the only problem I have with braces in that location is you cannot put the door back in periodically to check gaps as you progress.
|
|
|
|
| Sfreeman615 |
Jun 27 2014, 09:16 AM
Post
#84
|
|
Member Group: Members Posts: 146 Joined: 23-February 14 From: Nashville,TN Member No.: 17,033 Region Association: South East States |
QUOTE(zambezi @ Jun 27 2014, 12:49 AM) Looks good, the only problem I have with braces in that location is you cannot put the door back in periodically to check gaps as you progress. These are much easier to take off then busting the welds on other braces I have seen every time you wanna check the doors. 2 bolts and these come off! We also fabricated additional brackets and braces that run across the top of the targa top. This car won't move an inch and they are all removable in 5 minutes! |
|
|
|
| jbyron |
Jun 27 2014, 09:52 AM
Post
#85
|
|
Jamie Group: Members Posts: 149 Joined: 17-July 07 From: Ballwin, MO Member No.: 7,916 Region Association: Upper MidWest |
Really enjoying reading your build thread. Great pics, and your enthusiasm is contagious! Keep up the good work and keep up the documentation. This is going to be one outstanding finished product.
|
|
|
|
| malcolm2 |
Jun 27 2014, 10:04 AM
Post
#86
|
|
Advanced Member Group: Members Posts: 2,747 Joined: 31-May 11 From: Nashville Member No.: 13,139 Region Association: South East States |
QUOTE(zambezi @ Jun 27 2014, 12:49 AM) Looks good, the only problem I have with braces in that location is you cannot put the door back in periodically to check gaps as you progress. Make a jig out of wood or scrap metal to slip in place every once in a while, or just measure NOW and along the way. Make marks on both sides so you know where your measurement should be taken each time. Spread the welding out to reduce heat concentration and use compressed air to cool the spot. |
|
|
|
| Sfreeman615 |
Jun 27 2014, 05:50 PM
Post
#87
|
|
Member Group: Members Posts: 146 Joined: 23-February 14 From: Nashville,TN Member No.: 17,033 Region Association: South East States |
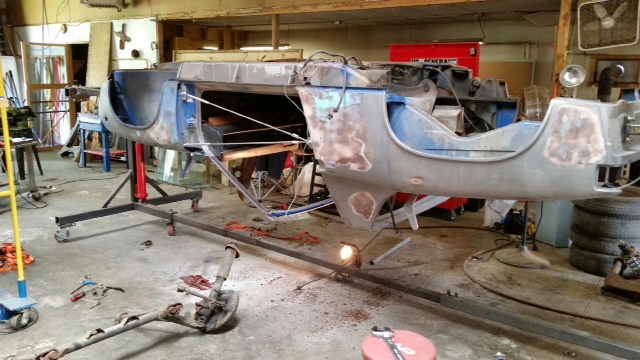
More work being done today! Finally got to see my teener upside down! LOL. All of the suspension is out. Taking lots of pieces to powder coating next week. Also got some spot welds drilled out!
     |
|
|
|
| trojanhorsepower |
Jun 27 2014, 05:58 PM
Post
#88
|
|
Senior Member Group: Members Posts: 866 Joined: 21-September 03 From: Marion, NC Member No.: 1,179 Region Association: None |
Man you are smoking along! Great work. Are you going to media blast again after you get the bad spots cut out?
|
|
|
|
| Sfreeman615 |
Jun 27 2014, 06:11 PM
Post
#89
|
|
Member Group: Members Posts: 146 Joined: 23-February 14 From: Nashville,TN Member No.: 17,033 Region Association: South East States |
QUOTE(trojanhorsepower @ Jun 27 2014, 06:58 PM) Man you are smoking along! Great work. Are you going to media blast again after you get the bad spots cut out? Yes, the media blast booth is right behind where my car is sitting about 20 feet away. We will completely go over the car once again. Once complete, we are spraying por15 on everything on the bottom side as well as in the trunk, hell hole and under the hood up front. |
|
|
|
| Mblizzard |
Jun 27 2014, 06:20 PM
Post
#90
|
|
Advanced Member Group: Members Posts: 3,033 Joined: 28-January 13 From: Knoxville Tn Member No.: 15,438 Region Association: South East States |
Wow! I thought Clark and I did some damage!
Great work. Let us know when the reassemble party is. |
|
|
|
| Sfreeman615 |
Jun 27 2014, 06:23 PM
Post
#91
|
|
Member Group: Members Posts: 146 Joined: 23-February 14 From: Nashville,TN Member No.: 17,033 Region Association: South East States |
QUOTE(Mblizzard @ Jun 27 2014, 07:20 PM) Wow! I thought Clark and I did some damage! Great work. Let us know when the reassemble party is. Hey, it would not be where it is right now if not for you and Clark! Thanks a for sure thing! I can't wait to reassemble! |
|
|
|
| malcolm2 |
Jul 1 2014, 07:58 PM
Post
#92
|
|
Advanced Member Group: Members Posts: 2,747 Joined: 31-May 11 From: Nashville Member No.: 13,139 Region Association: South East States |
QUOTE(Mblizzard @ Jun 27 2014, 07:20 PM) Wow! I thought Clark and I did some damage! Great work. Let us know when the reassemble party is. Looks like you have lots of room to work too. |
|
|
|
| Sfreeman615 |
Jul 9 2014, 06:06 PM
Post
#93
|
|
Member Group: Members Posts: 146 Joined: 23-February 14 From: Nashville,TN Member No.: 17,033 Region Association: South East States |
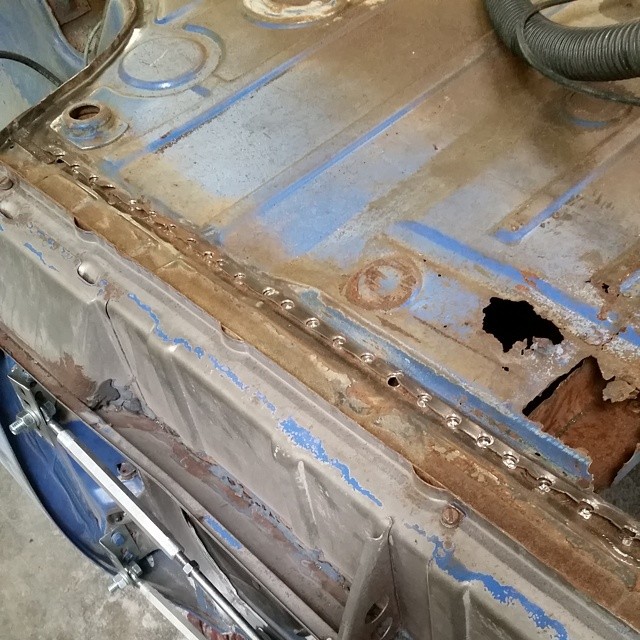
More progress in the last few days! Over the next 2 weeks we will be finished with all of the welding, body work and be priming and painting! I'm so ready for this thing to look any way other than the way it does right now!!!
(IMG:style_emoticons/default/sawzall-smiley.gif) (IMG:style_emoticons/default/welder.gif) 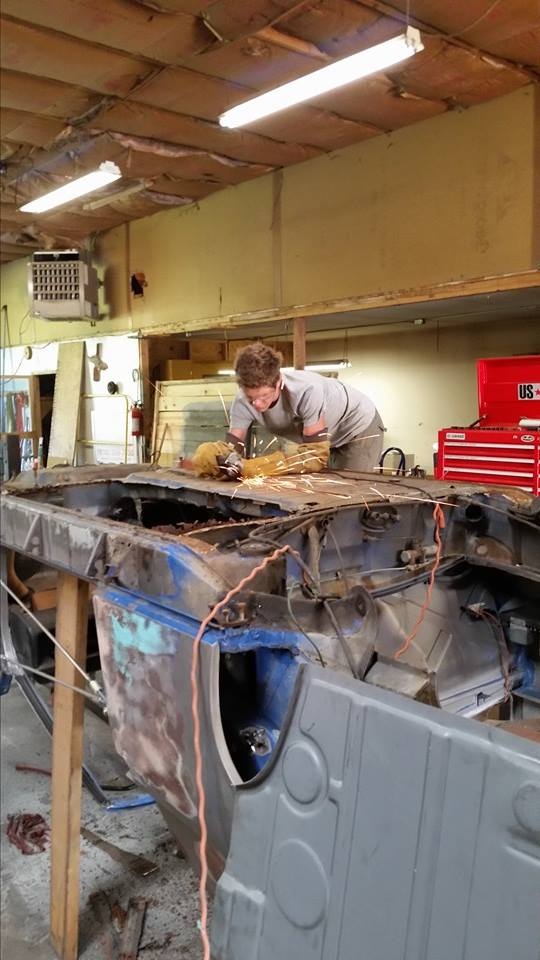 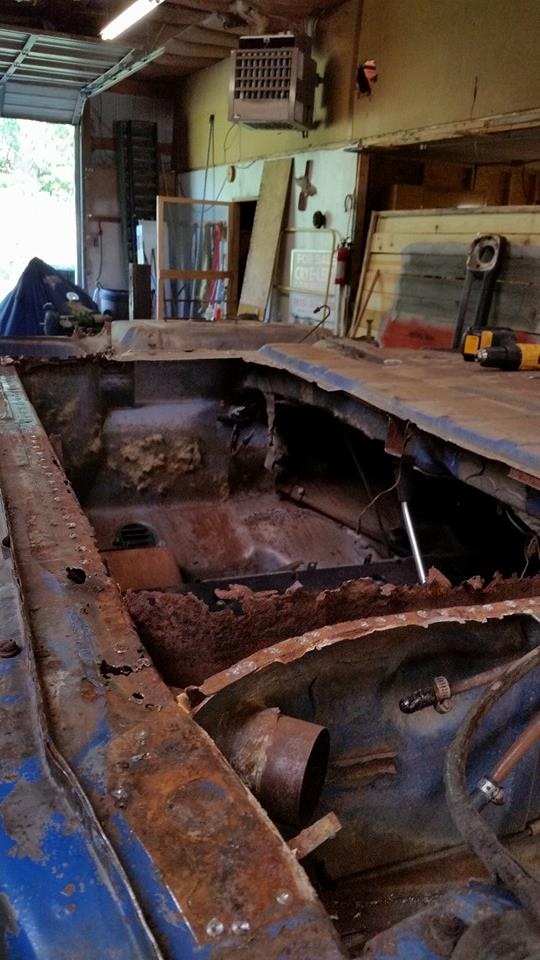 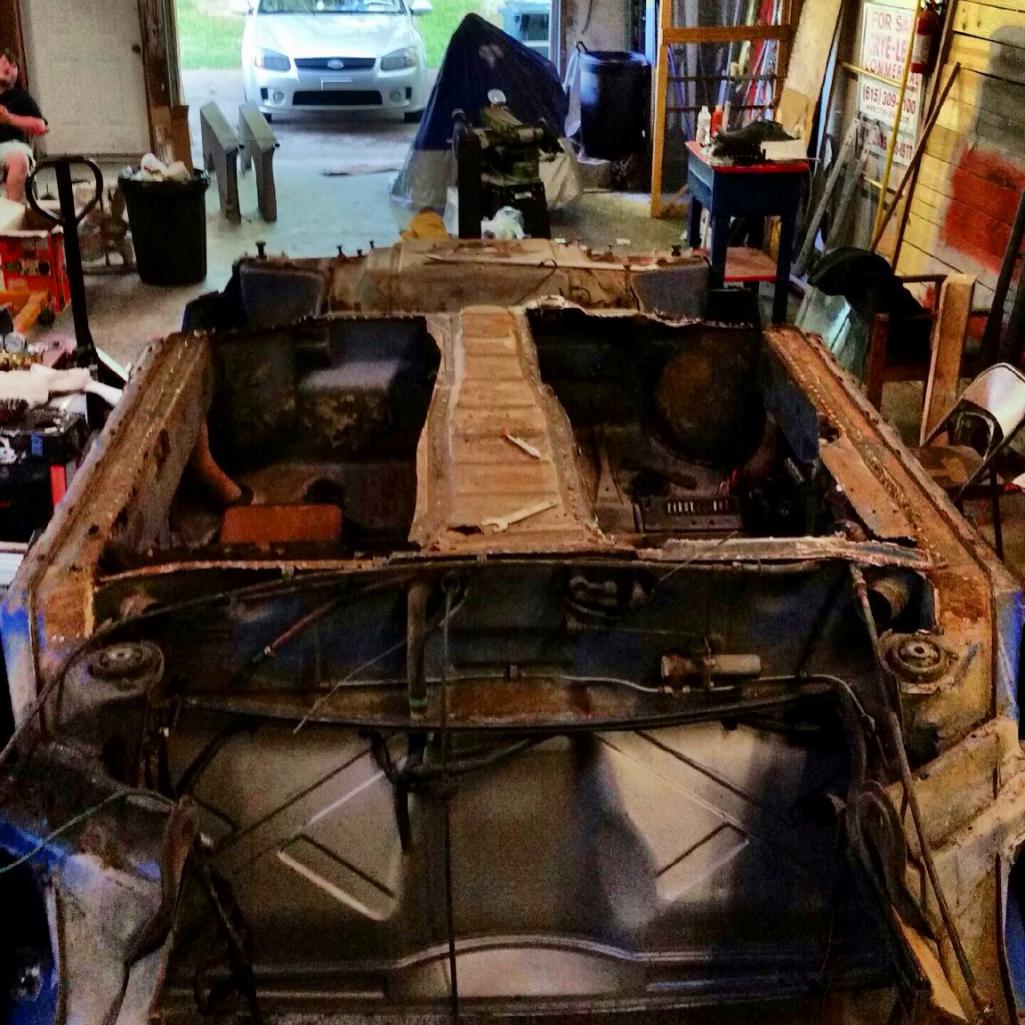 Attached thumbnail(s) 
|
|
|
|
| Mblizzard |
Jul 9 2014, 06:12 PM
Post
#94
|
|
Advanced Member Group: Members Posts: 3,033 Joined: 28-January 13 From: Knoxville Tn Member No.: 15,438 Region Association: South East States |
That's a big hole! Keep welding (IMG:style_emoticons/default/welder.gif)
|
|
|
|
| swooshdave |
Jul 9 2014, 08:38 PM
Post
#95
|
|
Member Group: Members Posts: 184 Joined: 11-June 14 From: Portland Member No.: 17,475 Region Association: Pacific Northwest |
QUOTE(Sfreeman615 @ Mar 29 2014, 09:01 AM) Also, tried heat, pb blaster and wd40 on the screws at the bottom of the rocker panels , got fed up and went ninja on them and got them off! What was your final ninja trick? |
|
|
|
| Sfreeman615 |
Jul 10 2014, 01:22 PM
Post
#96
|
|
Member Group: Members Posts: 146 Joined: 23-February 14 From: Nashville,TN Member No.: 17,033 Region Association: South East States |
QUOTE(swooshdave @ Jul 9 2014, 09:38 PM) QUOTE(Sfreeman615 @ Mar 29 2014, 09:01 AM) Also, tried heat, pb blaster and wd40 on the screws at the bottom of the rocker panels , got fed up and went ninja on them and got them off! What was your final ninja trick? Hate to admit, but I got under the car and just kicked the rocker panel covers until they broke off, then cut the screws and bolts off! Not the proper way to do it but I was pissed off 2 hours into trying to get them off! I'm going back with fiberglass rocker panel covers, so it didn't matter in the end (IMG:style_emoticons/default/smile.gif) |
|
|
|
| Mblizzard |
Jul 10 2014, 02:24 PM
Post
#97
|
|
Advanced Member Group: Members Posts: 3,033 Joined: 28-January 13 From: Knoxville Tn Member No.: 15,438 Region Association: South East States |
QUOTE(Sfreeman615 @ Jul 10 2014, 11:22 AM) QUOTE(swooshdave @ Jul 9 2014, 09:38 PM) QUOTE(Sfreeman615 @ Mar 29 2014, 09:01 AM) Also, tried heat, pb blaster and wd40 on the screws at the bottom of the rocker panels , got fed up and went ninja on them and got them off! What was your final ninja trick? Hate to admit, but I got under the car and just kicked the rocker panel covers until they broke off, then cut the screws and bolts off! Not the proper way to do it but I was pissed off 2 hours into trying to get them off! I'm going back with fiberglass rocker panel covers, so it didn't matter in the end (IMG:style_emoticons/default/smile.gif) Funny what owning a 914 will do to a guy! Steve was not sure what to do on our tear down day. Now he is going bat shit and tearing the car apart with his bare hands and feet. (IMG:style_emoticons/default/smash.gif) Somebody hand that guy a beer! (IMG:style_emoticons/default/beer3.gif) |
|
|
|
| Sfreeman615 |
Aug 11 2014, 10:40 PM
Post
#98
|
|
Member Group: Members Posts: 146 Joined: 23-February 14 From: Nashville,TN Member No.: 17,033 Region Association: South East States |
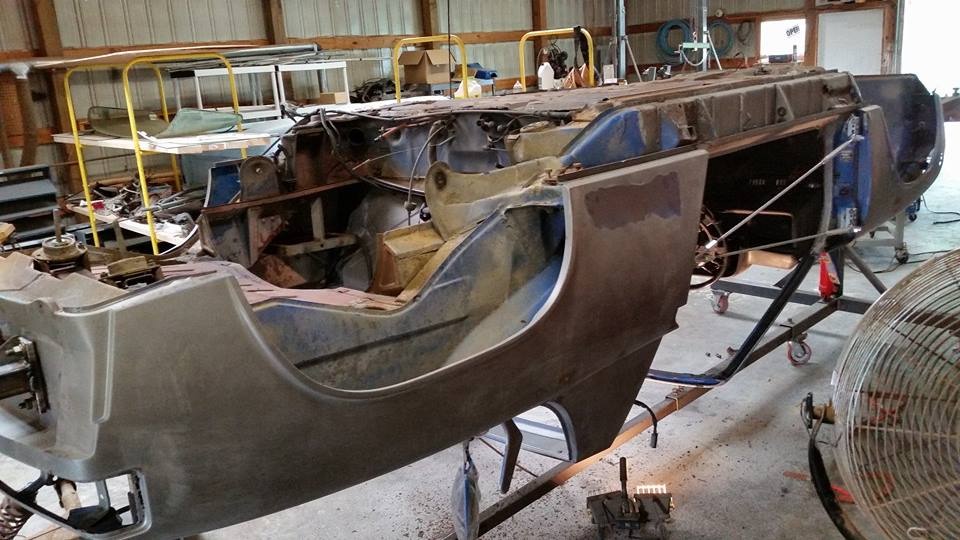
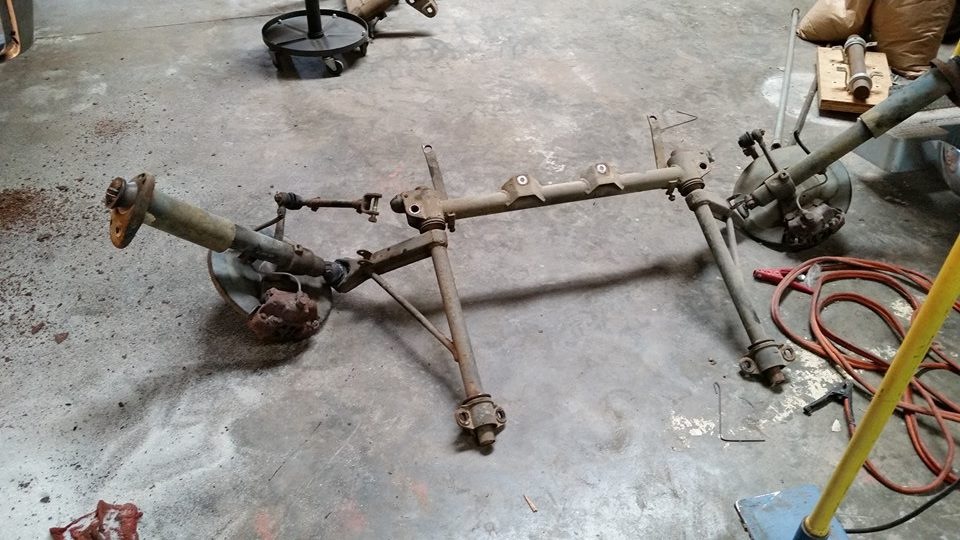
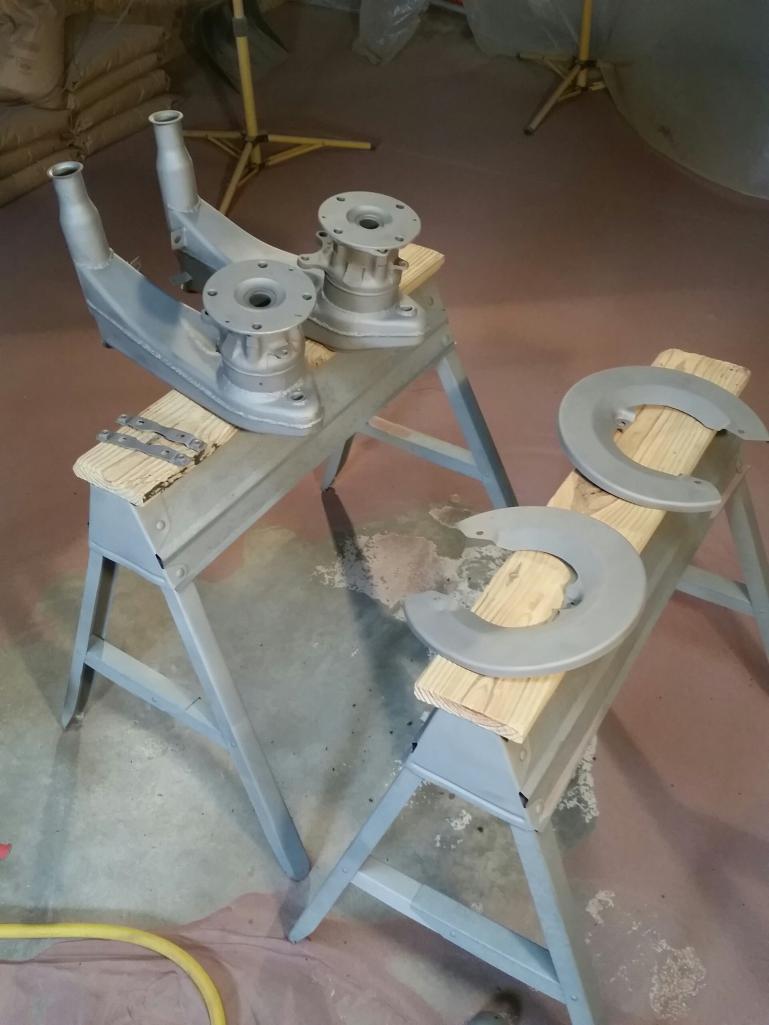
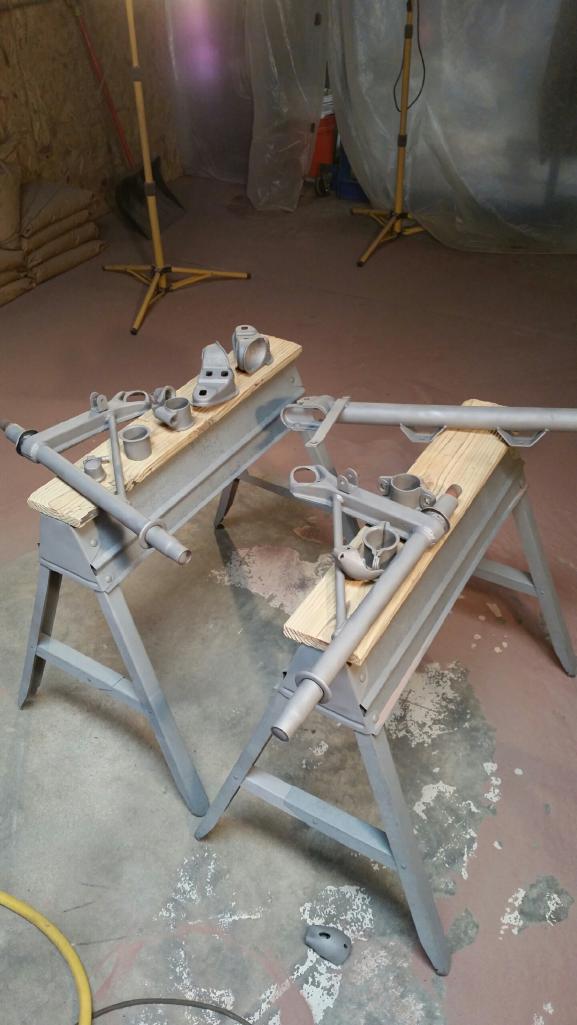
Starting to come together now! Getting exciting that's for sure. Today we blasted the front and rear suspension components and got them ready for paint.
  |
|
|
|
| falcor75 |
Aug 12 2014, 01:48 AM
Post
#99
|
|
Senior Member Group: Members Posts: 1,579 Joined: 22-November 12 From: Sweden Member No.: 15,176 Region Association: Scandinavia |
Shouldnt you have taken the rear hubs and bearings out before mediablasting? Chances are you might have gotten media into your bearings....
Nice work on the car tho and fast...I started my teardown april 2013 and my body is just ready for paint now. (IMG:style_emoticons/default/smile.gif) |
|
|
|
| Sfreeman615 |
Aug 12 2014, 05:08 PM
Post
#100
|
|
Member Group: Members Posts: 146 Joined: 23-February 14 From: Nashville,TN Member No.: 17,033 Region Association: South East States |
QUOTE(falcor75 @ Aug 12 2014, 02:48 AM) Shouldnt you have taken the rear hubs and bearings out before mediablasting? Chances are you might have gotten media into your bearings.... Nice work on the car tho and fast...I started my teardown april 2013 and my body is just ready for paint now. (IMG:style_emoticons/default/smile.gif) Usually yes, but I am doing the 5 lug conversion and changing the hubs and all the bearings later this week! Congrats on yours being ready for paint, feels like mine is taking forever, but I should be done by the second week of September! |
|
|
|
|
1 User(s) are reading this topic (1 Guests and 0 Anonymous Users)
0 Members:

|
Lo-Fi Version | Time is now: 24th September 2024 - 12:51 PM |
Invision Power Board
v9.1.4 © 2024 IPS, Inc.