|
|

|
Porsche, and the Porsche crest are registered trademarks of Dr. Ing. h.c. F. Porsche AG.
This site is not affiliated with Porsche in any way. Its only purpose is to provide an online forum for car enthusiasts. All other trademarks are property of their respective owners. |
|
|
  |
| 914_teener |
 Apr 21 2014, 07:32 PM Apr 21 2014, 07:32 PM
Post
#21
|
|
914 Guru      Group: Members Posts: 5,250 Joined: 31-August 08 From: So. Cal Member No.: 9,489 Region Association: Southern California |
Bob, Some may remember my long thread after installing my 2.0 djet bucking at 3300 rpm. After months and tons if money changing injectors ,tps ecu, vaccum lines trotle body and gasket, the issue was a $100 fix. It was the vacuum advanced on the dizzy getting stuck. I replaced it and that was it. I know it could be a number of things as stated in your thread, but you can do a simple test by sucking air out of the tubes and see if the arm moves. Give it a try Here is the thread Buckling at 3300 Yep.....and testing the vac at the can....it has been suggested a couple of times. |
| zymurgist |
 Apr 21 2014, 08:49 PM Apr 21 2014, 08:49 PM
Post
#22
|
|
"Ace" Mechanic      Group: Members Posts: 7,411 Joined: 9-June 05 From: Hagerstown, MD Member No.: 4,238 Region Association: None |
Wow, good info in the linked thread. Mine is doing this too. Distributor is fine, though, I just had it apart and lubed everything and made sure the advance plates and can were all in working order.
|
| luskesq |
 Apr 21 2014, 09:08 PM Apr 21 2014, 09:08 PM
Post
#23
|
|
Member   Group: Members Posts: 276 Joined: 24-October 10 From: Fresno, CA Member No.: 12,303 Region Association: Central California |
Timing (and it wasn't off by much) caused my issue as well as a defective vacuum advance (wouldn't hold a vacuum for long).
Keith |
| watsonrx13 |
 May 10 2014, 10:39 AM May 10 2014, 10:39 AM
Post
#24
|
|
Advanced Member     Group: Members Posts: 2,735 Joined: 18-February 03 From: Plant City, FL Member No.: 312 Region Association: South East States |
Well finally had a chance to check the vacuum advance on the distributor.
Here are the steps I took (photos to follow). 1. Removed distributor cap 2. Disconnected the vacuum hose 3. Hookup up a vacuum gauge (hand pump to bleed brakes) to vacuum advance on distributor 4. Pump up the vacuum and checked movement of arm. 5. No movement on arm 6. Hookup vacuum gauge on other line 7. Pump up vacuum and noticed movement on arm 8. Reconnected vacuum line to other side of vacuum advance (using a hose clamp) 9. Test drove car Conclusion: the car didn't sputter, but now the idle is around 1600 RPM, before was 900 RPM. So is this a good solution? If this is a good solution I'll readjust the idle. Vacuum pump hooked up to first vacuum line 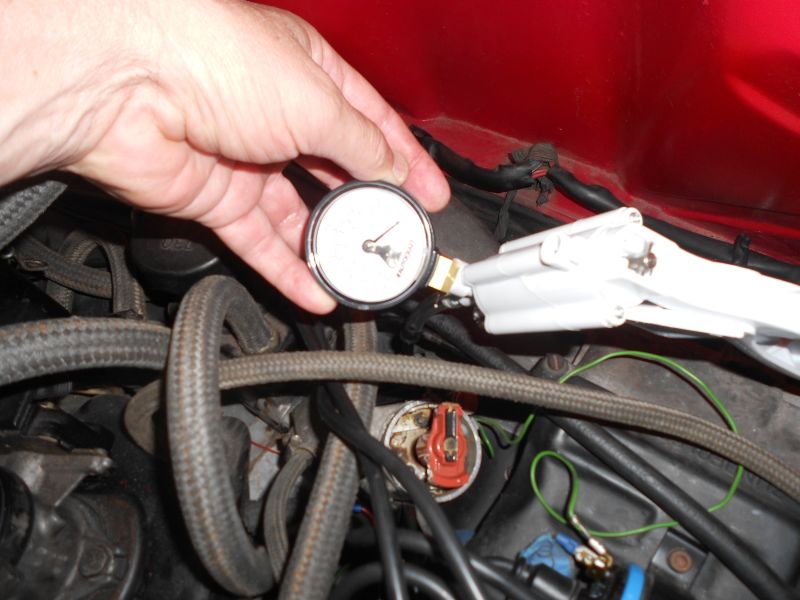 Close up of connection of vacuum pump 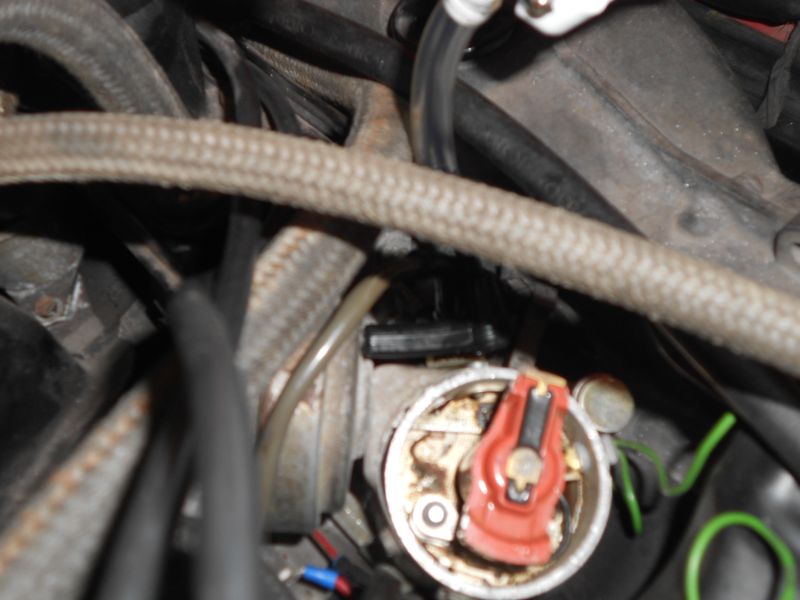 Vacuum hose hookup to second vacuum line with extra hose clamp 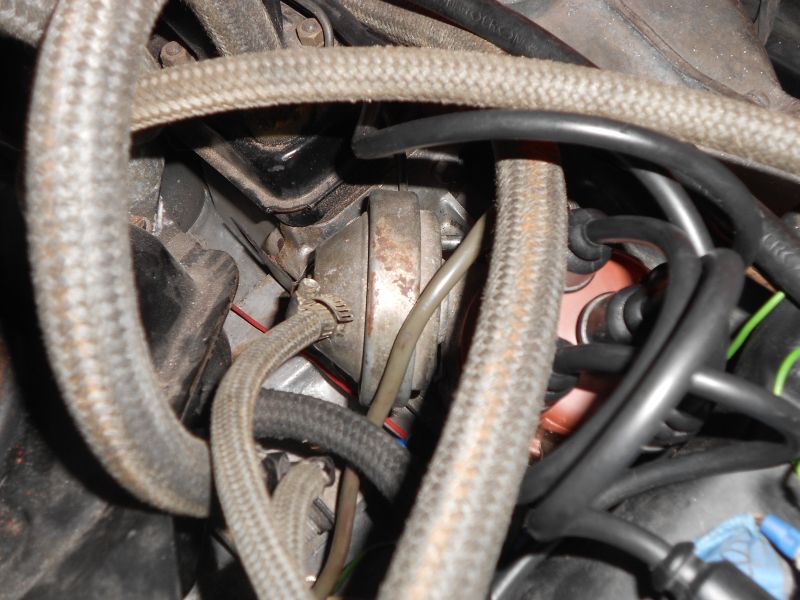 Wide shot of distributor/vacuum hose connection 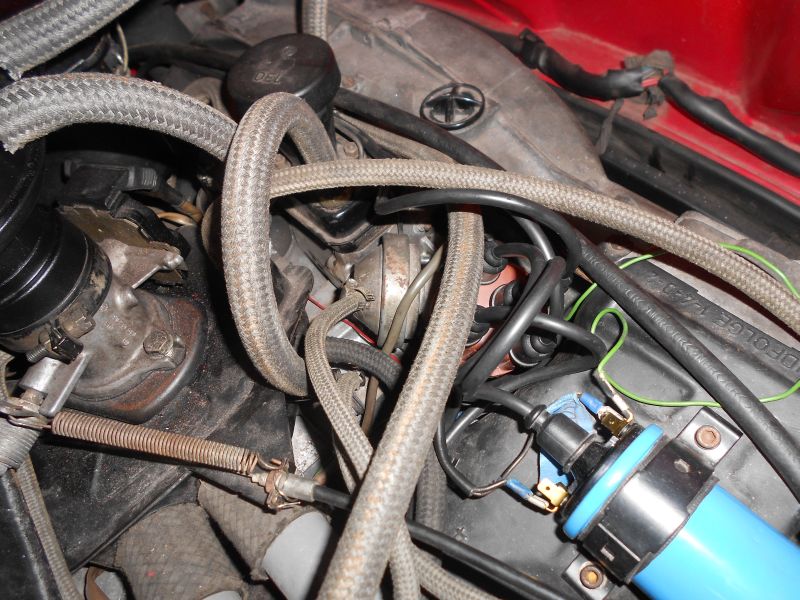 Vacuum pump set up 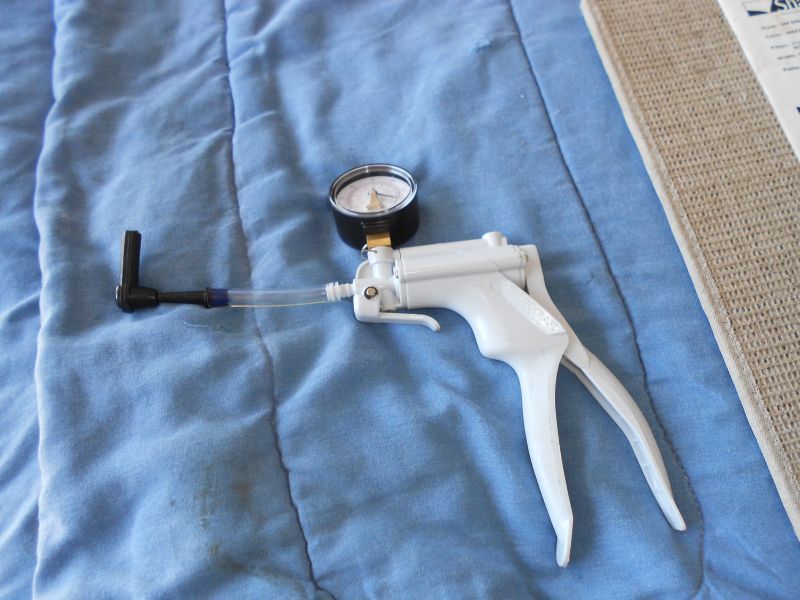 Vacuum pump kit 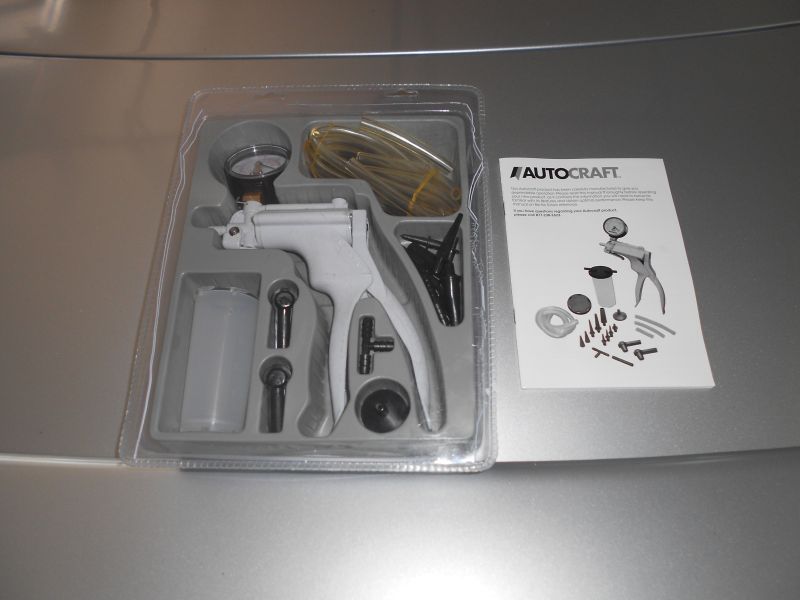 |
| r_towle |
 May 10 2014, 10:45 AM May 10 2014, 10:45 AM
Post
#25
|
|
Custom Member                Group: Members Posts: 24,663 Joined: 9-January 03 From: Taxachusetts Member No.: 124 Region Association: North East States 
|
The distributor has never been cleaned...well it's 40 years old and it may be time to relive the advance plates...
Cost is about 5 cents of grease and some time. Rich |
| type47 |
 May 10 2014, 10:51 AM May 10 2014, 10:51 AM
Post
#26
|
|
Viermeister     Group: Members Posts: 4,254 Joined: 7-August 03 From: Vienna, VA Member No.: 994 Region Association: MidAtlantic Region |
I checked the vacuum advance on a distributor on a project motor and was surprised at how little the plate moved with vacuum applied. Anybody have an estimate/comment about the amt of movement?
|
| r_towle |
 May 10 2014, 10:52 AM May 10 2014, 10:52 AM
Post
#27
|
|
Custom Member                Group: Members Posts: 24,663 Joined: 9-January 03 From: Taxachusetts Member No.: 124 Region Association: North East States 
|
|
| watsonrx13 |
 May 10 2014, 12:14 PM May 10 2014, 12:14 PM
Post
#28
|
|
Advanced Member     Group: Members Posts: 2,735 Joined: 18-February 03 From: Plant City, FL Member No.: 312 Region Association: South East States |
The distributor has never been cleaned...well it's 40 years old and it may be time to relive the advance plates... Cost is about 5 cents of grease and some time. Rich Rich I think you missed my point. When I checked the second vacuum line on the vacuum advance, the arm DID move. My question is: 'Is it OK to use either vacuum line on either side of the vacuum advance?' --- Rob |
| TheCabinetmaker |
 May 10 2014, 12:19 PM May 10 2014, 12:19 PM
Post
#29
|
|
I drive my car everyday      Group: Members Posts: 8,325 Joined: 8-May 03 From: Tulsa, Ok. Member No.: 666 |
One port is advance, the other is retard.
|
| boxsterfan |
 May 10 2014, 02:08 PM May 10 2014, 02:08 PM
Post
#30
|
|
914's are kewl    Group: Members Posts: 1,776 Joined: 6-June 03 From: San Ramon, CA Member No.: 791 Region Association: Northern California |
I think your vacuum line (as pictured) is hooked up to the wrong port on the cannister for a 74 2.0L. Mine is hooked to the other port on the cannister. And the port you are hooked to is left open (mine has a short 3-4" piece of rubber hose on it connecting to nothing). Some cars had a connection on the plenum for that side of the cannister.
|
| r_towle |
 May 10 2014, 02:12 PM May 10 2014, 02:12 PM
Post
#31
|
|
Custom Member                Group: Members Posts: 24,663 Joined: 9-January 03 From: Taxachusetts Member No.: 124 Region Association: North East States 
|
Yup, one is advance, one is retard.
Retard was left up capped and floating in the atmosphere on stock cars. Also I think some parts swapping was going on because in order for it to work properly, you would need a throttle body that has one vacuum port in front of and one port behind the throttle plate. Not every car has the right throttle body and not every distributor has both ports for retard and advance. Mixed results in the car I tuned that had everything required. It would slam back to idle between shifts.... |
| watsonrx13 |
 May 10 2014, 03:46 PM May 10 2014, 03:46 PM
Post
#32
|
|
Advanced Member     Group: Members Posts: 2,735 Joined: 18-February 03 From: Plant City, FL Member No.: 312 Region Association: South East States |
Rich thanks for the reply, that explains everything.
--- Rob |
| type47 |
 May 10 2014, 04:06 PM May 10 2014, 04:06 PM
Post
#33
|
|
Viermeister     Group: Members Posts: 4,254 Joined: 7-August 03 From: Vienna, VA Member No.: 994 Region Association: MidAtlantic Region |
I checked the vacuum advance on a distributor on a project motor and was surprised at how little the plate moved with vacuum applied. Anybody have an estimate/comment about the amt of movement? Depends upon the distributor. Rich 039.xxx.??? but it's a 2L distributor... |
| TheCabinetmaker |
 May 10 2014, 04:06 PM May 10 2014, 04:06 PM
Post
#34
|
|
I drive my car everyday      Group: Members Posts: 8,325 Joined: 8-May 03 From: Tulsa, Ok. Member No.: 666 |
Where does the hose with the clamp go to? It's headed the wrong direction. That hose is to too big also.
|
| 914_teener |
 May 10 2014, 11:06 PM May 10 2014, 11:06 PM
Post
#35
|
|
914 Guru      Group: Members Posts: 5,250 Joined: 31-August 08 From: So. Cal Member No.: 9,489 Region Association: Southern California |
I really think you should yank that dizzy out and make sure the the little ball for which the advance plate rides is clean and moving fully....if you haven't already.
My .02...just from the look of it. |
| watsonrx13 |
 May 11 2014, 08:08 AM May 11 2014, 08:08 AM
Post
#36
|
|
Advanced Member     Group: Members Posts: 2,735 Joined: 18-February 03 From: Plant City, FL Member No.: 312 Region Association: South East States |
Thanks for everyone's suggestions. I have pulled the distributor and removed the vacuum advance. I visually checked the arm and it looks clean. I also manually was able to move it. I hooked up a vacuum gauge to the advance port and nothing moved nor did it hold vacuum. I hooked up to the retard port and was able to get vacuum and movement.
At this point I'm assuming the advance side isn't working and I've placed an ad for a2.0l vacuum advance. Once I've replaced the vacuum advance I'll reinstall the distributor, hook up the vacuum hose and test the car again. Also someone commented about the vacuum hose not routed correctly, I've included a photo of where the hose is connected to the plenum. Stay tuned for more updates. Vacuum advance, advance side where arm comes out. 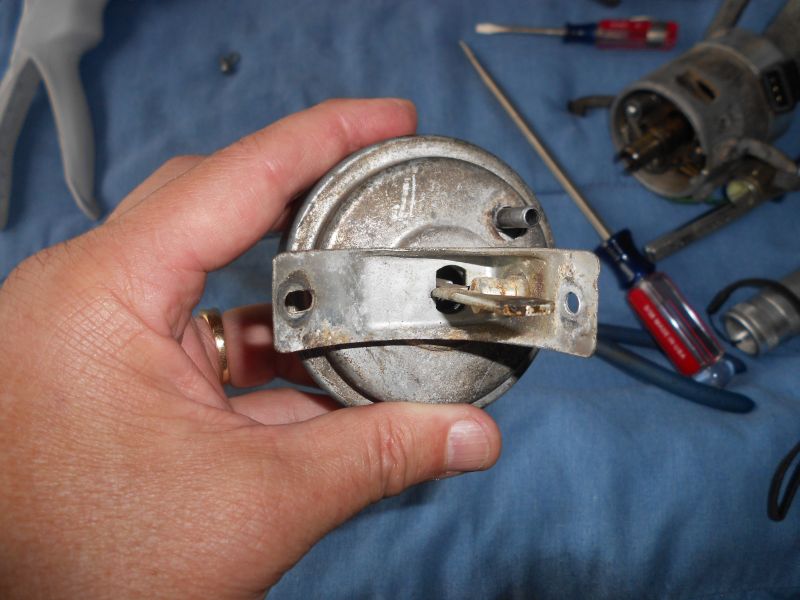 Distributor (039 905 205A) with vacuum advance removed. The advance is removed by removing the circlip from the distributor and (2) screws. 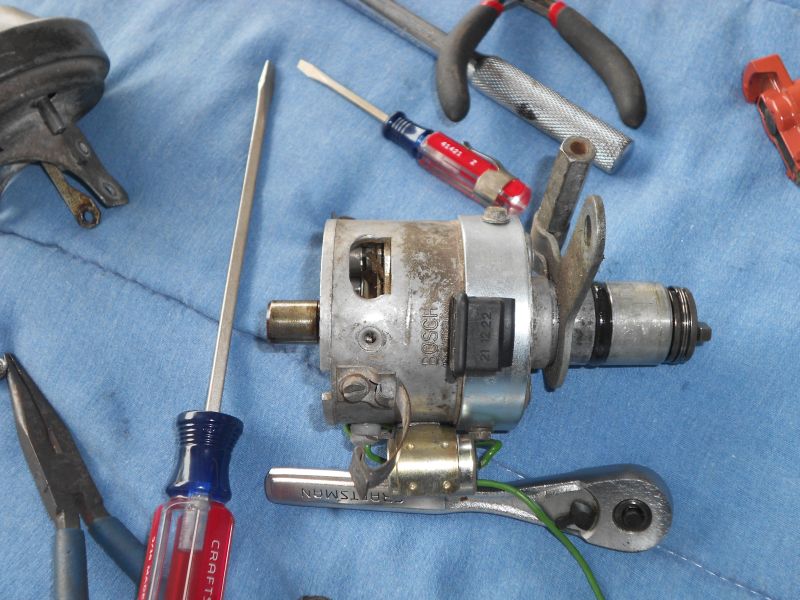 Distributor removed. The distributor is easily removed by removing the wires to the FI trigger and coil and unbolting the mounting nut and washer. Do NOT loosen the locking arm. 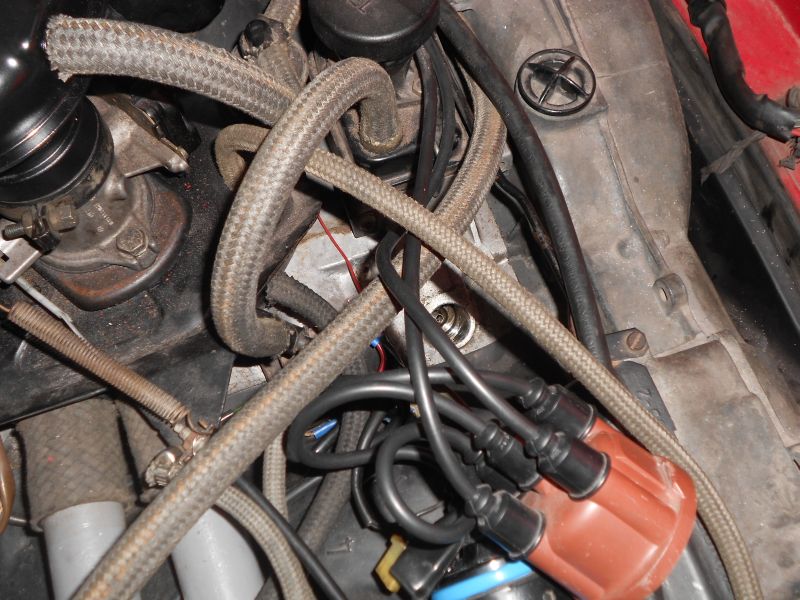 Location of the vacuum advance hose on the plenum. 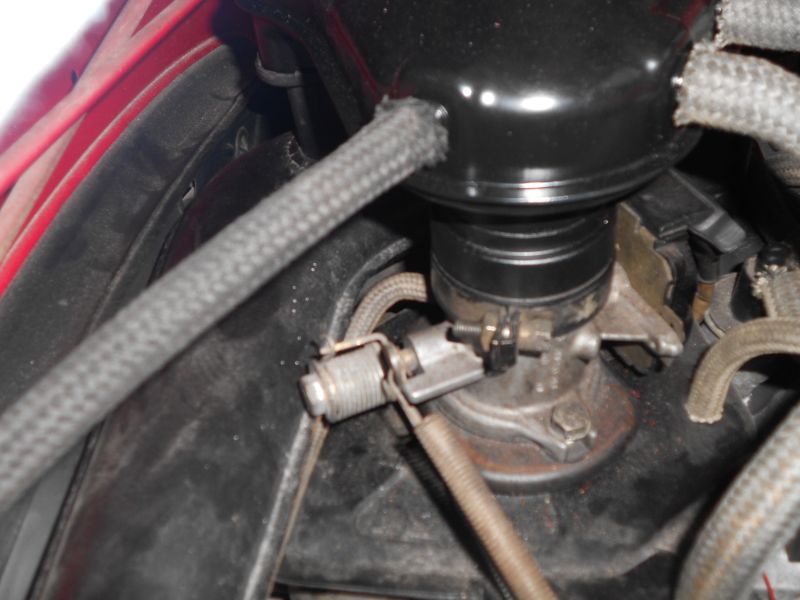 --- Rob |
| r_towle |
 May 11 2014, 08:51 AM May 11 2014, 08:51 AM
Post
#37
|
|
Custom Member                Group: Members Posts: 24,663 Joined: 9-January 03 From: Taxachusetts Member No.: 124 Region Association: North East States 
|
Remove the other two screws and pull out the actual advance plates...the plates that your points are attached to.
Be careful not to break the ground strap between the two plates. Pull them out, pull off the little clip on the side. There is a single ball bearing in there that could fly across the floor....so go slow. Open them up and see the sludge.... That is why they don't move well when it gets hot. Clean and re grease that setup and out it back in place. Your car will run fine without the vacuum advance. That is there to being on the advance a little earlier, but eventually the rotating for extends the advance plates anyways to full advance. |
| watsonrx13 |
 May 11 2014, 09:19 AM May 11 2014, 09:19 AM
Post
#38
|
|
Advanced Member     Group: Members Posts: 2,735 Joined: 18-February 03 From: Plant City, FL Member No.: 312 Region Association: South East States |
Rich, which (2) screws are you talking about removing?
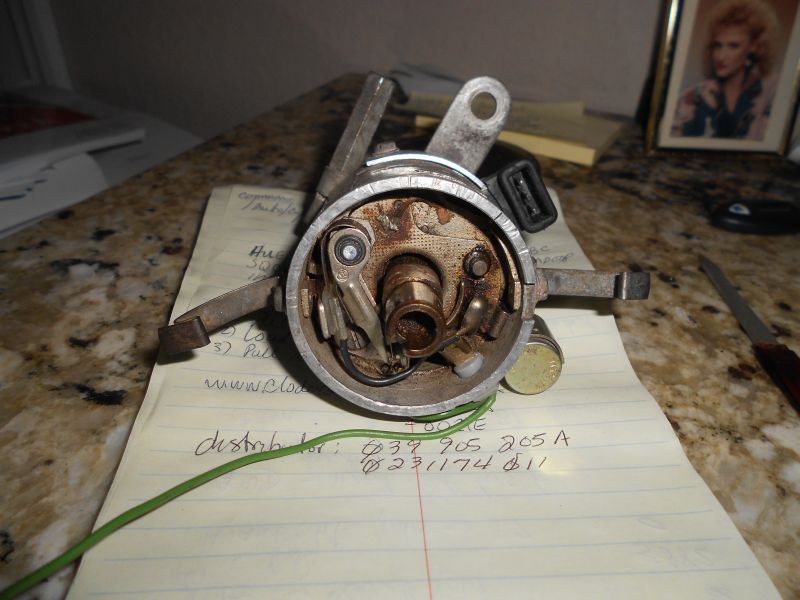 --- Rob |
| watsonrx13 |
 May 11 2014, 09:44 AM May 11 2014, 09:44 AM
Post
#39
|
|
Advanced Member     Group: Members Posts: 2,735 Joined: 18-February 03 From: Plant City, FL Member No.: 312 Region Association: South East States |
OK, I reread your reply and did the following
1. Removed screw from condenser and removed from distributor 2. Removed (2) screws that held the clips 3. Carefully removed the actual advance plates 4. Removed clip with ball bearing What should I use to clean the parts? Can I use some aerosol electronic cleaner I got from Radio Shack? After cleaning, where should I put grease? Before shot 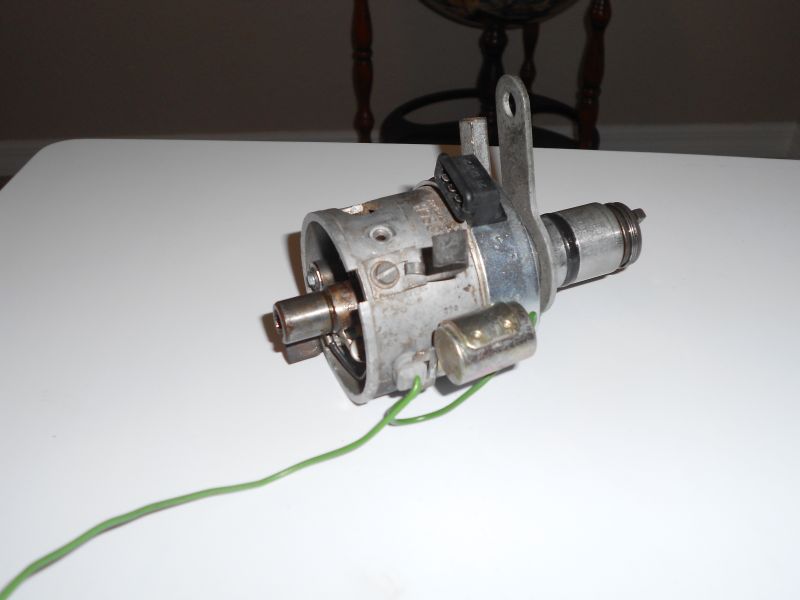 After condenser removal 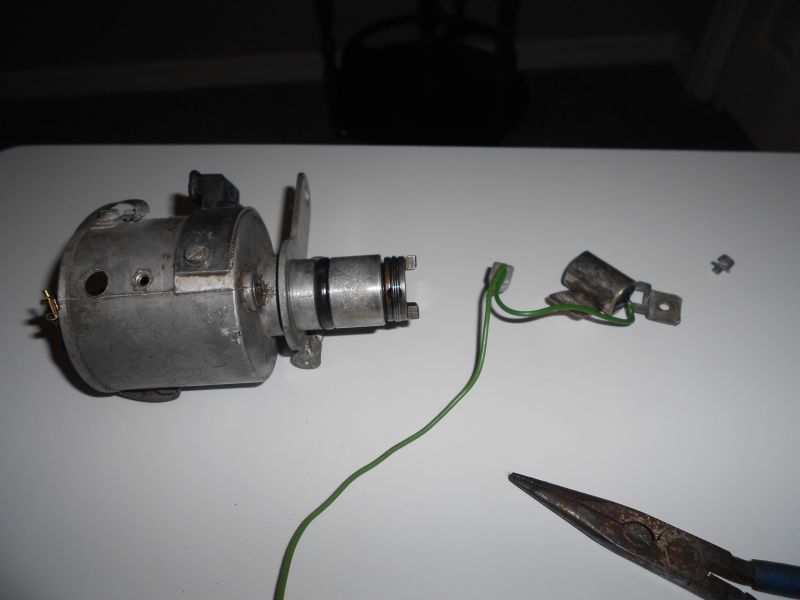 After (2) clip and advance plate removal 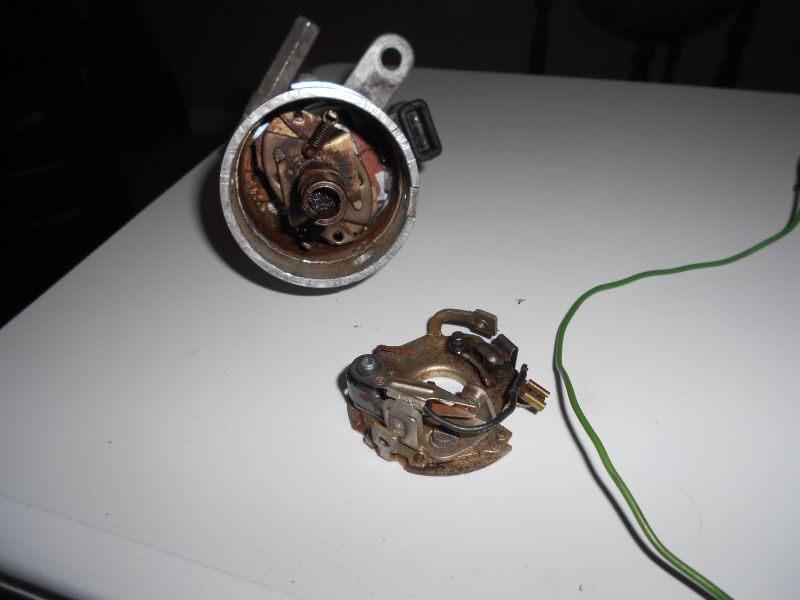 Dirty distributor 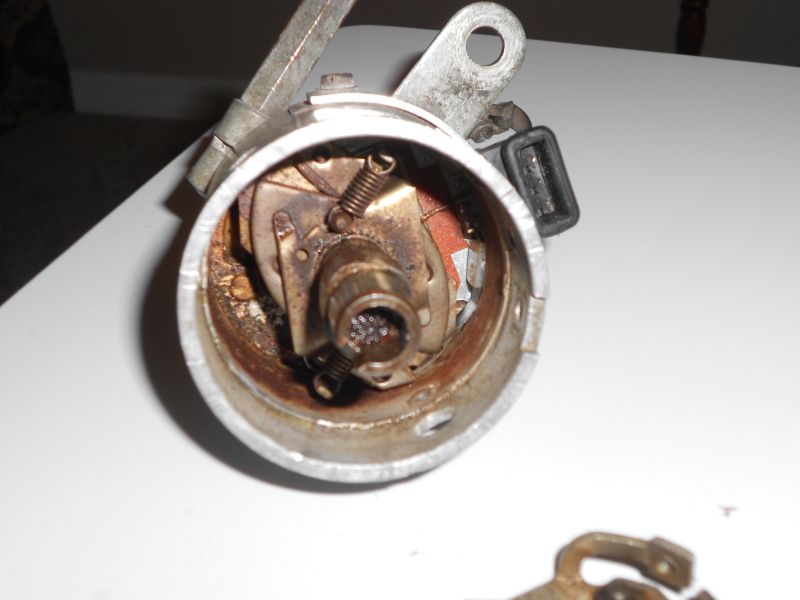 Clip with ball bearing removed 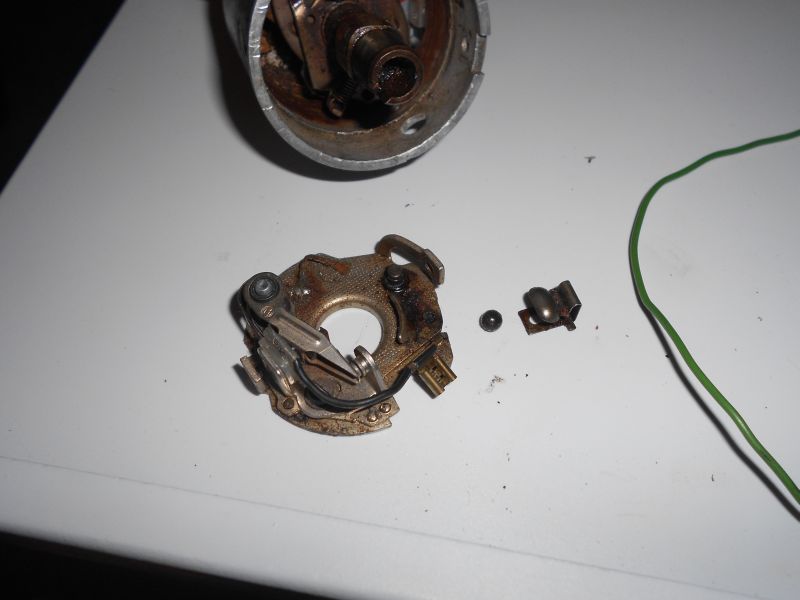 --- Rob |
| Dtjaden |
 May 11 2014, 10:08 AM May 11 2014, 10:08 AM
Post
#40
|
|
Member   Group: Members Posts: 232 Joined: 25-May 13 From: Morgan Hill, CA Member No.: 15,915 Region Association: Northern California |
Carb or brake cleaner would work well. The RS cleaner will most likely not be strong enough.
OK, I reread your reply and did the following 1. Removed screw from condenser and removed from distributor 2. Removed (2) screws that held the clips 3. Carefully removed the actual advance plates 4. Removed clip with ball bearing What should I use to clean the parts? Can I use some aerosol electronic cleaner I got from Radio Shack? After cleaning, where should I put grease? Before shot  After condenser removal  After (2) clip and advance plate removal  Dirty distributor  Clip with ball bearing removed  --- Rob (IMG:style_emoticons/default/birthday3.gif) |
  |
1 User(s) are reading this topic (1 Guests and 0 Anonymous Users)
0 Members:

|
Lo-Fi Version | Time is now: 27th December 2024 - 11:13 AM |
Invision Power Board
v9.1.4 © 2024 IPS, Inc.


