|
|

|
Porsche, and the Porsche crest are registered trademarks of Dr. Ing. h.c. F. Porsche AG.
This site is not affiliated with Porsche in any way. Its only purpose is to provide an online forum for car enthusiasts. All other trademarks are property of their respective owners. |
|
|
  |
| monkeyboy |
 Jan 19 2015, 11:38 AM Jan 19 2015, 11:38 AM
Post
#45
|
|
Senior Member    Group: Members Posts: 808 Joined: 8-June 08 From: Los Angeles, Ca Member No.: 9,147 Region Association: None |
I will take a set of the US Fronts.
I already have your taillight sets and they are awesome! |
| abnrdo |
 Jan 20 2015, 09:10 AM Jan 20 2015, 09:10 AM
Post
#46
|
|
Member   Group: Members Posts: 399 Joined: 24-September 04 From: Panama City, FL Member No.: 2,820 Region Association: South East States |
Spoke,
I have been waiting to post this for awhile. I'm in for: Front Euro w/blanking $140; Rear Brake RED and Turn Amber $180! Cant wait to add these to my project. Thanks, Jim |
| Spoke |
 Jan 28 2015, 10:40 PM Jan 28 2015, 10:40 PM
Post
#47
|
|
Jerry      Group: Members Posts: 7,149 Joined: 29-October 04 From: Allentown, PA Member No.: 3,031 Region Association: None 
|
Making some progress on the front lights. Going slower than I hoped. These more complicated to make than the rears because of the blanking circuit and that the LEDs must be soldered with the body of the LED 115mils off the board so they can be pointed forward when mounted on the vehicle.
Attached thumbnail(s) 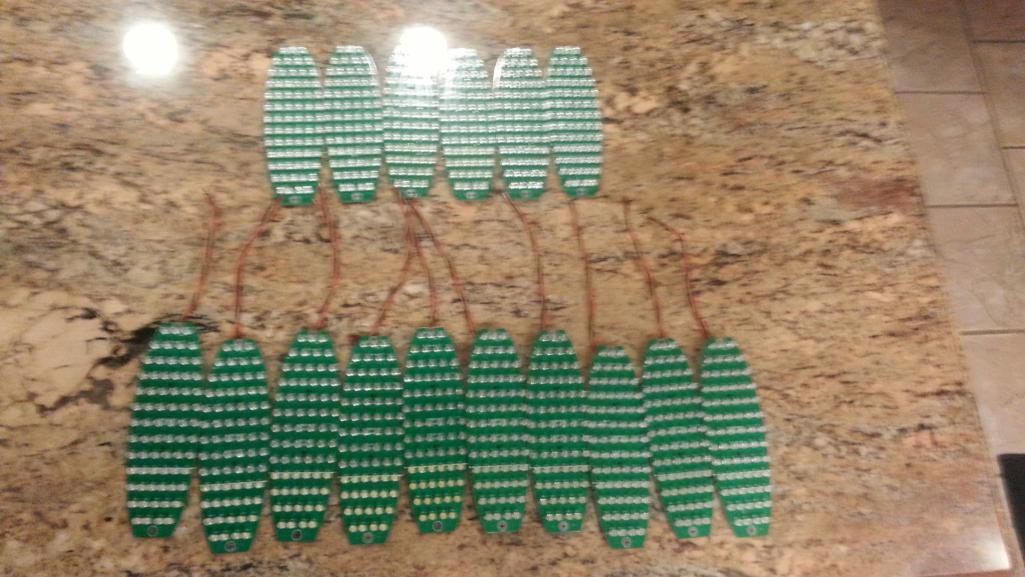
|
| Briby37 |
 Jan 29 2015, 09:57 AM Jan 29 2015, 09:57 AM
Post
#48
|
|
Member   Group: Members Posts: 81 Joined: 22-October 14 From: San Jose, CA Member No.: 18,049 Region Association: Northern California |
I'm down for a full set, please. US for the front buckets and the rear brake light and turn signals. These are looking great!
|
| cn2800 |
 Jan 29 2015, 10:24 AM Jan 29 2015, 10:24 AM
Post
#49
|
|
Member   Group: Members Posts: 119 Joined: 11-August 14 From: Amarillo, Texas Member No.: 17,766 Region Association: None |
If you're still taking orders, I'd like to request front turn signals, rear turn signals, and brake lights, all US spec. Thanks!
|
| Spoke |
 Jan 31 2015, 09:26 AM Jan 31 2015, 09:26 AM
Post
#50
|
|
Jerry      Group: Members Posts: 7,149 Joined: 29-October 04 From: Allentown, PA Member No.: 3,031 Region Association: None 
|
If you're still taking orders, I'd like to request front turn signals, rear turn signals, and brake lights, all US spec. Thanks! Yes, still taking orders. These boards take a long time to assemble and thus we'll be doing this for a few months. Requests are handled in order so we'll be in touch via PM when we're ready to make boards for you. |
| Spoke |
 Jan 31 2015, 10:10 AM Jan 31 2015, 10:10 AM
Post
#51
|
|
Jerry      Group: Members Posts: 7,149 Joined: 29-October 04 From: Allentown, PA Member No.: 3,031 Region Association: None 
|
A couple of folks have had issues installing the bulb bases into the existing sockets. Much of the difficulty has to do with the existing socket which is over 40 years old and may likely have suffered from aging and moisture. This makes the bulbs hard to install/remove and can affect the electrical connection to the bulb.
This is a good time to do some preventive maintenance on the socket to improve electrical connectivity and ease installation of the LED bulb bases or even the standard bulbs. Here's an example of a bulb with severe oxidation and crud that came off of my 930. This bulb was so hard to remove that I thought the bulb was going to break in my hand as I removed it. Likewise the socket looked in the same condition. I connected an LED board for the 911 in its place and it didn't light up at all. I had to clean the socket with a wire wheel on my Dremel before the LEDs would light up. 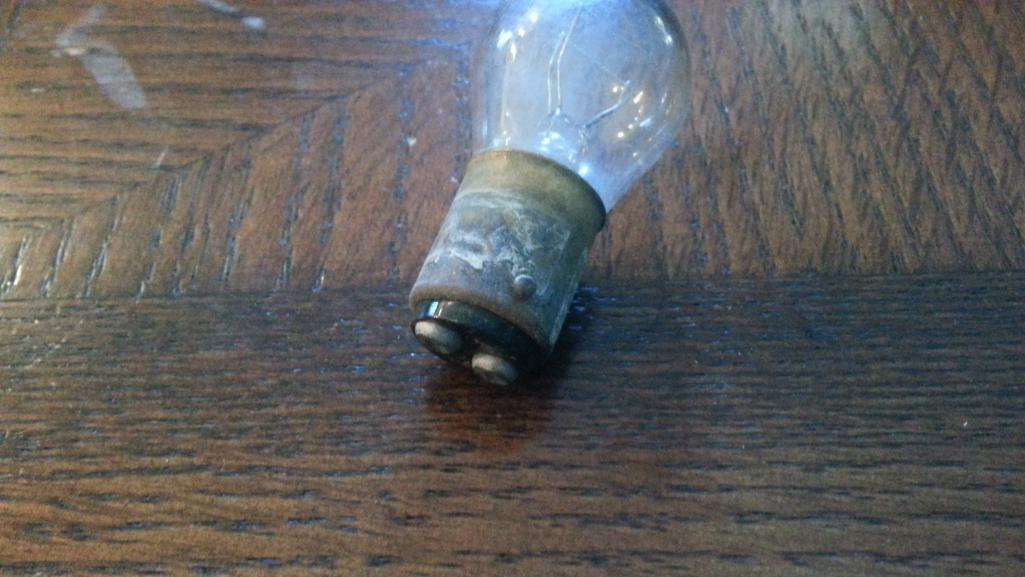 After cleaning the socket with a wire wheel, or scraping the crud with a small screwdriver, dielectric grease like this one are available at your FLAPS for less than $2 goes a long way to improving electrical contact and easing installation of bulbs/LEDs. 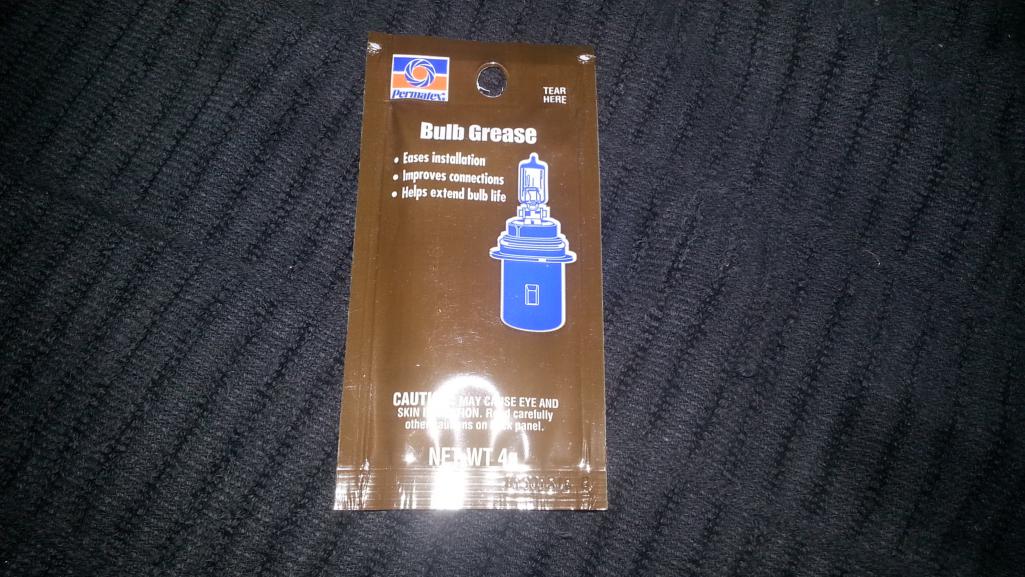 |
| Spoke |
 Feb 4 2015, 12:06 PM Feb 4 2015, 12:06 PM
Post
#52
|
|
Jerry      Group: Members Posts: 7,149 Joined: 29-October 04 From: Allentown, PA Member No.: 3,031 Region Association: None 
|
I've been thinking of ways to provide a handle to help assist the installation of the bulb bases. Thought about a piece of metal, wood, or plastic but nothing seemed to fit the bill.
Then I tried a piece of circuit board. Seems like it would give a good grip for installation and would not short out the wires if they touched. What I did was chop up some old boards we had lying around work. I will try this on these boards. Would it take away from the product if I used old circuit boards for the handles? I could state that we're using recycled materials to be more ecologically friendly. Your feedback is welcome. Attached thumbnail(s) 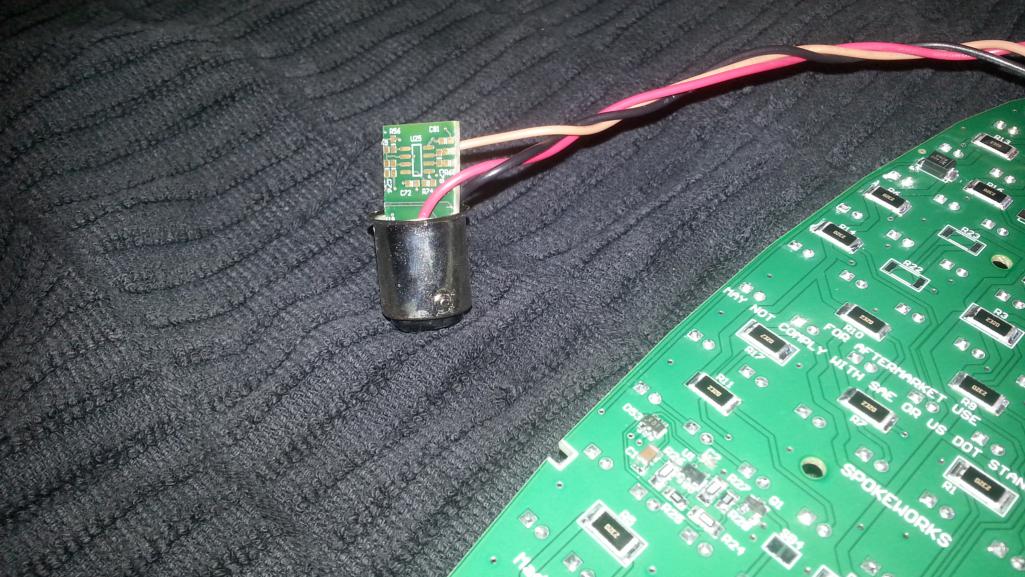 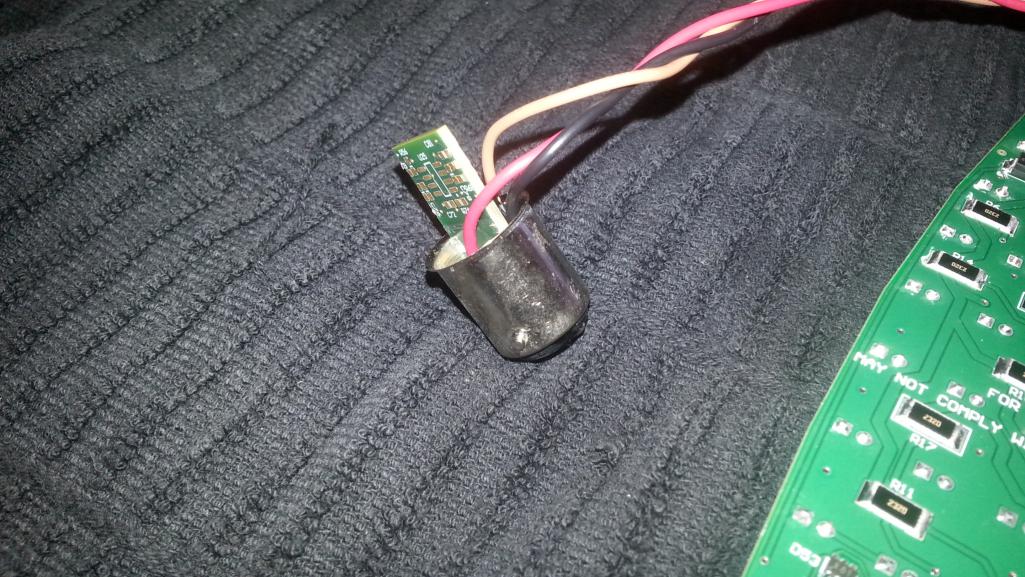
|
| clapeza |
 Feb 4 2015, 12:58 PM Feb 4 2015, 12:58 PM
Post
#53
|
|
Member   Group: Members Posts: 229 Joined: 7-February 11 From: South GA Member No.: 12,677 Region Association: South East States 
|
That'd be great! I buggered up one of my tail light bulb bases trying to get a good grip so it would turn and engage in the socket. This "green solution" is a great idea!
|
| Cairo94507 |
 Feb 4 2015, 01:06 PM Feb 4 2015, 01:06 PM
Post
#54
|
|
Michael           Group: Members Posts: 10,294 Joined: 1-November 08 From: Auburn, CA Member No.: 9,712 Region Association: Northern California 
|
Great idea and eco-friendly too. The world and the 914 wins! (IMG:style_emoticons/default/bye1.gif)
|
| Spoke |
 Feb 5 2015, 09:59 PM Feb 5 2015, 09:59 PM
Post
#55
|
|
Jerry      Group: Members Posts: 7,149 Joined: 29-October 04 From: Allentown, PA Member No.: 3,031 Region Association: None 
|
Now is a good time to seal up the front and rear buckets to protect your LED board investments.
I am very pleased to be able to offer bundle pricing for front and rear bucket and rear lens seals by 914Rubber for anyone purchasing front or rear LED boards. Prices: Front bucket seals: $12.50 savings of 24% over retail Rear housing seals: $16.00 savings of 33% over retail Rear lens beads: $5.00 savings of $28% over retail Front Bucket Seal Rear Housing Seal Rear Lens Bead |
| cn2800 |
 Feb 6 2015, 12:10 AM Feb 6 2015, 12:10 AM
Post
#56
|
|
Member   Group: Members Posts: 119 Joined: 11-August 14 From: Amarillo, Texas Member No.: 17,766 Region Association: None |
Now is a good time to seal up the front and rear buckets to protect your LED board investments. I am very pleased to be able to offer bundle pricing for front and rear bucket and rear lens seals by 914Rubber for anyone purchasing front or rear LED boards. Prices: Front bucket seals: $12.50 savings of 24% over retail Rear housing seals: $16.00 savings of 33% over retail Rear lens beads: $5.00 savings of $28% over retail Front Bucket Seal Rear Housing Seal Rear Lens Bead Bundle me, please! Additionally, you can put my LED assemblies at the tail end of your build schedule. I won't be needing them until next fall at the earliest. |
| kid914 |
 Feb 6 2015, 09:04 AM Feb 6 2015, 09:04 AM
Post
#57
|
|
ALWAYS lead...NEVER follow!!!!     Group: Members Posts: 2,535 Joined: 9-March 11 From: Canada Member No.: 12,811 Region Association: Canada |
Is this another thread? I didn't see my post. (IMG:style_emoticons/default/blink.gif)
In for a set of front ambers...and rear reds. Thanks (IMG:style_emoticons/default/beerchug.gif) |
| Spoke |
 Feb 9 2015, 07:43 PM Feb 9 2015, 07:43 PM
Post
#58
|
|
Jerry      Group: Members Posts: 7,149 Joined: 29-October 04 From: Allentown, PA Member No.: 3,031 Region Association: None 
|
Is this another thread? I didn't see my post. (IMG:style_emoticons/default/blink.gif) In for a set of front ambers...and rear reds. Thanks (IMG:style_emoticons/default/beerchug.gif) This is the right thread. Got you on the list from the previous thread. It's been slow getting all the cogs going for this project. Just received the first batch of clips for the fronts and rears. Things are going to start happening now. I gotta get my own 3d printer. (IMG:style_emoticons/default/dry.gif) Attached thumbnail(s) 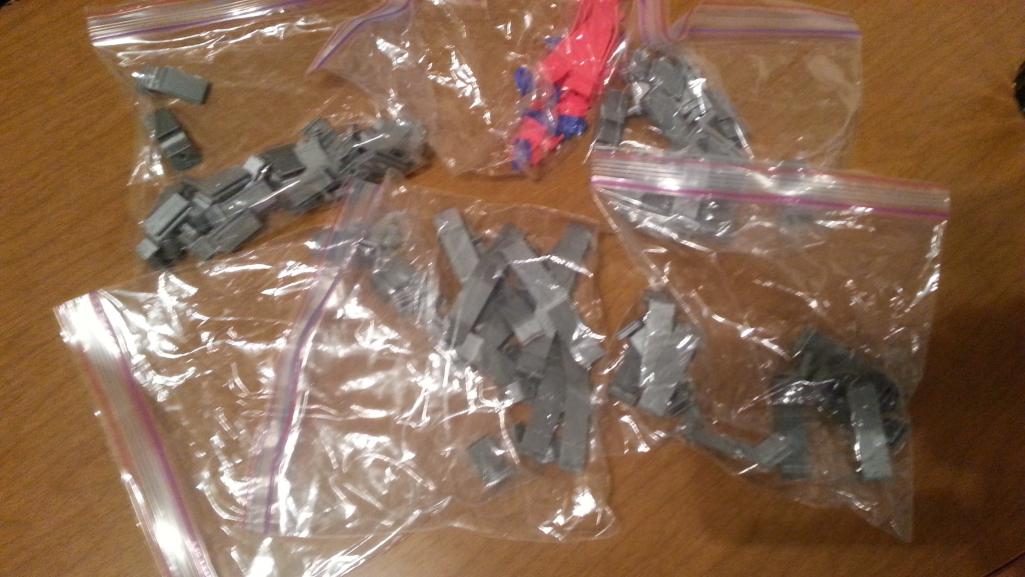
|
| euro911 |
 Feb 13 2015, 02:56 AM Feb 13 2015, 02:56 AM
Post
#59
|
|
Retired & living the dream. God help me if I wake up!      Group: Members Posts: 8,878 Joined: 2-December 06 From: So.Cal. & No.AZ (USA) Member No.: 7,300 Region Association: Southern California 
|
I've been thinking of ways to provide a handle to help assist the installation of the bulb bases. Thought about a piece of metal, wood, or plastic but nothing seemed to fit the bill. I'm good with it (IMG:style_emoticons/default/shades.gif) Then I tried a piece of circuit board. Seems like it would give a good grip for installation and would not short out the wires if they touched. What I did was chop up some old boards we had lying around work. I will try this on these boards. Would it take away from the product if I used old circuit boards for the handles? I could state that we're using recycled materials to be more ecologically friendly. Your feedback is welcome. Are you going to glue the boards into the bulb bases? |
| GermermanCarGuy |
 Feb 13 2015, 09:37 AM Feb 13 2015, 09:37 AM
Post
#60
|
|
GermanCarGuy   Group: Members Posts: 81 Joined: 13-May 14 From: Rapid City, SD Member No.: 17,346 Region Association: Upper MidWest |
Now is a good time to seal up the front and rear buckets to protect your LED board investments. I am very pleased to be able to offer bundle pricing for front and rear bucket and rear lens seals by 914Rubber for anyone purchasing front or rear LED boards. Prices: Front bucket seals: $12.50 savings of 24% over retail Rear housing seals: $16.00 savings of 33% over retail Rear lens beads: $5.00 savings of $28% over retail Front Bucket Seal Rear Housing Seal Rear Lens Bead Spoke, When the seals come in, I'd be in for a complete set all the way around. Just let me now. Thanks |
| morgan_harwell |
 Feb 13 2015, 09:49 AM Feb 13 2015, 09:49 AM
Post
#61
|
|
Ha! Finally snuck up on a camera!   Group: Members Posts: 126 Joined: 28-January 03 From: Santa Cruz Mtns., Ca. Member No.: 203 Region Association: Northern California |
Howdy,
I would like to place my order in the queue. Question about the Front Euro LEDs. Are the Amber LEDs lit (on) when the TurnSignal is not engaged? Front: #2, Euro non-blanking LED Rear: #1, Red Brake LED #3, Amber TurnSignal LED Seals: Front bucket seals: $12.50 Rear housing seals: $16.00 Rear lens beads: $5.00 Thanks, --Moe-- |
| Spoke |
 Feb 13 2015, 04:40 PM Feb 13 2015, 04:40 PM
Post
#62
|
|
Jerry      Group: Members Posts: 7,149 Joined: 29-October 04 From: Allentown, PA Member No.: 3,031 Region Association: None 
|
Are you going to glue the boards into the bulb bases? Yes. I fill the bases with epoxy then install the handle. The epoxy locks the wires in place so they won't work loose from the base. The handles are in rock solid. So installation can be done with a pair of pliers or your fingers. Should make installation very easy. Attached thumbnail(s) 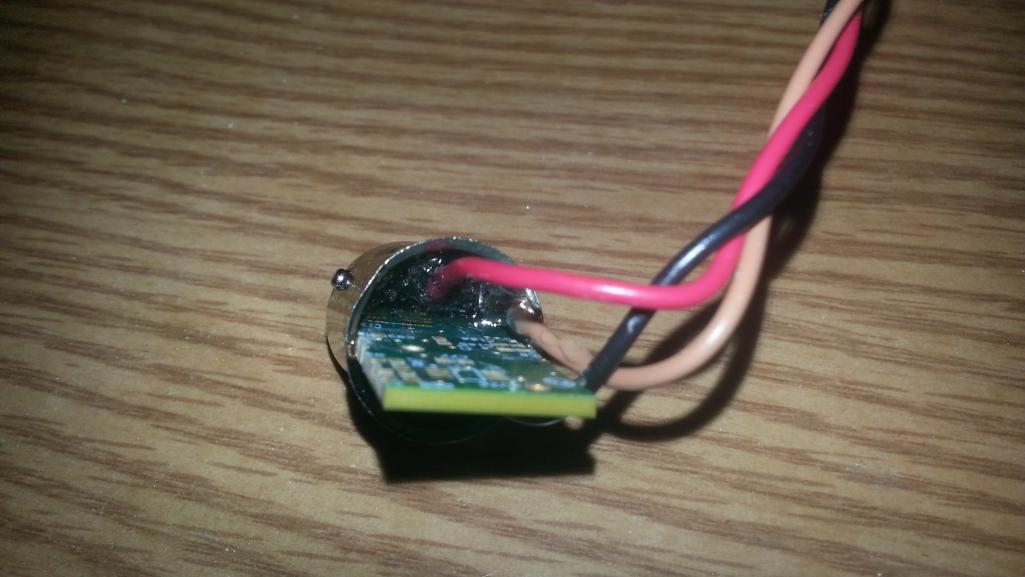
|
| Spoke |
 Feb 13 2015, 05:41 PM Feb 13 2015, 05:41 PM
Post
#63
|
|
Jerry      Group: Members Posts: 7,149 Joined: 29-October 04 From: Allentown, PA Member No.: 3,031 Region Association: None 
|
We had a bit of a hangup on the first rear LED boards. The assembly was done incorrectly on the first 18 boards. The boards cannot be reworked. Just thrown in the garbage. They are trashed. (IMG:style_emoticons/default/dry.gif)
So there will be a delay on the rear boards until we make more. I will PM those for whom these boards were being built. The fronts are coming along fine. Will be shipping out the first sets of fronts this week. |
| cary |
 Feb 14 2015, 12:18 AM Feb 14 2015, 12:18 AM
Post
#64
|
|
Advanced Member     Group: Members Posts: 3,900 Joined: 26-January 04 From: Sherwood Oregon Member No.: 1,608 Region Association: Pacific Northwest 
|
Are you going to glue the boards into the bulb bases? Yes. I fill the bases with epoxy then install the handle. The epoxy locks the wires in place so they won't work loose from the base. The handles are in rock solid. So installation can be done with a pair of pliers or your fingers. Should make installation very easy. That will work .................. It doesn't need to be very tall. Just enough to grab with fingers or pliers. |
  |
4 User(s) are reading this topic (4 Guests and 0 Anonymous Users)
0 Members:

|
Lo-Fi Version | Time is now: 18th April 2025 - 06:22 PM |
Invision Power Board
v9.1.4 © 2025 IPS, Inc.


